
Rear sway bar "shifting" side to side???
 07-28-2011, 04:56 PM
#1
Racer

Thread Starter

I just finished buttoning up the last of my suspension upgrades and decided to take the car out for a quick spin around the block to see if all was well. Just as I started to turn the wheel to go around the first "bend" of my street - I heard a horrible "grinding" sound coming from the drivers side rear.
I immediately stopped and got out to see what was hitting, but could find nothing. I turned around and headed straight home (only another 15-20 seconds away). The grinding was not constant, but seemed as if it would come and go with each full rotation of the tires or something.
When I got home I took off the rear wheels and discovered the rear sway bar had slid over towards the driver side and the bolt that secures the sway bar to the heim link, had dug into the side of my wheel, not only damaging the bolt itself, but the inside of the wheel as well.
I can physically "slide" the sway bar left to right with my bare hands with very little effort. The sway bar mounting brackets have been tightened to factory spec and the poly bushings were installed properly, so I don't know what I could have done wrong.
Since the heim links are designed to actually pivot from side to side where as the stock links are a solid piece of steel, is this normal for heim links to allow so much side to side play, that the sway bar may end up hitting the frame of the car?
Has anyone else experienced this? Have I done something wrong?
I noticed when I first removed the stock sway bar, that it was a very tight fit (clearance-wise) between the bar and the frame of the car on both sides. The larger 26mm bar barely cleared, but I was relieved after installing it and seeing that it didn't actually hit anything. Unfortunately, I never imagined I'd run into the problem of the sway bar not staying in place....
What can I do?
I did put some marine grease on the poly bushings before I installed them to prevent squeeking, is that what's causing my sway bar to slide around? The lube I put on the bushings themselves?
Any help would be greatly appreciated. I'm anxious to get this car on the road, but until I figure this one out, I'm stuck!!
Please help!
Here's a picture of the sway bar/end link on the drivers side. You can see that the sway bar shifted all the way over causing the end link bolt to jam into the wheel. Notice the head of the bolt has come into contact with the inside of the wheel and been ground down.

With the sway bar shifted all the way over, there's plenty of clearance between the frame and the bar on the drivers side but.....

Here's a picture of the passenger side. You can see that since the bar shifted over to the drivers side, the bolt on the inside of the link dug into the frame. Notice the long scratch going down the side of the frame.

I immediately stopped and got out to see what was hitting, but could find nothing. I turned around and headed straight home (only another 15-20 seconds away). The grinding was not constant, but seemed as if it would come and go with each full rotation of the tires or something.
When I got home I took off the rear wheels and discovered the rear sway bar had slid over towards the driver side and the bolt that secures the sway bar to the heim link, had dug into the side of my wheel, not only damaging the bolt itself, but the inside of the wheel as well.
I can physically "slide" the sway bar left to right with my bare hands with very little effort. The sway bar mounting brackets have been tightened to factory spec and the poly bushings were installed properly, so I don't know what I could have done wrong.
Since the heim links are designed to actually pivot from side to side where as the stock links are a solid piece of steel, is this normal for heim links to allow so much side to side play, that the sway bar may end up hitting the frame of the car?
Has anyone else experienced this? Have I done something wrong?
I noticed when I first removed the stock sway bar, that it was a very tight fit (clearance-wise) between the bar and the frame of the car on both sides. The larger 26mm bar barely cleared, but I was relieved after installing it and seeing that it didn't actually hit anything. Unfortunately, I never imagined I'd run into the problem of the sway bar not staying in place....
What can I do?
I did put some marine grease on the poly bushings before I installed them to prevent squeeking, is that what's causing my sway bar to slide around? The lube I put on the bushings themselves?
Any help would be greatly appreciated. I'm anxious to get this car on the road, but until I figure this one out, I'm stuck!!
Please help!
Here's a picture of the sway bar/end link on the drivers side. You can see that the sway bar shifted all the way over causing the end link bolt to jam into the wheel. Notice the head of the bolt has come into contact with the inside of the wheel and been ground down.
With the sway bar shifted all the way over, there's plenty of clearance between the frame and the bar on the drivers side but.....
Here's a picture of the passenger side. You can see that since the bar shifted over to the drivers side, the bolt on the inside of the link dug into the frame. Notice the long scratch going down the side of the frame.
Last edited by LT1*C4; 07-28-2011 at 09:38 PM.
 07-28-2011, 05:24 PM
#2
If I remember right polyurethane is not resistant to all kind of oilbased grease. There are special grease to use for this kind of rubber that I allways use myself. Since I newer used regular grease I can not tell what effect it has, but if it do make harm I could imagine that the bushing will sort of melt so you end up with a bit large hole. (I guess).
07-28-2011, 05:36 PM
#3
Race Director


On a C5, this is common if the bars aren't "neutral". However not sure in your case. People often put clamps on the bars, adjacent to the mounts, to prevent them moving.
07-28-2011, 05:42 PM
#4
Racer
Thread Starter
Can it be that the lube itself is possibly "too" slippery and is what's causing the bar to slide around? I could remove the lube, but if I did that though, the bushings would squeek like crazy wouldn't they?
Thanks again guy's for trying to help out. I appreciate it.
Last edited by LT1*C4; 07-28-2011 at 05:47 PM.
07-28-2011, 05:59 PM
#5
Drifting

Look at some pictures of the Pfadt bars. They include a shaft collar (ring) with a set screw that you place against the bushing of the chassis mount on each side and it prevents the bar from shifting left to right. Since they are a sponsor, I hope it is OK to link to their site. Here is a picture. Look closely at the outside edge of the bushings and you will see the shaft collar. You can probably get something in close to the right size from a place like McMaster-Carr. You might need something that comes in two halves instead of one solid piece so you don't have to slide it over the moment arms of the bar. Hopefully that helps and can work with whatever chassis mounts you are using.
Last edited by ltborg; 07-28-2011 at 06:01 PM.
07-28-2011, 06:16 PM
#6
Race Director

There are pix in my old thread:
http://forums.corvetteforum.com/c4-t...l-options.html
Got the collars from McMaster.com IIRC.
http://forums.corvetteforum.com/c4-t...l-options.html
Got the collars from McMaster.com IIRC.
07-28-2011, 07:06 PM
#8
Race Director
Just for more info, my bars were actually to tight. I used a washer between the shells so the bar could rotate better. Is there any spec for bar clamp force?
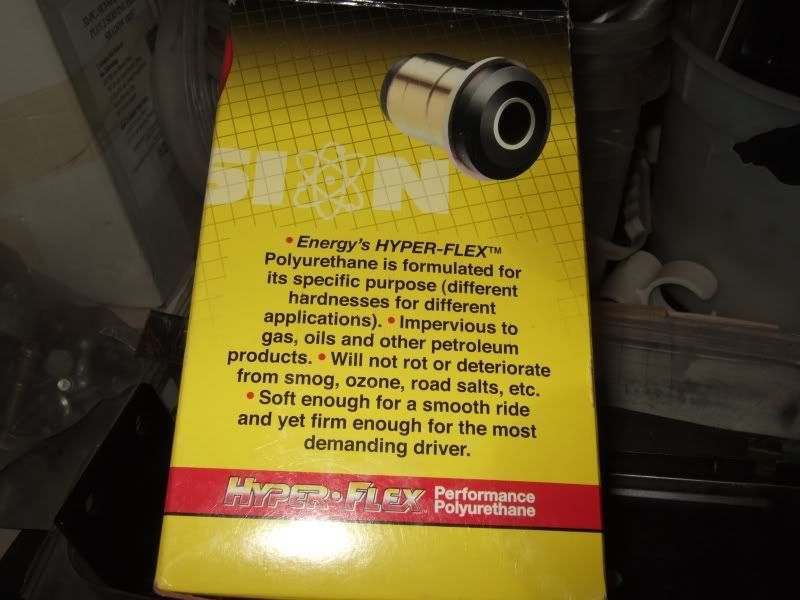
Also additional info my poly bushing box said impervious to petroleum.
Without lube it will wear the powder coating away, changing clamp force. I added zerks to mine.
Also additional info my poly bushing box said impervious to petroleum.
Without lube it will wear the powder coating away, changing clamp force. I added zerks to mine.
07-28-2011, 07:10 PM
#9
Race Director
I assume this is on a C4 (per your sig). The bar looks too long. Compare the overall length to the original bar. What bar is it?
I don't think it's a "grease" problem.
The degree of misalignment on the heims seems a lot. Are they "high misalignment" heims? I think they may hit under movement & clunk. BTDT.

I don't think it's a "grease" problem.
The degree of misalignment on the heims seems a lot. Are they "high misalignment" heims? I think they may hit under movement & clunk. BTDT.
Last edited by froggy47; 07-28-2011 at 07:16 PM.
07-28-2011, 07:10 PM
#10
Racer
Thread Starter
There are pix in my old thread:
http://forums.corvetteforum.com/c4-t...l-options.html
Got the collars from McMaster.com IIRC.
http://forums.corvetteforum.com/c4-t...l-options.html
Got the collars from McMaster.com IIRC.
This may just be the solution I've been looking for.

I read through the thread you linked to and I agree, it's surprising you don't read more about this stuff happening (at least in the C4 sections anyway).
I wish I had known about these "collars" before. I would have bought them right away and avoided this whole mess and trashing the inside of my brand new wheels.

Oh well. What's done is done.
I checked out McMaster and noticed they don't carry a 26mm collar. Only a 25mm and the next size from there is a 30mm.
Unfortunately, McMaster refuses to ship to Canada (for sometime now) - so I couldn't get anything from them anyway.
I found another site on-line that does ship to Canada but they too, only have a 25mm collar and from there goes to 30mm.
Aardwolf, what size is your rear sway bar? Hard to tell from the picture you provided. Is it stock or aftermarket?
The bar is a 26mm from VB&P and other than the diameter, it's the same length as stock.
Looks weird in the pictures I know, because the car sits so much lower than stock. before, the sway bar ran parallel with the floor. Now that the car's been lowered, it's actually pointing at an upwards angle. If I jack the car up from the rear so that it's back to the original ride height, the bar straightens out again.
By the way, yes, this is for my C4.

Last edited by LT1*C4; 07-28-2011 at 07:18 PM.
07-28-2011, 07:21 PM
#11
Race Director
I assume this is on a C4 (per your sig). The bar looks too long. Compare the overall length to the original bar. What bar is it?
I don't think it's a "grease" problem.
The degree of misalignment on the heims seems a lot. Are they "high misalignment" heims? I think they may hit under movement & clunk. BTDT.
I don't think it's a "grease" problem.
The degree of misalignment on the heims seems a lot. Are they "high misalignment" heims? I think they may hit under movement & clunk. BTDT.
On my sway bars the rear is 1" and I ordered 1" bar collars and 1.25" for the front. They are VBP hollow sway bars, specs were in that thread I linked IIRC.
07-28-2011, 08:09 PM
#12
Race Director
By long I mean overall length. I base that observation on the angles of the links. I have fit a lot of different (GM) bars on c4 and c5 and they always are "pretty close" to vertical, not leaning in or out.
It's been a while since I worked on my c4 and my c4 was not slammed, but it was lowered on stock adjusters (not the longer bolts).
Is the backspace on the rims stock or are they wider with more backspace?
What you have to consider is, if the bar hit on an easy/short drive down the street, I don't think it'll get better when you hit some bumps/potholes and get the suspension moving thru full travel.
I don't think the collars will be a solution if the bar tries to occupy the same space as the rim during a maximum suspension movement. You have to have some clearance one way or the other.
When a sway bar "floats" in it's bushings (as it should in high performance setups) you can turn it by hand (links detached) and it is "self centering". It moves a half inch or so left/right & you can see this marking on the sides of the bushings. It doesn't get stuck to one side and stay there. Collars are (usually) not necessary to keep the bar centered.
BTW for a heim to work correctly it needs a spacer on both sides of the ball so the link can swivel on the ball unimpeded.
Here is a link to an old thread I started about sway bar links, go to #9 and you can see the spacers required for heims to be able to work/swivel. The bottom picture.
http://forums.corvetteforum.com/auto...-question.html
Last edited by froggy47; 07-28-2011 at 08:34 PM.
07-28-2011, 08:30 PM
#13
Racer
Thread Starter
That's why I'm going to go back to the 10" bolts as they at least are threaded higher and I can raise the rear a bit more.
I'm starting to think the same thing.
Just checked the car again and even if I centered the sway bar so that there's an even amount of space on both sides of the car between the swaybar and the side of the frame, there would still only be 1/8" clearance tops from the end-link bolt and the frame. That's just too tight.
The stock end-links are a "U-shaped" design and the sway bar ends fit in between the metal tabs of the end-links. Therefore, the links themselves, are always straight. The heim-jointed end links are NOT u-shaped and have to be angled outwards of the sway bar end in order to attach. Even if I try and space the end links closer to one side of the end-link bracket, the most I can move it over is maybe 3-4mm. That's not going to straighten the end-links much at all and they'll still be angled quite a bit outwards.
Short of drilling 2 new holes in the suspension knuckle and mounting the end-link mounting tabs over, I don't see these things ever being straight.
The more I think about it, the more I'm starting to think the stock end links are the only way to go.
Sucks that I just spent $200+ on a part I might not even be able to use...
Here you can see what I mean. The stock end links are "U-shaped" and the sway bar ends slide in between the two tabs. This means the end links are perfectly straight underneath the sway bar end.

With The Heim-joint design, the mounting style is different. You have to angle the heim joints "outwards" to the "side" of the sway bar ends in order to attach them via the bolt that passes through them.
Because of this, the heims are always going to be tilted "outwards".
The more I look at them, the more I dislike their mounting design...

Last edited by LT1*C4; 07-28-2011 at 09:56 PM.
07-28-2011, 08:44 PM
#14
Race Director
Making more clearance side to side is easy. I did not just bolt mine in I checked clearances. Do not use that huge 1/4" thick washer on the back, cut the bolt length down and perhaps the nut too. On the outboard side grind down the bar insert. You want the link as straight as possible in both axis.
I won't ever go back to the stock or poly bushings there. Poly got a dent in it quickly and the stock rubber type ones wore out on my setup.
Edit, you also do not use the same amount of spacers on the bottom mount like in your picture. You want less on one side so the link is more straight. No need to dislike the mounting design, go back to making it straight.
Last edited by Aardwolf; 07-28-2011 at 08:48 PM.
07-28-2011, 09:07 PM
#15
Race Director
I think that's a good plan, raise the rear and use stock links.
Having the rear that low looks good but can make the car really pushy (understeer).
There are a lot of good reasons for heims, but if they are not a proper fit, you will end up worse than the stock links.
BTW I had GS rims on my 96 LT4 & no clearance problems so I think you are ok there.
Having the rear that low looks good but can make the car really pushy (understeer).
There are a lot of good reasons for heims, but if they are not a proper fit, you will end up worse than the stock links.
BTW I had GS rims on my 96 LT4 & no clearance problems so I think you are ok there.
07-28-2011, 09:21 PM
#16
Race Director
I have heim links on mine and they work fine. The rear is so low on mine that the spring bolts bind in the spring. Because it is trying to be to flat. I need to take the mounting shims from the top and put them on the bottom. You don't need lowering bolts for that depending on height.
I'm strongly against using the stock links, they are poor. Those and the stock rear camber bars are total junk. Next would be the trailing arms. BTW places change four times more on these things. Think about ordering them yourself and save hundreds. Whoever designed the spacers for that kit got it wrong. If there were instructions they should say to make them straight.
I'm strongly against using the stock links, they are poor. Those and the stock rear camber bars are total junk. Next would be the trailing arms. BTW places change four times more on these things. Think about ordering them yourself and save hundreds. Whoever designed the spacers for that kit got it wrong. If there were instructions they should say to make them straight.
07-28-2011, 09:23 PM
#18
Racer
Thread Starter
Making more clearance side to side is easy. I did not just bolt mine in I checked clearances. Do not use that huge 1/4" thick washer on the back, cut the bolt length down and perhaps the nut too. On the outboard side grind down the bar insert. You want the link as straight as possible in both axis.
Edit, you also do not use the same amount of spacers on the bottom mount like in your picture. You want less on one side so the link is more straight. No need to dislike the mounting design, go back to making it straight.
Edit, you also do not use the same amount of spacers on the bottom mount like in your picture. You want less on one side so the link is more straight. No need to dislike the mounting design, go back to making it straight.
Well that's just it, these end links came with no instructions of any kind. They came with 4 small spacers, some washers, 4 bolts and the links themselves. Got them from "Guldstrand Motorsport" who supposedly are Corvette "specialists". I suppose they think all their customers as "specialists" as well...
When connecting the end link to the stock mounting tab on the rear suspension knuckle, there's only enough space for two spacers, so, naturally, I figured one spacer on either side. Even then, it was a really tight fit. Unless I'm just not understanding you correctly, I don't see how I can have more spacers on one side then the other. I can barely squeeze two in there as it is...
 ..
..
The larger 1/4" thick washer on the sway-bar end, was installed as it came. Again, since there were no instructions given, I figured it was that size for a reason so I left it alone.
I guess I should have known this little "kit" was a bit half-@ss, when I saw that 2 of the supplied bolts were nowhere near long enough to even reach the nylon part of the nuts supplied with the kit. I actually had to go out and buy two bolts that were about 1/4" longer in order for them to reach the nylon part of the nuts.

For $200+ I'd expect this stuff to at least fit properly without the customer having to go out and modify everything. Or at the very least, come with some instructions and/or a warning letting the customer know modification have to be done to get it to fit.
Again, maybe I'm just not seeing things straight right now, so bare with me here. I'm used to working on engines, not suspension systems.

It's too dark to go out and see anything right now, so I'll take a real close look at everything tomorrow when my heads straight.
Last edited by LT1*C4; 07-28-2011 at 09:41 PM.
07-28-2011, 09:32 PM
#19
Race Director
Think, make it straight! See in the picture above, two same sized spacers side and side. Wrong wrong wrong. Grind down, make, or buy, a new thinner spacer for the outboard side. This will make the bottom of the link move outboard, making the link more straighterer. 
07-28-2011, 09:43 PM
#20
Race Director
Oh and you should be smarter than I and see if you can get them straight, at ride height, without having to use bar collars. Jack the suspension through its typical range of motion. Gotta sleep, check tomorrow.