
DRM Transmission Cooler Kit - Your Experience ??
 07-21-2012, 05:39 PM
#1
Safety Car

Thread Starter
Member Since: Nov 2000
Location: Shenandoah Valley Virginia
Posts: 4,549
Likes: 0
Received 27 Likes
on
24 Posts

I finally have to bite the bullett and put a tranny cooler on the Z06. I tried the band aids of short shifting, wrapping the exhaust with header wrap and switching to redline fluid, but continue to get the overheat messages. I like the looks of the DRM kit for the C5 and have been very satisfied with their engine oil cooler. If you have used this kit, how easy was the install ? Did it adequately bring down the temp ? How much extra fluid is required to fill the system ? Is it difficult to drain when it is time for fluid change ? Thanks for your input --


 This one is at the top of my list as well.
07-22-2012, 10:40 AM
This one is at the top of my list as well.
07-22-2012, 10:40 AM
#3
Pro


I have ran this kit all year after my Feb event. Trans high temp light has not come on since installing it, and I have ran 40 minute races in serious heat. Can't tell you how hard it is to install as I did not do it. It takes about 1 extra quart of fluid. Fluid should not be any harder to change after install. I am completely satisfied with this kit.

 07-22-2012, 10:59 PM
#5
Drifting

I have the DRM kit on my C5 Z06 since 2001.
Has always worked perfectly.
I did have to replace one pump four of five yrs ago.
DRM did the original installation, so I can't provide any info about the time/effort.
Has always worked perfectly.
I did have to replace one pump four of five yrs ago.
DRM did the original installation, so I can't provide any info about the time/effort.
07-22-2012, 11:38 PM
#6
Drifting

I have the DRM trans and Diff. coolers, I have been very happy with them. I have yet to see the trans overtemp message even in a 45 minute race in real hot ambient conditions.
I would put the install time around 6 hours for both, so maybe 3 for just the trans. I wired both of my pumps through relays.
I would put the install time around 6 hours for both, so maybe 3 for just the trans. I wired both of my pumps through relays.
07-23-2012, 03:56 PM
#8

Woods...any pictures? I have the parts and am trying to find the time to do it...not too proud to replicate a clean install done by someone else I am using Weldon pumps rather than the Tiltons, but that is only because I stumbled into a pair at a very attractive price.
I am using Weldon pumps rather than the Tiltons, but that is only because I stumbled into a pair at a very attractive price.
07-23-2012, 11:02 PM
#9
Pro
Woods...any pictures? I have the parts and am trying to find the time to do it...not too proud to replicate a clean install done by someone else I am using Weldon pumps rather than the Tiltons, but that is only because I stumbled into a pair at a very attractive price.
I am using Weldon pumps rather than the Tiltons, but that is only because I stumbled into a pair at a very attractive price.
07-27-2012, 04:52 PM
#10
Safety Car
Thread Starter
Member Since: Nov 2000
Location: Shenandoah Valley Virginia
Posts: 4,549
Likes: 0
Received 27 Likes
on
24 Posts
Based on everyones satisfaction, I ordered the kit. Will start a separate thread and log process of install with plenty of pics once I get started in a couple of weeks. Kmagvette. I got a email from Randy at DRM chock full of pics and install info. PM me your email address and I will forward it to you.
07-27-2012, 06:57 PM
#11
Pro
I'm a little late but I thought I would post a few pics.
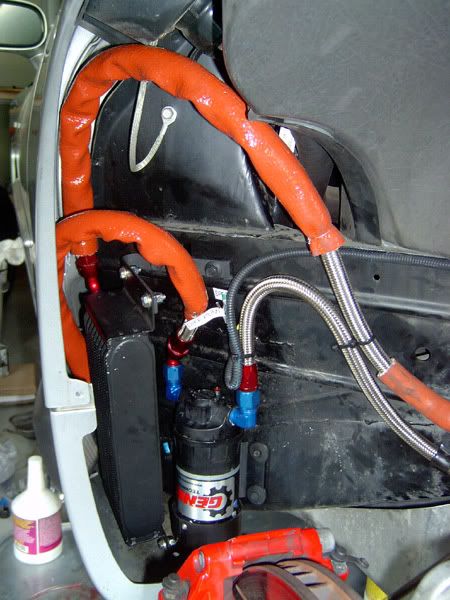
Word of caution about these pics: For some reason, I convinced myself when I did the install that I should wrap the lines in the bits of Firesleeve I had. While it is likely a good idea to put some rubber hose or something around the braided lines in areas that will rub, I went WAY overboard! It doesn't look very nice.
From what I recall, the hardest parts are making the brackets to hold the cooler. Space is very tight and it took me a little while to make brackets which fit. The other issue I recall having is getting access with a drill to make the holes in the car for the bolts that hold brackets. Some holes I believe were made by going through the brake duct opening. I did this a couple of years ago so I don't quite remember all the details.
In this pic, you can see the upper bracket holding the cooler. It is somewhat U-shaped with a couple of automotive bolts from Lowes holding it to the car's sheetmetal. I talked with Randy about how close the fuel tanks were on the other side of the sheetmetal and he said not to worry so long as the bolt length doesn't get too crazy.
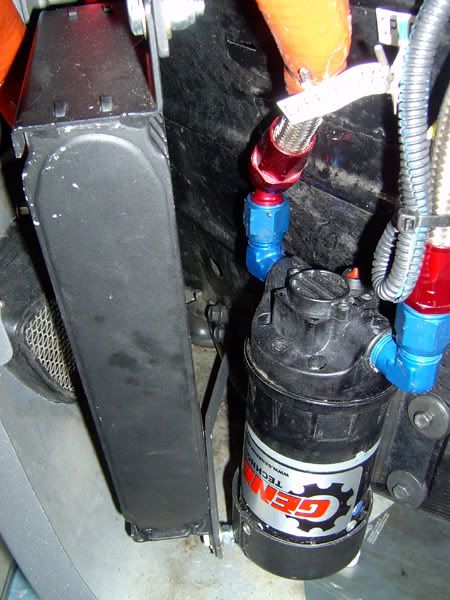
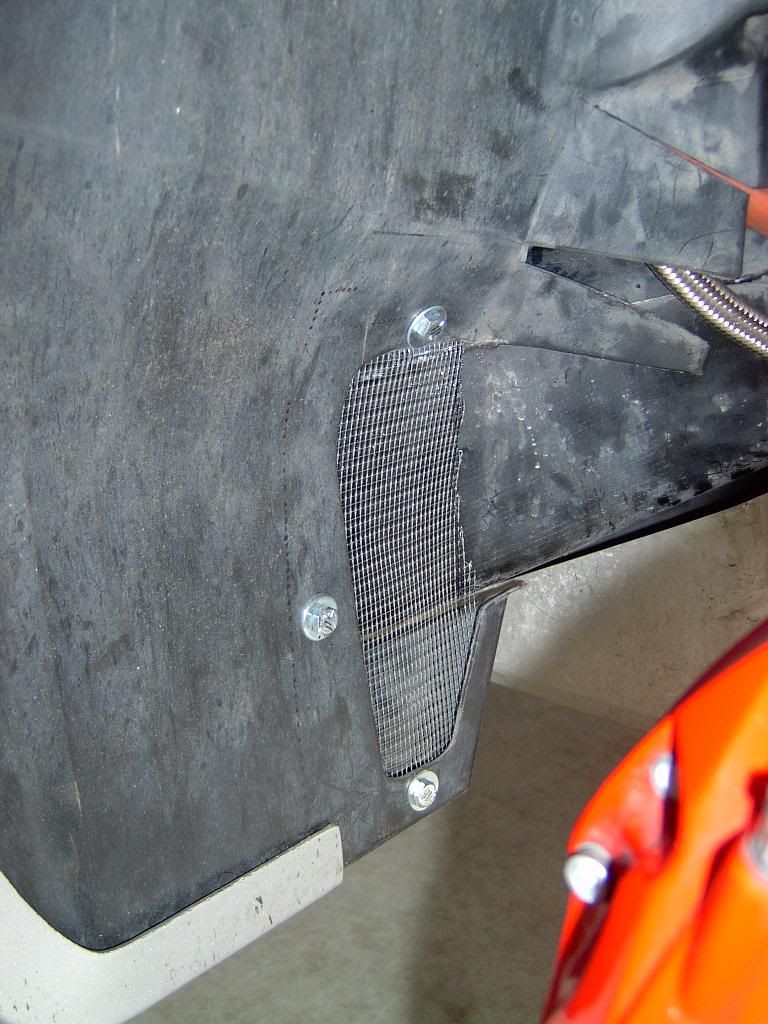
Here you can see the lower bracket holding the cooler. I trimmed, I can't remember if you HAVE to, the brake duct so it stopped just on the inside of the metal screen.
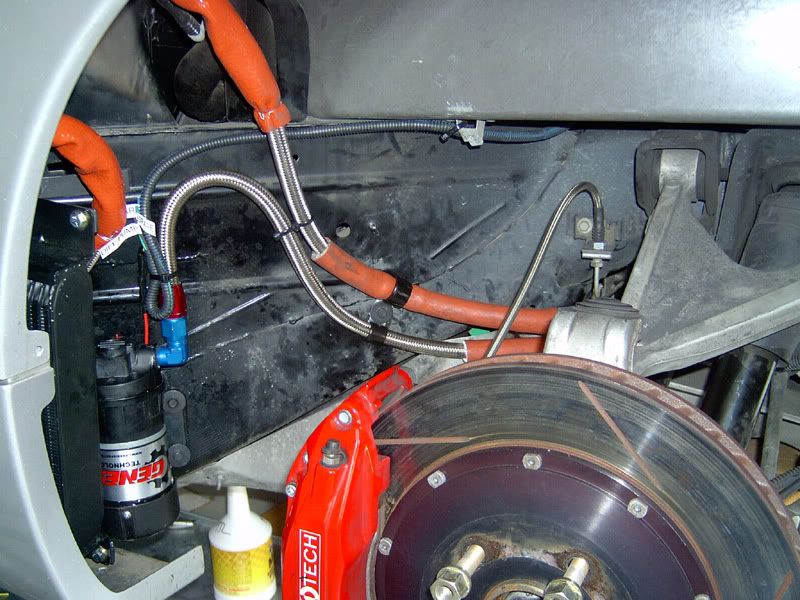
I ran a bundle of electrical wire from the battery, past the computer, then down the passenger's side rocker panel. I included wire for a diff cooler, which I also have, and a few extra wires as spares. Those spares have since been very handy. You could just as easily run wires inside the car and drill/find a hole somewhere to get them out.
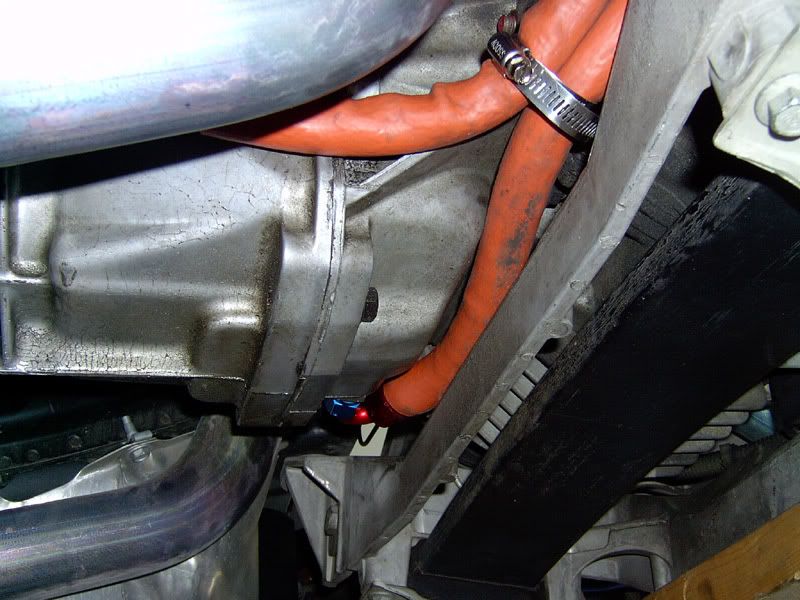
This isn't a very good picture but one of the areas I was concerned about what how close the oil lines were to the brake hardlines. I didn't want to drill into the rear sub-frame to hold the lines so I used a big hose clamp to secure the oil lines and hold them right up against the sub-frame mount.
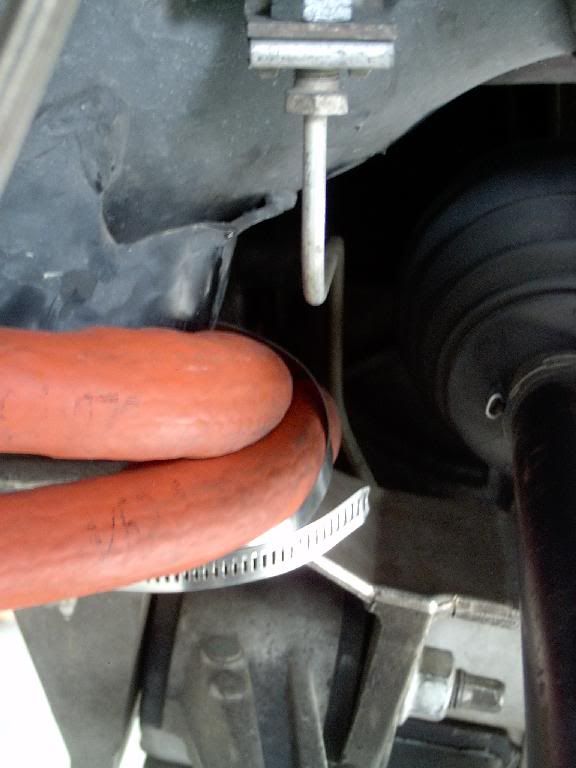
The rest is pretty easy.
To keep too much debris from getting through the opening where the brake duct use to go, I put some mesh screen. I first tried some rain gutter screening. That isn't heavy enough. I found some heavier gauge "wire cloth" at the hardware store in the garden area. It works much better.
Best of luck!
Word of caution about these pics: For some reason, I convinced myself when I did the install that I should wrap the lines in the bits of Firesleeve I had. While it is likely a good idea to put some rubber hose or something around the braided lines in areas that will rub, I went WAY overboard! It doesn't look very nice.
From what I recall, the hardest parts are making the brackets to hold the cooler. Space is very tight and it took me a little while to make brackets which fit. The other issue I recall having is getting access with a drill to make the holes in the car for the bolts that hold brackets. Some holes I believe were made by going through the brake duct opening. I did this a couple of years ago so I don't quite remember all the details.
In this pic, you can see the upper bracket holding the cooler. It is somewhat U-shaped with a couple of automotive bolts from Lowes holding it to the car's sheetmetal. I talked with Randy about how close the fuel tanks were on the other side of the sheetmetal and he said not to worry so long as the bolt length doesn't get too crazy.
Here you can see the lower bracket holding the cooler. I trimmed, I can't remember if you HAVE to, the brake duct so it stopped just on the inside of the metal screen.
I ran a bundle of electrical wire from the battery, past the computer, then down the passenger's side rocker panel. I included wire for a diff cooler, which I also have, and a few extra wires as spares. Those spares have since been very handy. You could just as easily run wires inside the car and drill/find a hole somewhere to get them out.
This isn't a very good picture but one of the areas I was concerned about what how close the oil lines were to the brake hardlines. I didn't want to drill into the rear sub-frame to hold the lines so I used a big hose clamp to secure the oil lines and hold them right up against the sub-frame mount.
The rest is pretty easy.
To keep too much debris from getting through the opening where the brake duct use to go, I put some mesh screen. I first tried some rain gutter screening. That isn't heavy enough. I found some heavier gauge "wire cloth" at the hardware store in the garden area. It works much better.
Best of luck!
The following users liked this post:
MR Turco (10-20-2018)
07-27-2012, 08:38 PM
#13
Pro
My pleasure. Just don't follow my example with all the hose wrap! I would suggest either using spiral wrap or just a cut piece of rubber hose slipped over the braided line where it could rub.
I know people use switches and relays. I didn't. I just used some heavy duty switches, like this:
http://www.summitracing.com/parts/LNG-45420/
They are rated for 40 amps at 12 volts. To wire it up, I use the stud that powers the relay/fuse panel under the hood next to the battery. I come off that stud, have an in-line fuse, then into the cabin through the firewall grommet behind the battery. In the cabin, the wires go the switches, then back out through the firewall grommet, down the rocker panel to the back of the car.
07-27-2012, 10:32 PM
#15
Former Vendor
Randy
07-27-2012, 10:58 PM
#16
Pro
You can wire them up however you want. I have mine to switches. In the early spring and fall when it is cool out, you may not want to run them right away in order to help the temps raise up a bit.
As Randy said, the pumps are loud. You won't want run them when driving on the street. Can you speak softly over them? I doubt it. I always have my helmet on when I run the pumps and they seem pretty loud. Then again, my car doesn't have any carpet or sound deadening.
As Randy said, the pumps are loud. You won't want run them when driving on the street. Can you speak softly over them? I doubt it. I always have my helmet on when I run the pumps and they seem pretty loud. Then again, my car doesn't have any carpet or sound deadening.
07-28-2012, 10:55 AM
#17
Safety Car
 07-28-2012, 05:13 PM
#18
Drifting
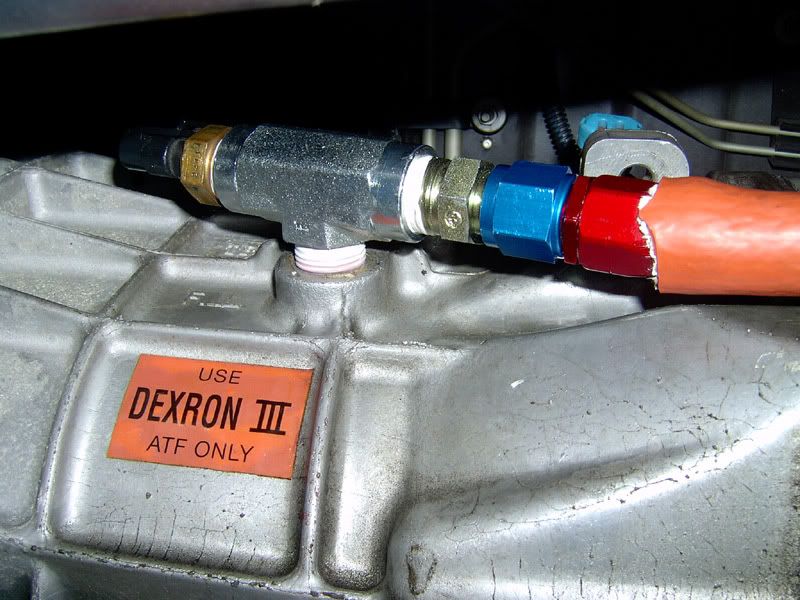
One tip: I let my lines run too close to the boot on the CV joint... It rubbed a hole in the boot and grease went everywhere. Be careful where you run your lines. I wired mine up to a switch. Note the orientation of the T fitting in the photo. You want the fill end of that to be slightly higher than the hose end.