
Welders, give me some advice on my welds (pics)
 11-02-2012, 08:32 PM
#1
Drifting

Thread Starter
Member Since: Dec 2007
Location: Sumter South Carolina
Posts: 1,661
Likes: 0
Received 7 Likes
on
7 Posts

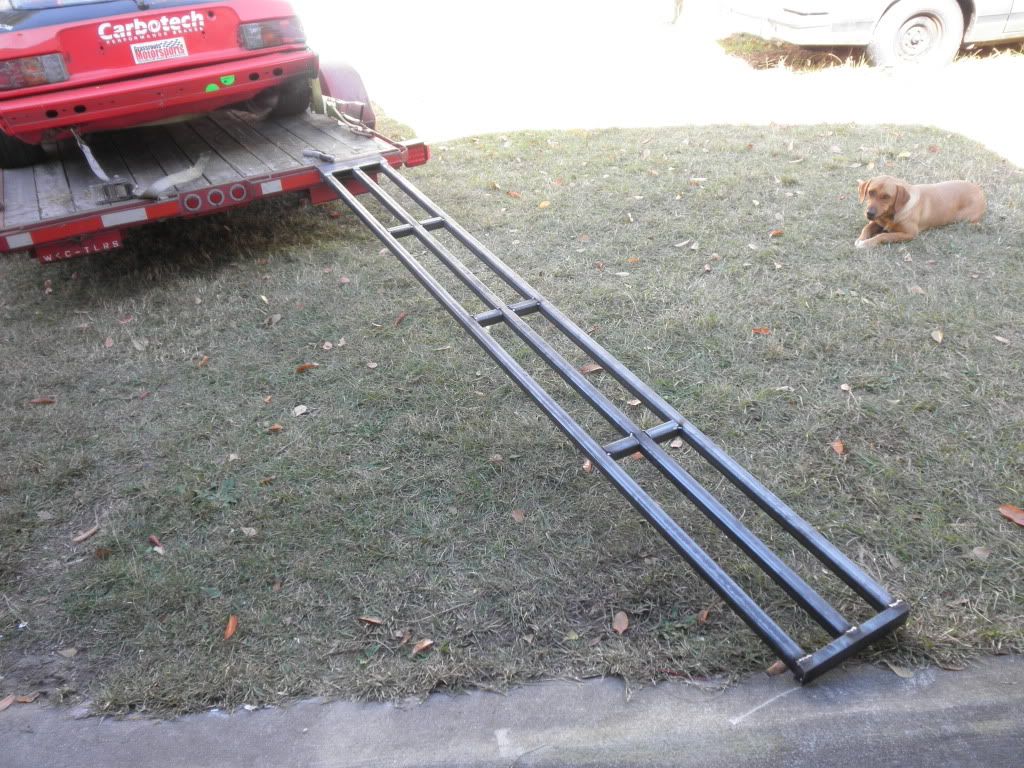
I am building two 10' trailer ramps for my '89 vette, and 79 rx7 race car cause my current setup is embarrassing... I figured I'd keep posting here since some of you have been helping me with trailer advice. I've got all my metal and going to put it all together tomorrow. I'm still new to welding and don't really have a fear of them "failing" but it never hurts to get advice on if everything looks ok or how to make them better.
My design is simple, 3x, 1.5" x 10' square tubing (1/4 wall) with caps on ends, and 3 additional cross tubes. Then I will run expanded metal on top (1/4).
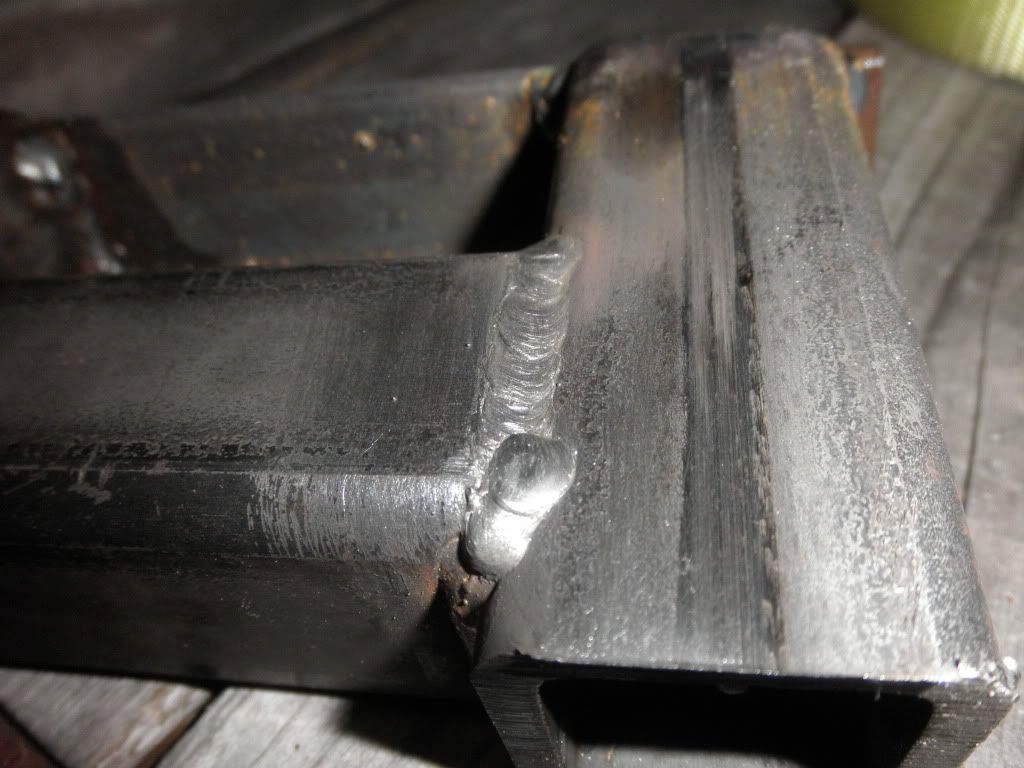
I'm using a Lincoln Electric 140 with 25%/75% Argon/CO2 mix. I have the heat set to max (E) and the feed speed low at 3...
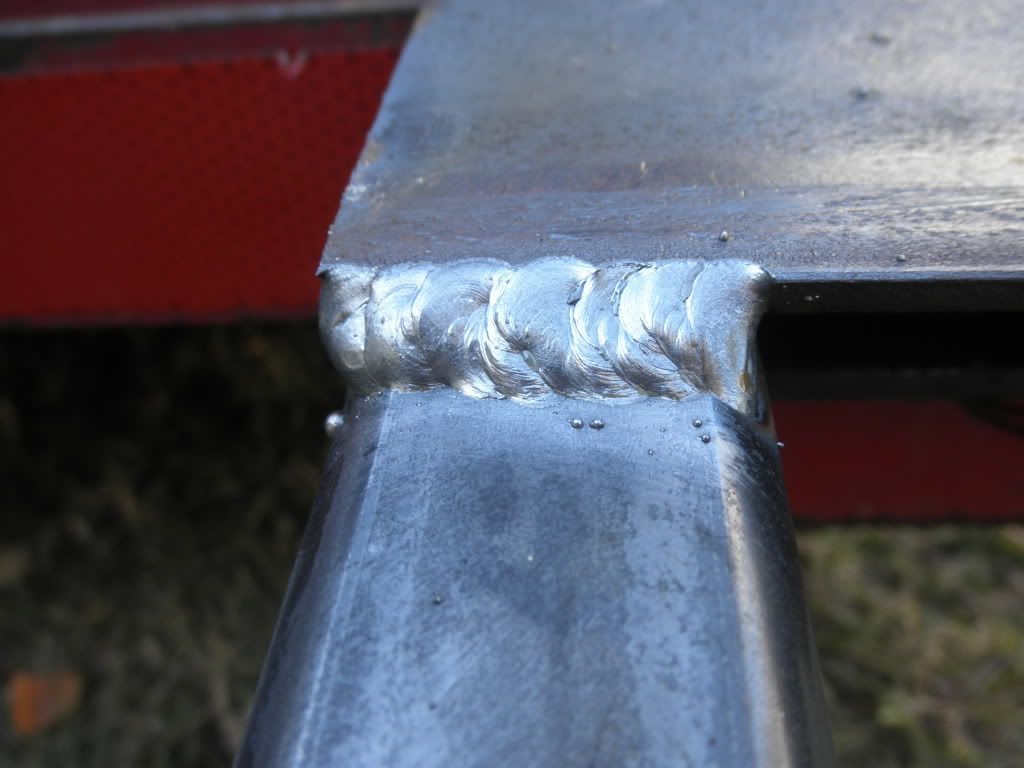
Pic 1: These are some of my nicer looking welds but I think I went too fast because the bead is rounded instead of flat.
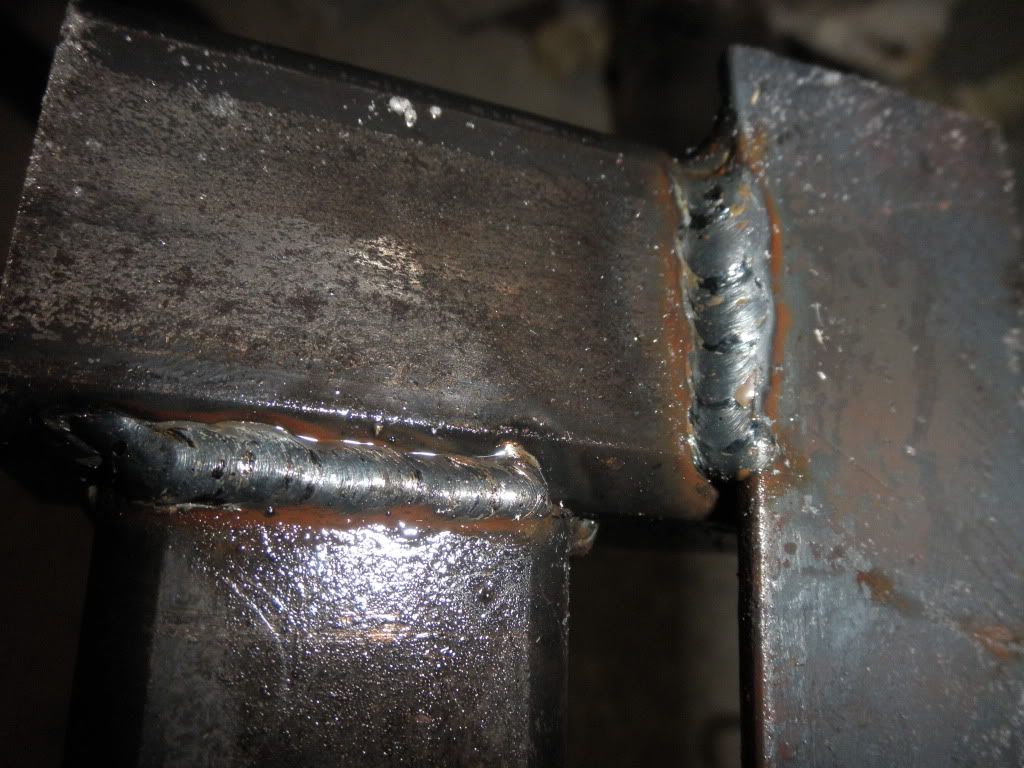
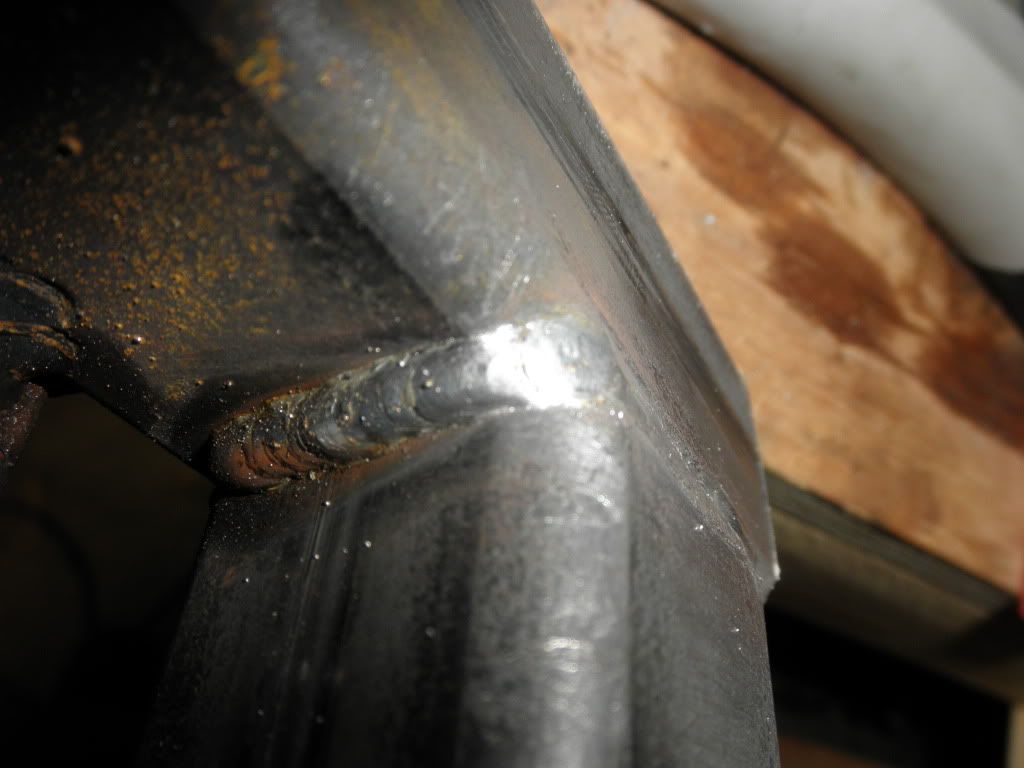
Pic 2: Although this isn't as pretty, I think it is more sucessful in penetrating both pieces...
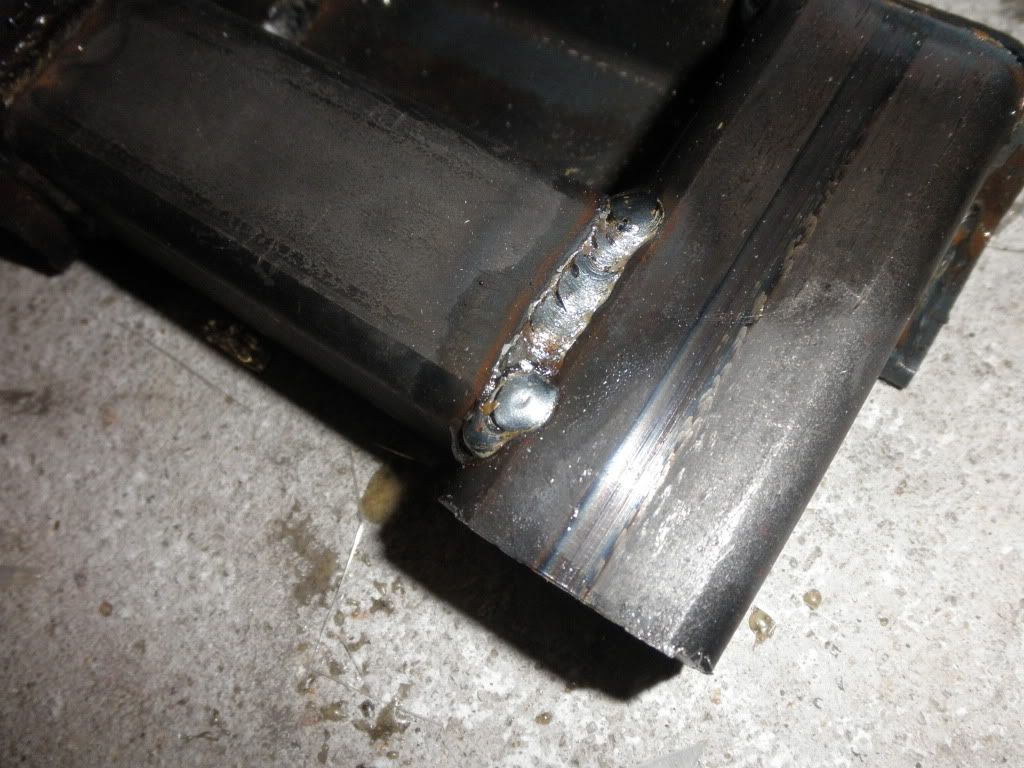
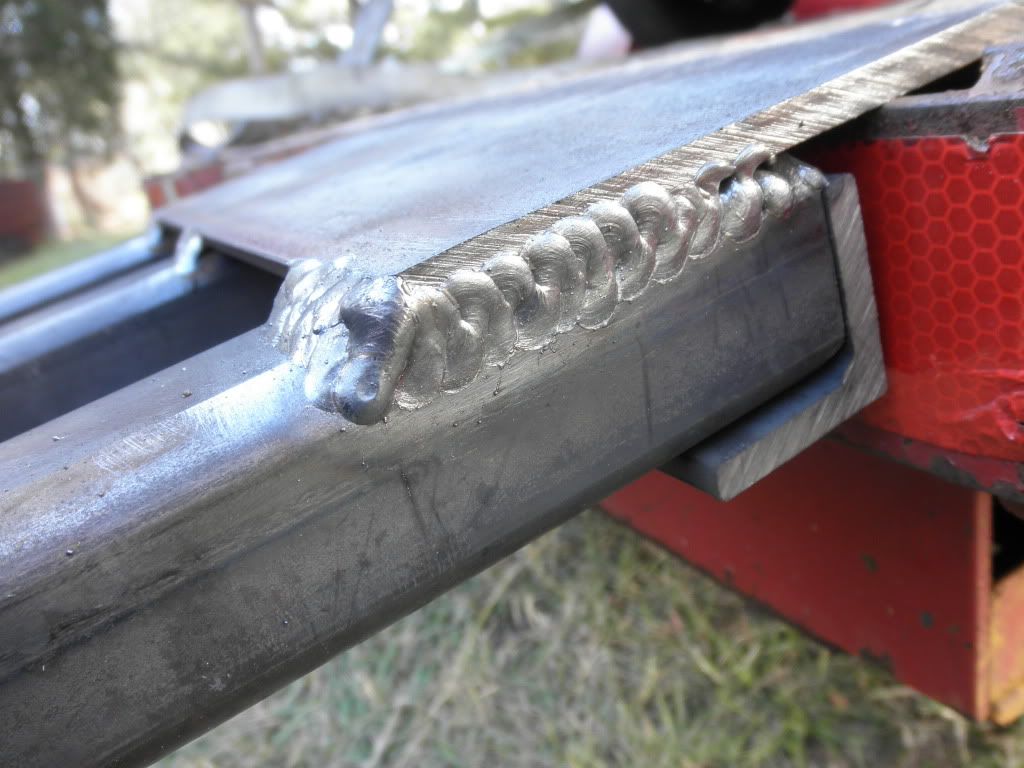
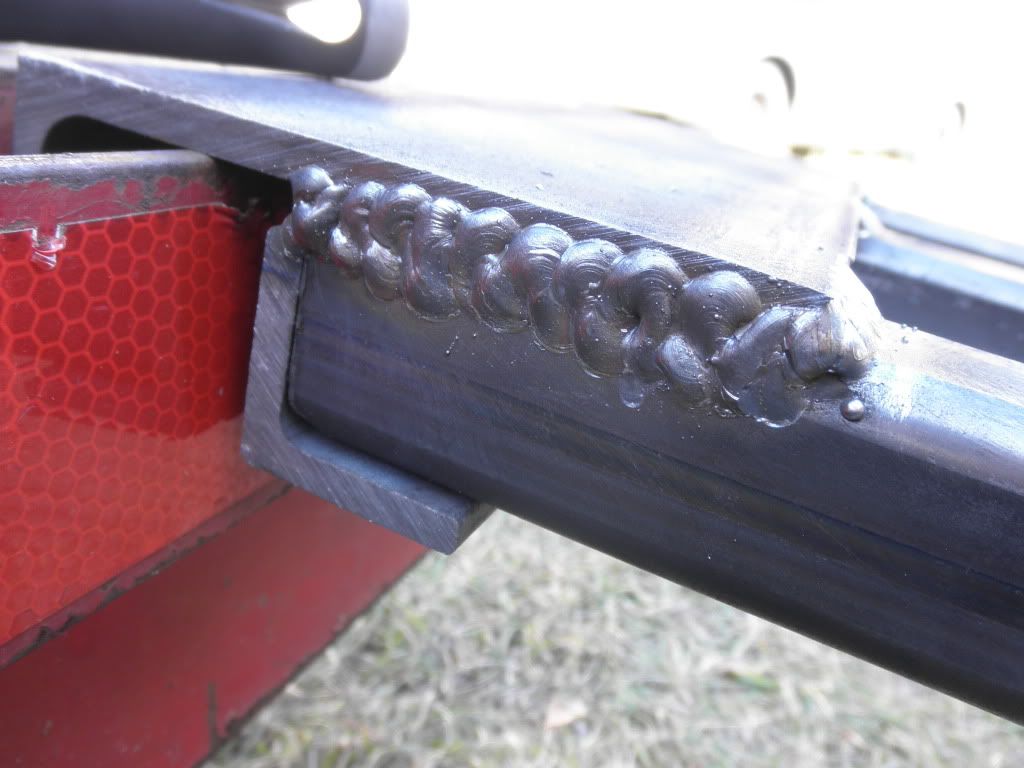
Pic 3: This weld is where I had to bridge about a 1/8 inch gap, I think it looks ok
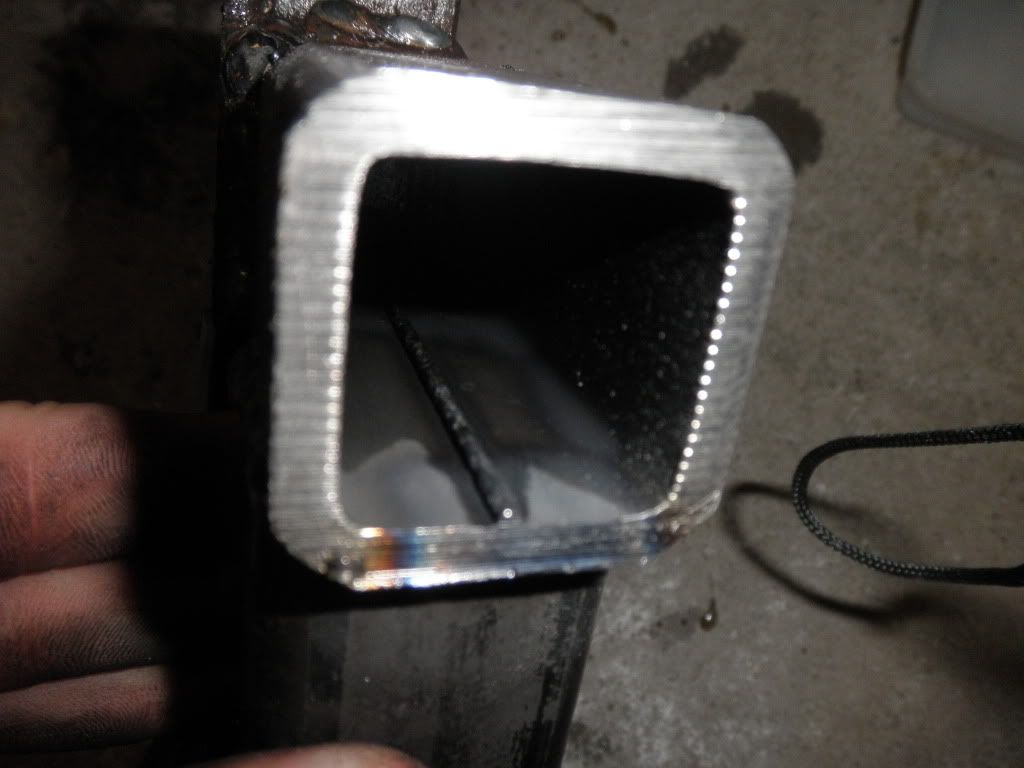
Pic 4: And here is inside of the tube, I can see the heat marking that tells me I have penetrated the metal enough...
In addition, I know I should take a welding class at a tech college and plan to this summer, If you see any huge design flaws please point them out but really I've bought and cut all the metal so it ain't changing unless there is a huge problem. I also realize these things will weigh a butt load but I have a solution to it so don't worry.
My design is simple, 3x, 1.5" x 10' square tubing (1/4 wall) with caps on ends, and 3 additional cross tubes. Then I will run expanded metal on top (1/4).
I'm using a Lincoln Electric 140 with 25%/75% Argon/CO2 mix. I have the heat set to max (E) and the feed speed low at 3...
Pic 1: These are some of my nicer looking welds but I think I went too fast because the bead is rounded instead of flat.
Pic 2: Although this isn't as pretty, I think it is more sucessful in penetrating both pieces...
Pic 3: This weld is where I had to bridge about a 1/8 inch gap, I think it looks ok
Pic 4: And here is inside of the tube, I can see the heat marking that tells me I have penetrated the metal enough...
In addition, I know I should take a welding class at a tech college and plan to this summer, If you see any huge design flaws please point them out but really I've bought and cut all the metal so it ain't changing unless there is a huge problem. I also realize these things will weigh a butt load but I have a solution to it so don't worry.
 11-02-2012, 08:45 PM
#2
Former Vendor

Member Since: Oct 2010
Location: Philadelphia PA
Posts: 1,250
Likes: 0
Received 53 Likes
on
45 Posts
How wide are you making the ramps? Just asking in case you end up extending them slightly with Race Ramps. Most of the standard Race Ramps trailer ramps are 14" wide. The RR-TR-8 is the only model that is 16" wide.
I would add a cross bar across the end of the ramps that will rest on the ground. That way if you do use the Race Ramps then you won't have all the weight supported on just the 1.5" tubes.
Hope this helps.
I would add a cross bar across the end of the ramps that will rest on the ground. That way if you do use the Race Ramps then you won't have all the weight supported on just the 1.5" tubes.
Hope this helps.
11-02-2012, 09:02 PM
#3
Burning Brakes

cover looks pretty good from the pics, no under cut, no concave or excessive build up. edges look tied in but you should brush out the slag so you can see. The root side is very important. you need 100% penetration. lets see the back side. Use a v shape joint prep with a little gap, 3/32 or so. The back needs to be tied in just as good as the front. also joints are stress risers and need to be stronger than the rest of the fab for a couple of reasons. Buy a couple bags of gussets and use them everywhere.
edit; on the last photo get the ends of your beads tied into each other. Use a 41/2" grinder with a .25 thick wheel and grind that one out. then re do it. Fire up with the wire about 1/8 frm the crown of the last bead. push the bead into the tie in then reverse and start your new bead. If you are a little short on heat point the wire straight in, push the puddle to lay it down and drag it to crown it up.
edit; on the last photo get the ends of your beads tied into each other. Use a 41/2" grinder with a .25 thick wheel and grind that one out. then re do it. Fire up with the wire about 1/8 frm the crown of the last bead. push the bead into the tie in then reverse and start your new bead. If you are a little short on heat point the wire straight in, push the puddle to lay it down and drag it to crown it up.
Last edited by Crepitus; 11-02-2012 at 09:51 PM.
11-02-2012, 09:46 PM
#4
Drifting
Thread Starter
Member Since: Dec 2007
Location: Sumter South Carolina
Posts: 1,661
Likes: 0
Received 7 Likes
on
7 Posts
My ramps are 1 foot wide, the end will be one flat piece. I am using the U shaped metal to cap the end. I am pretty sure I will need the ramps and I need them in my garage anyway. I was thinking of making legs that wont let the back of my trailer go lower than a certain point then jacking up the front if I need a bit extra clearance for the Vette.
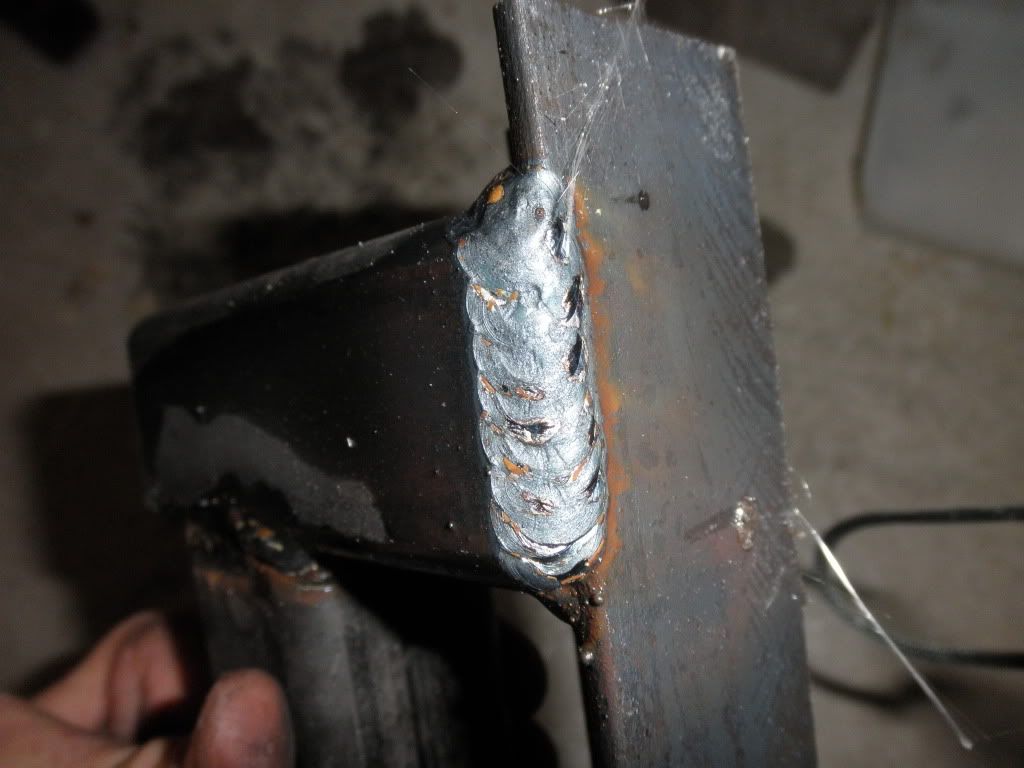
Here is slag removed (don't pay attention to the other welds, this is just a practice piece for when I do the real thing tomorrow, some of them I was trying to dial in the speed I liked and try different things.)
This is also the inside weld I'm sort of happy with
When I do inside welds I'm getting a hiss sound instead of crackle, what is that from?
I tried getting more pics of penetration but my camera wouldn't focus on it. I'm getting discoloration on other side but no circles or anything where is burnt through. It is 1/4 inch though...
Last edited by rithsleeper; 11-02-2012 at 10:06 PM.
11-02-2012, 10:10 PM
#5
Burning Brakes
I dont know about the hiss if you are moving into spray transfer instead of droplet it well hiss. The gas mix will support spray (not a bad thing) but I dont know if the machine has enough power. That last joint started out pretty cold I doubt there is proper penetration. put a 45* chamfer on the end of the tube leaving about a 1/16 land. get the wire right down in the bottom of the v. if it is a little hot point more toward the side of the closed tube and or speed up. If a little cold point straight in, 22* each side from the wire. If the joint is veed out properly it takes very little heat to tie in a good root. is this a 110volt machine? If so dont use an extension cord and plug directly into a circuit that is as dedicated as possible. Make sure the metal is at least 55* If it is ice cold the starts will be a prob
btw the crown should stand up about 3/32 +or- 1/32
Very important; use a wire wheel on your grinder to remove the mill scale before welding.
btw the crown should stand up about 3/32 +or- 1/32
Very important; use a wire wheel on your grinder to remove the mill scale before welding.
Last edited by Crepitus; 11-02-2012 at 10:24 PM.
11-02-2012, 10:39 PM
#6
Drifting
Thread Starter
Member Since: Dec 2007
Location: Sumter South Carolina
Posts: 1,661
Likes: 0
Received 7 Likes
on
7 Posts
Will do, thanks for the advice, I will try getting closer with my tip. It is a 110v and I have it on a dedicated breaker. I'll post more pics tomorrow as my progress gets going. shouldn't take me too long to make them, long part will be welding on the expanded metal.
11-02-2012, 11:03 PM
#7

That's pretty nice for a 110V machine. I've seen rollcages with worse welds. Welding is all about practice. Your machine should have a power vs. speed feed vs. gas pressure chart to get you close. With experience you can see into your weld puddle whether using mig or tig as to whether you are getting good penetration or not. Without looking at the backside there is no way to see if the penetration is good looking from the top but making convex welds of course is proper and compensates. A depressed weld usually also has evidence of gouging and is a weak weld. Your inside weld is puddled up nicely. The top weld looks flat. I would add more spaggetti into the weld pool by slowing down just a bit to build up the weld but still it will wet out into the parent steel like you have it. You don't want to pile up the weld like a "bird poop" like you almost did at the inside to top transition. I hope I make sense.
11-02-2012, 11:49 PM
#8
Drifting
Thread Starter
Member Since: Dec 2007
Location: Sumter South Carolina
Posts: 1,661
Likes: 0
Received 7 Likes
on
7 Posts
Makes perfect sense, that top splotch is actually a tack weld thats why it looks wtierd. My last pic on my op is the best i can get of the back side of the weld. Its a little wet but you can make out the discoloration as a grey. As for seeing the penetration i definately can see it, it takes huge chunks out of the metal and sometimes i think it wont build back up but it does.
All the structural welds on this thing will be redundant except one and unfortunately its at the top of the trailer, it will be a piece of angle that spreads away from the ramp to hook over the trailer lip. It will be 1/4 thick, and measures 4x 2". Its very massive but im going to really make sure everything is very deep since the entire weight of the car will be on that piece when im almost to the top of the ramp. Ill have my jack stands ready when testing the first few weeks using them but im not worried.
Like i said, ill take pics of the whole thing so if any welds im not sure of ill get a close up and see what you think.
11-03-2012, 11:57 AM
#9
Drifting
Thread Starter
Member Since: Dec 2007
Location: Sumter South Carolina
Posts: 1,661
Likes: 0
Received 7 Likes
on
7 Posts
So I ran out of Gas.... Pretty mad now that I can't finish till Tuesday but I at least got the first one tacked up for the frame. I was able to finish a few welds and I'm having to bridge some gaps so I'm using a zig zag pattern to weld because I can't see my penetration if I just try to push it way back in the crack.
Here is how it sits so far without the expanded metal on top (its going to be super strong, its really heavy)
Here is one of my welds, not all the way finished on end
And another...
This one, I'm not sure about. I have good penetration, but I think I just built up too much material which I don't think is a bad thing, just unnecessary...
Alot of them I'm going to go back and make sure it is complete all around the edges but since I was running out of gas I wanted to get at least enough to where I could stand on the frame.
11-04-2012, 01:31 AM
#10
Burning Brakes
I think you understand the concept, penetration is key. MIG is tough with thick stuff like that, it wouldn't hurt to pre-heat to ensure proper penetration. Also put some gussets at least on the bottom corners. It's possible you could really load up on of those tubes if you initially pull on crooked or they aren't sitting perfectly flat. Nice work and don't be afraid to teach yourself, lot's of good books and info on the net. Check out weldingtipsandtricks.com. I taught myself to TIG, MIG, Stick, and Gas Weld, nobody ever showed me a thing.
Last edited by moespeeds; 11-04-2012 at 01:34 AM.
11-04-2012, 10:30 AM
#11
Look at your last picture. Your welds look good. I would not be worried about seeing into the weld puddle. That takes time and experience, but in the meantime there is a better way. You see when metal is approximated (especially in your early metalworking days) there are often gaps like you see on the bottom of the angle iron to the tube. That makes for a defacto "V" notch root. With the spaggetti gun it is easy to fill and push wire deep into the notch and fill the V from the bottom up. This gives you good penetration and preheats the closer surface of metal and gives you good wetout on the top most portion of your convex bead. That is a better approach than the figure 8 rosette because with your method you added weld metal but but at unknown penetration. Does that make any sense? Sorry I don't have the proper terms down, I'm like Moespeed as I also am a self-taught gas, mig, tig welder. Oh and I second weldingtipsandtricks, great sight.
11-04-2012, 08:41 PM
#12
Drifting
Thread Starter
Member Since: Dec 2007
Location: Sumter South Carolina
Posts: 1,661
Likes: 0
Received 7 Likes
on
7 Posts
I checked out the weldingtipsandtricks. Lots of great info there and my thoughts exactly about going deep into the grove, if not in one pass but doing a single pass deep, then a "v" pass on top. After watching more videos on the tips and tricks i think my wire speed is a tad low too. Ill be getting more gas tomorrow and finishing the project tuesday and let you know how it goes. Thanks for all the help.