
Double-Duty Daily Driver (‘03 Z06 Build Thread)
 05-10-2019, 10:10 AM
#81
Instructor

Thread Starter
Once you use the ATI pin kit you then use the hub's keyway to keep it from spinning. There is no need for the crazy torque procedure with the interference fit setup. Use an old bolt to torque to 150 or so to fully seat damper, then you can install the ATI bolt to 100 or 125 ft lbs (I typically used 125 as a "round number). The bolt is no longer keeping the damper secure on the crank.

The install instructions are here:
http://www.atiracing.com/instructions/918993.pdf
I'm slightly confused because I was planning to install 2 pins, which the instructions also reference, but this kit has you drilling perpendicular to the center axis of the crank so that the pin can seat in the keyway. The instructions tell you to install a second pin 180 degrees to the first one, but there's no keyway to match it on the pulley.
Other kits have you drilling into the front face of the crank and pulley so that half of the pin is in the crank and the other half is in the pulley, i.e. this one:

So I'm assuming that to have two pins using the ATI kit I'd need to add a second keyway to the pulley.
Easiest path seems to be to just use a single pin in the ATI keyway, but there are some folks saying that the keyway is really meant for a key on the crankshaft and a pin will dig into the keyway over time and make the pulley difficult to uninstall in the future.
Thoughts?
 05-10-2019, 10:26 AM
#82


Use the single pin... 2 pins is only for high strain supercharged applications. Even then 2 pins is overkill. Yes the "normal" pin kids pin a crank from the front, but the ATI pin is creating a sort of crankshaft key for a crank not machined for a key which of course allows you to use the ATI hub's keyway.
Never ever had an issue removing an ATI hub, never seen any wear between the pin and hub keyway... like most crap in the internet, bad info.
Never ever had an issue removing an ATI hub, never seen any wear between the pin and hub keyway... like most crap in the internet, bad info.
Last edited by RapidC84B; 05-10-2019 at 10:27 AM.
05-10-2019, 10:58 AM
#83
Instructor
Thread Starter
Use the single pin... 2 pins is only for high strain supercharged applications. Even then 2 pins is overkill. Yes the "normal" pin kids pin a crank from the front, but the ATI pin is creating a sort of crankshaft key for a crank not machined for a key which of course allows you to use the ATI hub's keyway.
Never ever had an issue removing an ATI hub, never seen any wear between the pin and hub keyway... like most crap in the internet, bad info.
Never ever had an issue removing an ATI hub, never seen any wear between the pin and hub keyway... like most crap in the internet, bad info.
I've got everything disassembled and the steering rack pushed out of the way but somehow managed to break one of the jaws on my puller tool trying to get the pulley off. Pretty sure I was doing something wrong. Waiting for new tool to arrive is giving me more time to clean up the mess in the engine bay, it is absolutely filthy.
I'm about 90% sure the crank seal is the source of my oil leak so I'm getting pretty excited to have everything back together. The big question is the camshaft, I'm hoping to be able to identify it without removing it. If I have to remove it then that creates a whole new set of steps.
05-10-2019, 01:37 PM
#84
You can "rent" a pulley puller from any local auto parts store for free... they put a hold on a CC and take it off when you return it.
05-13-2019, 12:17 PM
#85
Instructor
Thread Starter
I got the factory harmonic balancer off, luckily there doesn't appear to be any damage to the crank snout.
Unfortunately there are no markings on the front of the cam, which means it will need to come all the way out for me to identify it. To take it out I'll need to remove the valve covers, lifters, and rods. I've got to say I'm tempted to not even bother but I feel like I've come this far and I might as well go the rest of the way. The car is already tuned for this cam so replacing it would require a new tune. It's already going to be a challenge for me to get everything back together properly and I'm worried about getting the cam and crank properly clocked and getting the lifters back on correctly.
Even though I'm not excited to tear even deeper into it, I do need to know what kind of cam I'm dealing with because I might want to replace it or at least know what the maintenance schedule for the springs is going to be.
Another aspect that's a little daunting is that I'm not 1000% sure the front crank seal was the oil leak culprit, although I'd say I'm 90% sure, especially considering that my harmonic balancer bolt had backed all the way out, which let the balancer come half-way off of the crank before it was stopped by the steering rack.
Notice this discoloration on the corners of the pan gasket where it meets the timing chain cover:
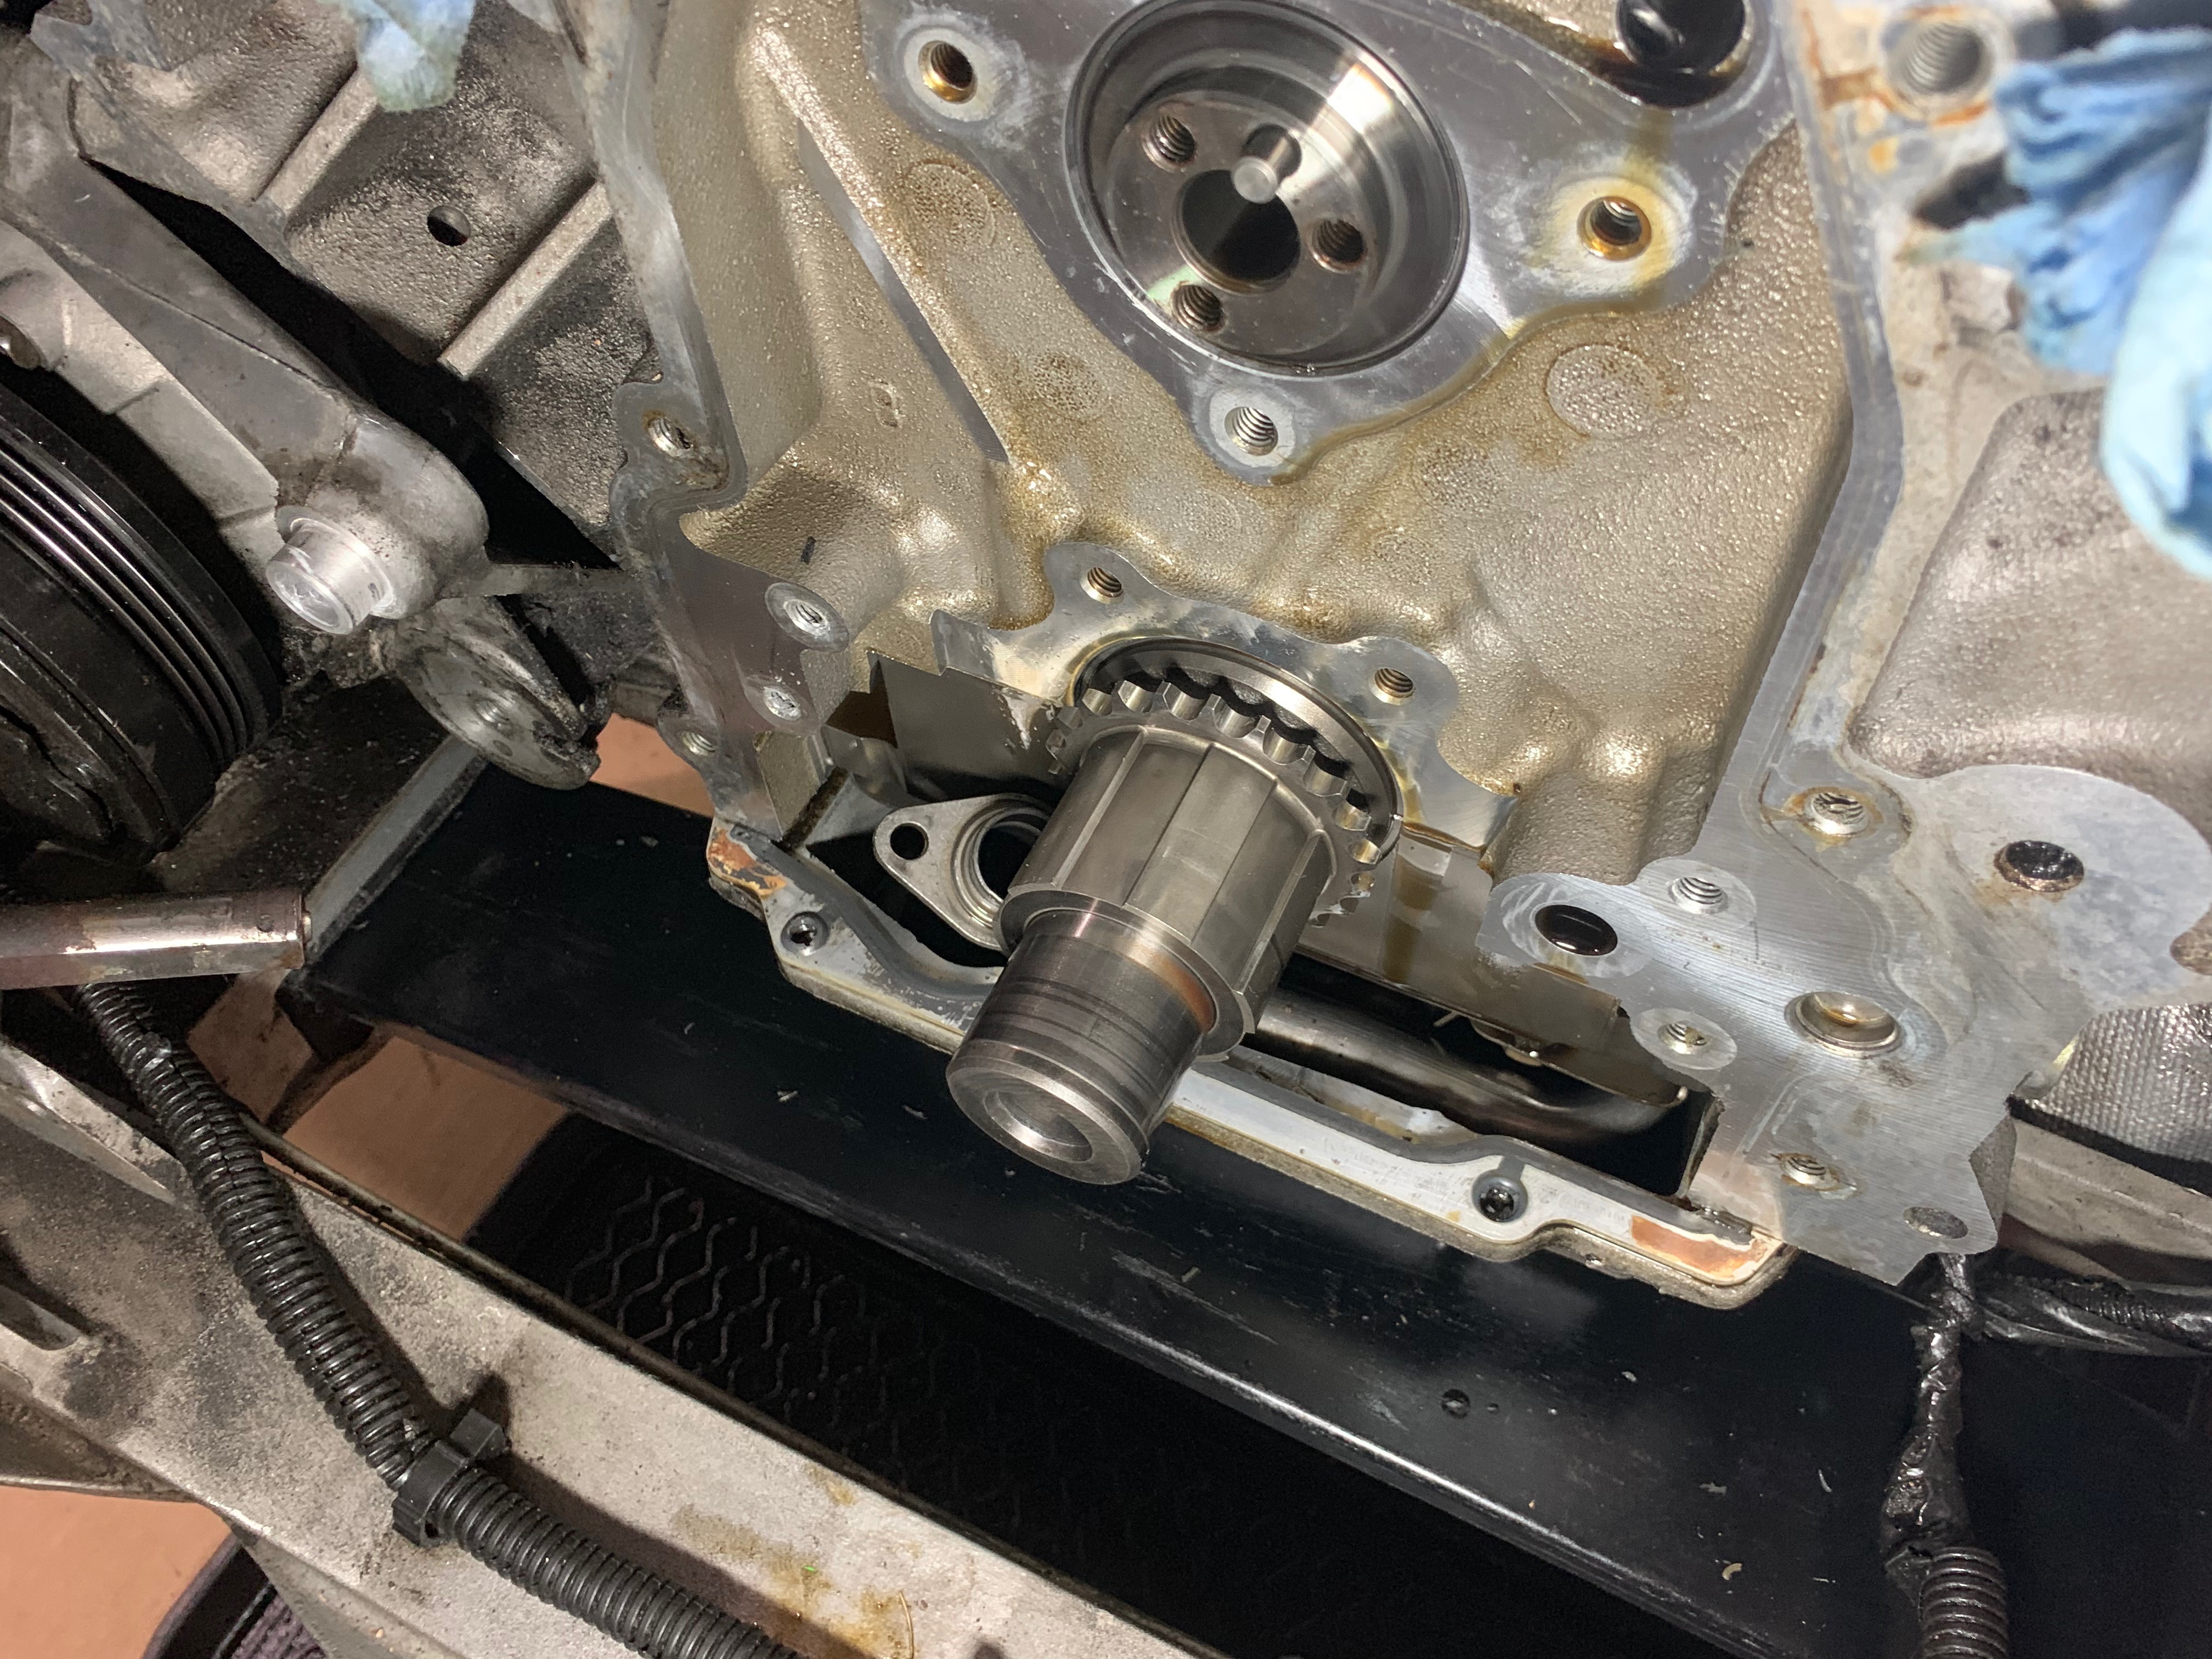
Is that normal? I would really hate to do all this work and find out I have a problem with the oil pan gasket. How perfect do I need to get those surfaces before I reassemble?
The bright side is that installing the DRM steering rack bushing was a piece of cake with everything taken apart.
I've also spent many hours degreasing / degriming various parts of the engine and engine bay. It's not perfect but it's a huge improvement.
Unfortunately there are no markings on the front of the cam, which means it will need to come all the way out for me to identify it. To take it out I'll need to remove the valve covers, lifters, and rods. I've got to say I'm tempted to not even bother but I feel like I've come this far and I might as well go the rest of the way. The car is already tuned for this cam so replacing it would require a new tune. It's already going to be a challenge for me to get everything back together properly and I'm worried about getting the cam and crank properly clocked and getting the lifters back on correctly.
Even though I'm not excited to tear even deeper into it, I do need to know what kind of cam I'm dealing with because I might want to replace it or at least know what the maintenance schedule for the springs is going to be.
Another aspect that's a little daunting is that I'm not 1000% sure the front crank seal was the oil leak culprit, although I'd say I'm 90% sure, especially considering that my harmonic balancer bolt had backed all the way out, which let the balancer come half-way off of the crank before it was stopped by the steering rack.
Notice this discoloration on the corners of the pan gasket where it meets the timing chain cover:
Is that normal? I would really hate to do all this work and find out I have a problem with the oil pan gasket. How perfect do I need to get those surfaces before I reassemble?
The bright side is that installing the DRM steering rack bushing was a piece of cake with everything taken apart.
I've also spent many hours degreasing / degriming various parts of the engine and engine bay. It's not perfect but it's a huge improvement.
05-13-2019, 12:20 PM
#86
1. I wouldn't pull the cam just to find out the specs given the car is tuned for it. You can use dowels to hold the lifters up vs. pulling the heads... you have to pull the heads to pull the lifters. If you're going to do all that you may as well get a ton of new stuff.
2. That "discoloration" is RTV which is what you're supposed to do at the corners of the gasket where the timing cover meets the front of the pan.
2. That "discoloration" is RTV which is what you're supposed to do at the corners of the gasket where the timing cover meets the front of the pan.
05-13-2019, 12:23 PM
#87
Le Mans Master

Member Since: Oct 2007
Location: Akron Ohio
Posts: 8,871
Received 1,754 Likes
on
941 Posts
2023 C5 of the Year Finalist - Modified
2022 C5 of the Year Finalist - Modified
St. Jude Donor '09-'10-'11

Why do you need to know what cam is in there? Is it not running the way you want? Not make enough power? Since you are just learning the car, dont change things like add power, or anything until you can fully drive what you already have.
Replace the crank seal, install the new timing chain, pump and balancer and put it back together.
Replace the crank seal, install the new timing chain, pump and balancer and put it back together.
05-13-2019, 12:35 PM
#88
Instructor
Thread Starter
1. I wouldn't pull the cam just to find out the specs given the car is tuned for it. You can use dowels to hold the lifters up vs. pulling the heads... you have to pull the heads to pull the lifters. If you're going to do all that you may as well get a ton of new stuff.
Why do you need to know what cam is in there? Is it not running the way you want? Not make enough power? Since you are just learning the car, dont change things like add power, or anything until you can fully drive what you already have.
Replace the crank seal, install the new timing chain, pump and balancer and put it back together.
Replace the crank seal, install the new timing chain, pump and balancer and put it back together.
I don't really mind the drivability aspect of it and I'm happy with the power it makes. I'm concerned that it's too aggressive and may hurt the longevity of the engine or could require frequent spring replacement and I don't even know what springs to pair it with.
I'd love to start buttoning it up today instead of going any deeper.
05-13-2019, 12:37 PM
#89
The brown stuff is the OEM RTV. Just get red high temp rtv and put a little on the corners there when you reinstall the timing cover.
05-13-2019, 12:42 PM
#91
Instructor
Thread Starter
05-13-2019, 12:45 PM
#92
You should get a set of C5 shop manuals as deep as you're getting.... I'd sell you my set, but I'll probably end up with another C5 one day.
05-13-2019, 12:48 PM
#93
Instructor
Thread Starter
I picked up a copy of "How To Rebuild GM LS Series Engines" by Chris Werner but until this point I've been relying on the tutorial at ls1howto.com for the disassembly.
The following users liked this post:
Turbotalon1g (12-18-2020)
05-13-2019, 01:10 PM
#94
 05-13-2019, 02:39 PM
#95
Le Mans Master
Member Since: Oct 2007
Location: Akron Ohio
Posts: 8,871
Received 1,754 Likes
on
941 Posts
2023 C5 of the Year Finalist - Modified
2022 C5 of the Year Finalist - Modified
St. Jude Donor '09-'10-'11
I'm actually thinking about getting a milder cam. The idle is set at about 950 RPM which I assume is to keep it from stalling, it smells of raw fuel at startup, and it needs to be kept above 2K RPM at slow speed or it lugs pretty badly.
I don't really mind the drivability aspect of it and I'm happy with the power it makes. I'm concerned that it's too aggressive and may hurt the longevity of the engine or could require frequent spring replacement and I don't even know what springs to pair it with.
I'd love to start buttoning it up today instead of going any deeper.
05-14-2019, 10:25 AM
#96
Instructor
Thread Starter

Last edited by 911tt; 05-14-2019 at 10:26 AM.
05-14-2019, 10:29 AM
#97
Yeah that's not needed... I did that on my first C5Z and it didn't hurt anything, but if you look at your picture the pan already has a gasket there. The OEM FSMs only call for rtv at the corners.
05-14-2019, 02:30 PM
#98
Instructor
Thread Starter
OK the new plan is to leave the cam in and button her up. At some point I'll get a valve cover off to get a look at the springs and see if I can get any clues about a service schedule for them, but for now the goal is a car that doesn't leak oil and is ready for a track event in early June.
I ordered one of the SacCityCorvette AlignIt tools to make sure I get the cover perfectly centered on the crank and hopefully minimize chances of the seal leaking again any time soon. While I'm waiting for that to show up I'll continue cleaning up the engine compartment and maybe get around to finishing up the seat/harness install.
I ordered one of the SacCityCorvette AlignIt tools to make sure I get the cover perfectly centered on the crank and hopefully minimize chances of the seal leaking again any time soon. While I'm waiting for that to show up I'll continue cleaning up the engine compartment and maybe get around to finishing up the seat/harness install.
05-14-2019, 02:32 PM
#99
Return it... your ATI pin fixture is a perfect alignment tool and a direct copy of a crank pulley hub.
05-15-2019, 01:59 PM
#100
Instructor
Thread Starter
In the process of getting it back together, realized the old pump was a Melling 10295, which is a high-pressure pump. That would explain why I was always seeing such high oil pressure. I'm installing a Melling 295, which is a stock replacement. I haven't done a lot of reading but there seems to be some risk of a high pressure pump causing problems.