RPO 684 brake drums
 12-03-2016, 08:40 PM
#41
Race Director


Member Since: Mar 2001
Location: Mustang OK
Posts: 13,847
Received 3,768 Likes
on
1,670 Posts
2023 C1 of the Year Finalist - Modified
2015 C1 of the Year Finalist

Just press them. The steel center web is a malleable steel.
I totally came up with these modifications to the drums all on my own. The final result is improved brakes, BUT NOT race proven (but I would expect them to work just as well as original 57-62 HD brakes).
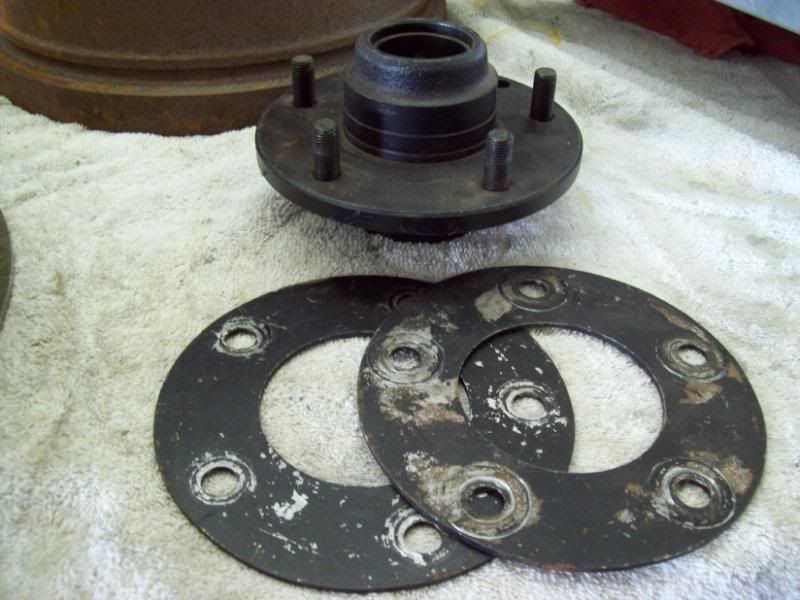
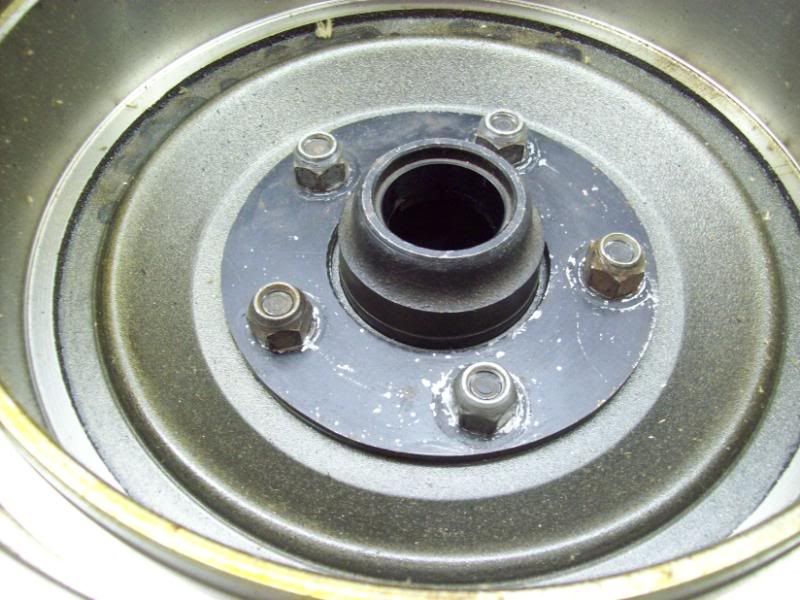
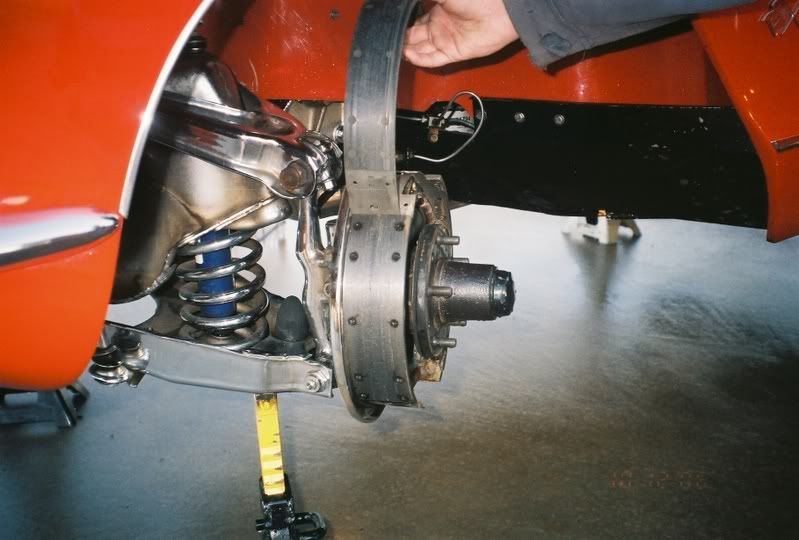
I simply use a Chevy front hub (ANY hub with a 4 3/4in bolt pattern) and I cut the center out of 4-5 junk brake drums to make plates. I sandwich the drum (to be modified) between the hub and the plates, then place it in my Harbor Freight press and press, turn, press, turn, press turn until I have the center pressed in where I want it. This pressing is done BEFORE turning the drums in the brake lathe to true them up. I've been running these drums for 12-15yrs. ZERO issues.
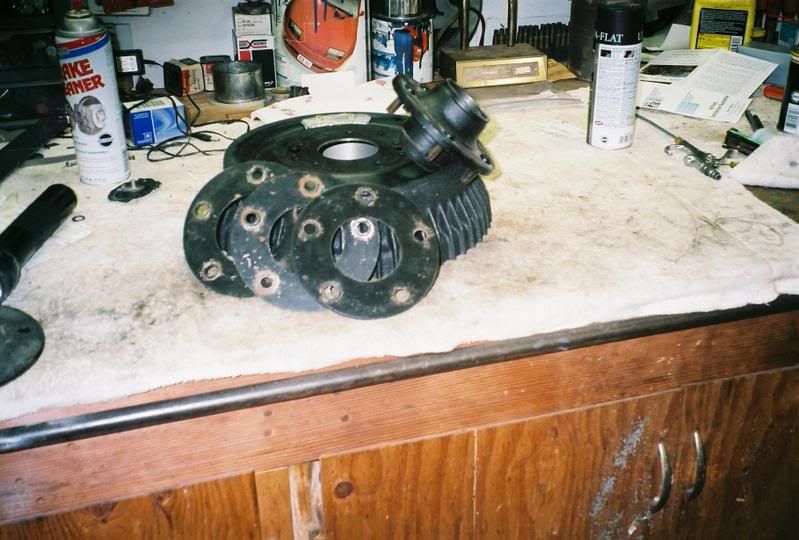
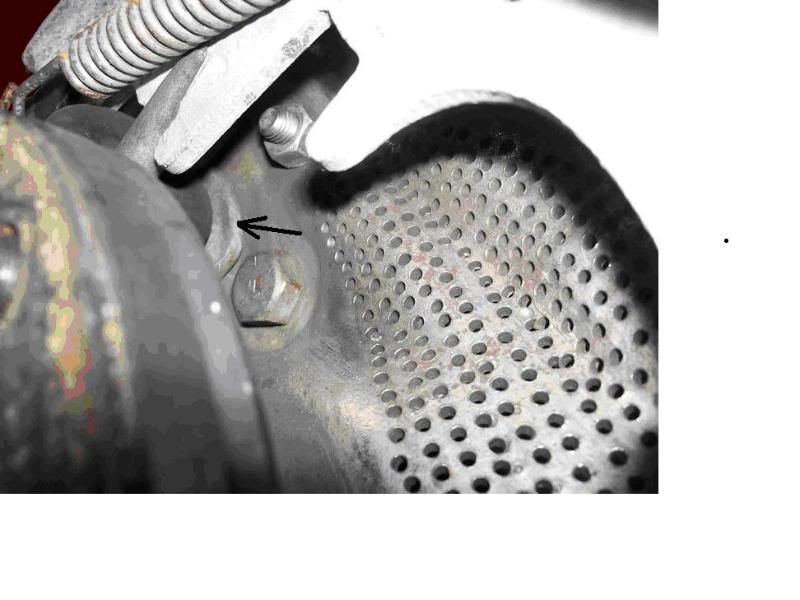
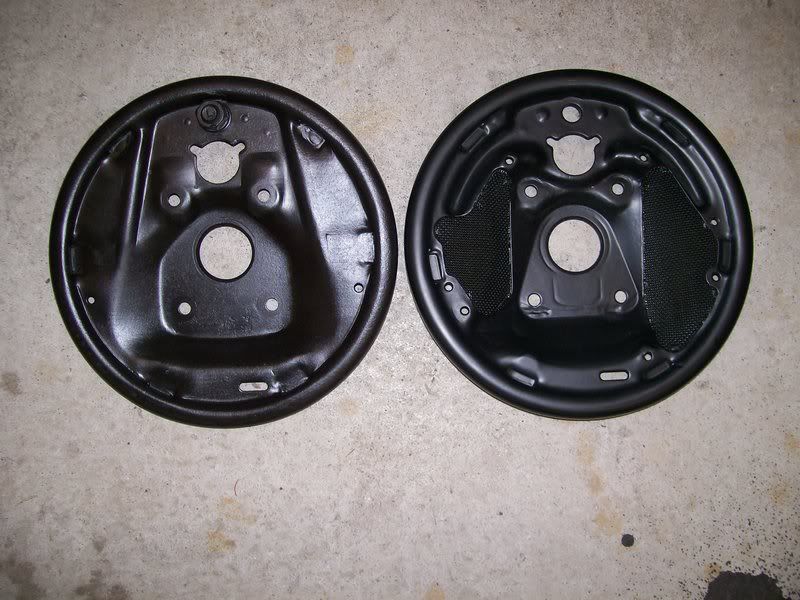
I ventilated STOCK backing plates simply by drilling about 300 holes per backing plate. I borrowed one of John Neas original backing plates to determine where the vent areas should be. I marked a grid on my plates, set them in a drill press and just started drilling.
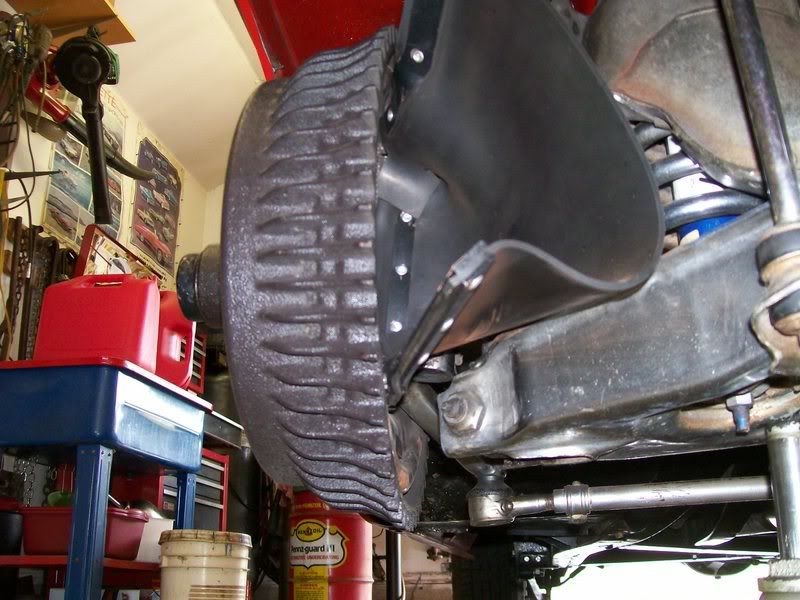
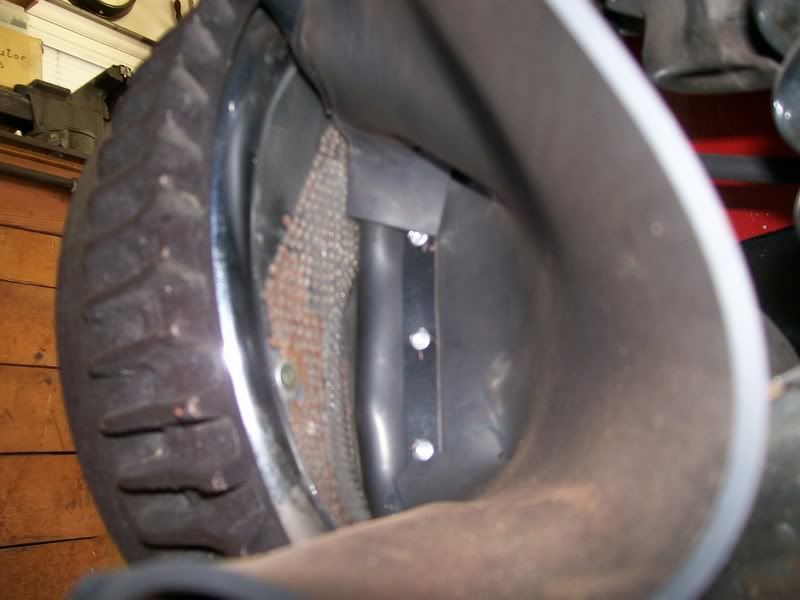
I bought a pair of repo "elephant ears", positioned them on the backing plates, drilled holes and attached them with bolts and nuts. Again, ZERO issues.
Here is a comparison of the 2 1/2in shoes and the std 2in shoes (for street use, I use late 50s-early 60s Olds shoes-----that is what was recommended by Chevrolet for street driving).

The following users liked this post:
jerry gollnick (12-04-2016)
12-03-2016, 08:45 PM
#42
Race Director
Member Since: Mar 2001
Location: Mustang OK
Posts: 13,847
Received 3,768 Likes
on
1,670 Posts
2023 C1 of the Year Finalist - Modified
2015 C1 of the Year Finalist
If you look REAL CLOSE at the drums in JohnZ's post #24, it APPEARS that those 58 drums have had the wrap around portion of the fins cut down (I presume in a lathe), as compared to the later style finned drums shown in Mashinter's post #36.
Last edited by DZAUTO; 12-03-2016 at 08:48 PM.
The following users liked this post:
jerry gollnick (12-04-2016)
12-04-2016, 11:48 AM
#43
Burning Brakes


Thank you Tom. Brilliant creative solution. I just tried this and the first thing that happened was the balance chuck of metal popped off, but I'll figure that out later. The important part is it worked just as you said. Thank you for your help and ideas. Jerry
12-05-2016, 05:46 PM
#44
Burning Brakes
Tom I pressed the first one. i mounted to the hub on the car and measured run out. I haven't removed the outer flange yet so I used that as the measurement surface. from minimum to maximum i have .072 inch change. How does that sound to you. I haven't figured out a good way to true up. Your thoughts?
12-05-2016, 07:06 PM
#45
Race Director
Member Since: Mar 2001
Location: Mustang OK
Posts: 13,847
Received 3,768 Likes
on
1,670 Posts
2023 C1 of the Year Finalist - Modified
2015 C1 of the Year Finalist
I simply pressed the center hub as square as I could, THEN I put the drum in the brake lathe and turned it. I first cut off the outer flange and then turned the inside brake surface and took off only as much as needed to true it up. When finished, the back side (which faces the backing plate) and the inside braking surface turns true in relation to the backing plate, shoes and the hub.
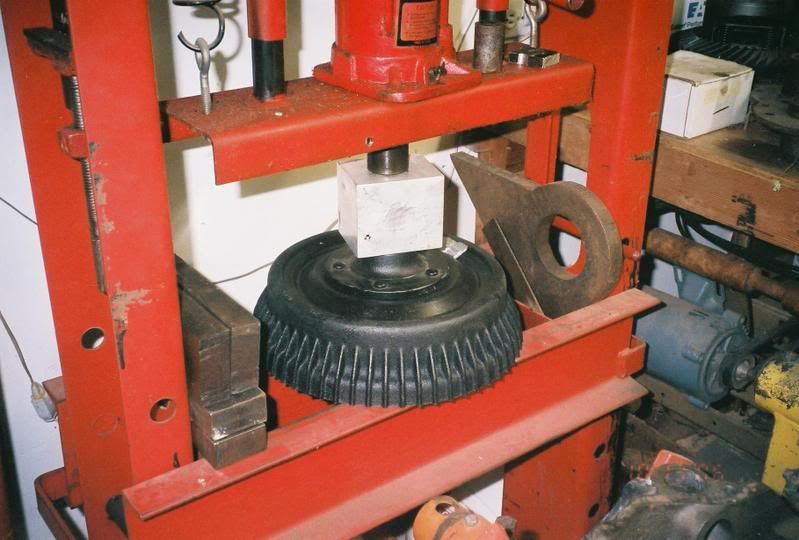
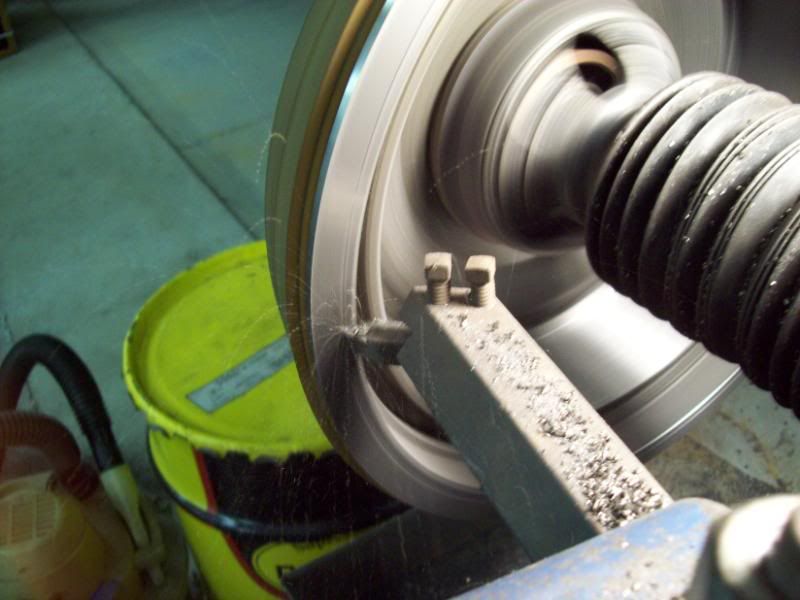
This shows cutting the flange away from the back side of the fins. Once the cutter gets down the the fins, YOU MUST GO VERY SLOW AND MAKE VERY SMALL CUTS OR THE CUTTER WILL SNAG A FIN AND BREAK OFF!!!!
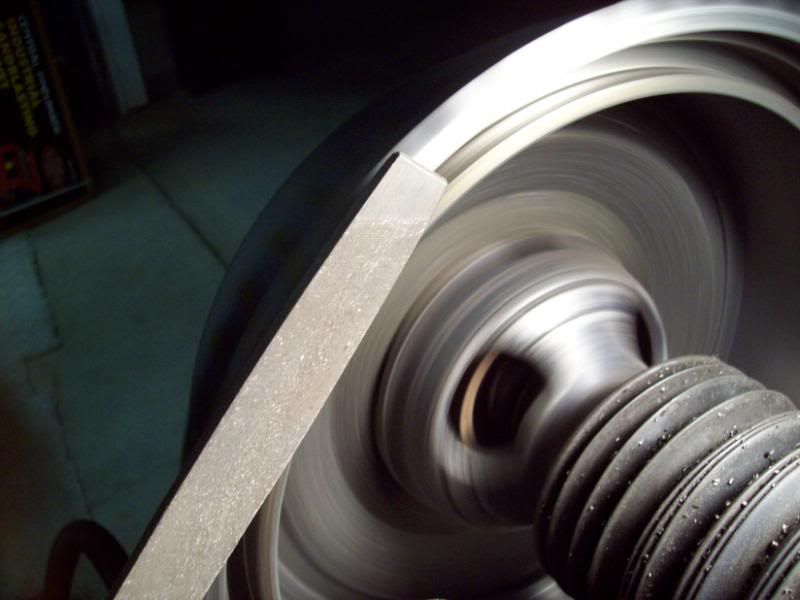
Once the flange is completely removed, I then used a file (with the drum turning) to smooth out the ends of the fins.
When I cut the inside braking surface, I position the cutter well into the inside corner to assure a nice squared off inside surface is made.
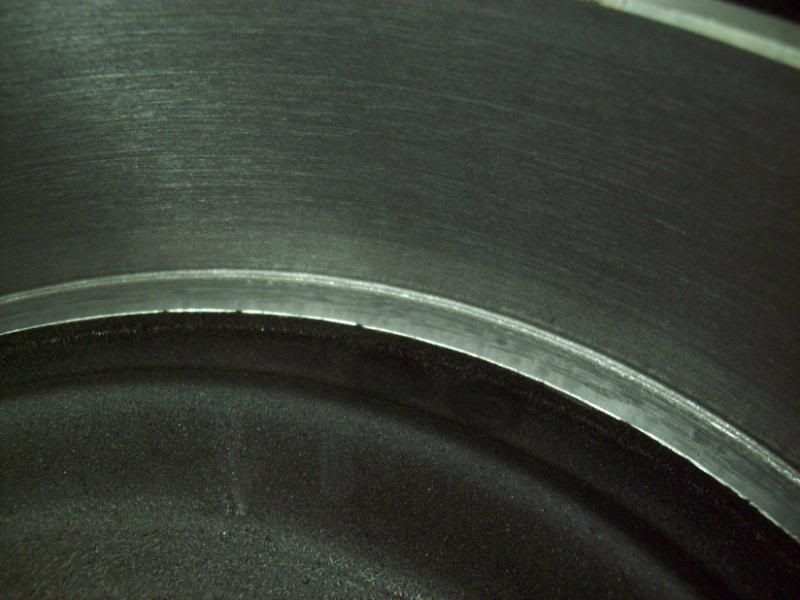
And this is what I end up with.
This shows cutting the flange away from the back side of the fins. Once the cutter gets down the the fins, YOU MUST GO VERY SLOW AND MAKE VERY SMALL CUTS OR THE CUTTER WILL SNAG A FIN AND BREAK OFF!!!!
Once the flange is completely removed, I then used a file (with the drum turning) to smooth out the ends of the fins.
When I cut the inside braking surface, I position the cutter well into the inside corner to assure a nice squared off inside surface is made.
And this is what I end up with.
The following 2 users liked this post by DZAUTO:
63Corvette (12-05-2016),
jerry gollnick (12-06-2016)