DIY license plate restoration
 09-29-2011, 02:10 PM
#1
Safety Car

Thread Starter
License plate paint restoration : .. I would like to take on on re-doing the paint on my license plates. The plates are CA black/yellow.
Have you done your license plates on your own?. . How best to paint the letters? .. One DIY license plate resto website mentions using a brush to paint the letters, but says that this method leaves brush strokes, also.
The license plate background color being the easy part, how best to get a nice smooth finish on painting the letters?
 09-29-2011, 02:28 PM
#2
Burning Brakes


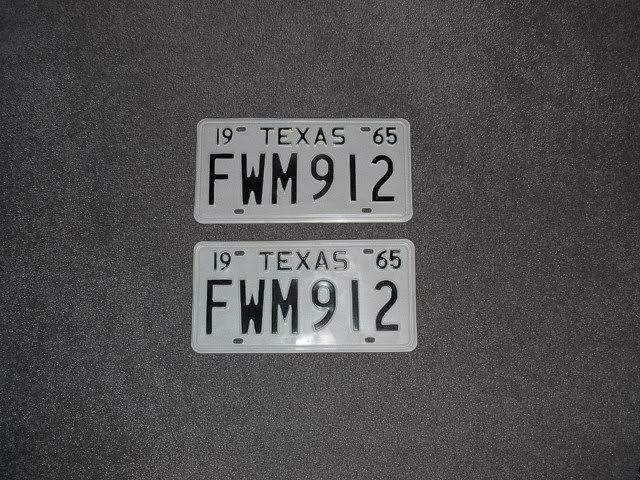
I think there is a post on here about doing it with Texas plates (maybe the Mustang Forum I�m on). General idea was to paint the plate black (in your case yellow) then paint it white (in your case black) then rub the letters/numbers with paint remover to get the underlying black (yellow) color. I would think this would require some practice on an old plate.
I was tying with the idea of a set of 69 plates that I picked up. My thought would be to paint the plate white and then find a hard, rubber roller that would cover the letters and roll the paint on�I imagine this is how it was done originally. Problem is I don�t know where to begin to find a rubber roller.
I was tying with the idea of a set of 69 plates that I picked up. My thought would be to paint the plate white and then find a hard, rubber roller that would cover the letters and roll the paint on�I imagine this is how it was done originally. Problem is I don�t know where to begin to find a rubber roller.
 09-29-2011, 02:34 PM
#3
Burning Brakes
Member Since: Aug 2011
Location: 6000' up in the mountains CA
Posts: 830
Likes: 0
Received 2 Likes
on
2 Posts
I've got 2 sets of the yellow on black plates that need touching up also.
The guy who sold them to me said the ones that are perfect are done just like bodywork is done, w/ bondo, hammering etc. He mentioned something about hiting them in sand or wet sand, which I think is some sort of bodywork technique.
Good luck...please post u'r progress w/ pics.
The guy who sold them to me said the ones that are perfect are done just like bodywork is done, w/ bondo, hammering etc. He mentioned something about hiting them in sand or wet sand, which I think is some sort of bodywork technique.
Good luck...please post u'r progress w/ pics.
09-29-2011, 03:25 PM
#6
Le Mans Master


I've done several sets. I glass bead them, do any necessary "body work", prime and then paint the whole plate the background color. Let it dry for a few days and then using 3M fine-line striping tape, outline the large numbers/letters and mask off the rest of the plate and spray them with the other color. You'll still have to do the small stuff free hand. Go to an art supply store and buy a GOOD brush (approx. $10) and keep the paint thin and you won't have any brush strokes.
Jim
Jim
09-29-2011, 03:48 PM
#7
Race Director

Member Since: Jan 2007
Location: Down on the bayou in south Louisiana
Posts: 13,671
Likes: 0
Received 12 Likes
on
9 Posts
St. Jude Donor '10
One way is to paint the letters/numbers color first. Then apply thin painters tape over the letters and trace the edges with an exacto knife. Peal off the extra tape and spray the entire plate with the background color. Before the background paint is dry remove the residual tape fron the letters. Using the thin tape and taking it off before the background tape is dry will reduce any line between the paint surfaces. I've restored several plates but I've never been happy with brush painted letters. M2C
09-29-2011, 04:06 PM
#8
Le Mans Master
Member Since: Feb 2004
Location: Norcal CA
Posts: 6,717
Received 551 Likes
on
444 Posts
2018 C1 of Year Finalist

I've done several sets. I glass bead them, do any necessary "body work", prime and then paint the whole plate the background color. Let it dry for a few days and then using 3M fine-line striping tape, outline the large numbers/letters and mask off the rest of the plate and spray them with the other color. You'll still have to do the small stuff free hand. Go to an art supply store and buy a GOOD brush (approx. $10) and keep the paint thin and you won't have any brush strokes.
Jim
Jim
 09-29-2011, 08:32 PM
#12
Melting Slicks

I started by using paint stripper to remove all paint.Sanded all the rust off.
With a sanding block I sanded all numbers and letters,state,month ,year and outside border trying to get them all flat.
Then sprayed about ten coats of white on all raised surfaces without masking.Let it dry and painted the burgandy one coat only.After drying a day I came back with 1,000grit wet and sanded the raised surfaces.and then installed without using any clear.
09-29-2011, 08:35 PM
#13
Team Owner

I started by using paint stripper to remove all paint.Sanded all the rust off.
With a sanding block I sanded all numbers and letters,state,month ,year and outside border trying to get them all flat.
Then sprayed about ten coats of white on all raised surfaces without masking.Let it dry and painted the burgandy one coat only.After drying a day I came back with 1,000grit wet and sanded the raised surfaces.and then installed without using any clear.

what brand of paint did you use?
 Otherwise, it looks great.
09-29-2011, 09:27 PM
Otherwise, it looks great.
09-29-2011, 09:27 PM
#16
Melting Slicks
09-29-2011, 09:30 PM
#17
Drifting

Yep! Also, I would buy lettering paint since it is easier to work with. Plus, you can get the paint matched up at any paint supplier. They can put it into a can for you. Bake the background color after it is painted. This will smooth out the paint. Then letter paint and clean up the edges with mineral spirits and cotton swabs. The background paint will not rub off. Make sure to allow the paint to completely dry before applying masks.
http://www.1shot.com/
09-29-2011, 10:32 PM
#18
Safety Car


I started by using paint stripper to remove all paint.Sanded all the rust off.
With a sanding block I sanded all numbers and letters,state,month ,year and outside border trying to get them all flat.
Then sprayed about ten coats of white on all raised surfaces without masking.Let it dry and painted the burgandy one coat only.After drying a day I came back with 1,000grit wet and sanded the raised surfaces.and then installed without using any clear.
With a sanding block I sanded all numbers and letters,state,month ,year and outside border trying to get them all flat.
Then sprayed about ten coats of white on all raised surfaces without masking.Let it dry and painted the burgandy one coat only.After drying a day I came back with 1,000grit wet and sanded the raised surfaces.and then installed without using any clear.
09-29-2011, 11:03 PM
#19
Burning Brakes
Member Since: Aug 2011
Location: 6000' up in the mountains CA
Posts: 830
Likes: 0
Received 2 Likes
on
2 Posts
I started by using paint stripper to remove all paint.Sanded all the rust off.
With a sanding block I sanded all numbers and letters,state,month ,year and outside border trying to get them all flat.
Then sprayed about ten coats of white on all raised surfaces without masking.Let it dry and painted the burgandy one coat only.After drying a day I came back with 1,000grit wet and sanded the raised surfaces.and then installed without using any clear.
With a sanding block I sanded all numbers and letters,state,month ,year and outside border trying to get them all flat.
Then sprayed about ten coats of white on all raised surfaces without masking.Let it dry and painted the burgandy one coat only.After drying a day I came back with 1,000grit wet and sanded the raised surfaces.and then installed without using any clear.

