birdcage repair: where do I cut the fiberglass
 11-10-2012, 08:06 AM
#1
Melting Slicks

Thread Starter


I used a car endoscope (VERY handy) to inspect my birdcage, about the only way I found to identify rust without cutting and removing the fiberglass.
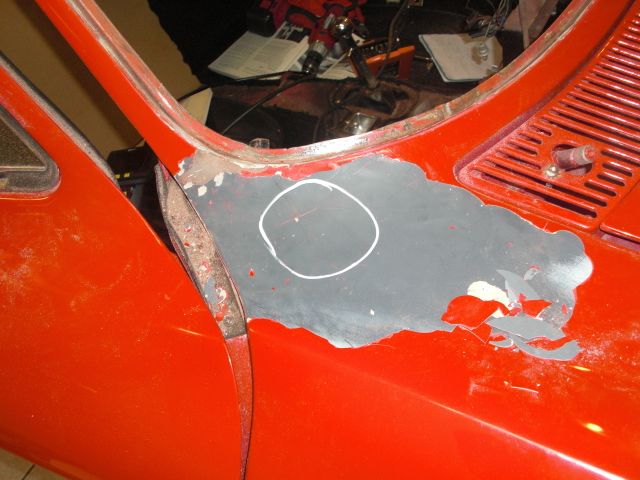
I was very happy with what I saw, here and there some slight surface rust on the (original?) light green cage. Only one spot for now that calls for repair. It's an about 1 square inch hole on the bottom of the A pillar (motor side). I need to cut away some of the fiberglass to get access.
Is it better to cut out following the white line centered around the hole (my car), more than enough to get access to the repair area? Or should I take off a considerable panel size, like on the other picture (someone else's car).
The reason I ask is that this is a 'stress' area where the fiberglass gets loaded a lot, and I want to be sure that the refit fiberglass panel holds well over time without 'edge' lines showing through the paint.
 11-10-2012, 08:24 AM
#2
Safety Car


Alexandervdr,
I had to repair my car in the same area. Believe it or not we did not cut any fiberglass on the top surround. The shop cut out a piece in the door jam. You can't see any evidence of where it was removed. I was very happy with the repair. A little less light in the wallet (ok a lot less) but the repair was excellent.
I had to repair my car in the same area. Believe it or not we did not cut any fiberglass on the top surround. The shop cut out a piece in the door jam. You can't see any evidence of where it was removed. I was very happy with the repair. A little less light in the wallet (ok a lot less) but the repair was excellent.
Last edited by woodsdesign; 11-11-2012 at 08:20 AM. Reason: spelling
11-25-2012, 12:29 AM
#3
4th Gear


Member Since: Aug 2009
Posts: 4
Likes: 0
Received 0 Likes
on
0 Posts
Alexandervdr,
You can cut the hole. To insure a strong repair you will have to install backing strips on the back side of the hole before you reinstall the plug. This will keep the plug from falling in the hole and it provides a surface for the plug to be bonded. You can use bonding adhesive or fiberglass resin. Either will work.
You can cut the hole. To insure a strong repair you will have to install backing strips on the back side of the hole before you reinstall the plug. This will keep the plug from falling in the hole and it provides a surface for the plug to be bonded. You can use bonding adhesive or fiberglass resin. Either will work.
11-25-2012, 06:58 AM
#4
Melting Slicks
Thread Starter
Alexandervdr,
You can cut the hole. To insure a strong repair you will have to install backing strips on the back side of the hole before you reinstall the plug. This will keep the plug from falling in the hole and it provides a surface for the plug to be bonded. You can use bonding adhesive or fiberglass resin. Either will work.
You can cut the hole. To insure a strong repair you will have to install backing strips on the back side of the hole before you reinstall the plug. This will keep the plug from falling in the hole and it provides a surface for the plug to be bonded. You can use bonding adhesive or fiberglass resin. Either will work.
I may have been a victim (!) of 'beginner's luck', checked my birdcage all around, and the chassis all around. And till now the 1 square inch rust hole on the birdcage is the only weak spot identified ;-)
 11-25-2012, 08:54 AM
#5
4th Gear
Member Since: Aug 2009
Posts: 4
Likes: 0
Received 0 Likes
on
0 Posts
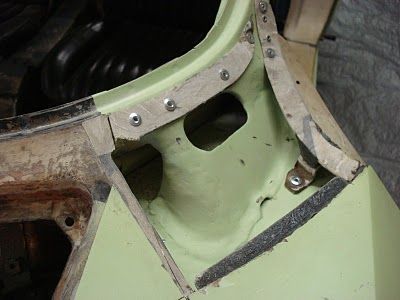
Depending on where your rust is located, access from inside the car should be possible. Here is a picture that should help your efforts. Good luck.
http://forums.corvetteforum.com/album.php?albumid=30214[/IMG]
http://forums.corvetteforum.com/album.php?albumid=30214[/IMG]
 11-25-2012, 09:37 AM
#7
Team Owner


http://forums.corvetteforum.com/albu...ctureid=127180
Better still, here's the picture

Last edited by 65GGvert; 11-25-2012 at 09:44 AM.

The following users liked this post:
1960 (04-11-2021)
11-25-2012, 02:44 PM
#10
Melting Slicks
Thread Starter
11-26-2012, 07:06 AM
#11
Melting Slicks
Thread Starter
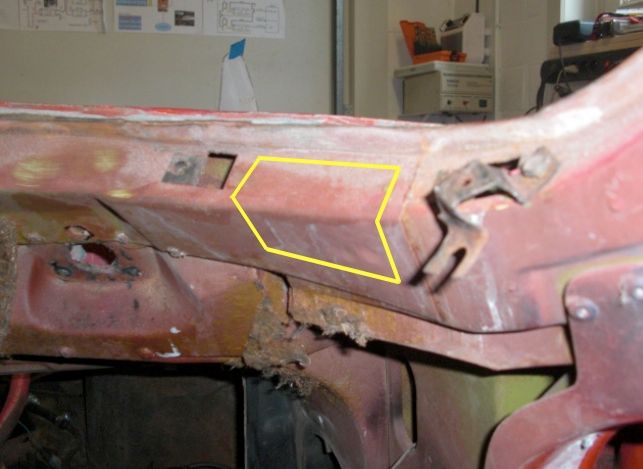
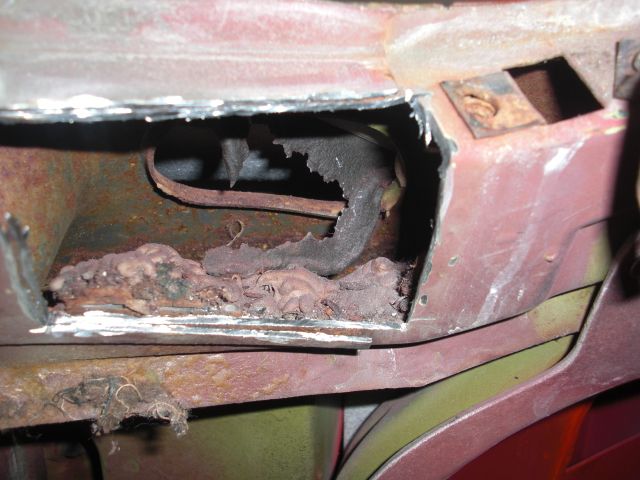
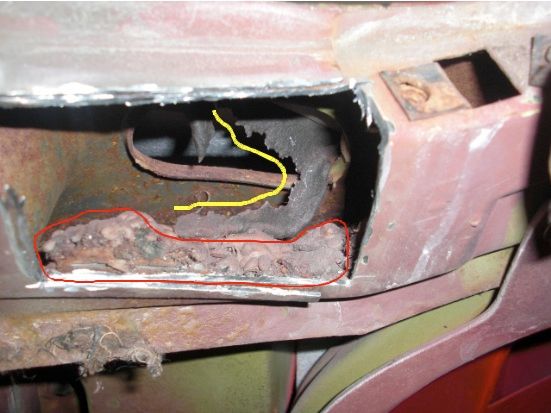
big surprise, after cutting out the birdcage from the inside with a dremel tool , I discovered that there was no rot rust at all. What I saw was squeezed out bonding agent with edges (see yellow line) that I had taken for heavily corroded metal... looking through the endoscope image that's quite understandable (I hope ). The birdcage is apart from some surface rust in good shape. The 'bloop' in the red line is bonding agent too.
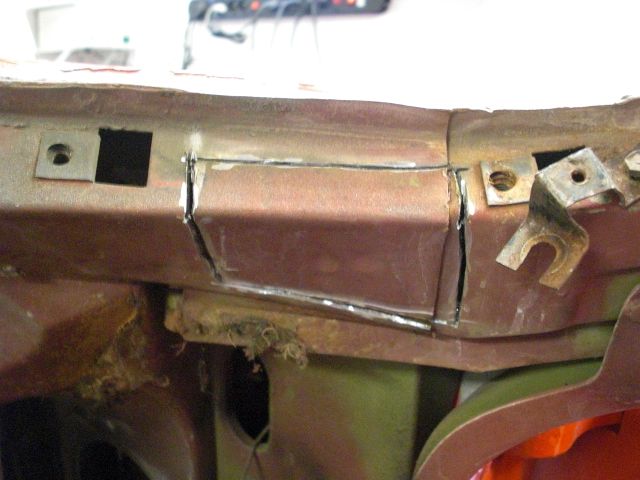
Because I cut the metal with a small disk dremel, the gap created is very narrow, and I can simply weld the cut out panel back in.
Glad I did not do the cutting from the fiberglas panel side
). The birdcage is apart from some surface rust in good shape. The 'bloop' in the red line is bonding agent too.Because I cut the metal with a small disk dremel, the gap created is very narrow, and I can simply weld the cut out panel back in.
Glad I did not do the cutting from the fiberglas panel side