When you click on links to various merchants on this site and make a purchase, this can result in this site earning a commission. Affiliate programs and affiliations include, but are not limited to, the eBay Partner Network.
Wiring is not my strong suit... so it goes slow for me, finally got the wiring and A/C work all done on the passenger side. Also been working on the hoses/wires in the engine bay. Here's the glove box all done and in, I REALLY hope it doesn't have to come out any more. Just one power wire to the A/C motor but that can happen anytime now. Also got the front header bar on the top frame rebuilt by Coffman and the restored frame is in the car.
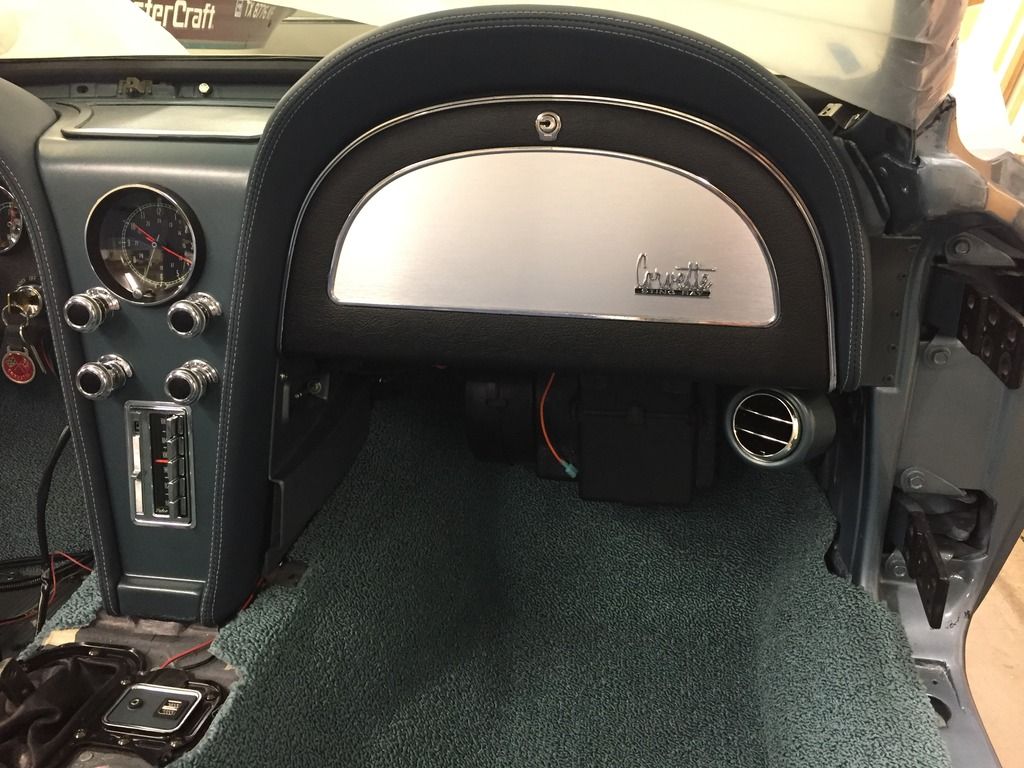
No high water here in Dallas Bill, just crazy winter weather - 75 one day and 45 the next. Has been pretty nice lately so I've been wrapping up the wiring. Only have four wires left to route/connect so I got the radio side panels and console in last night, also the shifter and leather shift boot. I'll get the last wires done tonight and move on to getting the pedals and steering column in.
Yup, wiring's all finito! (Except for the random debugging after startup of course...) E-brake cover and pedals are in, working on the clutch linkage now. Only 28 items on the task list - downhill now...
I just finished reading the last 4 years of your life start to finish. What an amazing job on everything. If I can wind you back a couple of years what filler did you use on the body? I recently finished my frame and am just starting soda blasting the body so all this still lays in front of me. I know you'll soon be enjoying all of this work. Especially When you drive it and get to see everybodies dental work because of all the smiles on their faces as you go by.
Thanks for the kind words, y'all!! I finished fabricating the adjustable clutch rod for the T5 and got it all installed. Moved on to the accelerator linkage and what a PIA to get it bolted in with only about an inch of clearance between the tunnel and bell housing - my hands are toasted but got it in there. Also put the hardware on the hood, the w/s is next for that. Will bench bleed the M/C and install the steering column next.
Thanks for the kind words, y'all!! I finished fabricating the adjustable clutch rod for the T5 and got it all installed. Moved on to the accelerator linkage and what a PIA to get it bolted in with only about an inch of clearance between the tunnel and bell housing - my hands are toasted but got it in there. Also put the hardware on the hood, the w/s is next for that. Will bench bleed the M/C and install the steering column next.
Rhett,
Nice work on the pushrod . . . however, I will tell you that I used a similar design initially for my T5 application. But, I found that after only @ 500 miles I noticed some premature wear on the forward end likely caused by the angle created with the "tilted" bellhousing - with this bellhousing it seems that the pushrod is no longer a "straight shot" to the clutch fork like with the original bellhousing.
To solve this problem, I came up with a new design using a heim joint on the front end. I believe the heim joint solves the "angle" issue! My design is based on the the following article I found online:
This article lists all of the components you'll need - they're all readily available I found except the tubing! I found the tubing at a specialty metal supply store (online) - but had to buy a 3' section. I can send you a piece of tubing if you'd like to build a similar pushrod - just shoot me a PM and I'll send you a section on Saturday!
I'm trying to post of photo of my clutch pushrod installed in my car - but the photo site is not cooperating! Shoot me a PM and I can email it to you!
Tom, You are correct, I didn't like the angle when I first set it up so I modified the z-bar by welding an extension to the lower leg. The lower rod that I fabbed is now level and the throw is shorter from the pedal. I'll see how it stands up to the use...
Yup, wiring's all finito! (Except for the random debugging after startup of course...) E-brake cover and pedals are in, working on the clutch linkage now. Only 28 items on the task list - downhill now...
The highlighted seams on the eyebrows look great, who did that for you?
Tom, You are correct, I didn't like the angle when I first set it up so I modified the z-bar by welding an extension to the lower leg. The lower rod that I fabbed is now level and the throw is shorter from the pedal. I'll see how it stands up to the use...
Rhett . . . I initially thought of adding an extension onto the lower leg as well, but many people told me that would increase the force required to depress the clutch pedal - no what I wanted. Here's a photo of my pushrod:
 01-18-2017, 11:55 AM


 Awesome work Rhett! Cheers, Bill


 Dennis
