1957 Corvette clutch replacement- any tips?
 06-22-2013, 09:55 PM
#1
Racer

Thread Starter
After 56 years, the original clutch in my 1957 Corvette gave up the ghost. My plan is to pull the tranny, clutch, and flywheel. In addition to refacing the flywheel, I also plan to replace the transmission input, tailshaft, and side cover, and rear end pinion seals as well as the shifter linkage. Any tips for the R&R process? Likewise, best way/ locations to support the rear of the engine when pulling the tranny? The tranny has never been out in the past, so I have already soaked all the various nuts and bolts with penetrating fluid.
Thanks from a forum newbie
Marc in Indianapolis third owner (my dad bought in 1962)
1957 Corvette EH 245 HP 4 spd posi semi-survivor (repainted/reupholstered in the 80s)
Thanks from a forum newbie
Marc in Indianapolis third owner (my dad bought in 1962)
1957 Corvette EH 245 HP 4 spd posi semi-survivor (repainted/reupholstered in the 80s)


 06-23-2013, 08:03 AM
#3
Team Owner


Member Since: Mar 2003
Location: Greenville, Indiana
Posts: 26,118
Received 1,843 Likes
on
1,398 Posts

Don't forget to change the crankshaft pilot bushing. Replace with a real oilite bushing.


 06-23-2013, 12:34 PM
#5
Racer
Thread Starter
Oops! Forgot to mention I was going to replace the tranny and rear pinion SEALS. Big difference! They leak like a sieve. Total miles unknown. My dad replaced the speedometer/odometer with a new one in 1962 because it was broken. I have no idea how many miles were on the car at the time. Only 2100 miles since. Yea, I know it comes out to only 41 miles a year. i have let it sit for way too long while other family, business, and car projects came first. Time to wake up Sleeping Beauty.
Marc
Forgot to mention I was going to replace the tranny and rear pinion SEALS. Big difference! They leak like a sieve. Total miles unknown. My dad replaced the speedometer/odometer with a new one in 1962 because it was broken. I have no idea how many miles were on the car at the time. Only 2100 miles since. Yea, I know it comes out to only 41 miles a year. i have let it sit for way too long while other family, business, and car projects came first. Time to wake up Sleeping Beauty.Marc
07-15-2013, 08:57 PM
#6
Racer
Thread Starter
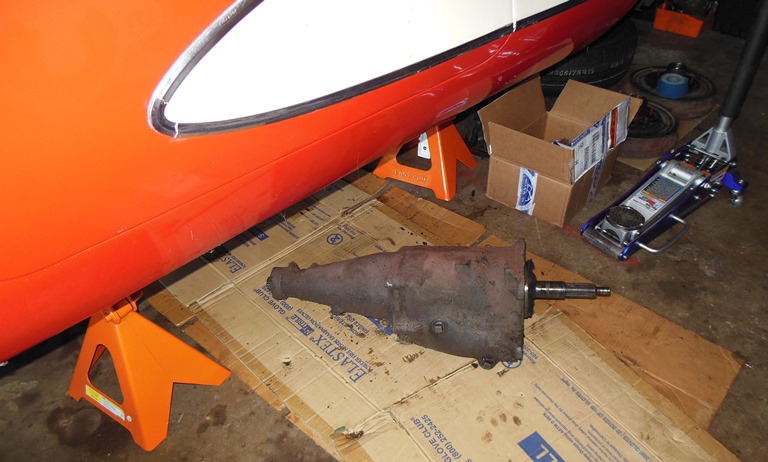
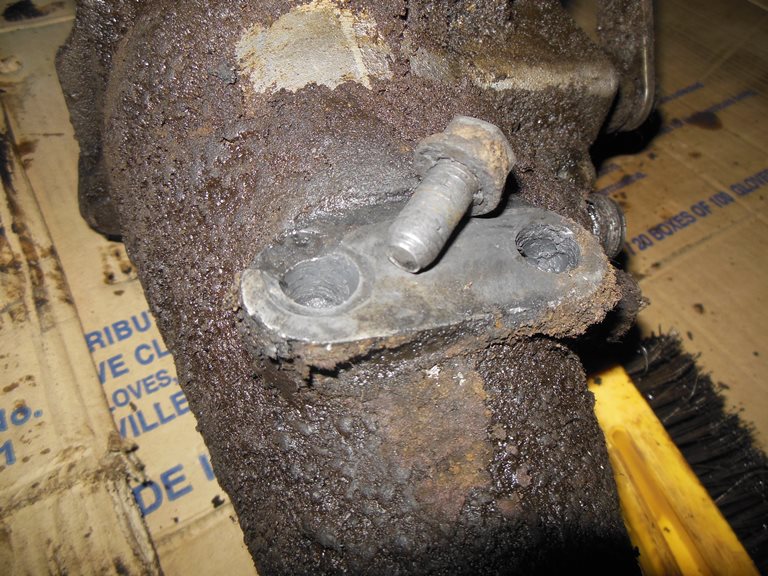
Finally got this bad boy out. First light of day for it since 1957. Thank goodness my 23 y.o. son was there when the moment of truth came in sliding it out. Next up is the clutch and flywheel. One deviation I would recommend from the factory shop manual is to remove the crossmember before tackling the three bolts that hold the shifter in place. It gives a little bit more room to get to those bolts. I think I also discovered the source of the whomp-whomp-whomp when I got on it hard. Note the stripped out bolt holes for the tranny mount. Basically the tranny was just resting on the mount, not really attached to it. Will keep everybody posted!
Marc in Indy
Marc in Indy


 07-16-2013, 07:29 PM
#9
Racer
Thread Starter
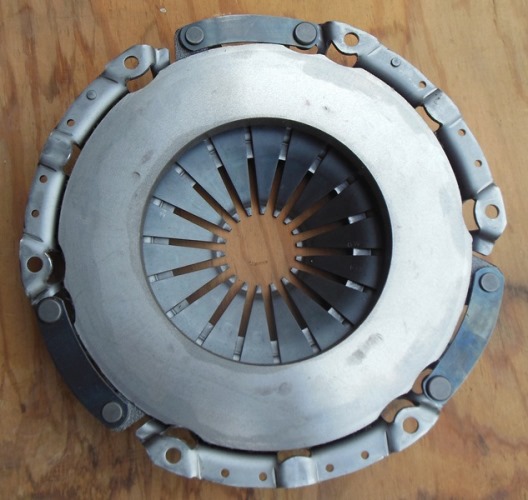
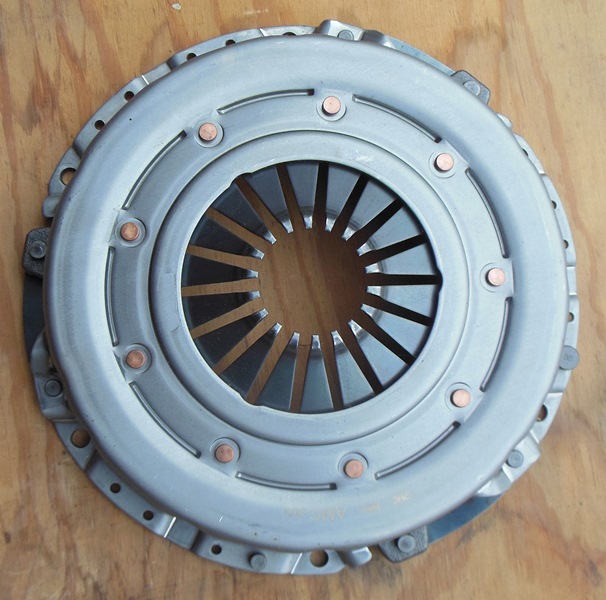
Is this okay? I hope so, as I bought it from a major Corvette supplier a couple of years ago. I know about the over-center spring, but please educate me how it affects the pressure plate selection, and what to look for in a pressure plate.
Marc in Indy
Marc in Indy
07-16-2013, 07:38 PM
#10
Racer
Thread Starter
Are you talking about the fingers on the diaphragm where the throw-out bearing comes in contact? On this model, the fingers are bent, not straight. Just want to double check before I wrestle this moose back in.
Marc in Indy
Marc in Indy
07-16-2013, 08:45 PM
#13
Team Owner


Member Since: Oct 2000
Location: Washington Michigan
Posts: 38,899
Received 1,856 Likes
on
1,099 Posts

Make sure you use the correct (1-1/4"-long, NOT 1-7/8" long) throwout bearing, and ensure that you install it correctly on the clutch fork, with the ends of the flat spring inside the rear groove on the bearing, with the ends of the fork. The design allows it to be installed wrong.
07-17-2013, 06:23 AM
#14

Hi Marc,
Nice to hear of another 56,7 solid axle owner in the area. I have a couple 56's and have owned other 56 and 57's. Give me a call if you want to discuss the old cars.
Thanks Mike (317)729-2418
Nice to hear of another 56,7 solid axle owner in the area. I have a couple 56's and have owned other 56 and 57's. Give me a call if you want to discuss the old cars.
Thanks Mike (317)729-2418
07-18-2013, 07:37 AM
#15
Drifting

It's been a long time, but I think I cut the heads off two long bolts that I used in the bellhousing trans bolt holes. That allowed me to hang the tranny while I fiddled the splines into engagement; trans in gear so turning the ouput shaft would turn the input shaft.
 07-18-2013, 07:54 AM
#16
Team Owner

Its a perfect time to go through the entire clutch geometry/linkage. Ball studs at engine and frame (yours simply have to be worn out I'm thinking); clutch fork and its ball stud, even the upper clutch pedal bushings/spacers under the dash. When I put my 5-speed in the '61 ALL of that stuff needed refurbished.
Might be the time to resurface the flywheel and either flip or replace the ring gear too!
Might be the time to resurface the flywheel and either flip or replace the ring gear too!
07-18-2013, 04:48 PM
#17
Yes, this might have been a JohnZ trick and it works very well.
07-19-2013, 03:55 PM
#18
Racer
Thread Starter
Ok, now the flywheel is at the machine shop- they want to know if it is a stepped or flat face design. The senior machinist thinks it already has a .040 step but he doesn't have a reference that goes that far back, and he wants to be 100% sure before he cuts it. There is no mention of flywheel resurfacing in either of my two shop manuals.
Marc in Indy
Marc in Indy
07-19-2013, 04:11 PM
#19
Race Director

Member Since: Jun 2006
Location: Inverness FL
Posts: 17,891
Received 727 Likes
on
621 Posts
St. Jude Donor '07
Ok, now the flywheel is at the machine shop- they want to know if it is a stepped or flat face design. The senior machinist thinks it already has a .040 step but he doesn't have a reference that goes that far back, and he wants to be 100% sure before he cuts it. There is no mention of flywheel resurfacing in either of my two shop manuals.
Marc in Indy
Marc in Indy
Bill
07-19-2013, 04:58 PM
#20
Team Owner
I'm pretty darn sure it is flat - here is my '61 after resurfacing and new ring gear: