When you click on links to various merchants on this site and make a purchase, this can result in this site earning a commission. Affiliate programs and affiliations include, but are not limited to, the eBay Partner Network.
1956 to 1960 Reproduction Soft Top Rear Bow Modifications
I've used several reproduction rear bows the last few years on restorations, and although it's great to have availability, a few things are different which require some modifications if you want them to look right. I did this the other night on a '59 top frame I restored in preparation for a new original type vinyl top.
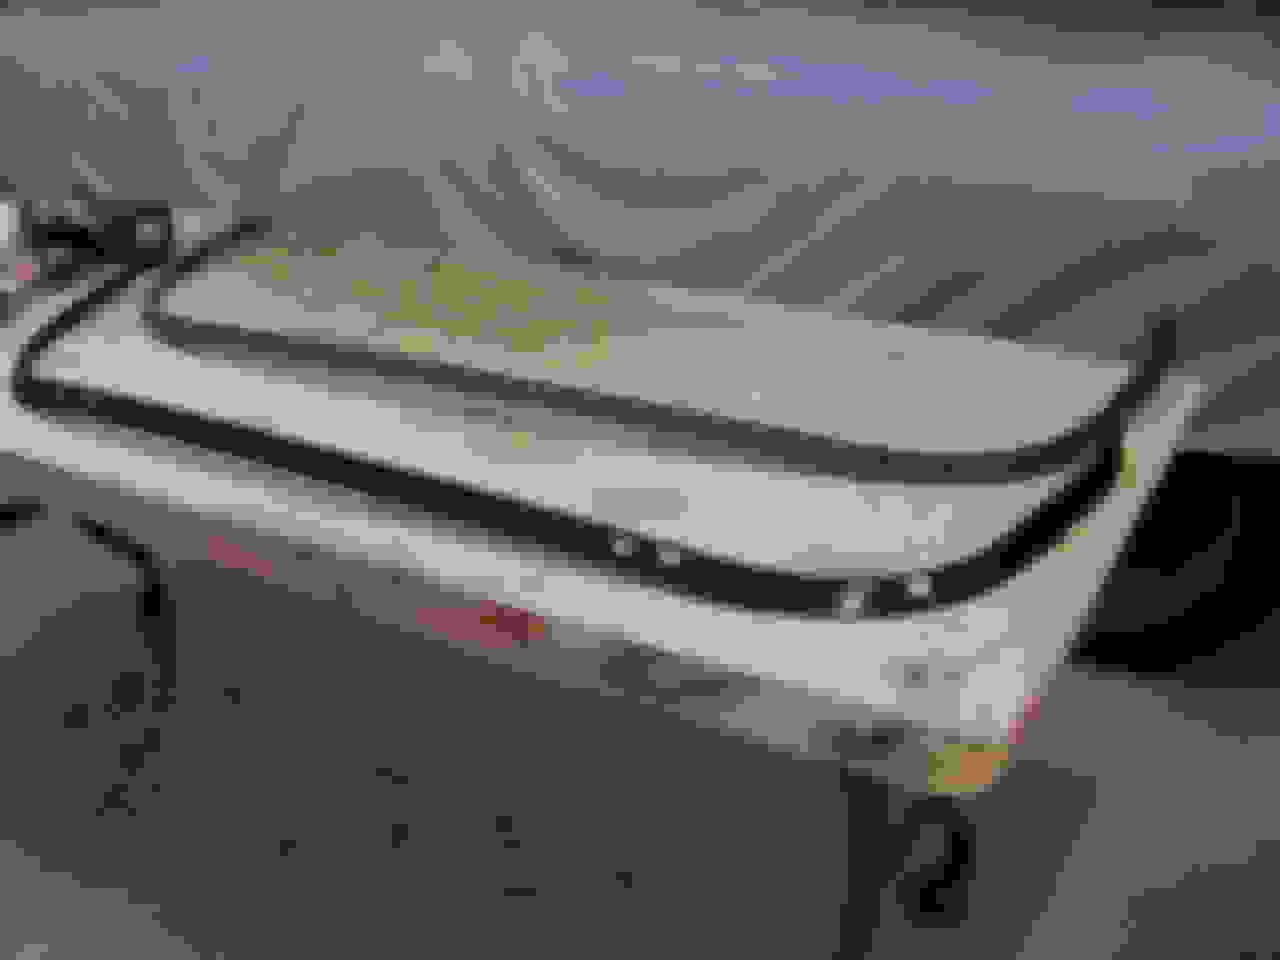
The rear bows are now made of extruded aluminum as opposed to steel which was used originally. One of my issues is that they do not include recesses for the 6 T-Nuts nor are there recesses for the side window straps. They also are a little thicker than originals, and do not come pre-drilled for the lower filler weatherstrips. Being a tad thicker is also a issue when using the '59 to '60 hard rubber rear weatherstrip. '56 to '58 uses a mohair seal which is not a problem, but the rear lip of the hard rubber style will stick out to the rear and will show a line on the outside of the vinyl. I simply cut that rear lip off full length and glue the rubber to the bow as a last step of assembly.
First, here are a few shots of a rusty old original '56-'60 bow along with the repro. As you can see, the recesses for the T-nuts are there to prevent them from showing up as a protrusion after the vinyl is installed. The vinyl tops have a thick plastic guard but not hard enough to hide the T-nuts.
2 for the Swing latch and 1 for the hold-up strap on each side. Recess(each side) for the side-window strap. Sheet metal screws for the filler weatherstrip.
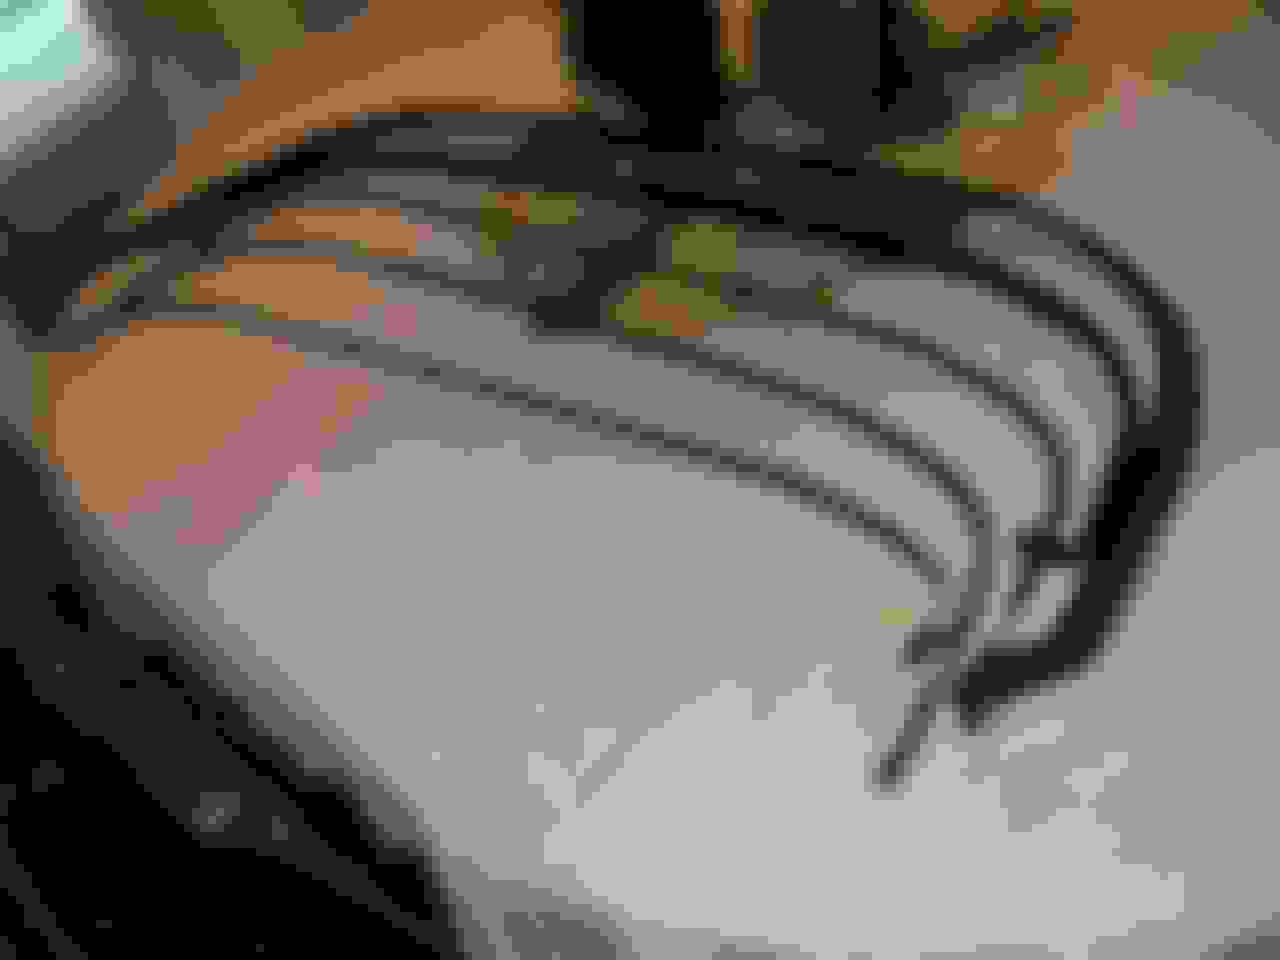
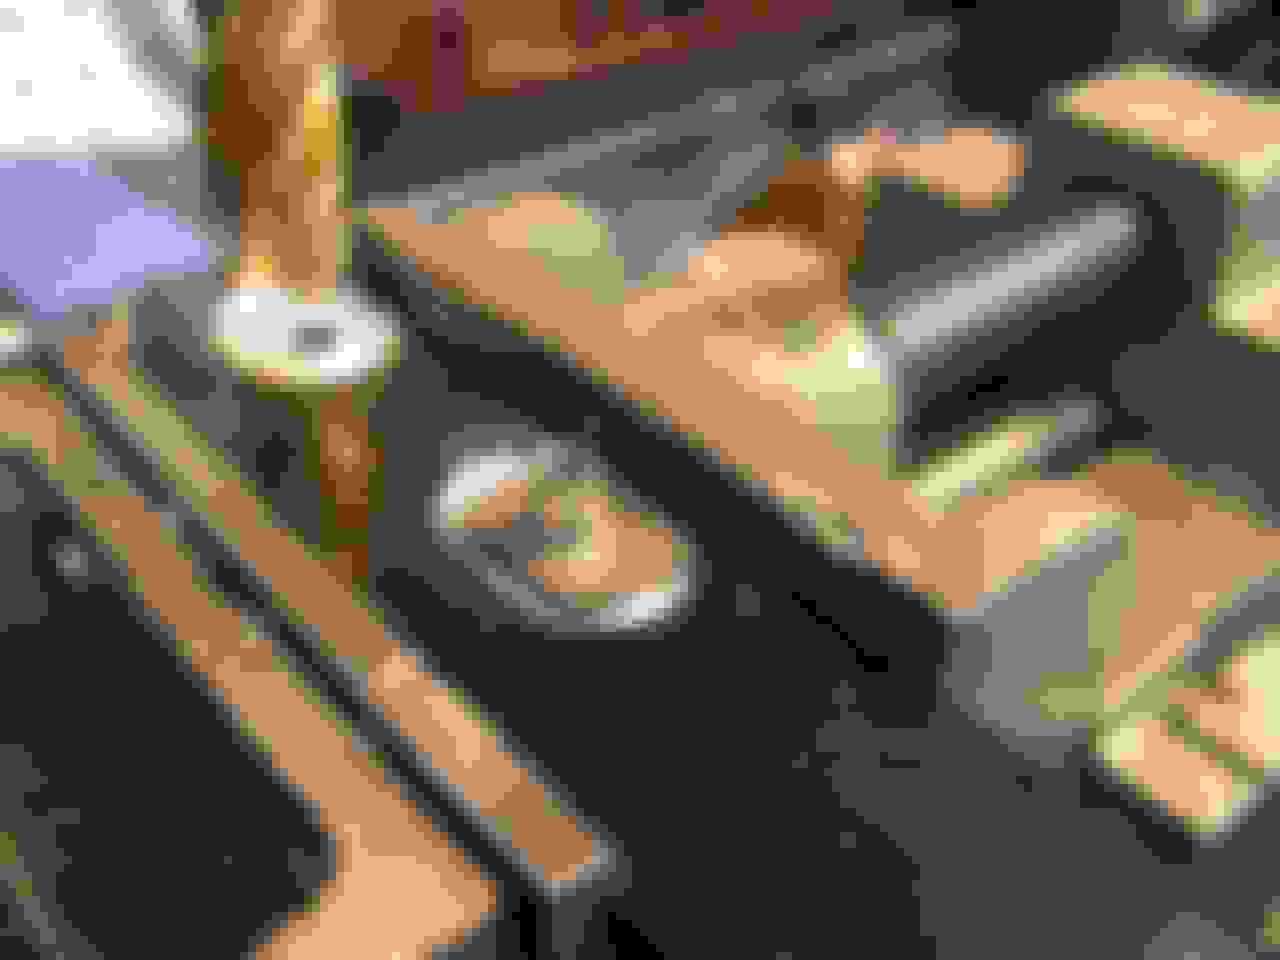
Here is the reproduction bow. The T-nuts are just pressed in. They'll spin if the screws ever get corroded. One spun on me when I test fit a swing latch.
Here is a photo of a '60 I did a few years ago using my first repro bow. You can see the telltale of the T-nuts and the side straps(rear window). At that time I removed some strap thickness by cutting one of the 3 layers, but it was still obvious. But those T-nut shadows were annoying to me. Next time I used a repro I decided to fix that issue. This is that time.
I decided to modify a brand new reproduction rear bow on the '59 I'm restoring to make the assembly appear as original with no trace of the T-nuts, and a similar look to original to the rear strap areas. I used the original bow as a guide. I marked the areas for the strap area for milling/filing.
I set up my mill and cleaned out the 6 T-nut areas to a depth to recess the T-nuts. There is plenty of thickness to allow this mod. This recess also will act as a T-nut-stop when fastening or removing the screws. Original bow T-nuts were spot welded on.
I also drill and tap the 2 sides for the filler weatherstrip using #8-32 machine screws.
All 6 T-nut areas done and the strap areas milled and filed and modified with reliefs. Strings are to hold the bows in position for assembly to the car for adjustments and preparation for the vinyl top installation. Pads just taped on for test fit.
The final result. No more T-nut protrusions sticking out and a nice rear strap transition under the vinyl.
Just finished steaming a few wrinkles out and final trimming. Very different but sharp IMO. This vinyl listed for about $550 from AK, and we had to get 5 new bows and restore the frame. Tedious, but I like the results.
Great idea on modifying that repro part to allow the finished job to appear as original. To go that extra distance on a customers car IS dedication! Thanks for sharing that
I think I may change my own '59 interior from Red to Turquoise. I've fallen in love with the color.
I played in the shop all day yesterday finishing up some details on the interior. Fellow forum member Mike from the west coast of Fl has owned this car since 1964 and it has been apart over 25 years IIRC as he told me.
A little background...
He moved several times when the car was apart and had to store all of the pieces in several locations around the country. He actually worked in Brazil, in a town called Campinas about 90 miles from Sao Paulo and met his wife there. Ironically and coincidentally, I was in that exact town on business when Mike was there and when we discovered that when we first spoke it was a omen. I just had to do his car for him when he asked me to do the build up after paint.
He's building the engine and waiting for some machine shop finish up. We've become good friends since we met and wish we were closer together proximity wise.
He and I spoke yesterday and I offered to take the car back to him and help him install the engine as he's all alone over there with no real car guys to help him, along with some health issues that've slowed him down a bit. Our wives and Mike and I have had several visits together on both coasts and Mike has invited my wife and I, and our little Spaniel Holly, to stay with them while Mike and I play in his garage for a few days.
I like these before and after shots.
Somewhere in Rich Creek VA many years ago. Mike painted the car a few times in the last 50 years.
After his body shop put on a new nose and back to original Ivory.
And these...
In storage in pieces, and finally back together after many years.
Fine job Rich. I just started restoring the top frame off my '59. What paint did you use on your frame?
Thanks Ken. Frames are Gloss Black. I use Duplicor Acrylic Enamels on of of my small pieces like this. These frames were badly rusted from sitting for many years. It took some time to free all of the pivots. Then sandblasted, a few repairs of rusted areas, then primed, then painted. Best to use black primer so if it scratches it's not so obvious. I use Duplicor red oxide primer and it's easy to see the scratches for touchup after assembly.
 09-13-2015, 05:42 AM