C2 backup lights convert to tail lights except 1967.
 08-09-2016, 07:58 PM
#1
Melting Slicks

Thread Starter

Member Since: Feb 2011
Location: Middletown Ohio
Posts: 2,892
Received 167 Likes
on
130 Posts
2016 C1 of Year Finalist
There was recently a post concerning converting the 2 backup lights on C2's to tail lights.
I could not find that thread so I started a new one.
I tried to figure it out and I did it with no cutting of wires, no drilling holes or other modifications.
A LED tail light assembly is used in this process (cut off plug) , bulbs will not work since the backup light socket is single contact whereas the tail lights are double contact.
Here is the process in short statements:
Disconnect battery
Remove outside tail light lens and bulb.
From the back reach in and remove 2 screws holding tail light housing in place. On my 65 coupe I was able to reach up with a 1/4" drive ratchet. Note position of ground wire on housing.
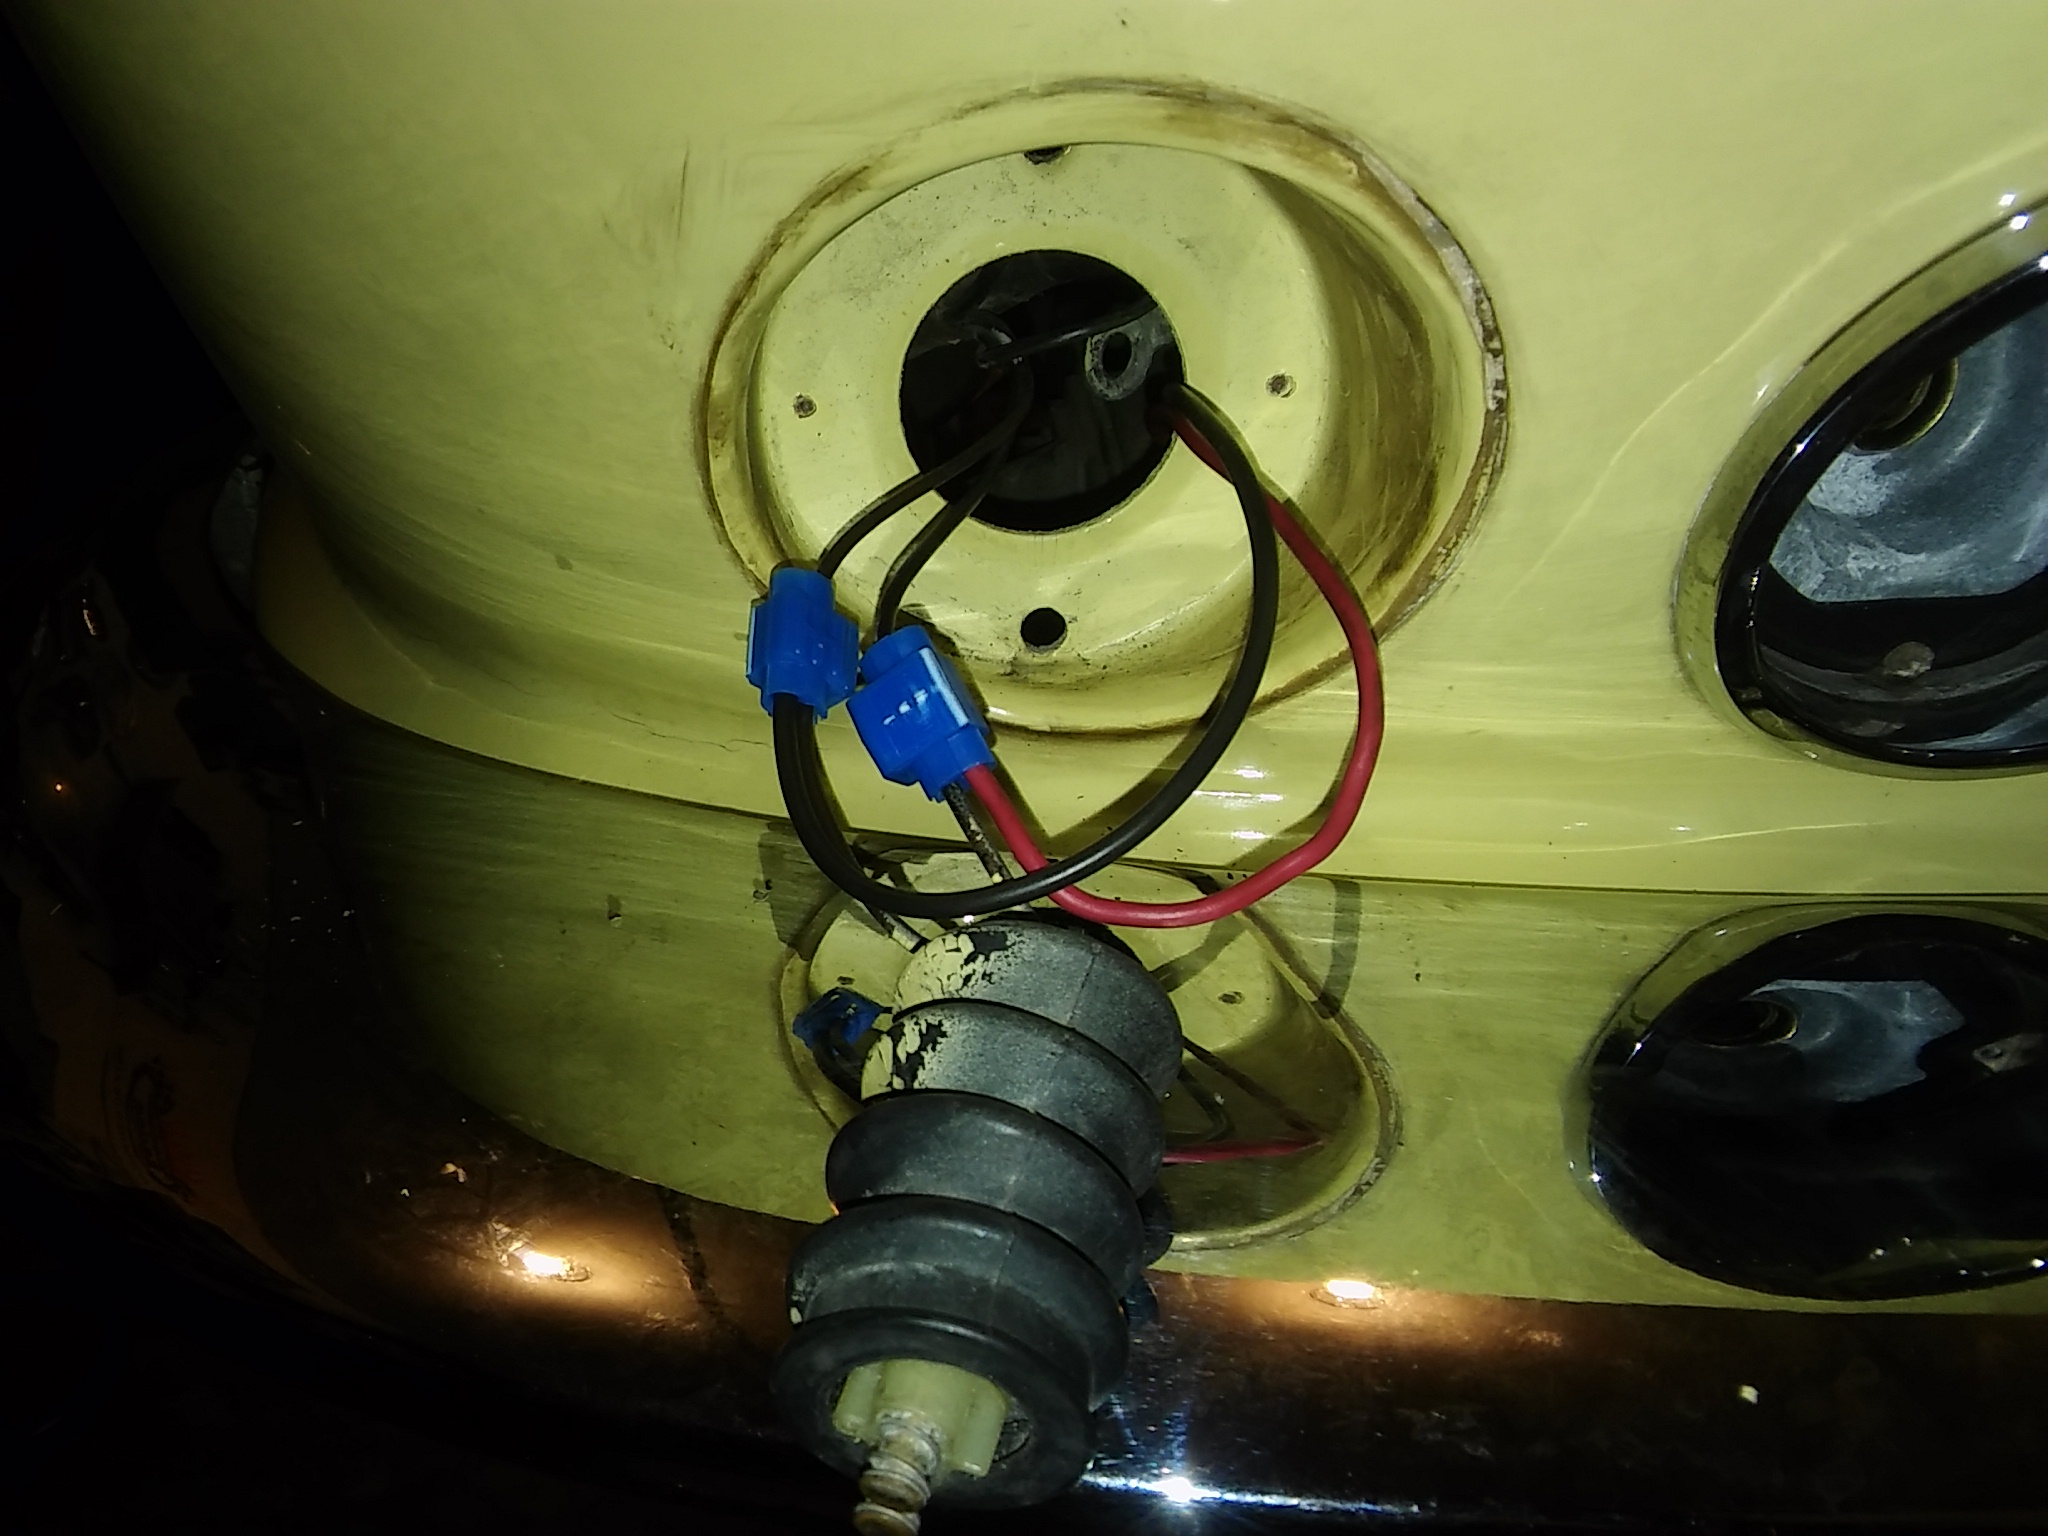
Remove housing out the back, be careful with wires .Carefully pull wires through the hole, be gentle and just get enough to allow attaching new connections, 3 to 5 inches.
Unplug connector from back of the housing.
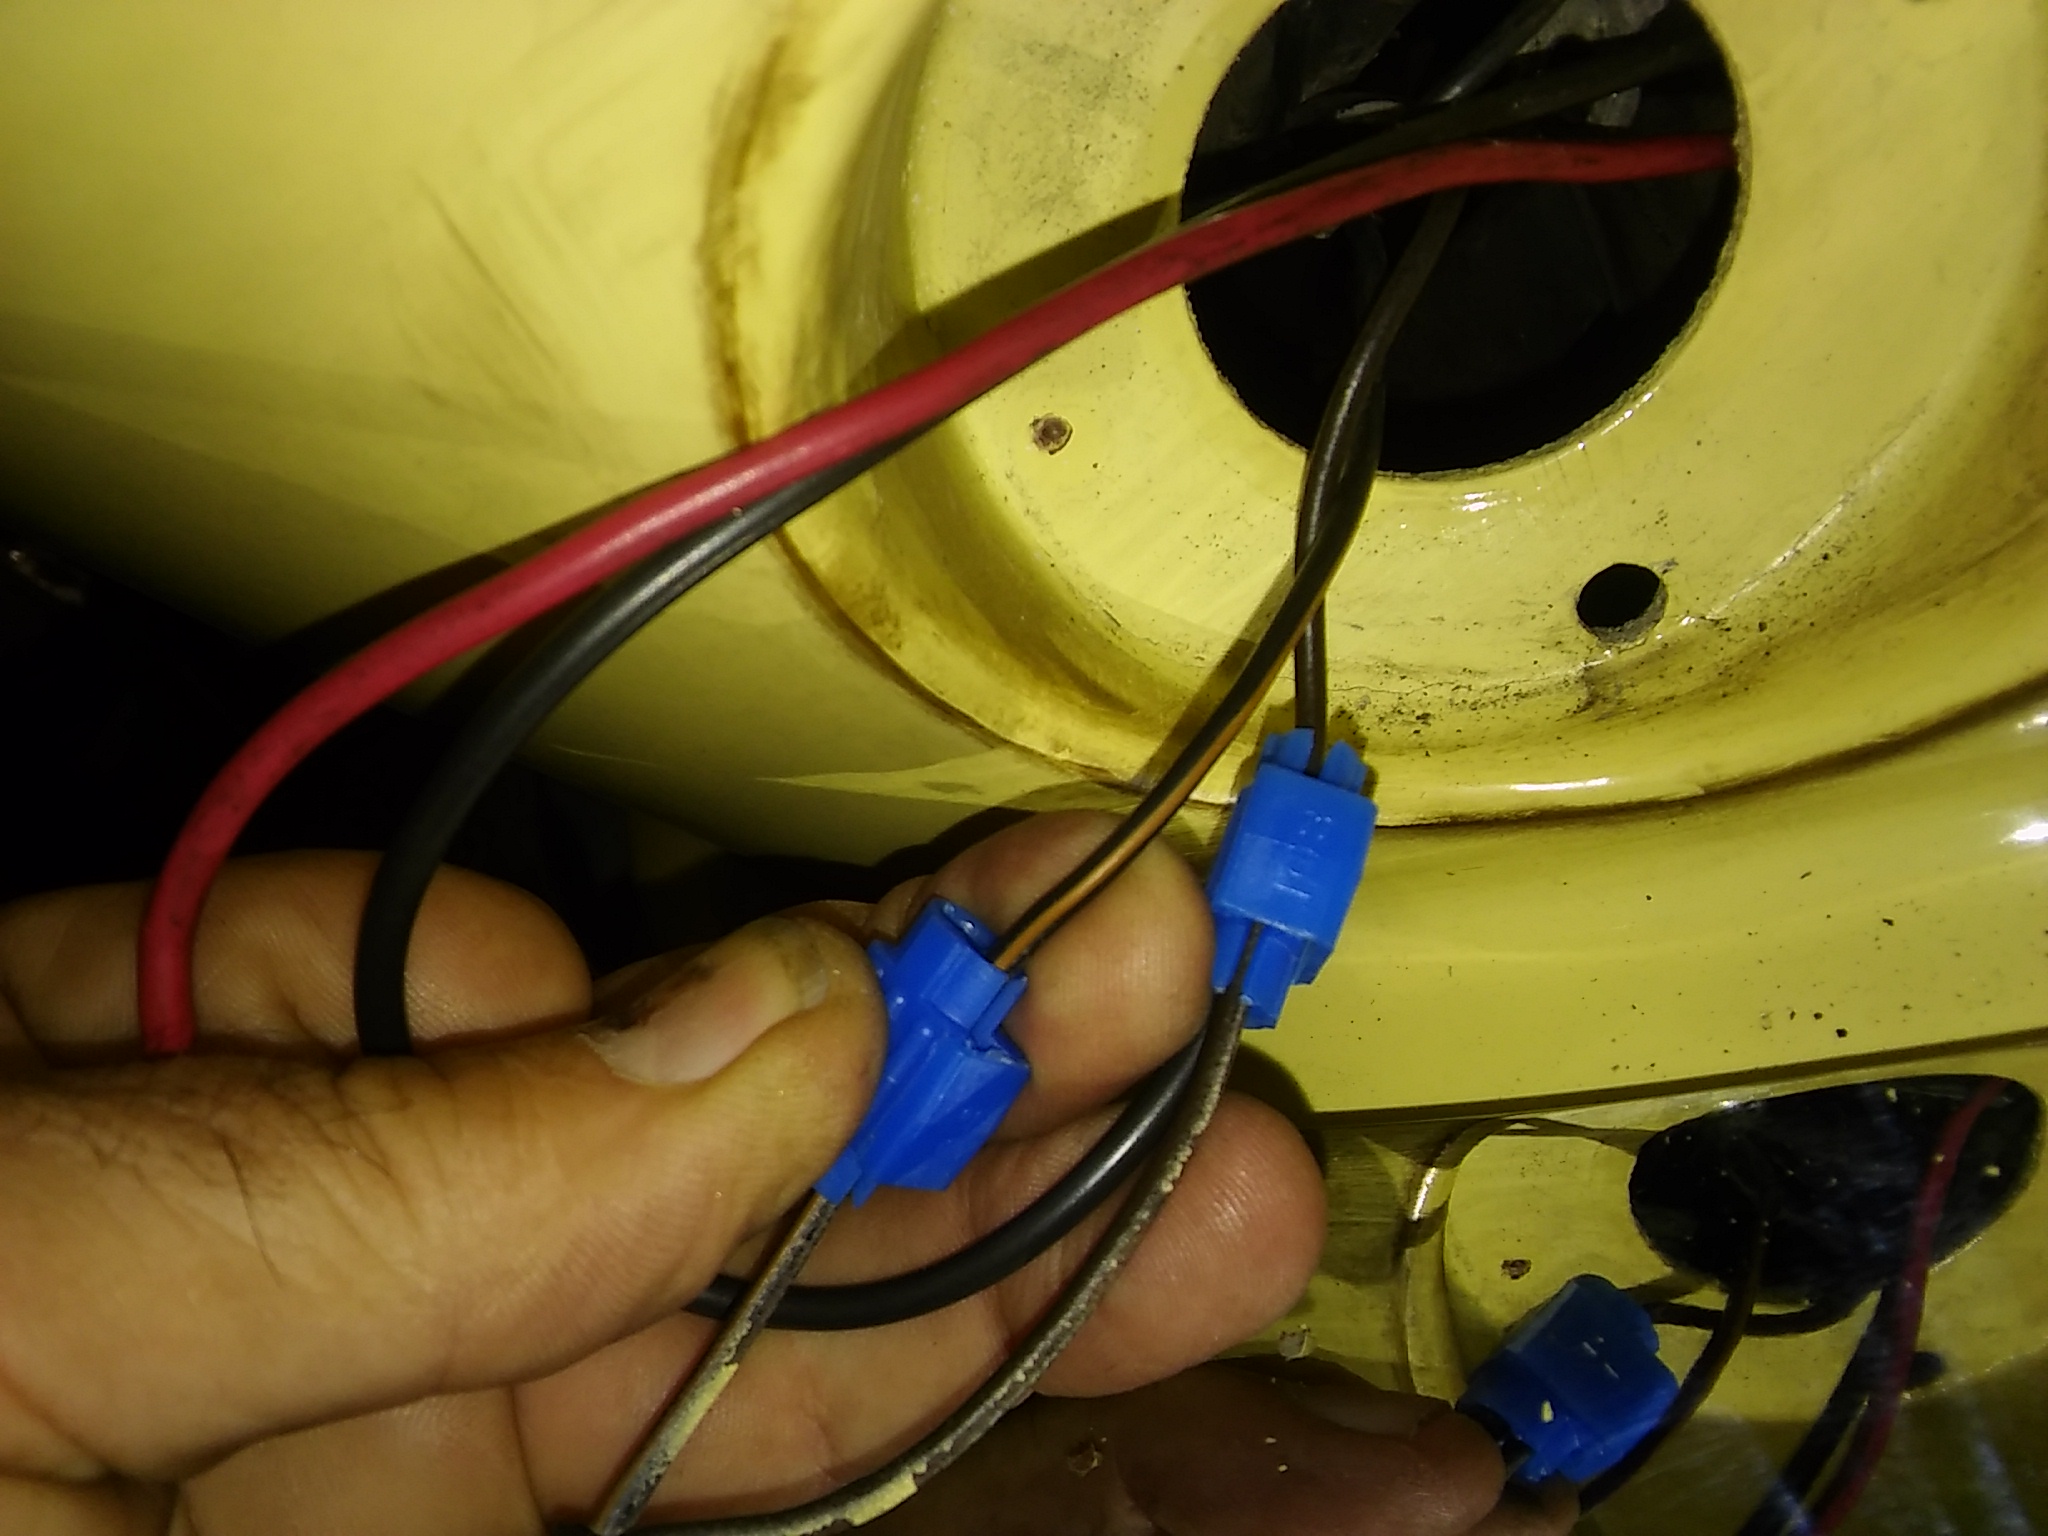
Determine from the wiring diagram which wire is the stop/turn wire. It is the brown /yellow trace on drivers side on my 65. Using a Scotch-lock attach a 12" red wire to the brown/yellow trace wire.
Next attach the black 12" wire to the brown wire (running lights) using a Scotch Lock.
Make up a 12" white wire and put a large ring terminal on the end which will attached to the ground stud on the housing. Feed these 3 wires back into the body and fish them through the socket hole on the backup light housing.
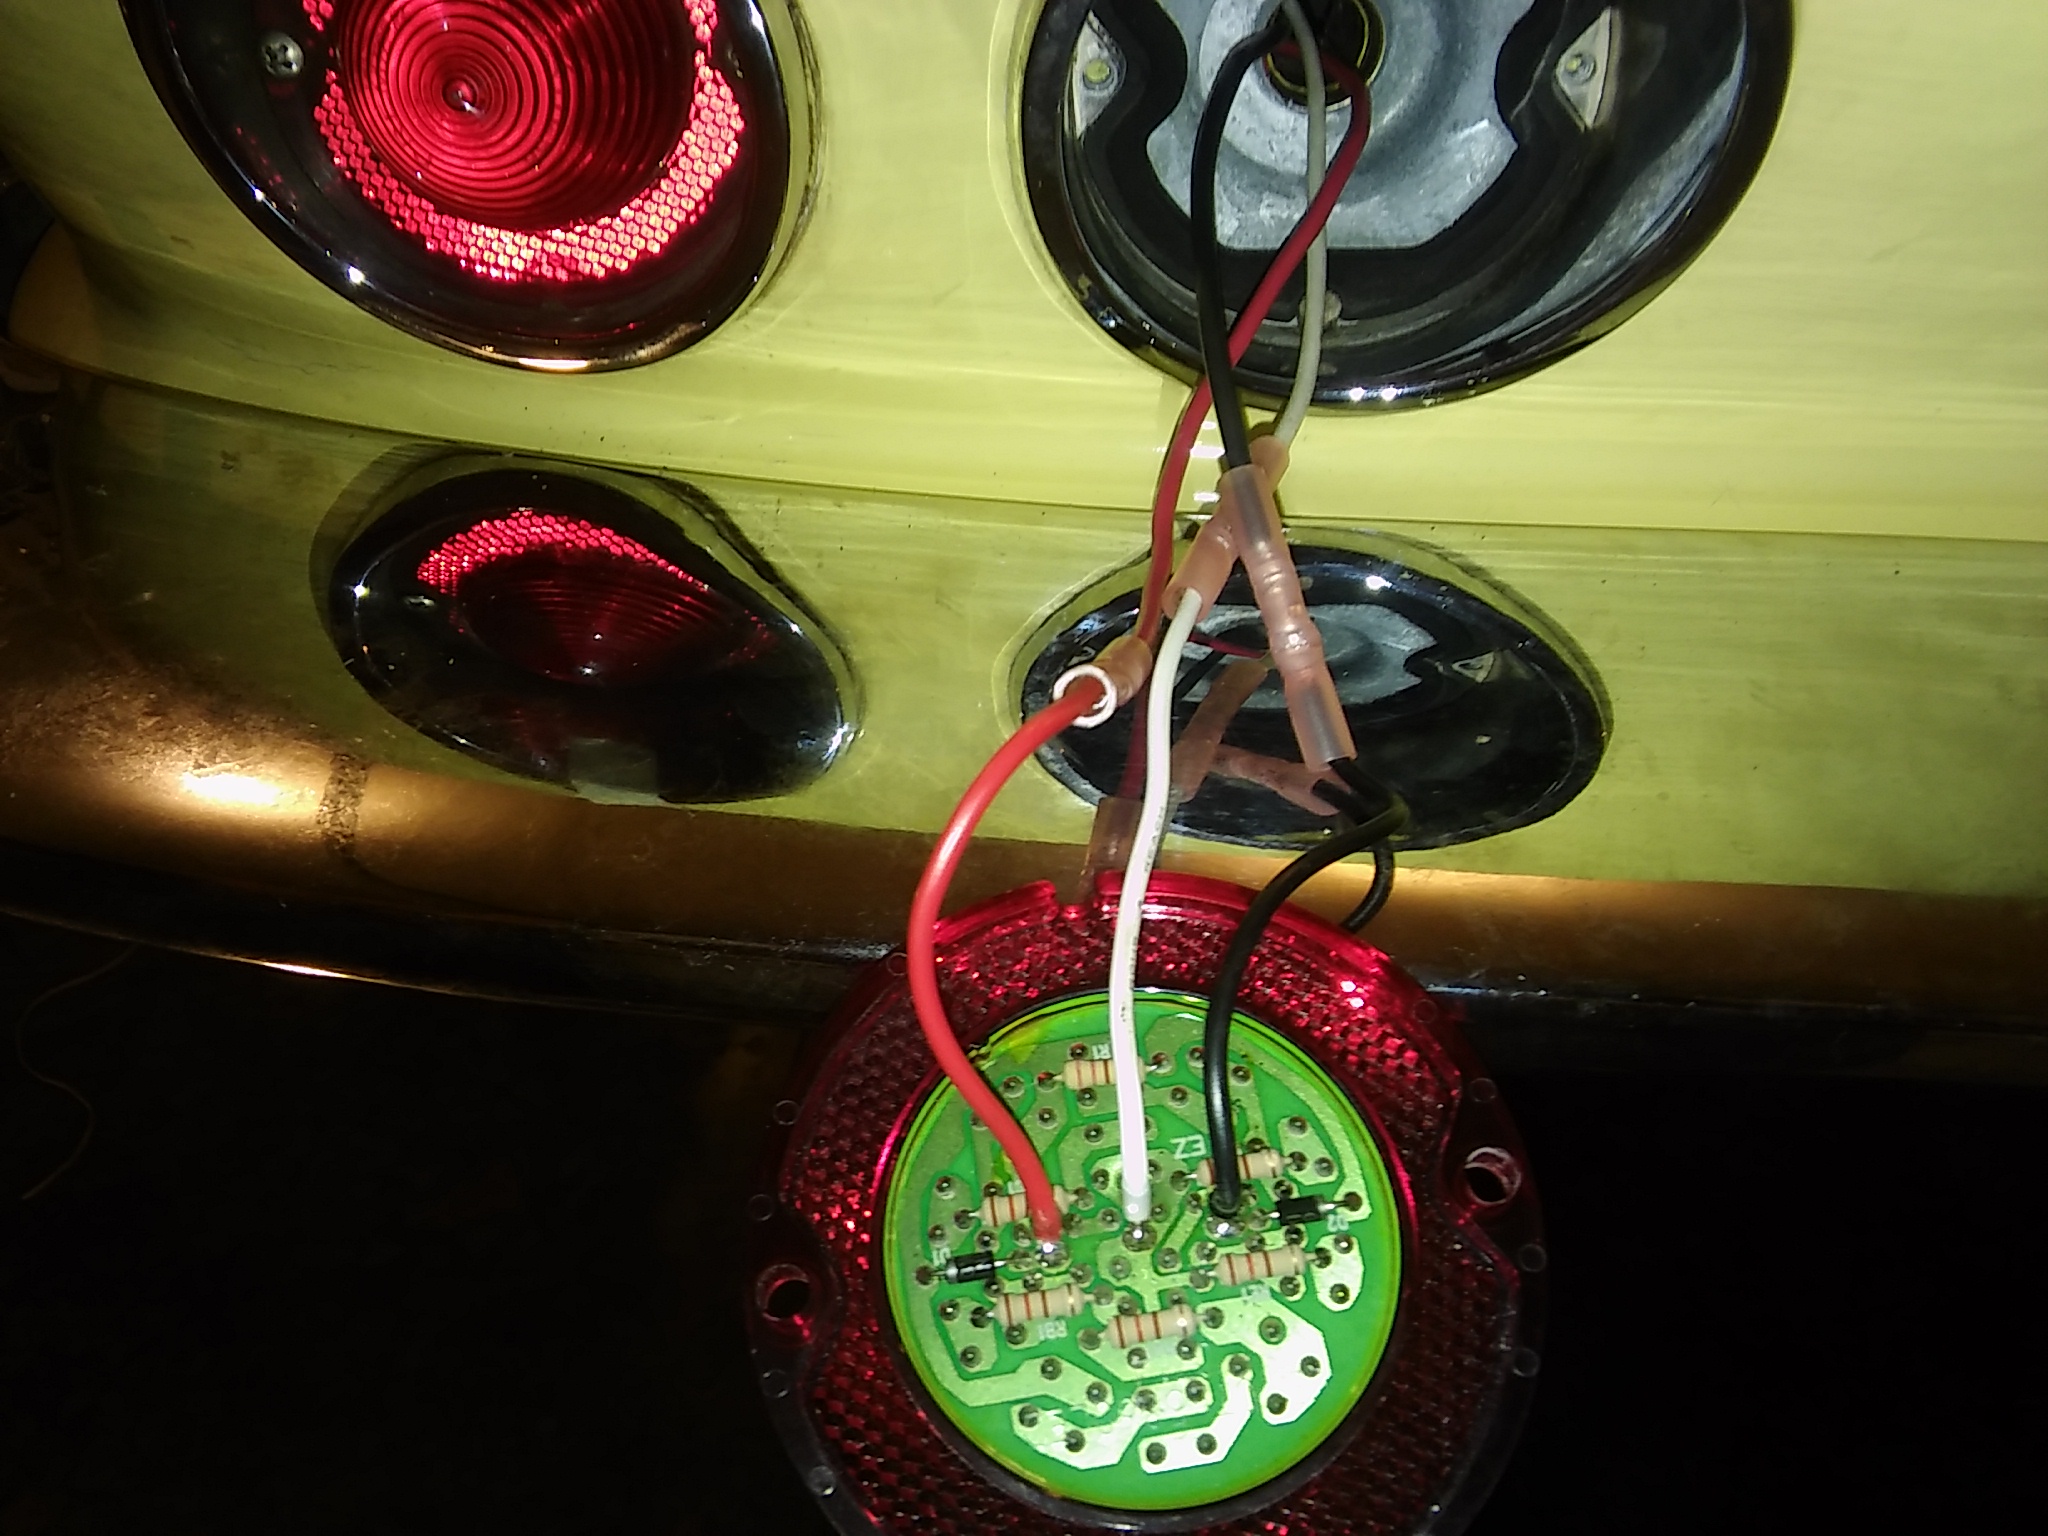
Take the 3 wires and using butt connectors attach the white, black and red wires to the respective wires on LED light assembly. I used butt connectors with built in shrink tube which makes a excellent connection.
Install the LED light assembly while feeding the wires into the hole where the socket went into.
Install the second speed nut on the tail light housing being sure to attach the white ring connector to ground.
Install LED tail light into the backup light housing and you are done.
Do the same on the passenger side, I still need to do the pass side.
You can use some dumdum to seal the socket hole in the backup light assembly. Also Remove the backup light fuse and/or tape the wires where they went into the socket.
Now that I have done one the second light will be easier.
Be sure to identify the stop/turn wire correctly, I think it is brown on the passenger side.
Supplies needed:
6 Scotch Lock connectors.
2 pieces each 12" long of red, white and black wire.
6 butt connectors
2 large ring connectors
Electrical tape optional on connections.
See attached pictures.
Attachment 48007739
Attachment 48007742
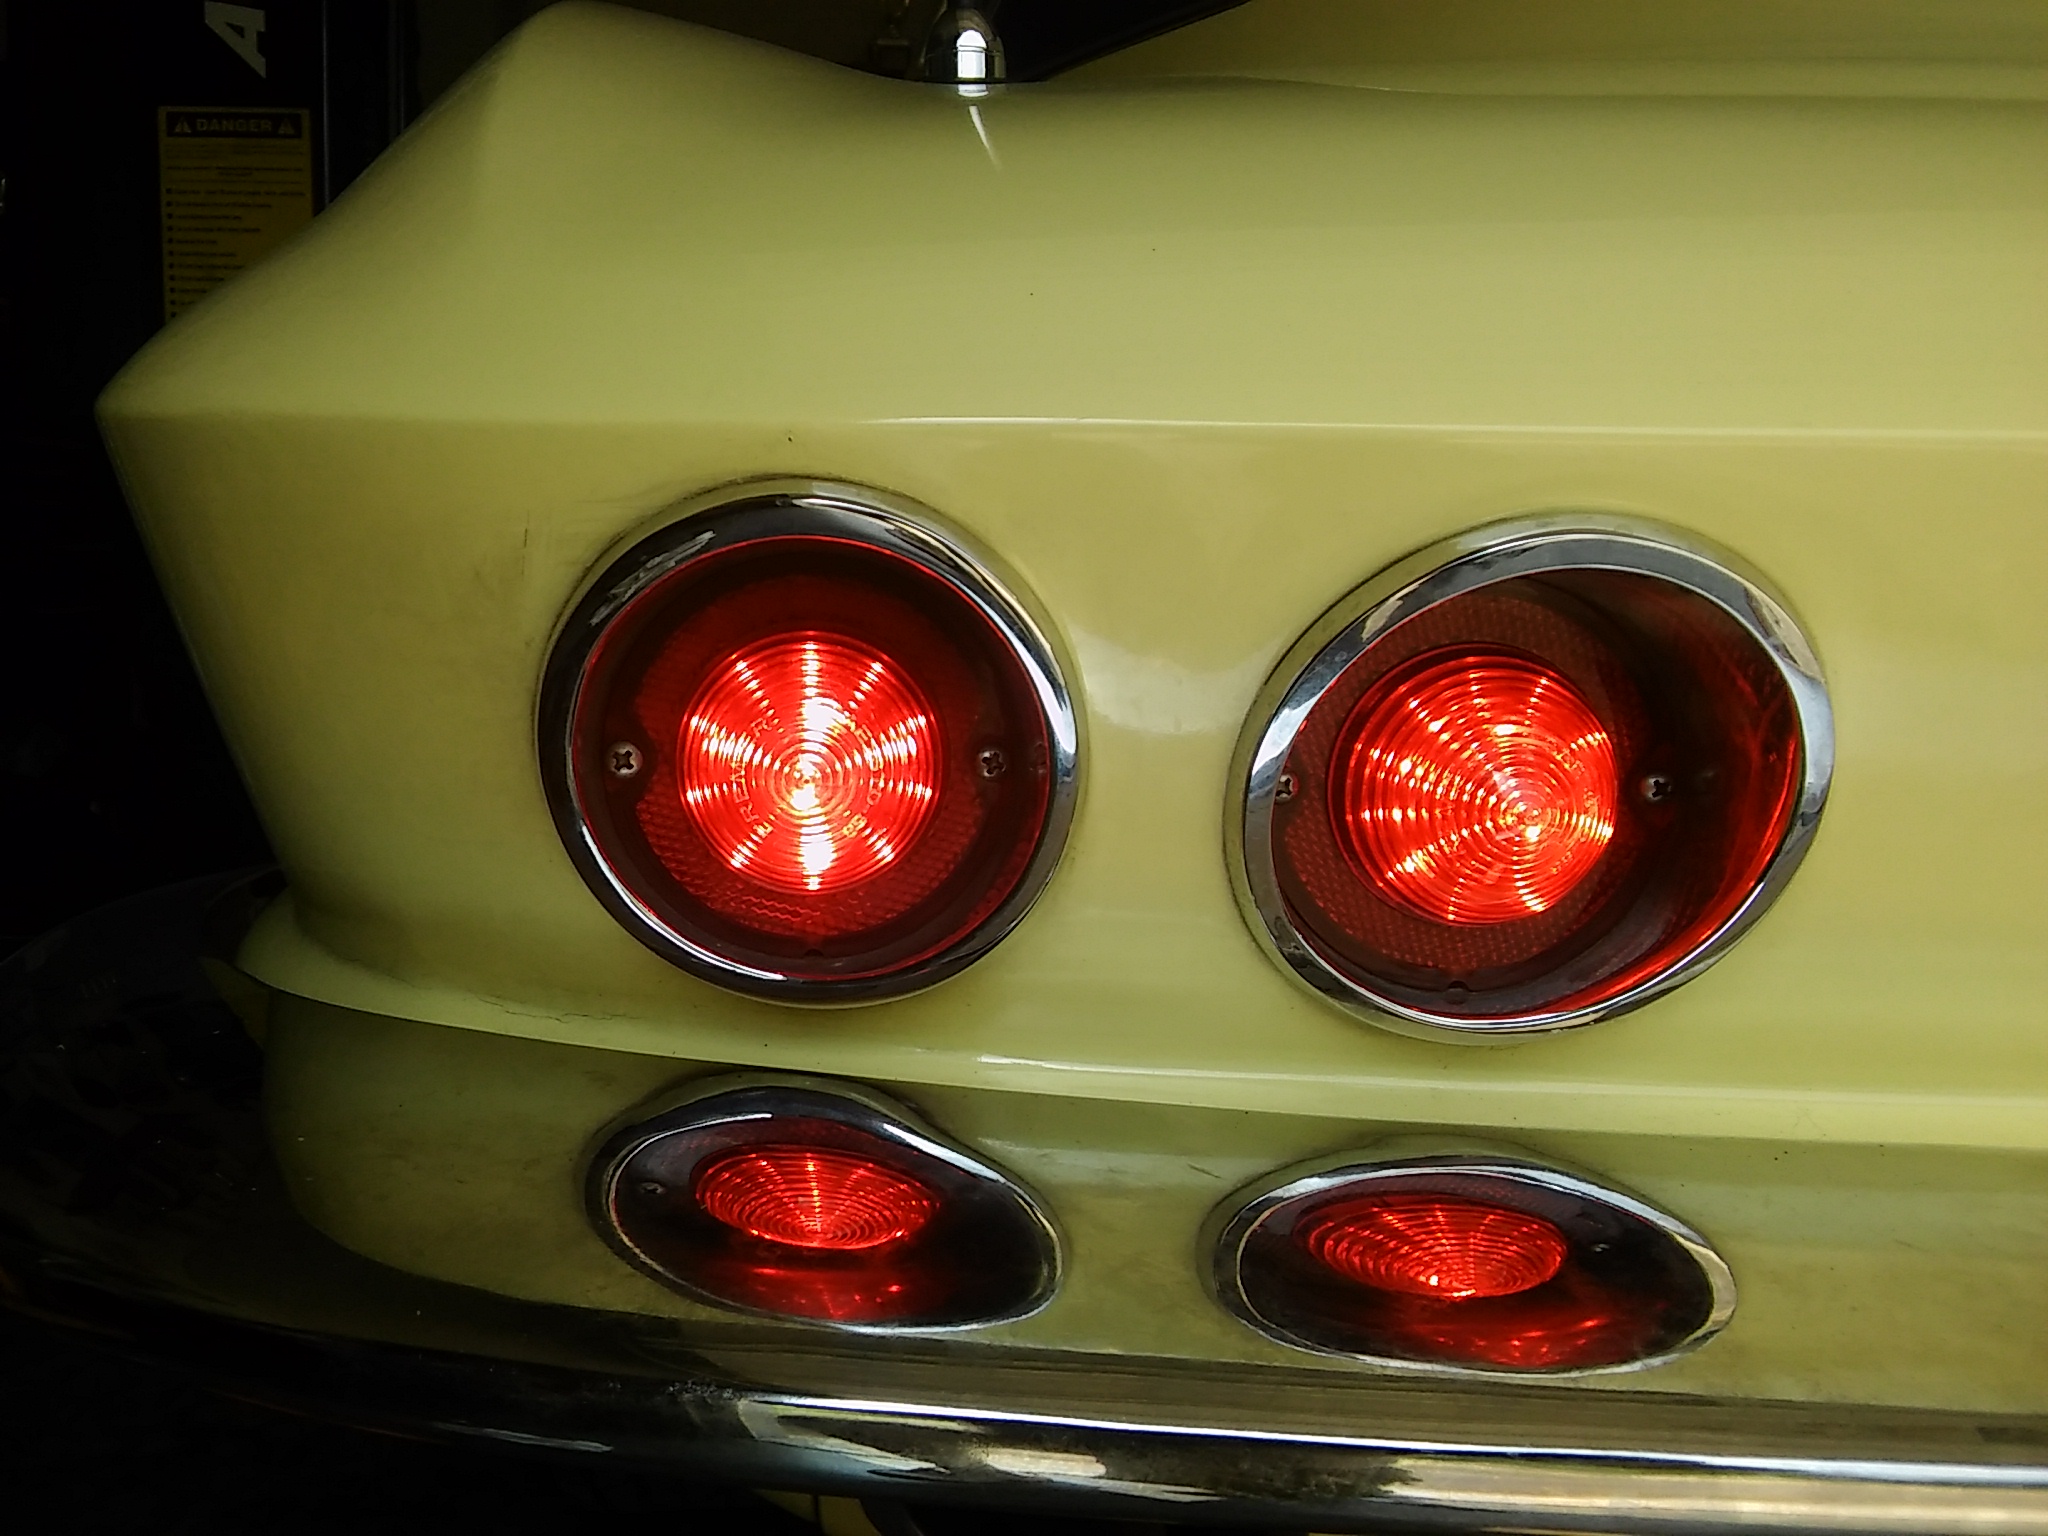
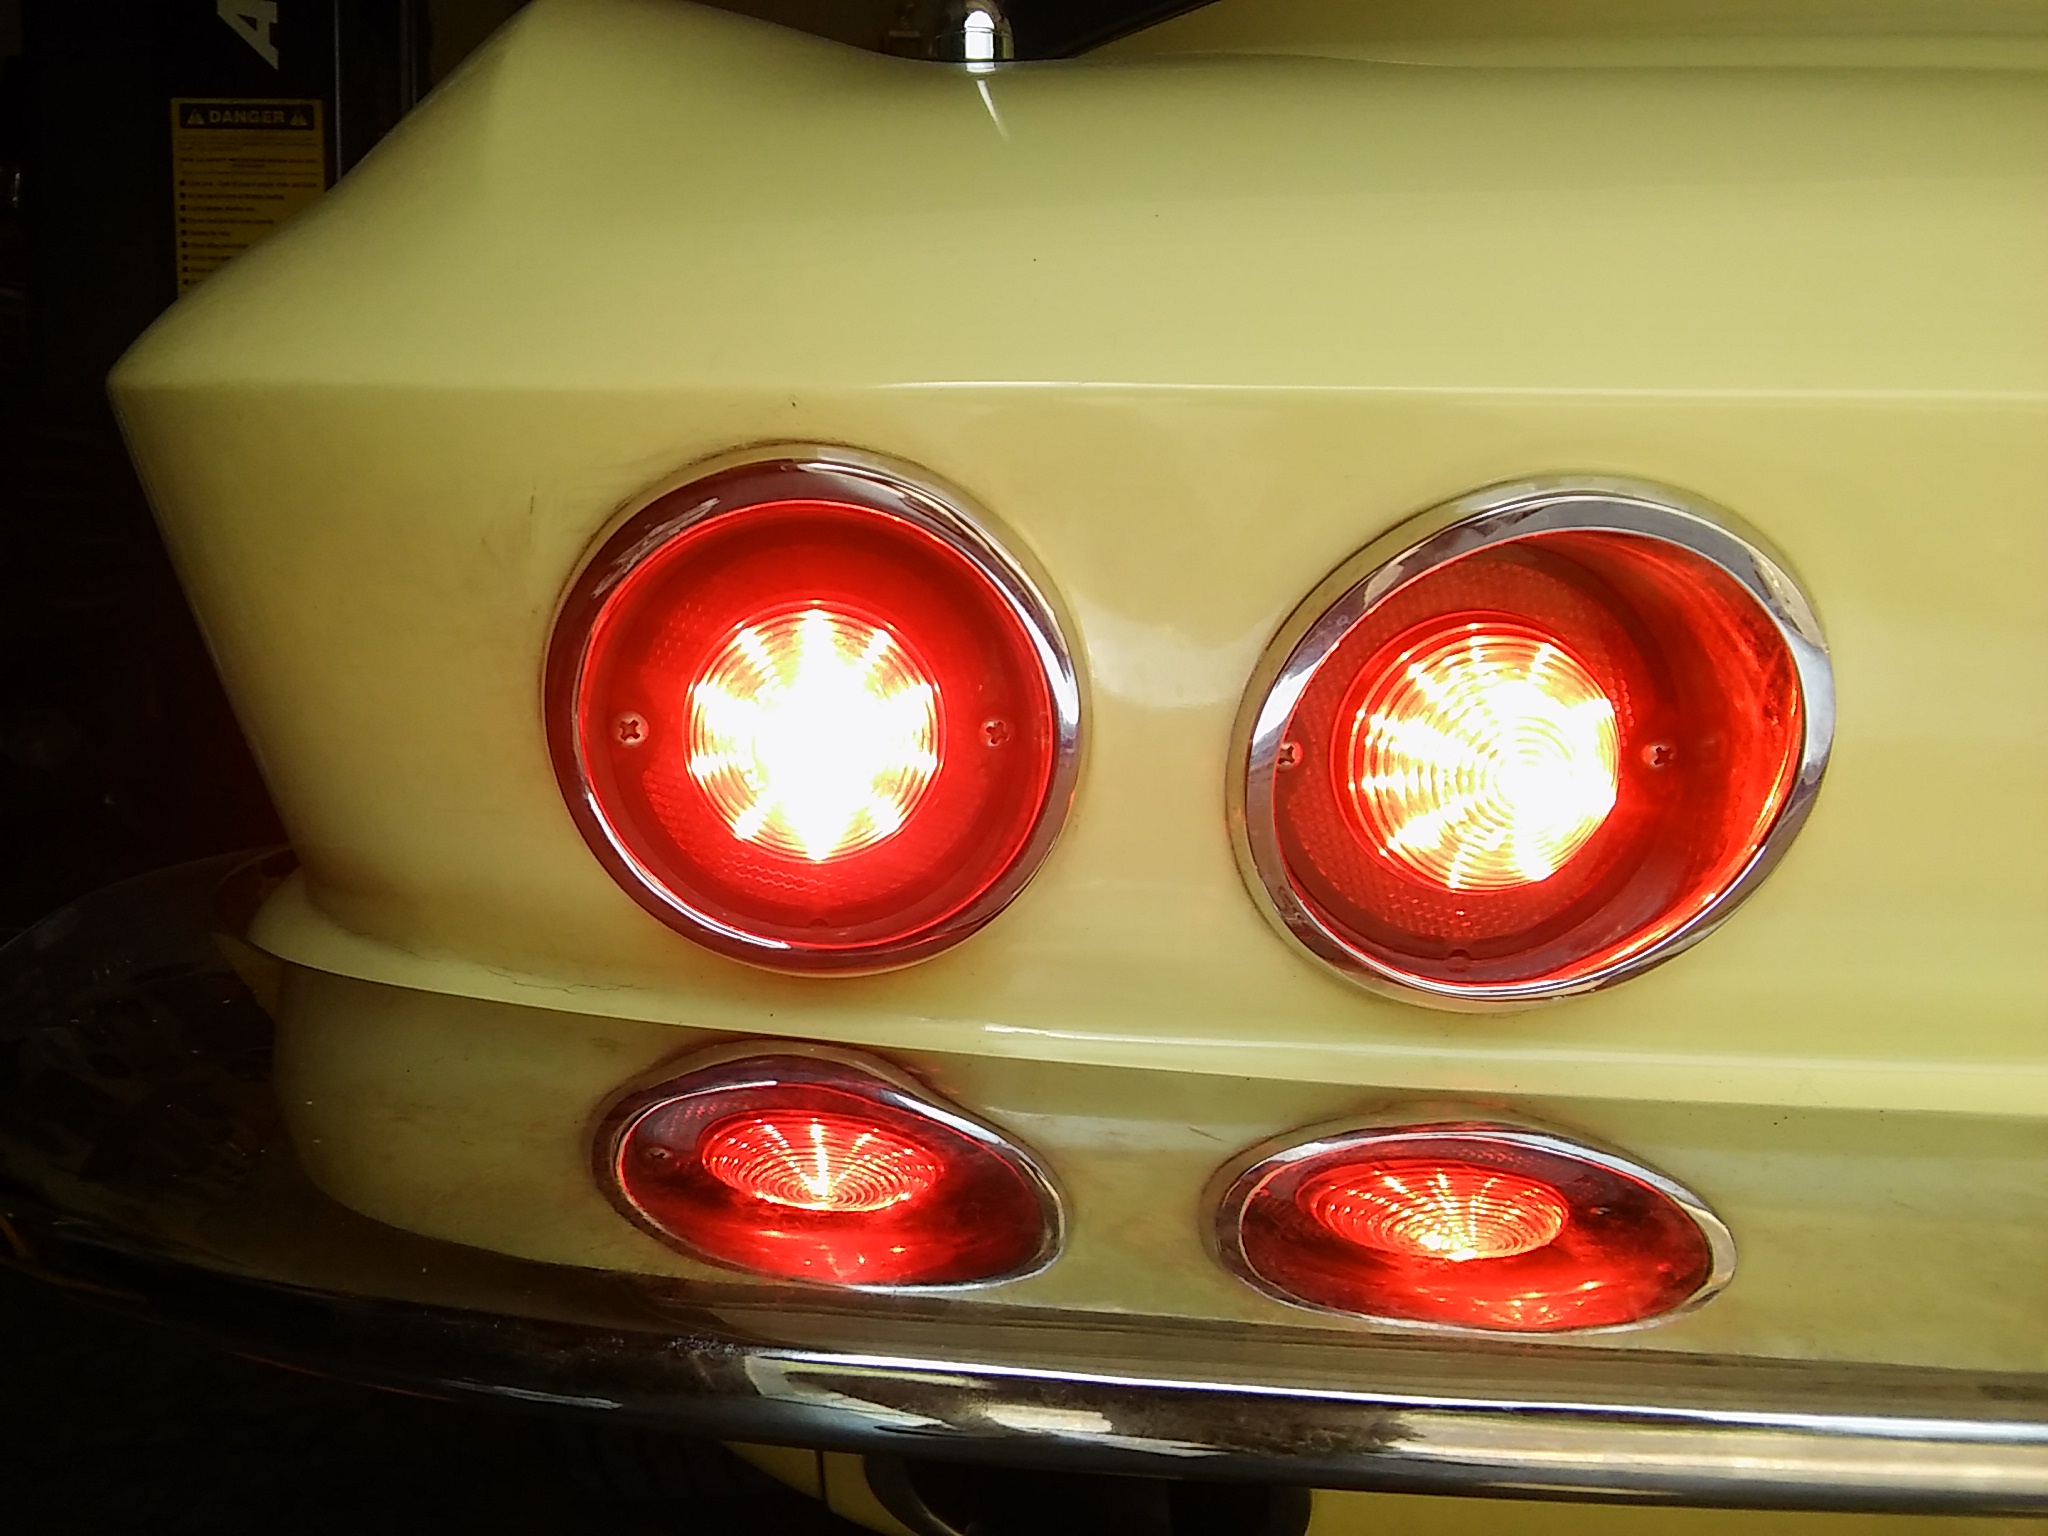
Of the tail light pics the brightest ones are the turn/stop lights the other is running lights.
I hope I didn't miss anything but feel free to contact me by PM.
Bruce B
I could not find that thread so I started a new one.
I tried to figure it out and I did it with no cutting of wires, no drilling holes or other modifications.
A LED tail light assembly is used in this process (cut off plug) , bulbs will not work since the backup light socket is single contact whereas the tail lights are double contact.
Here is the process in short statements:
Disconnect battery
Remove outside tail light lens and bulb.
From the back reach in and remove 2 screws holding tail light housing in place. On my 65 coupe I was able to reach up with a 1/4" drive ratchet. Note position of ground wire on housing.
Remove housing out the back, be careful with wires .Carefully pull wires through the hole, be gentle and just get enough to allow attaching new connections, 3 to 5 inches.
Unplug connector from back of the housing.
Determine from the wiring diagram which wire is the stop/turn wire. It is the brown /yellow trace on drivers side on my 65. Using a Scotch-lock attach a 12" red wire to the brown/yellow trace wire.
Next attach the black 12" wire to the brown wire (running lights) using a Scotch Lock.
Make up a 12" white wire and put a large ring terminal on the end which will attached to the ground stud on the housing. Feed these 3 wires back into the body and fish them through the socket hole on the backup light housing.
Take the 3 wires and using butt connectors attach the white, black and red wires to the respective wires on LED light assembly. I used butt connectors with built in shrink tube which makes a excellent connection.
Install the LED light assembly while feeding the wires into the hole where the socket went into.
Install the second speed nut on the tail light housing being sure to attach the white ring connector to ground.
Install LED tail light into the backup light housing and you are done.
Do the same on the passenger side, I still need to do the pass side.
You can use some dumdum to seal the socket hole in the backup light assembly. Also Remove the backup light fuse and/or tape the wires where they went into the socket.
Now that I have done one the second light will be easier.
Be sure to identify the stop/turn wire correctly, I think it is brown on the passenger side.
Supplies needed:
6 Scotch Lock connectors.
2 pieces each 12" long of red, white and black wire.
6 butt connectors
2 large ring connectors
Electrical tape optional on connections.
See attached pictures.
Attachment 48007739
Attachment 48007742
Of the tail light pics the brightest ones are the turn/stop lights the other is running lights.
I hope I didn't miss anything but feel free to contact me by PM.
Bruce B
 08-09-2016, 08:12 PM
#2
Team Owner

Passenger side stop/turn is either green wire or green stripe. The solid brown is tail lights.


The following users liked this post:
ohiovet (08-10-2016)
08-10-2016, 08:33 AM
#4
Instructor


Thank you for this. My LEDs are on order and I am also replacing my back up lights with tail lights. This will help. Two questions: 1. Did you also replace the flasher? Mine is coming with an LED flasher. 2. Is there a fuse for the back up lights? I didn't notice one in my 1966.
08-10-2016, 08:43 AM
#5
Melting Slicks
Thread Starter
Member Since: Feb 2011
Location: Middletown Ohio
Posts: 2,892
Received 167 Likes
on
130 Posts
2016 C1 of Year Finalist
I have a LED flasher made specifically for LED lights.
As far as the fuse, I will have to double check as I thought about it when I did the write up.
Check your PM.
Bruce B
As far as the fuse, I will have to double check as I thought about it when I did the write up.
Check your PM.
Bruce B

The following users liked this post:
StingU2 (08-10-2016)
08-16-2016, 09:15 PM
#7
Instructor
I got started on mine this evening and got only the driver side installed. The tail and brake lights work but NO turn signal. I installed the included LED flasher but no luck. I could use some help with trying to figure out my issue.
08-16-2016, 09:53 PM
#8
Team Owner
If it worked before, the problem will be in the flasher area or turn signal switch. Brake lights use the same wires, bulbs, sockets, and grounds as the turn signal, so you can eliminate those. You also have to have the key on for turn signals, but not the others. With the key on and all lights off, what happens when you move the turn signal in either direction? Then what happens with the tail lights on, brakes off, switch on if you turn the turn signal lever? Be specific and we might be able to narrow it down.
08-16-2016, 10:31 PM
#9
Melting Slicks
Thread Starter
Member Since: Feb 2011
Location: Middletown Ohio
Posts: 2,892
Received 167 Likes
on
130 Posts
2016 C1 of Year Finalist
65GGVERT has outlined a good plan to determine the problem.
Be sure the flasher ground is good, check with a test light if you have one.
Please post your results.
Be sure the flasher ground is good, check with a test light if you have one.
Please post your results.
08-17-2016, 07:15 AM
#10
Instructor
I had the key on and the tail lights on when I tried it. The new LED flasher came with a reverse polarity adapter so I tried that with no luck. The flasher does have an external ground wire (about 3 inches long with a spade connector) but I did not attach it to anything. My LED lights and flasher came with NO instructions so I had no idea what the ground wire was supposed to be used for. Is it supposed to be attached to a ground source somewhere near the flasher mount (near the center under dash by the park brake)?
08-17-2016, 08:27 AM
#11
Team Owner
I had the key on and the tail lights on when I tried it. The new LED flasher came with a reverse polarity adapter so I tried that with no luck. The flasher does have an external ground wire (about 3 inches long with a spade connector) but I did not attach it to anything. My LED lights and flasher came with NO instructions so I had no idea what the ground wire was supposed to be used for. Is it supposed to be attached to a ground source somewhere near the flasher mount (near the center under dash by the park brake)?
08-17-2016, 10:19 AM
#12
Melting Slicks
Thread Starter
Member Since: Feb 2011
Location: Middletown Ohio
Posts: 2,892
Received 167 Likes
on
130 Posts
2016 C1 of Year Finalist
I had the key on and the tail lights on when I tried it. The new LED flasher came with a reverse polarity adapter so I tried that with no luck. The flasher does have an external ground wire (about 3 inches long with a spade connector) but I did not attach it to anything. My LED lights and flasher came with NO instructions so I had no idea what the ground wire was supposed to be used for. Is it supposed to be attached to a ground source somewhere near the flasher mount (near the center under dash by the park brake)?
Please check your PM (Private Messages) for all the answers to your questions.
Bruce B.
08-17-2016, 11:49 AM
#13
Instructor
Thanks for the detailed write-up and photos!
One of the first things I did on my '66 was change the tail lights to LEDs for safety reasons, same as you. Turning the backup lights to tail lights would be the next logical step towards more visibility, but I cannot convince myself to delete a factory option, especially one that I find useful.
By the way, for tapping wires, I prefer "Posi-tap" connectors. You can buy them from their own website (posi-products.com) or from Amazon. The big advantage is that there is much less damage done to the tapped wire's insulation, just a tiny pinhole. I find it better, especially as someone might want to return this to the original at some point. I like my modifications to be reversible...
The following users liked this post:
ohiovet (08-17-2016)
08-17-2016, 01:09 PM
#14
Melting Slicks
Thread Starter
Member Since: Feb 2011
Location: Middletown Ohio
Posts: 2,892
Received 167 Likes
on
130 Posts
2016 C1 of Year Finalist
Thanks for the detailed write-up and photos!
One of the first things I did on my '66 was change the tail lights to LEDs for safety reasons, same as you. Turning the backup lights to tail lights would be the next logical step towards more visibility, but I cannot convince myself to delete a factory option, especially one that I find useful.
By the way, for tapping wires, I prefer "Posi-tap" connectors. You can buy them from their own website (posi-products.com) or from Amazon. The big advantage is that there is much less damage done to the tapped wire's insulation, just a tiny pinhole. I find it better, especially as someone might want to return this to the original at some point. I like my modifications to be reversible...
One of the first things I did on my '66 was change the tail lights to LEDs for safety reasons, same as you. Turning the backup lights to tail lights would be the next logical step towards more visibility, but I cannot convince myself to delete a factory option, especially one that I find useful.
By the way, for tapping wires, I prefer "Posi-tap" connectors. You can buy them from their own website (posi-products.com) or from Amazon. The big advantage is that there is much less damage done to the tapped wire's insulation, just a tiny pinhole. I find it better, especially as someone might want to return this to the original at some point. I like my modifications to be reversible...
Thanks for the information.
The Posi-Tap looks like a better way to tap into a wire then a Scotch Lock.
I will order some on Amazon or find a local distributor.
Great information.
Thanks again,
Bruce B
08-17-2016, 05:29 PM
#15
Melting Slicks
Member Since: Jul 2005
Location: Cuyahoga Falls OH
Posts: 2,507
Received 334 Likes
on
261 Posts
2016 C2 of the Year Finalist

I like the posi tap idea as well. After looking at the wiring diagram for my 64, am I right in assuming that the grounds to the rear lights are 16 gauge and the supply lines are 18 gauge? I want to be sure I order the right size posi taps for the job. Dave
Dave
Last edited by dkleather; 08-17-2016 at 05:30 PM.
08-17-2016, 06:14 PM
#16
Le Mans Master


Member Since: Apr 2006
Location: Oklahoma City Oklahoma
Posts: 5,975
Received 979 Likes
on
491 Posts
On my '66 coupe I wanted to change the inner backup lamps to tail & stoplamps just like the two outers but I wasn't converting to LEDs but I was planning on replacing the rear wiring harness. To do this "correctly" (meaning no breakes or splices in the harness) I had to order a rear wiring harness for a '65 roadster without backup lamps.
Ray
Ray
08-17-2016, 08:20 PM
#18
Melting Slicks
Thread Starter
Member Since: Feb 2011
Location: Middletown Ohio
Posts: 2,892
Received 167 Likes
on
130 Posts
2016 C1 of Year Finalist
On my '66 coupe I wanted to change the inner backup lamps to tail & stoplamps just like the two outers but I wasn't converting to LEDs but I was planning on replacing the rear wiring harness. To do this "correctly" (meaning no breakes or splices in the harness) I had to order a rear wiring harness for a '65 roadster without backup lamps.
Ray
Ray
The way I did the conversion I used Scotch Locks to tap into the tail light wires. No cutting or splices required. There is also a device called a Posi Tap which also is a clean way to tap into a existing harness.
I think the only reason you had to buy the new harness is to get the double contact base for the socket. That base replaces the single contact base for the backup light bulb.
You could have gotten new double contact pigtails and used the existing wiring and the Posi Tap or Scotch Locks.
Bruce b
08-18-2016, 11:02 AM
#19
Le Mans Master
Member Since: Apr 2006
Location: Oklahoma City Oklahoma
Posts: 5,975
Received 979 Likes
on
491 Posts
Ray
Last edited by rayvaflav; 08-18-2016 at 11:02 AM.
08-18-2016, 07:26 PM
#20
Instructor
Thanks for all of the help. I was instructed that the LED flasher needed to be grounded. I did that and the turn signals now work and I finished installing the passenger side with success. I highly reccomend this upgrade.