When you click on links to various merchants on this site and make a purchase, this can result in this site earning a commission. Affiliate programs and affiliations include, but are not limited to, the eBay Partner Network.
I am waiting for them to arrive (will take some weeks), in the meantime I would like to finish the rest of the door window install. Can I install window first and mount the molding later?
I think you would be making more trouble for yourself than its worth. IIRC there is no way to reach those mounting screws with the window installed; others may know more.
My worst 'do overs' occur on these cars when I become impatient - word to the wise.
Last edited by Frankie the Fink; 09-05-2016 at 08:18 AM.
With the doors in particular, there is an order that it all must come out and go back in. With the side glass fully installed the molding screw holes are covered. However, if you drop the glass in the door with the rear track loose (off to the side), you will have room and can go ahead and install the front vent window assemblies, and just about everything else and when the outer moldings arrive, you can install them and finish the side window install normally through the access holes. Pilot Dan
OP I am pretty sure you are starting with bare doors, if so follow my previous post. Place the door glass in the door first, followed by the front vent assembly
thanks all for your suggestions , it may be more practical if I just wait till the moldings are delivered so I can do the install in the most practical sequence.
Last edited by alexandervdr; 09-06-2016 at 04:12 AM.
With the doors in particular, there is an order that it all must come out and go back in. With the side glass fully installed the molding screw holes are covered. However, if you drop the glass in the door with the rear track loose (off to the side), you will have room and can go ahead and install the front vent window assemblies, and just about everything else and when the outer moldings arrive, you can install them and finish the side window install normally through the access holes. Pilot Dan
Thanks for posting this info. I'm about to replace both vent window assemblies on my '67 convertible with assemblies I bought from a forum member and install the outer window seals that were in a box when I bought the car earlier this year. Now that I know I can do all this by removing the rear channel and not have to remove the side windows, it won't take me as long to do and just maybe motivate me to get started!
got my new mouldings. Fit is only so and so, especially the rear upwards curved part needed some careful tweaking to have it follow the lines of the door panel. For the driver side alone it took me more than an hour with small steps and numerous test fits (brute force is not an option, I used a small hammer)
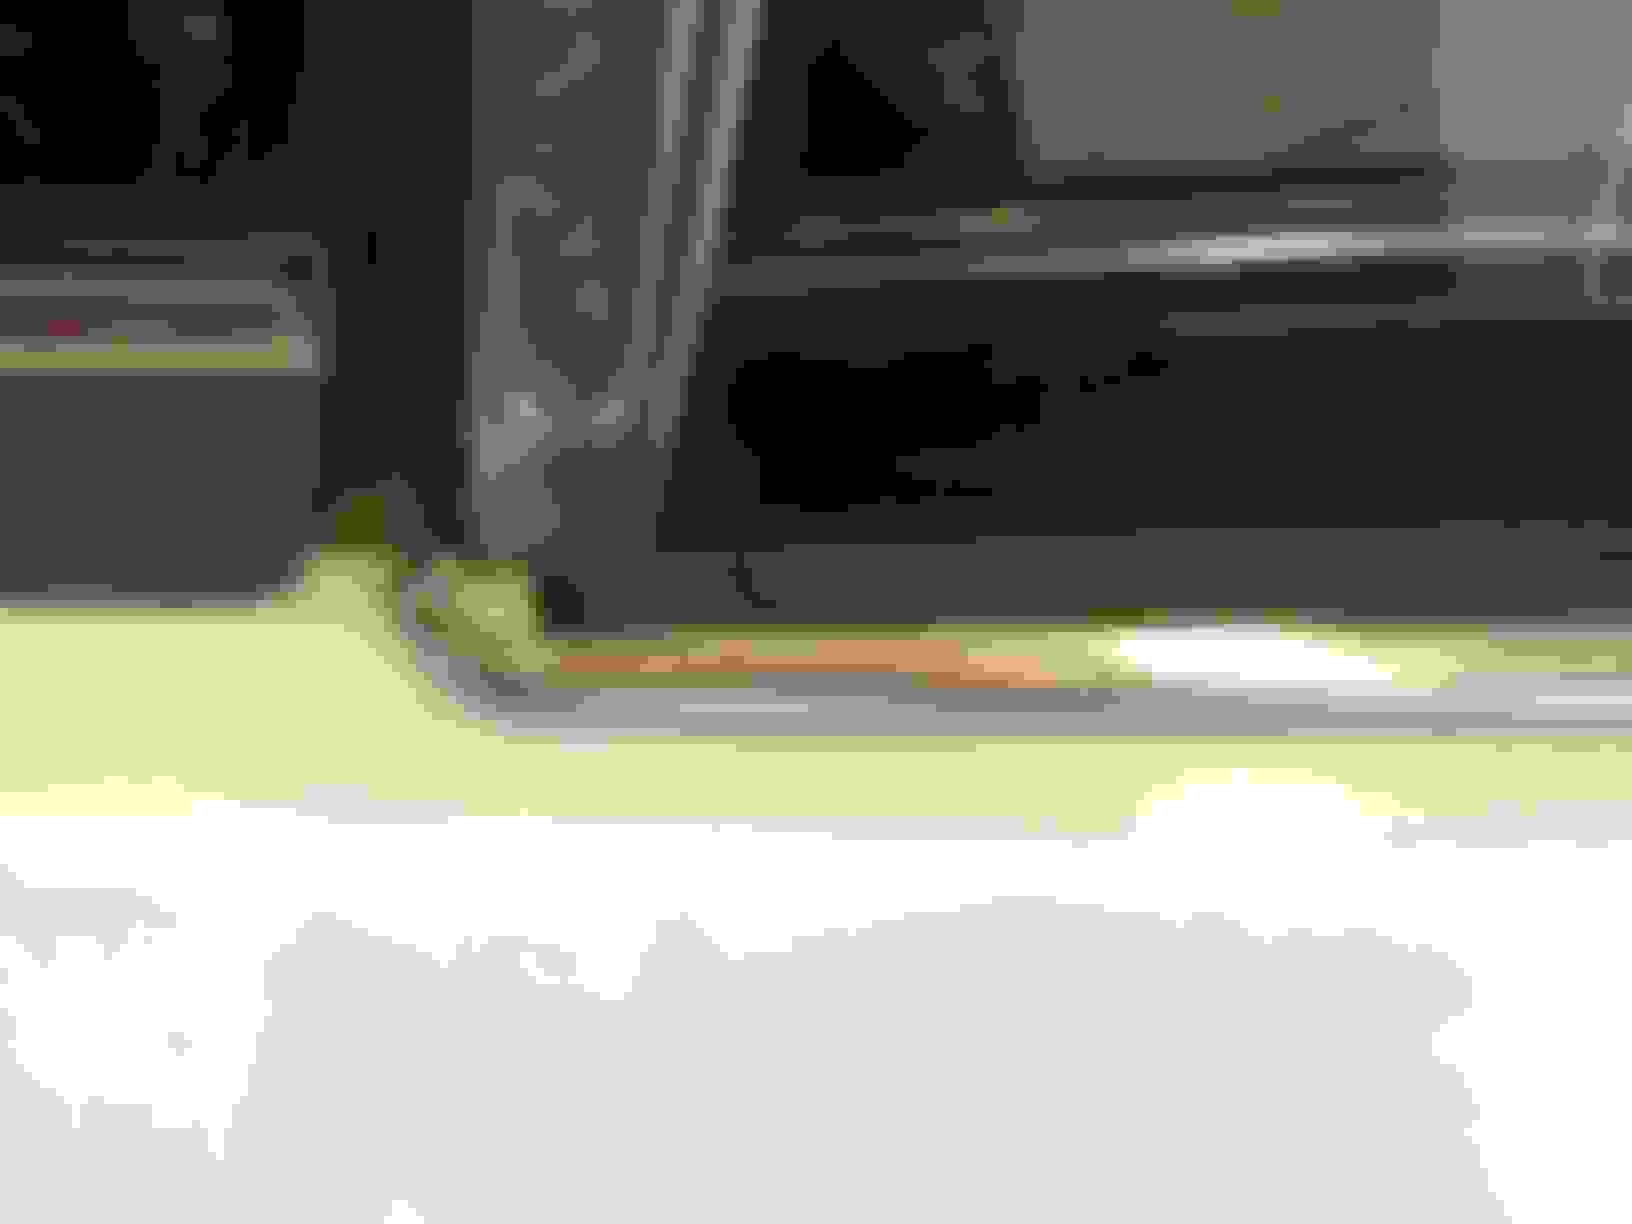
I assume the front 'finger' fits in between the vent glass surrounding rubber and the vertical seal? (yellow lines)
When I do so, the rubber lip needs to be bended (red circle) up (or down) to have the moulding slide in. Should I cut off the rubber lip here (about 1/4", blue area) or leave as is ?
I had scrapped the old mouldings because they did not go flush with the door pannel, leaving an 1/4 inch gap about in the middle. The upwards sweep to the stainless window seal edge did not fit neither. So I had ordered new ones expecting them to be better, they weren't...
I took me a holiday trip to Canada (where I could manage to take a closer look at a 65 coupe, similar issue) to understand that these things rarely fit as hoped. Bending the moulding along it's 'flat' surface is a challenge I did not even want to attempt, given that it's almost 2 inch wide and very thin. After some (a lot...) of thinking and experimenting on the scrapped items (did not want to screw up the new ones) , I found that flattening out the outer bottom side with a hammer does very nicely curl the top edge in the desired direction. Flattening makes the bottom edge longer, so to pushed the top edge in a curve. It really works well and can be very nicely tuned to fit the curve of the door panel. Another advantage is that no force needs to be applied to the top edge, so that one stays unscratched and the only traces of hammering are hidden inside the door. The 90� transition sweep needed some very gentle hammering, bending and almost sculpturing with a dremmel tool. But it all worked out fine.
The process is to first have the mouldings fit WITHOUT mounting the rubber seals using above hammering in small steps. Then I screw the moulding and the seal to the door to check if the screw holes fit. Not so, so I enlarged them as needed. Then taking everything off again , put a light bead of flexible adhesive to the back of the rubber seal and mount back everything to the door. When cured take off, drill the holes for the staples and install the staples. This should be a perfect fit assembly, I'll know tomorrow
Last edited by alexandervdr; 10-10-2016 at 01:06 PM.
 09-05-2016, 05:52 AM


 Pilot Dan