When you click on links to various merchants on this site and make a purchase, this can result in this site earning a commission. Affiliate programs and affiliations include, but are not limited to, the eBay Partner Network.
65GTO, I see a '37--'38 Mopar coupe in the background! I had a '37 Imperial business coupe for about 15 years, selling it in 2001. Great cars. (I also have a '65 GTO hardtop, but mine's Blue Charcoal..like the wheels on yours....) Congrats on your hard work...you'll be glad you did it when it's done.
Ohh.. the wheels on the GTO.. put those on over the winter. They are the Craiger version of the Hurst Dazzlers. As you may know, Hurst is again making the Dazzlers (there is a current thread on the forum of where a poster mounted a set on his Vette.. 65 vette if I recall).
Hurst has no plans to make the silver version of the Dazzler.. only black and gold versions. Silver was a version one could get back when they 1st made them. I could not see gold or black going with my color of the GTO.. wanted silver. I found that Craiger is doing a Dazzler 'knock off' and they offer a silver version. So went with Craiger.
Nice.. thanks for the tip. I was thinking about what to use. I am always a little leary of aerosol based solutions (paints, coatings) as the strike me as not professional grade. Are you happy with the product ? Does the coating seem 'industrial grade' ?
I was thinking of creating my own spray wand, where I can shoot industrial grade red oxide primers into cavities, and then SEM industrial coating paint.
It seems to work quite well. A bit of a mess to apply but the coverage is excellent and worth the few bucks that it costs IMO.
I'll add that in industry, the corrosion protection is often applied from spray cans by dealerships and professional body shops. In I-CAR training, we used the canned stuff. It's basically a wax based product that coats inside surfaces with a thick, cosmoline-like coating. It will stay there until it is blasted out with solvent or media. (forever, basically). You can also get this at auto finish supply shops that sell weatherstrip caulk, paint, solvents, etc. A really good idea, and one that most new cars use from the get-go.
I'll add that in industry, the corrosion protection is often applied from spray cans by dealerships and professional body shops. In I-CAR training, we used the canned stuff. It's basically a wax based product that coats inside surfaces with a thick, cosmoline-like coating. It will stay there until it is blasted out with solvent or media. (forever, basically). You can also get this at auto finish supply shops that sell weatherstrip caulk, paint, solvents, etc. A really good idea, and one that most new cars use from the get-go.
Hi All. Been a few weeks since an update on this what will be a long term thread.
Been side tracked with various work and personal items. I actually finally had our wedding ceremony.. that was sidetracked for about 2 years during my mom's cancer, our trying to care for her at home and through hospice, her passing from related complications, and then all that effort of clearing out and selling her house. But my gal and I finally had the chance to 'marry proper'. Had a nice party at our house a few weeks ago. Cars and friends.. my idea of a wedding !!!
Again... thanks so much for all that are following the thread and offering 'how to' and 'advice'. It is much appreciated indeed !
I will add a few separate posts below just to try to compartmentalize the conversations.
There is an ongoing 'getting a good front end saga' related to this project... front ends received and returned to the vendor
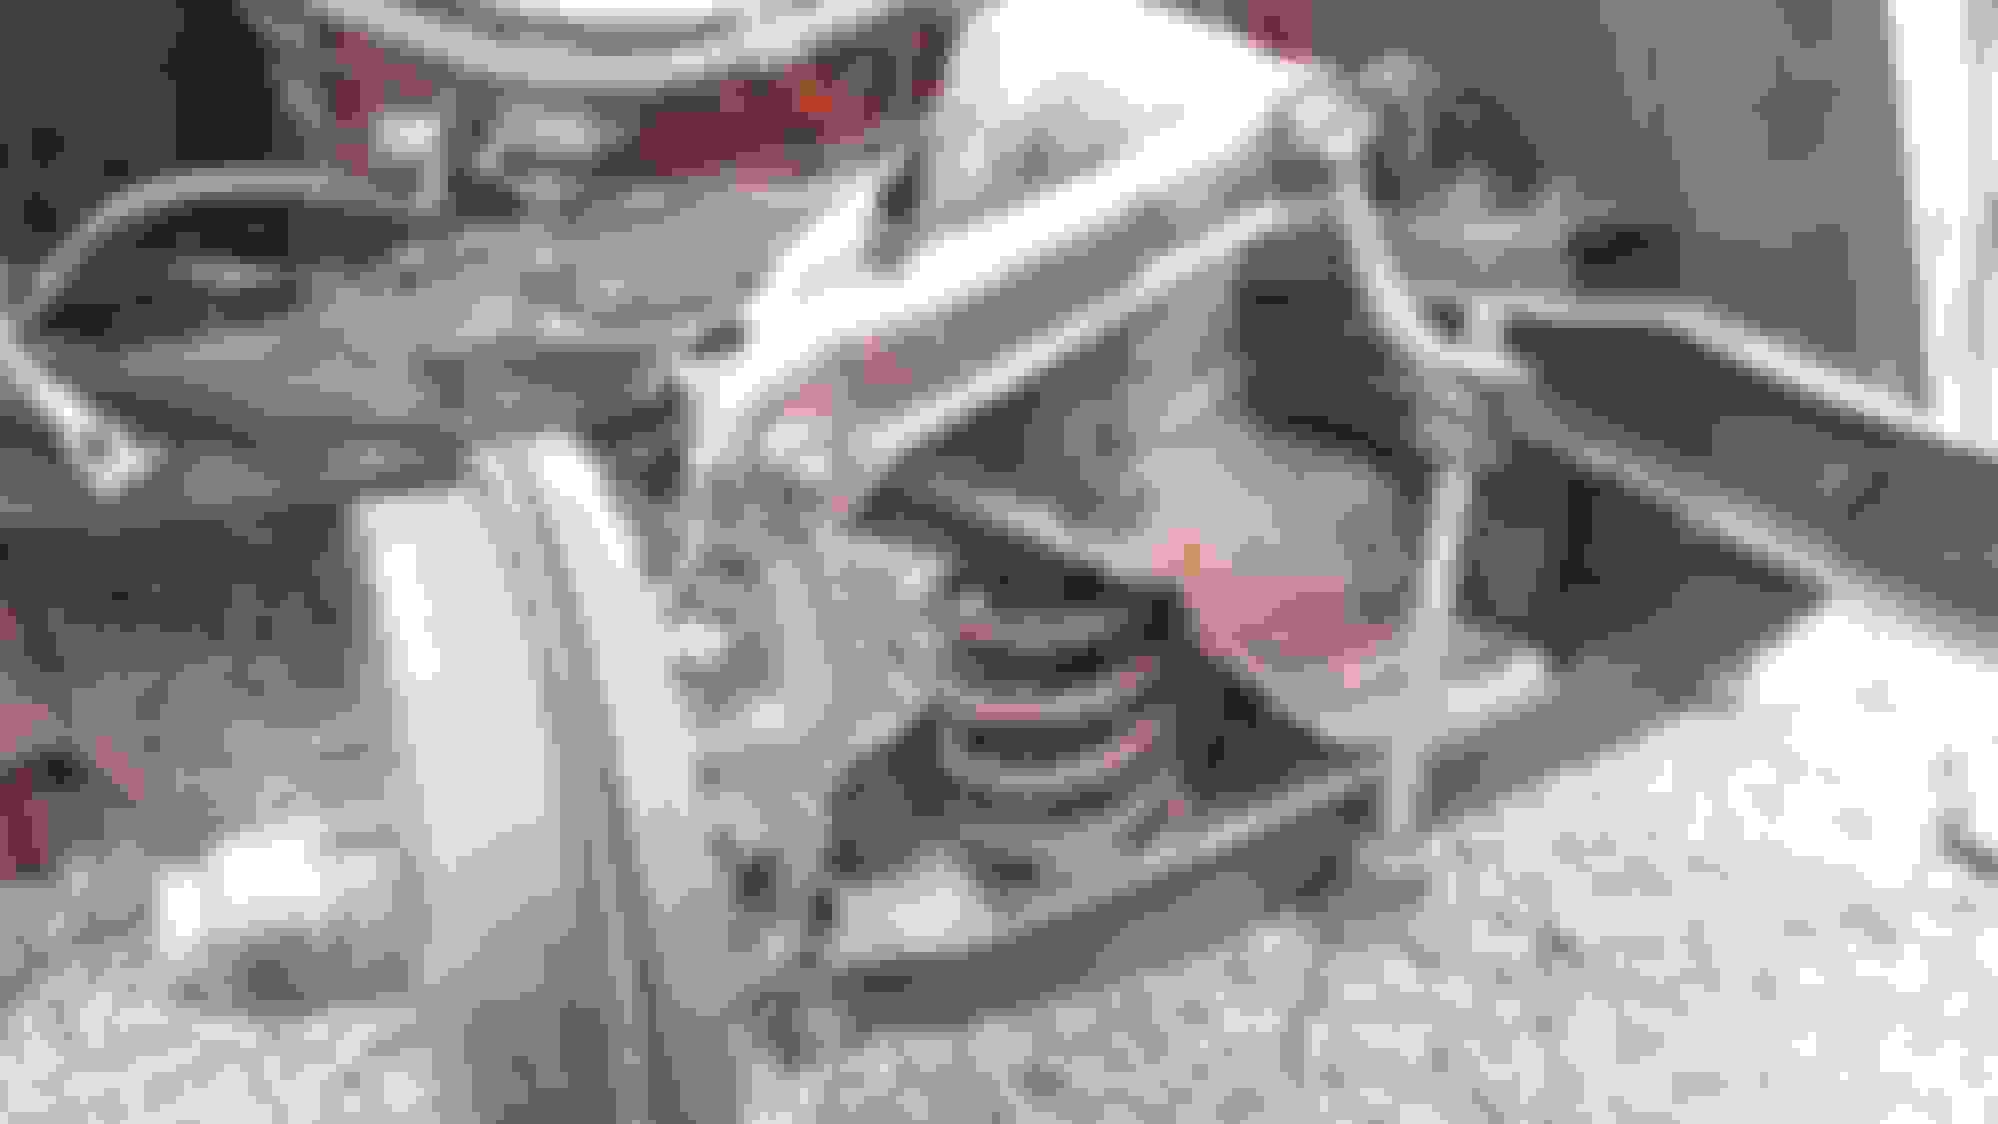
While that is all shaking out, just some pics of 'doing the dirty work'. Here is some pics of starting to get the 55 years of crud off the front end while the nose is off. I will do a 'on frame' clean, sand, prime, seal, and re-paint of the front end and frame as far back as the tranny. Do the same 'on frame clean up' from the tranny back to rear of car as a future mini-project at some later date after the car is back on the road.
I do not want to do a full front suspension / chassis disassemble (the car drove and handled well, and the king pins have no play in them), but am thinking to pull the coil springs just so I have better access to refinish them and the parts in the area and coil towers. I am looking at how to drop those coils, but the 'how to' it is not jumping out at me as I look at it. I am used to dropping coil springs on ball joint a-frames.
Congrats! Nice looking couple! I am very sorry to hear about your mom's passing.
Corvette related
Are you gonna replace the rocker reinforcements and get some metalwork done on the braces in the kick panel area? A lot of corvettes have these problems with these two area. Mine were replaced too.
Also, not a bad idea to get the fender reinforcements which run along to the top fender molding underneath the fenders. It will help stiffen up the fenders. I might have some kick panel supports left over to replace the rusted one in the picture. Plus, I know I have some rubber bushing for the sway bar. Let me know if you want any of these parts.
Maybe the rocker metal is fine... Not sure.
The front suspension looks fine. Maybe get some paint on it and call it good!
Yesterday.... Arrival of the 'newest' nose.... Three is the Charm !!!!!!!!
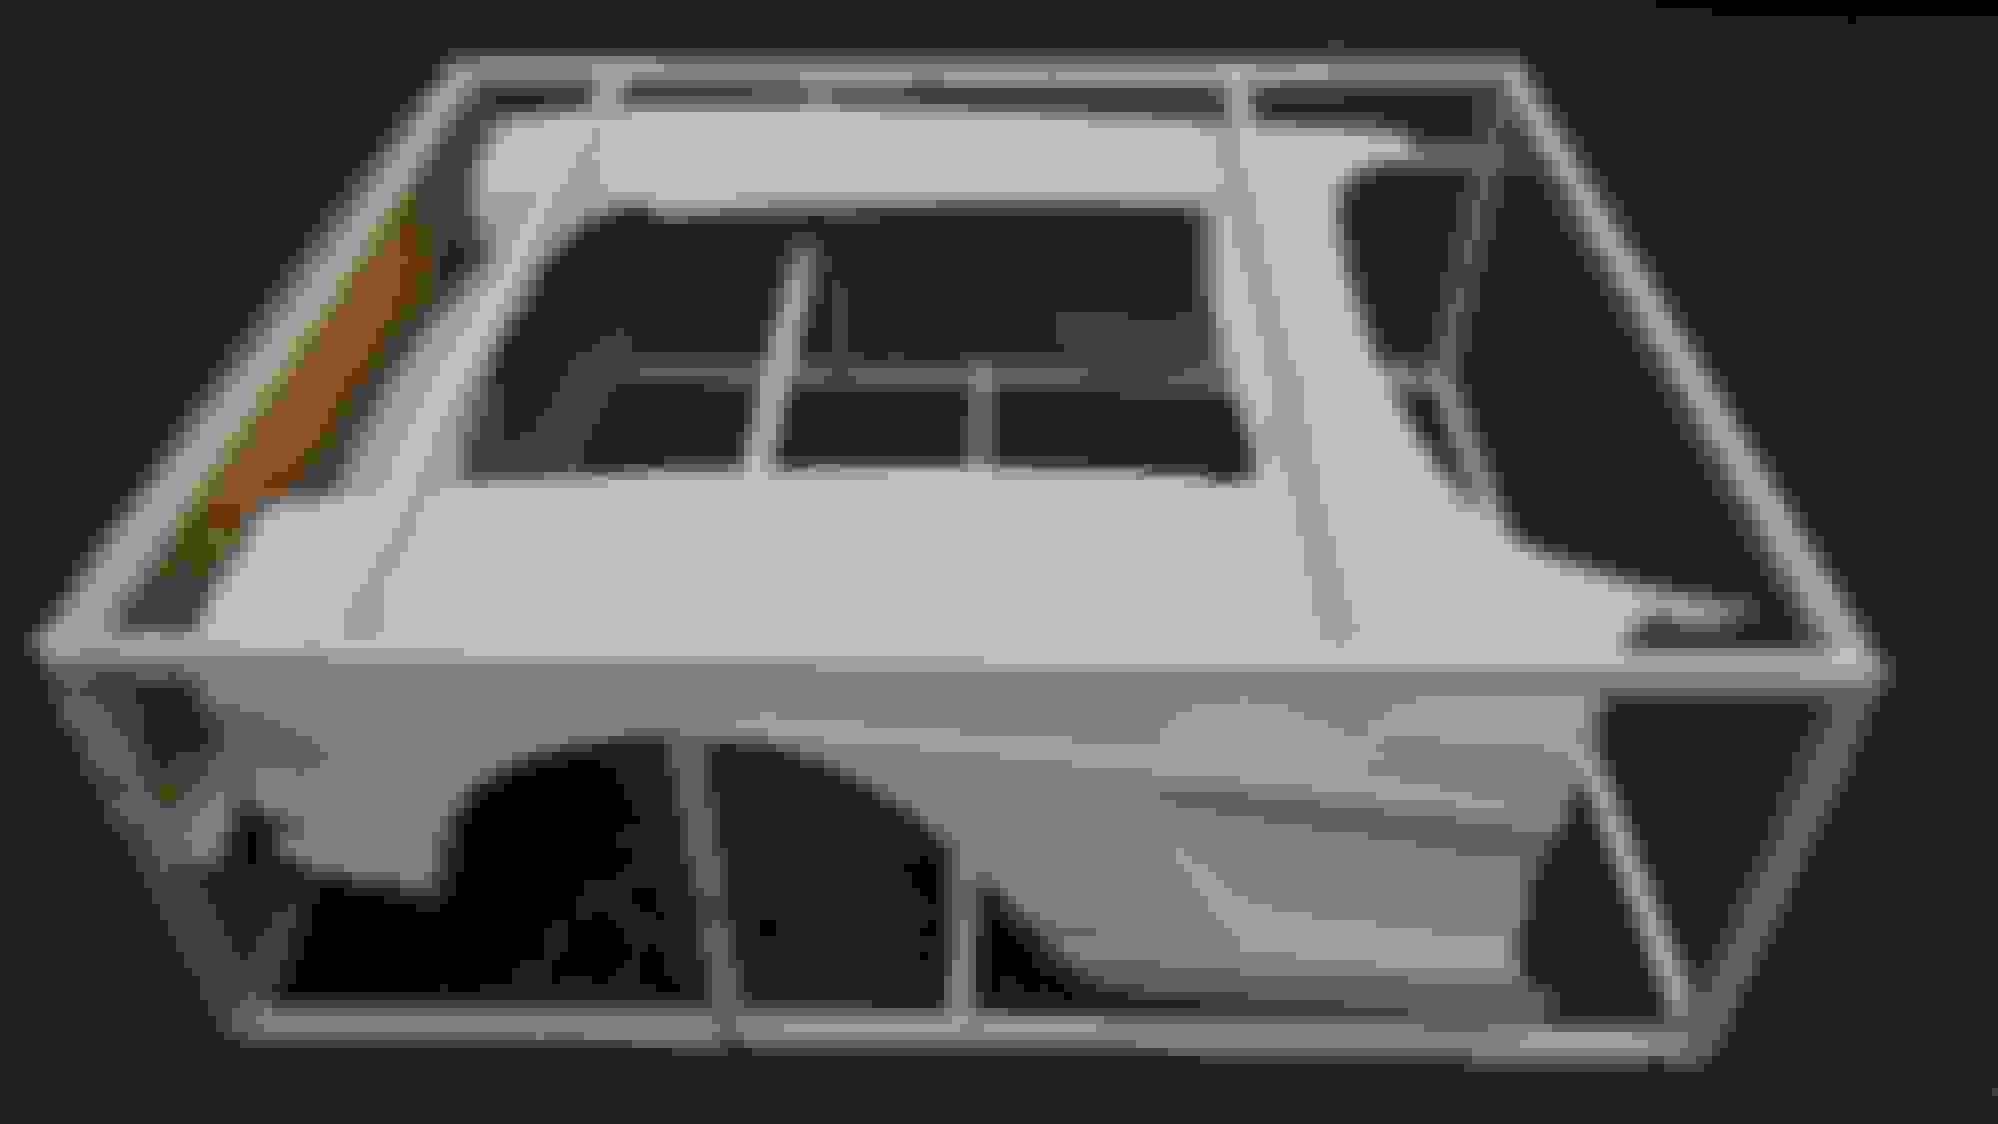
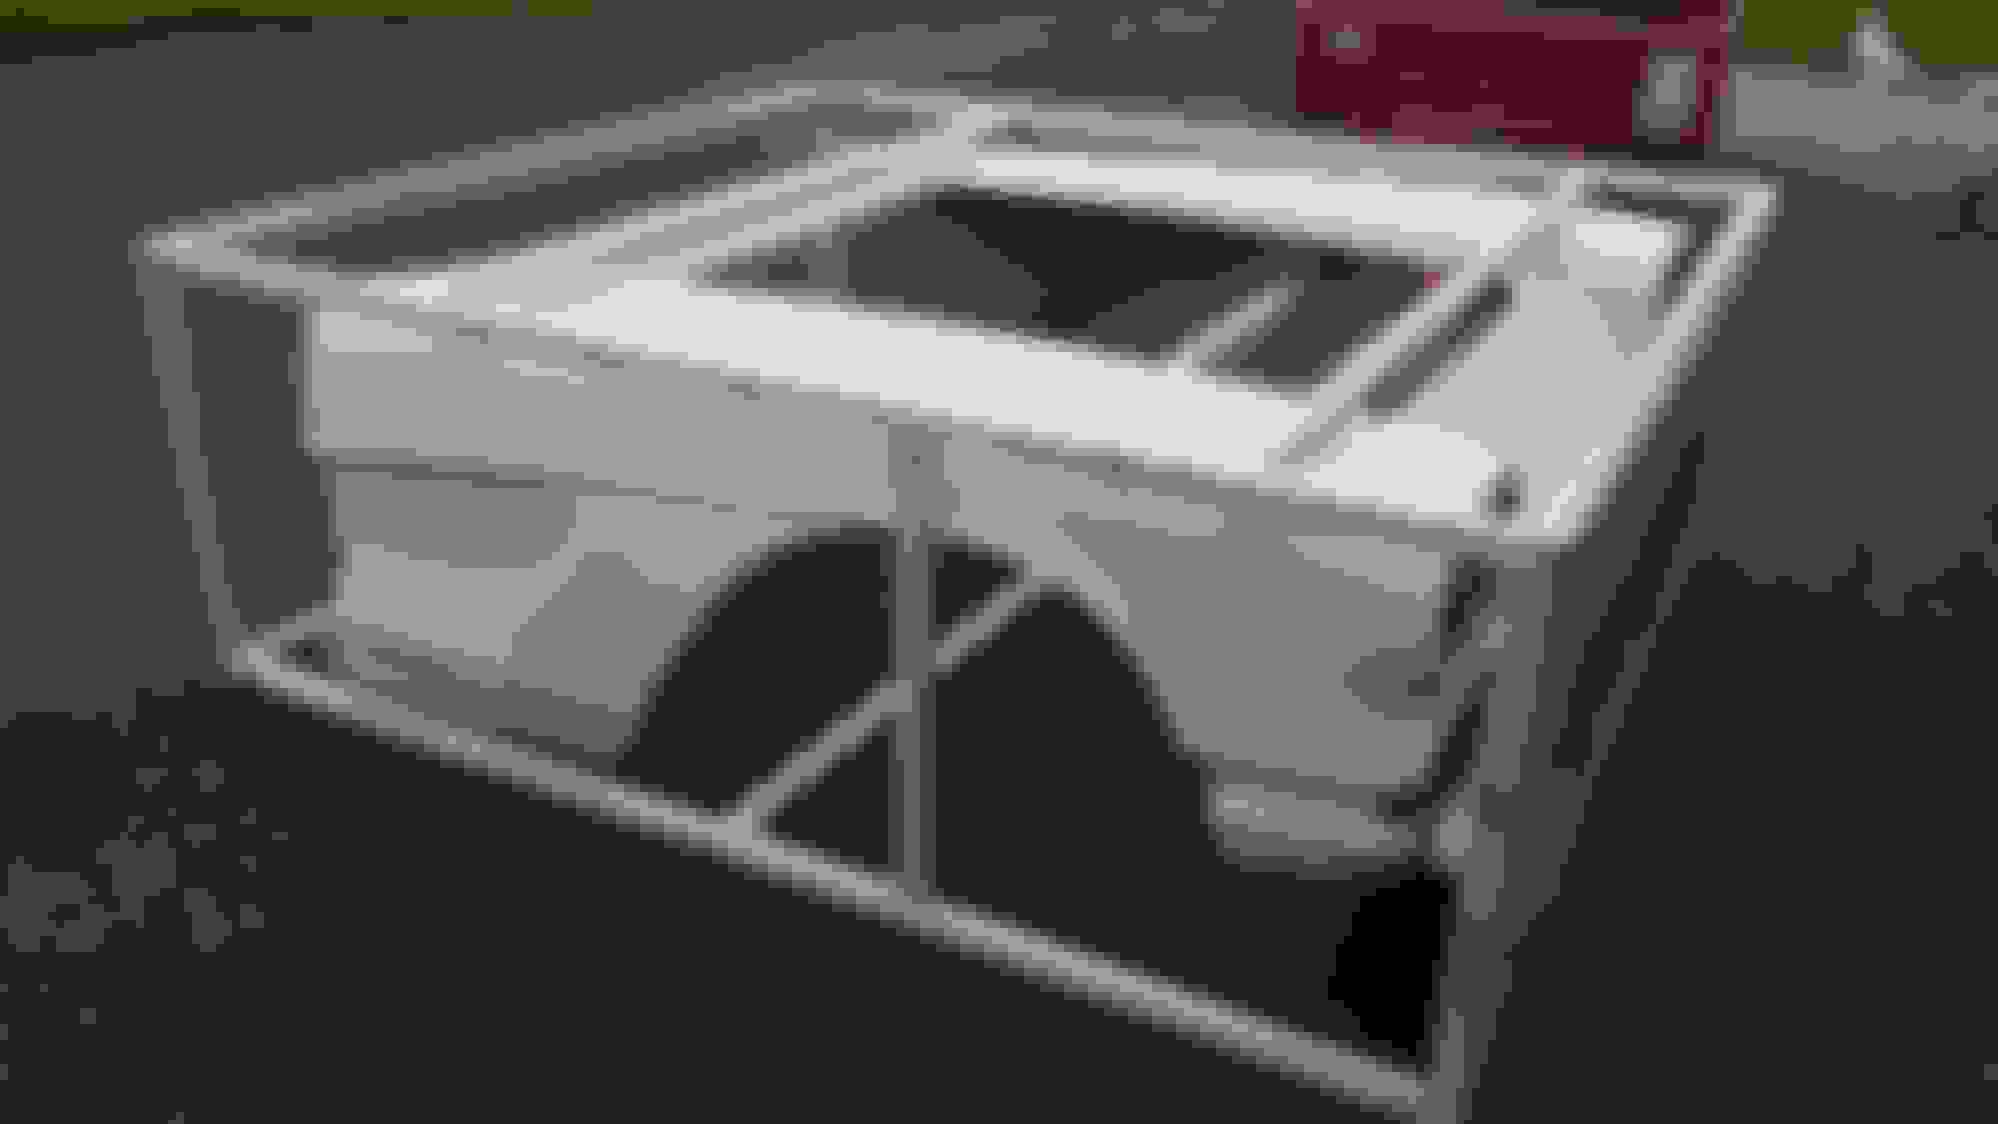
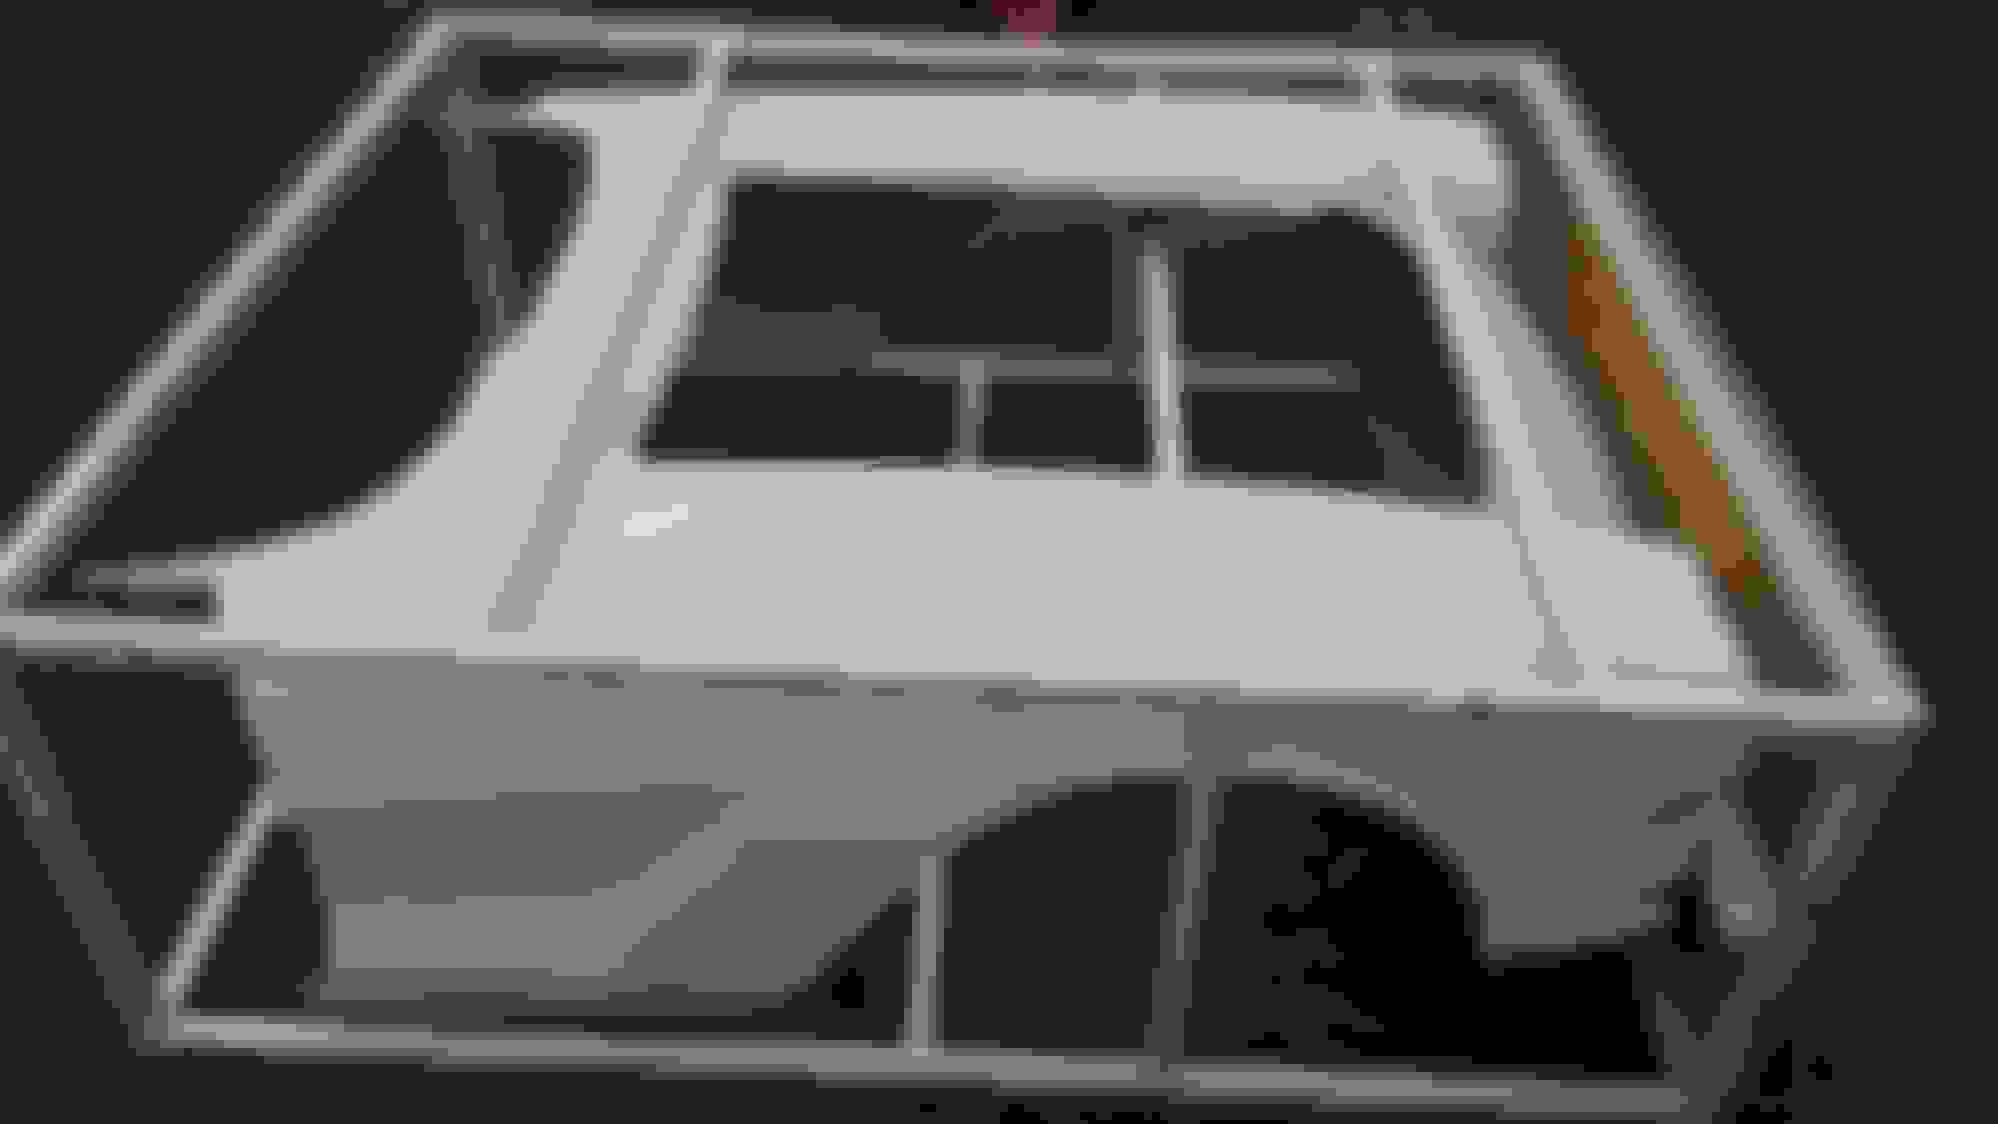
Received the 3rd attempt at a front end. This time from Corvette Image (3rd vendor used).
Man.. I cannot be more pleased !!! CI quality rocks !!!!! Look how they even ship / crate this thing (the others arrived simply in a cardboard box). No 'molded in droop in the fender tops', no cracks, super quality 'lay up' work. Super quality trim work after pulled from the mold. And clearly their mold (where all the quality starts) is not some worn out piece of junk. No waves, drooping areas, inexplicable 'indents' for no reason. Crisp and straight ridge lines. Any nose will require some finessing... but this one will be relatively minimal.
Decision Point; The Corvette Image (CI) product (unlike the others) includes the full cowl top (tucks under windshield).
This now opens the question (decision point) to cut off the cowl and splice in the nose to the existing cowl just below the windscreen, or bite the bullet and do the full cowl replace (relatively a lot more work).
I have done a 'splice job' before (me and brother on his 67 vette) but never a full cowl. So not sure what I am in for here if I go that route. Obviously I would now need to pull the windscreen, work with cowl vents, wiper arms with cable drives (a new one to me), wiper washer nozzles, etc. Do I now also need pull the dash pad (and now it becomes a dash pad job too ???).
Clearly the best way is a full cowl job. If anyone has any tips, or especially detail pictures of under that cowl, all would be of help.
Thanks !!!!! Jim
Tractor-Trailer would not come down my street so I needed to go meet them about a mile away and get it home the rest of the way myself
Cars & friends.......makes for a perfect celebration !
If you decide to remove the coil springs, it's pretty easy, unbolt the sway bar links (get new rubber bushings) and then you unbolt the lower inner control arms from the frame and using a good floor jack lower slowly and remove.
One other thing I noticed from your car pictures was your clutch cross shaft. That hairpin clip does not belong in that groove, the teardrop link should fit in that slot and is held in place by tension from the big spring. Would be easy to correct that.
Congrats! Nice looking couple! I am very sorry to hear about your mom's passing.
Corvette related
Are you gonna replace the rocker reinforcements and get some metalwork done on the braces in the kick panel area? A lot of corvettes have these problems with these two area. Mine were replaced too.
Also, not a bad idea to get the fender reinforcements which run along to the top fender molding underneath the fenders. It will help stiffen up the fenders. I might have some kick panel supports left over to replace the rusted one in the picture. Plus, I know I have some rubber bushing for the sway bar. Let me know if you want any of these parts.
Maybe the rocker metal is fine... Not sure.
The front suspension looks fine. Maybe get some paint on it and call it good!
Thanks Jim for the thoughts.
Corvette related....
Door hinge pillar braces; I do plan to do metal work on the door hinge pillar braces. The drivers side def needs some attention (but I already have a plan of attack in place and should not be too much work). The passenger side actually looks worse in the pics than it is. It is all surface rust on that one.
Rocker Braces; That is an interesting one. They are not horrible, but have some rust. I have not investigated how they are attached / replaced. But quick look while doing some initial cleaning of the inner rocker cavity (see previous pics) was that those were not easily replaceable. If these are in fact something relatively easy to replace I will. Any insights on R+R ('how to') appreciated. If the outer fiberglass 1st needs to be cut away to access the inner area, then I will likely live with how it is.
Fender top braces; Yup.. I have a set from when I was 1st thinking to repair the 61 nose that was on the car. The nose was drooping so bad that I was going to use the braces to try to prop the fender tops up higher.
An interesting side note... At Corvette Image, when I was discussing the 'fender top droop' and wanted to know if their mold had droop already in it, they related a story to me that the reason GM discontinued installing those braces after 59 was that in front end collisions, the driver was getting impaled (skewered) with the braces ! Got me to thinking... to use braces or no braces
The spear (non-collapsible steering column) did not do the trick?
Cars & friends.......makes for a perfect celebration !
If you decide to remove the coil springs, it's pretty easy, unbolt the sway bar links (get new rubber bushings) and then you unbolt the lower inner control arms from the frame and using a good floor jack lower slowly and remove.
One other thing I noticed from your car pictures was your clutch cross shaft. That hairpin clip does not belong in that groove, the teardrop link should fit in that slot and is held in place by tension from the big spring. Would be easy to correct that.
Congratulations on your wedding! Pilot Dan
Hi Dan: Thanks for the input.
Wedding; Thanks on the 'congrats'. I was perfectly happy a single guy. We have been together for years. She never pressured me, but wanted to be 'official' mostly for her parents happiness (old school Chinese). But when my mom took ill, my gal was there 150%. Up many nights, all night, changing my mom when she soiled herself in the middle of the night, right there all the trips to the ER in the middle of the night. Preparing special foods for her. There for her 200% at the end stages. The level of giving that someone could give was humbling. She did the same for me 3 years back when a car fell off the jack stands on me and nearly crushed me to death (a bad day all around). Cared for me when I could not move 1/4" on my own for many weeks. So all in all... she is a keeper and if this added to her happiness by making her parents more happy... then it is the least I can do to even begin to pay her back.
Cross Shaft; Thanks for scanning the pics and pointing out the non-obvious stuff ! Will take a look. At some point I need to investigate a clutch noise that sounds like a bad throw out bearing. Was not sure when I would do that... too many sub-projects going on at the same time ! But good to know that cross shaft item while I think about that clutch noise.
Coil Spring Drop; Do you mean remove the inner bolts (at the control arm / frame attach point) or the through bolt at the bottom of king pin ? Thanks !
Sermersheim made or makes fiberglass Z braces for under the fender.
We installed mine using bonding strip adhesive and bolts though the trim holes to clamp everything together during the cure. I would imagine the fiberglass ones would break in the event of a collision.
Doug
Originally Posted by 65GTO
An interesting side note... At Corvette Image, when I was discussing the 'fender top droop' and wanted to know if their mold had droop already in it, they related a story to me that the reason GM discontinued installing those braces after 59 was that in front end collisions, the driver was getting impaled (skewered) with the braces ! Got me to thinking... to use braces or no braces
Last edited by AZDoug; 07-26-2017 at 03:17 PM.
Reason: Spelling
 05-26-2017, 02:21 PM


 Pilot Dan


