When you click on links to various merchants on this site and make a purchase, this can result in this site earning a commission. Affiliate programs and affiliations include, but are not limited to, the eBay Partner Network.
Many of you have seen and helped me through the perils of some issues with my 1963. My father and I rebuilt the car when I was 16. And 16 +24 now, so the rebuild has some years on it. And the carburetor....oh what a mess.
I have always been leery of hitting the throttle with the car having what I consider bike tires on it. When my dad visited we took it out and he said he would do it...so I figured ok...this dude used to race these things...if it gets sideways hopefully he can handle it. Well it never got that far. He said he felt the second set of barrels kick in...but I didn't feel anything. Then when I looked at the carb for the first time, I knew why. The combination of sitting for 6 months at a time and then having the original air filter, which was foam, disintegrate into pieces and likely hit the barrels turned into a goop...and it killed the secondary. So, after futsing with the electrical system, which by the way, putting the shielding back on has been the biggest pain in the *** with this car, I figured what the hell.
Many people have helped me with how to do this before even starting. Most notably the Finke, tbarb, and others. So, I sacked up and bought a kit from Daytona Parts. It was $50 with shipping and arrived in 2 days. They don't take orders online because they are a manufacturer...but they are efficient when you email them. It comes with everything that is Ethanol resistant. And from the looks of it, the accelerator pump and the secondary was completely shot. I also think I had a clogged primary jet. Pictures to come.
Any words of wisdom, condolences, prayers, or therapy is always appreciated. I decided to jump it because, after timing and the distributor fun, this can't be that bad.
If that's the original 3461 Carter it's in good condition, take it apart and clean it, the fuel solidifies looking like varnish. Use a air Chuck to blow out all the small holes and watch your eyes, get some stabile and treat the fuel in the tank once or twice a year. Educate yourself to the different carburetor circuits and don't overtighten the small screws, remember it's only aluminum.
It's a easy carburetor to work on, other than the poor secondary operation were there any other issues with it? I don't like the fuel inlet line how it runs from the filter to the carb inlet fitting so something is not adjusted right.
Do you have the 1963 Corvette shop manual, there is a very good detailed section about the AFB and that will help you. As you get things together there are plenty people here that will help answer any questions. The primary and secondary venturi clusters do all the work so carefully probe the small holes, (air bleeds etc) but don't open them any larger.
There are some Youtube videos as well including a 6 part series on rebuilding a later version of the AFB, but its still applicable to your carb.
That carb is indeed grungy and varnished up and needs a good soak in some carb cleaner; my hobby is buying unloved old Carter carbs and "bringing them back" to serviceable condition and your carb is about as gummed up as I've seen in a while:
I think that car was driven lightly -- a lot -- and the secondaries didn't see much action along with the worst thing that can happen to carbs which is them sitting until the fuel degrades.
Pay particular attention to the choke operation; if that is gummed up and the piston doesn't move freely in the choke housing or the secondary "lockout" is mis-adjusted the back barrels won't work and things will get scuzzed up from lack of use.
A sideways shot of the fuel filter to carb plumbing would be good - something is indeed amiss as noted.....there are special hard lines just for those connections and people sometimes reverse them and that is wrong (see picture -- Note the long arm of the line vs the short arm position)..
Last edited by Frankie the Fink; 07-09-2018 at 06:41 AM.
tbarb...Yes it is the original carb. Keep in mind this was already restored from death in 1996 ish. But it was meant to be a show car that never got more than 500 miles on it since 1996, so it has some gunk. The stuff that was under the secondary literally turned to tar, and under that cement. I didn't realize there was a passage where the weight is supposed to move...it was completely gummed up.
Mr Finke....That manual is so gospel to me I actually have two of them (really). The back barrels were literally gummed shut. I had to take the butterflies off and pull the pin it swivels on. What a pain in the *** to get those realigned. I learned that the butterflies are larger than the cutouts the hard way...but, it is getting there. I also have the shop manual and watched MANY videos, most notably this series by Carb Mike (even though it is not the exact same carb, it's really close).
I have learned to love ChemDip( $15 at Autozone, half cost compared to all other stores)...and my old friend Muriatic Acid is a thing of the past.
Question on the second picture. All the pictures I have seen show these two "setup rods" to be pointy and these are flat at the bottom. They don't look warn, they look like they are supposed to be like that. Seeing how I have nothing to compare them too, I was curious what the experts knew about them.
Those metering rods look fine to me. Just need cleaned up....
If you removed the butterflies I assume you know that the small screws are staked on the end once tightened (and I use a bit of blue LokTite too)....you don't want one of them to wind up on top of a piston...
Last edited by Frankie the Fink; 07-09-2018 at 12:15 PM.
The part # on those metering rods should 16-389 if you look closely. They are .060/.069 on the step, vacuum pulls the piston down and the .069 step sits inside the main jet for cruise then when you accelerate and vacuum drops the springs on the bottom of the piston overcome the vacuum and lift the rod to the .060 part of the rod which allows more fuel to the main well for best power.
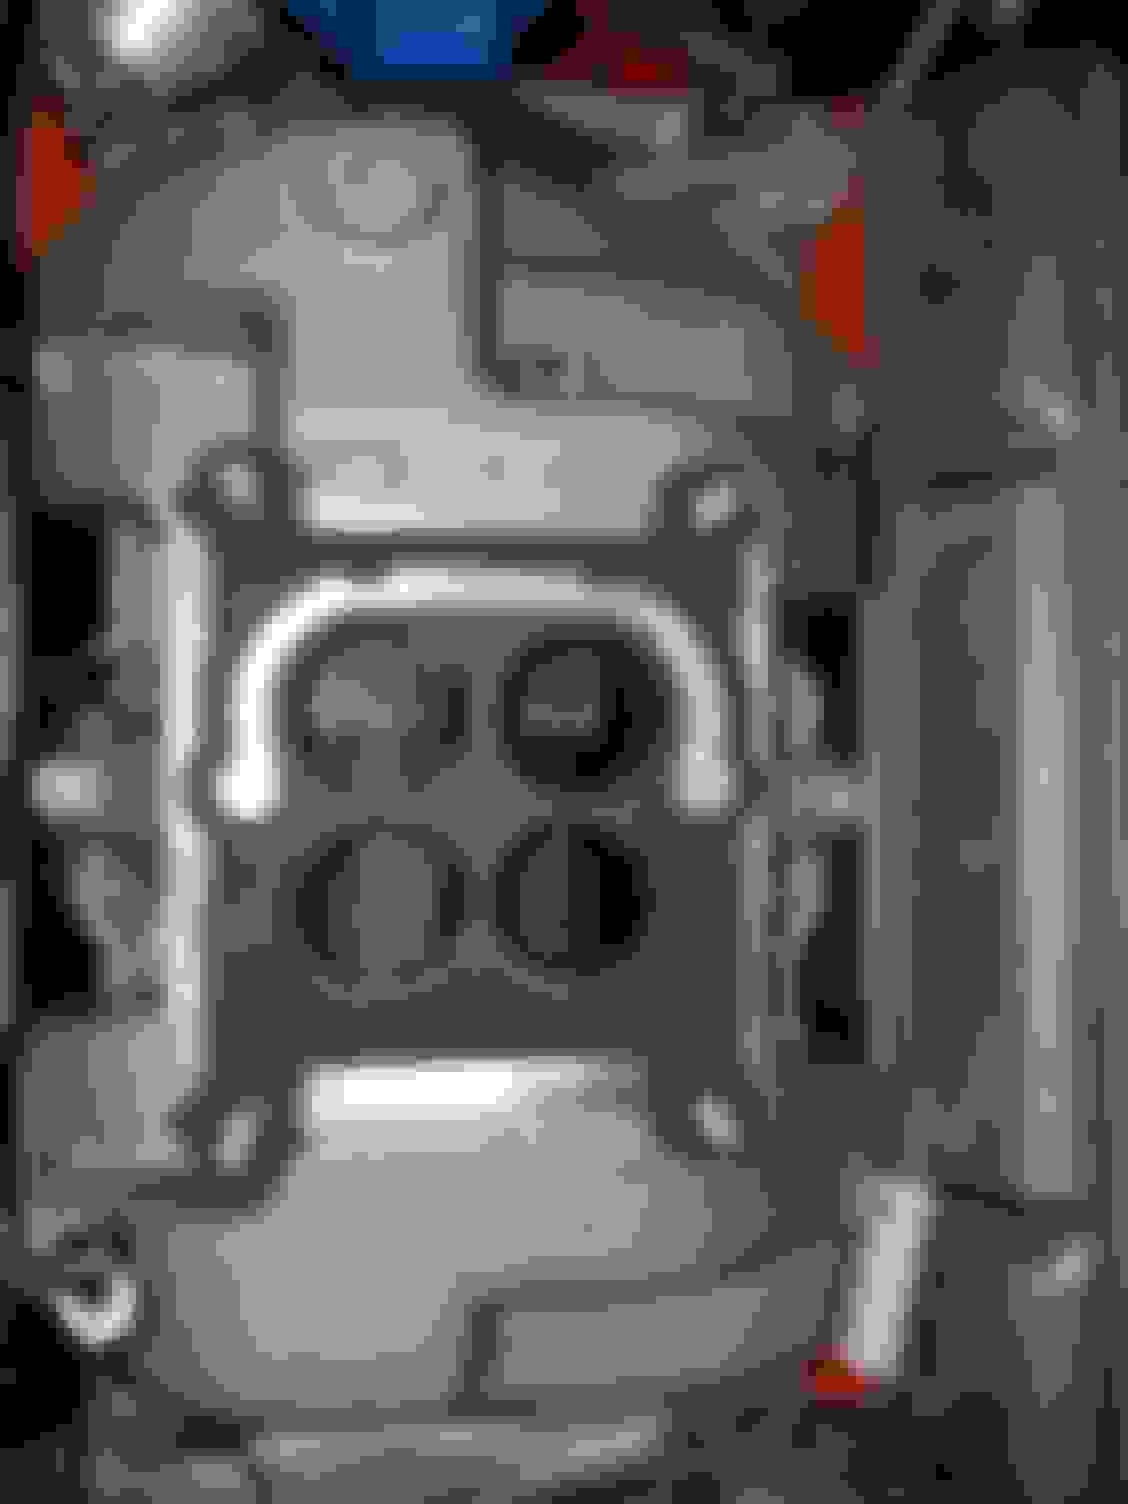
Looks good to me, the 340 engine only uses a gasket under the carburetor unlike the 300hp engine. In this heat you nay want to wire the heat riser open because the intake plenum will stay much cooler.
Just checked and both say 16-38. I don't see a "9" but maybe that wore down. Either way, it is going to run MUCH better and I can replace those without having to take the thing apart again. And as far as I can tell I don't have a lot of spare parts!
One last question to the forum (until I try to start it!). The gaskets seem a little off. I ordered the kit from Daytona Parts and have heard great things about them, so maybe it is my paranoia. The gaskets seem to close off the opening around the intake, all though both butterflies open fully. And the one on the carb seems to be REALLY thin on the part facing the firewall. Is this anything to worry about?
Looks quite nice, if all the linkage now works, the floats are set properly and correct parts on board it should be fine and good for many years. Put it on the car and have a fire extinguisher nearby when first starting with the new piece.
Some prefill the carb bowls for an easier start up - I never do....a few seconds of pumping will fill those bowls up handily...
I think the gasket is fine as is BTW. It doesn't look like your aluminum intake uses the U-shaped "hot slot" anyway so -- no bigee..
Last edited by Frankie the Fink; 07-09-2018 at 05:39 PM.
If Dr Finke says its ok, that's good enough for me. BTW, that Chem Dip takes stains off pretty much anything. I cleaned the intake with a rag and just dipped it, took all that crap right off. Didn't even need brake cleaner!!
Here we go, thanks again to all for all your help. I started at 8Pm last night and done at 5PM today. Granted I got excited and stayed up until 5AM, so it was a bit longer than a couple hours...but did it in less than 24 hours technically.
After 150-200 miles resnug the screws in the carb's top and also the 1/2" carb mounting bolts ... you'll prob get another 1/2 turn on all of those.... Don't go crazy - just snug...
Well that was interesting and short lived. I was so used to the engine always having a fuel shortage that I flooded it...and the battery died (its old for arizona). So now the waiting game. Incidentally the secondary seems to have flooded too, which I thought was odd. On the last try, a puff of fuel shot out of the carb. I have seen that before and was happy there was no fire this time.
Well that was interesting and short lived. I was so used to the engine always having a fuel shortage that I flooded it...and the battery died (its old for arizona). So now the waiting game. Incidentally, the secondary seems to have flooded too, which I thought was odd. On the last try, a puff of fuel shot out of the carb. I have seen that before and was happy there was no fire this time.
I think it has something to do with the gasket or something of that nature. The engine is flooding, but the secondary is covered in gas too and it leaks out of the back of the carb...exactly where I was curious about the very thin gasket. This is gonna be interesting now.
You have the wrong gasket, it should not have a hot slot. Also, if you installed the gasket like you show it in the pictures it's upside down, the hot slot goes toward the front of the carburetor.
Did you use the little gaskets under the needle and seats. The floats can bind up on the sides of the main body and cause flooding.
MO - the base gasket should work as is. I don't see a source for a leak there....
If there is a different one in the kit that would work you can try it. The gasket as shown on the intake manifold is wrong; in the pic with the carb it has the slot in front... You can call Ron or Tim at Daytona Parts this morning with your kit number and carb number and confirm the gasket to use and describe the problem -- those guys will bend over backwards to help you..
More than likely a float/needle valve issue. The floats must be precisely centered in the bowls on these Carters.
You can try rapping on the side of the carb with the plastic handle of a screwdriver and sometimes that will free a float - if that works you'll still have to fix the problem though.
You can remove the lid on the carb while its mounted on the car to look inside for a diagnosis...and you can actually see the fuel levels in the bowls.. They should look something like this.
Last edited by Frankie the Fink; 07-10-2018 at 06:40 AM.
 07-09-2018, 02:36 AM