When you click on links to various merchants on this site and make a purchase, this can result in this site earning a commission. Affiliate programs and affiliations include, but are not limited to, the eBay Partner Network.
Just realized I had a brain fart when I said above that there's no way to easily separate the front u-joint and driveshaft at the transmission yoke. I was apparently thinking of my Plymouth GTX that has a one-piece transmission yoke and I recently did a transmission rebuild and yoke replacement on it.
I guess you probably could just disconnect the driveshaft at the front yoke and tie it up and out of the way and pull the yoke out. I've always removed it to get it out of the way and because mine was restored with a new tube and cleared I try to preserve the finish from damage. Sorry for the bit of mis-information.
Dan,
You can disconnect at the rear then front u bolts then push the yoke into the transmission which will allow removal of the driveshaft first, just as Larry stated above.
Before removing the transmission you can slide the yoke off and plug to stop the oil leak.
Right - that is what I have done the 3 or 4 times I've had my transmission out. I just had a brain fart and was apparently thinking of my GTX's transmission yoke for some, probably caffeine-deprived reason.
I just don't know if it might work to unbolt it at the transmission, slide the yoke in and leave the driveshaft in and tie it up slightly below the height of the tailhousing. Then remove the yoke and bag or plug the rear. I don't leave the yoke in since it gets in the way when sliding the transmission back and maneuvering it down.
The rear crossmember won't let the drive shaft drop very far and it would have to rest below the tailhousing to be out of the way when sliding the transmission to the rear. On a 66 the center seat belt retainer cable and fittings prevent sliding it over very much - a 63 may be different in this regard. I've always removed the driveshaft completely to protect it and give me a bit more room to unbolt the shifter.
This is how I remove the rear u-joint straps on my car. I leave the transmission in neutral so I can rotate the shaft to get to all 4 bolts. When I did it on my 4-post lift I rolled the car forward and backward to rotate the shaft to get to the bolts.
Last edited by DansYellow66; 06-13-2019 at 12:32 PM.
I removed the distributor before dropping the engine down so the front shaft of the transmission would clear. I cut up plastic anti-freeze containers and taped them on the crossmember and onto the tunnel insulation. The transmission slipped over the plastic without gouging the crossmember paint or tearing the insulation.
Almost easier and cleaner to just pull the engine.
Agree with Mike. When the time comes, trans and bell housing can stay, just pull the engine. I�m pretty sure I could pull the engine minus trans in half the time of just pulling the trans.
If if you do pull the trans with engine in, letting the engine tilt back on the mounts helps with the jack knife action of the bell housing and trans, but watch that you don�t let the distributor smash into the firewall.
I am thinking of pulling the engine, I can borrow a hoist. I have pulled a few V6 and inline 6. Being a Fuelie I don't want to disturb any thing near the FI unit. Where are the points to attach the chain and pull it out? Exhaust manifold bolts back right, front left?
Use a combination of the four center exhaust manifold bolts. Which ones depends on whether or not remove the fan/water pump and/or the starter motor before you pull it. The engine will balance front/rear, nicely that way.
You can leave the FI intact on the engine without fear of damage if you use a cross bar with lifting chains on each end. When you go back in, leaving the motor mounts off the block let's the engine glide right in to place.
I have photos of this, not on this computer. I can get to them next week if you're interested.
Almost easier and cleaner to just pull the engine.
I agree. It is easier to not only to do the clutch but clean up the entire engine, trans, starter package of parts compartment and care for other problems. In the old ''race days'', we had the complete engine and trans out in 20 minutes. With myself and two men that all knew their job.
Here is one of the pictures I posted here. Just popped up on an old thread. You can see the engine dropping down, dead level and slightly off balance to the front which is held by the ratchet strap for final leveling.
You can also see the spreader bar to keep the hang chain off the valve covers and FI.
The exhaust manifolds are on in this pictures. I have pictures of how I attached the manifold bolts and hangers.
PS. Yeah, I know, my plenum flags aren't installed yet.
so trying to remove the shift linkage. There is a 9/16 bolt at the base of the shifter. Then 2 at the top? The base bolt is torqued down very tight and I don't want to round it off, very tight area to work. Is this the correct bolt to remove along with the 3 1/2 inch nuts on the end of the linkage? Plus the nuts at the top of the shifter? Is that it? Thanks!
Leave the trans and shifter alone, unless the trans needs to come out. Just support it with a jack stand or the floor jack. Leave it hooked to the bell housing as well.
Unbolt all but but two of the bell housing bolts, remove the fan and shroud, unhook the exhaust pipes at the manifolds.
remove wiring for starter, alternator, voltage reg, battery. Remove coolant hoses. Attach lifting chains and tension lift. Remove motor mount bolts. Remove last two bell housing bolts. Slide engine block ahead a few inches to clear bell housing and lift it up and out.
It really does sound easy. I am working on locating a hoist with a spreader.
Slide engine block ahead a few inches to clear bell housing and lift it up and out.
This is the point where not having the motor mounts on the block helps. With them off, just slide the engine straight forward, off the bell housing without raising the engine. When you go back in with the engine, you can go straight in to the bellhousing without being on an angle and makes mating the two easier.
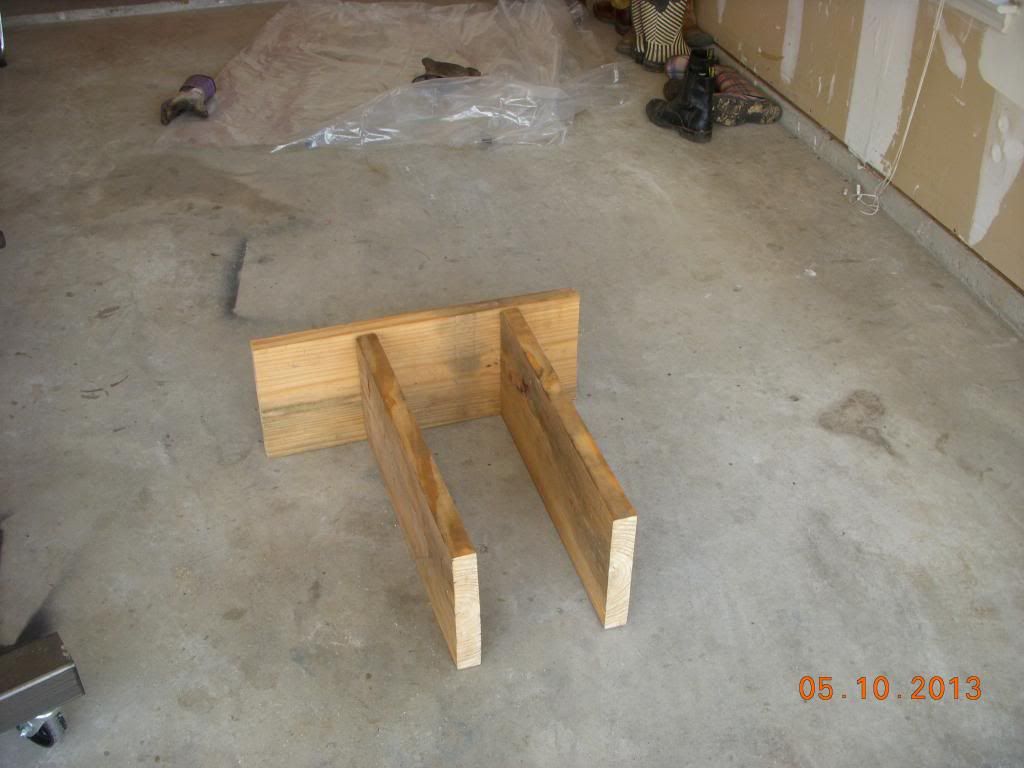
once the engine is out what is the best way to lower into a workable position? I see a cradle that straddles the sides of the oil pan. Is that the strongest point on the underside? I have a very beefy wood cart I used for a 911 engine. It's just flat to lay the 911 engine on. I could build some kind of cradle. I don't have an engine stand and probably not going to buy one. I've seen others lay the engine in an old tire. Seems the oils pans on these are flimsy and not a good idea to lay on the pan. Any suggestions or photos very appreciated. Thanks
I made several of these with a board across the bottom to mount casters. Then I bought a bunch of the metal ones. At the time, I gave $20/ea. for them.
I made several of these with a board across the bottom to mount casters. Then I bought a bunch of the metal ones. At the time, I gave $20/ea. for them.
Thanks Mike, after getting the shift linkage free, I went with plan A. Photos below, plenty of room to drop the bell housing.
 06-13-2019, 09:13 AM