When you click on links to various merchants on this site and make a purchase, this can result in this site earning a commission. Affiliate programs and affiliations include, but are not limited to, the eBay Partner Network.
Love it!! It's going to be awesome with personal touches. One of a kind and it'll be in your garage! After a full deep cleaning and personal touches / fixes it will be amazing and I can't wait to see the results!
I may have to come say HI when I'm in SA visiting family.
You know the old saying, “measure twice, cut once?”
How about measure 40 times, freak out, go in the house, have a drink, decide it can wait until tomorrow, drink some more, and when tomorrow comes, cut 20 times sneaking up on the dimensions. Seemed to work.
First, the wife had me power washing the patio this morning. Our friends Moose and Pat are coming over for Easter dinner tomorrow. It’s not what you’re thinking - Moose is Mary Sue who has gone by Moose since she was a kid. They have four boys who all got married within a year of each other about seven years ago. They now have 12 grandkids all under the age of 5! Whew. Pat is my ADHD friend who is missing the tips of several fingers from several different power tool accidents. I don’t let him borrow my tools. A few years ago I built a walnut bar top for the bar here in San Antonio. The old piece of quartz weighed about 200 pounds and I asked Pat to help me carry it outside. I lifted my side up, but Pat was struggling. I finally said, “just pick it up.” To which he replied, “I would if I had any damn fingers!” Since then I never forget to be extremely careful around power tools. He always tries to clarify that the only enemy is the cursed radial arm saw. He’s still not borrowing any of my tools. He still manages to shoot a good game of pool which is what we will be doing while drinking and celebrating Easter.
Anyway, I didn’t realize Moose and Pat warranted a clean patio. That delayed me about 3 hours, but I got one side done!
On projects like this, I always start on the passenger side. That way if I screw up I don’t see it every time I get in the car.
Walnut bar top in case you were wondering. Sucked it up and made the first cuts. I had visions of only using a compact hack saw and manually cutting for precise control. Yeah, it quickly got tossed and the saber saw was used. I cut the top out first given even using the laser it was very hard to judge parallel lines as they wrapped around the compound curves of the nose. That allowed me to set the bucket in place, mark the lines on the inside of the nose, and use the saw on the outside while observing the blade following the line on the inside. Sounds strange, but it worked well. I will say, having a lift is a huge help! And it’s a perfect fit! I still need some fine tuning, but this side is good! I’ll cut the other on Monday pending hangover status. Yay!
They now have 12 grandkids all under the age of 5!
I gotta say I would be a wreck trying to make that cut and not mess it up. And the starting too small and slowly getting closer has to be the best way to go. Nice work!
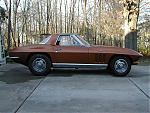
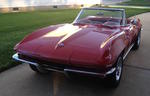
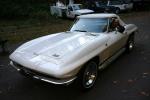
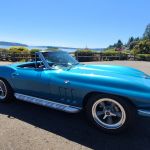
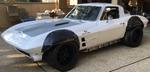
I'm not usually a fan of different style wheels on a C2, (for no reason other than I just like the stock look), but I have to say, those are pretty nice looking, don't think I've ever seen those before. Car looks great..!!
You know the old saying, “measure twice, cut once?”
On projects like this, I always start on the passenger side. That way if I screw up I don’t see it every time I get in the car. Sucked it up and made the first cuts. I had visions of only using a compact hack saw and manually cutting for precise control. Yeah, it quickly got tossed and the saber saw was used. And it’s a perfect fit! I still need some fine tuning, but this side is good! I’ll cut the other on Monday pending hangover status. Yay!
Come on Mark was there ever any doubt? Great work! Passenger side down. Driver side next up. Happy Easter. To be continued.........
Nice work. Our wive’s may be related as mine was stressing over the patio because my in-laws were coming. Even though she knows they won’t go out there.
Found some time this morning, so I cut out the driver side headlight opening. Bought these 1/8” fiberglass epoxy sheets on Amazon. I held them in place and traced the outline of the opening from the inside. They fit snuggly in place. Tomorrow I’ll epoxy them into the sides of the nose headlight openings. They not only make a great mounting point for the headlight buckets, they also stiffen up the nose significantly. Then I can install the buckets.
Since I like to give the epoxy about 24 hours to really cure, I got going early.
Got out the hot glue gun to temporarily bond these carpenter wedges onto my side pieces. I’ve used West since the mid-70’s, so it is my go to for just about everything. 5 pumps of each mixed well and then about an equal part high density filler mixed really well This creates an epoxy that is about the consistency of peanut butter (smooth, not chunky). When this stuff cures, it is rock hard and almost impossible to sand. These side pieces will be the strongest bonds on the car. Using the wedges allows me to move my cross brace around until the pressure and position is perfect. I gobbed on a bunch of epoxy, positioned the side pieces, and then used a small mixing stick to reach in blind and attempt to press the epoxy to the side piece while creating a filet to bond the pieces together. Not my most beautiful work, but effective and no one will ever see it. Same thing on the driver side. Slow hardener gives me a good 30 minutes to work. So, I was able to do all 4 pieces with one batch.
Mark,
Ain't no moss growing under your feet!! Something told me you'd attack this new project with verve. Kinda feel a bit sorry for Fat Boy...set aside for a while.
Well, at least you've got enough to keep you off the streets...at least for a little bit. Keep up the, usual, great work
Mark,
Ain't no moss growing under your feet!! Something told me you'd attack this new project with verve. Kinda feel a bit sorry for Fat Boy...set aside for a while.
Well, at least you've got enough to keep you off the streets...at least for a little bit. Keep up the, usual, great work
Fat Boy is in NY and we are heading up there for the summer in about a month. I’m looking forward to devoting a big chunk of my time to Fat Boy this summer. I finished the long list of wifey projects (at least the ones I know of) and hope to finish the body work. I’m trying to get three projects finished on BaTmobile before we go: headlights, paint touch up/front ppf, and tail light fix/sequentials.
Originally Posted by Dad's '66 427
Dang...... totally digging your 'work bench'........ is this the house with the garage right off the kitchen???
Man, you make quick work, and you are well on your way....... keep the photos coming!!!!
Shh! The wife was at the gym so I stole a piece of her kitchen counter. Funny how that works, the garage is mine and the kitchen is hers. I rarely violate her space (when she’s home) and she constantly violates mine.
I figured she was out test driving Grenadiers, while you where mixing stinky epoxy........
I am totally digging what you are doing...... one of my favorite 'movie cars' when I was younger was the King of The Hill Corvette....... follow that script and you don't need to worry about the paint....... heck don't even need a hood, or a back window!?!?!?!?!?!?
The other was the '68 Camaro from Aloha Bobby and Rose........
I guess I was exposed to flares at a young age....... might have something to do with my development.........
Well as I've aged my eyes aren't quite what they used to be. Mark from what I can see in the pictures it doesn't look like there is any paint damage. So it should allow the stripe project prep to be a bit easier. I know you have some road rash to deal with but at least it doesn't look like you made any additional work for yourself. You have an ambitious list to complete before coming up north. Based on current progress it's looking very doable.
Well as I've aged my eyes aren't quite what they used to be. Mark from what I can see in the pictures it doesn't look like there is any paint damage. So it should allow the stripe project prep to be a bit easier. I know you have some road rash to deal with but at least it doesn't look like you made any additional work for yourself. You have an ambitious list to complete before coming up north. Based on current progress it's looking very doable.
There are some chips where the paint flaked off.
This is the worst of it, but it will be an easy fix given it will be covered with ppf. Every green piece of tape is chip, bubble, or scratch. There are an equal number on the other side.
"Every green piece of tape is chip, bubble, or scratch. There are an equal number on the other side."
What's the plan for the chips, bubbles, and scratches? Touch up and finesse? You don't want to get into blending with a spray gun at this point do you?



















 Come on Mark was there ever any doubt? Great work! Passenger side down. Driver side next up. Happy Easter. To be continued.........