
Rookie's first attempt at a restoration...
 11-20-2007, 11:03 AM
#81
Safety Car

Thread Starter
Thanks for all the nice replies. When ever I am feeling down I come to this thread and it makes me feel good again. Unfortunately, the repaired right frame rail didn't turn out as good as I expected it to turn out...but it is still better than what it used to look like (a huge dent).
 11-20-2007, 01:26 PM
#82
Safety Car
Thread Starter
I discovered last night that the shock mounts on the frame are somewhat different. One of the shock mounts opens to the front of the frame while the other shock mount opens to the rear of the frame...I guess GM decided they could save some money by not having to produce two different mounts (one for each side of the car). They just flipped it around and welded it onto the other side. Anything to save money. Here is a thread I found regarding what I am talking about. I don't think it will matter though.
http://forums.corvetteforum.com/show...e+shock+mounts
http://forums.corvetteforum.com/show...e+shock+mounts

 What they said, and stop calling yourself a rookie ! Your no longer a rookie when you can accomplish what you showed us.
  11-20-2007, 08:14 PM
#84
Drifting

Member Since: Apr 2007
Location: Springfield Illinois
Posts: 1,892
Likes: 0
Received 3 Likes
on
3 Posts

Yeah, I noticed that too when I had to cut out my original shocks out. I, too, think they just tried to save money. It didn't really bother me becuase no one will ever had a clue. When I had already cut the right side out and moved onto the left, I didn't notice it until I was almost done.
11-21-2007, 01:00 AM
#85
Safety Car
Thread Starter
Alright, I made plans with my friend to take the frame to the powdercoaters tomorrow. Damn I'm excited to get this thing out of the garage and off of my shoulders!
11-21-2007, 10:52 AM
#87
Safety Car
Thread Starter
sly vette, that is exactly why I didn't want to use too much yellow. I have a picture from a forum member (sorry, I forgot his name) which I am using as a guide. I liked the way his chassis looked and thought to myself - why overdue it with the yellow just because? This forum member had painted his engine yellow and his calipers yellow, and used silver for his differential/half shafts, driveshaft - it looks very nice. As of right now, only the calipers are yellow. I'll put everything together and then decide if I need to coat some more stuff yellow.
11-21-2007, 08:32 PM
#88
Safety Car
Thread Starter
My friend just picked up the frame - its finally out of the garage! Tomorrow it gets taken to the powdercoaters, I'll post pics when it comes back.
11-22-2007, 03:30 PM
#89
Team Owner

Member Since: Sep 2006
Location: Westminster Maryland
Posts: 30,173
Likes: 0
Received 2,878 Likes
on
2,515 Posts

You said you were glad to get it "off your shoulders". I know just what you mean. Any progress feels sooooo good.
Regards,
Alan
Regards,
Alan
11-23-2007, 12:36 PM
#91
Safety Car
Thread Starter
I initially decided I was going to use por15 for all of my parts, but my first experience with it wasn't so great. I followed every direction. Degreased with marine clean, sandblasted the metal, wore rubber gloves to prevent skin contact with the clean metal, prepped with metal ready, applied coats when slightly tacky...and after two days of drying time I gave up on it and went with powdercoat (best decision i have ever made). But it isn't going to waste...i'll use it on my floor pans. I did another test piece yesterday and will let it dry again for a few days and see what the results are like...it is probably because calgary barely has any humidity in the air and the more humid, the faster it dries (according to the can). I need to paint some parts which cannot be powdercoated because the oven ruins these parts...so I'll use it on the energy absorbers and other things that can't go in the oven. Hopefully it works...or I just pissed away about 250 in materials. Now the waiting game
11-25-2007, 10:52 AM
#92
Safety Car
Thread Starter
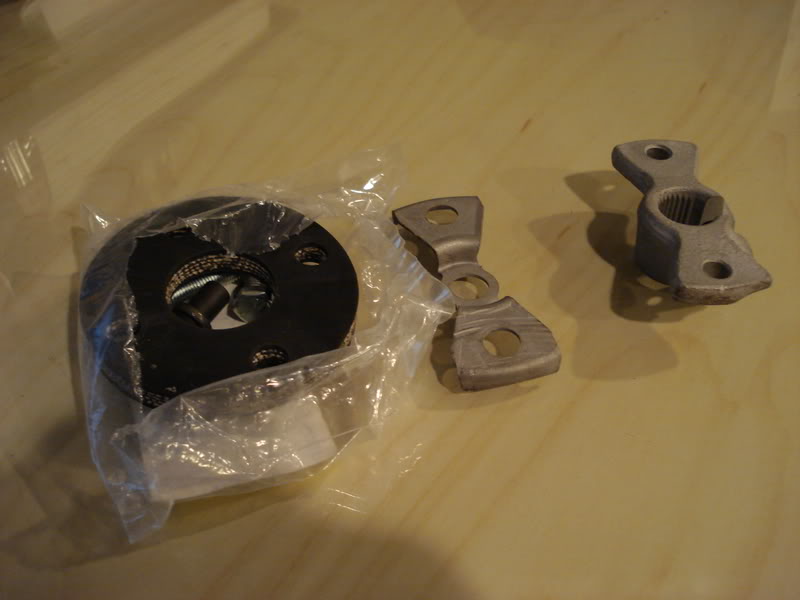
Ahhh crap, made a mistake on the rag joint yesterday. I was cutting off the old shoulder bolts with the grinder and then my hand slipped...grinding away lots of the metal from the part in the middle of the picture below. I really don't want to replace the entire rag joint...I've already bought the rebuild kit. Does anyone know if you can buy the part in the middle of the picture separately from a vendor? Please post. Thanks.
11-26-2007, 11:23 AM
#95
Safety Car
Thread Starter
My eastwood powdercoat gun broke yesterday...I've only used it probably 7 times and haven't dropped it once. I've taken great care of it as well - I bought it on September 6 off of their ebay store. I guess I got to call cutomer service.
11-26-2007, 05:47 PM
#96
Safety Car
Hey Jeremy,
Would you consider starting a "Part Two" thread when you start to re-assemble? This one is getting pretty long!!!
Thanks, and keep up the good work!!!
Mark
Would you consider starting a "Part Two" thread when you start to re-assemble? This one is getting pretty long!!!
Thanks, and keep up the good work!!!
Mark
11-26-2007, 07:12 PM
#97
Safety Car
Thread Starter
No problem...I'll start a new thread when I get my frame back from the powdercoaters. The second attempt with using por15 went awesome...the piece is hard as a rock now. I applied way thinner coats and waited longer between coats...like a day because we have very low humidity here in Calgary. The instructions said to keep it in the fridge after opening the can to prolong the use of the stuff - one day my fridge froze over. I thought the por15 was ruined and was going to throw it away...until I tried a test sample. Worked like a champ!
11-27-2007, 03:04 PM
#98
Safety Car
Thread Starter
I just called Angela at Eastwood regarding my powdercoat gun...she's sending me a new one asap! Talk about customer service, I highly recommend eastwood and I will be dealing with them a lot more in the future. All I have to do is send the broken one back to them when I receive my new one and I'm all set. I love it when companies actually care about their customers...makes life so much easier.
 11-27-2007, 05:48 PM
#100
Burning Brakes

Stinger12,
Just finished reading all these threads for the 1st time. I usually hang in the C2 section buy I'm always interested in what's happening in the C3 section.
What caught my eye was where your from, Calgary. So I thought I'd check out what a fellow Albertan was up to. I must say very impressive and way ahead of your time for your age, even your dialogue indicates as such.
When I was 18 I got my 1st Vette and wanted to restore it too. But the same problem-My Dad wouldn't let me use the single garage we had. Fast forward 30 years.... I know have my own garage, my son is 18 and we just finished restoring my/his 65 StingRay. Owned it for 30 years and finally got to do a frame off resto.
Your doing so well on your project but like anybody we run into difficulties that try our time and patience... it took me almost a week to set the bearing run-out and index the rotors using the method GTR99described. Just like yours, mine came in at .0015-.0022. So was it worth it like you said-You Bet It Was.
If you don't mind I thought I'd post a couple of pics of our resto here in Edmonton to help motivate and spur you along. It won't be long now till the fun begins once you get the frame back from powdercoating.
Here's a pic of the frame and my son loaded in the back of the Dodge on the way to the powdercoater.
[IMG]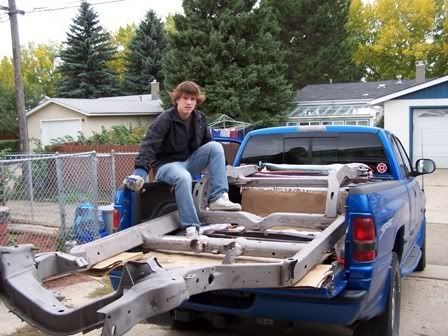 [/IMG]
Here it is just after.
[IMG]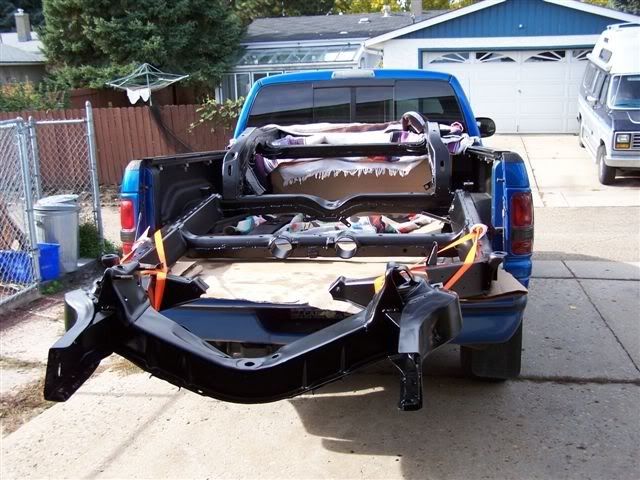 [/IMG]
And a few more to help with motivation.
[IMG]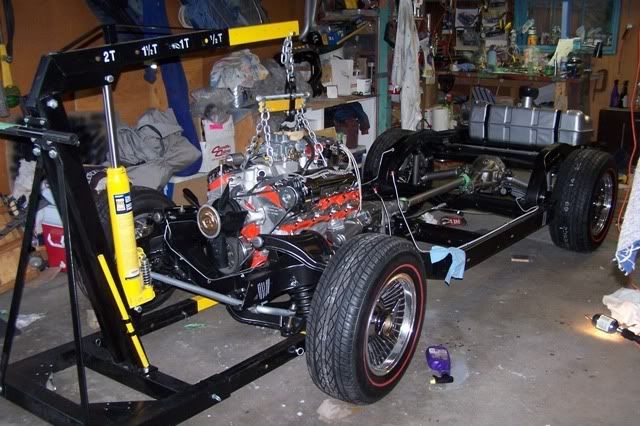 [/IMG]
[IMG]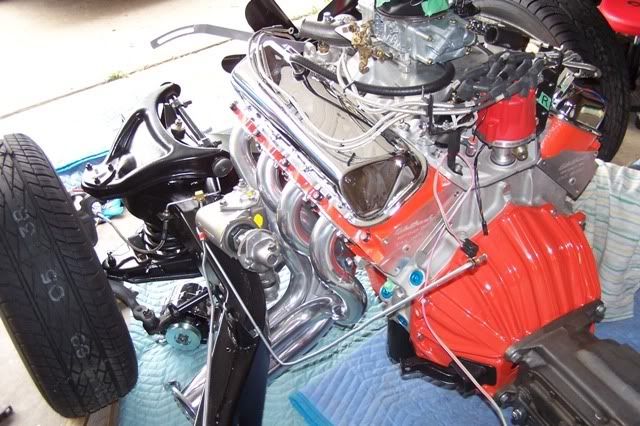 [/IMG]
[IMG]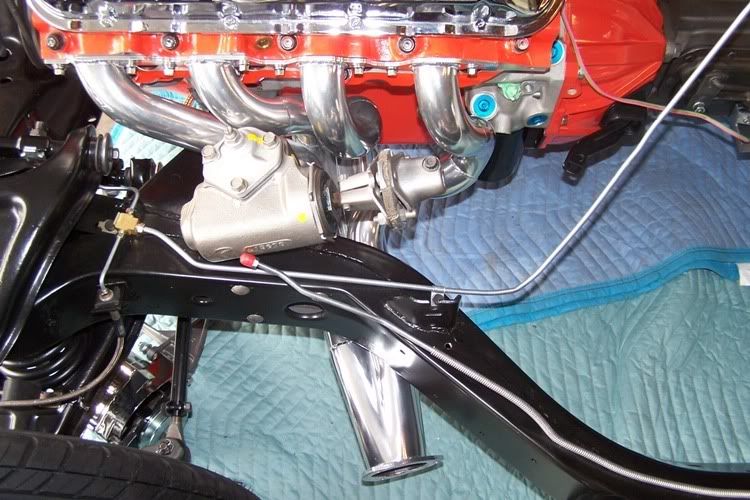 [/IMG]
[IMG]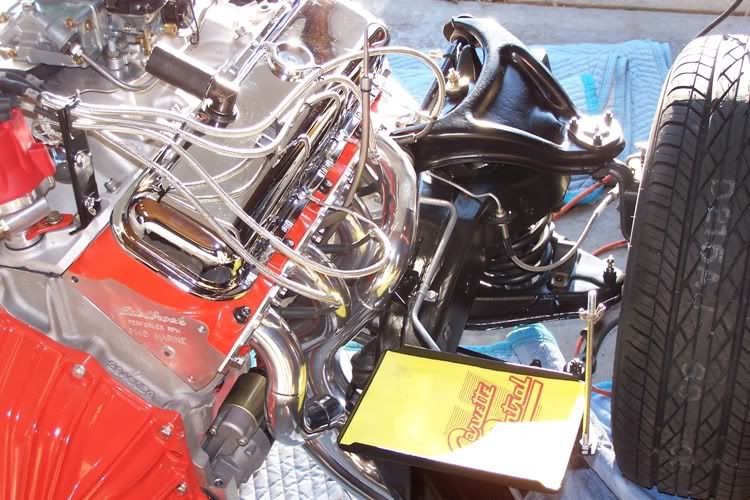 [/IMG]
[IMG]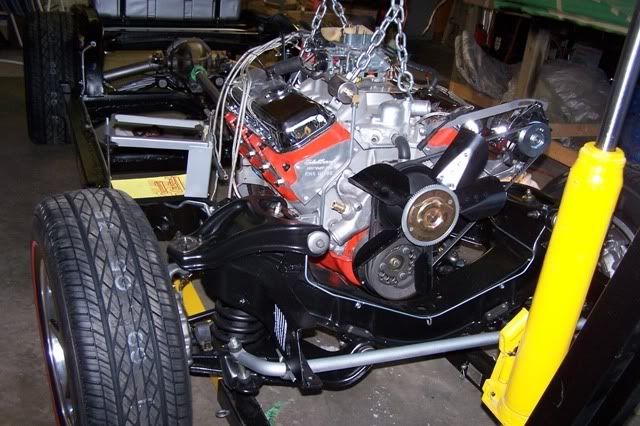 [/IMG]
[IMG] [/IMG]
Hope these help to get the juices flowing. I bet your Dad is very proud of you and rightfully so.
Good Luck, Great Work and keep everyone posted.
From just up the road,
Regards,
65-StingRay
'go flames go' just kidding!!!
Just finished reading all these threads for the 1st time. I usually hang in the C2 section buy I'm always interested in what's happening in the C3 section.
What caught my eye was where your from, Calgary. So I thought I'd check out what a fellow Albertan was up to. I must say very impressive and way ahead of your time for your age, even your dialogue indicates as such.
When I was 18 I got my 1st Vette and wanted to restore it too. But the same problem-My Dad wouldn't let me use the single garage we had. Fast forward 30 years.... I know have my own garage, my son is 18 and we just finished restoring my/his 65 StingRay. Owned it for 30 years and finally got to do a frame off resto.
Your doing so well on your project but like anybody we run into difficulties that try our time and patience... it took me almost a week to set the bearing run-out and index the rotors using the method GTR99described. Just like yours, mine came in at .0015-.0022. So was it worth it like you said-You Bet It Was.
If you don't mind I thought I'd post a couple of pics of our resto here in Edmonton to help motivate and spur you along. It won't be long now till the fun begins once you get the frame back from powdercoating.
Here's a pic of the frame and my son loaded in the back of the Dodge on the way to the powdercoater.
[IMG]
[/IMG]Here it is just after.
[IMG]
[/IMG]And a few more to help with motivation.
[IMG]
[/IMG][IMG]
[/IMG][IMG]
[/IMG][IMG]
[/IMG][IMG]
[/IMG][IMG]
[/IMG]Hope these help to get the juices flowing. I bet your Dad is very proud of you and rightfully so.
Good Luck, Great Work and keep everyone posted.
From just up the road,
Regards,
65-StingRay
'go flames go' just kidding!!!