Rookie's first attempt at a restoration...
 10-06-2009, 05:40 PM
#1001
Burning Brakes


 10-09-2009, 10:30 PM
#1002
Safety Car

Thread Starter
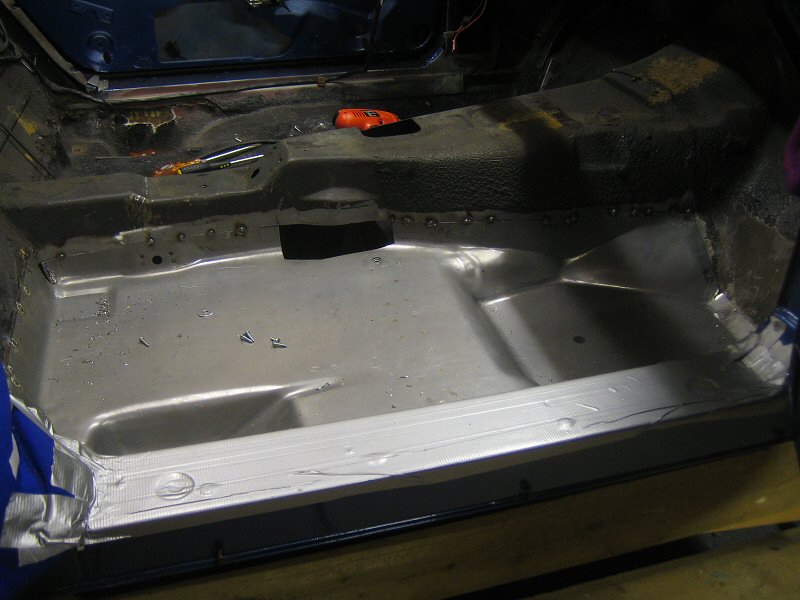
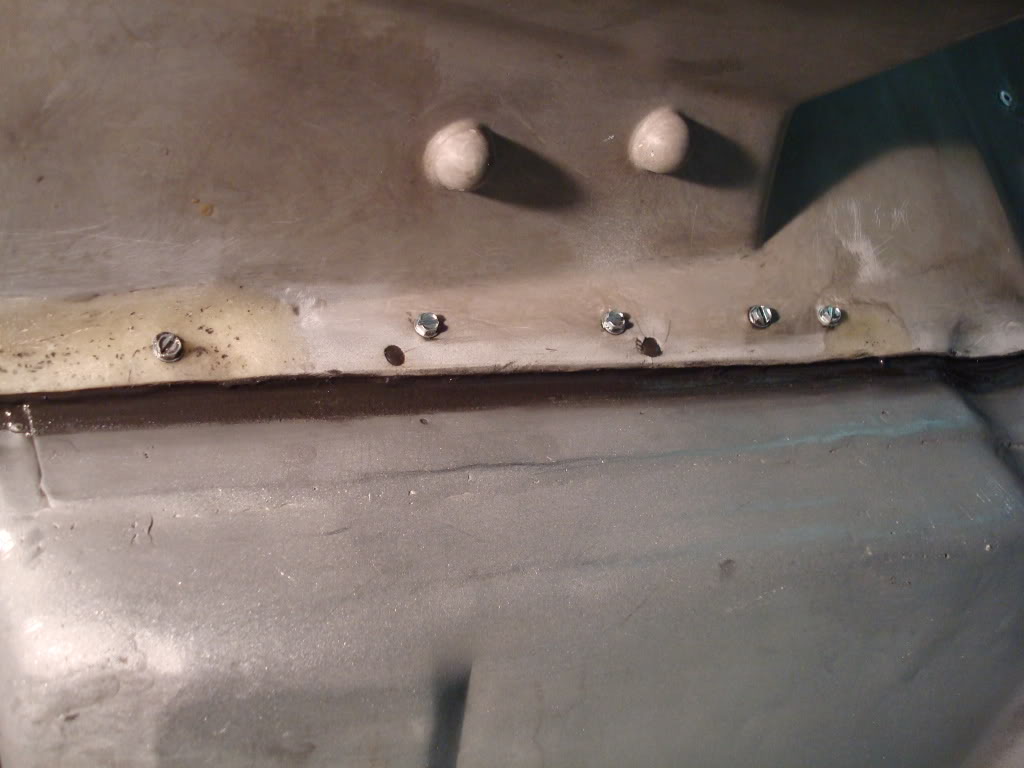
Finished bonding the floor pan to the bottom of the rear tub. This job was very tedious, and required a ton of prep...I never want to do this again! Ever tried fiberglassing upside down Tomorrow I will drill the holes out for the new rivets, and pop them in. Then I will be done with it.
Next project is the #4 body mounts (fiberglassing) and installing the cover reinforcements on them. I'm extremly close to finishing the underbody - less than a month before I get to install the body!
Tomorrow I will drill the holes out for the new rivets, and pop them in. Then I will be done with it.Next project is the #4 body mounts (fiberglassing) and installing the cover reinforcements on them. I'm extremly close to finishing the underbody - less than a month before I get to install the body!
10-10-2009, 03:16 AM
#1003
Safety Car
Thread Starter
I can't decide whether or not I should undercoat my underbody. I'll definitely undercoat just above the tires to prevent spider cracks. The bottom of the vette is spotless now - not one spot is uncleaned. You could eat off of it. I want to keep it that way.
Suggestions on a paint color to go with (if I decide to paint it)?
Suggestions on a paint color to go with (if I decide to paint it)?
10-10-2009, 10:23 AM
#1004
Burning Brakes
Member Since: Nov 2006
Posts: 947
Likes: 0
Received 29 Likes
on
10 Posts
2022 C3 of the Year Finalist - Modified

I just paint the underbody & the wheels house after I clean up with silk black paint but will spry some pitch like (I don't no the name for this black staff in English) on the wheels house after I install all the reinforcement brackets that I took out from the body to restore/galvanize them.
Avner
Avner
10-10-2009, 05:24 PM
#1005
Drifting

Back in the day, when we wanted a painted surface to be durable, we shot it in Dupont Imron. It's a sprayed paint, but is just short of powder coating in terms of strength. I'm not even sure you can still buy it. The stuff is toxic as hell.
10-14-2009, 09:07 PM
#1006
Safety Car
Thread Starter
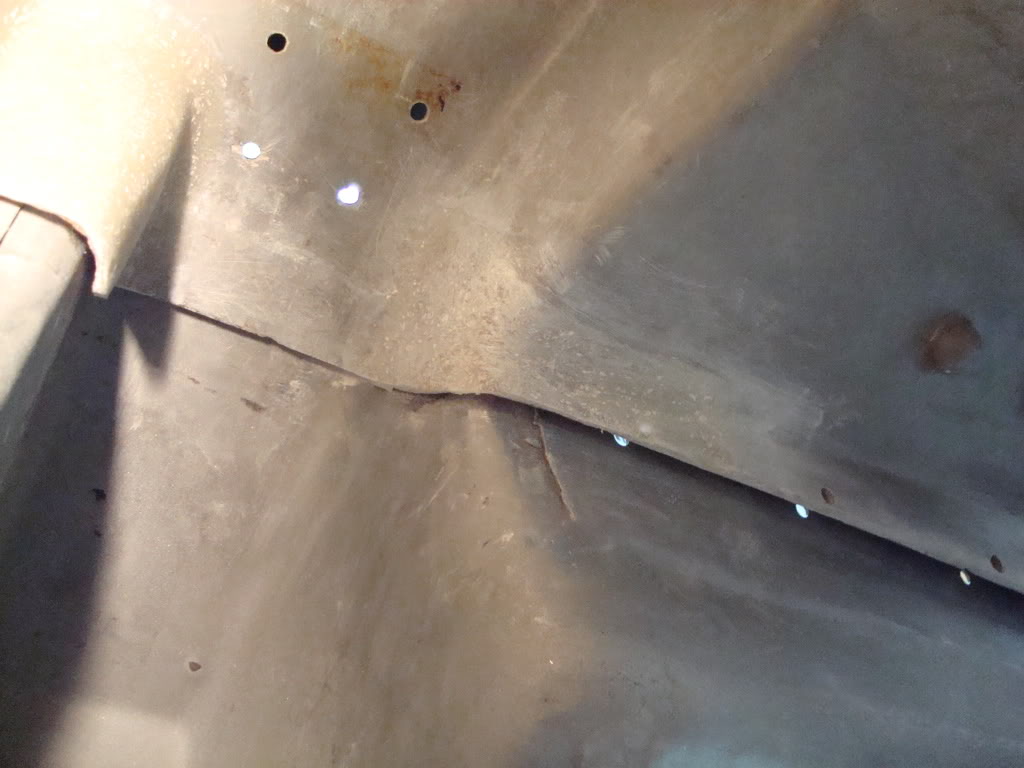
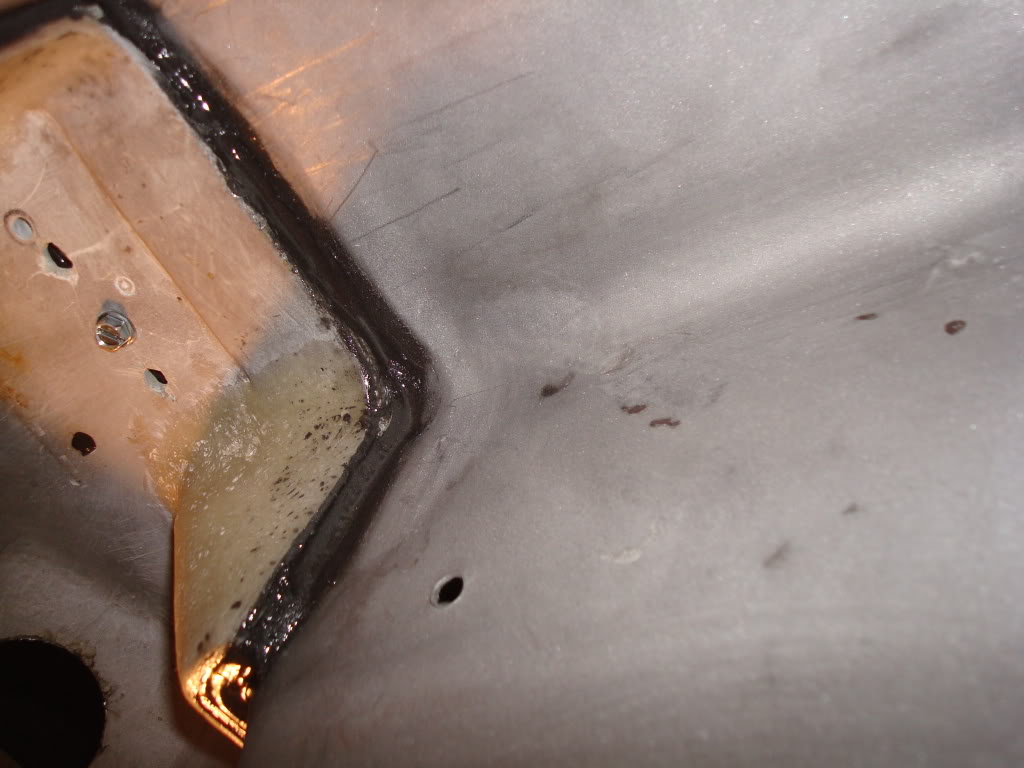
I finished the floor pan to rear tub bonding/rivetting. I countersunk the screws holes (the ones which were used as clamps during bonding) and packed them full of marinetex and sanded them smooth. Everything is getting a coat of undercoating once finished. If this were the outside of the body, then I would have glassed those holes shut...but this is the underbody. This bonding adhesive is insanely strong...I still can't believe how good the stuff is.
Next I finished sandblasting the pillars (the areas getting covered by the access covers). I masked them off, and gave them a coat of krylon rust tough enamel. Just these two areas are getting spray painted - the rest of the car is getting sprayed with my new paint gun and some high end primer.
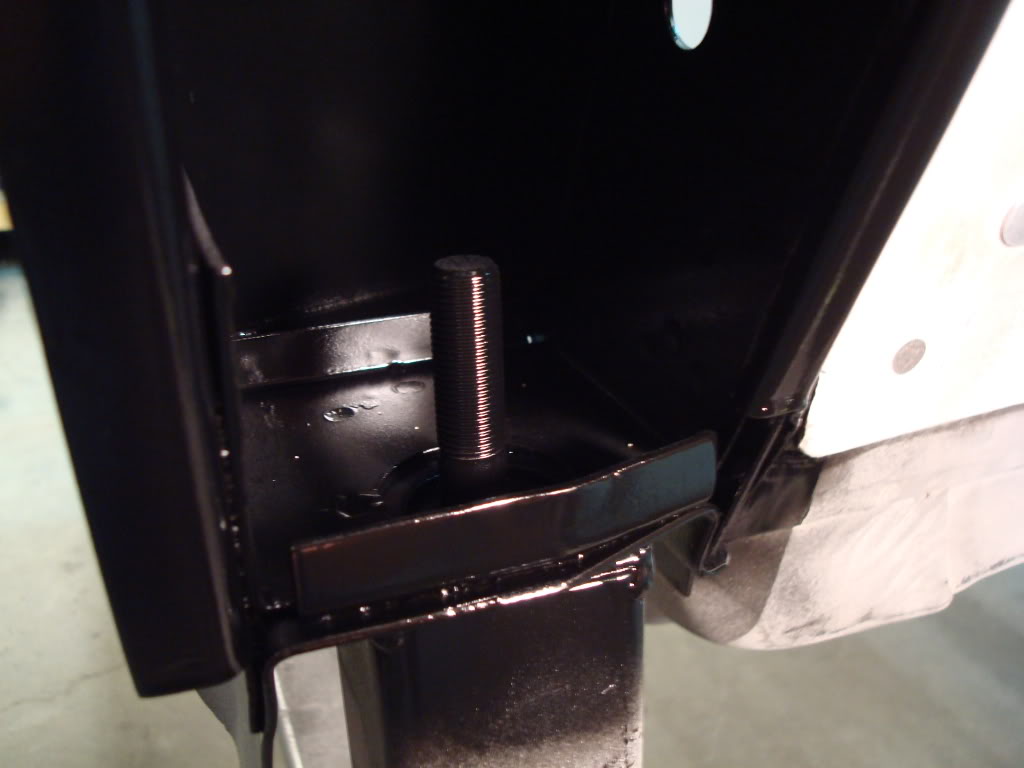
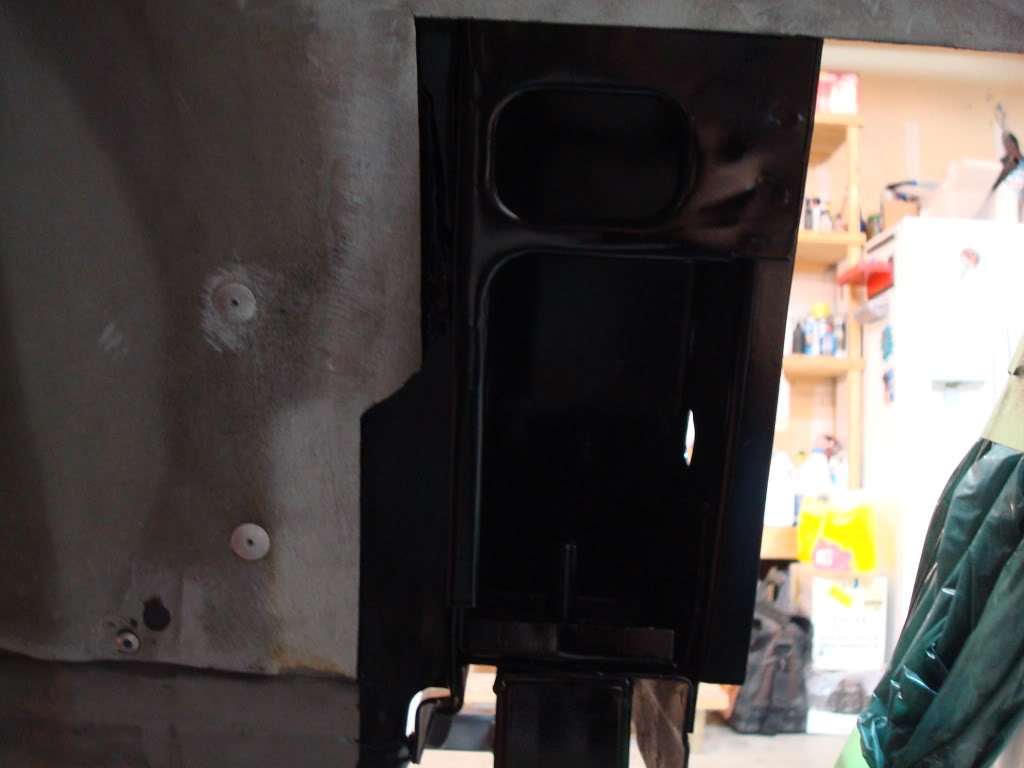
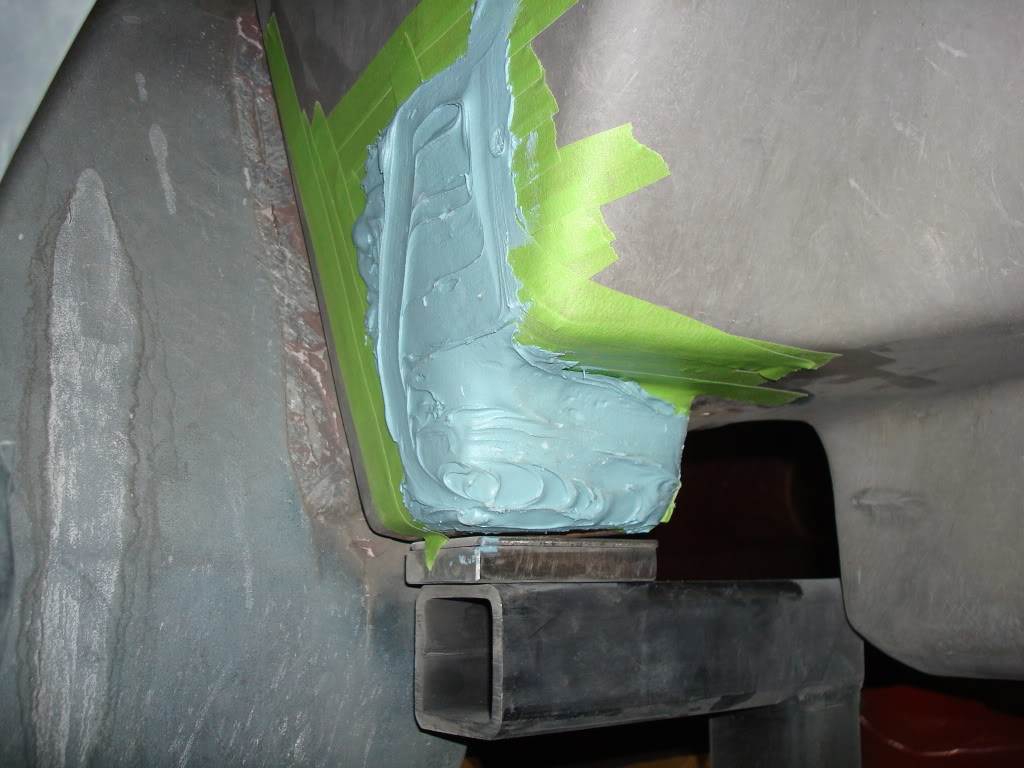
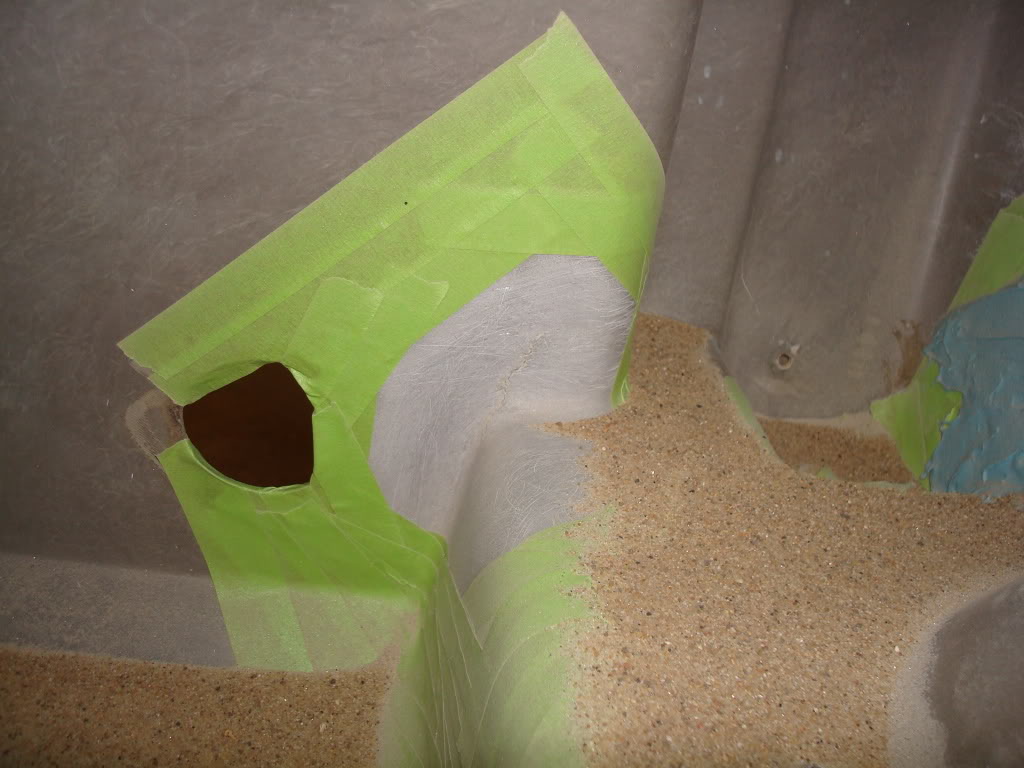
Then I started to prep some cracks for fiberglass repairs. I also masked off the inside of the #4 mount, and applied bondo on the backside...a trick that works awesome!
I still have a ton of work to do before I get to reunite the body/frame. Once again, I am beat/extremely exhausted.
Next I finished sandblasting the pillars (the areas getting covered by the access covers). I masked them off, and gave them a coat of krylon rust tough enamel. Just these two areas are getting spray painted - the rest of the car is getting sprayed with my new paint gun and some high end primer.
Then I started to prep some cracks for fiberglass repairs. I also masked off the inside of the #4 mount, and applied bondo on the backside...a trick that works awesome!
I still have a ton of work to do before I get to reunite the body/frame. Once again, I am beat/extremely exhausted.
10-15-2009, 12:38 PM
#1007
Safety Car
Thread Starter
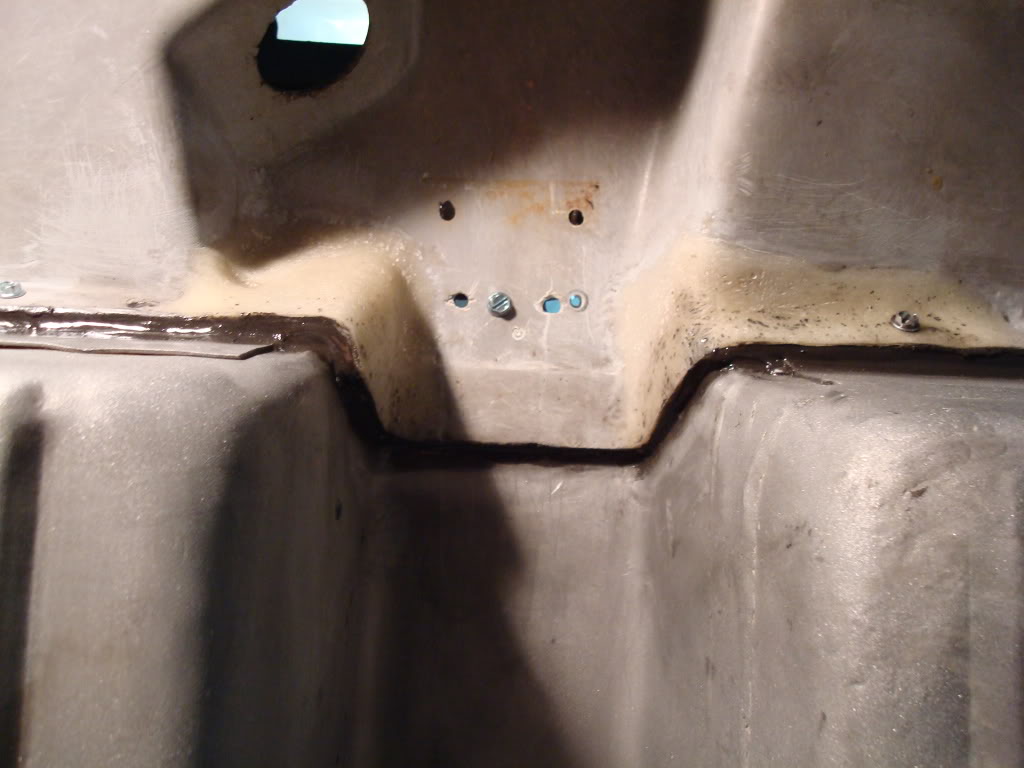
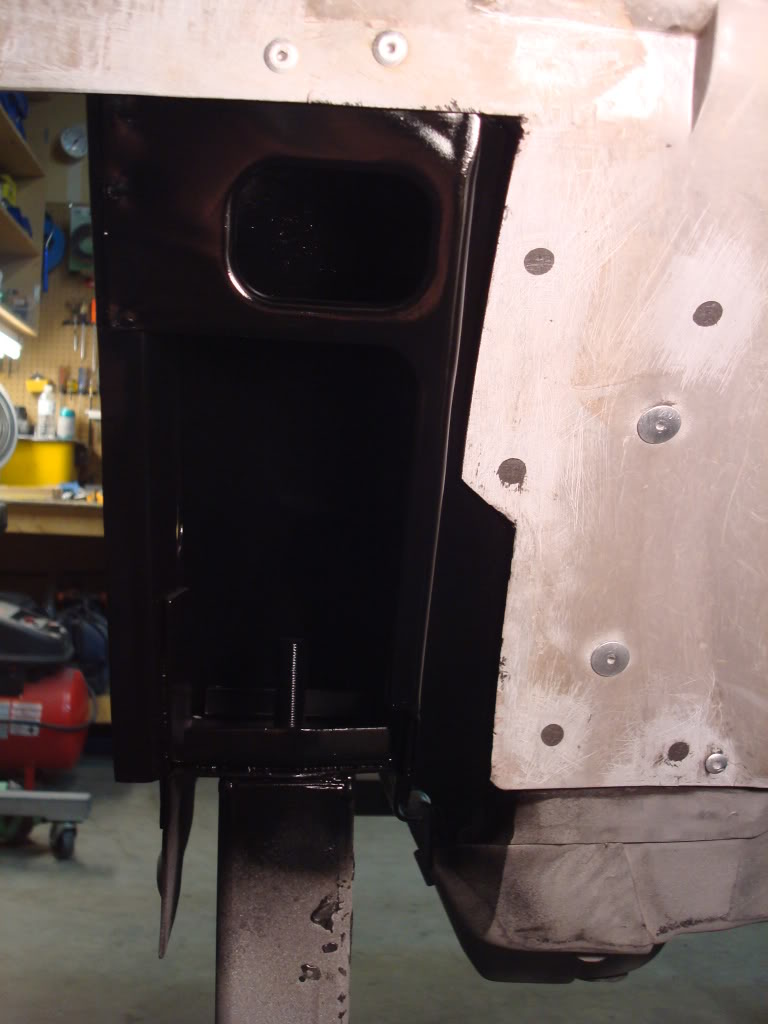
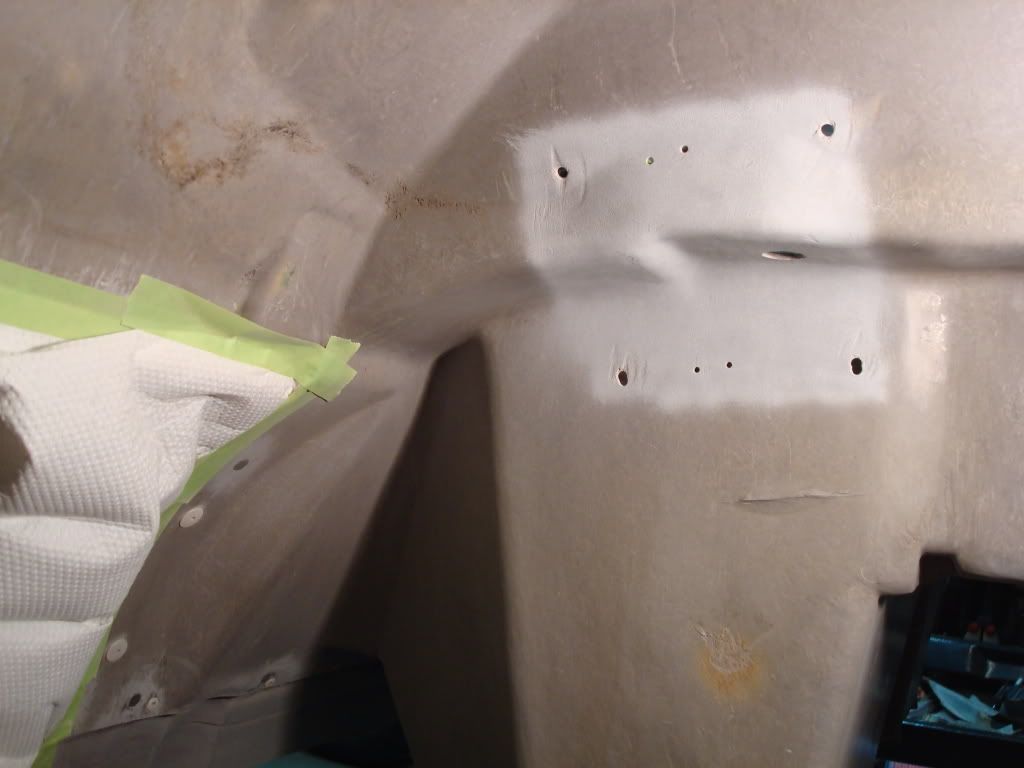
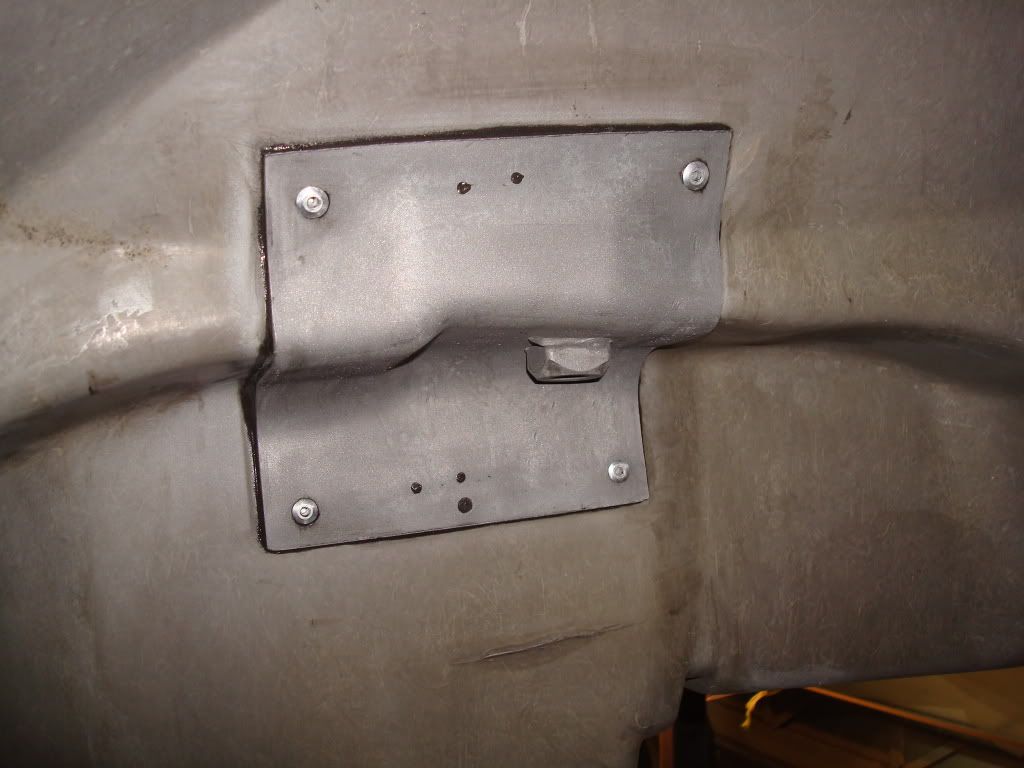
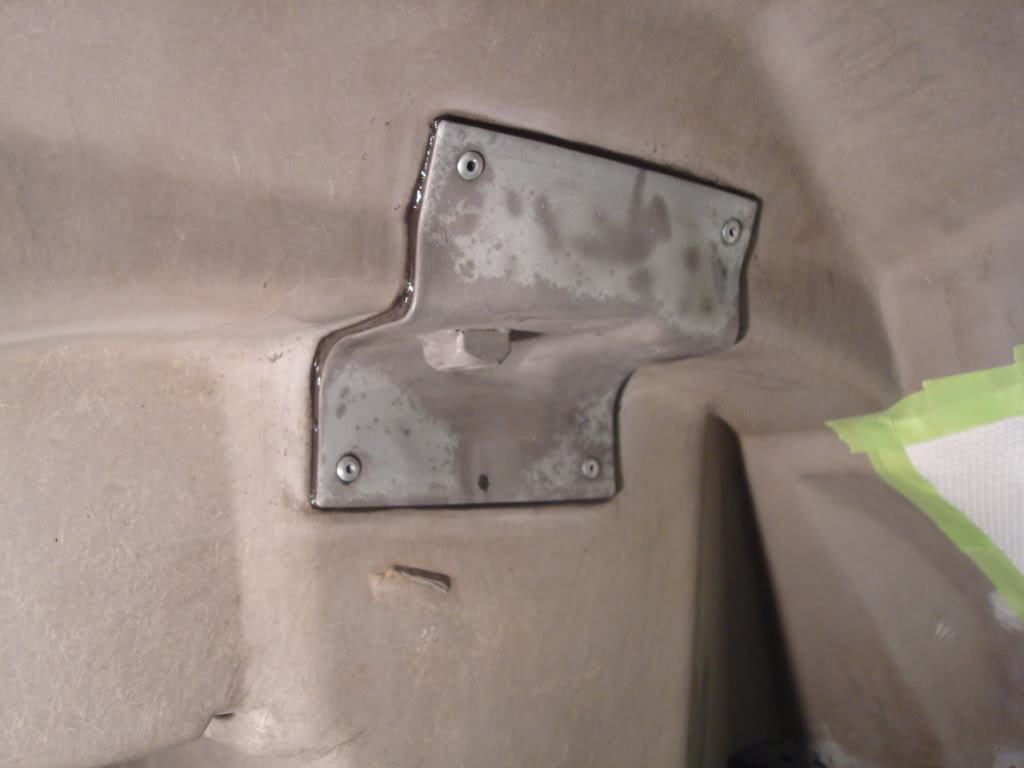
These pieces were still in good shape (seatbelt reinforcements). Water usually collects behind them and then they rust out. I sandblasted both sides (looks a little funny...there is still some original plating on them, which is some pretty tough stuff), then applied a ton of bonding adhesive on the backside. I pressed it tight against the fiberglass until it oozed out and sealed it to the tub. No water will be able to get to it now. I sandblasted the fiberglass before I bonded the reinforcements in place.
 10-19-2009, 05:35 AM
#1009
Safety Car
Thread Starter
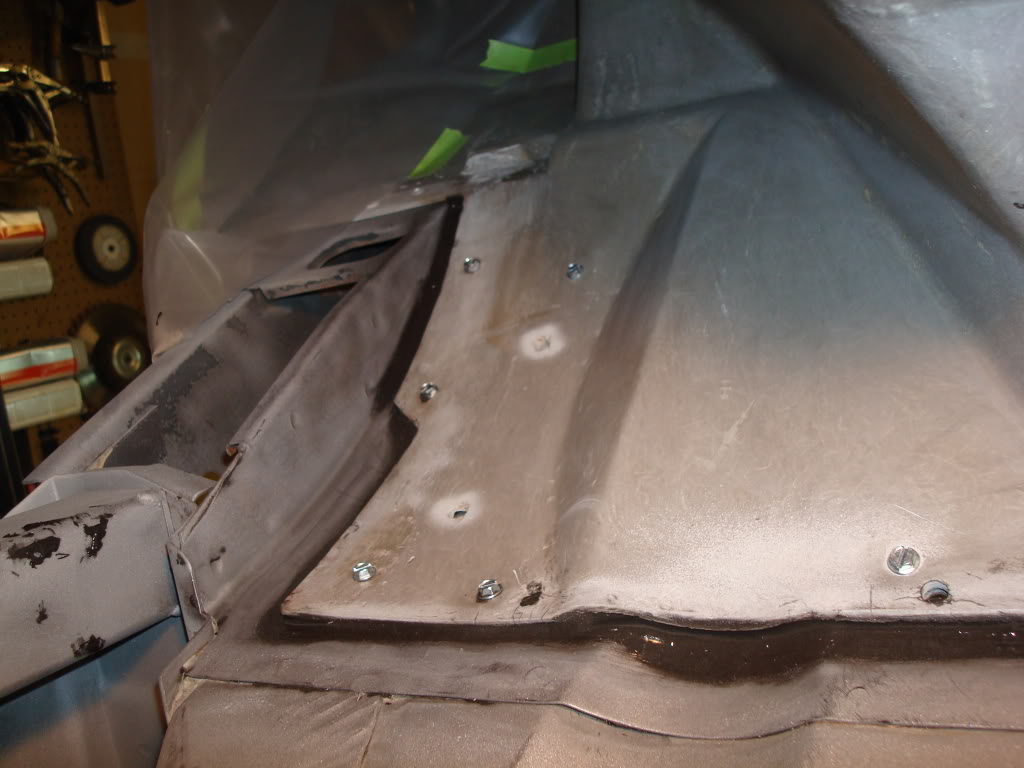
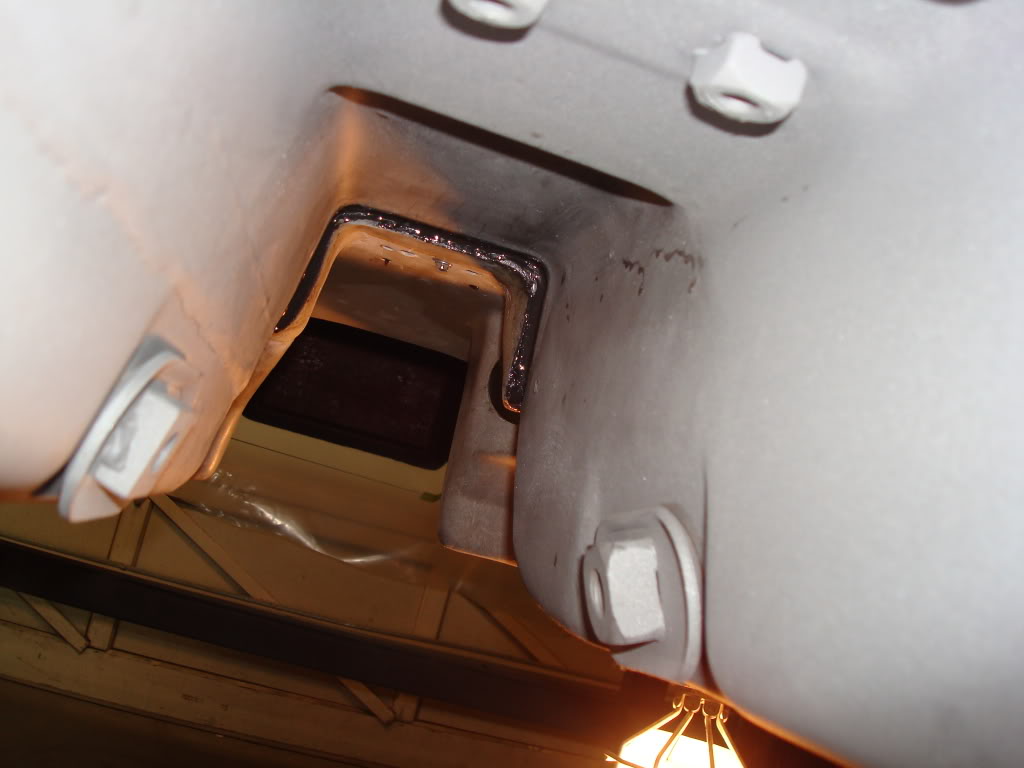
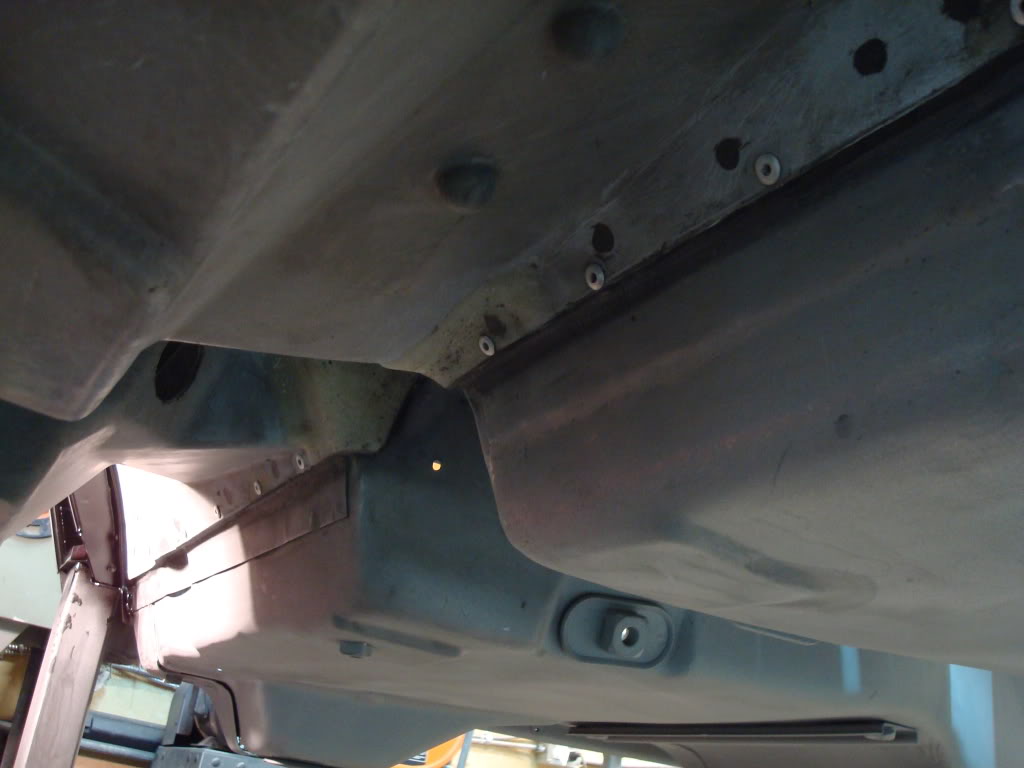
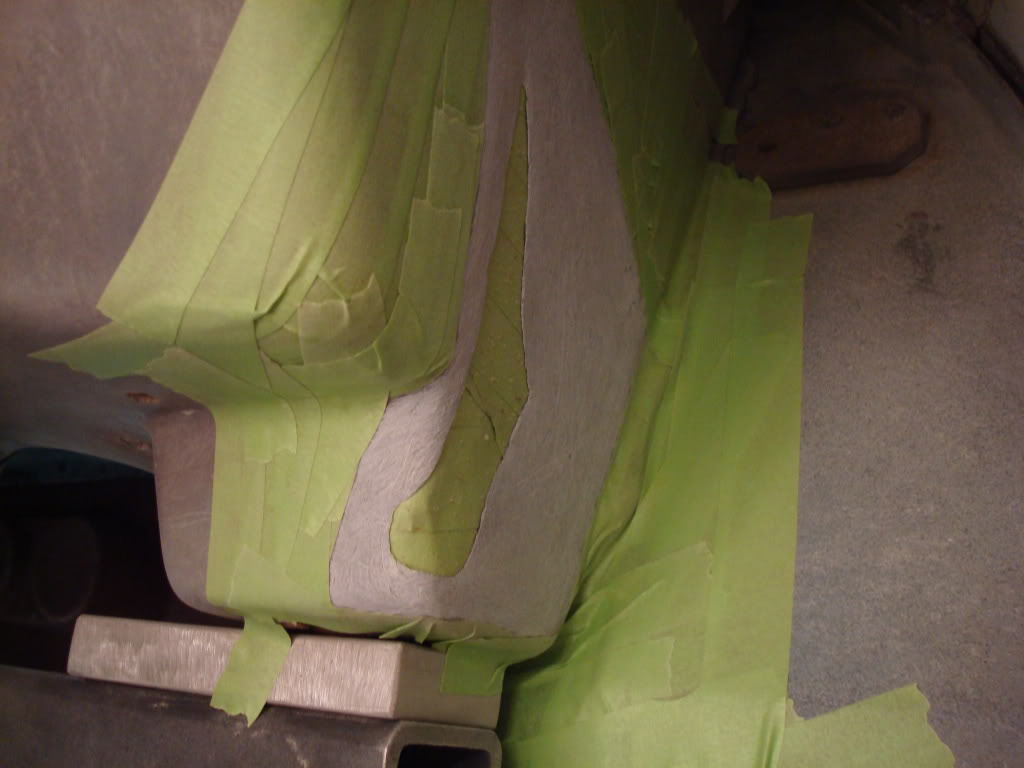
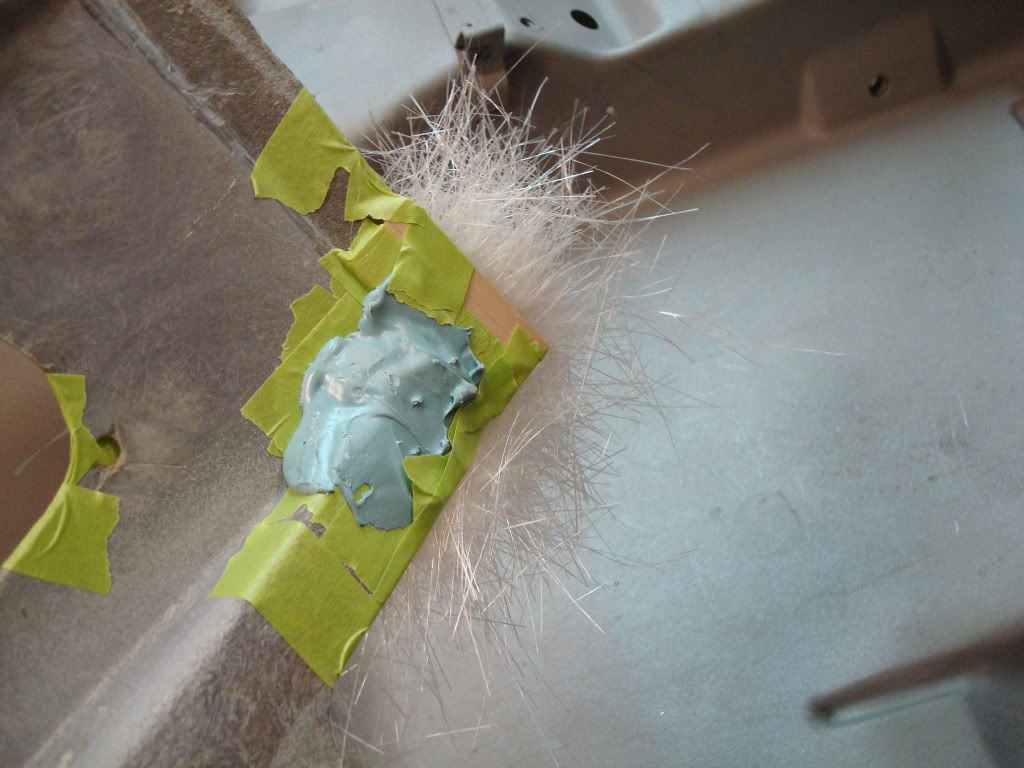
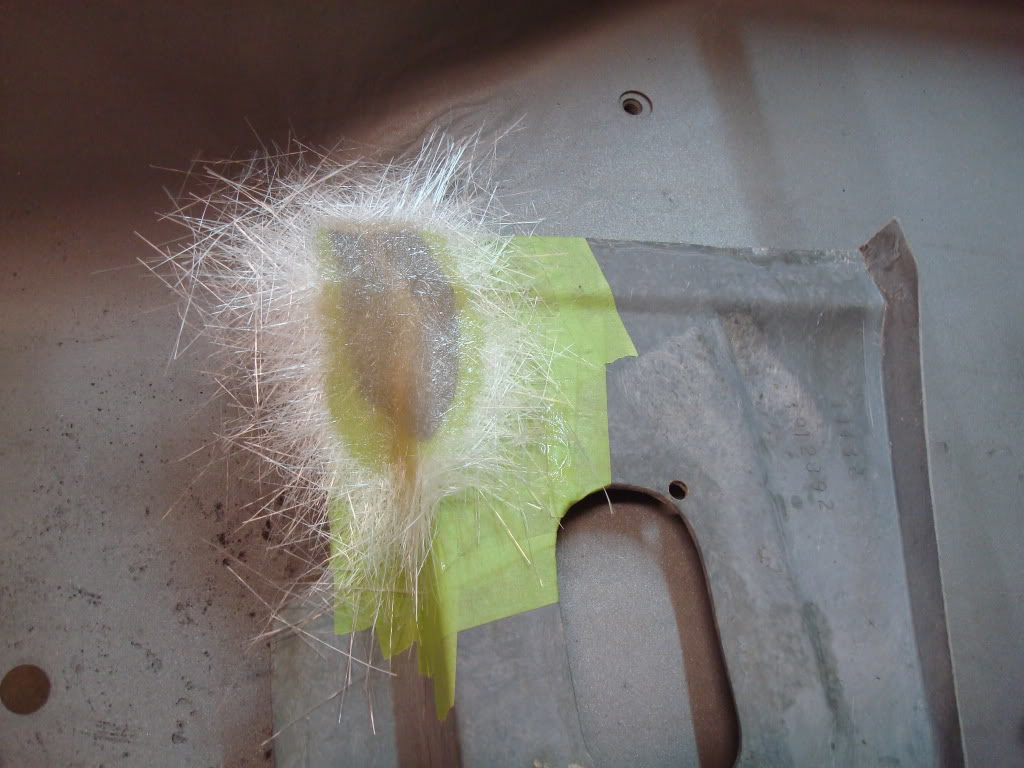
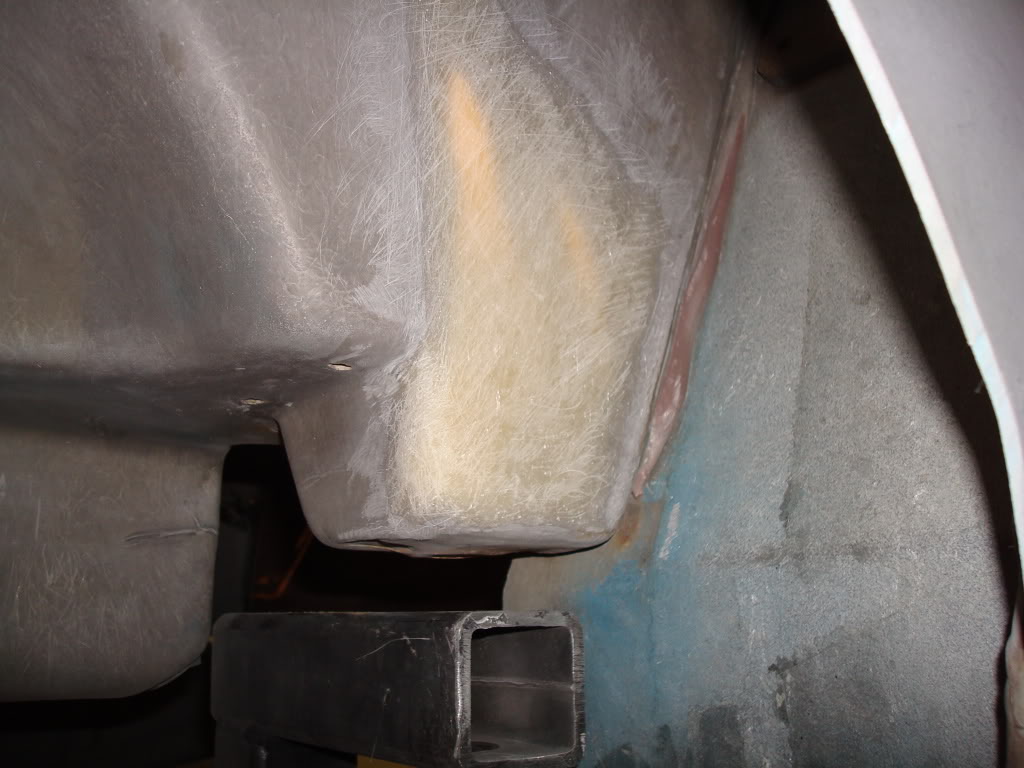
I sandblasted these two areas on each B-pillar. This is where the access cover butts up against, and GM never bonded them there. I am going overkill on everything - I never want to do this again.
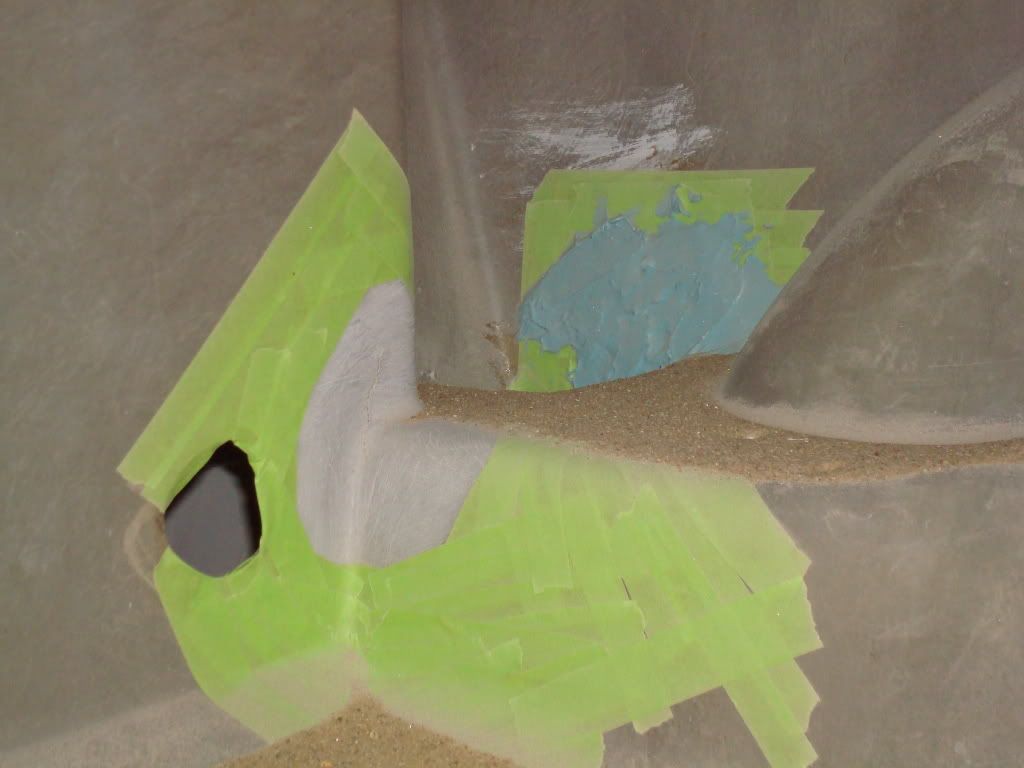
Next I prepped one of the access panels for fiberglass repairs. I stripped the panel of all the crap and crud last night.
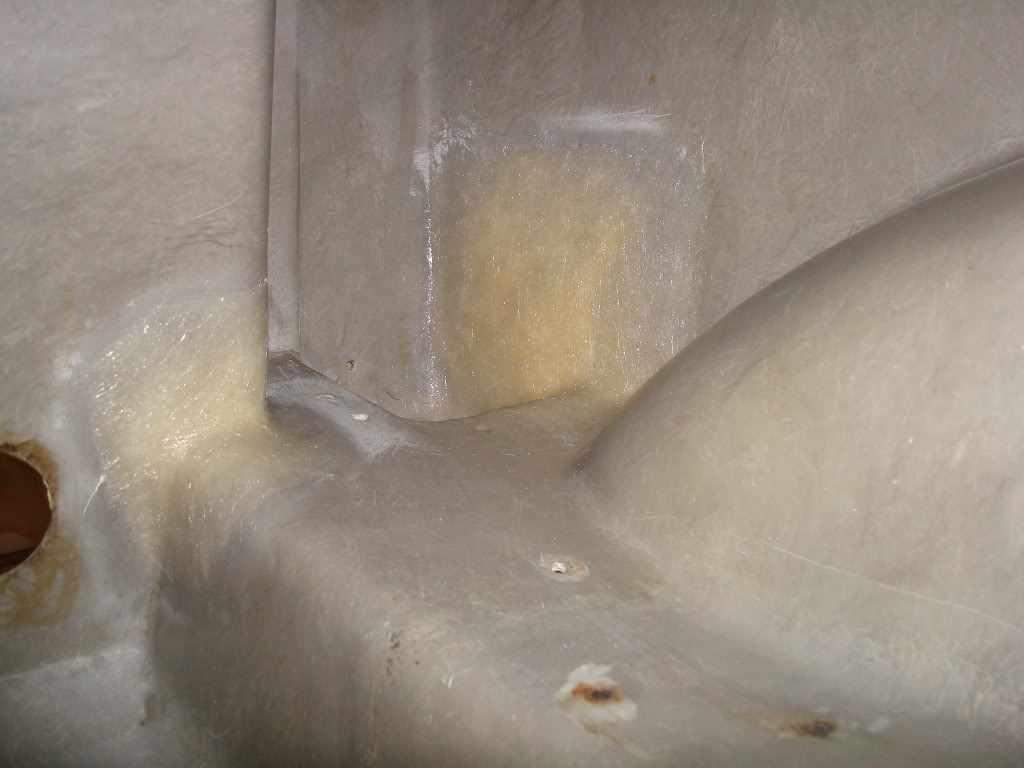
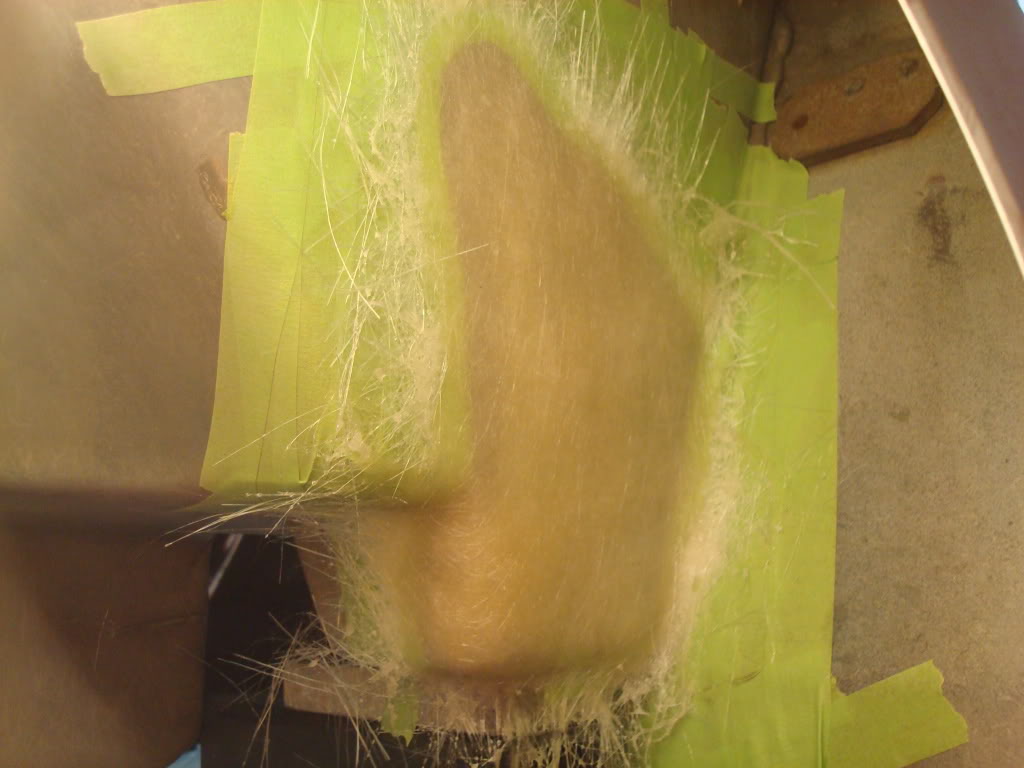
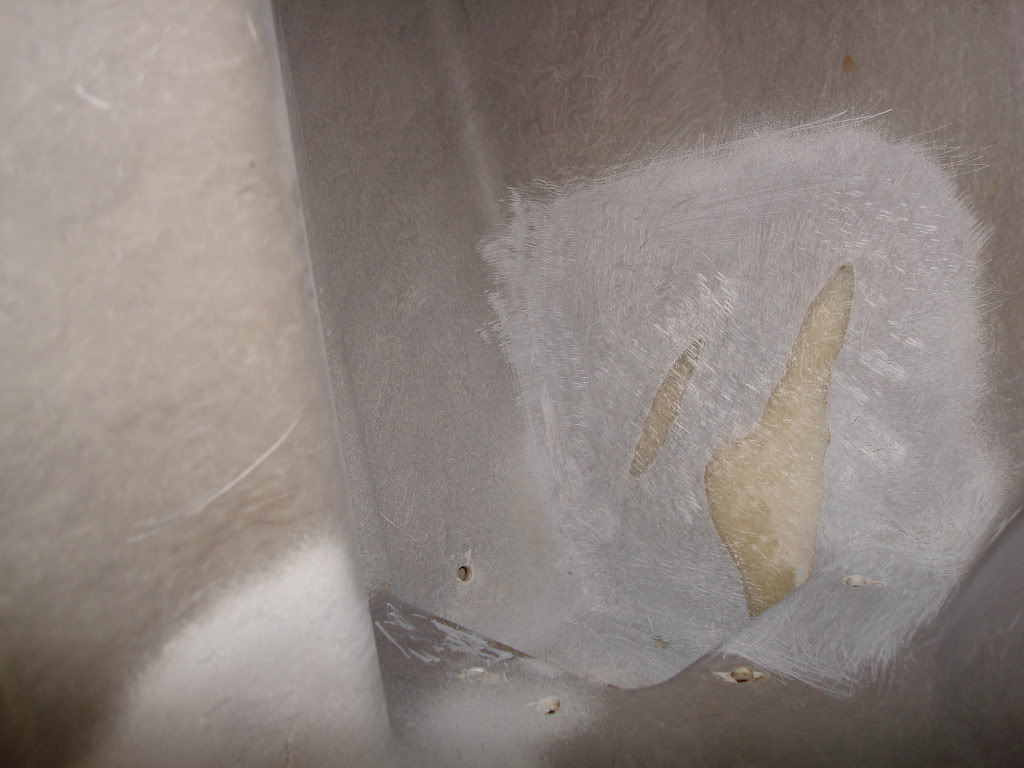
Here is the repair...
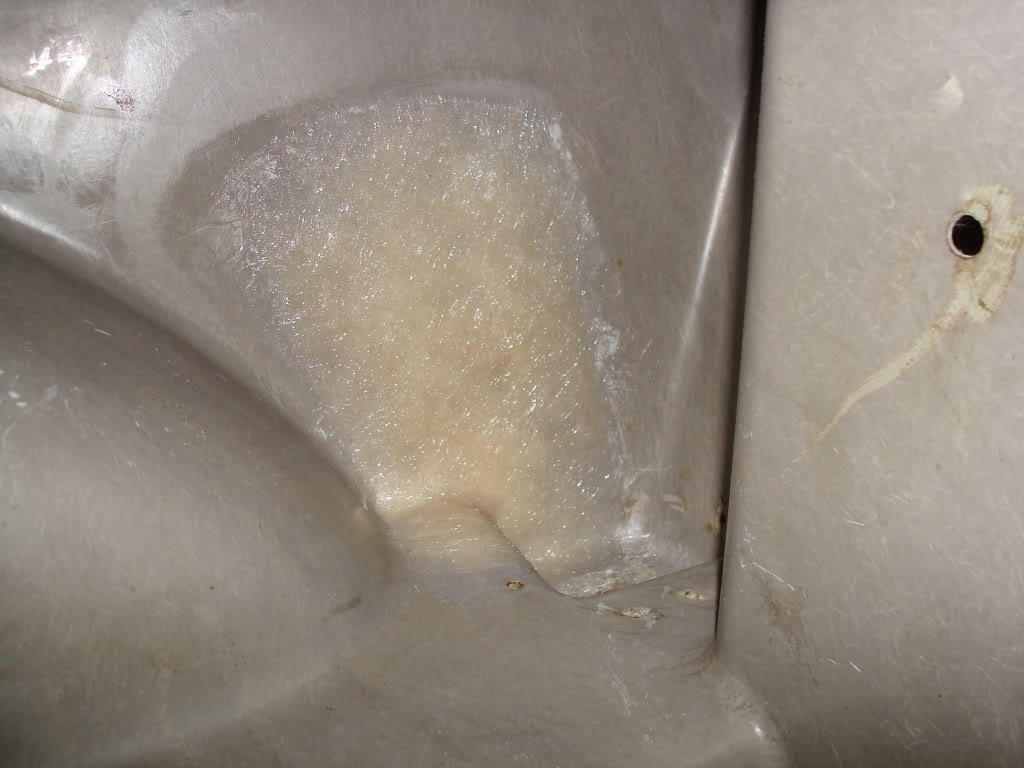
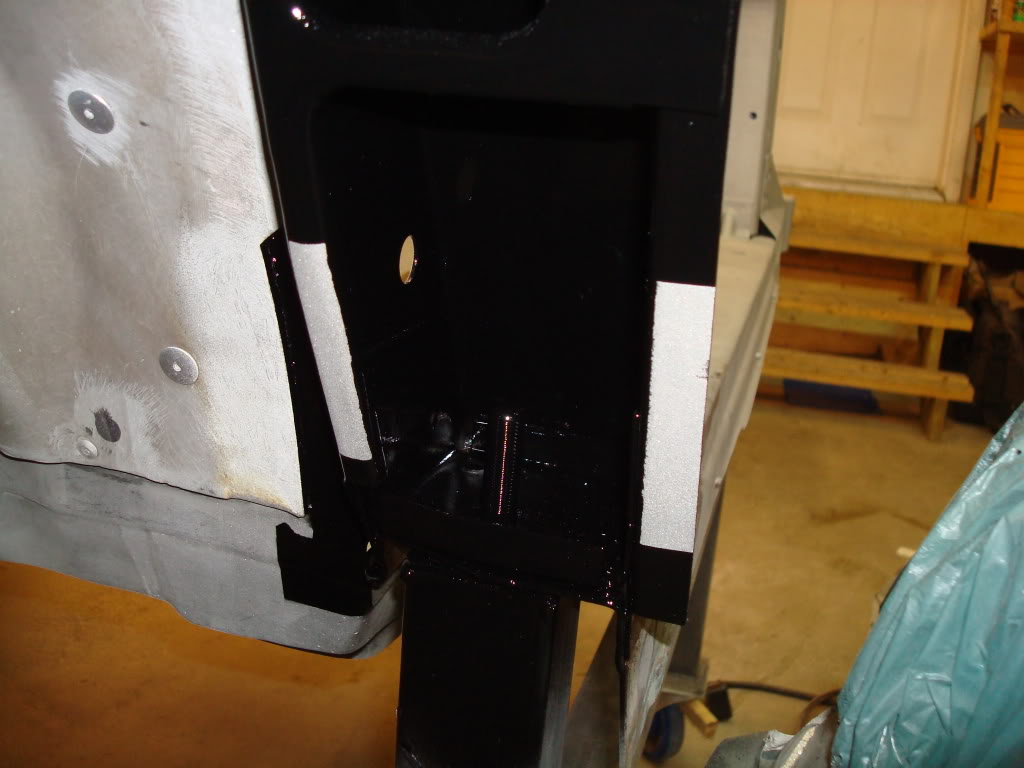
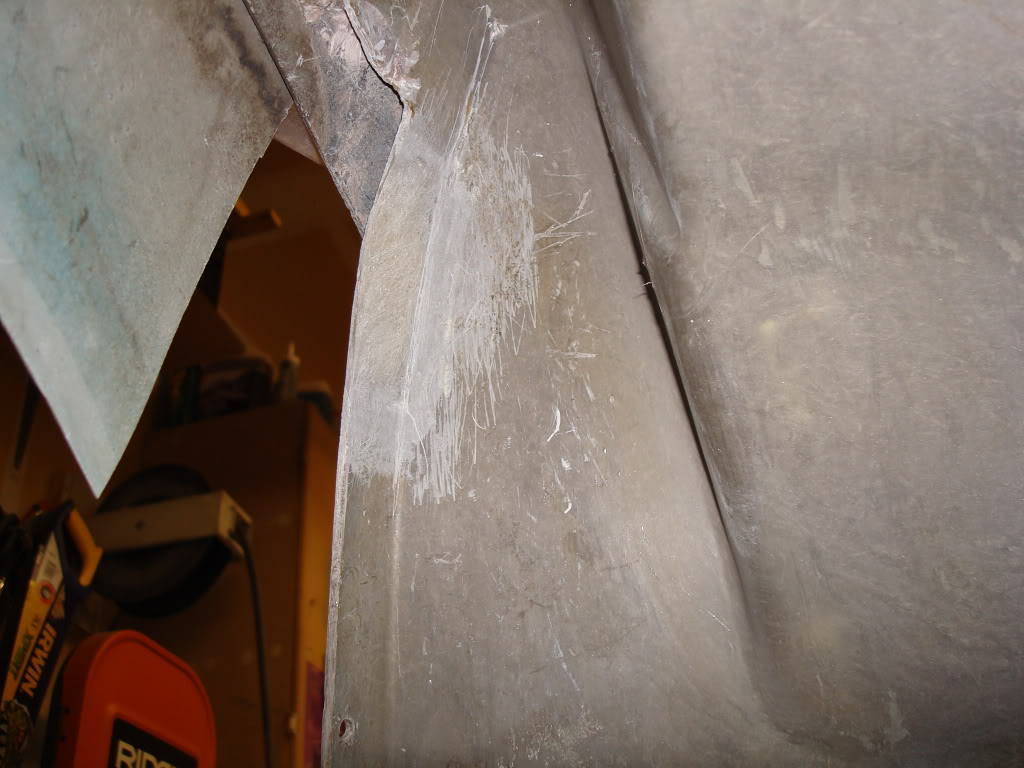
And here is the left #4 mount all glassed up...
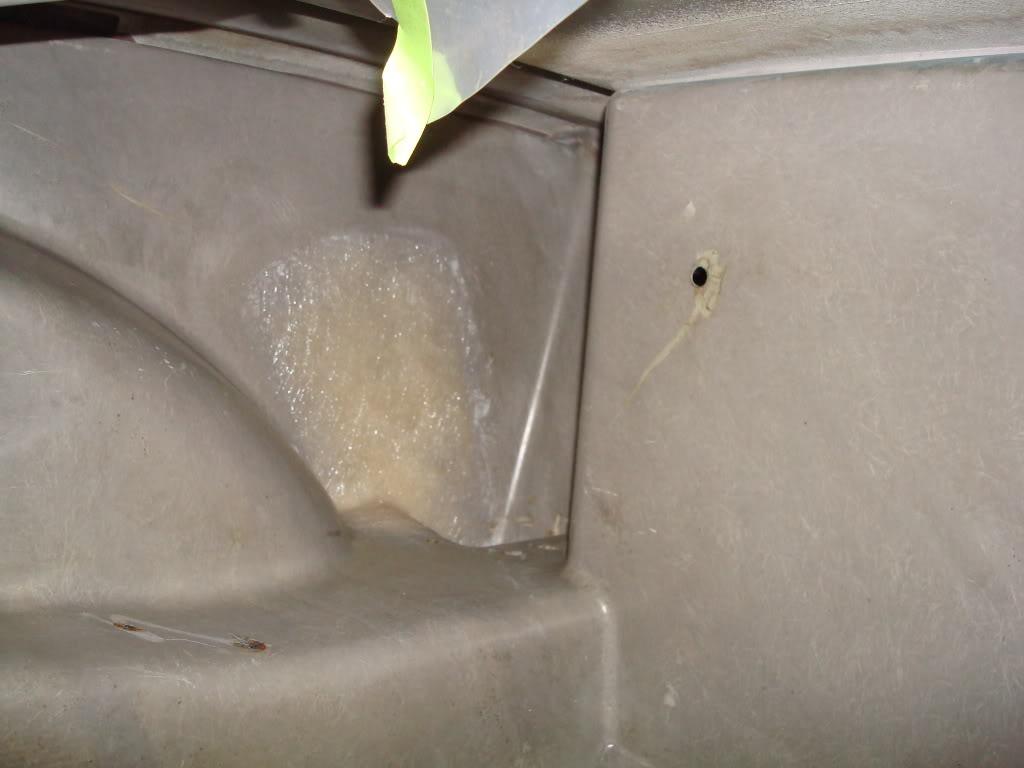
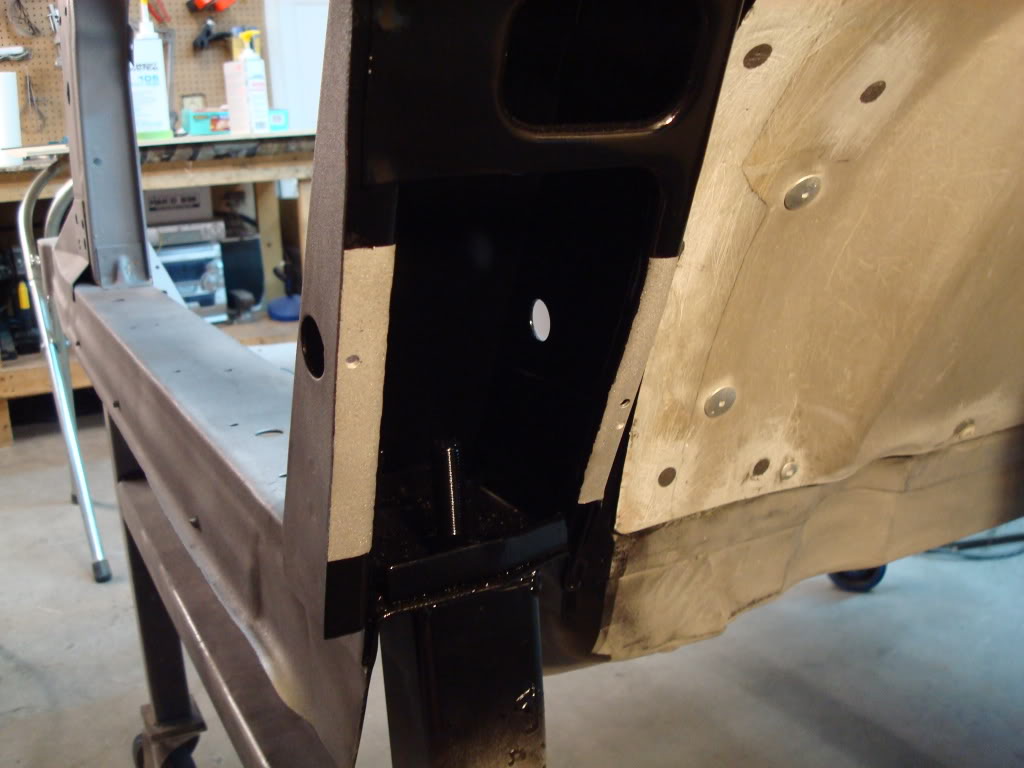
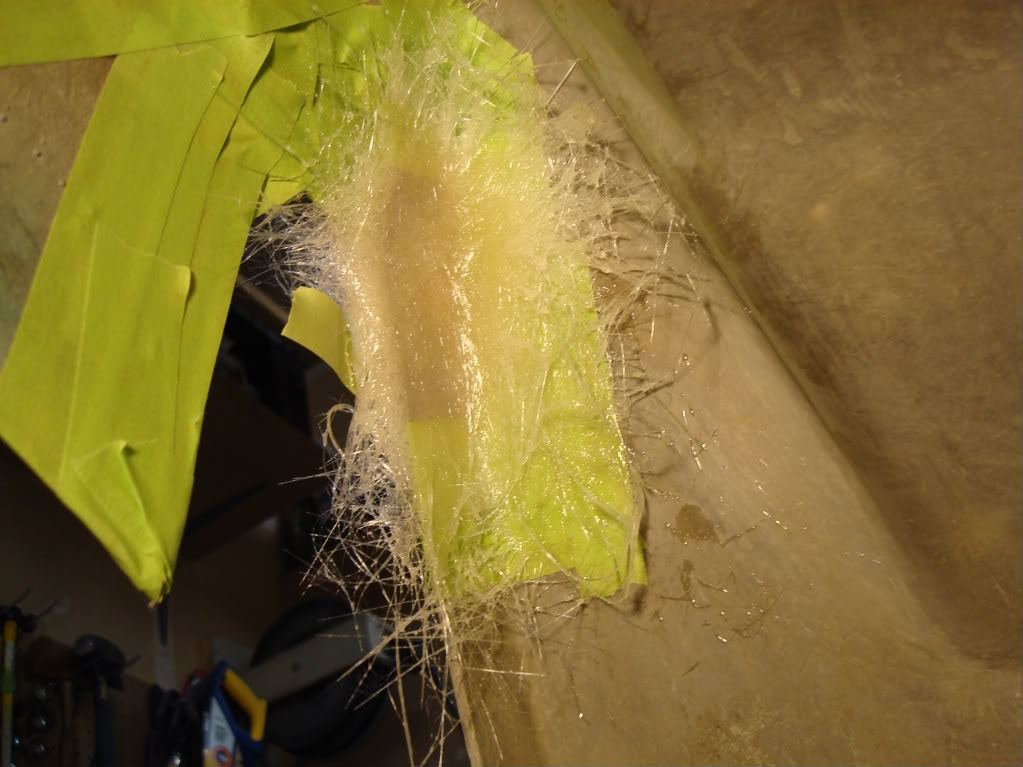
This area needed some glass work as well. It was previously repaired by GM using a 1/2''X1'' piece of fiberglass cloth...
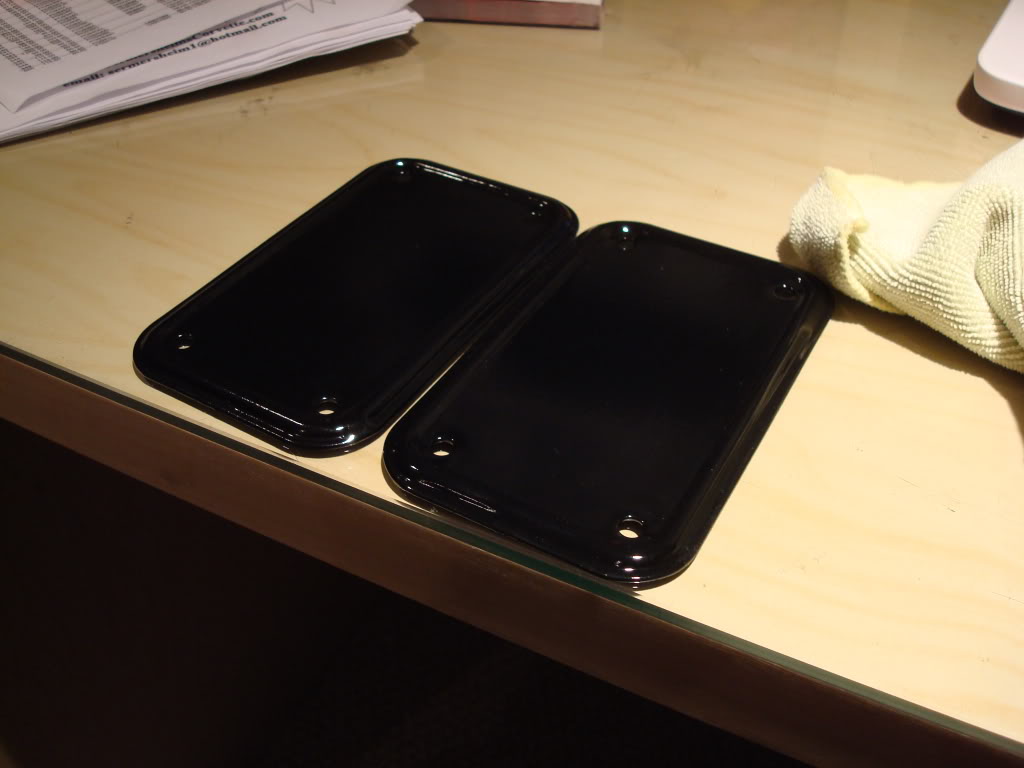
I sandblasted and powdercoated these two covers for the access covers in front of the rear tire...
Time to get some sleep
Next I prepped one of the access panels for fiberglass repairs. I stripped the panel of all the crap and crud last night.
Here is the repair...
And here is the left #4 mount all glassed up...
This area needed some glass work as well. It was previously repaired by GM using a 1/2''X1'' piece of fiberglass cloth...
I sandblasted and powdercoated these two covers for the access covers in front of the rear tire...
Time to get some sleep
Last edited by stinger12; 10-19-2009 at 05:48 AM.
 10-19-2009, 02:34 PM
#1011
Safety Car
Thread Starter
10-20-2009, 06:31 AM
#1012

Greaaatt job.  I restored a Piper Cub when I was your age. Took two years. No rush. When I got tired, I took off some time. It was always there when I got back to it. You only get to do this once. Why not enjoy the pleasure of your work. BTW I flew that plane from Philly to LA and back. (45 years ago).
I restored a Piper Cub when I was your age. Took two years. No rush. When I got tired, I took off some time. It was always there when I got back to it. You only get to do this once. Why not enjoy the pleasure of your work. BTW I flew that plane from Philly to LA and back. (45 years ago).
10-20-2009, 07:44 AM
#1013
Melting Slicks


We all enjoy seeing your updates and I know I am envious of your abilities; I'd love to have the ***** to tackle doing something like this to my '69 coupe.
10-20-2009, 07:20 PM
#1014
Racer

Keep plugging away but, don't make it a chore. Like the previous poster stated, this should be enjoyable and something that you'll be able to take great pride in once you're done. It looks like you're close to starting the reassembly process where you'll really start to see a car emerge from all of the parts you've been working on and assembling.
We all enjoy seeing your updates and I know I am envious of your abilities; I'd love to have the ***** to tackle doing something like this to my '69 coupe.
We all enjoy seeing your updates and I know I am envious of your abilities; I'd love to have the ***** to tackle doing something like this to my '69 coupe.
 When I find that it's not fun anymore during my restoration of my 57 2dr Sport Coupe, I take a few nights off, then recharged, I'm fine for a while. I liken it to eating an elephant a bite at a time! I have 3000 man hrs into it so far, and looks like anothe 200 to go.
10-20-2009, 07:28 PM
When I find that it's not fun anymore during my restoration of my 57 2dr Sport Coupe, I take a few nights off, then recharged, I'm fine for a while. I liken it to eating an elephant a bite at a time! I have 3000 man hrs into it so far, and looks like anothe 200 to go.
10-20-2009, 07:28 PM
#1015
Safety Car
Thread Starter
I'll take a break once the body is on...that's when all the fun stuff will start. No more cleaning or scrubbing panels...everything is already stripped. I am pushing myself really hard to get the body back on the frame in under three weeks from now...I could not be working any harder at the moment (there is no possible way...especially with my full time job).
10-20-2009, 08:31 PM
#1016
Heel & Toe
Member Since: Oct 2009
Location: Naples FL
Posts: 19
Likes: 0
Received 0 Likes
on
0 Posts
Heck yes!!!! Everyone has already said it, but I'll say it once more.
Amazing work...can't wait to see it progress. I've been on mine hard the last two months or so. On top of working 70-80 hours a week...still do a couple hours each day and 8-14 hours on my one day off. I can totally understand the exhausted part.
A bigggg pat on the back from me!!!
Mark
Amazing work...can't wait to see it progress. I've been on mine hard the last two months or so. On top of working 70-80 hours a week...still do a couple hours each day and 8-14 hours on my one day off. I can totally understand the exhausted part.
A bigggg pat on the back from me!!!
Mark
 10-21-2009, 02:36 AM
#1019
Safety Car
Thread Starter