
custom fiberglass interior (many pics)
 05-01-2008, 10:31 AM
#1
Melting Slicks

Thread Starter
Member Since: Jul 2005
Location: winter haven florida
Posts: 2,052
Likes: 0
Received 40 Likes
on
35 Posts
St. Jude Donor '12

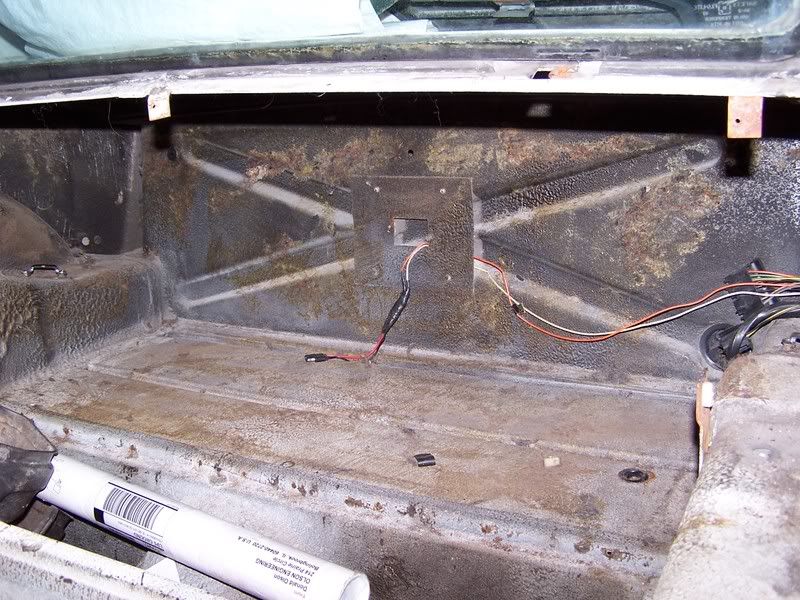
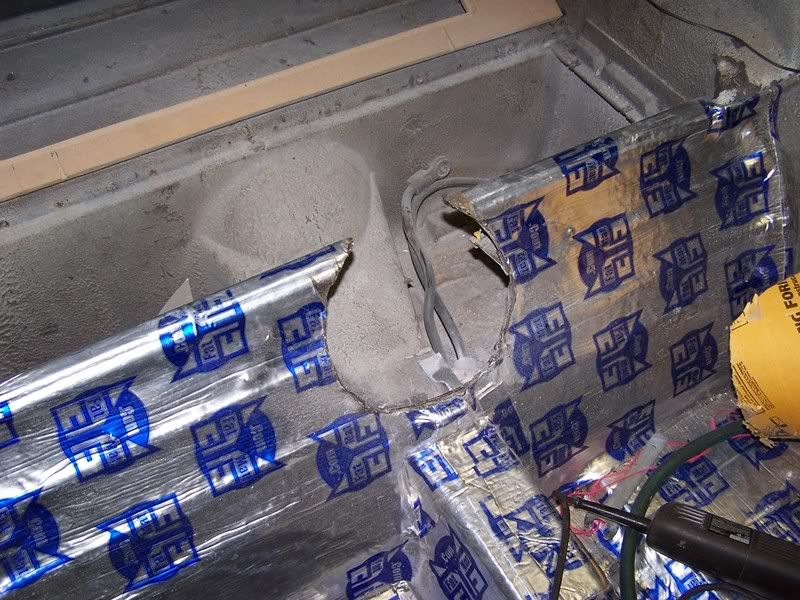
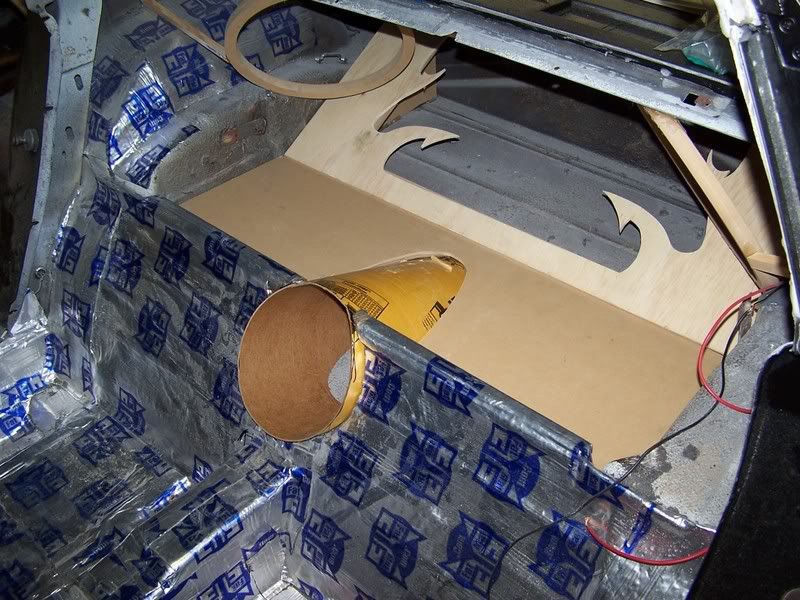
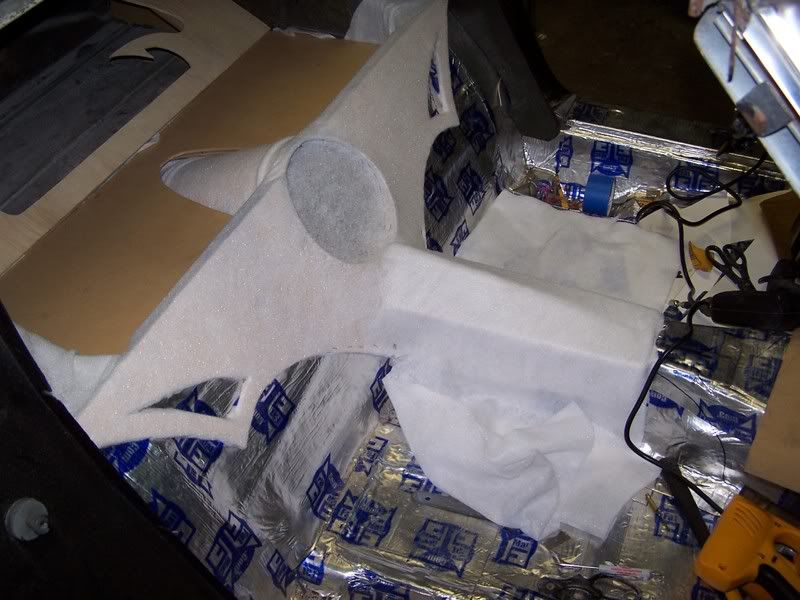
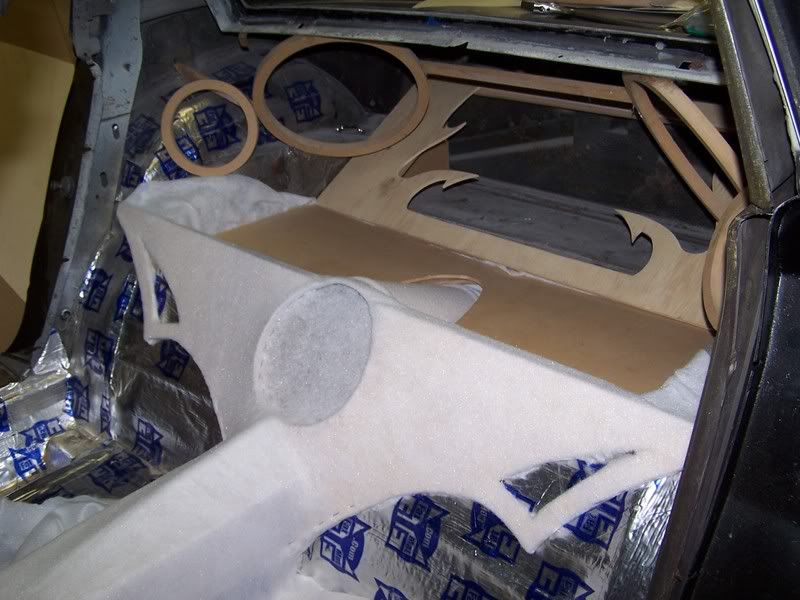
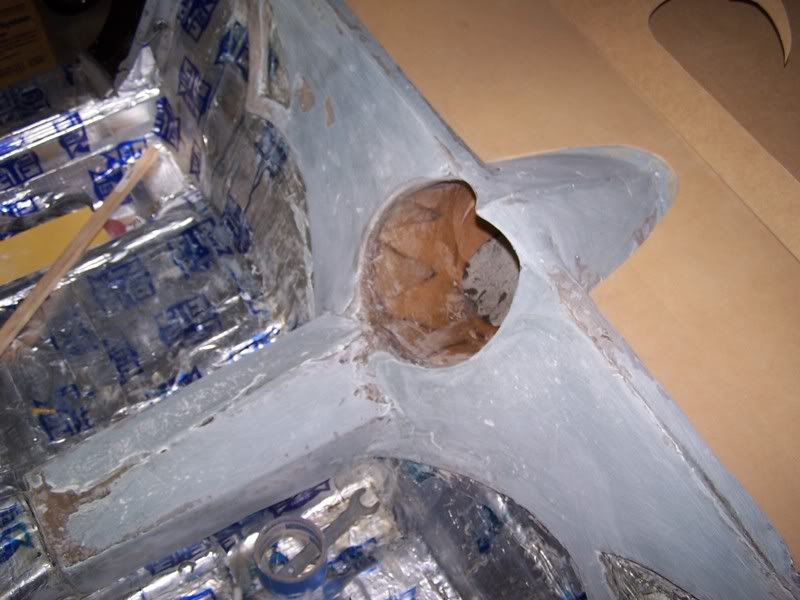
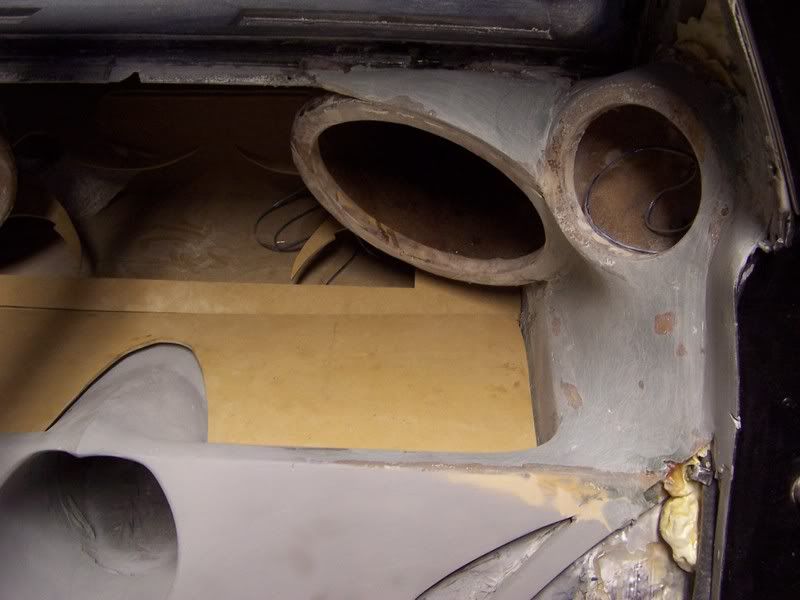
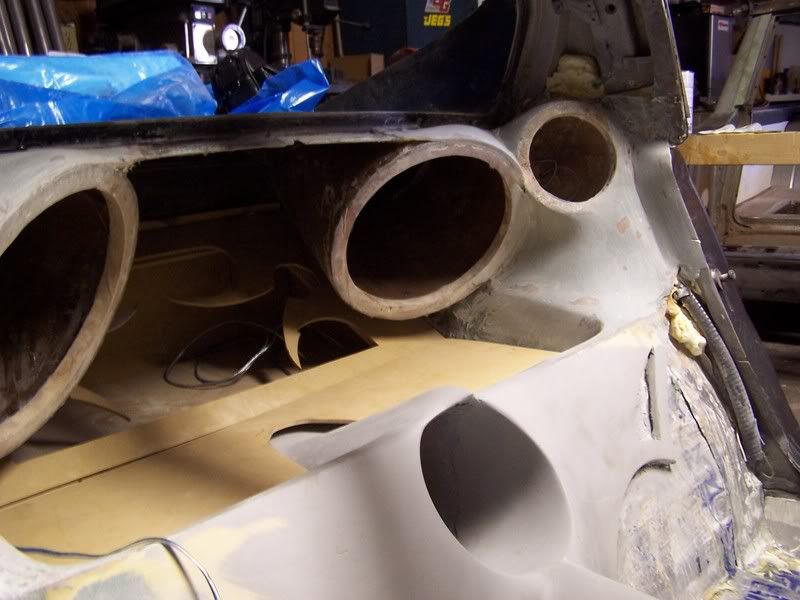
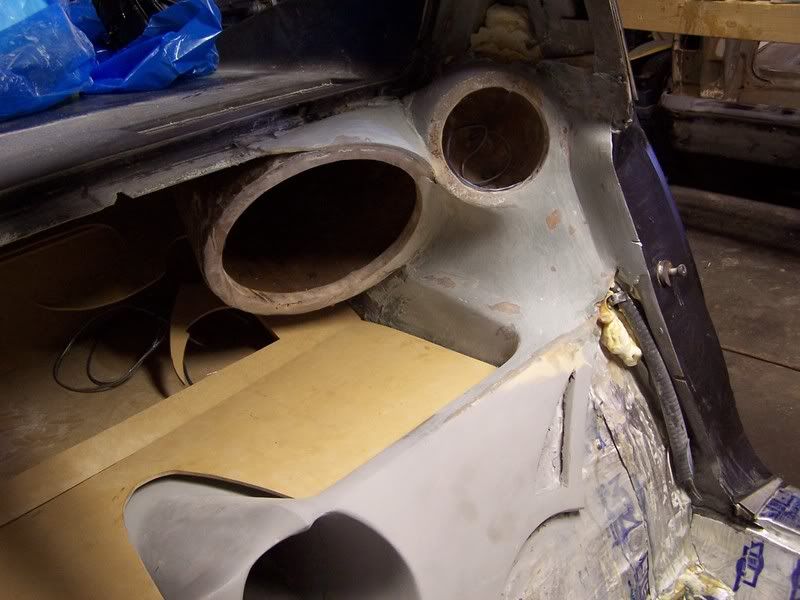
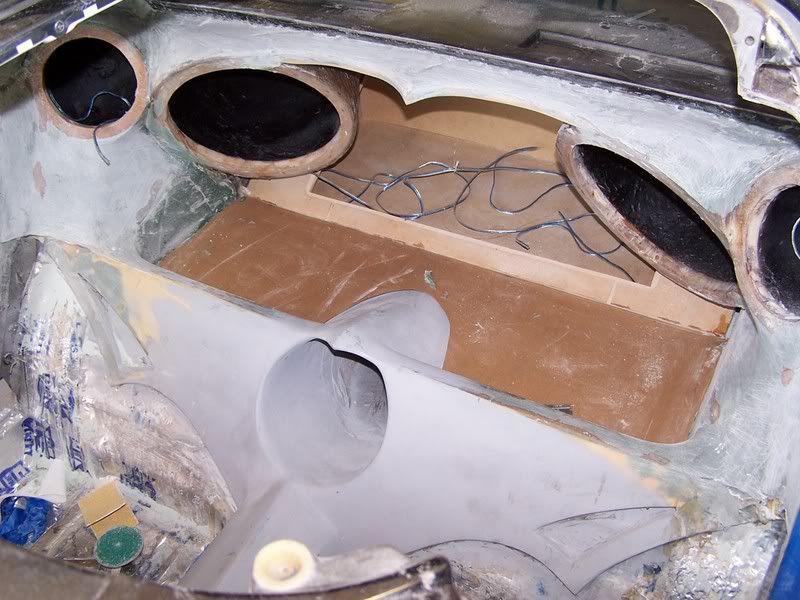
this is the start of my new interior. the next step after the rear is done is to do the dash and center console. the center hole is for a 5lbs nos bottle. there will much more to come in the next few weeks. i may do a how to thread at some point and explain the process. this is my first project like this. i am being helped by a very good friend that has done all kinds of projects and built some amazing cars.


Last edited by 2000FRCZ19; 05-28-2008 at 12:38 AM.
 05-01-2008, 10:39 AM
#2
Race Director

At first I was thinking that your cupholder was much too large and mounted too close to horizontal to be of much use, but I'm catching on. 
Nice work, keep us posted on the end product.
Nice work, keep us posted on the end product.
05-01-2008, 10:59 AM
#3
Burning Brakes

I like your concept, artistry, and details. I'm looking forward to more progress photos.
Just wondering though ... will you have access underneath your new installation without destroying your work? You may not care about future access, and that's okay, but it doesn't seem to be too late to cut joints in your new stuff and fasten w/ screws.
Just a thought.
Just wondering though ... will you have access underneath your new installation without destroying your work? You may not care about future access, and that's okay, but it doesn't seem to be too late to cut joints in your new stuff and fasten w/ screws.
Just a thought.


 05-01-2008, 12:58 PM
#8
Le Mans Master


look buddy, I said my 72 was up here so what do you think you are doing to that vette - you got the wrong one!  Seriously nice work I can't wait to see your finished product, thank-you for posting the pics.
Seriously nice work I can't wait to see your finished product, thank-you for posting the pics.
05-01-2008, 01:01 PM
#9
Le Mans Master
Looking great! The pics tell the whole story. I agree about access points for later. Also where will the emergency brake handle be located? Keep us updated.
Glenn
Glenn
05-01-2008, 02:18 PM
#10
Le Mans Master

Looks great. Where were you when I needed you? It would have livened this up as needed.
Actually we are getting ready to redo the rear. It obviously needed something. Can't wait to see yours done.

Actually we are getting ready to redo the rear. It obviously needed something. Can't wait to see yours done.
05-01-2008, 02:36 PM
#11
Racer

Looks very very nice...Might have to "BORROW" some of your ideas when I get to my rear.....what are your plans for the dash?? Check out my fiberglass interior project, its a little slow moving, but I am having a blast doing it.... http://forums.corvetteforum.com/show....php?t=1880979
05-01-2008, 11:51 PM
#12
Melting Slicks
Thread Starter
Member Since: Jul 2005
Location: winter haven florida
Posts: 2,052
Likes: 0
Received 40 Likes
on
35 Posts
St. Jude Donor '12
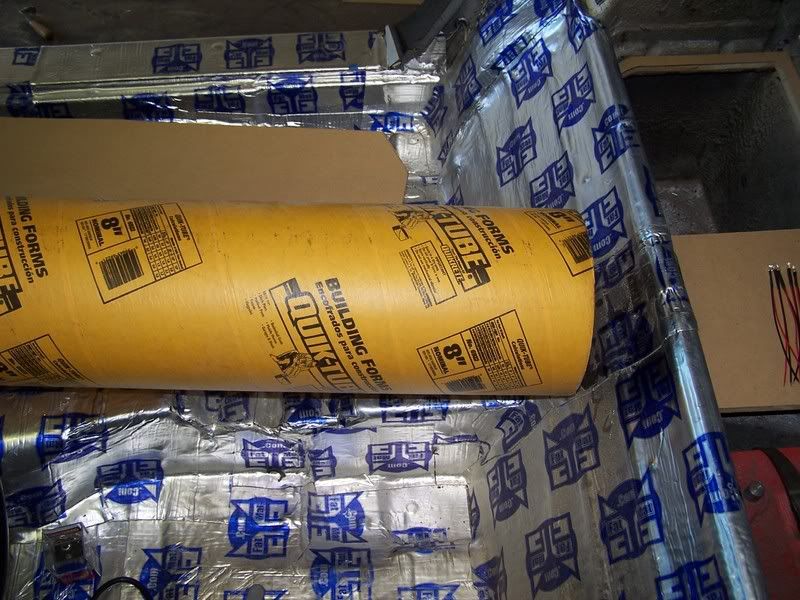
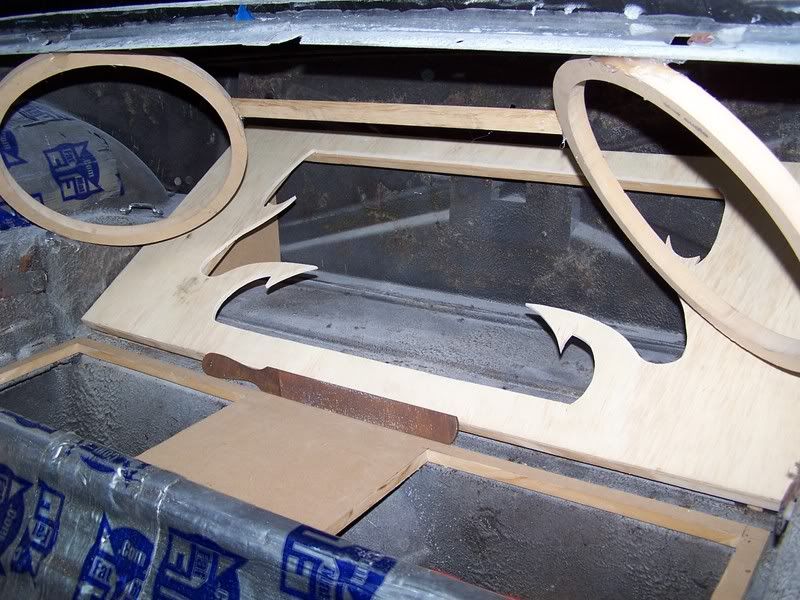
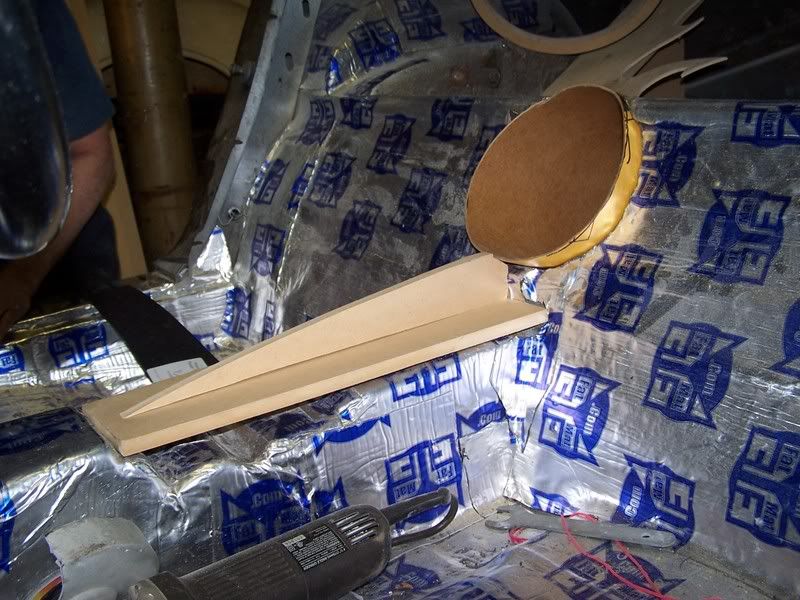
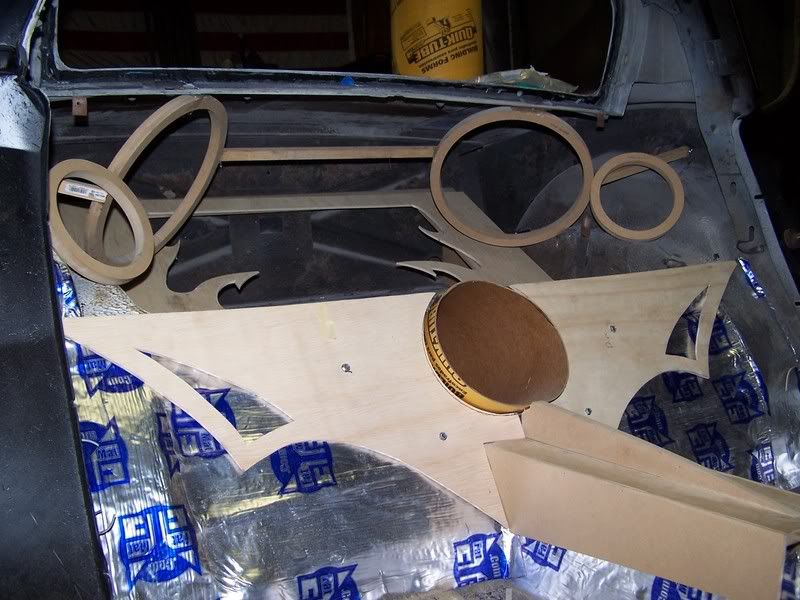
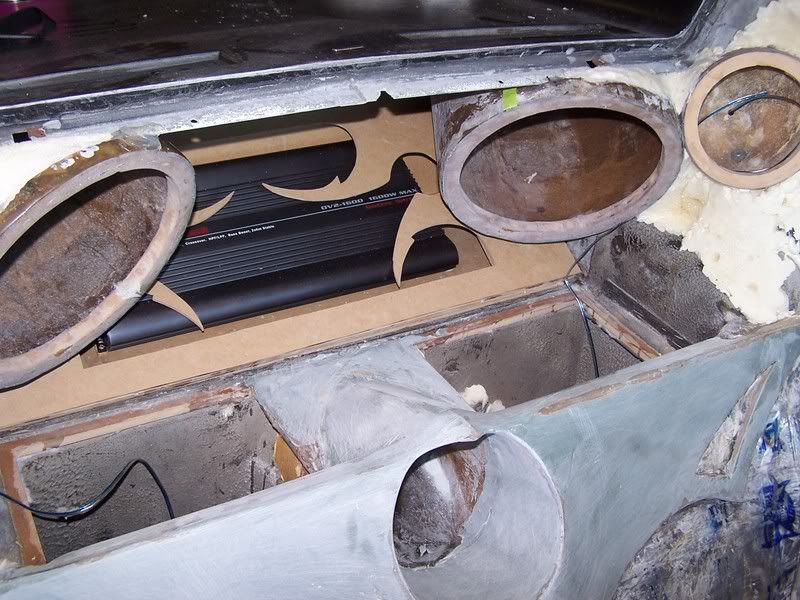
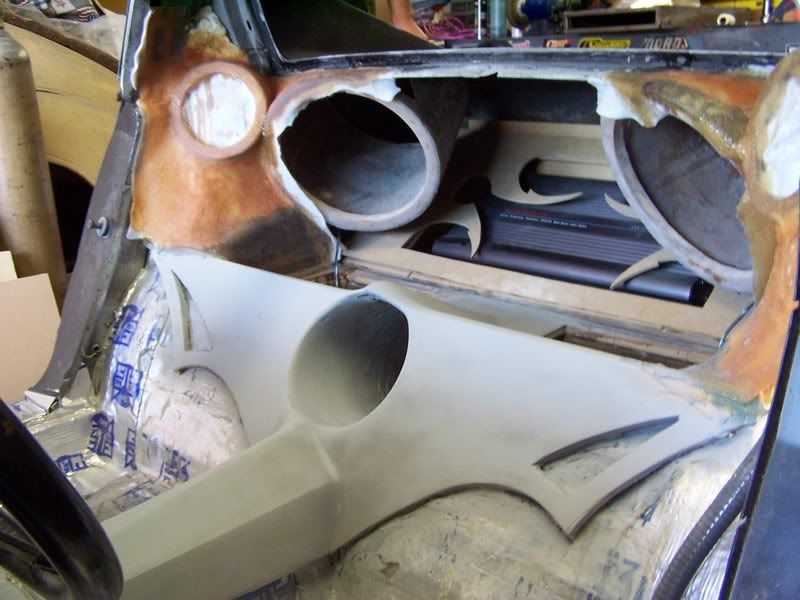
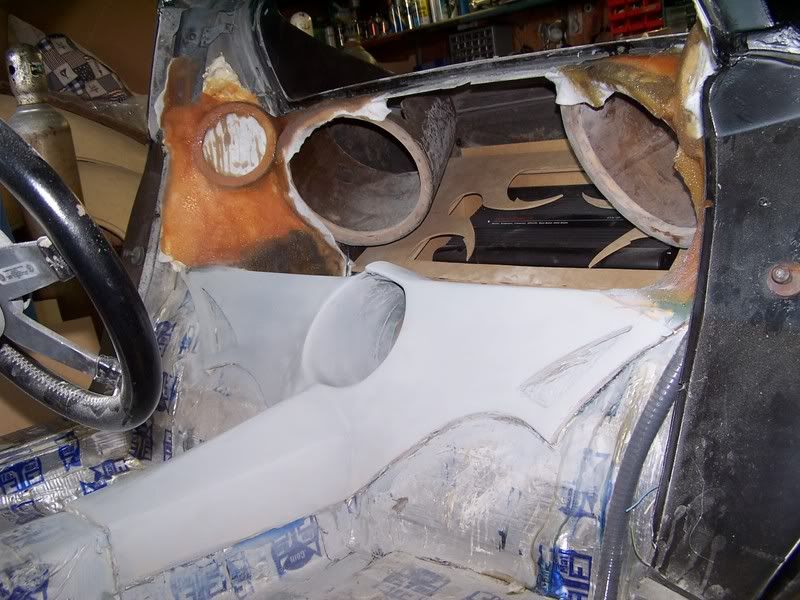
thanks for all the comments. i have thought about rear access. the top cover over the amp is removable and the amp and rack will slide out at an angle. i have tested it several times before the glassing was done and after so that will not be a problem. the amp cover is constructed in two parts. the seam is hidden behind the two woofer tubes. i also ran flextube for wiring. the e-brake will be eliminated i could put one in down the road and it will go next to the seat or i can add an e-brake peddle if needed. i also have custom seats. the dash will be even more wild than the rear. i have autometer procomp guages that will be angled and mounted higher than stock and in a curved set up. the dash and center console will also be removable. i am going to use a hurst pistol grip quarter stick shifter and it will be mounted in a non traditional way also. i am going to be using black light leds for lighting to create some very nice effects. i hope to be starting on the dash in the next couple of weeks. i will post a few more pics of the rear next week as i get more done on it. something i have learned from working with my friend dan is the trick to making everything good is to make everything flow and blend together. if something is curved in one place it needs to continue through the whole piece and flow into the next piece. try to hide all wires to keep everything simple and clean looking.
Last edited by 2000FRCZ19; 05-02-2008 at 12:37 AM.
 05-02-2008, 04:48 PM
#17
Le Mans Master
nice.....
heres some of my setup i did 2 years ago.....


i plan on redoing it though.......
if you can list your materials that would help out.... i know a few other cats are doing fiberglass interiors also
b
heres some of my setup i did 2 years ago.....
i plan on redoing it though.......
if you can list your materials that would help out.... i know a few other cats are doing fiberglass interiors also
b
05-02-2008, 05:46 PM
#18
Melting Slicks
Thread Starter
Member Since: Jul 2005
Location: winter haven florida
Posts: 2,052
Likes: 0
Received 40 Likes
on
35 Posts
St. Jude Donor '12
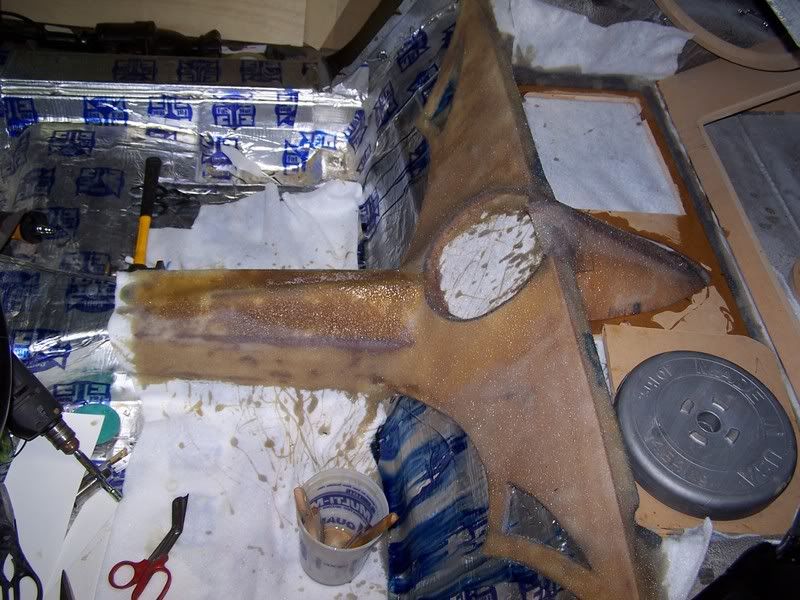
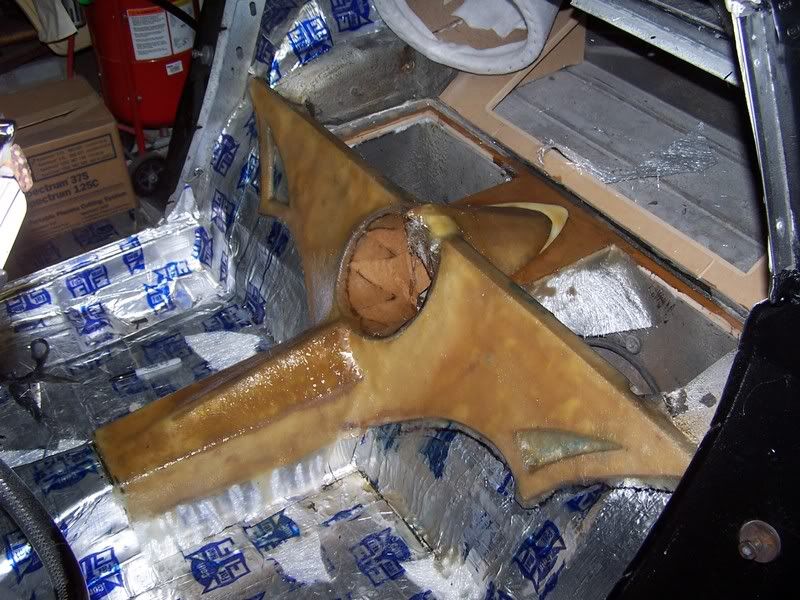
i am using hi-bond resin by poly guard. very nice to work with. i am using duraglass as a filler. for a final filler i am using evercoat rage gold. then before paint i am sealing with spi epoxy primer. for some bonding i use lord fusor t-21. it is very strong and sands nicely. it sticks to fiberglass and smc very well. i will post more pics later. thanks for the comments and feel free to ask questions.
Last edited by 2000FRCZ19; 07-23-2008 at 01:11 PM.
05-03-2008, 05:31 PM
#19
Melting Slicks
Thread Starter
Member Since: Jul 2005
Location: winter haven florida
Posts: 2,052
Likes: 0
Received 40 Likes
on
35 Posts
St. Jude Donor '12
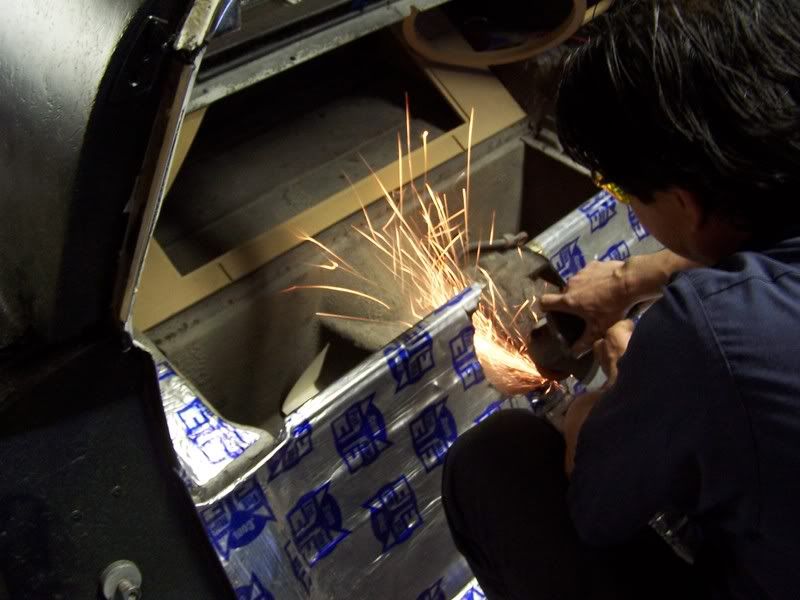
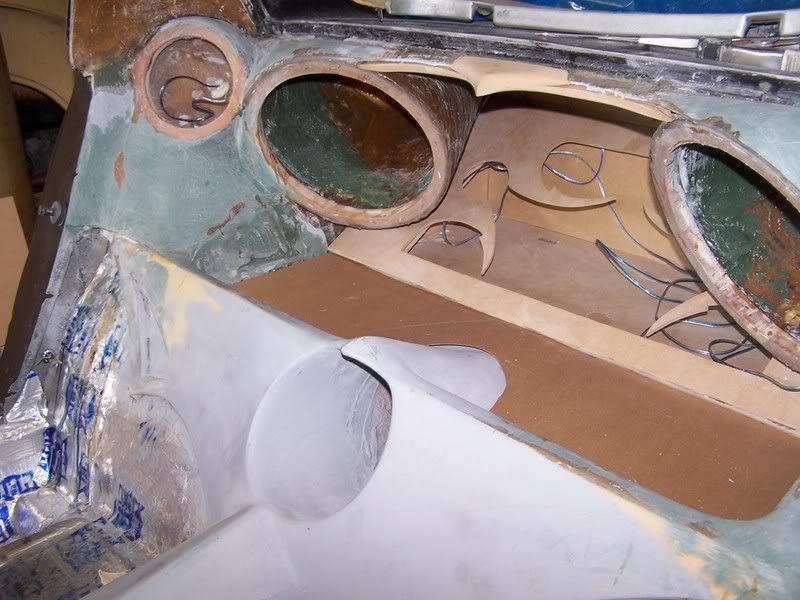
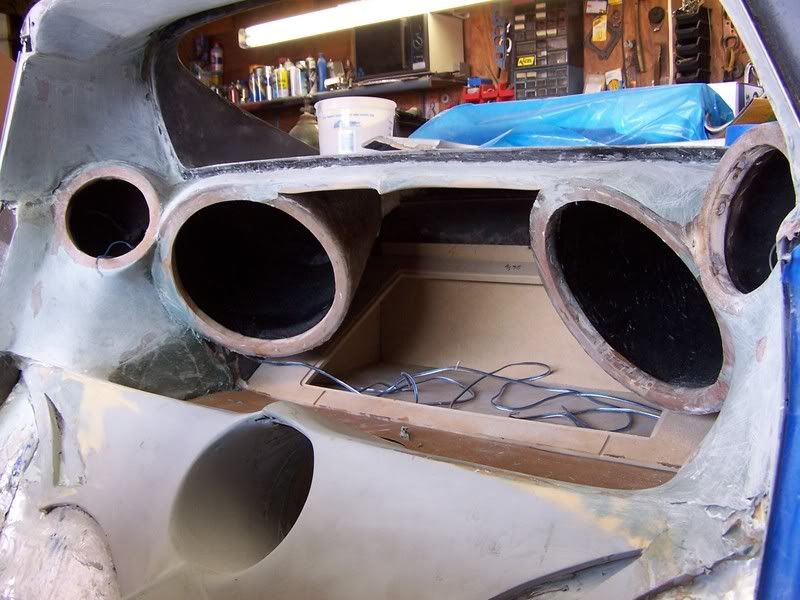
posted a few more photos at the top after the first layer of duraglass filler. next step is to do more glass work to the inside and back of the speaker tubes.