
74 LS4 Vert-Restoration in progress for a very long time(LOL)....lots of pics....
 05-23-2016, 11:13 AM
#101


Great pics, you can show off as much as you want , your work is very good.....

I do have the #1613 and that is what I used on the frame, wheel wells, engine compartment, etc...
And that creative foil idea came from another member that posted in this thread sometime ago. It does work well.....
Decided to leave my firewall basically stock (don't ask me why )but hopefully everything will turn out good. Again your engine compartment is something else!!!
The rebuild starts soon......
Hello Alan,
Yes retired does change everything Don't know if I will attempt to do any plating, as I don't have any type experience with that type of finish. I'm sure I can learn though......
I have a lot of questions in my head as about what direction I want to go with the 74. Although I took the engine apart with such low mileage, and have some updated parts ready to install, I find myself thinking to keep it totally stock and sell off the newer parts. So I have to make a decision in the near future. The first thing I need to do is get organized with everything......All of the suspension parts are completed, and ready to be reinstalled. Need to get the 74 back on the ground, been up on stands way to long.....
Even though the paint still shines, there are the bonding strips on all four corners that need attention. There will be new front and rear bumpers installed. I thought about just painting the rear deck since we filled the luggage rack holes, the bumpers, take care of the bonding strips and hopefully blend everything in....but I imagine the best way to do the paint is to strip it and reshoot the entire car. Still have plenty of time to think this one through.....
Looking to go out to the 74 this weekend or sometime early next week.
Hope I will make it interesting to follow along..... Tom
, your work is very good.....I do have the #1613 and that is what I used on the frame, wheel wells, engine compartment, etc...
And that creative foil idea came from another member that posted in this thread sometime ago. It does work well.....
Decided to leave my firewall basically stock (don't ask me why
)but hopefully everything will turn out good. Again your engine compartment is something else!!!The rebuild starts soon......
Hello Alan,
Yes retired does change everything
Don't know if I will attempt to do any plating, as I don't have any type experience with that type of finish. I'm sure I can learn though......I have a lot of questions in my head as about what direction I want to go with the 74. Although I took the engine apart with such low mileage, and have some updated parts ready to install, I find myself thinking to keep it totally stock and sell off the newer parts. So I have to make a decision in the near future. The first thing I need to do is get organized with everything......All of the suspension parts are completed, and ready to be reinstalled. Need to get the 74 back on the ground, been up on stands way to long.....
Even though the paint still shines, there are the bonding strips on all four corners that need attention. There will be new front and rear bumpers installed. I thought about just painting the rear deck since we filled the luggage rack holes, the bumpers, take care of the bonding strips and hopefully blend everything in....but I imagine the best way to do the paint is to strip it and reshoot the entire car. Still have plenty of time to think this one through.....
Looking to go out to the 74 this weekend or sometime early next week.
Hope I will make it interesting to follow along..... Tom
RVZIO

The following users liked this post:
74 LS4-454 (05-23-2016)
06-22-2016, 09:21 PM
#102
Melting Slicks

Thread Starter

Although I didn't do exactly what I wanted too, did get some things accomplished on the 74......some pics.....
Getting back into things, feels good......
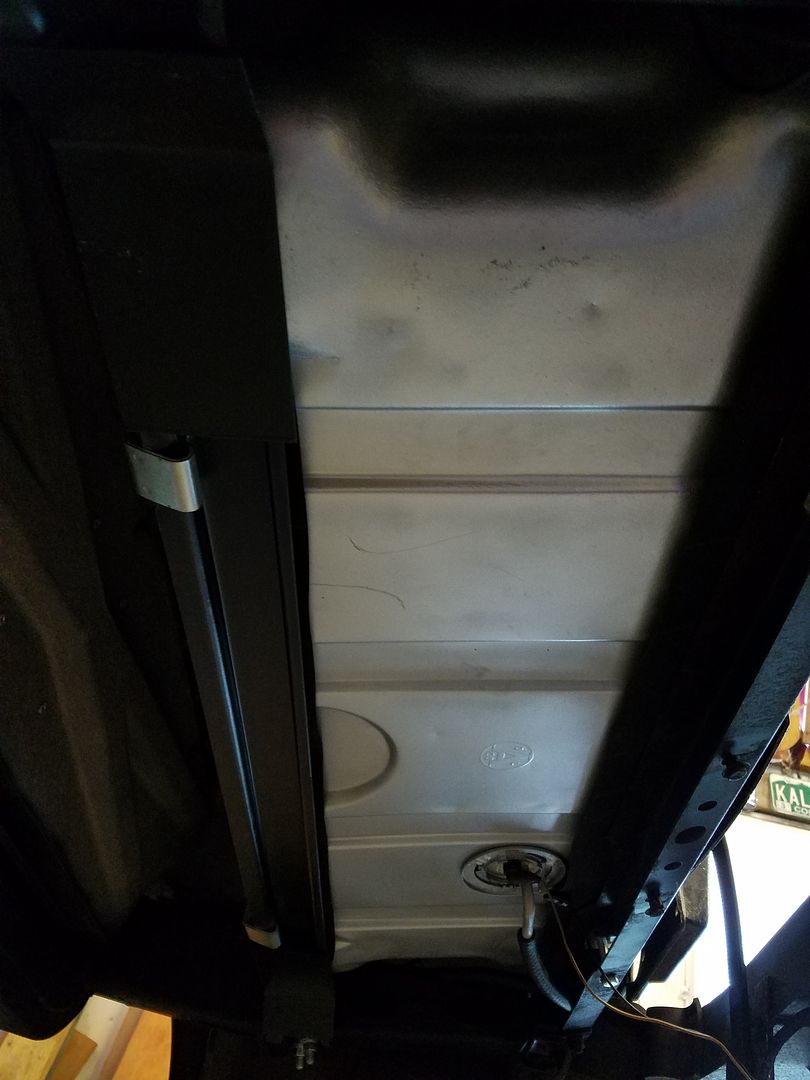
Resprayed the wheel wells again the other day, happy with the results....wanted to get the fuel tank, but no go, so I cleaned all the rear light connectors and wiring. Also retaped some ends of the rear harnesses where the electrical tape was coming apart.
Everything came out good. My plan is to start at the rear of the car and work forward.
So I am sticking with that rather than jump all over the place....Not much done, but still productive anyway, makes me happy..


The following users liked this post:
MISTERZ06 (06-08-2017)


 06-23-2016, 07:56 AM
#104
The work looks really nice. Makes you feel good when things come out looking good. Then the forum joins in to prod you along.
Good Job!
RVZIO
Good Job!
RVZIO
Last edited by SB64; 09-04-2017 at 03:17 PM.
The following users liked this post:
74 LS4-454 (06-24-2016)
06-24-2016, 08:36 PM
#105
Melting Slicks
Thread Starter
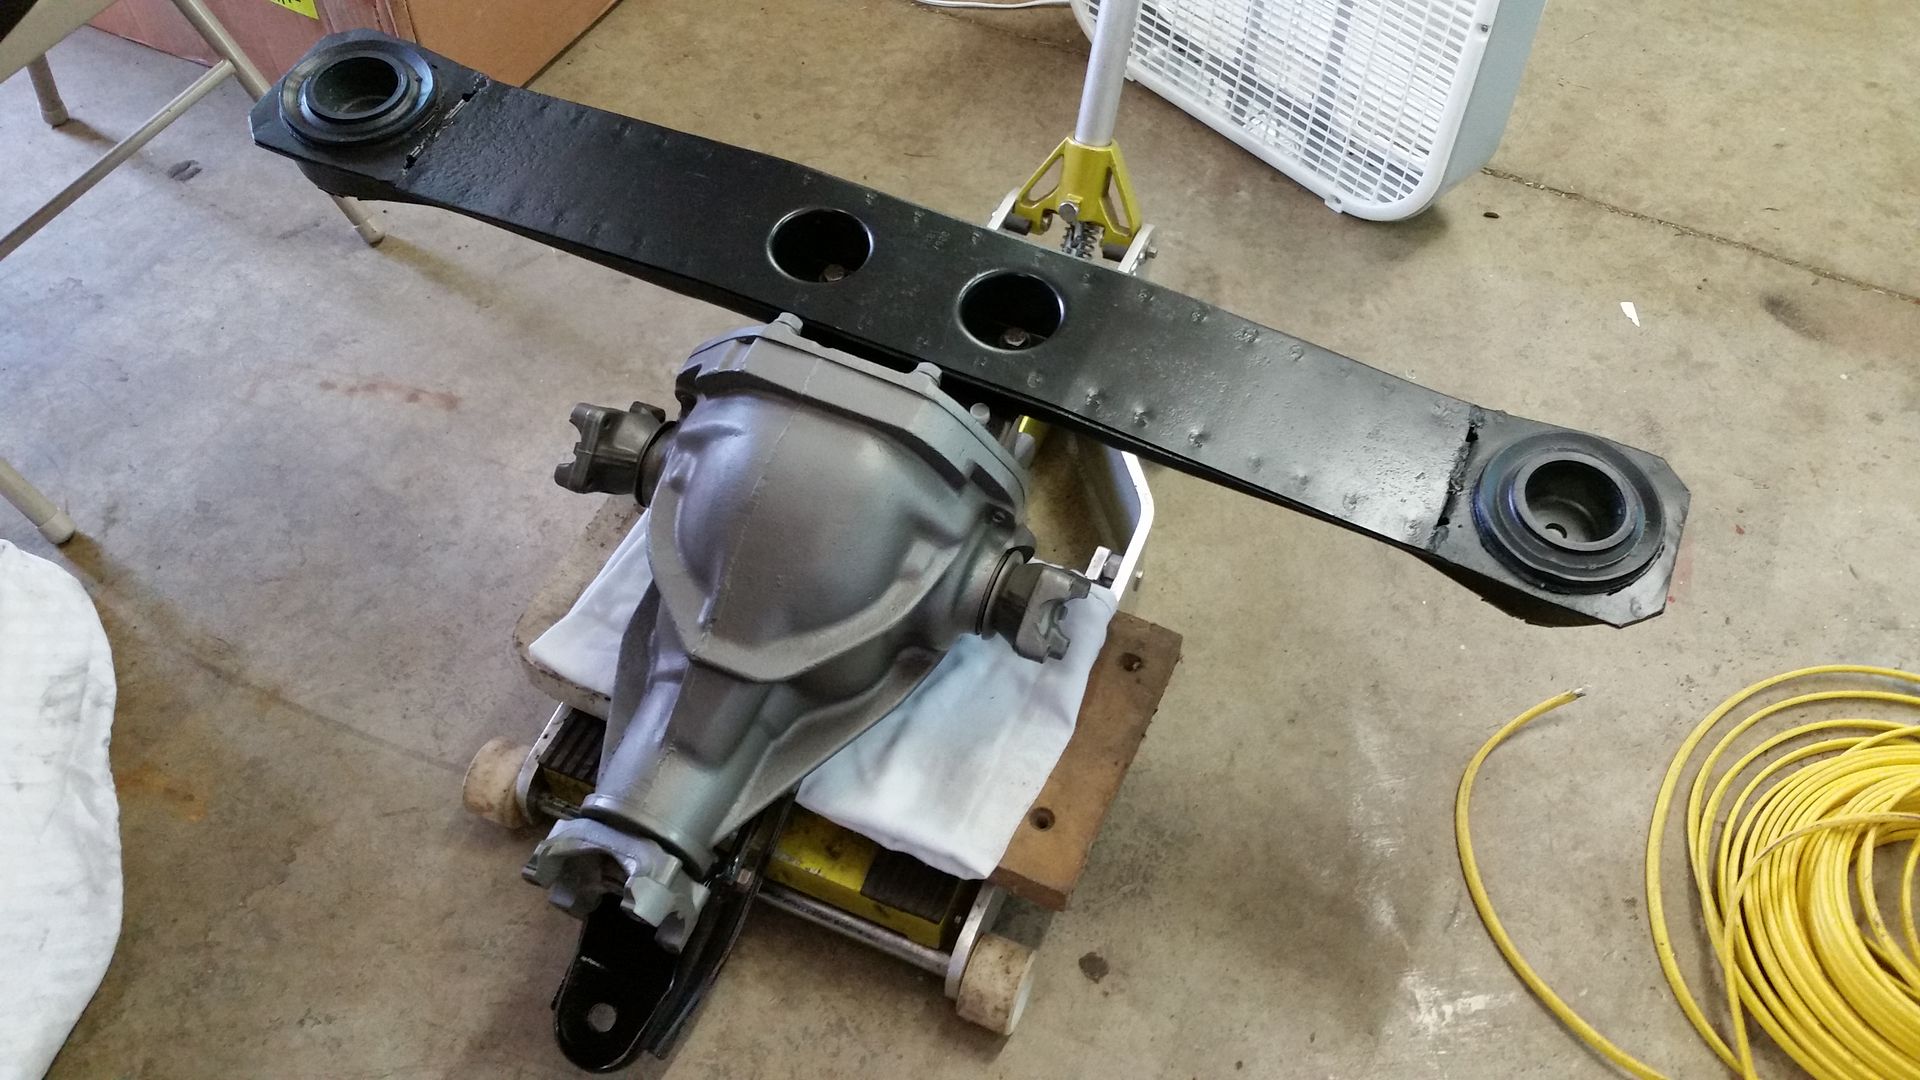
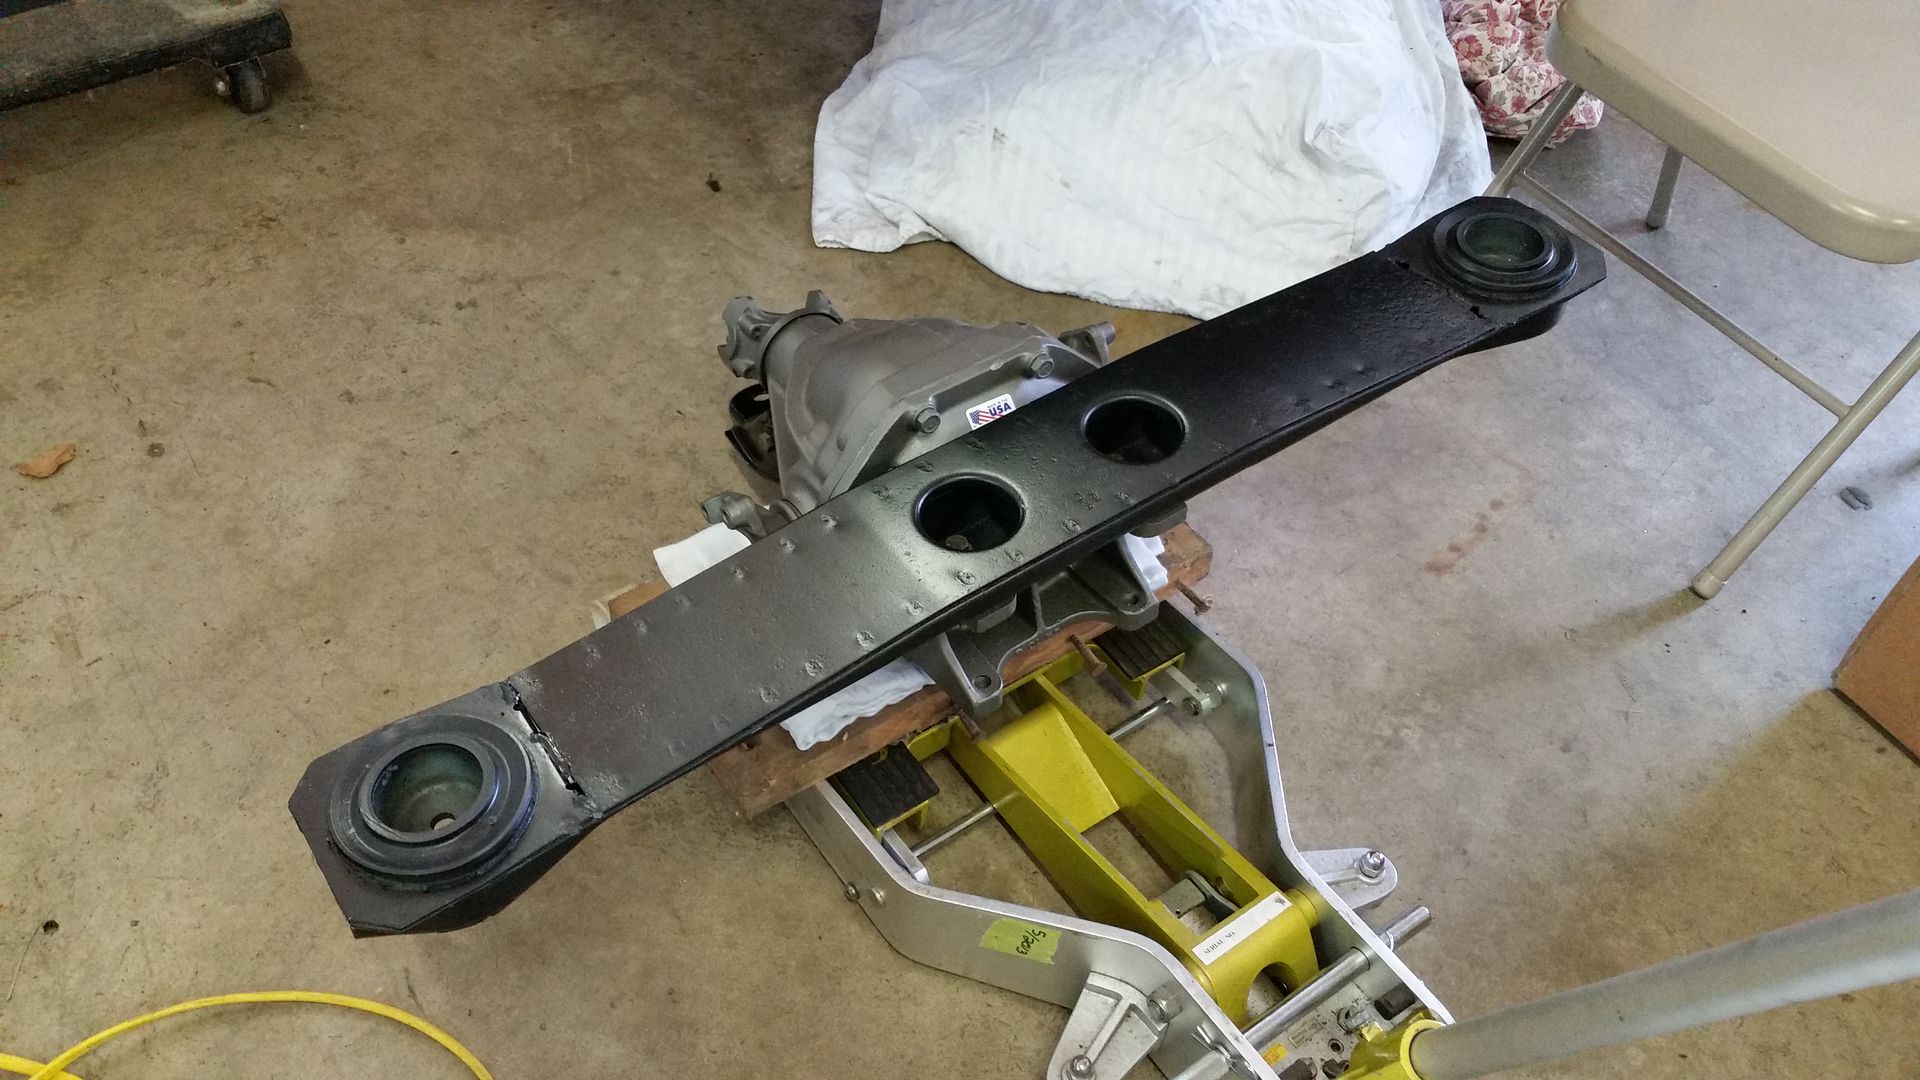
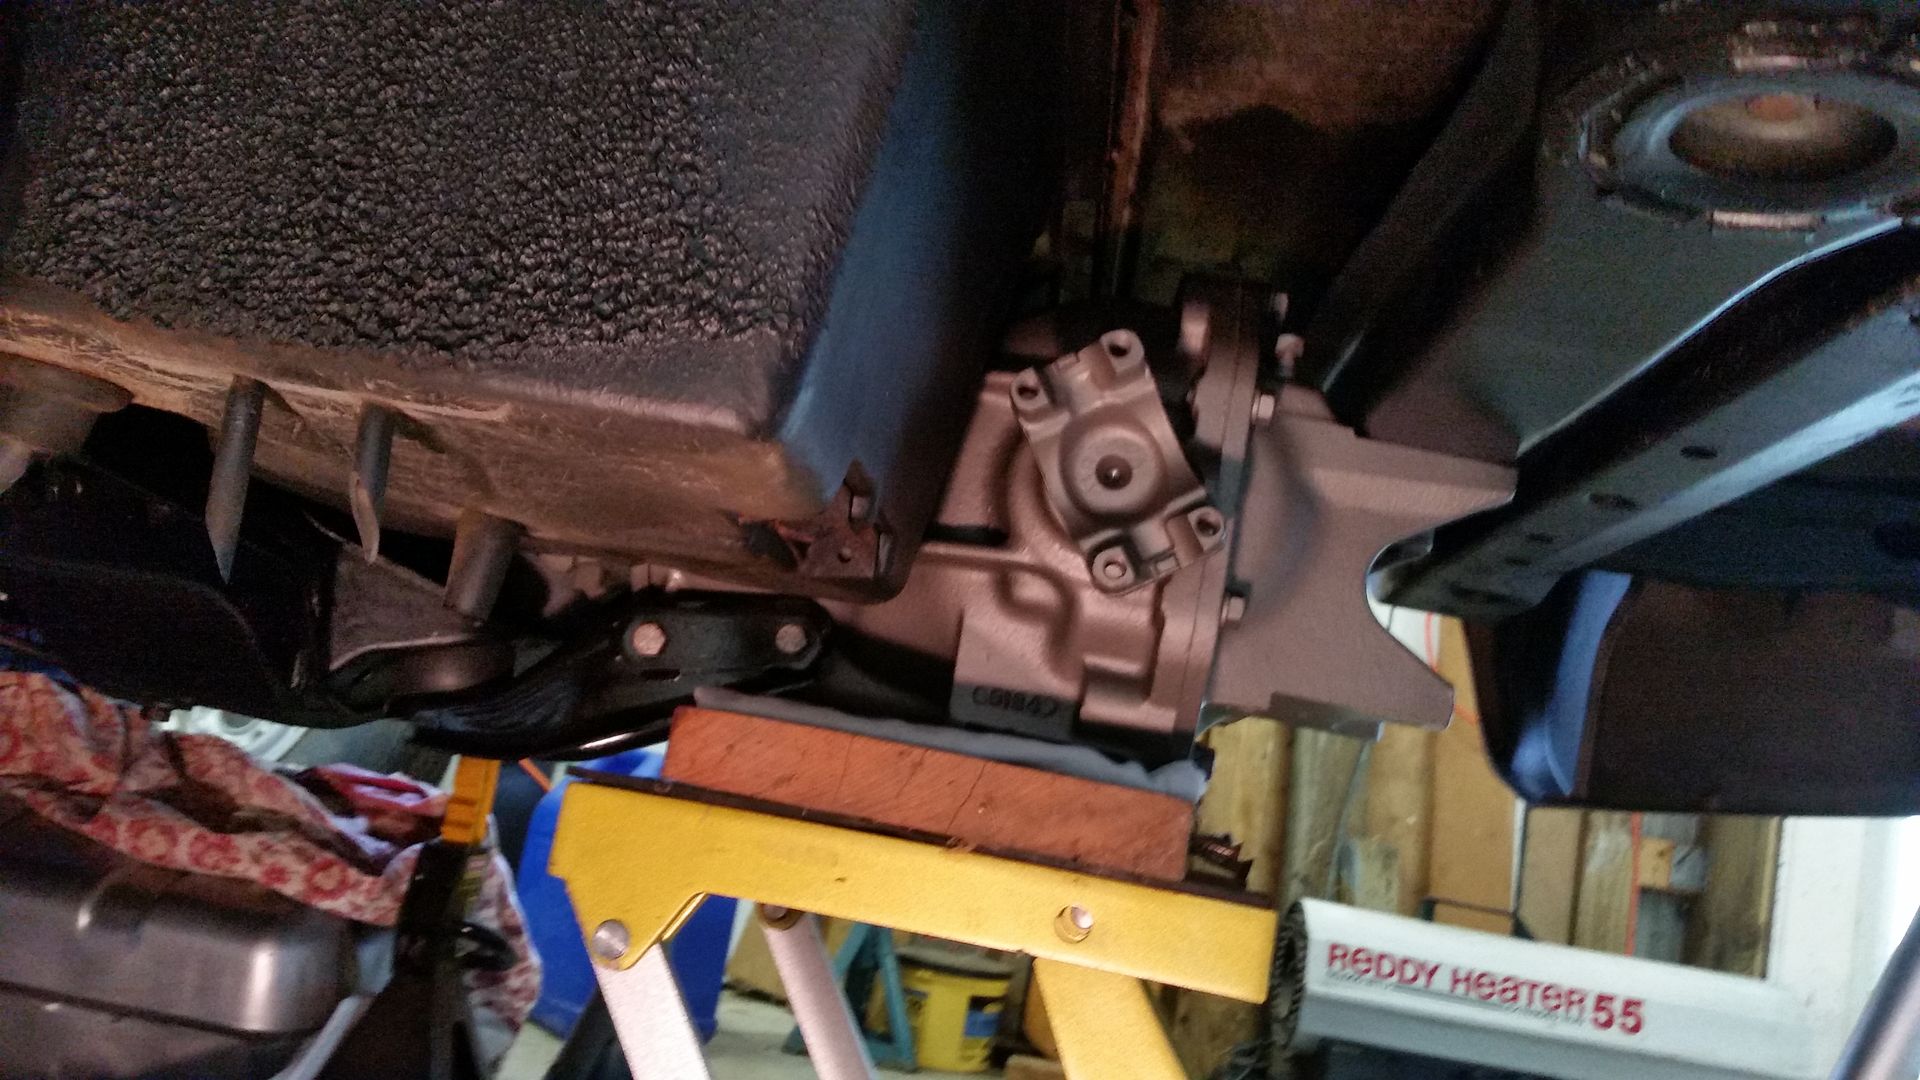
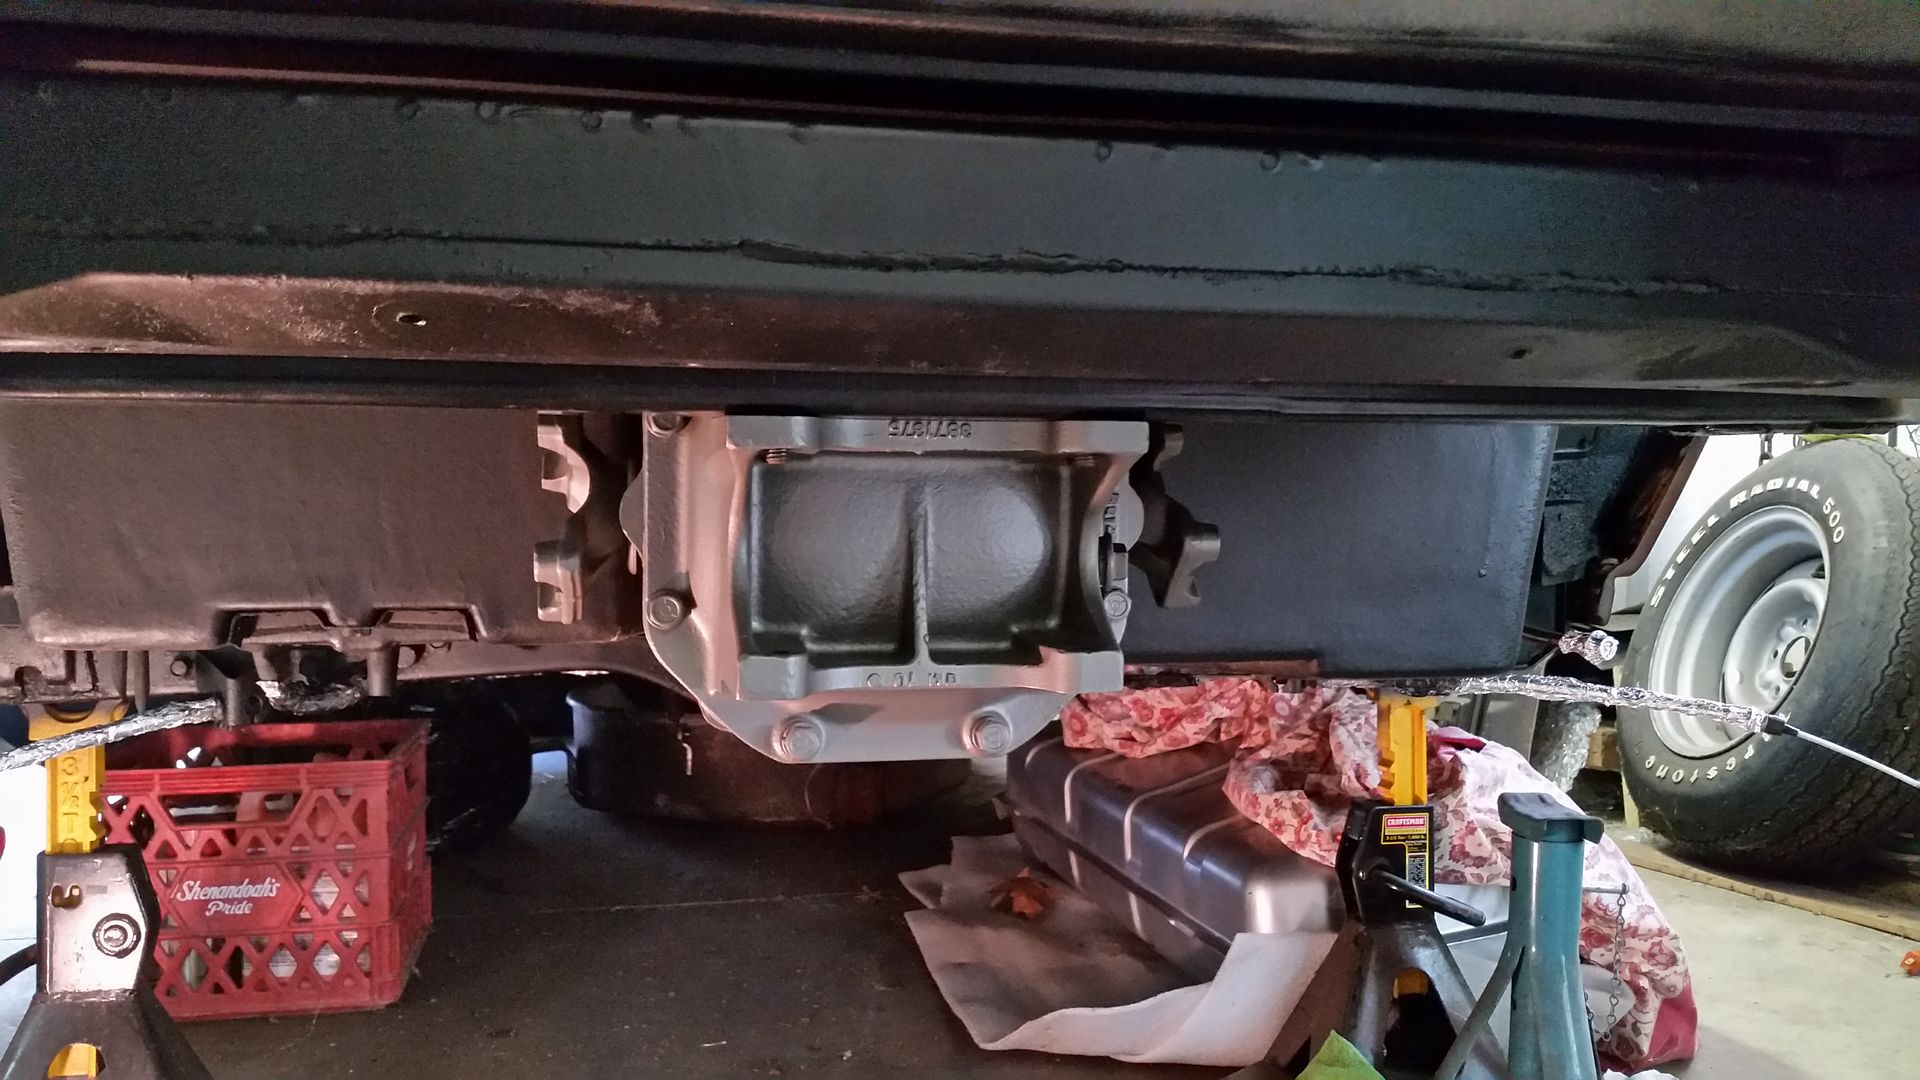
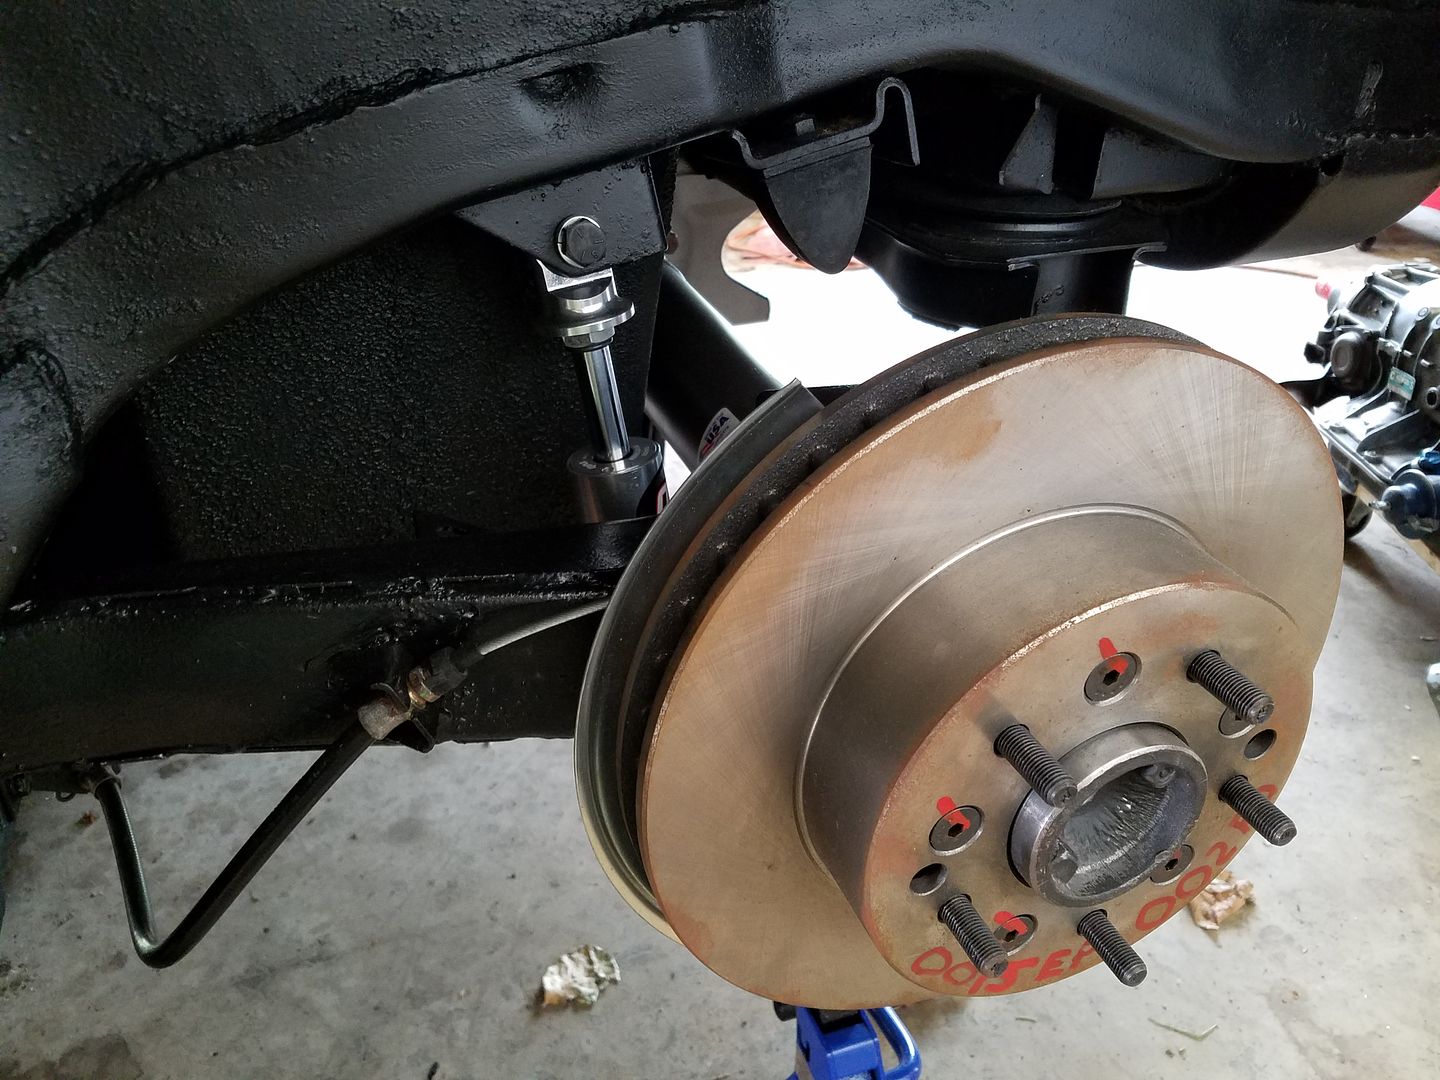
Some progress this afternoon.....the rear is in.....
Tomorrow the gas tank and more rear suspension if all goes well
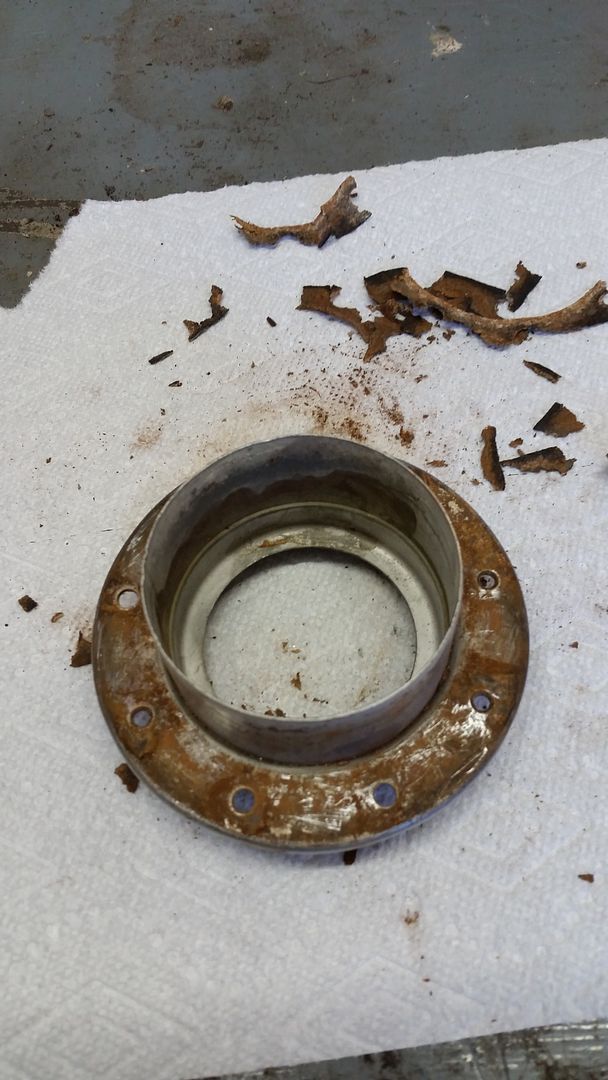
Bought a new gas tank last year with a little bit more capacity.....but just may end up using the original tank that I redid and sell the new one.....
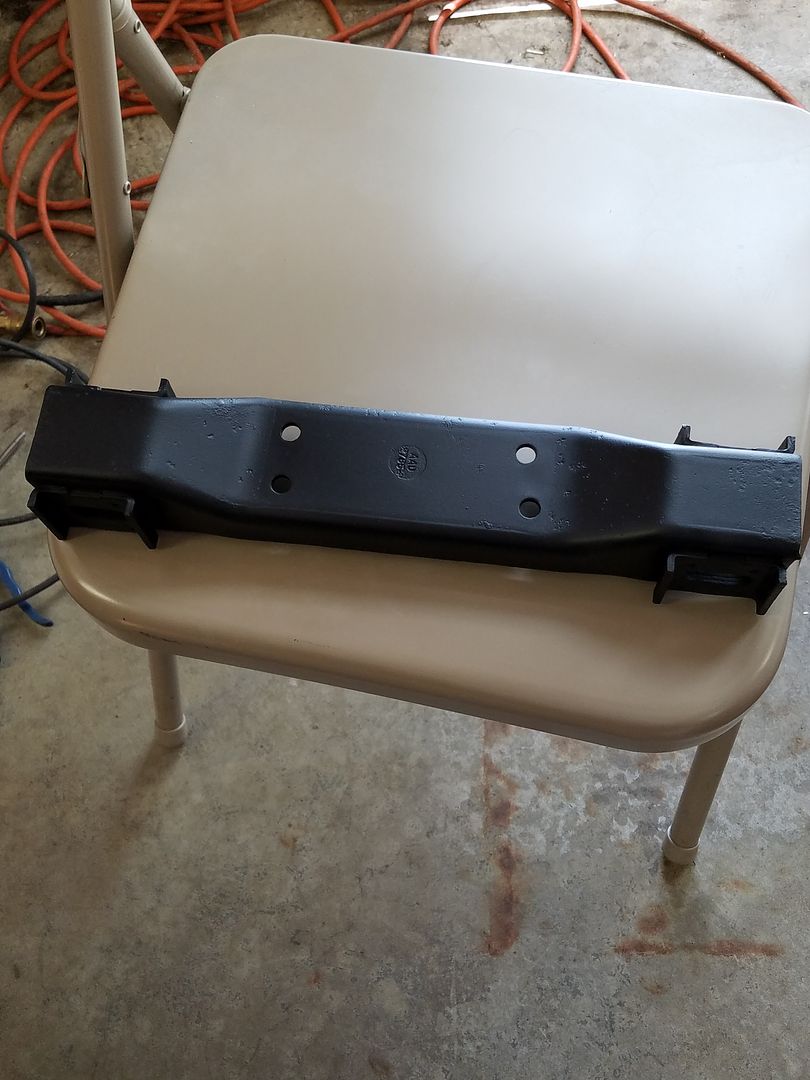
Although posted some time ago in this thread, see what you can notice in pic #4 and any info you may know about that item.....especially for the newer Corvette enthusiasts on the forum....
Tomorrow the gas tank and more rear suspension if all goes well
Bought a new gas tank last year with a little bit more capacity.....but just may end up using the original tank that I redid and sell the new one.....
Although posted some time ago in this thread, see what you can notice in pic #4 and any info you may know about that item.....especially for the newer Corvette enthusiasts on the forum....


Last edited by 74 LS4-454; 06-24-2016 at 08:41 PM.
The following users liked this post:
MISTERZ06 (06-08-2017)
 06-26-2016, 12:10 AM
#107
Melting Slicks
Thread Starter
Thanks.....yes it is the original harness, as the vehicle only has 10,250 plus original miles on it....but now, no longer original as it is completely apart and in the stages of reassembly. Its been a long time.....
06-26-2016, 12:30 AM
#108
Melting Slicks
Thread Starter
Yesterday's progress....the gas tank.......
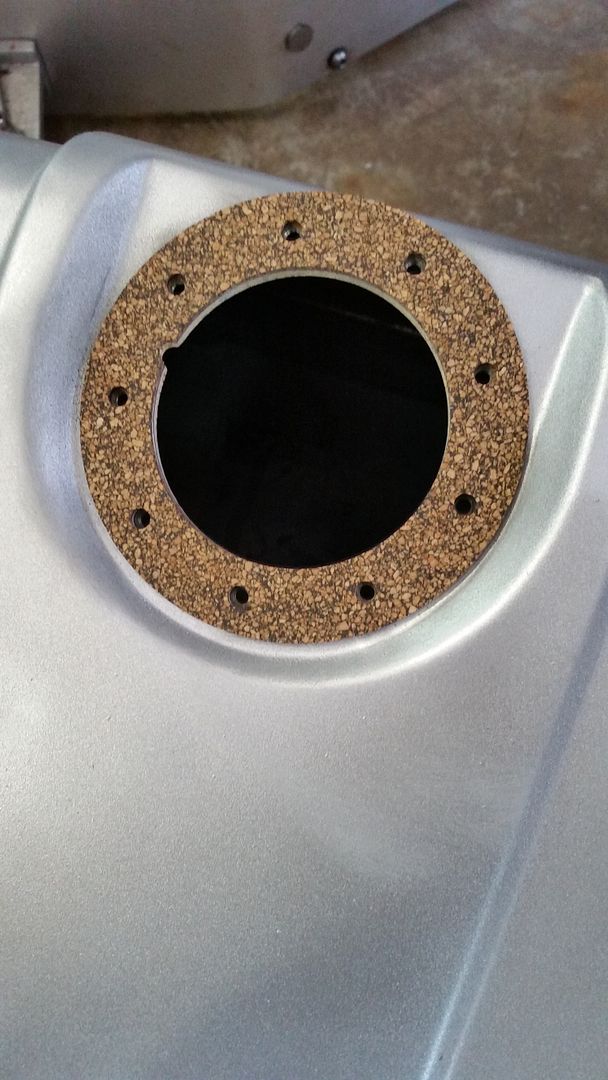
Was undecided on whether to use the new or original gas tank. I ended up going with the original tank that I redid a few years ago. I also figured that since I went this far, now would be a good time to change out the filler neck gasket. As you will see in the pics below, I am glad that I did.
Of course the seasoned owners already know all of this from their experiences over the years. As for the newer owners, when you have the opportunity and time to change out an item that you are undecided on, but think it would be a good measure to do it now as opposed to later when a problem may develop, then do it. Mind you, this does pertain to every little item, especially if you have a "dd". But if your doing a full or partial rebuild, and you think you should, then get it done.
I did run into a slight problem as I went to use a new set of bolts for the filler neck, which had new "O" rings on them. The old bolts were still good, but the "O" rings on them were shot. Of course I go with the new bolts and don't I break one off on the tank....Ok, got that removed finally......undid all the new bolts, ended up using the old bolds with the "O" rings from the new bolts.....
Finally have it ready for installation later today, with a new separator and hoses for the tank......
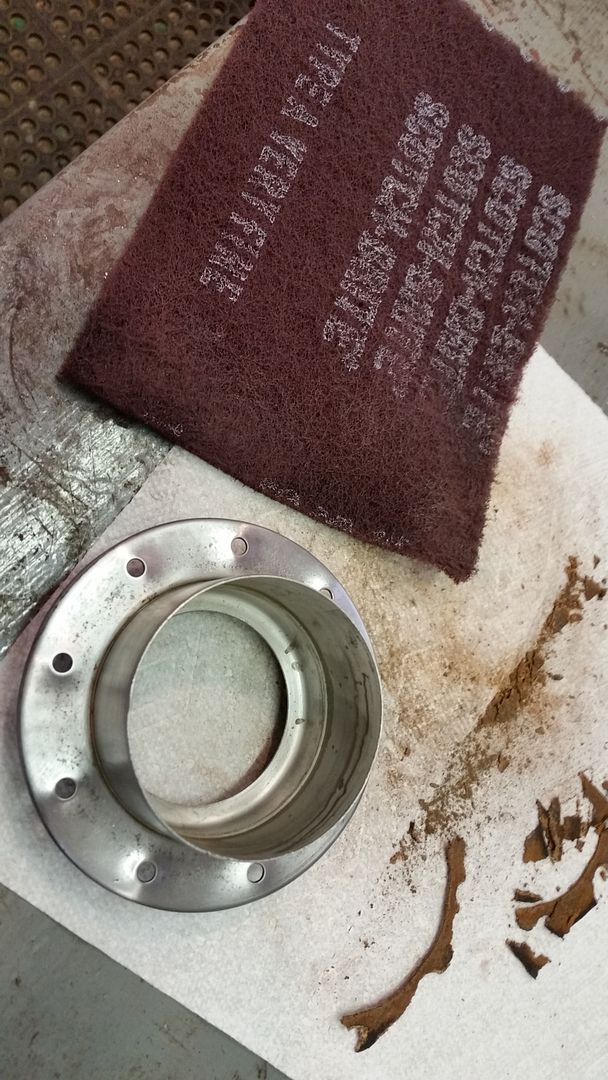
Old gasket was shot....sand paper, and Scotch Brite very fine pad did the job.....


Was undecided on whether to use the new or original gas tank. I ended up going with the original tank that I redid a few years ago. I also figured that since I went this far, now would be a good time to change out the filler neck gasket. As you will see in the pics below, I am glad that I did.
Of course the seasoned owners already know all of this from their experiences over the years. As for the newer owners, when you have the opportunity and time to change out an item that you are undecided on, but think it would be a good measure to do it now as opposed to later when a problem may develop, then do it. Mind you, this does pertain to every little item, especially if you have a "dd". But if your doing a full or partial rebuild, and you think you should, then get it done.
I did run into a slight problem as I went to use a new set of bolts for the filler neck, which had new "O" rings on them. The old bolts were still good, but the "O" rings on them were shot. Of course I go with the new bolts and don't I break one off on the tank....Ok, got that removed finally......undid all the new bolts, ended up using the old bolds with the "O" rings from the new bolts.....
Finally have it ready for installation later today, with a new separator and hoses for the tank......
Old gasket was shot....sand paper, and Scotch Brite very fine pad did the job.....


Last edited by 74 LS4-454; 06-26-2016 at 12:31 AM.
The following users liked this post:
MISTERZ06 (06-08-2017)
07-14-2016, 09:55 PM
#109
Melting Slicks
Thread Starter
More progress, more pics....along with some frustration....
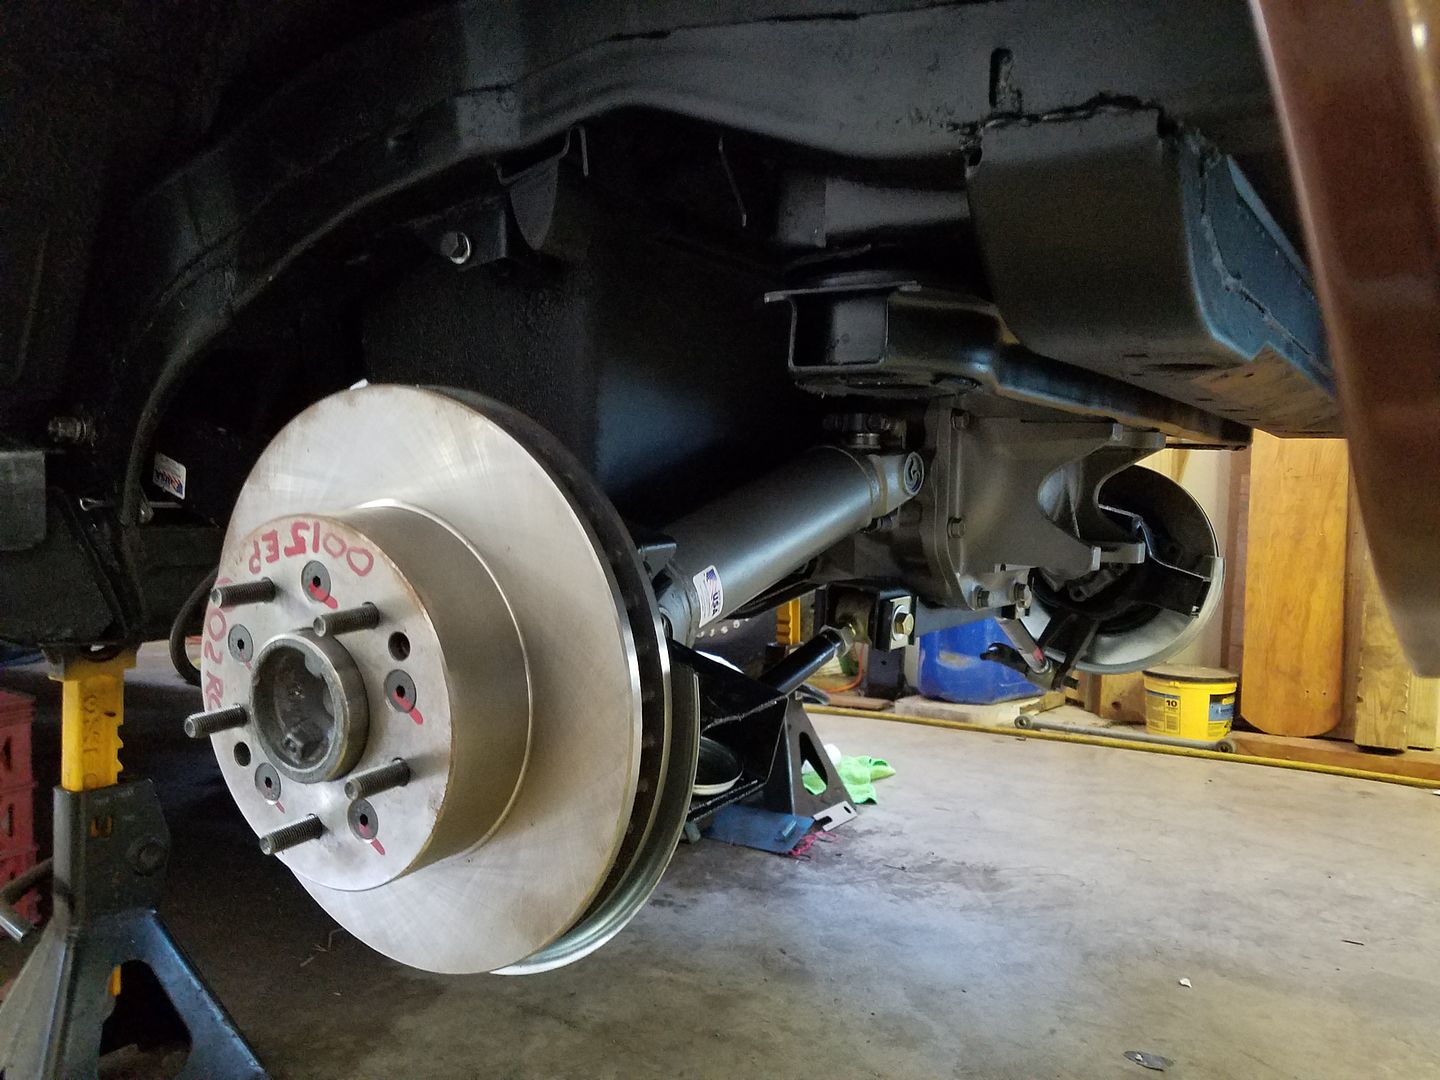
Rear suspension finally coming together....some.......
 [/URL]
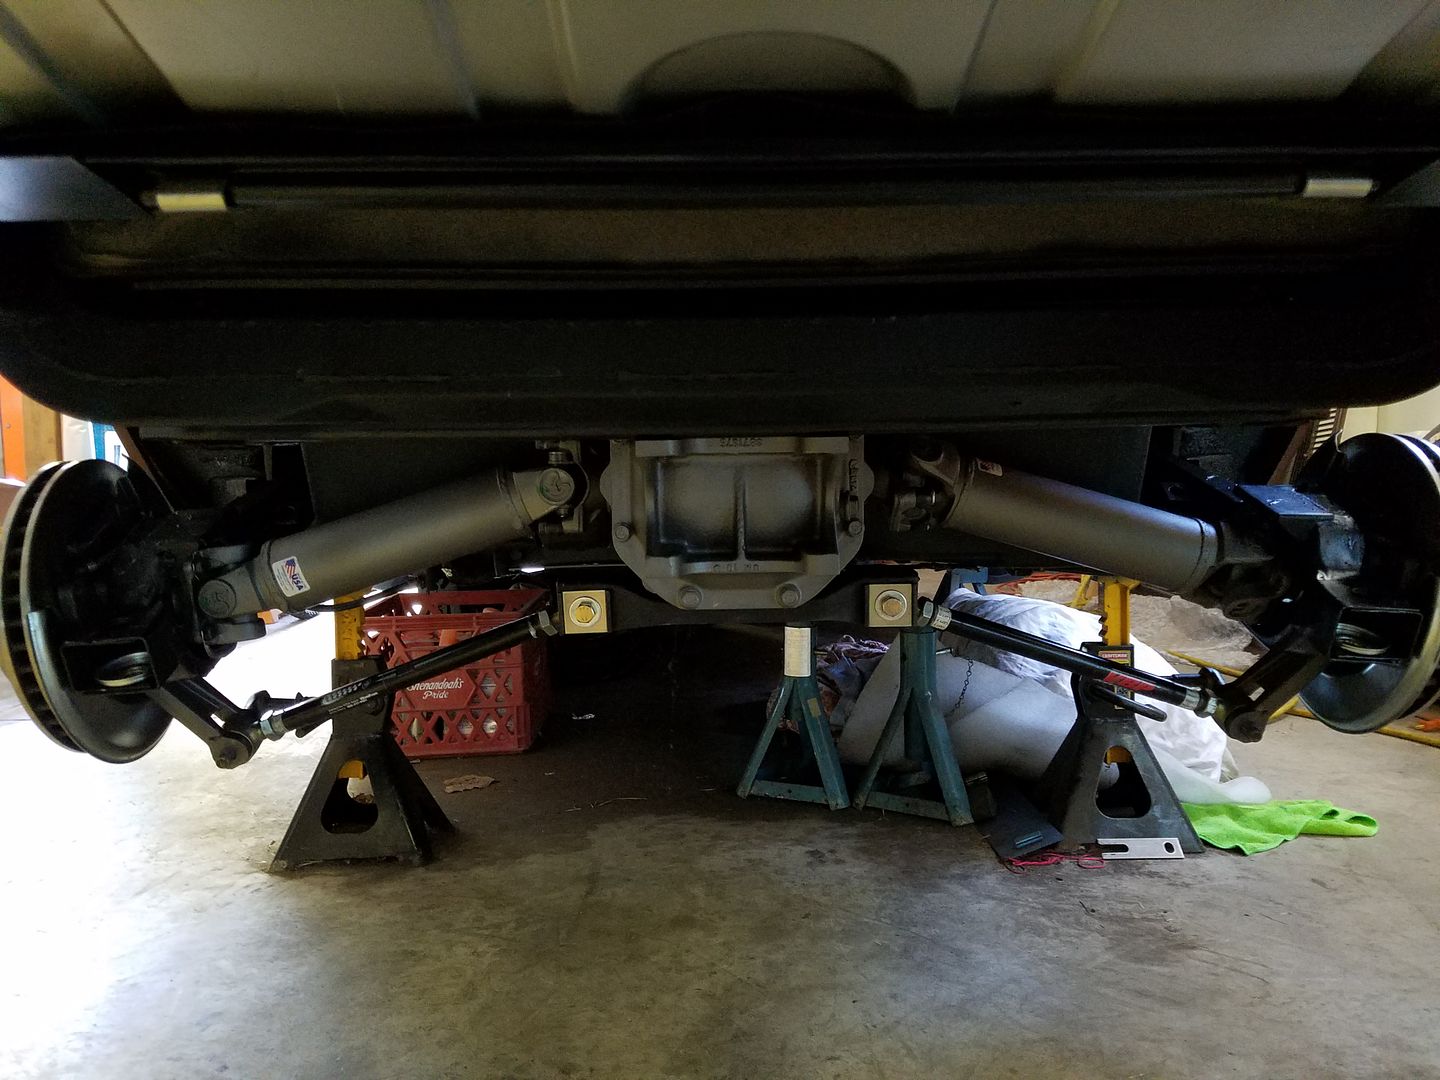
Rear suspension finally coming together....some.......


 [/URL]
Last edited by 74 LS4-454; 07-14-2016 at 09:59 PM.
The following users liked this post:
MISTERZ06 (06-08-2017)
04-23-2017, 01:01 AM
#110
Melting Slicks
Thread Starter
Its been awhile since my last update. Have recently started back working on the 74. The goal is to have it on the ground by or during the Summer and running by the Fall, if not sooner.
Getting things done big and small, but everything is progress no matter what is done!!!
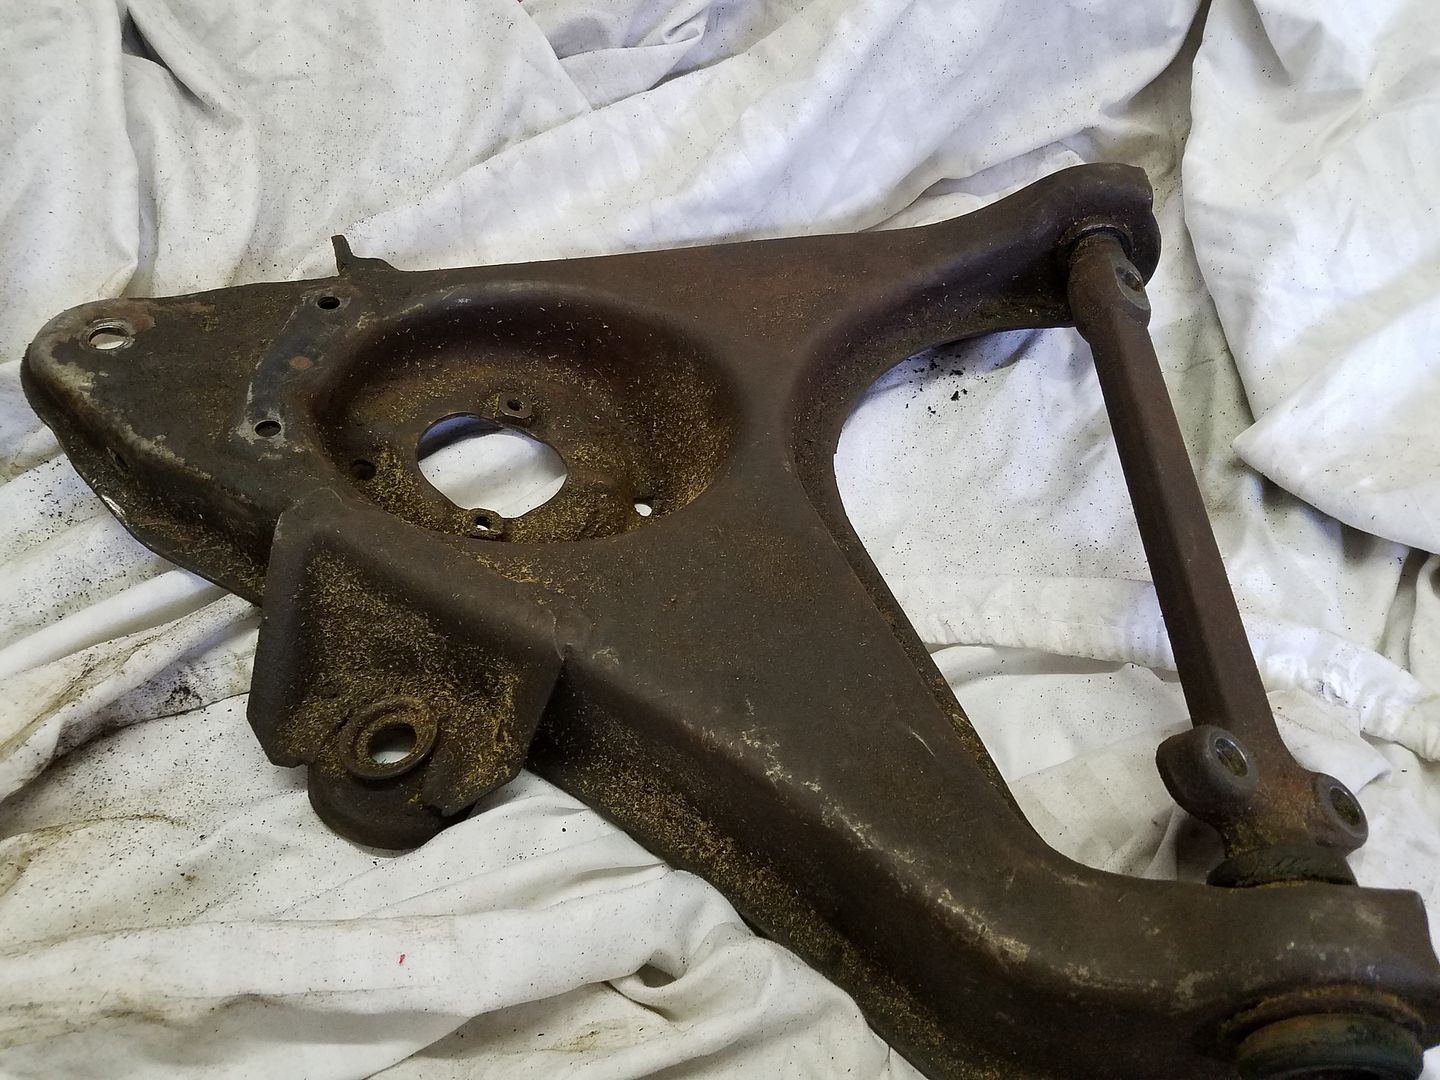
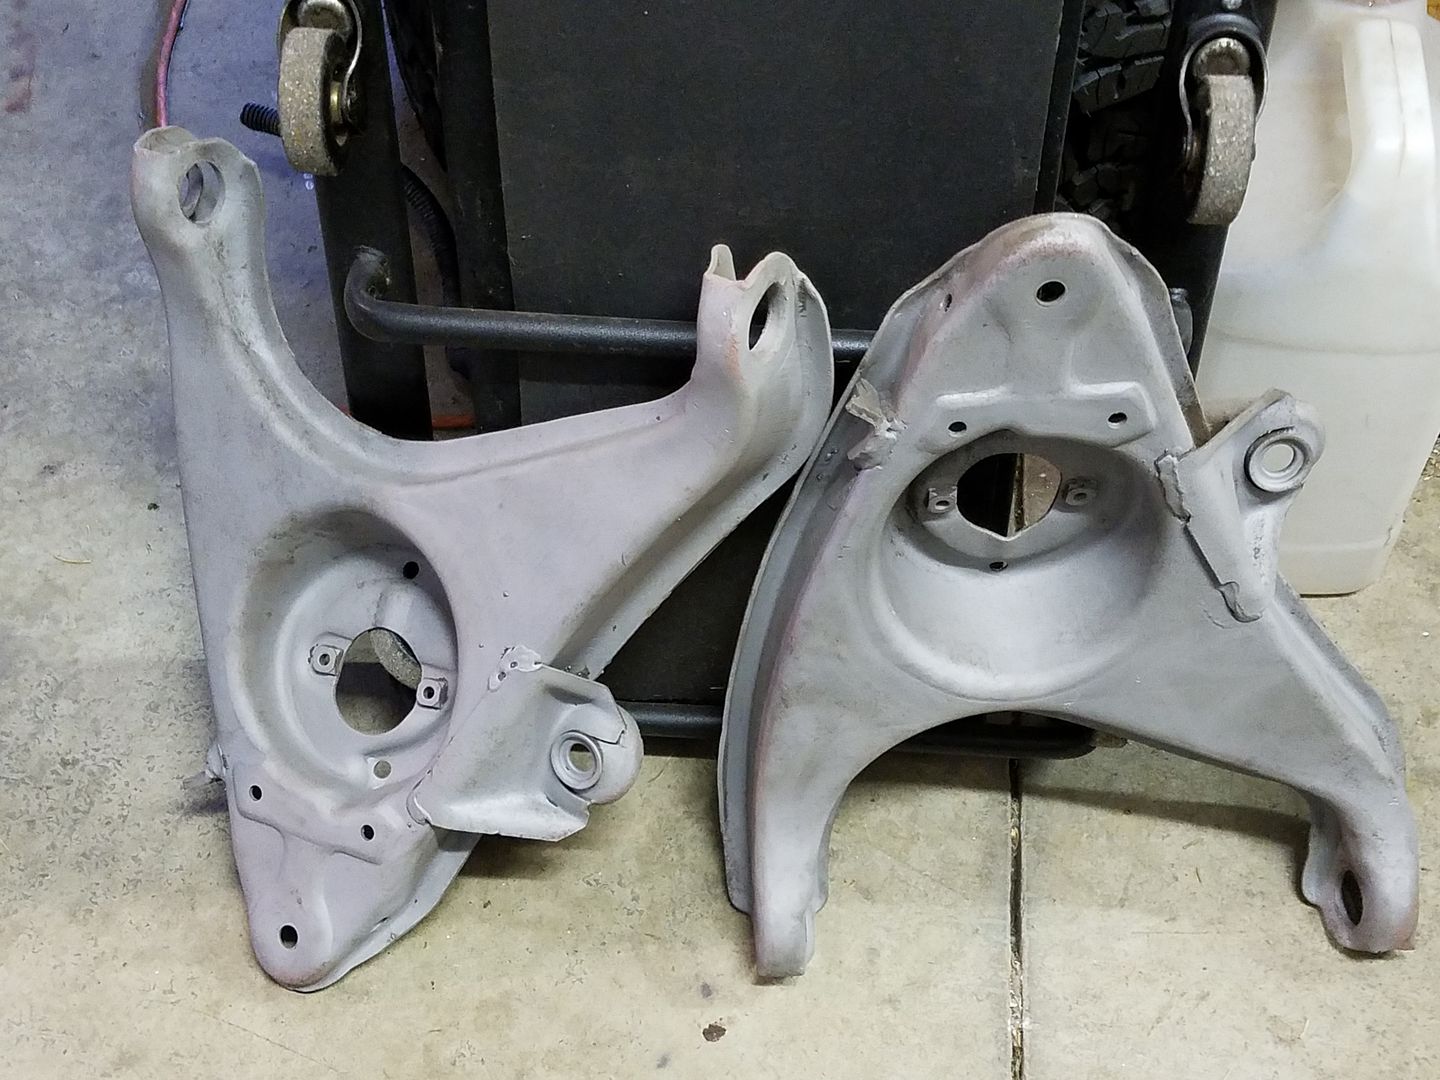
We did have a minor set back on Saturday as we were attempting to install the lower control arm bushings. We ended up using a press for a short time with other methods to remove the bushings. One of the arms got tweaked about a 1/2" or less. So I need the spec for the distance between the bushing holes (inside to inside & outside to outside) for the lower control arms. I don't want to take the measurement from the other arm just in case it also got tweaked . Hopefully we can get it back in spec without to much difficulty....
So if anyone knows or can take a measurement of one that is available, it would be appreciated. I can probably get one off the 82, but if someone has one out, it makes it easier.
Here are some updated pics....more as the progress continues....
QA1 non-adjustable rear shocks installed...
trans just about cleaned....
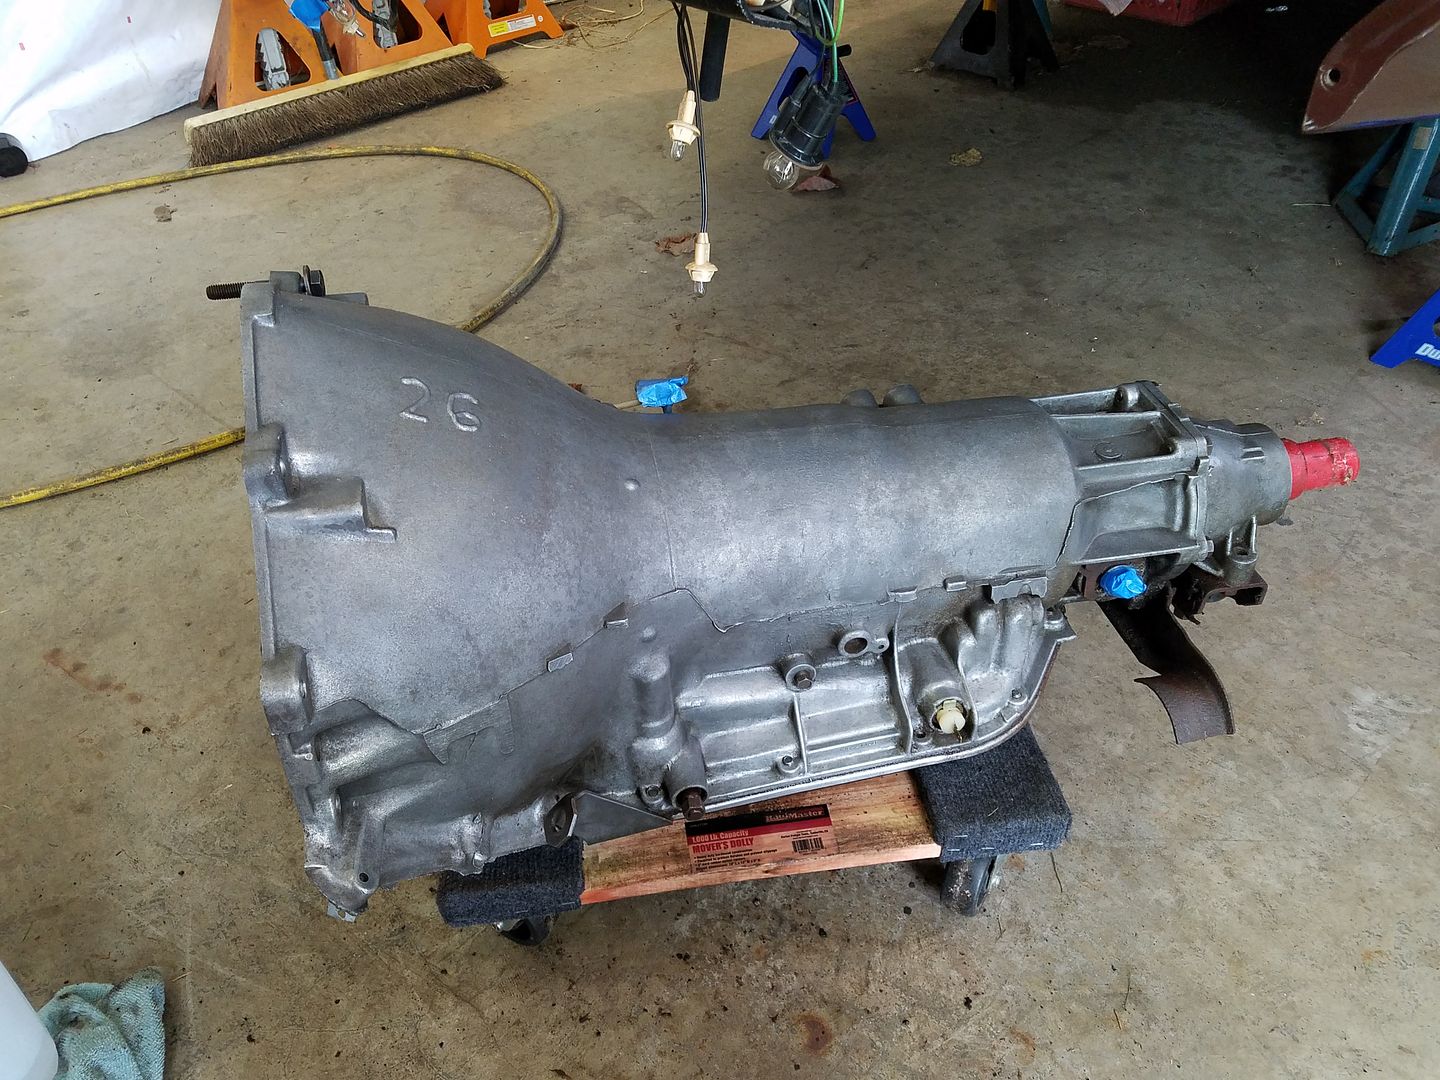

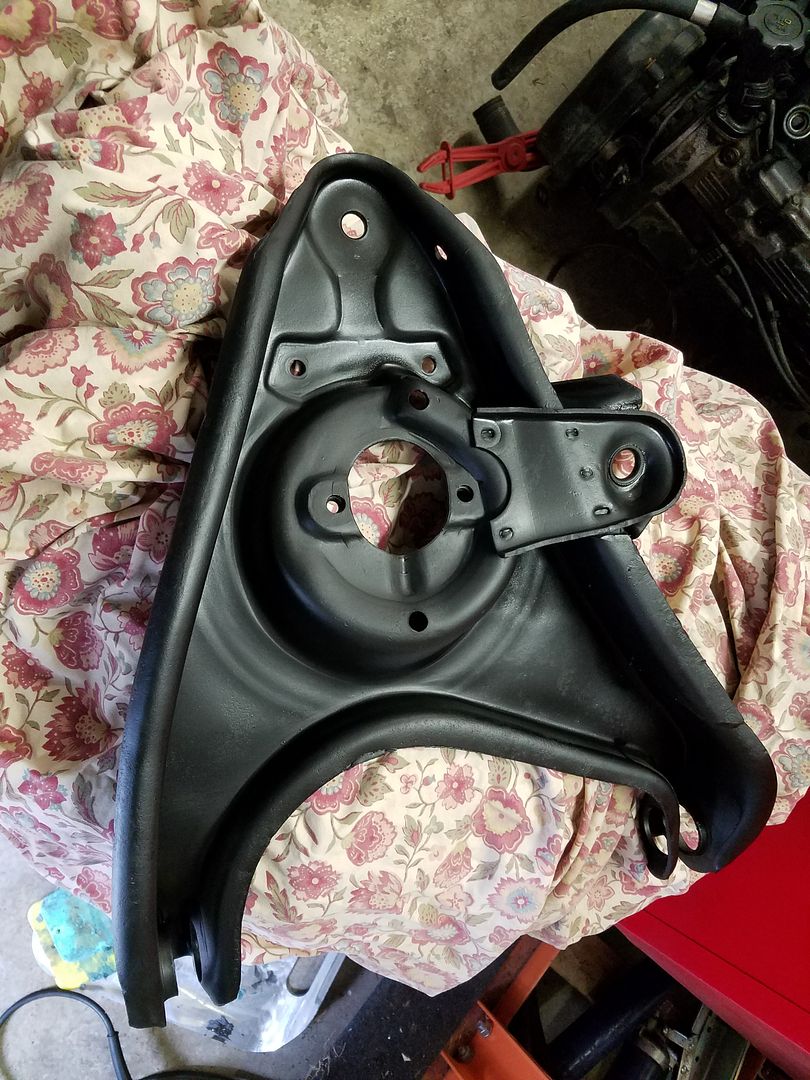
lower control arms getting refinished...
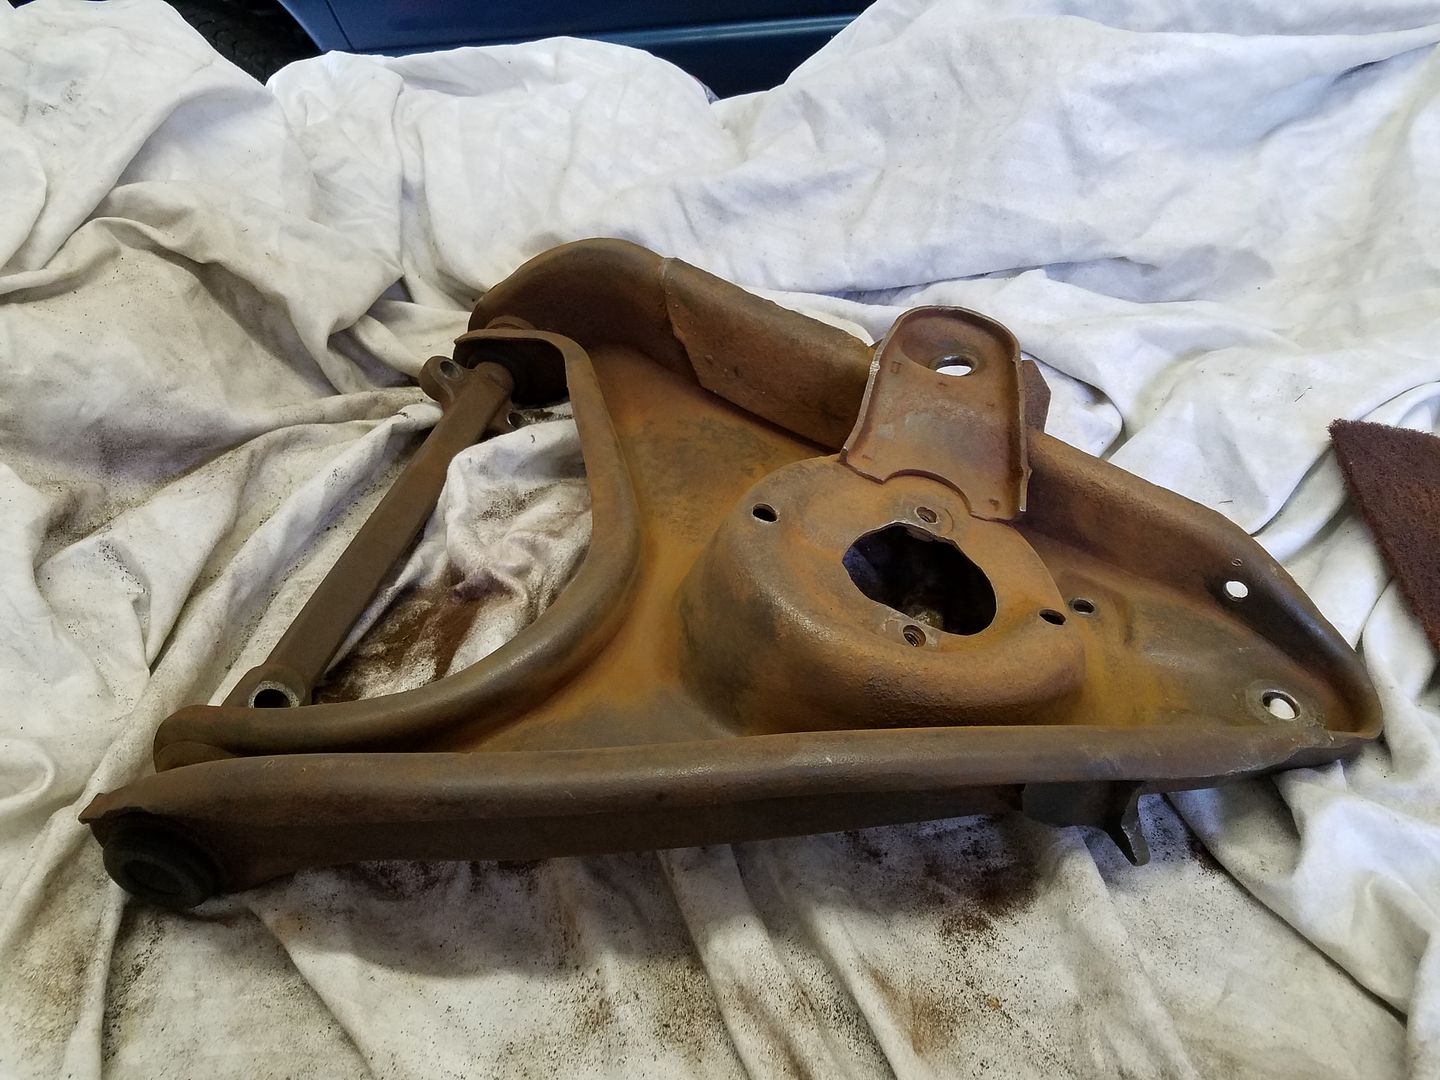
the "outside" makeshift paint booth....lol
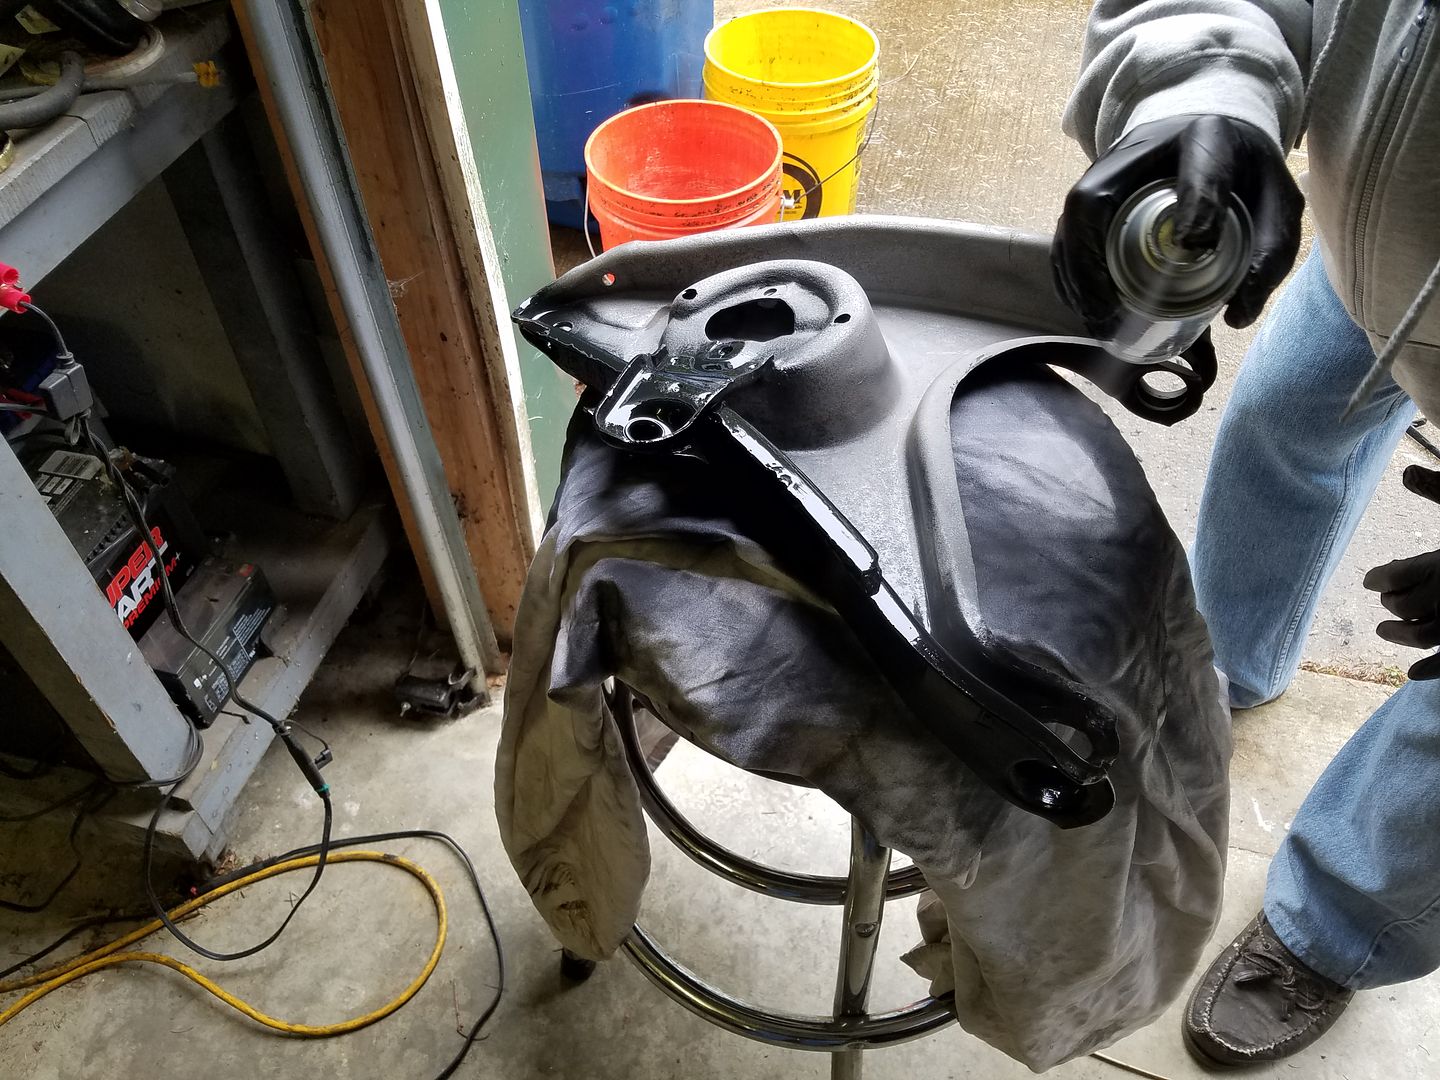
just one more coat needed after bushing install...
Getting things done big and small, but everything is progress no matter what is done!!!
We did have a minor set back on Saturday as we were attempting to install the lower control arm bushings. We ended up using a press for a short time with other methods to remove the bushings. One of the arms got tweaked about a 1/2" or less. So I need the spec for the distance between the bushing holes (inside to inside & outside to outside) for the lower control arms. I don't want to take the measurement from the other arm just in case it also got tweaked . Hopefully we can get it back in spec without to much difficulty....
So if anyone knows or can take a measurement of one that is available, it would be appreciated. I can probably get one off the 82, but if someone has one out, it makes it easier.
Here are some updated pics....more as the progress continues....
QA1 non-adjustable rear shocks installed...

trans just about cleaned....


lower control arms getting refinished...


the "outside" makeshift paint booth....lol

just one more coat needed after bushing install...

Last edited by 74 LS4-454; 04-23-2017 at 01:15 AM.
The following users liked this post:
MISTERZ06 (06-08-2017)
04-23-2017, 04:58 AM
#111
Its been awhile since my last update. Have recently started back working on the 74. The goal is to have it on the ground by or during the Summer and running by the Fall, if not sooner.
Getting things done big and small, but everything is progress no matter what is done!!!
We did have a minor set back on Saturday as we were attempting to install the lower control arm bushings. We ended up using a press for a short time with other methods to remove the bushings. One of the arms got tweaked about a 1/2" or less. So I need the spec for the distance between the bushing holes (inside to inside & outside to outside) for the lower control arms. I don't want to take the measurement from the other arm just in case it also got tweaked . Hopefully we can get it back in spec without to much difficulty....
So if anyone knows or can take a measurement of one that is available, it would be appreciated. I can probably get one off the 82, but if someone has one out, it makes it easier.
Here are some updated pics....more as the progress continues....
QA1 non-adjustable rear shocks installed...
trans just about cleaned....
lower control arms getting refinished...
the "outside" makeshift paint booth....lol
just one more coat needed after bushing install...
RVZIO
The following users liked this post:
74 LS4-454 (05-18-2017)
05-18-2017, 01:56 PM
#112
Melting Slicks
Thread Starter
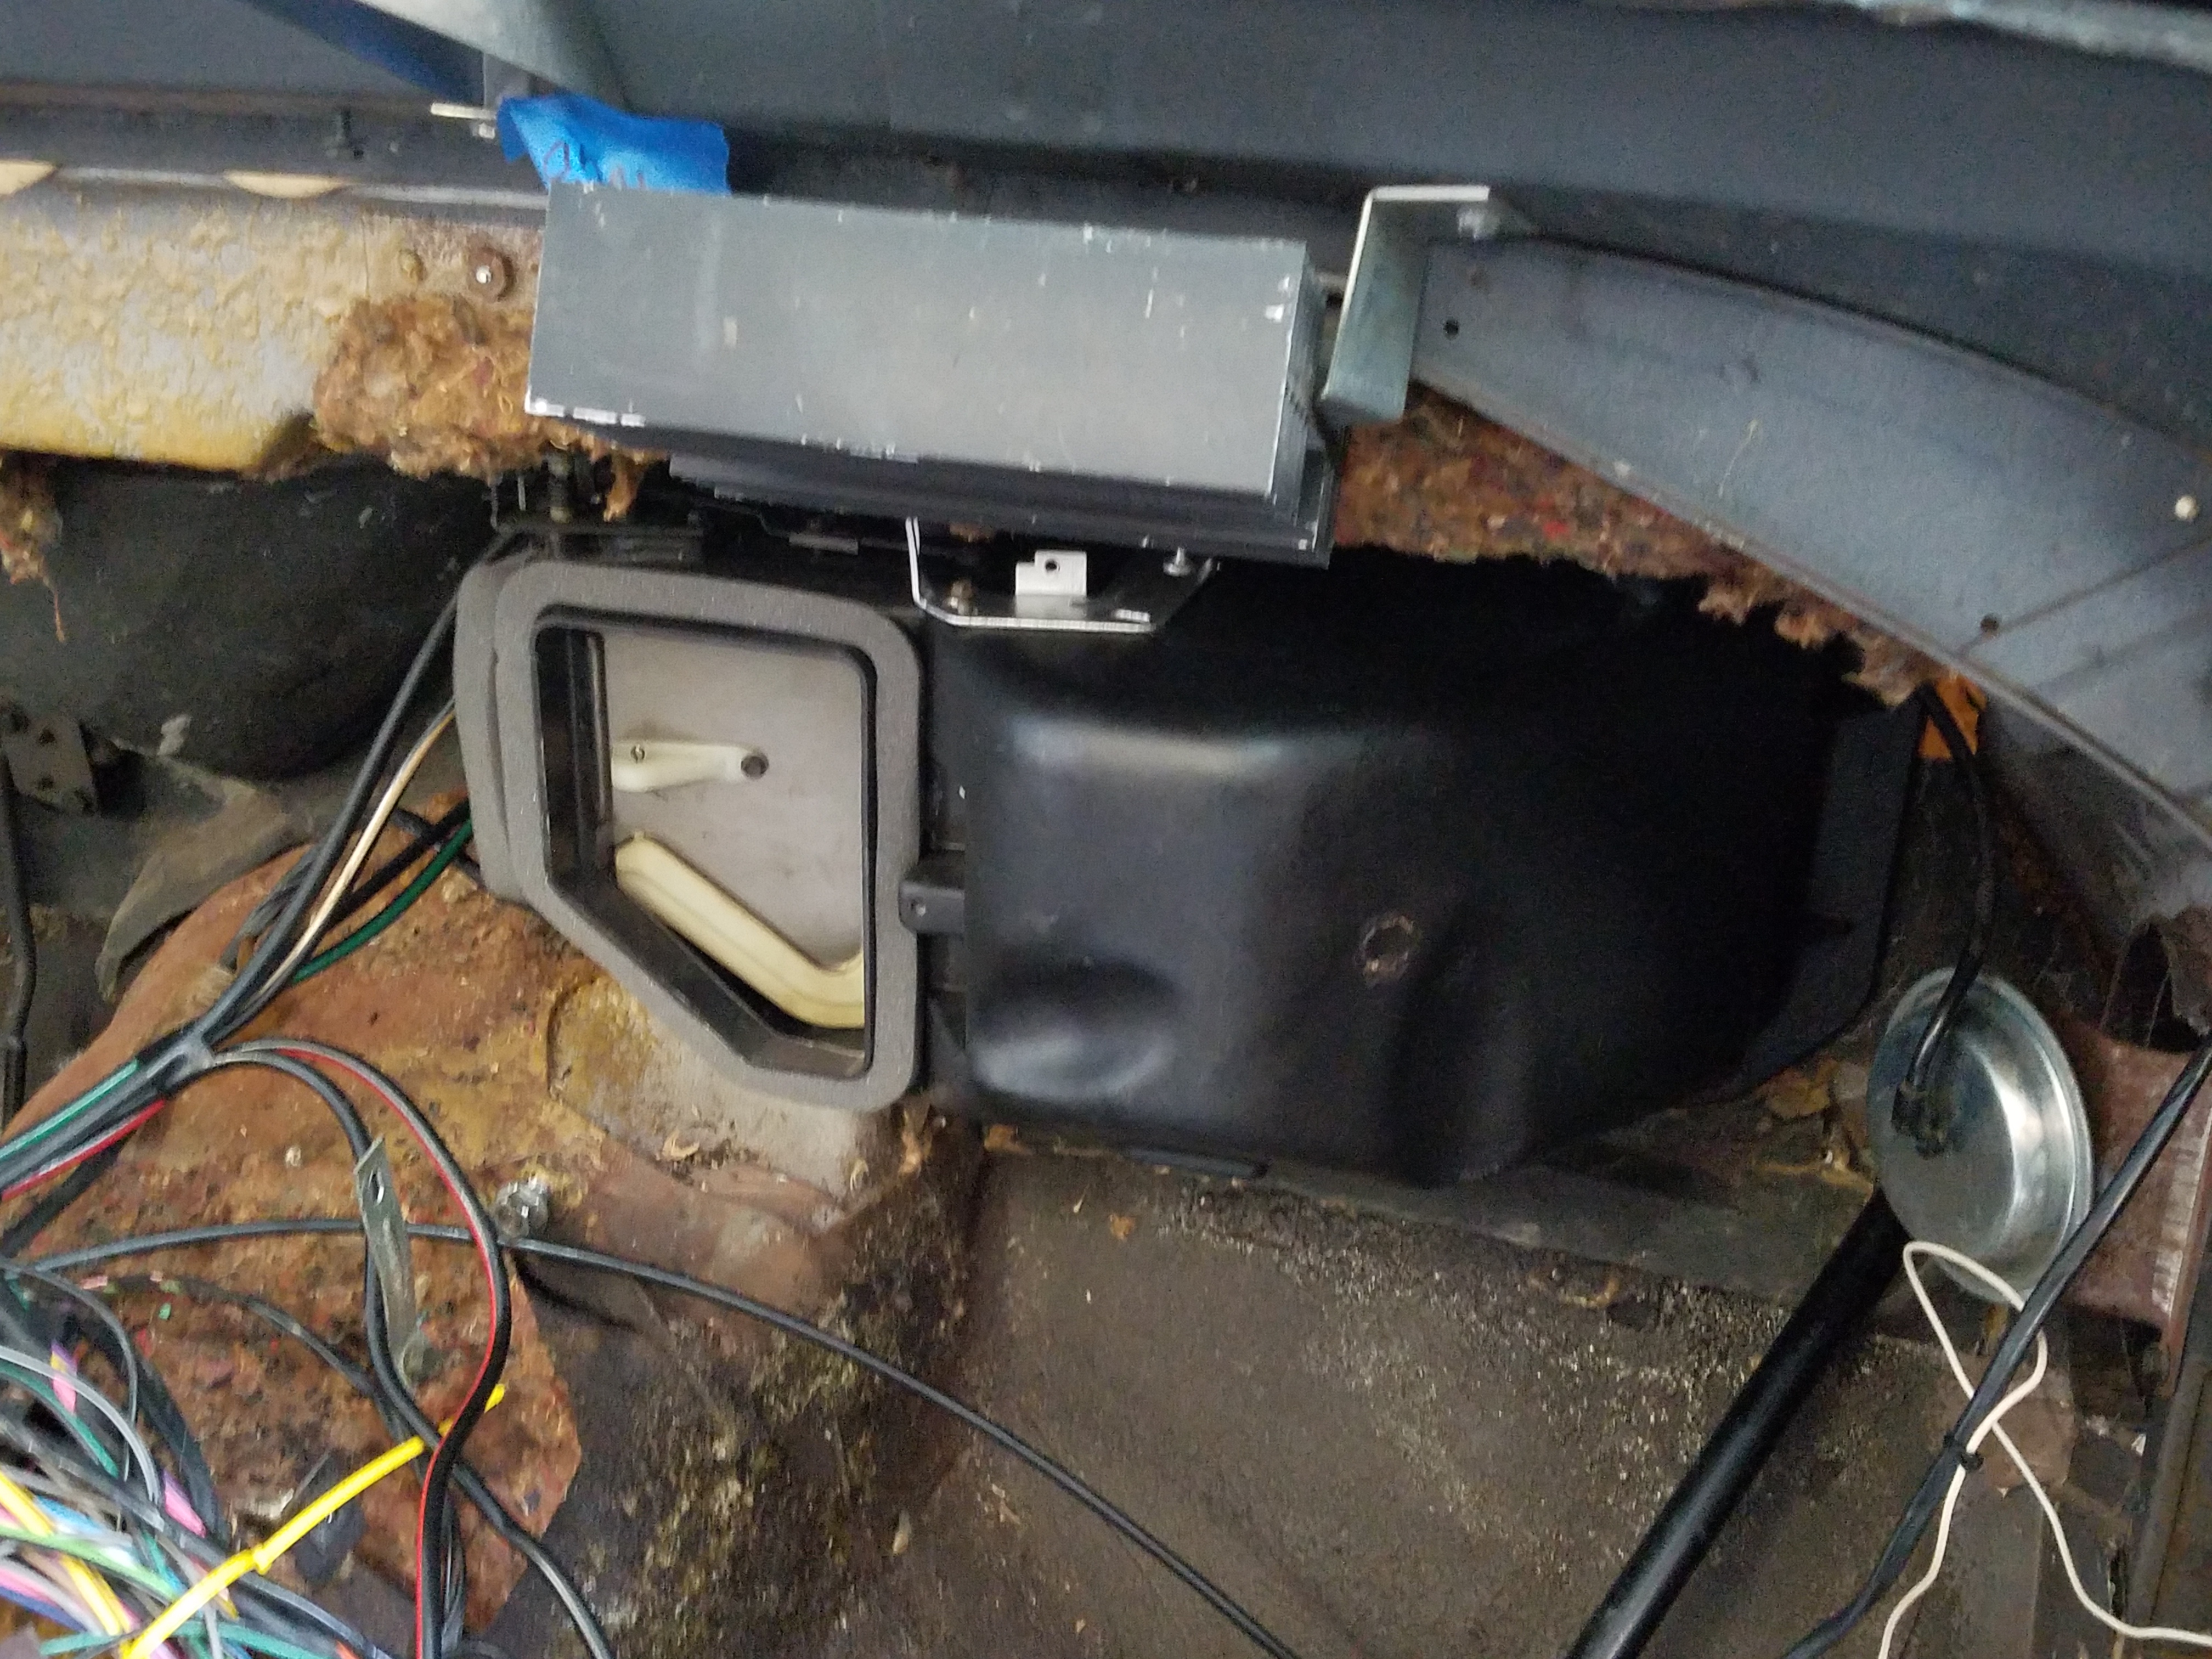
Making progress on a few items....had trouble installing the bushings on the lower control arms. Rather than making a mistake and regretting it after, I sent them out and had them installed. Results....perfect!!!
Turned my attention to the heater box and core. The original Harrison leaked and the original owner had it replaced at a Vette Shop. But I figured while the car is apart, now is the time to check out the heater core, and I'm glad I did. Took both the original and replacement core to the radiator shop and found out that both cores leak. The original leaks in 3 places in the core itself. While the replacement core was leaking from one pipe connection to the core. Needless to say, doing this now saved me a ton of time in the future.
While the shop re-soldered the pipe connection, he also went over other connections so that no new leaks should happen in the future.
From what he said, it is cost prohibitive to get the original re-cored unless there is a shop that already stocks that size core.
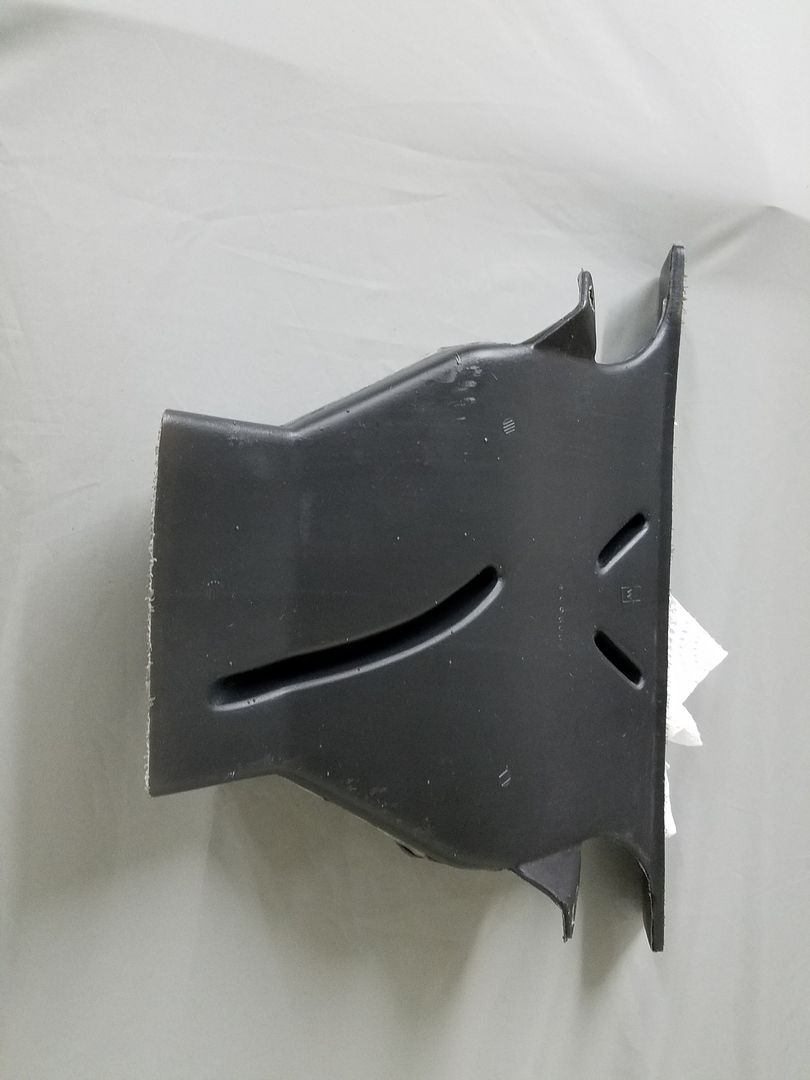
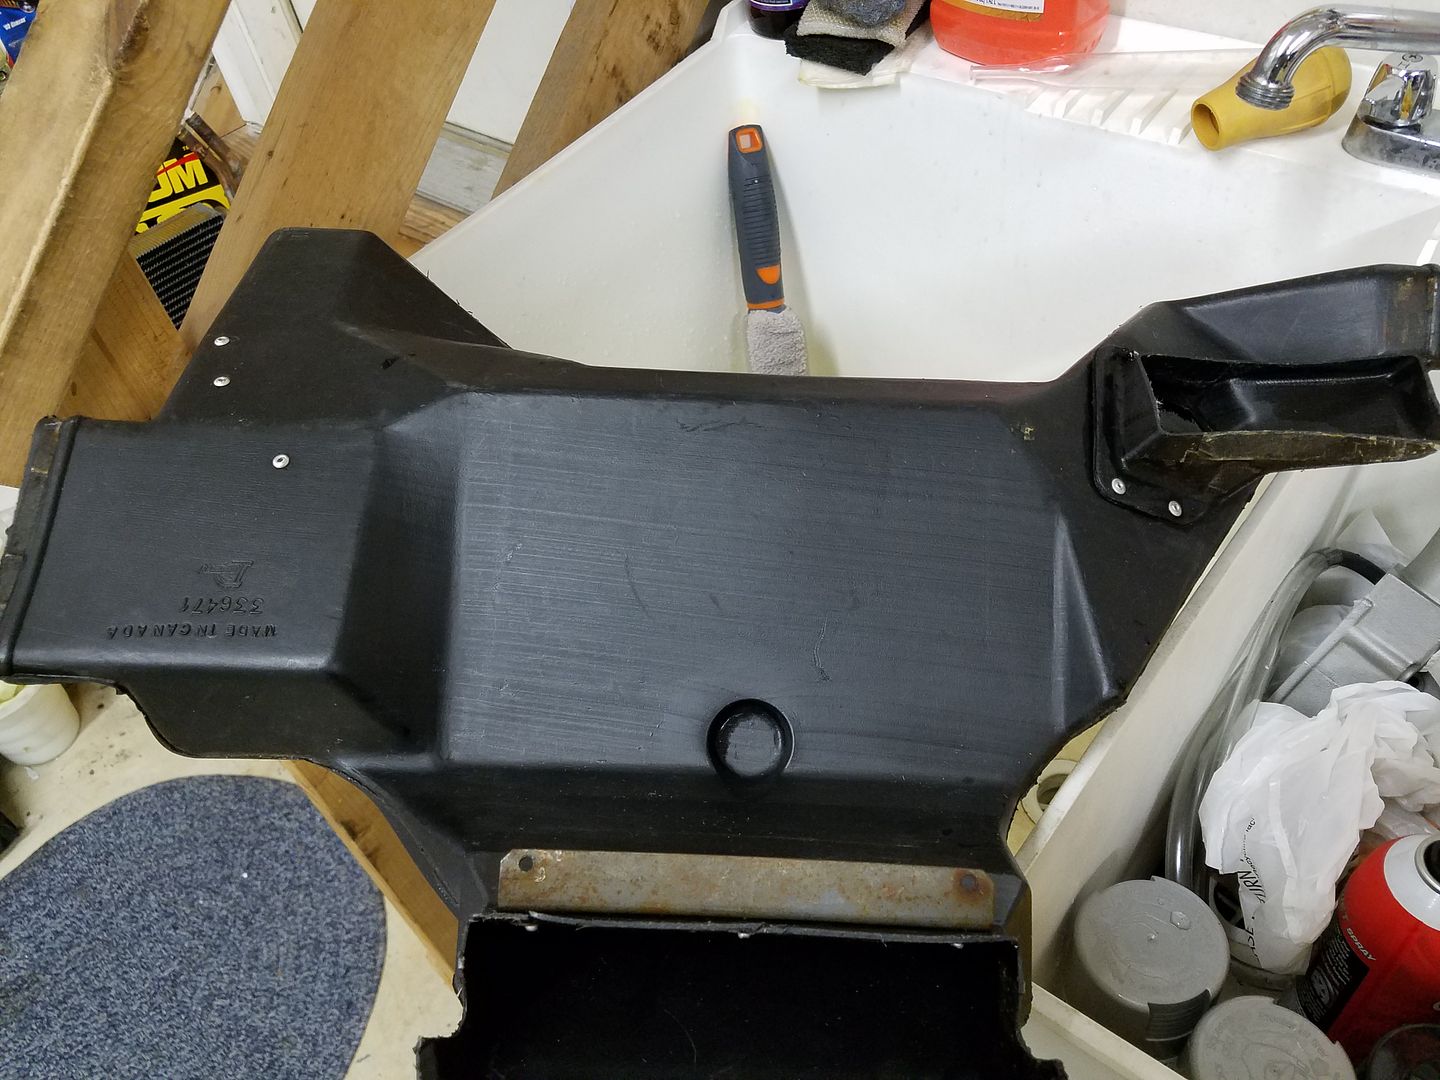
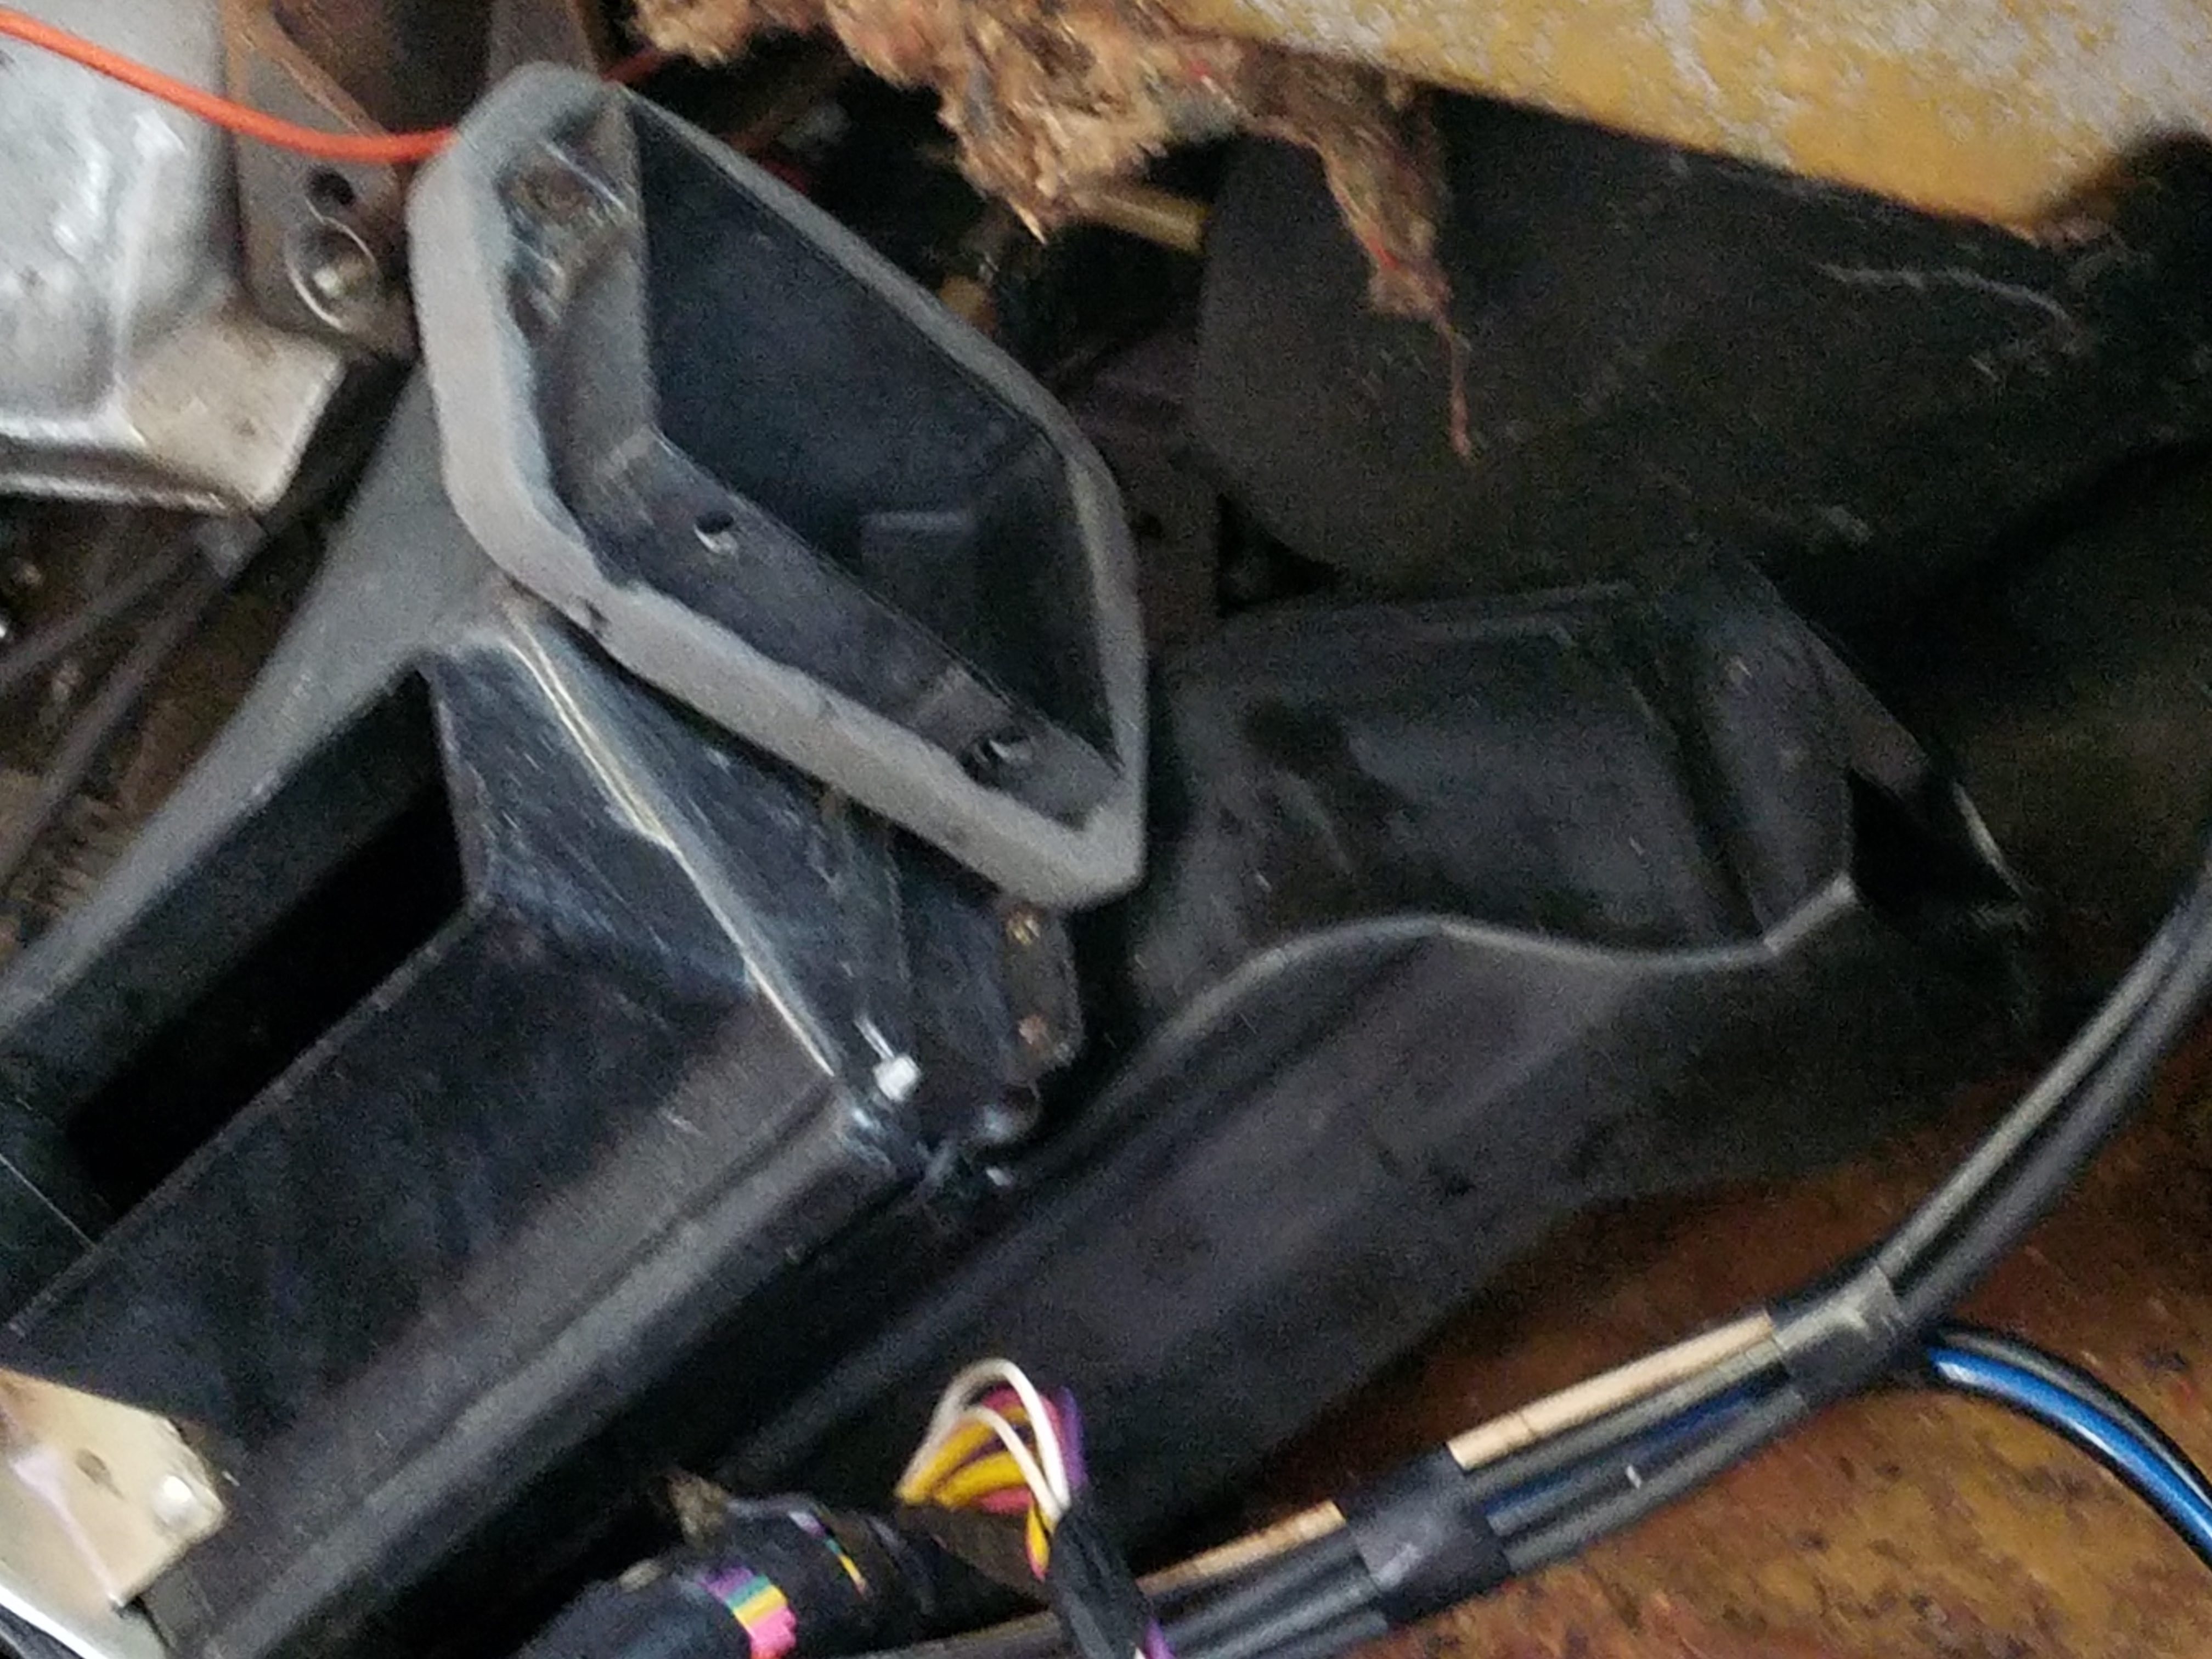
Also the Vette shop that did the core replacement job, did not tighten the bolts completely on the heater box. I guess they couldn't be bothered. They also never replaced the gaskets, they didn't even fully clean the old gaskets off of the box and the attaching ducts. This is another item that will be checked off when finished....
the box removed...
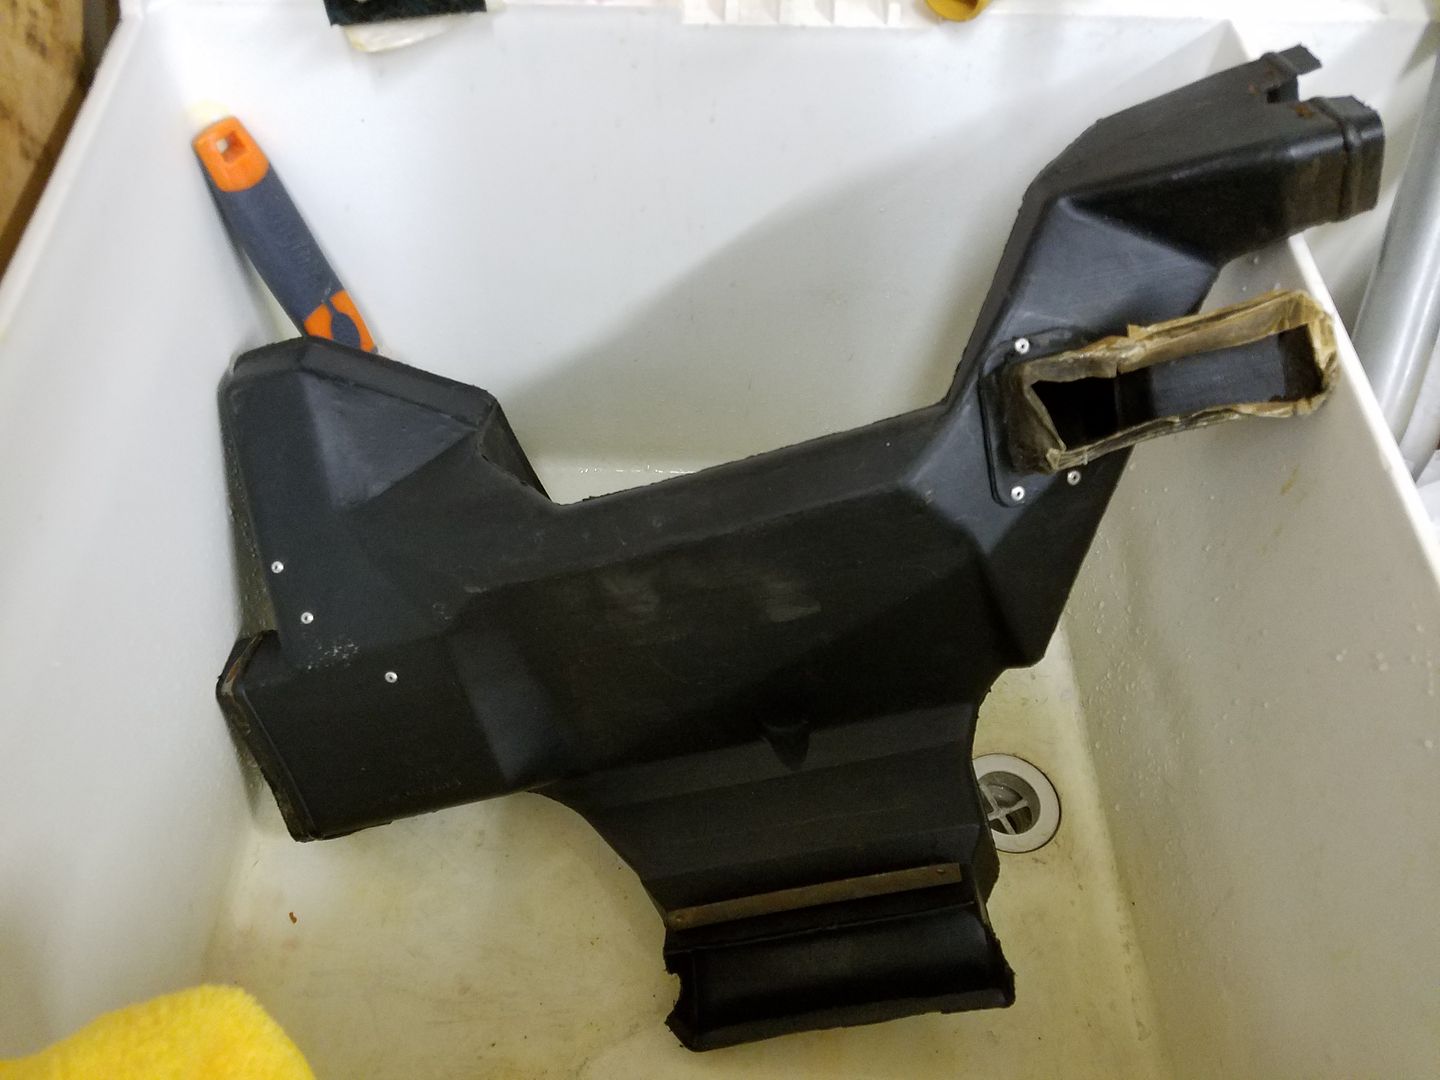
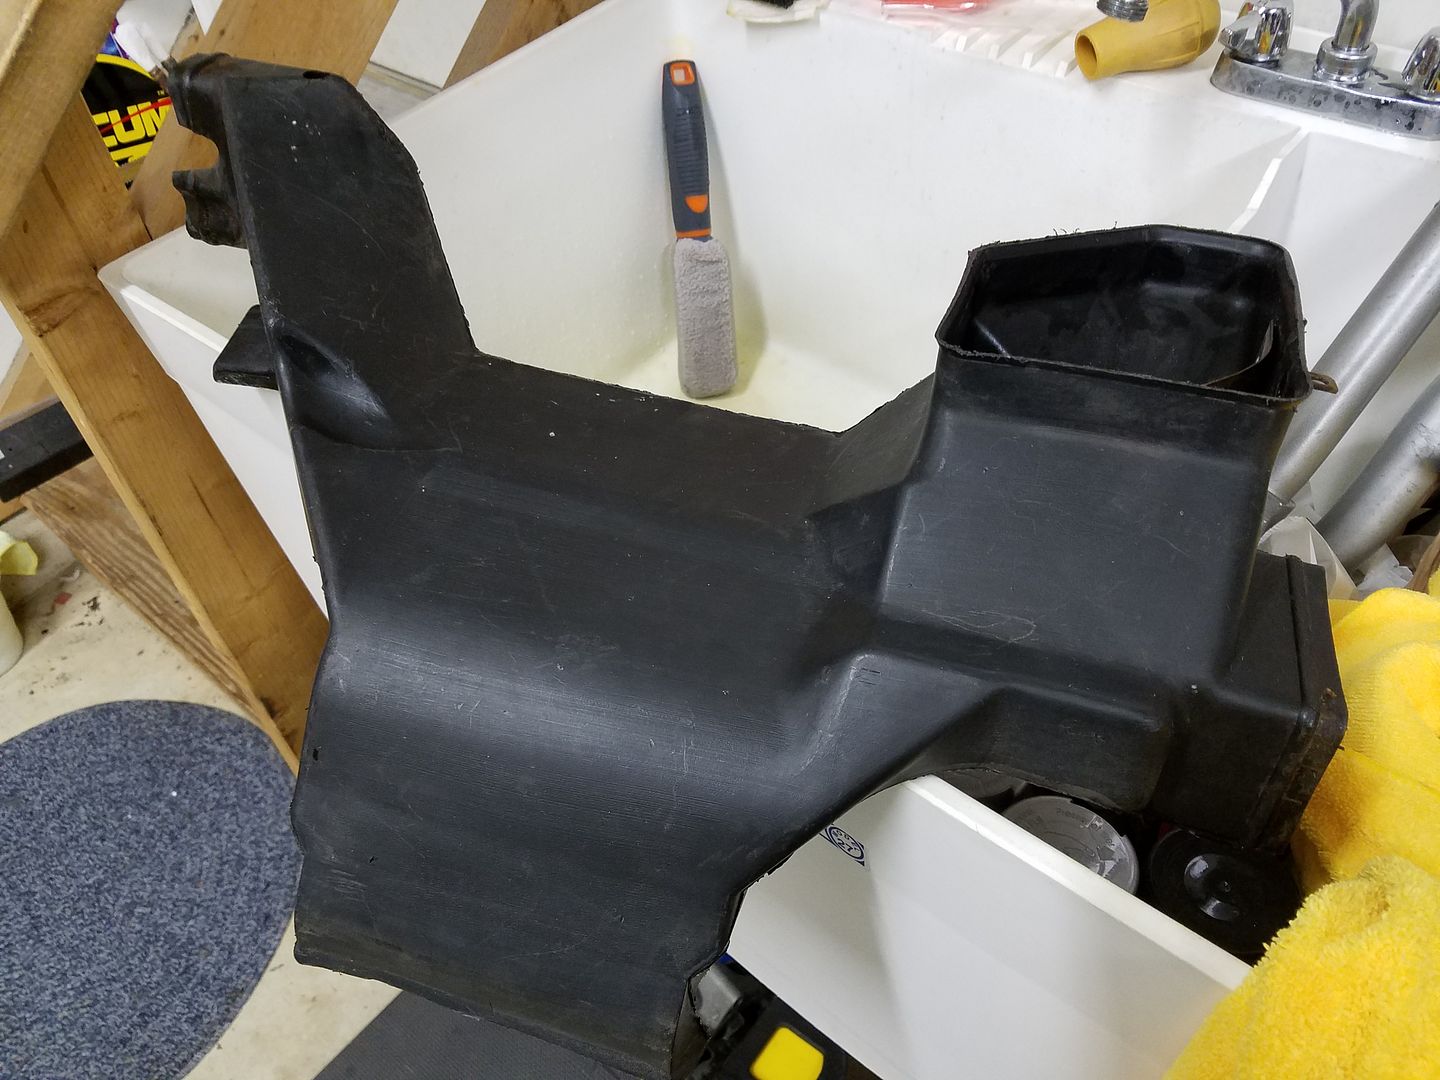
making progress with cleaning the HVAC ducts for the 74...
before...
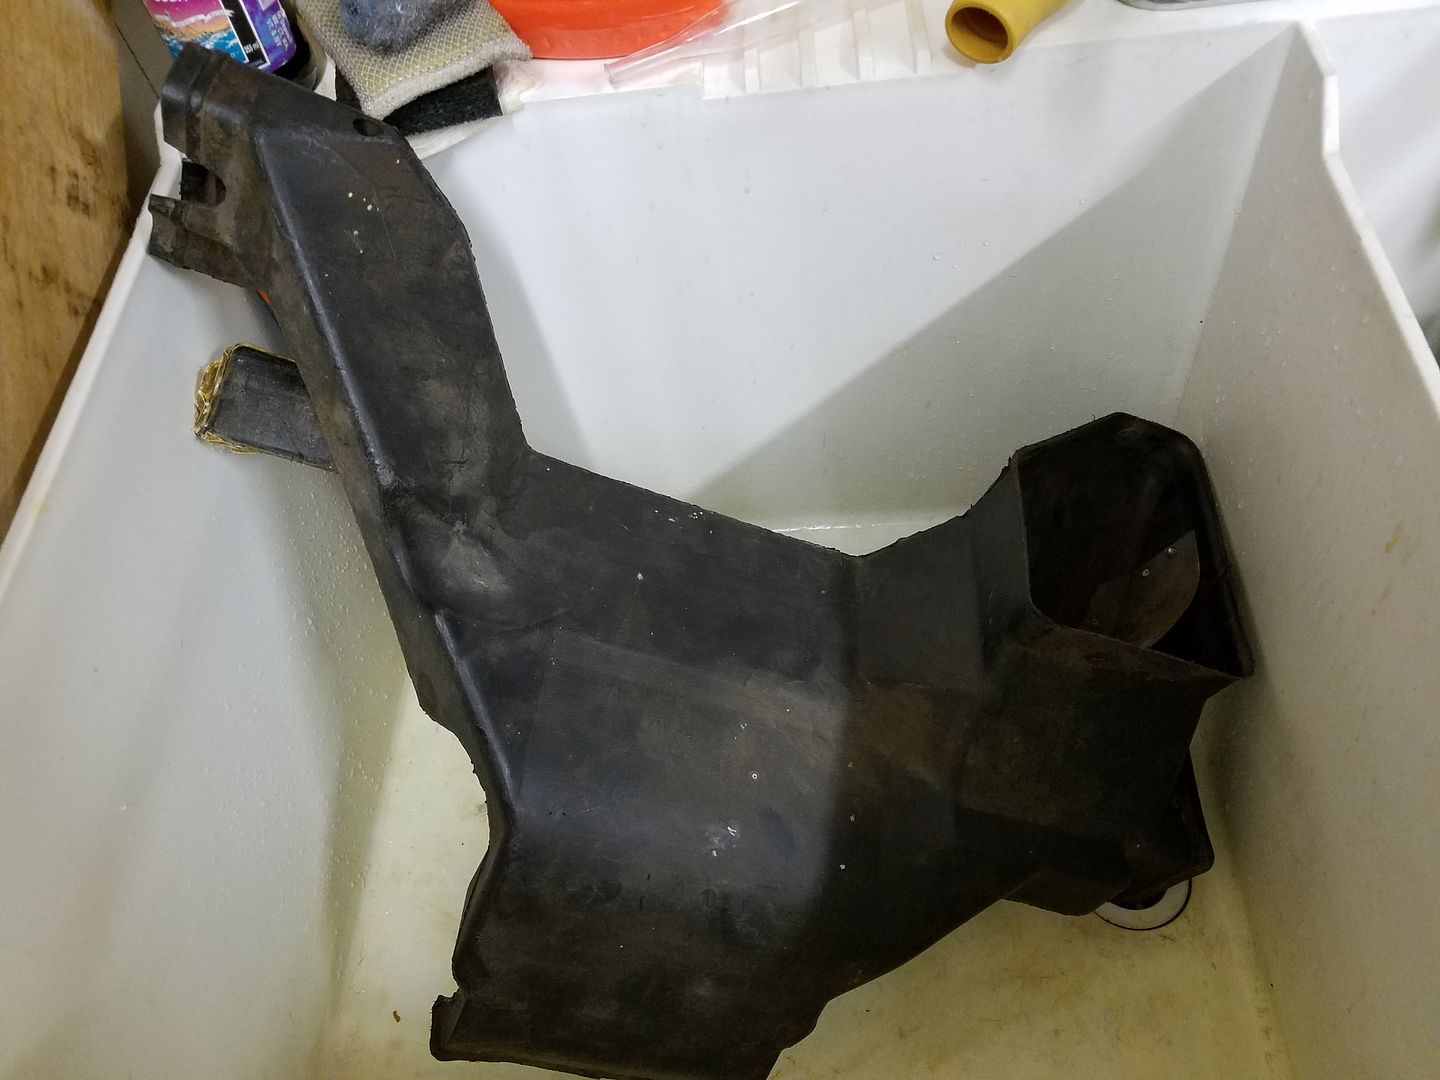
some of the dirt build up inside the ducts...

after...
Turned my attention to the heater box and core. The original Harrison leaked and the original owner had it replaced at a Vette Shop. But I figured while the car is apart, now is the time to check out the heater core, and I'm glad I did. Took both the original and replacement core to the radiator shop and found out that both cores leak. The original leaks in 3 places in the core itself. While the replacement core was leaking from one pipe connection to the core. Needless to say, doing this now saved me a ton of time in the future.
While the shop re-soldered the pipe connection, he also went over other connections so that no new leaks should happen in the future.
From what he said, it is cost prohibitive to get the original re-cored unless there is a shop that already stocks that size core.
Also the Vette shop that did the core replacement job, did not tighten the bolts completely on the heater box. I guess they couldn't be bothered. They also never replaced the gaskets, they didn't even fully clean the old gaskets off of the box and the attaching ducts. This is another item that will be checked off when finished....
the box removed...

making progress with cleaning the HVAC ducts for the 74...

before...


some of the dirt build up inside the ducts...

after...


Last edited by 74 LS4-454; 05-18-2017 at 02:04 PM.
The following users liked this post:
MISTERZ06 (06-08-2017)
05-18-2017, 02:00 PM
#113
Melting Slicks
Thread Starter


here is the original Harrison core from the 74. Took this core and the replacement core to the radiator shop for a flush and pressure test. Again, doing this is a real time saver in the future, now that I know the replacement core is leak free!!!

the replacement with new solder....

Last edited by 74 LS4-454; 05-18-2017 at 02:02 PM.
The following users liked this post:
MISTERZ06 (06-08-2017)
06-07-2017, 07:00 PM
#114
Melting Slicks
Thread Starter
Did some driveshaft work today, preliminary cleaning, still have to replace the u-joints and clean the flanges...
Can someone tell me what the correct paint (if any) should be on the driveshaft? Having a senior moment right now....
Thanks for any info...
the start...
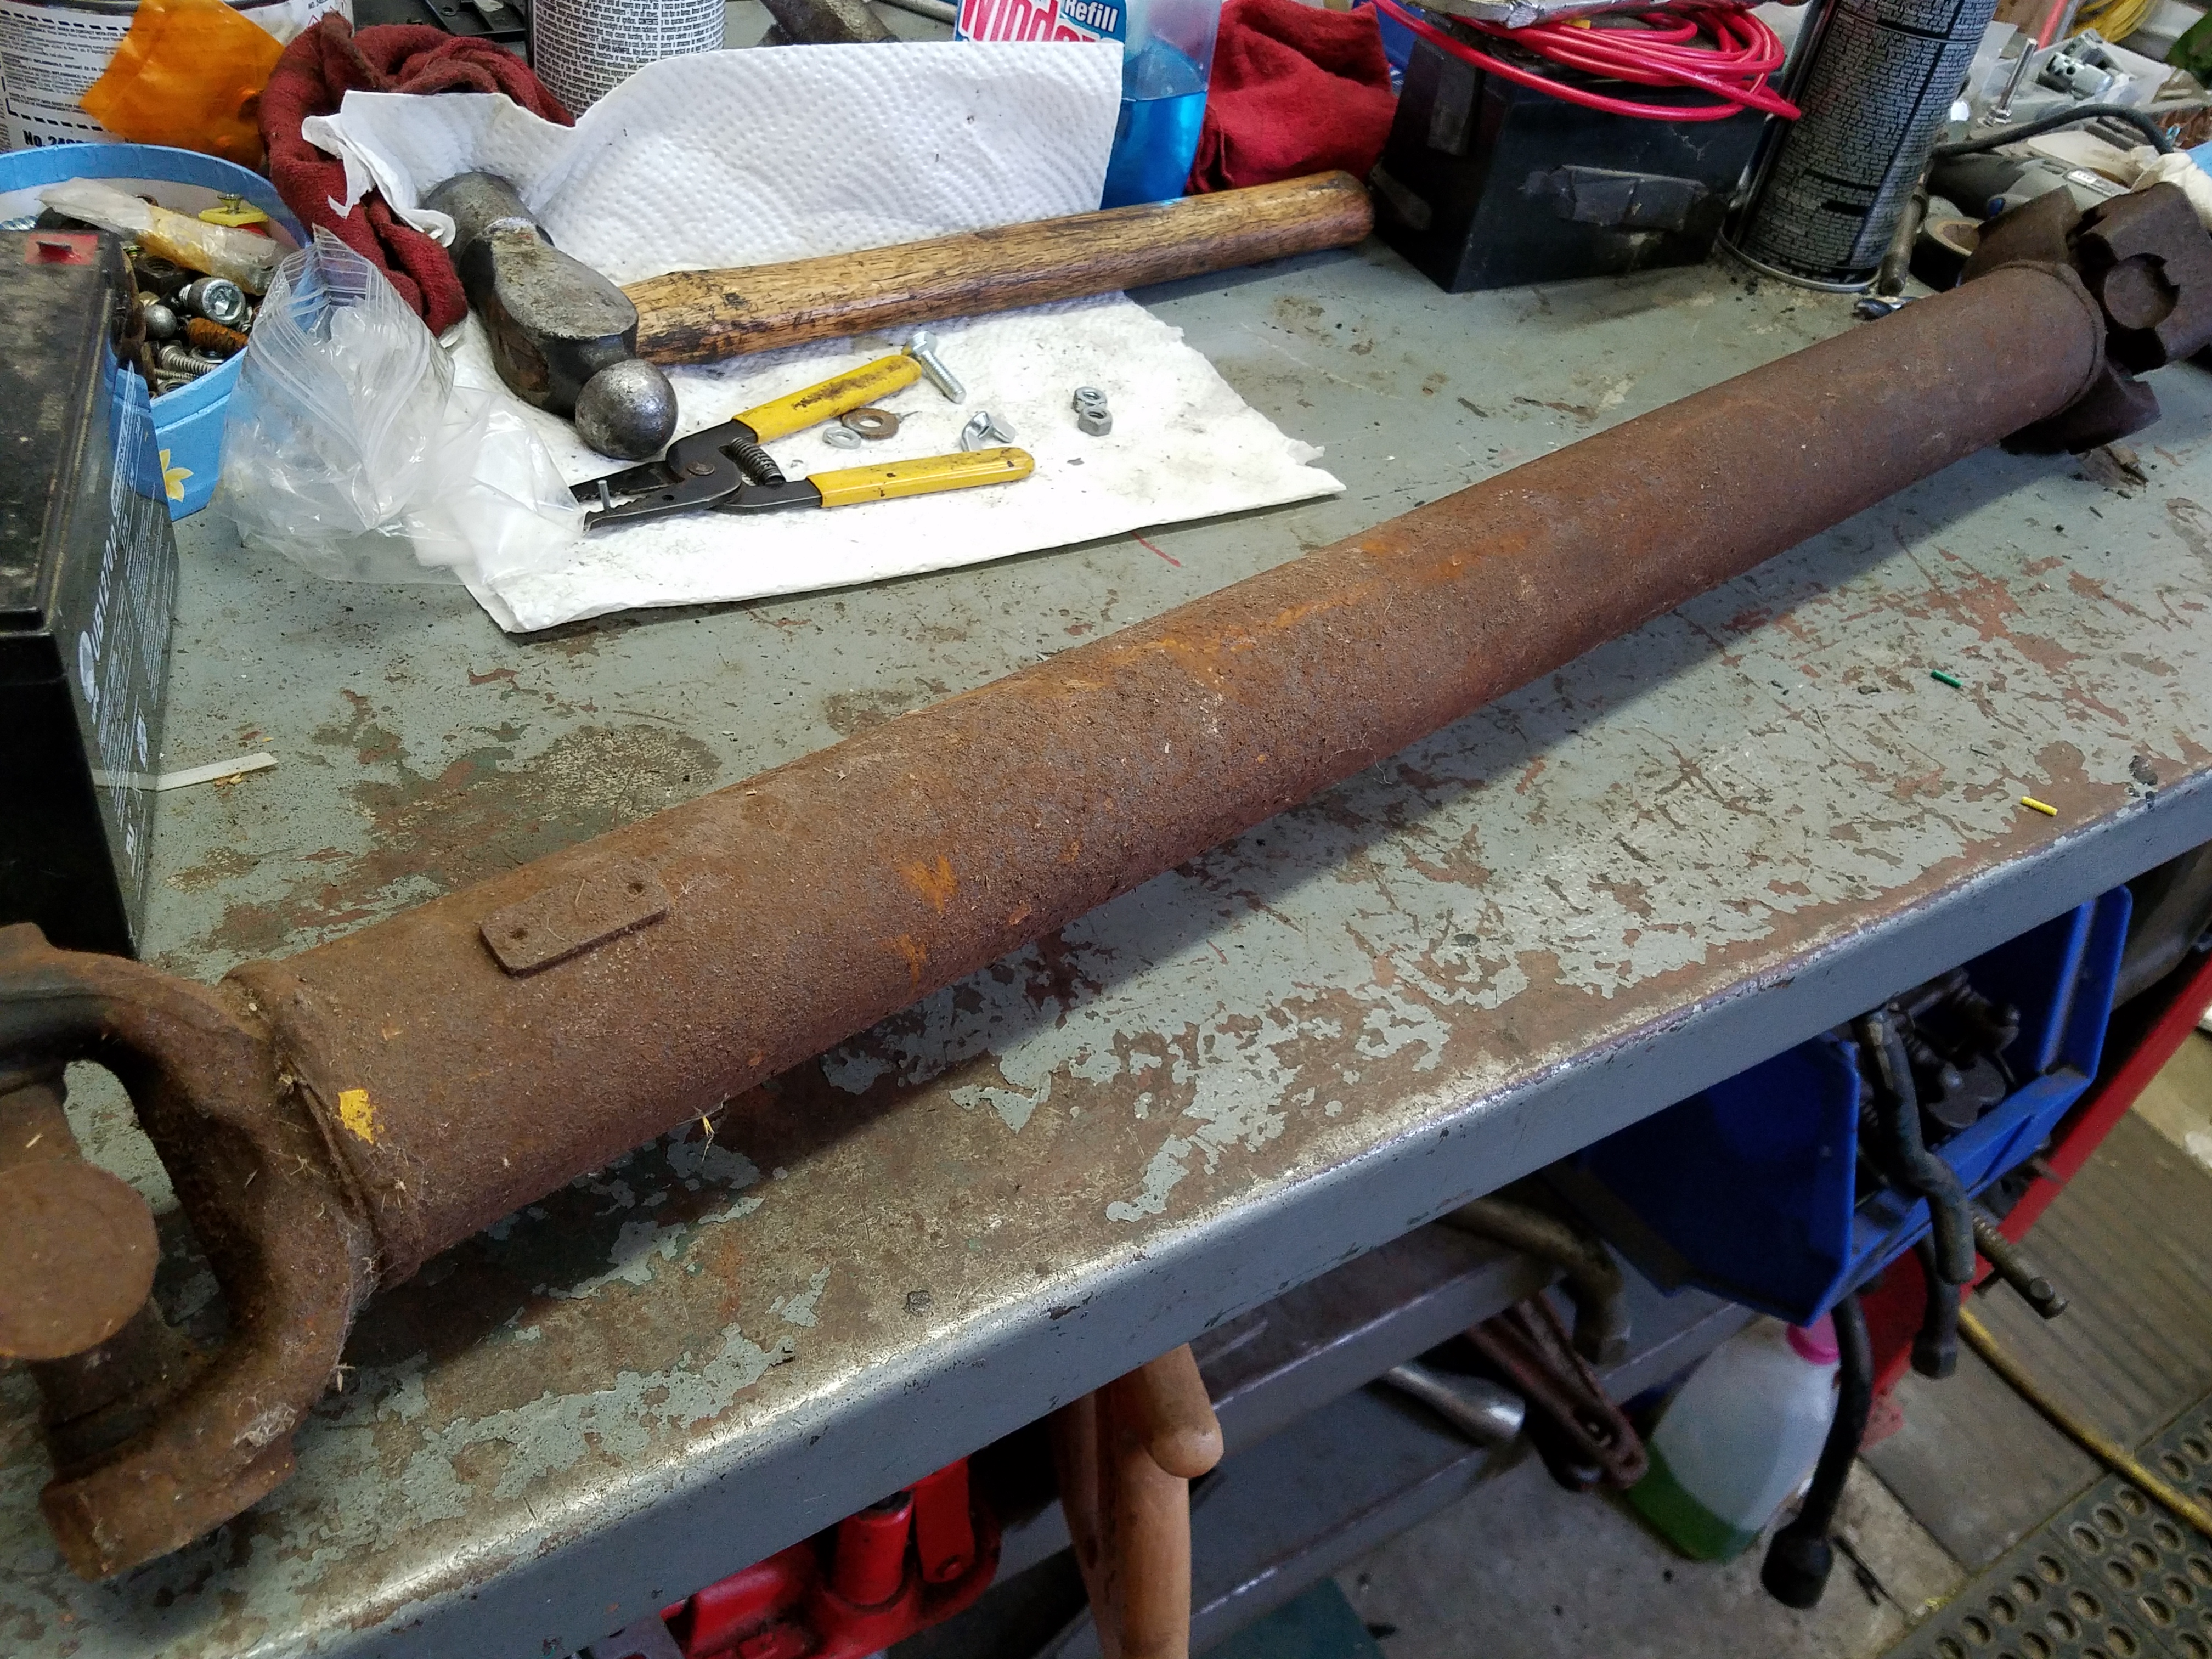
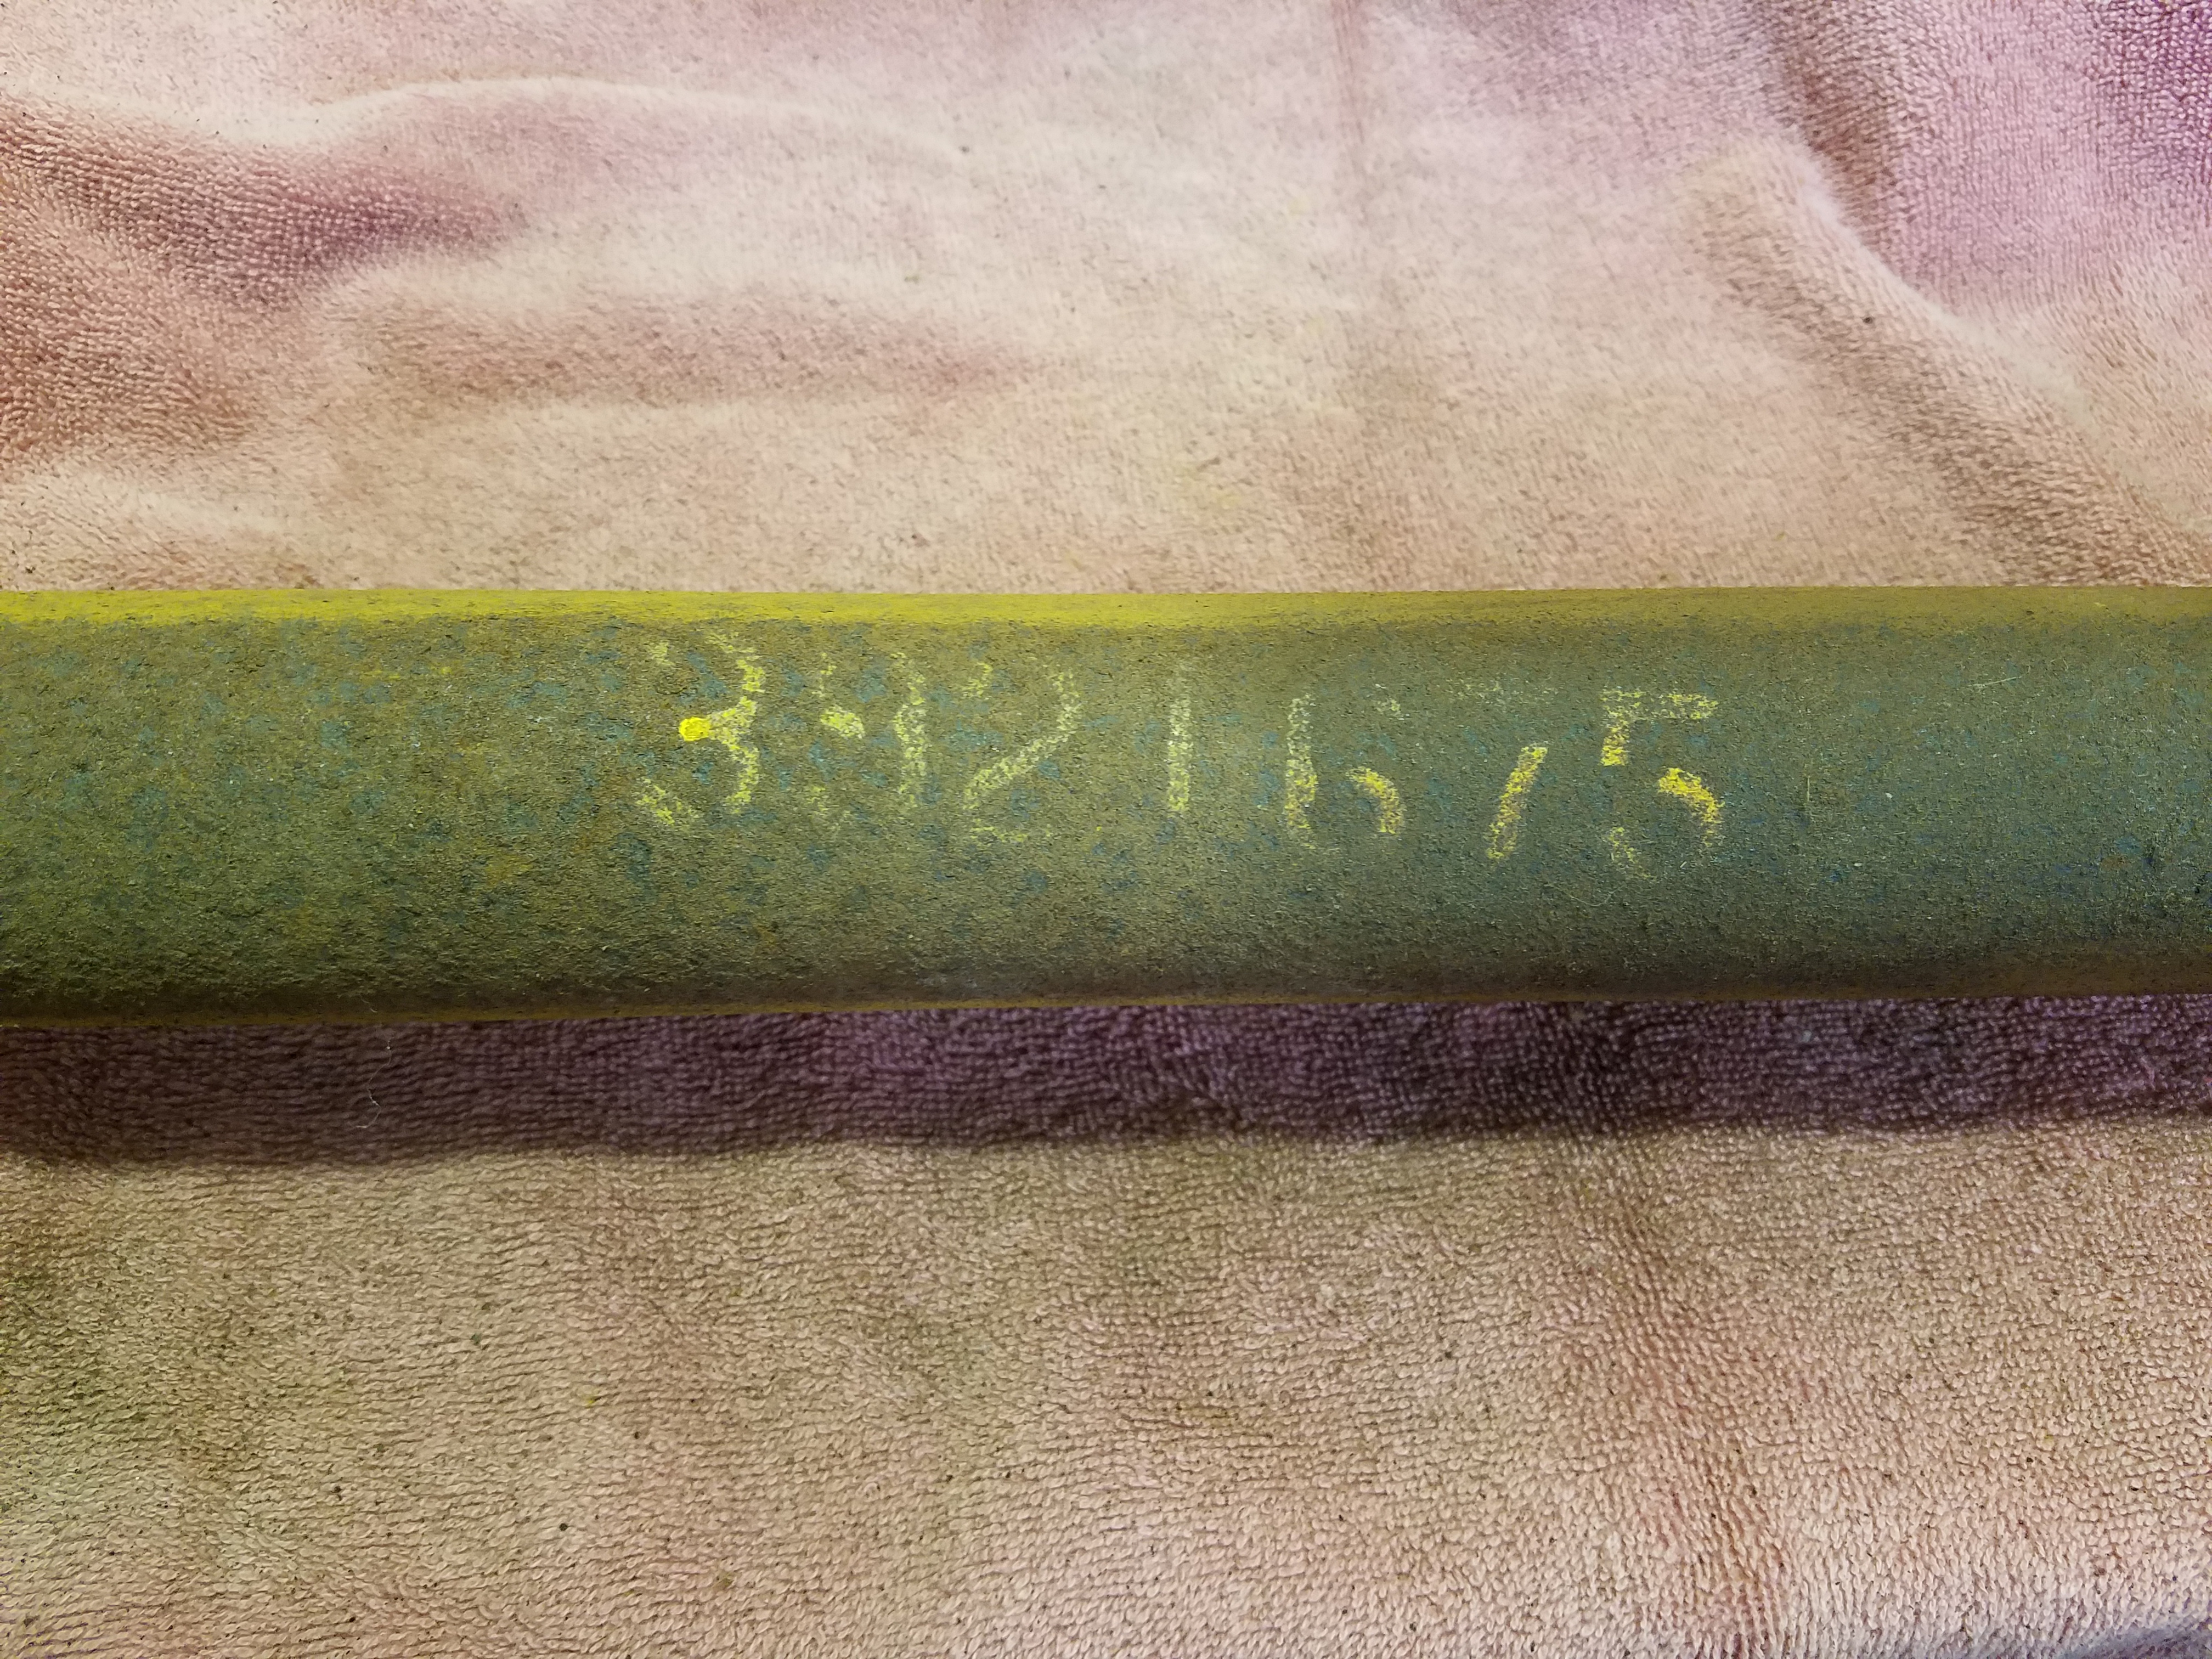
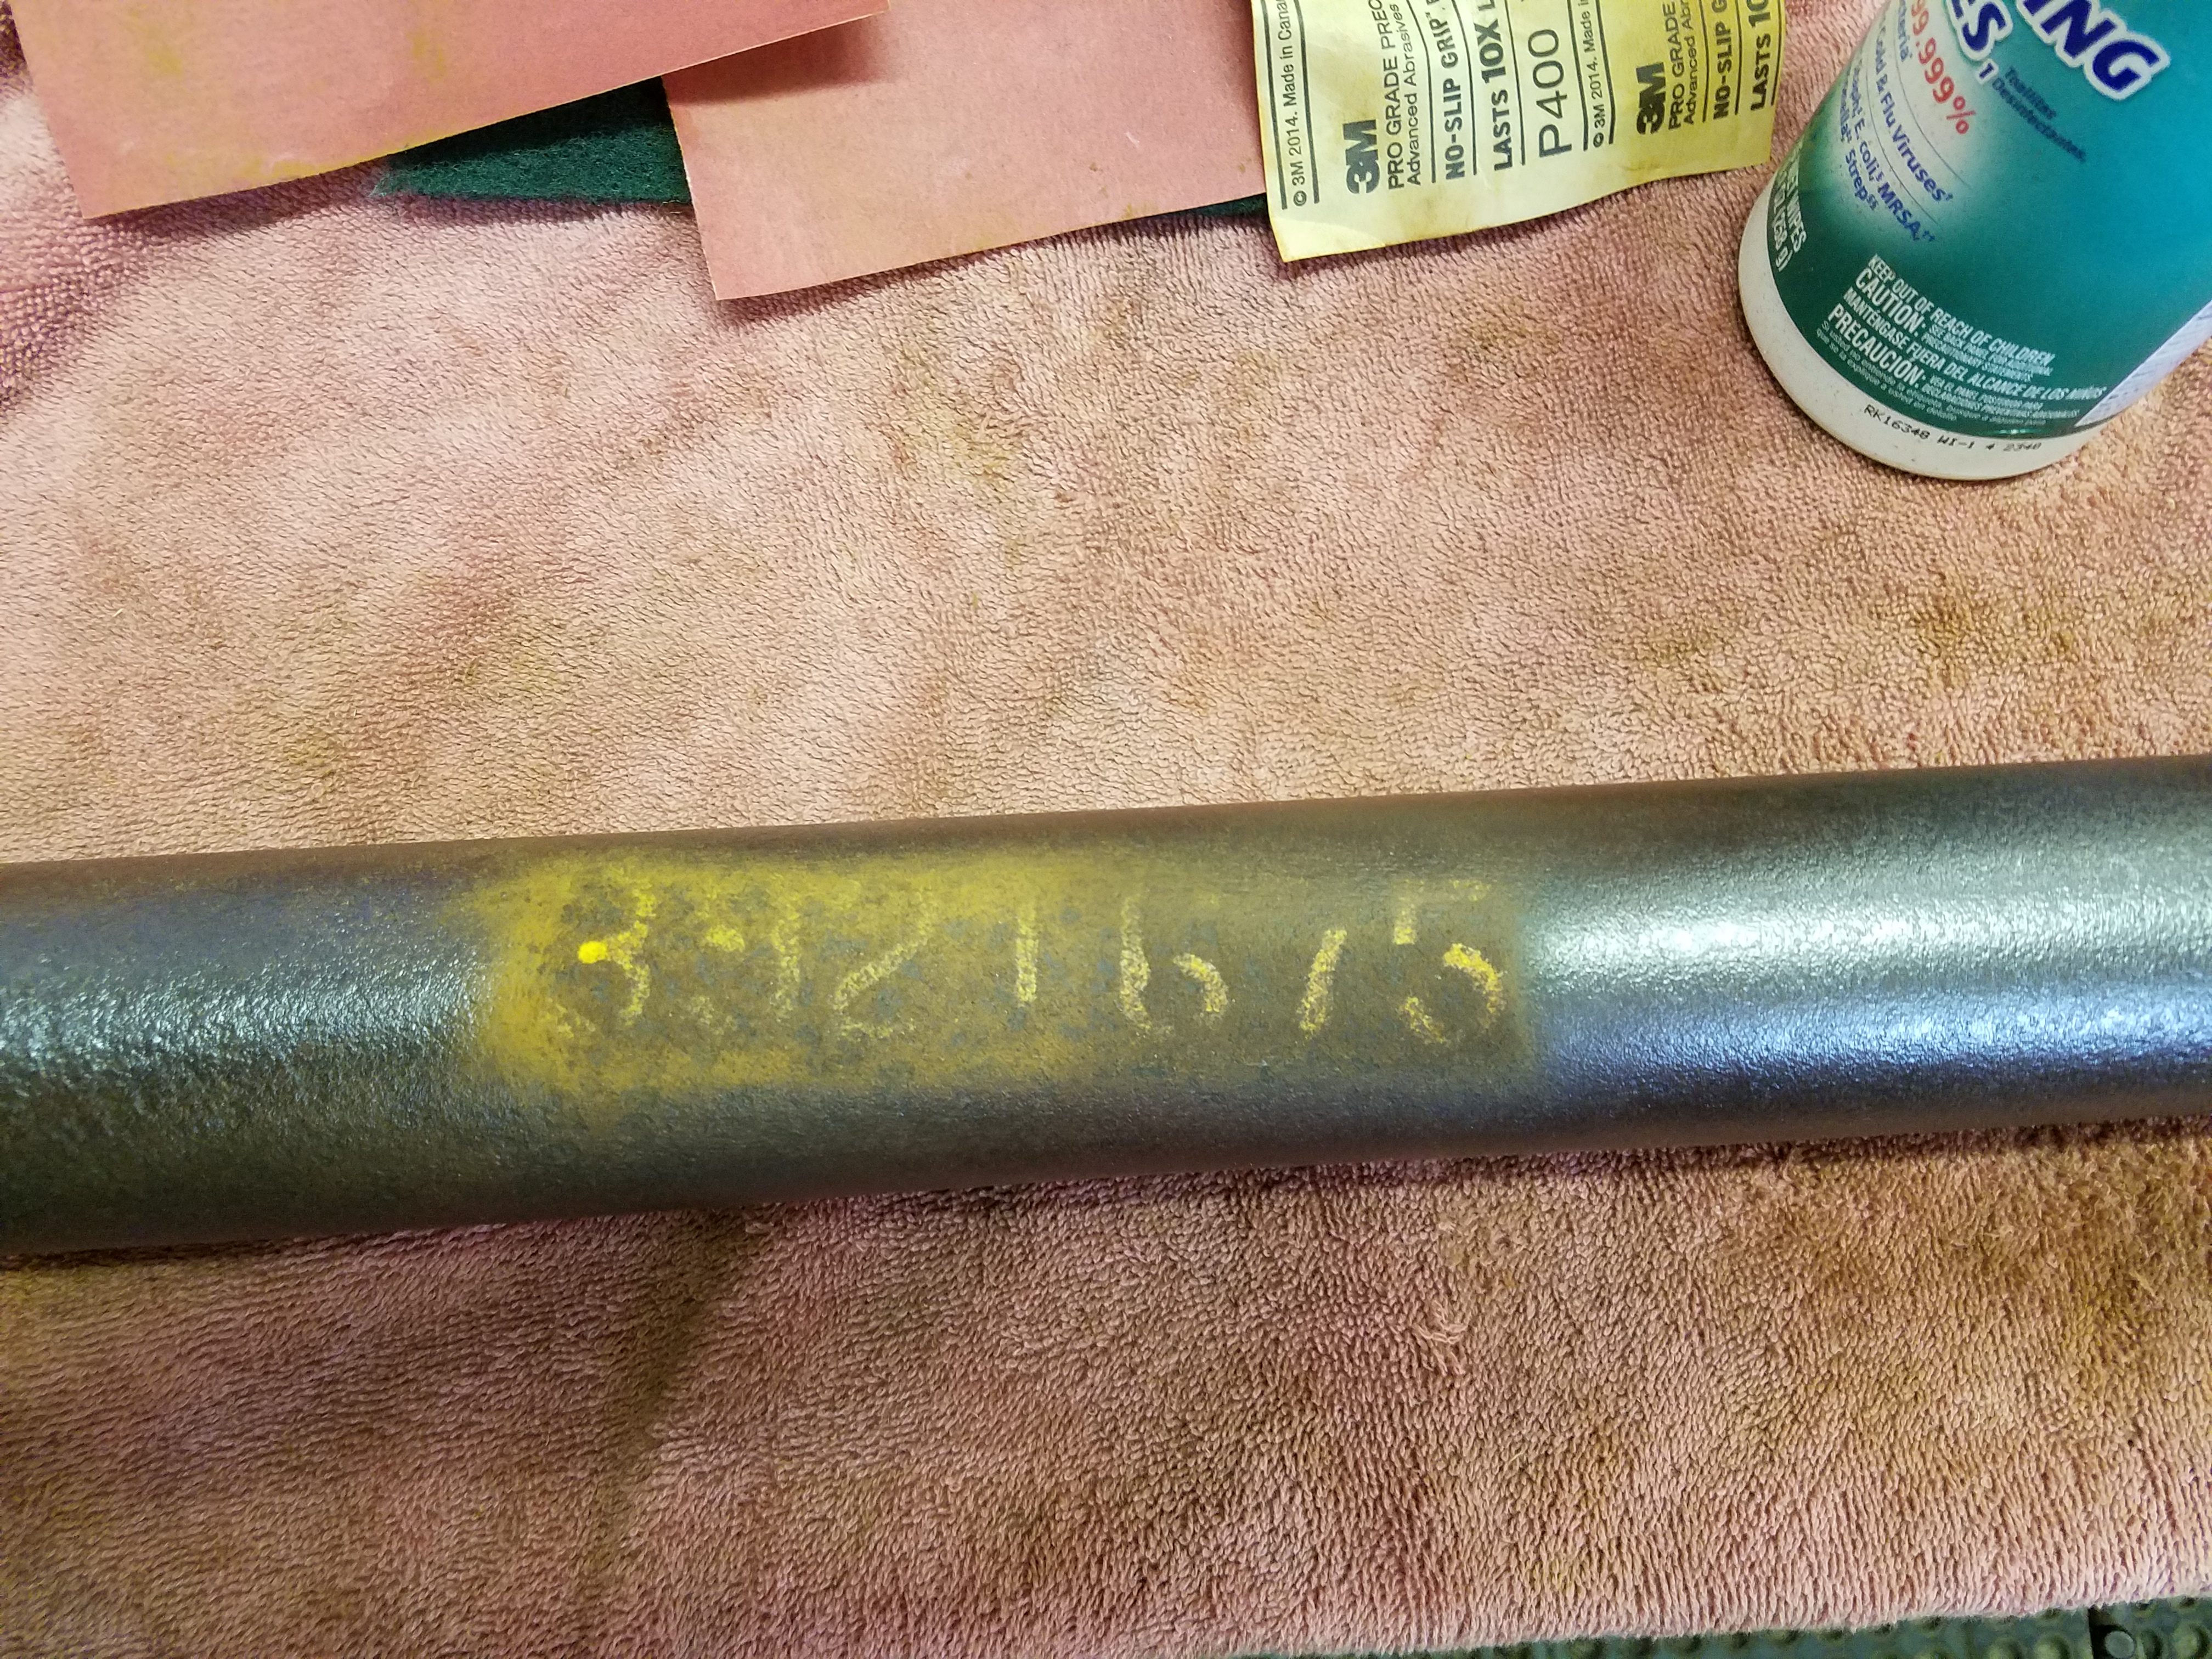
really didn't notice the part # when I disassembled many years ago...
cleaning up nicely....
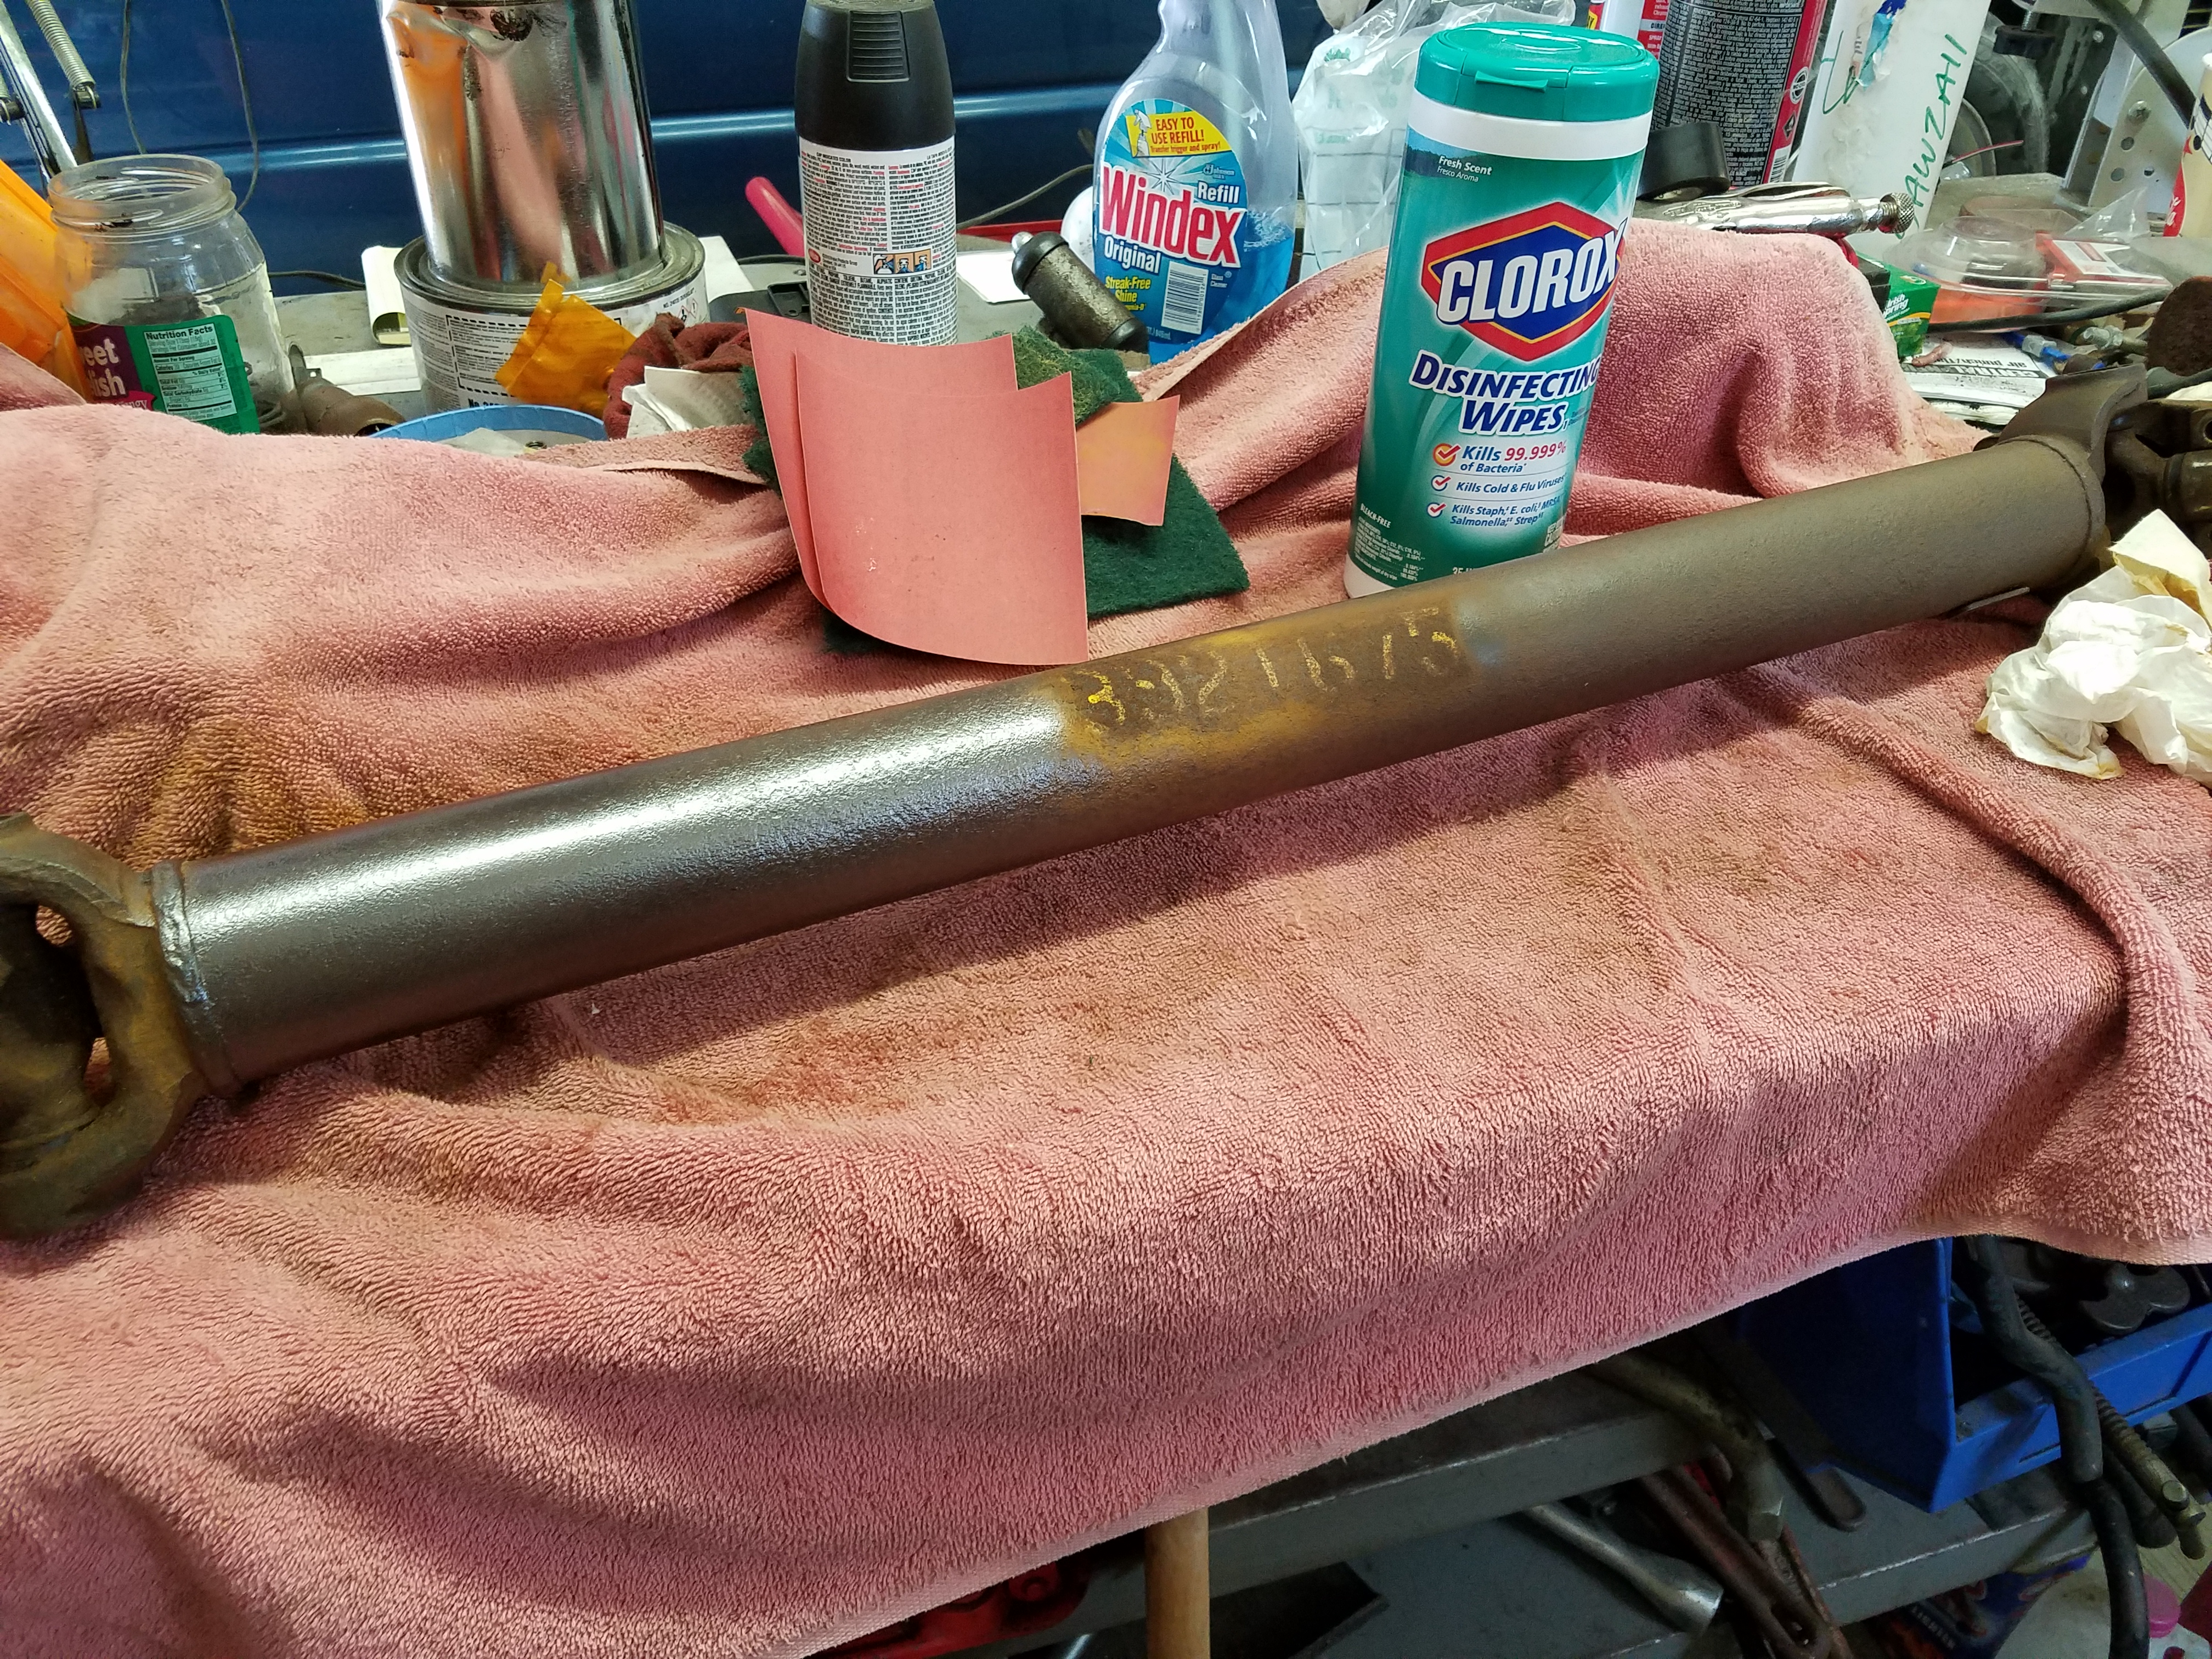
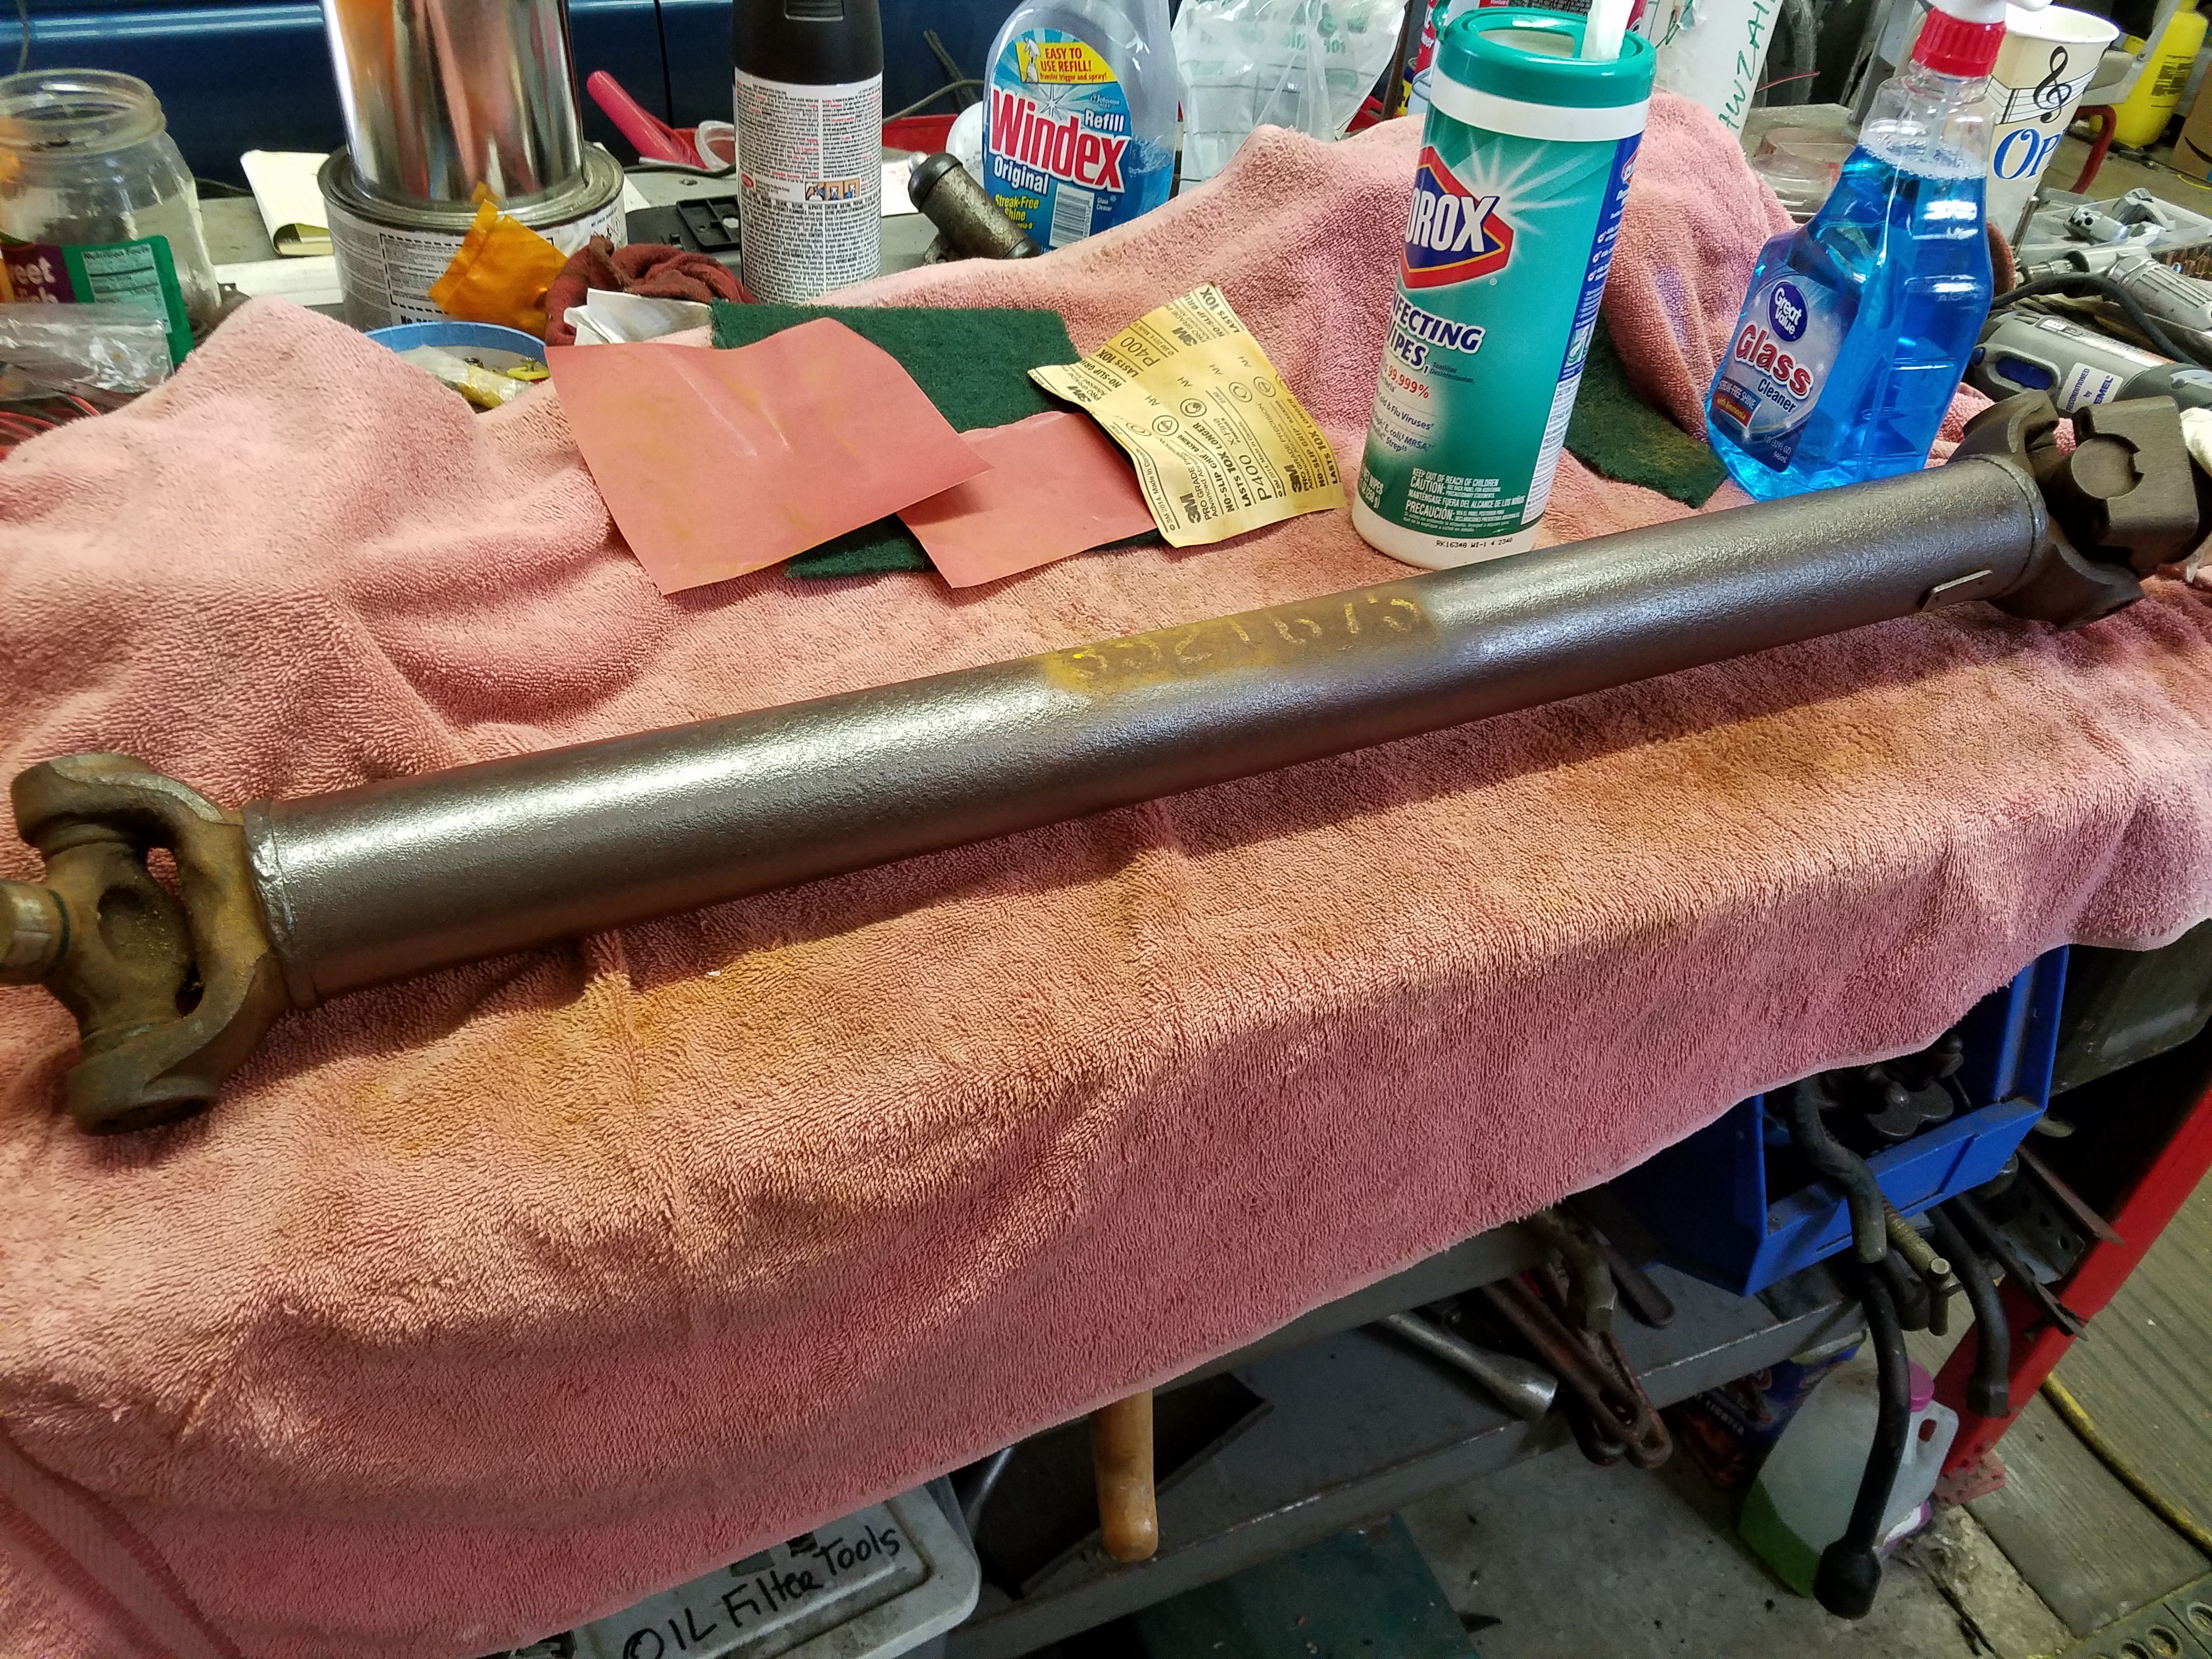
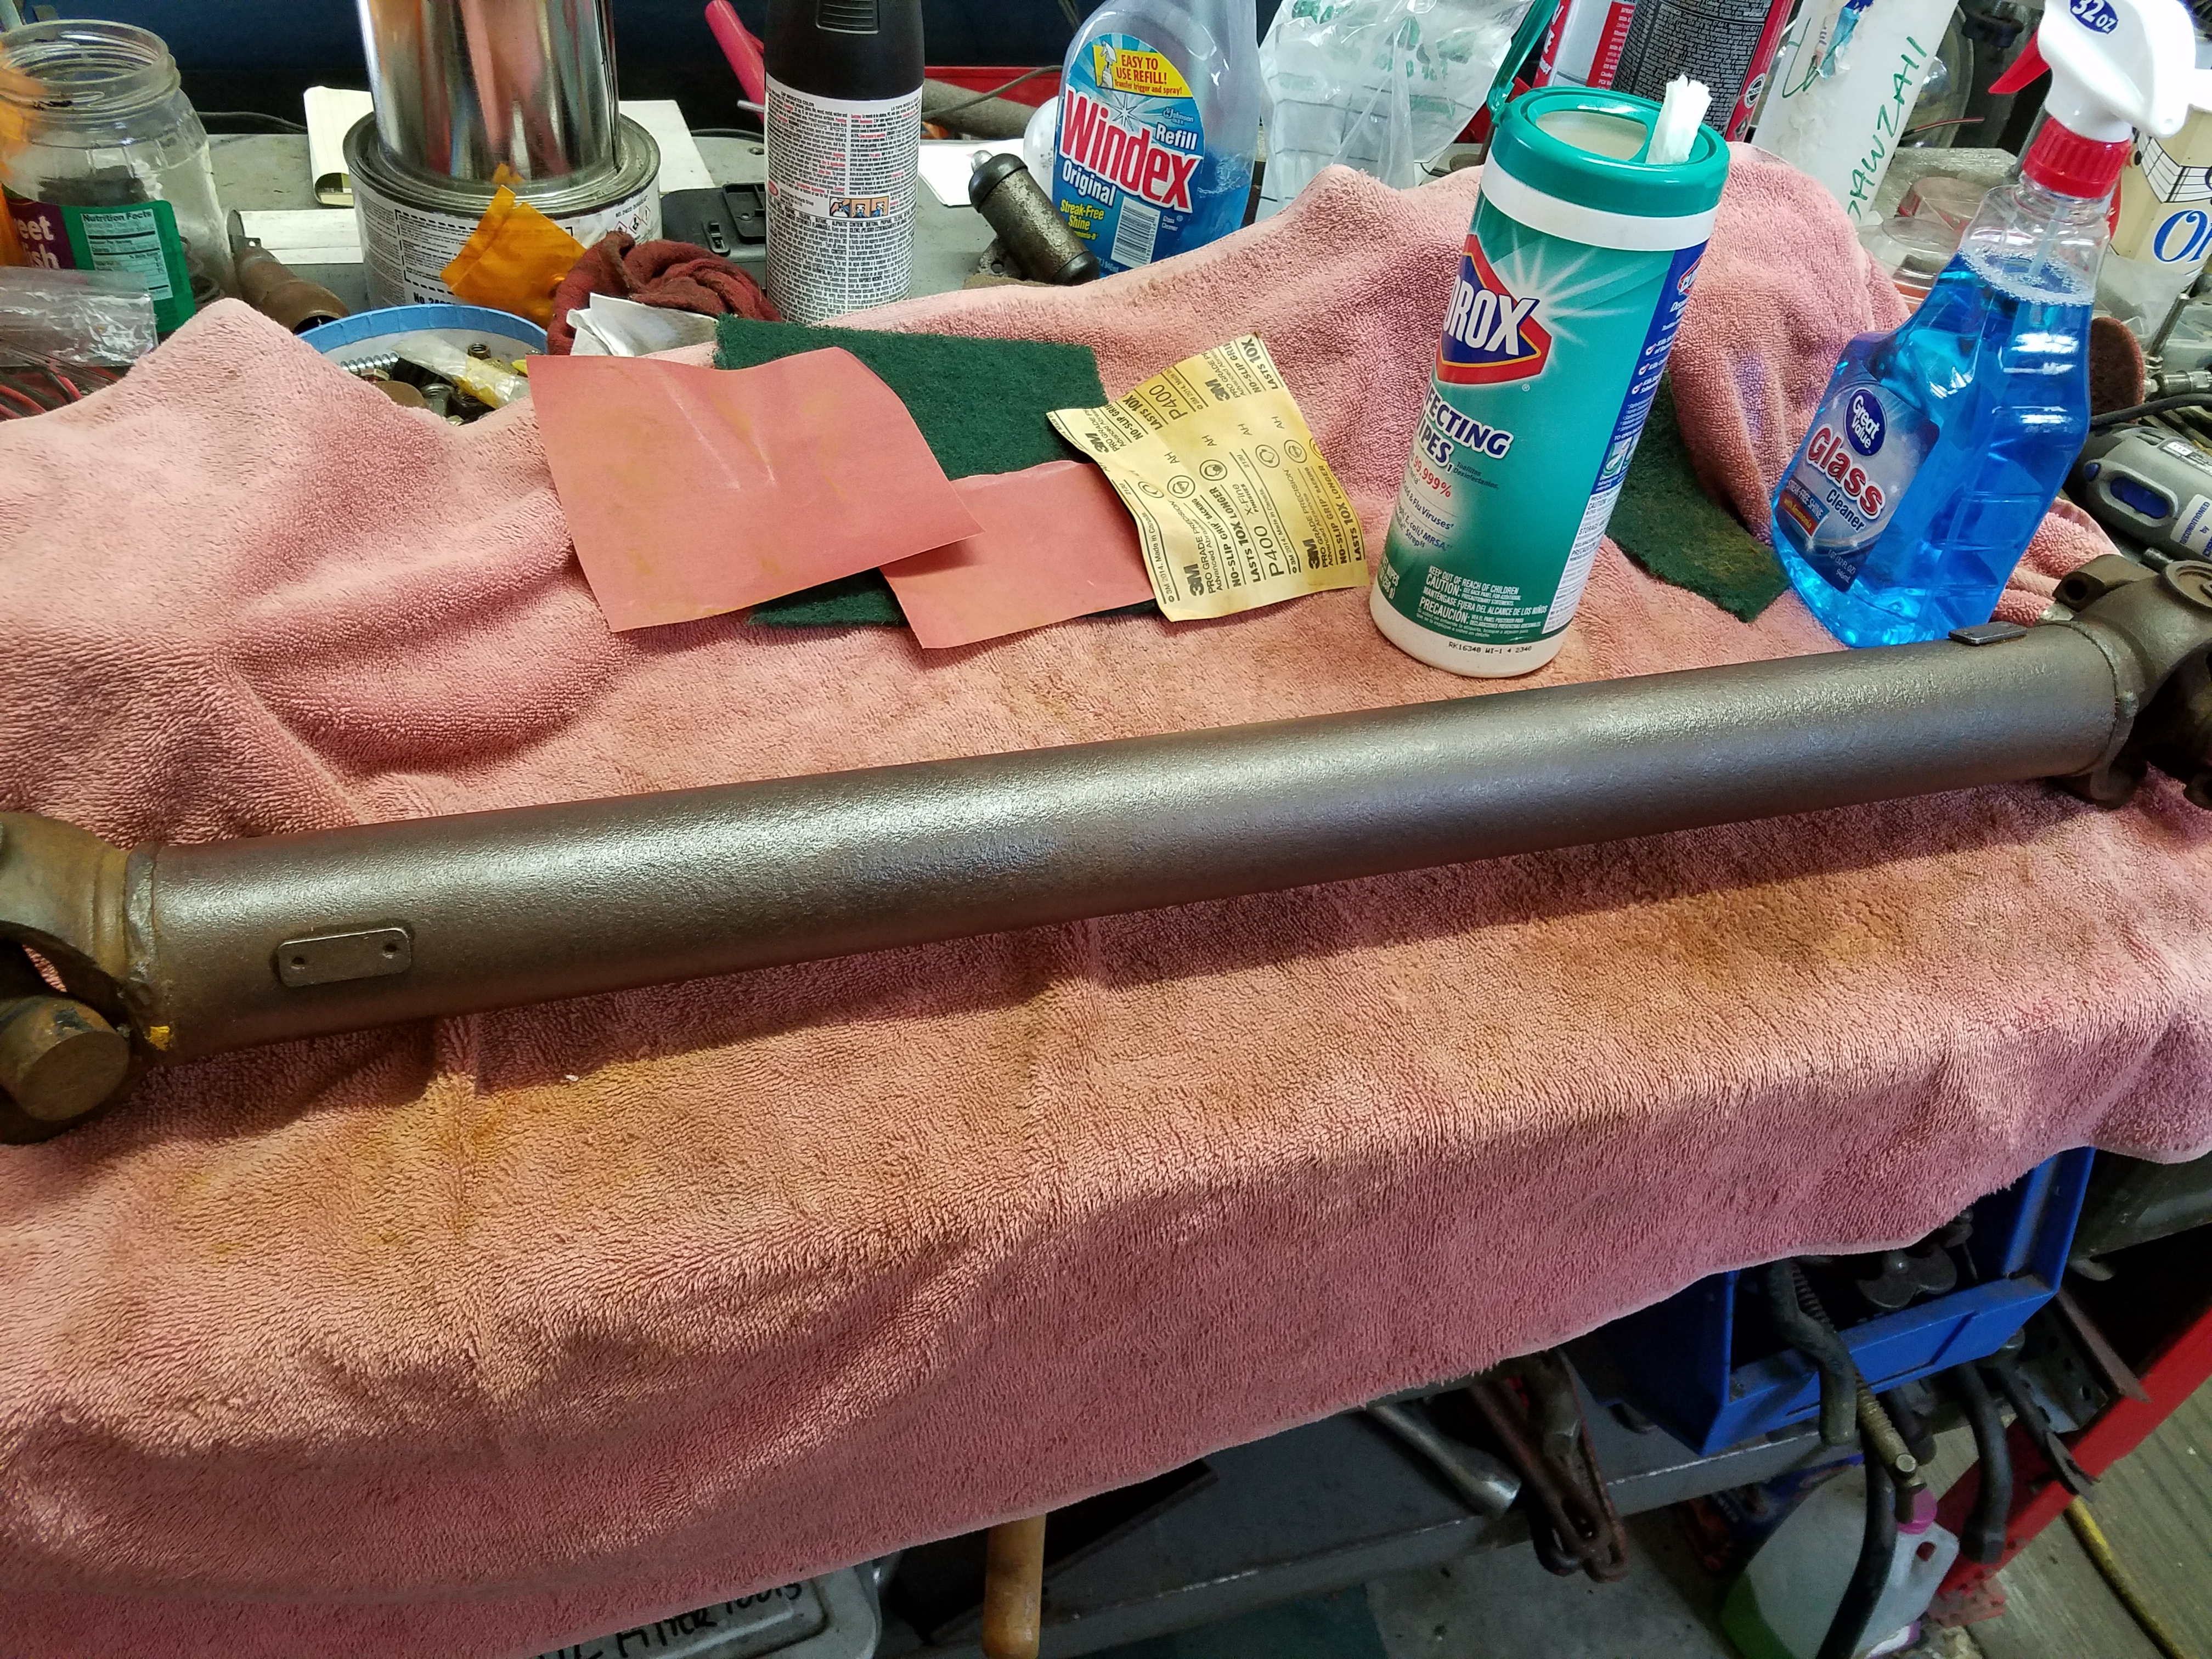
just have to figure out if I can save these numbers in anyway, or may have to re stencil...
Can someone tell me what the correct paint (if any) should be on the driveshaft? Having a senior moment right now....
Thanks for any info...
the start...

really didn't notice the part # when I disassembled many years ago...

cleaning up nicely....


just have to figure out if I can save these numbers in anyway, or may have to re stencil...

The following users liked this post:
MISTERZ06 (06-08-2017)
07-13-2017, 12:17 AM
#115
Melting Slicks
Thread Starter
A lot of activity going on lately.....progress is being made....
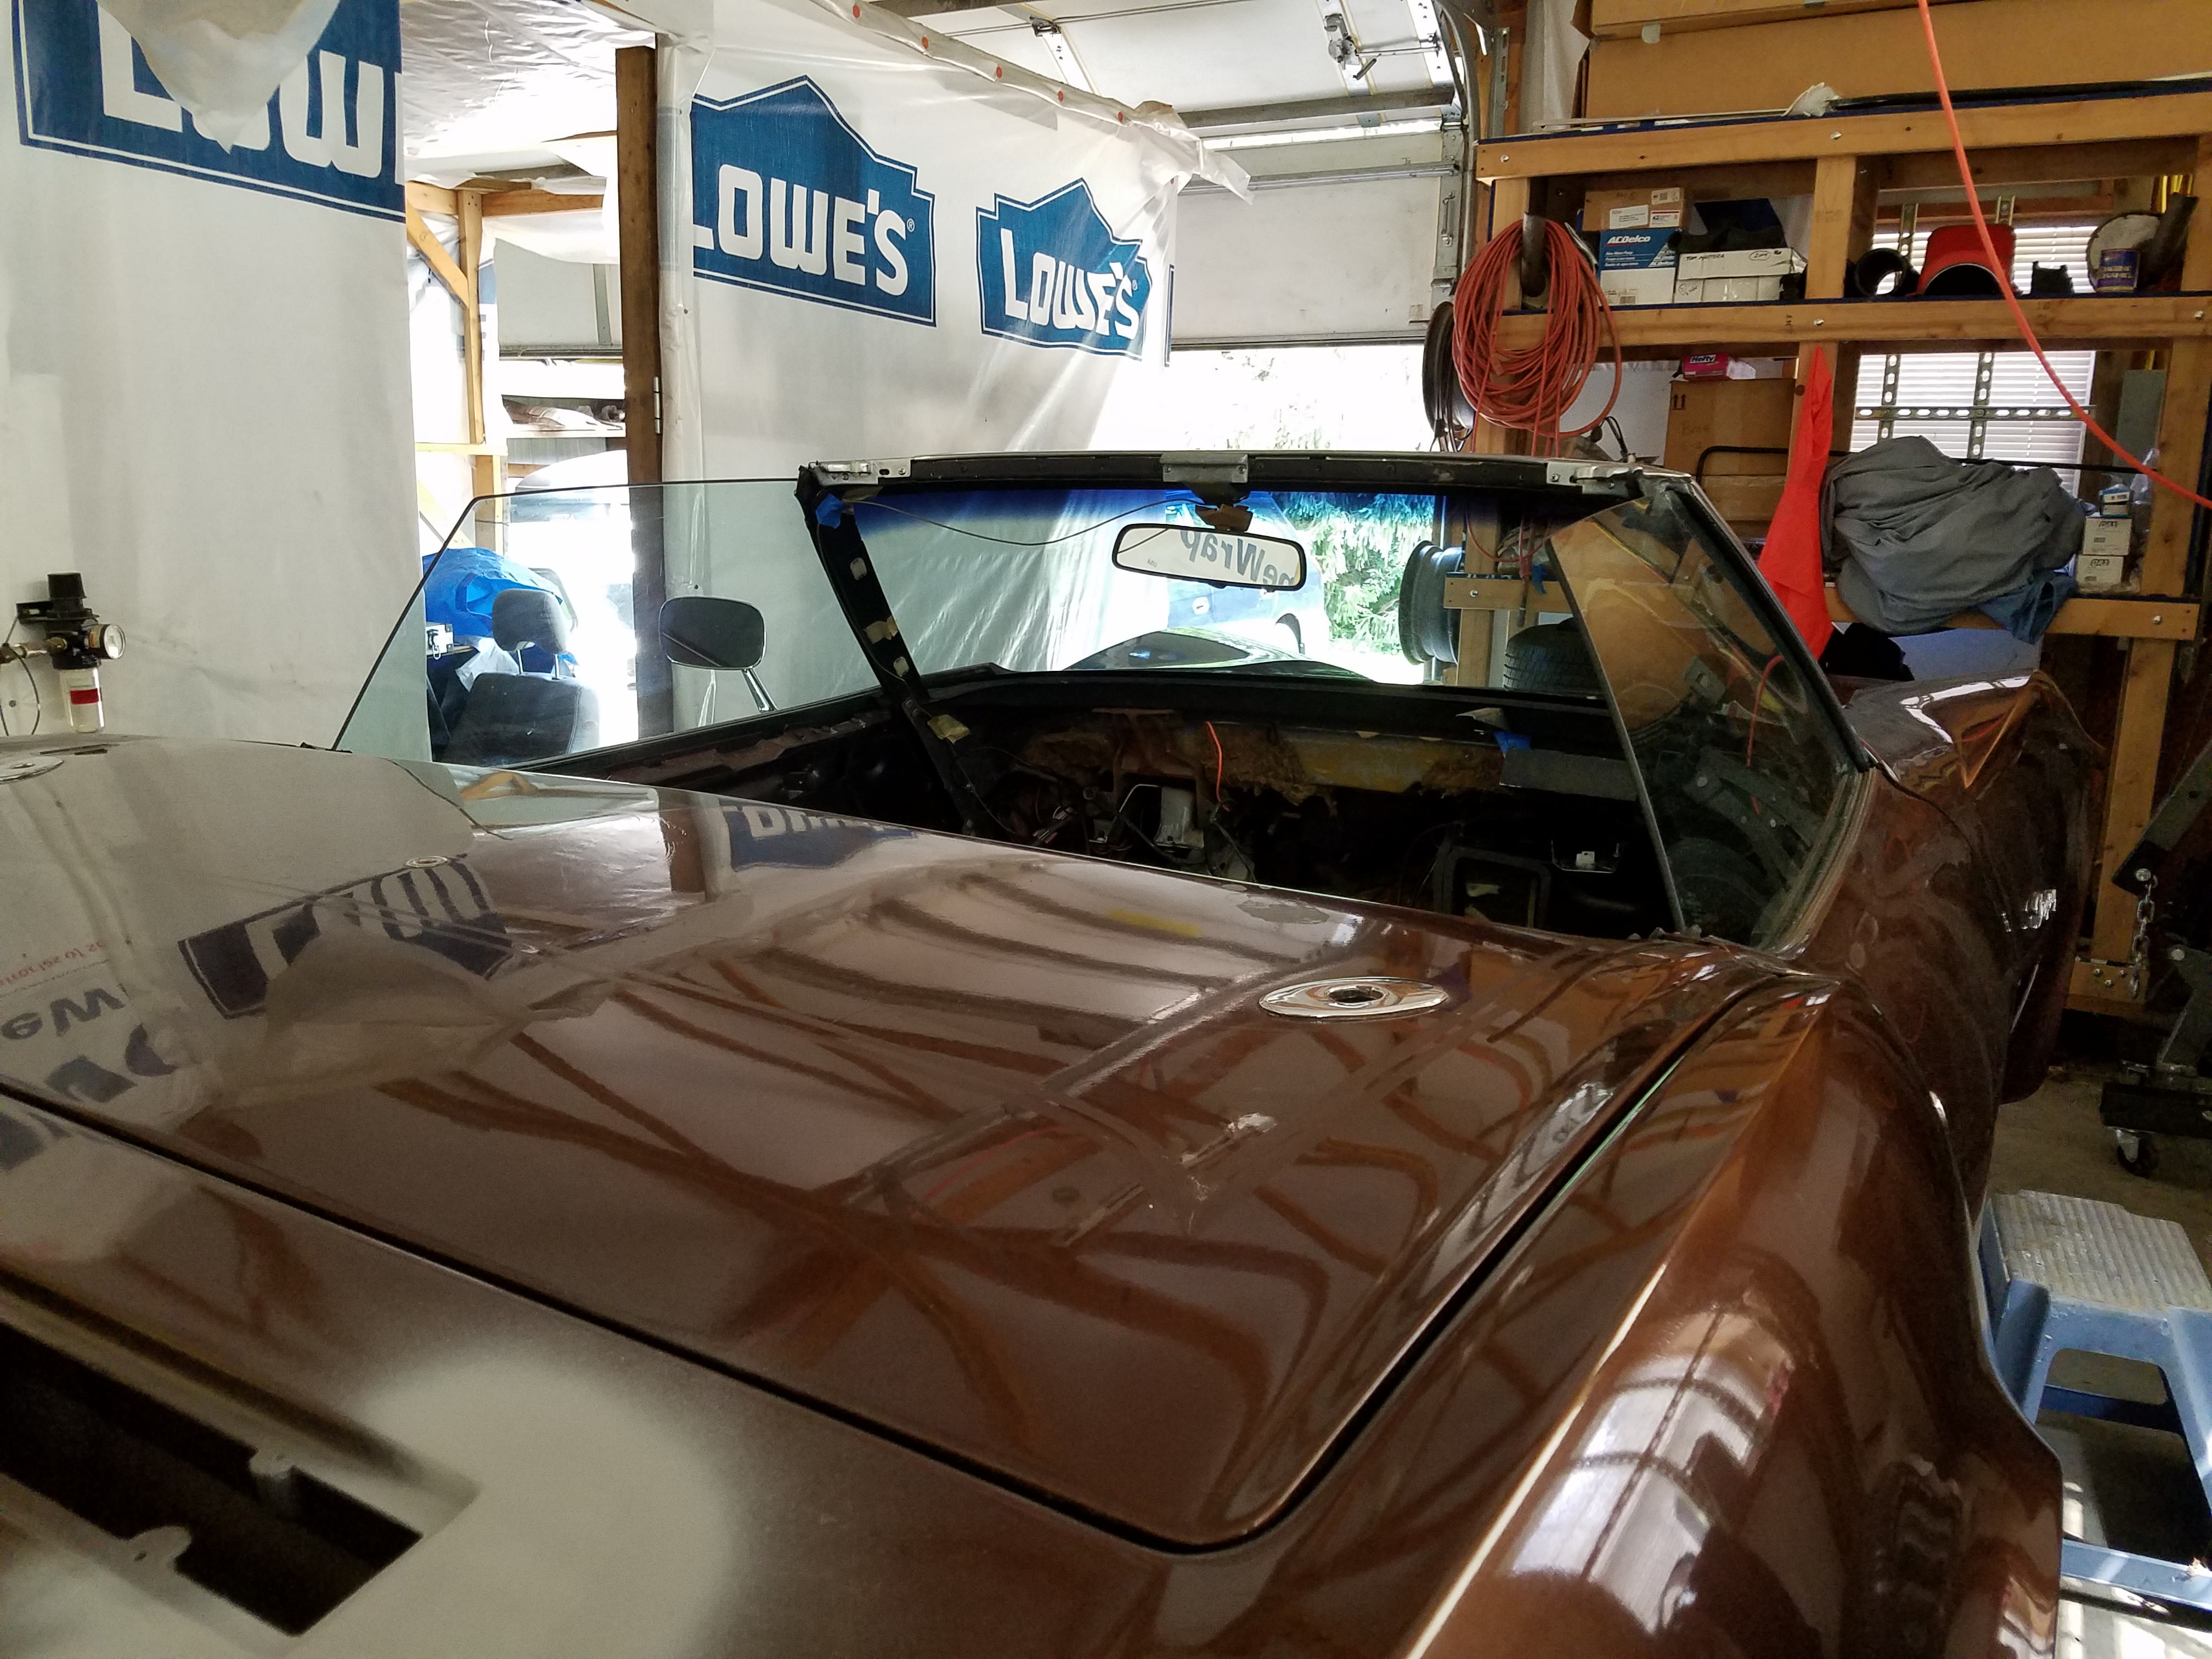
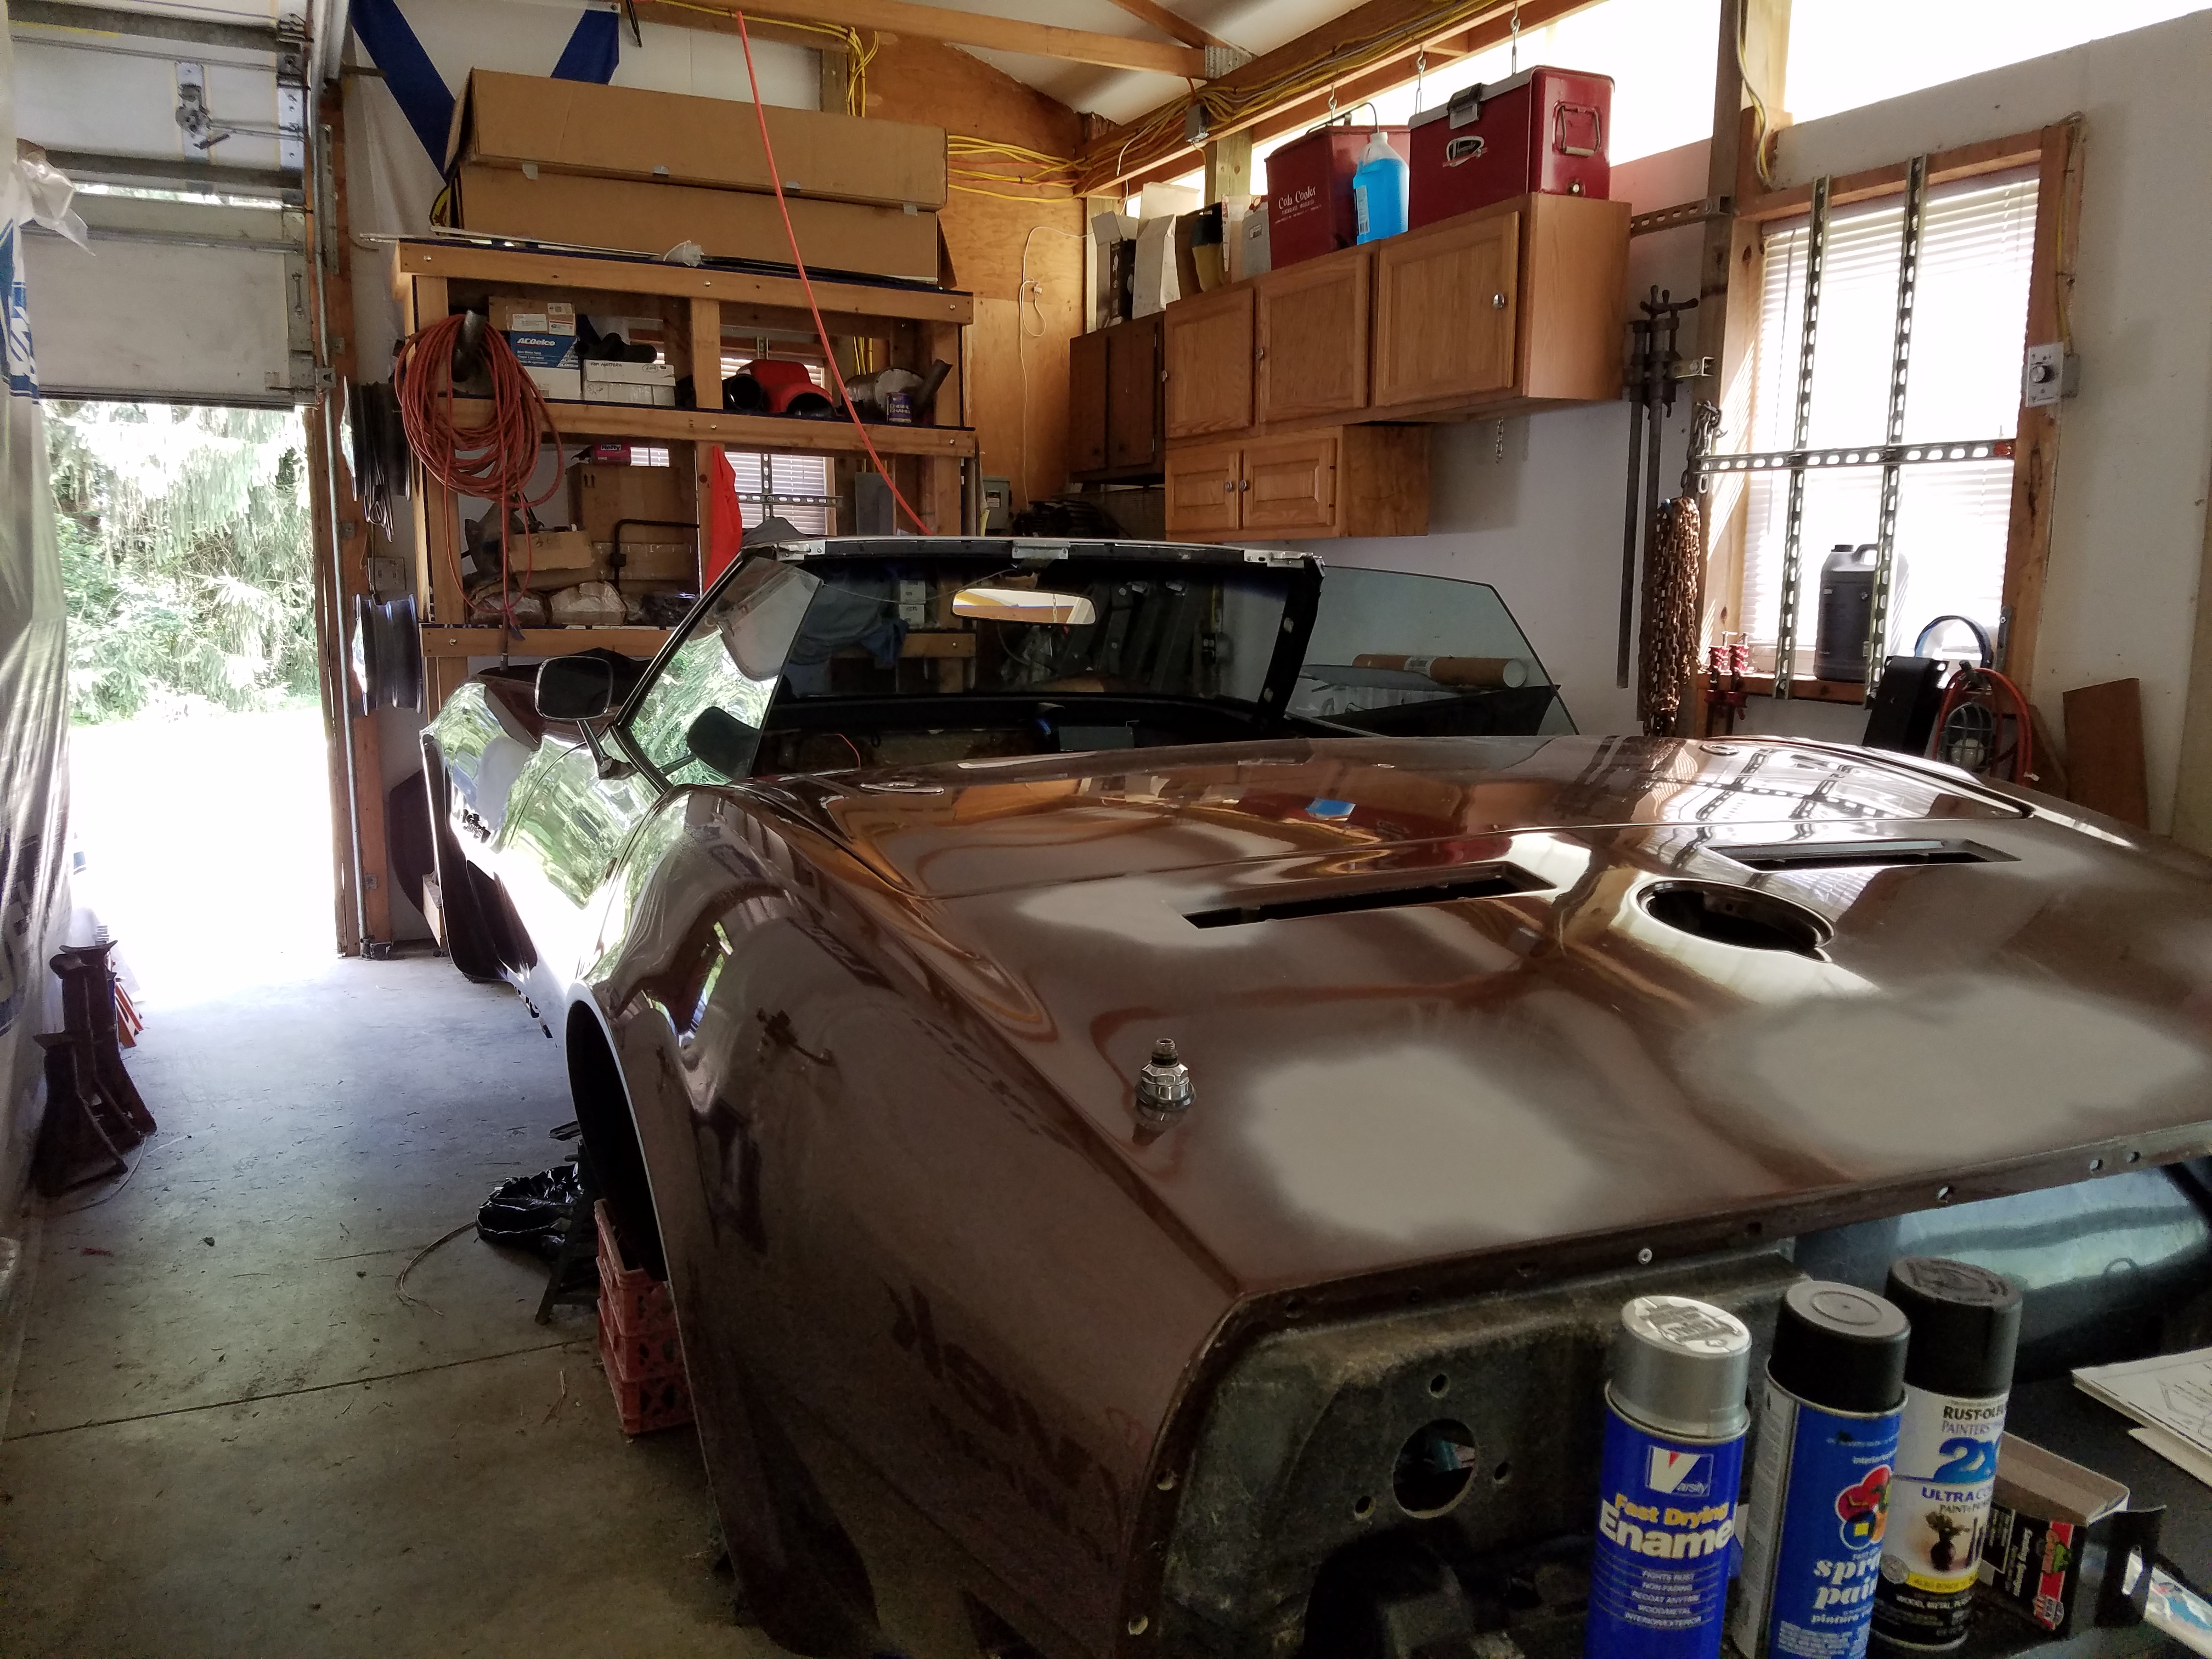
decided to take off the hardtop and start to stretch out the soft top...only the rear deck lid wouldn't cooperate...
adjustment made on the RS, and now the deck stays locked down...
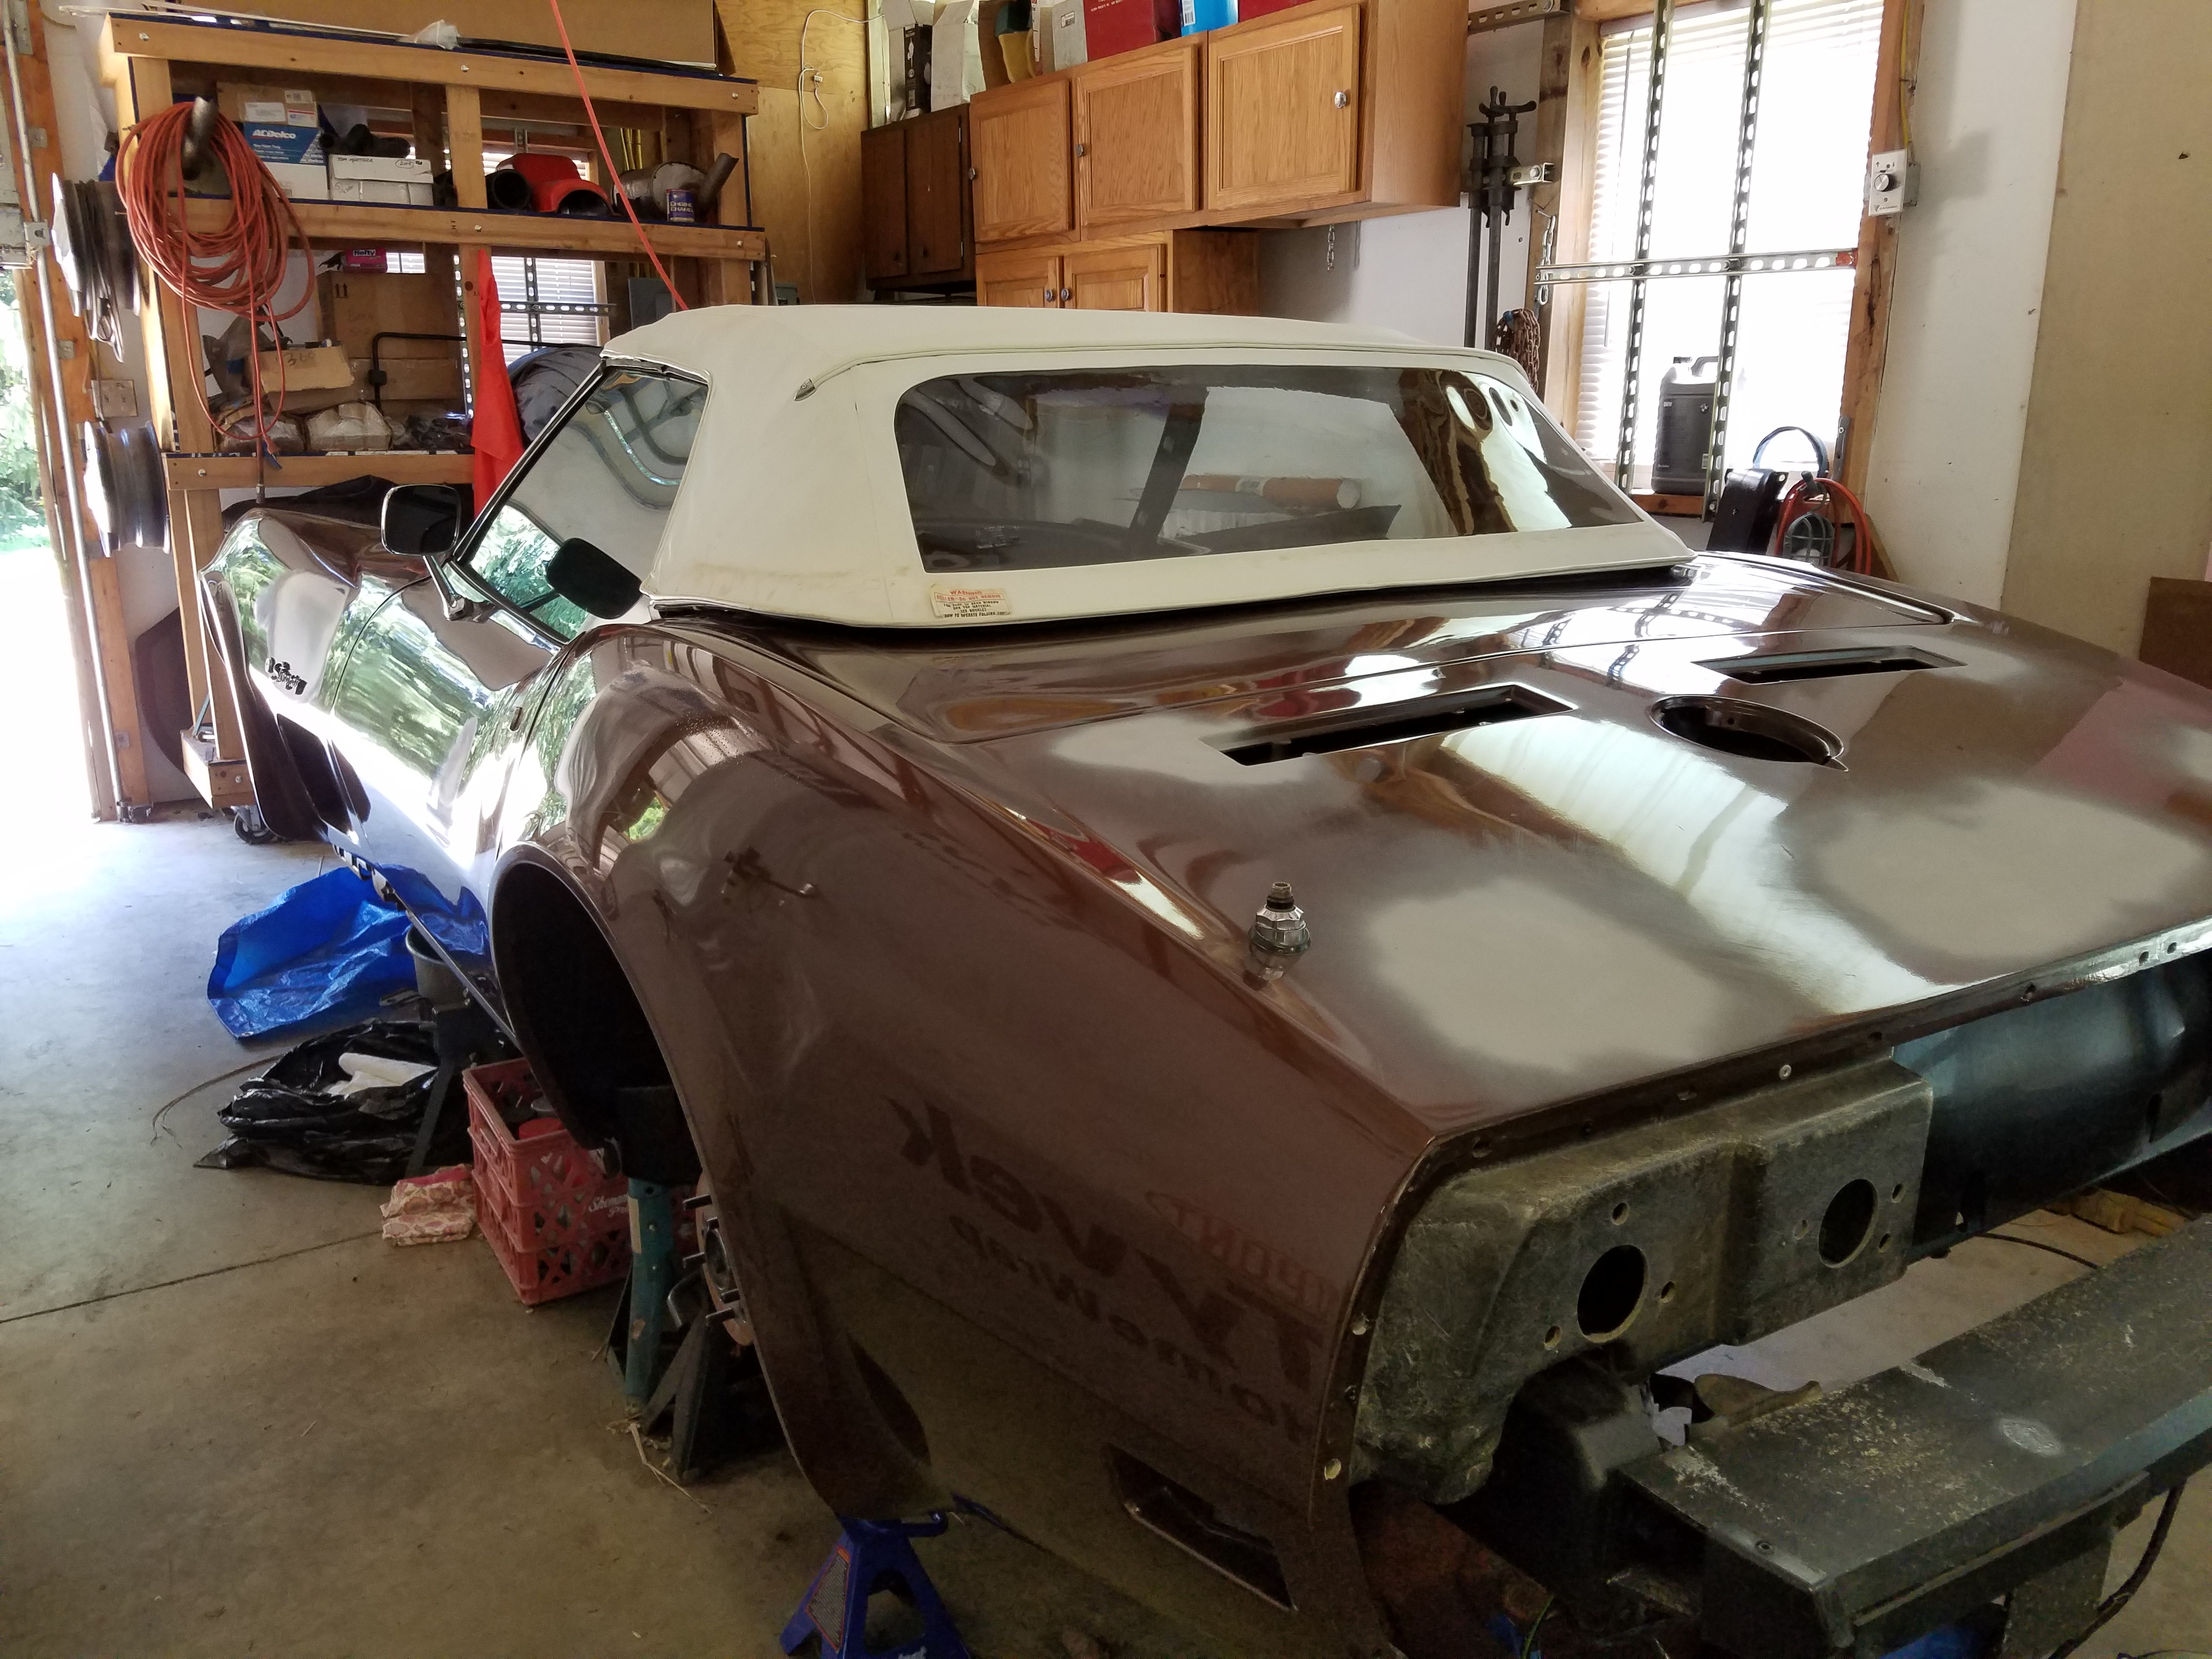
top still in decent shape for its age....rear window is like brand new...need to see if I can get those marks off and repair the one tear near the top...
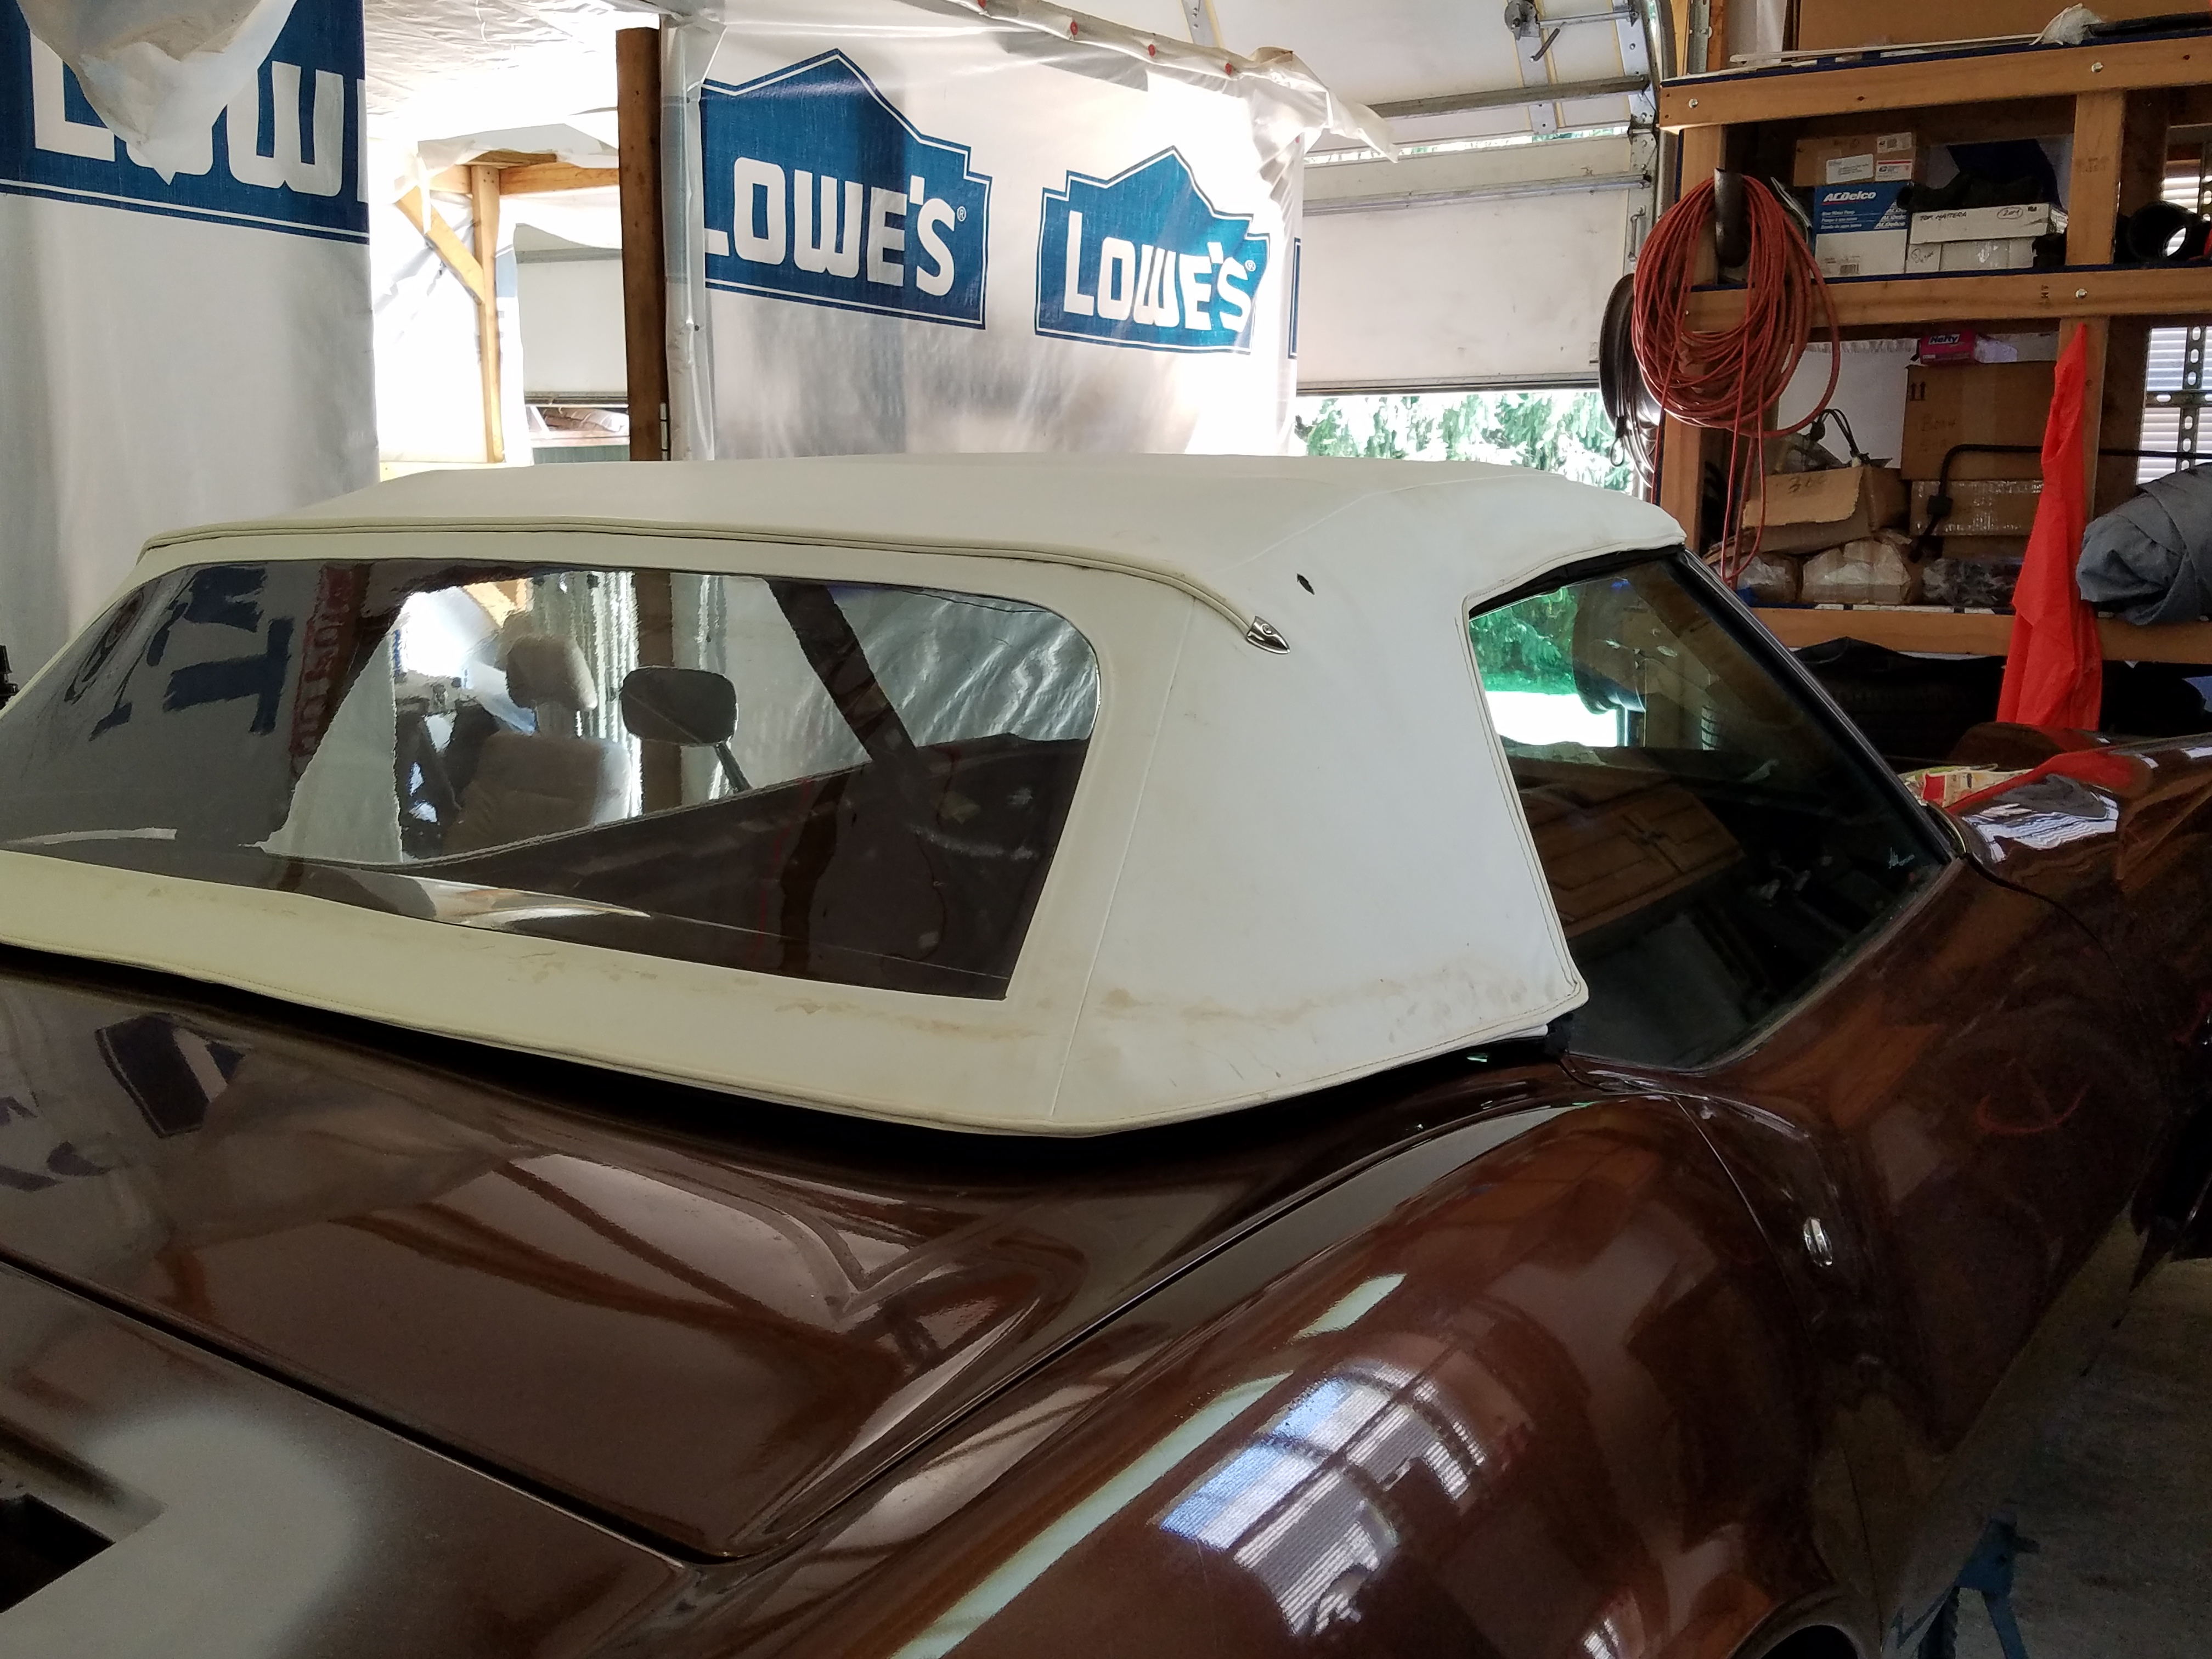
top down and plenty of room working on the interior...
decided to take off the hardtop and start to stretch out the soft top...only the rear deck lid wouldn't cooperate...

adjustment made on the RS, and now the deck stays locked down...

top still in decent shape for its age....rear window is like brand new...need to see if I can get those marks off and repair the one tear near the top...

top down and plenty of room working on the interior...

 07-13-2017, 12:20 AM
#116
Melting Slicks
Thread Starter
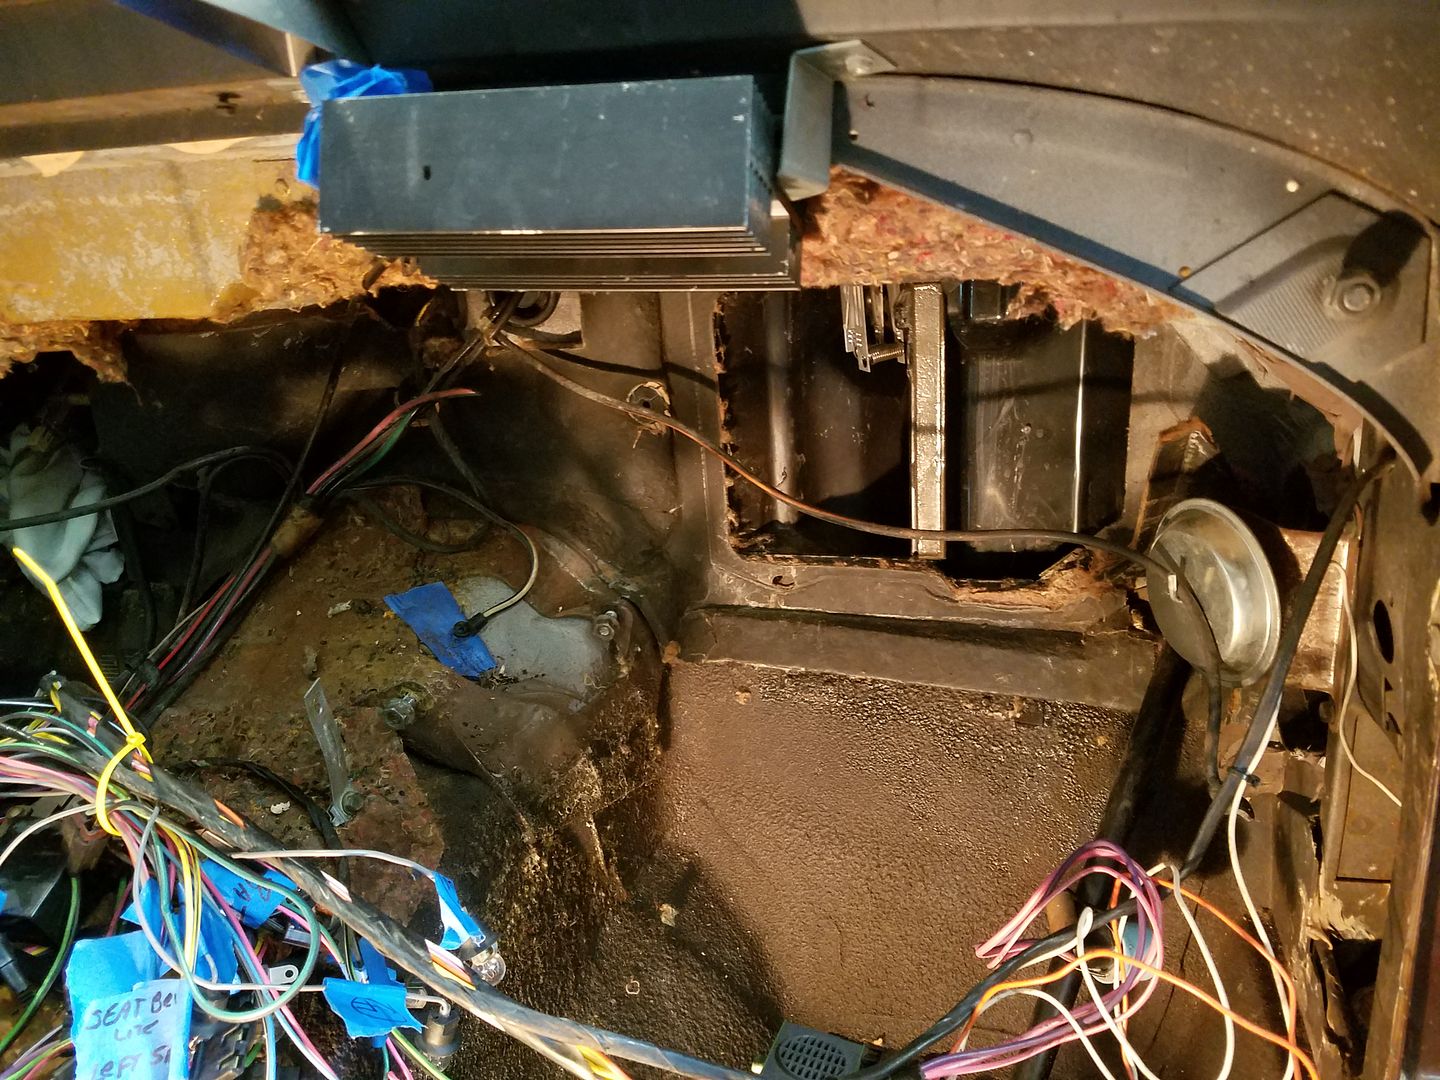
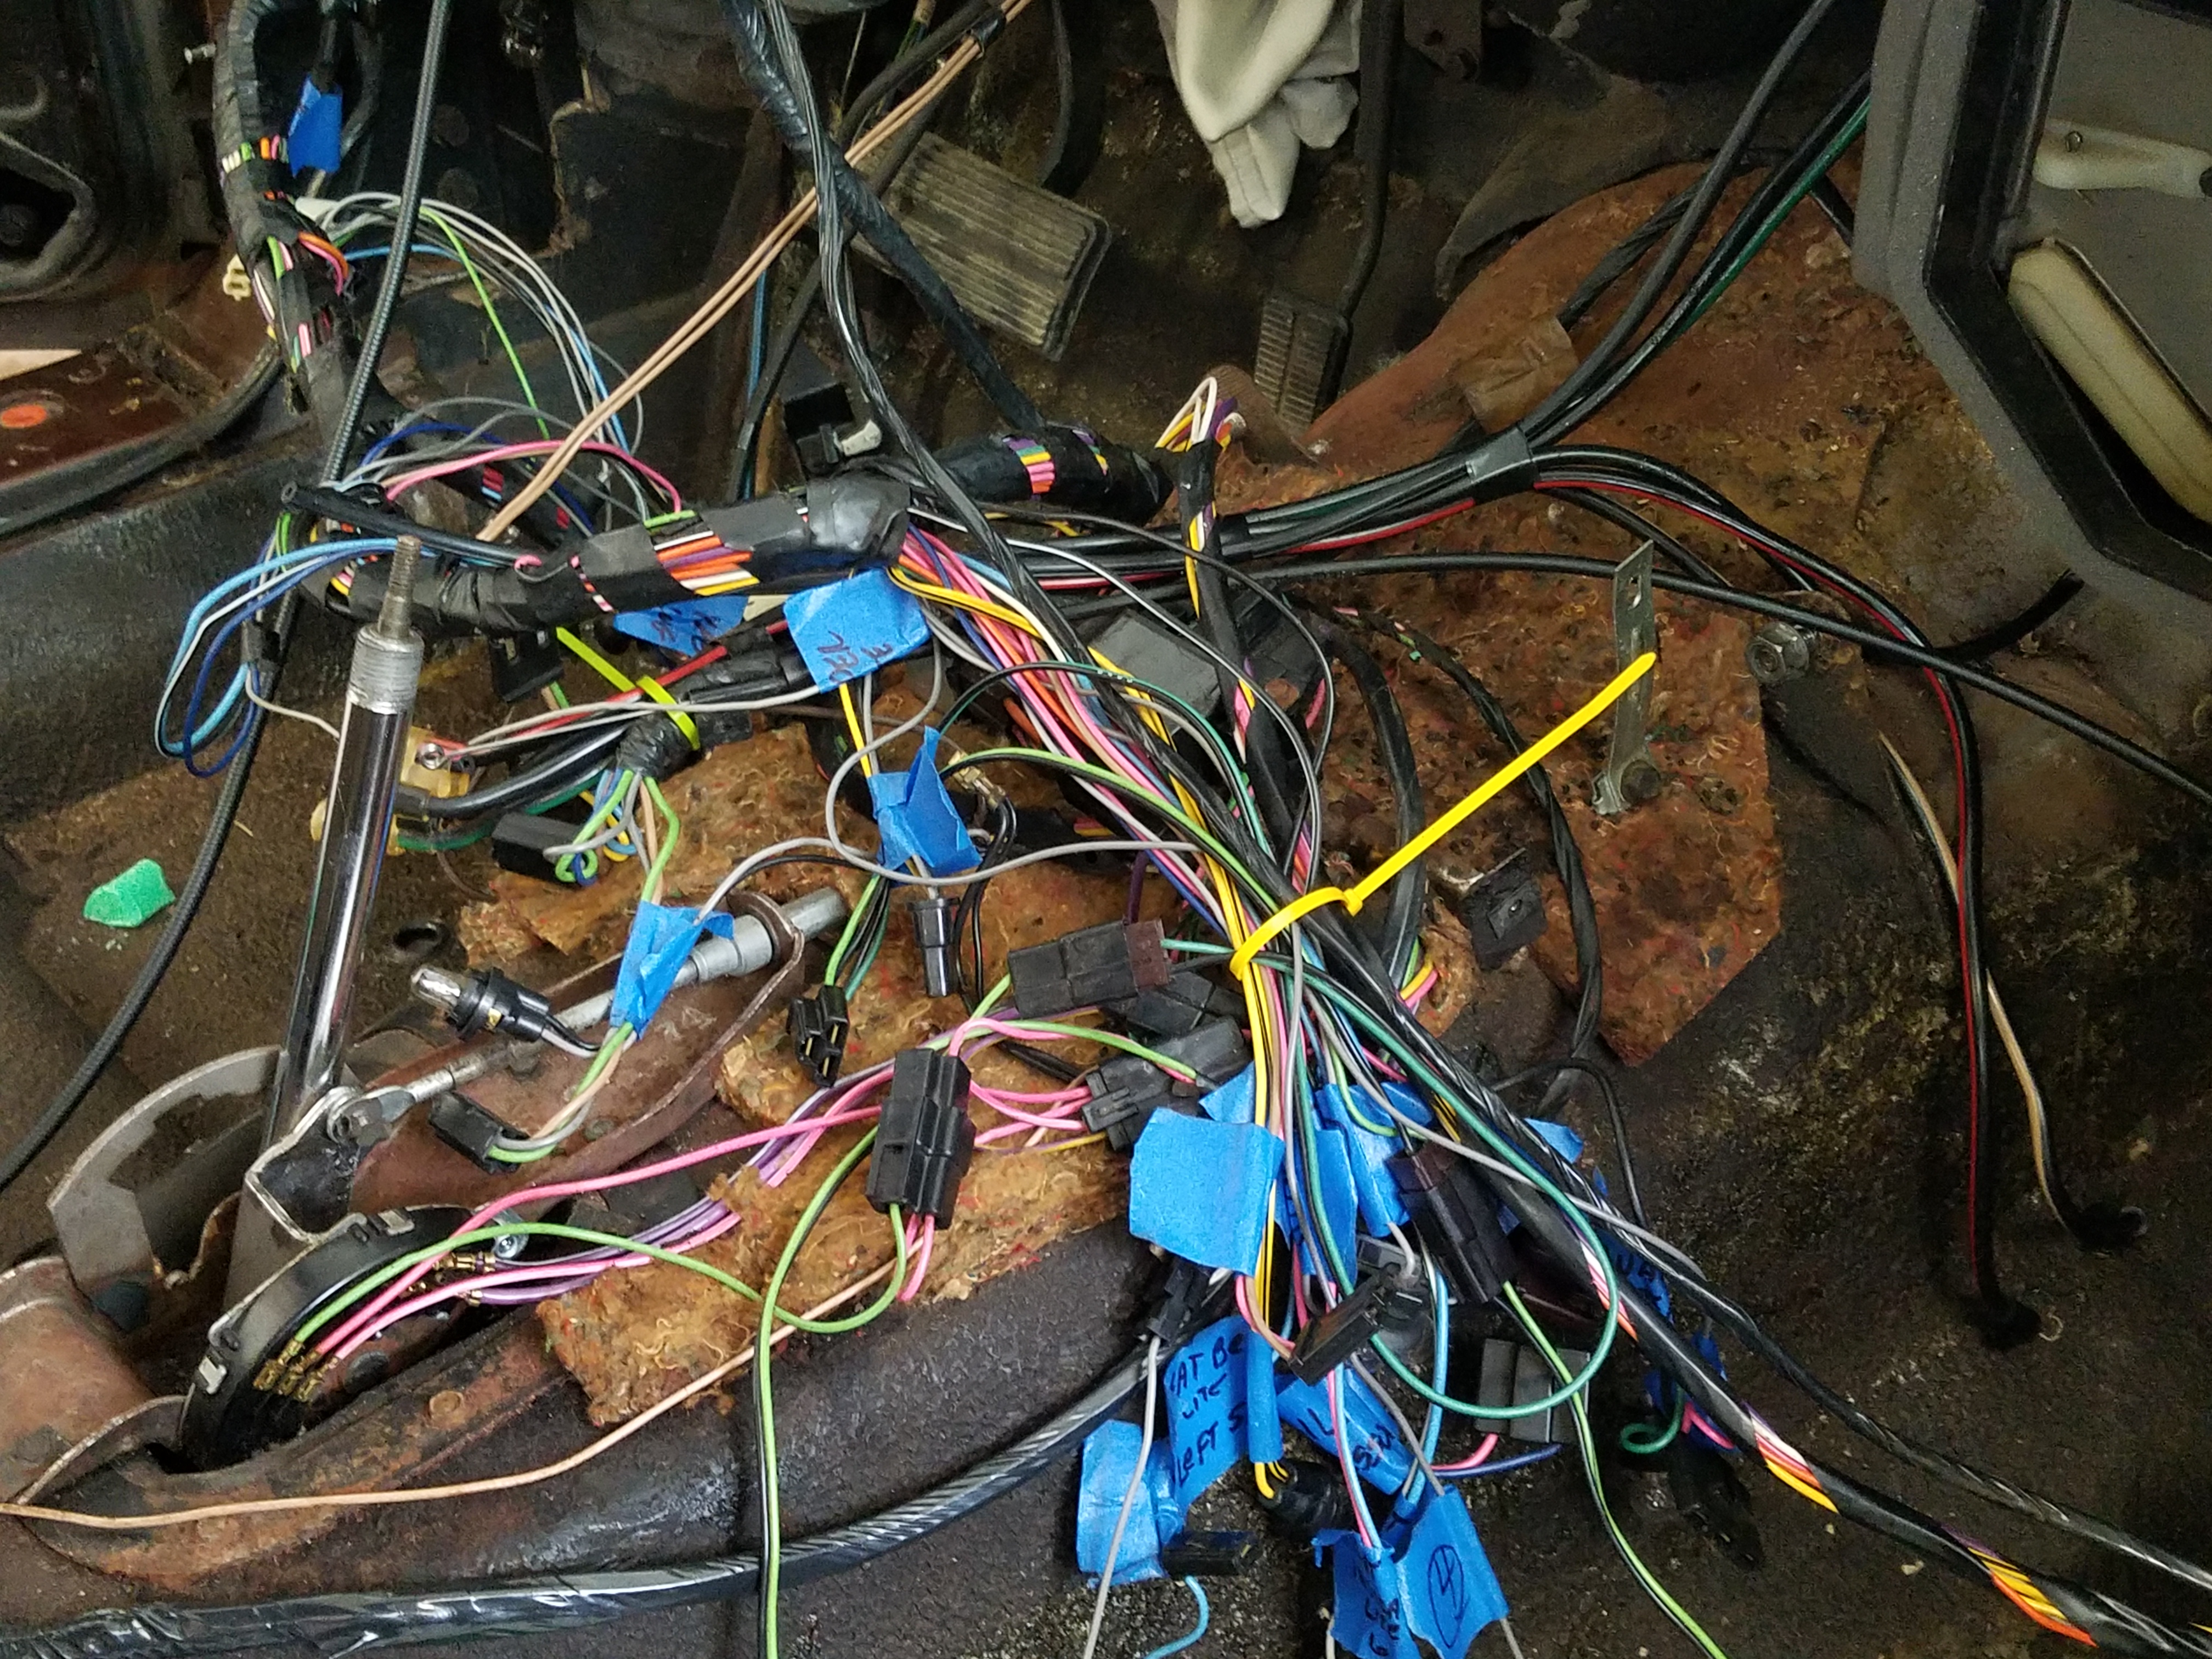
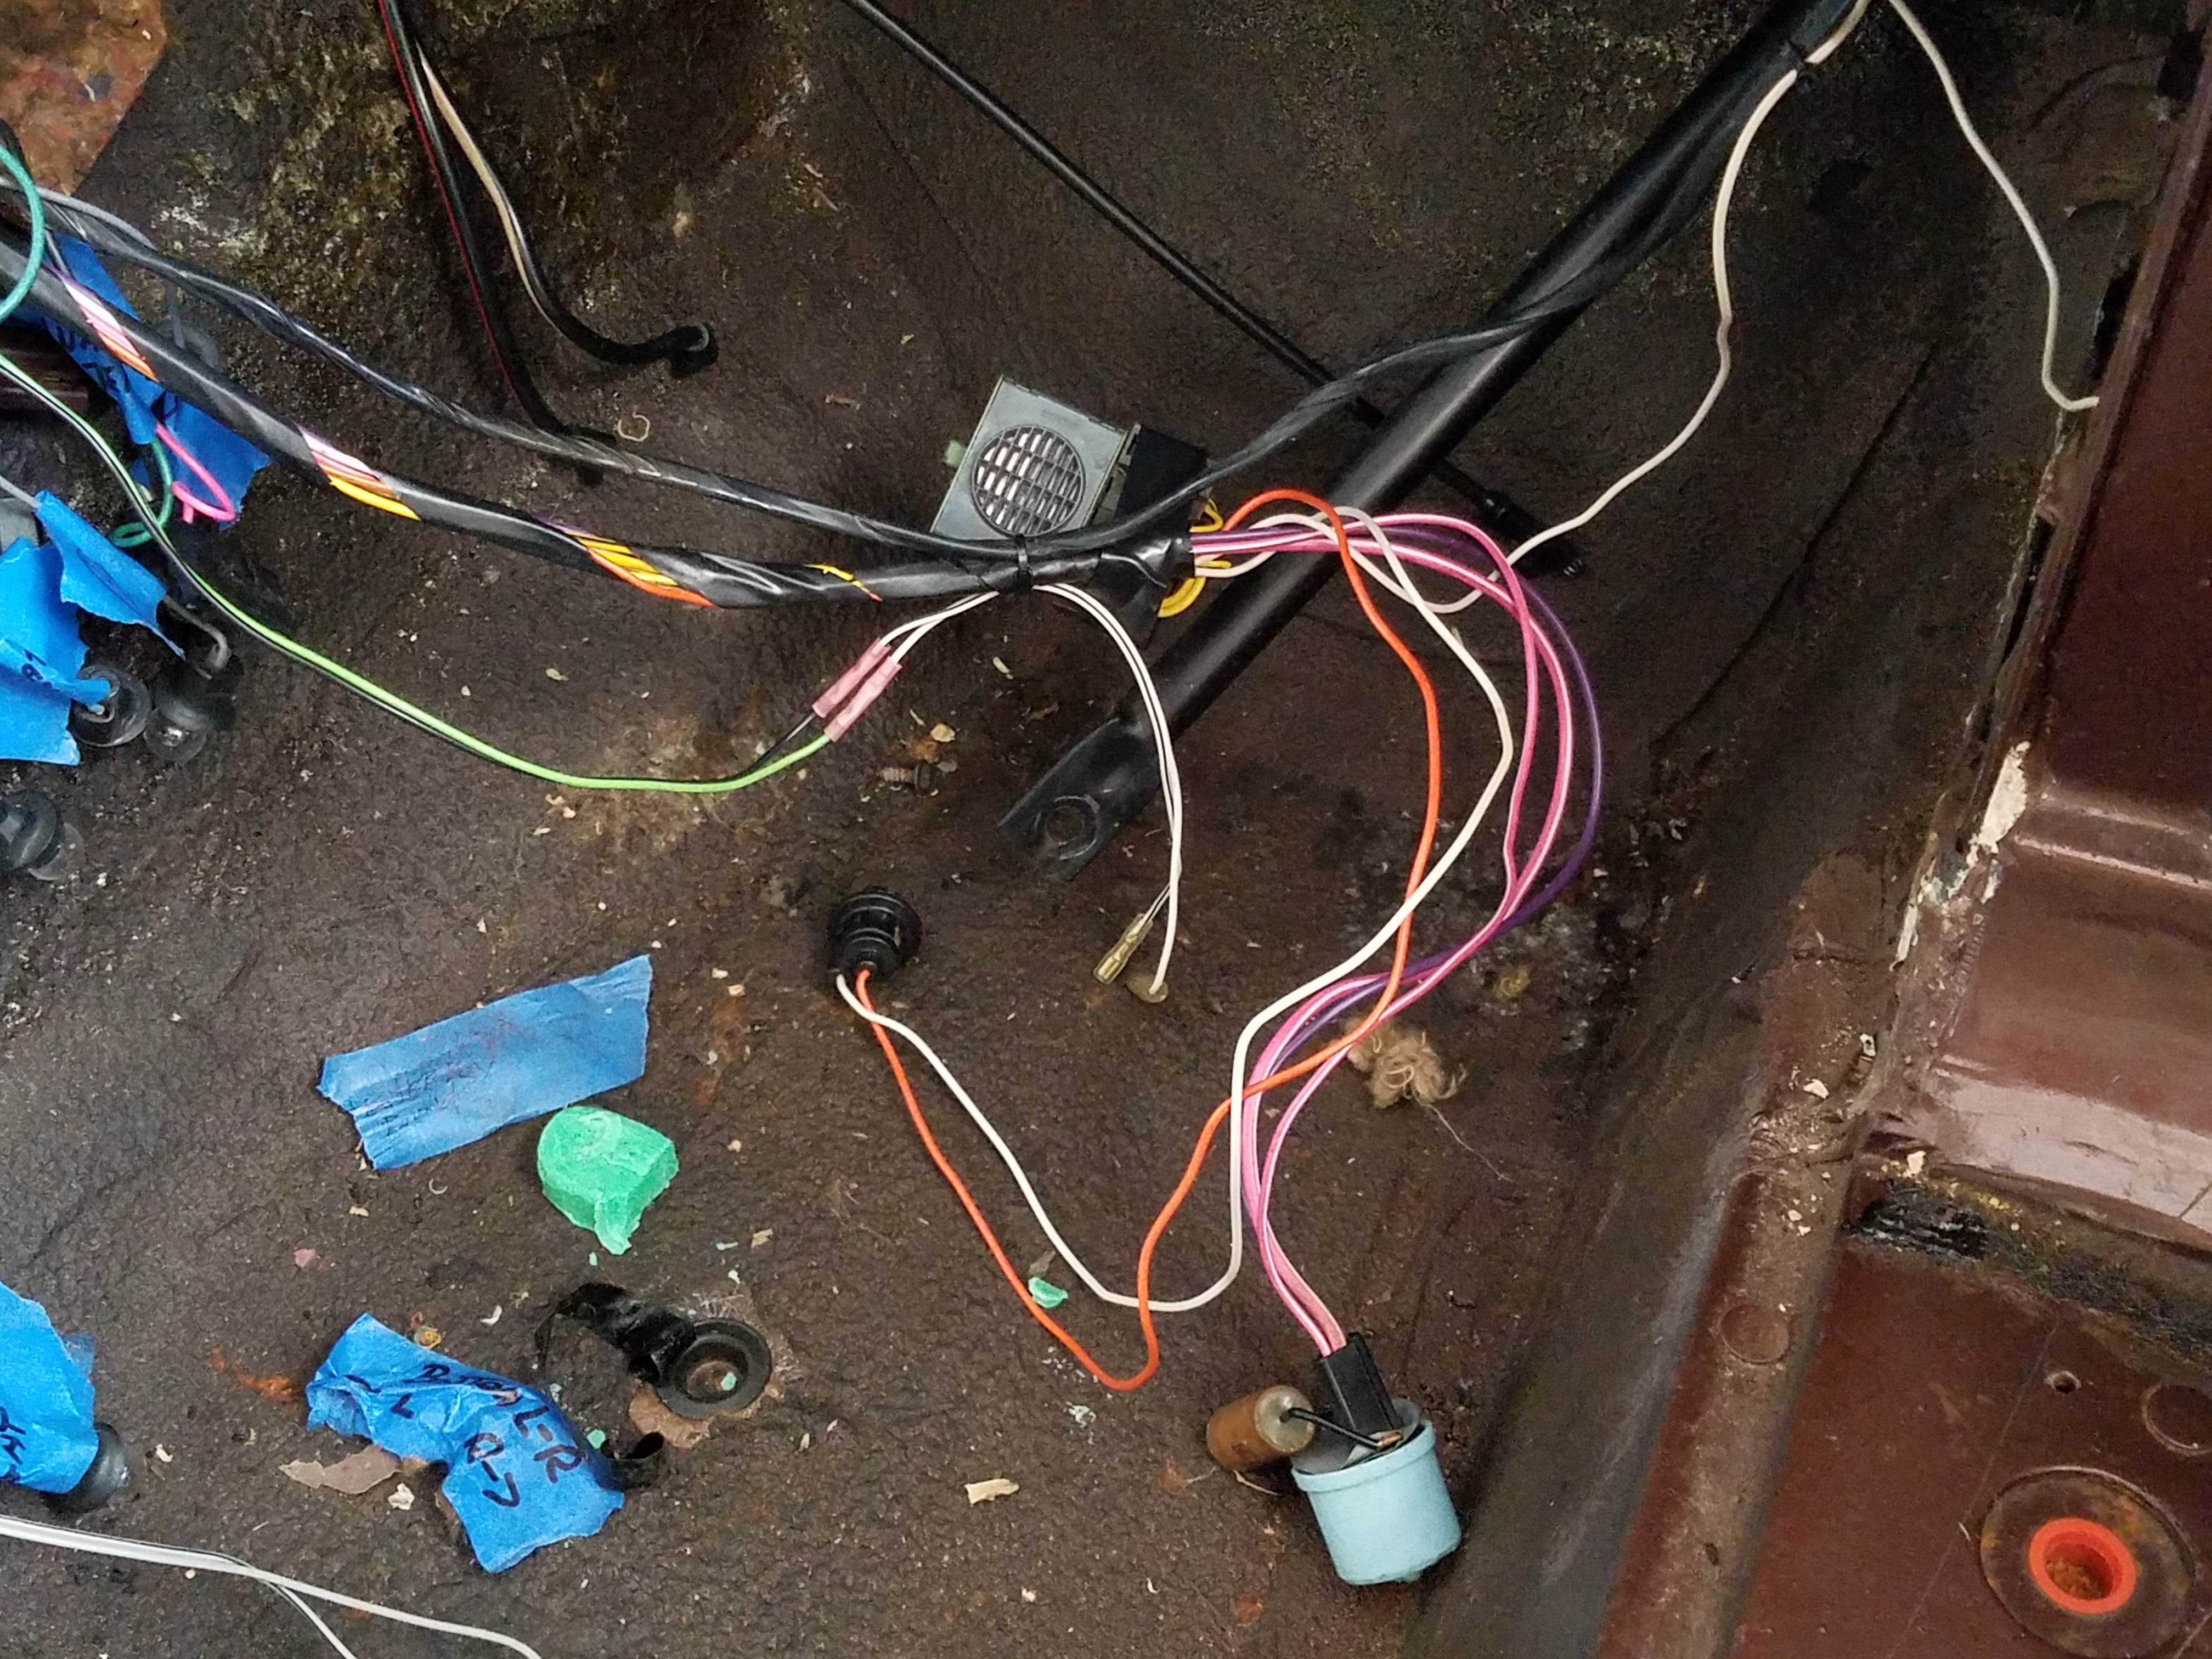
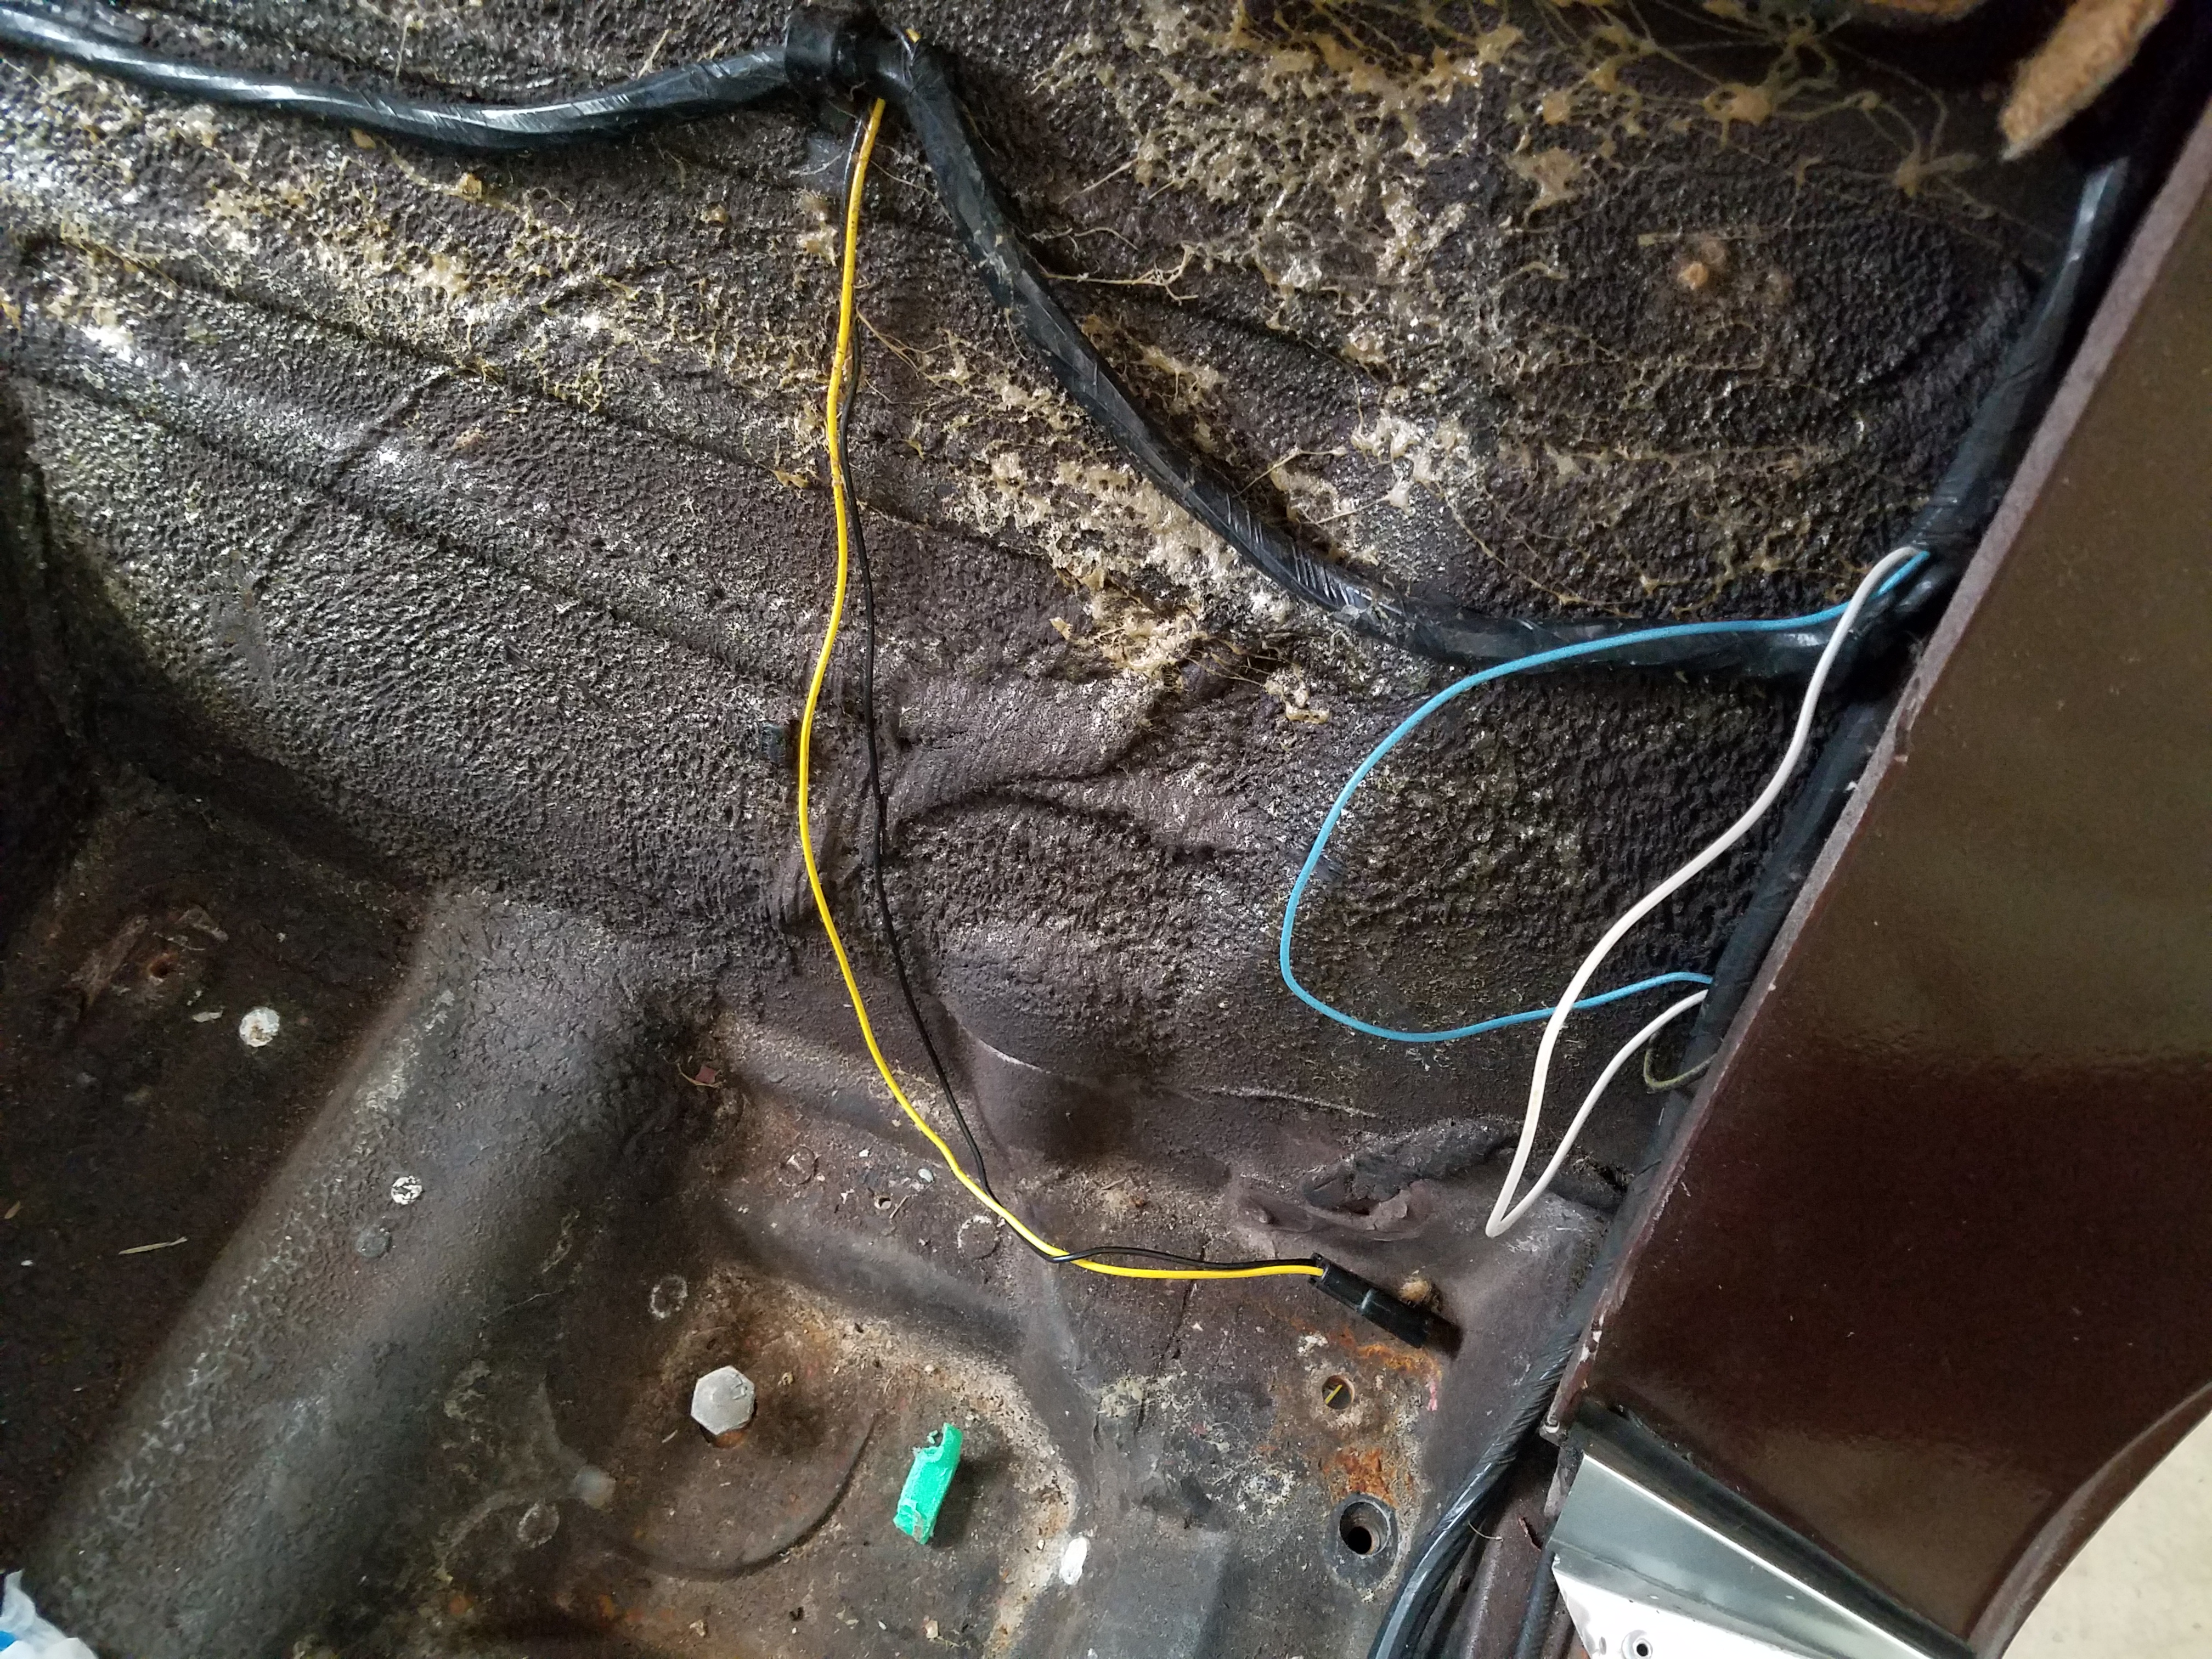
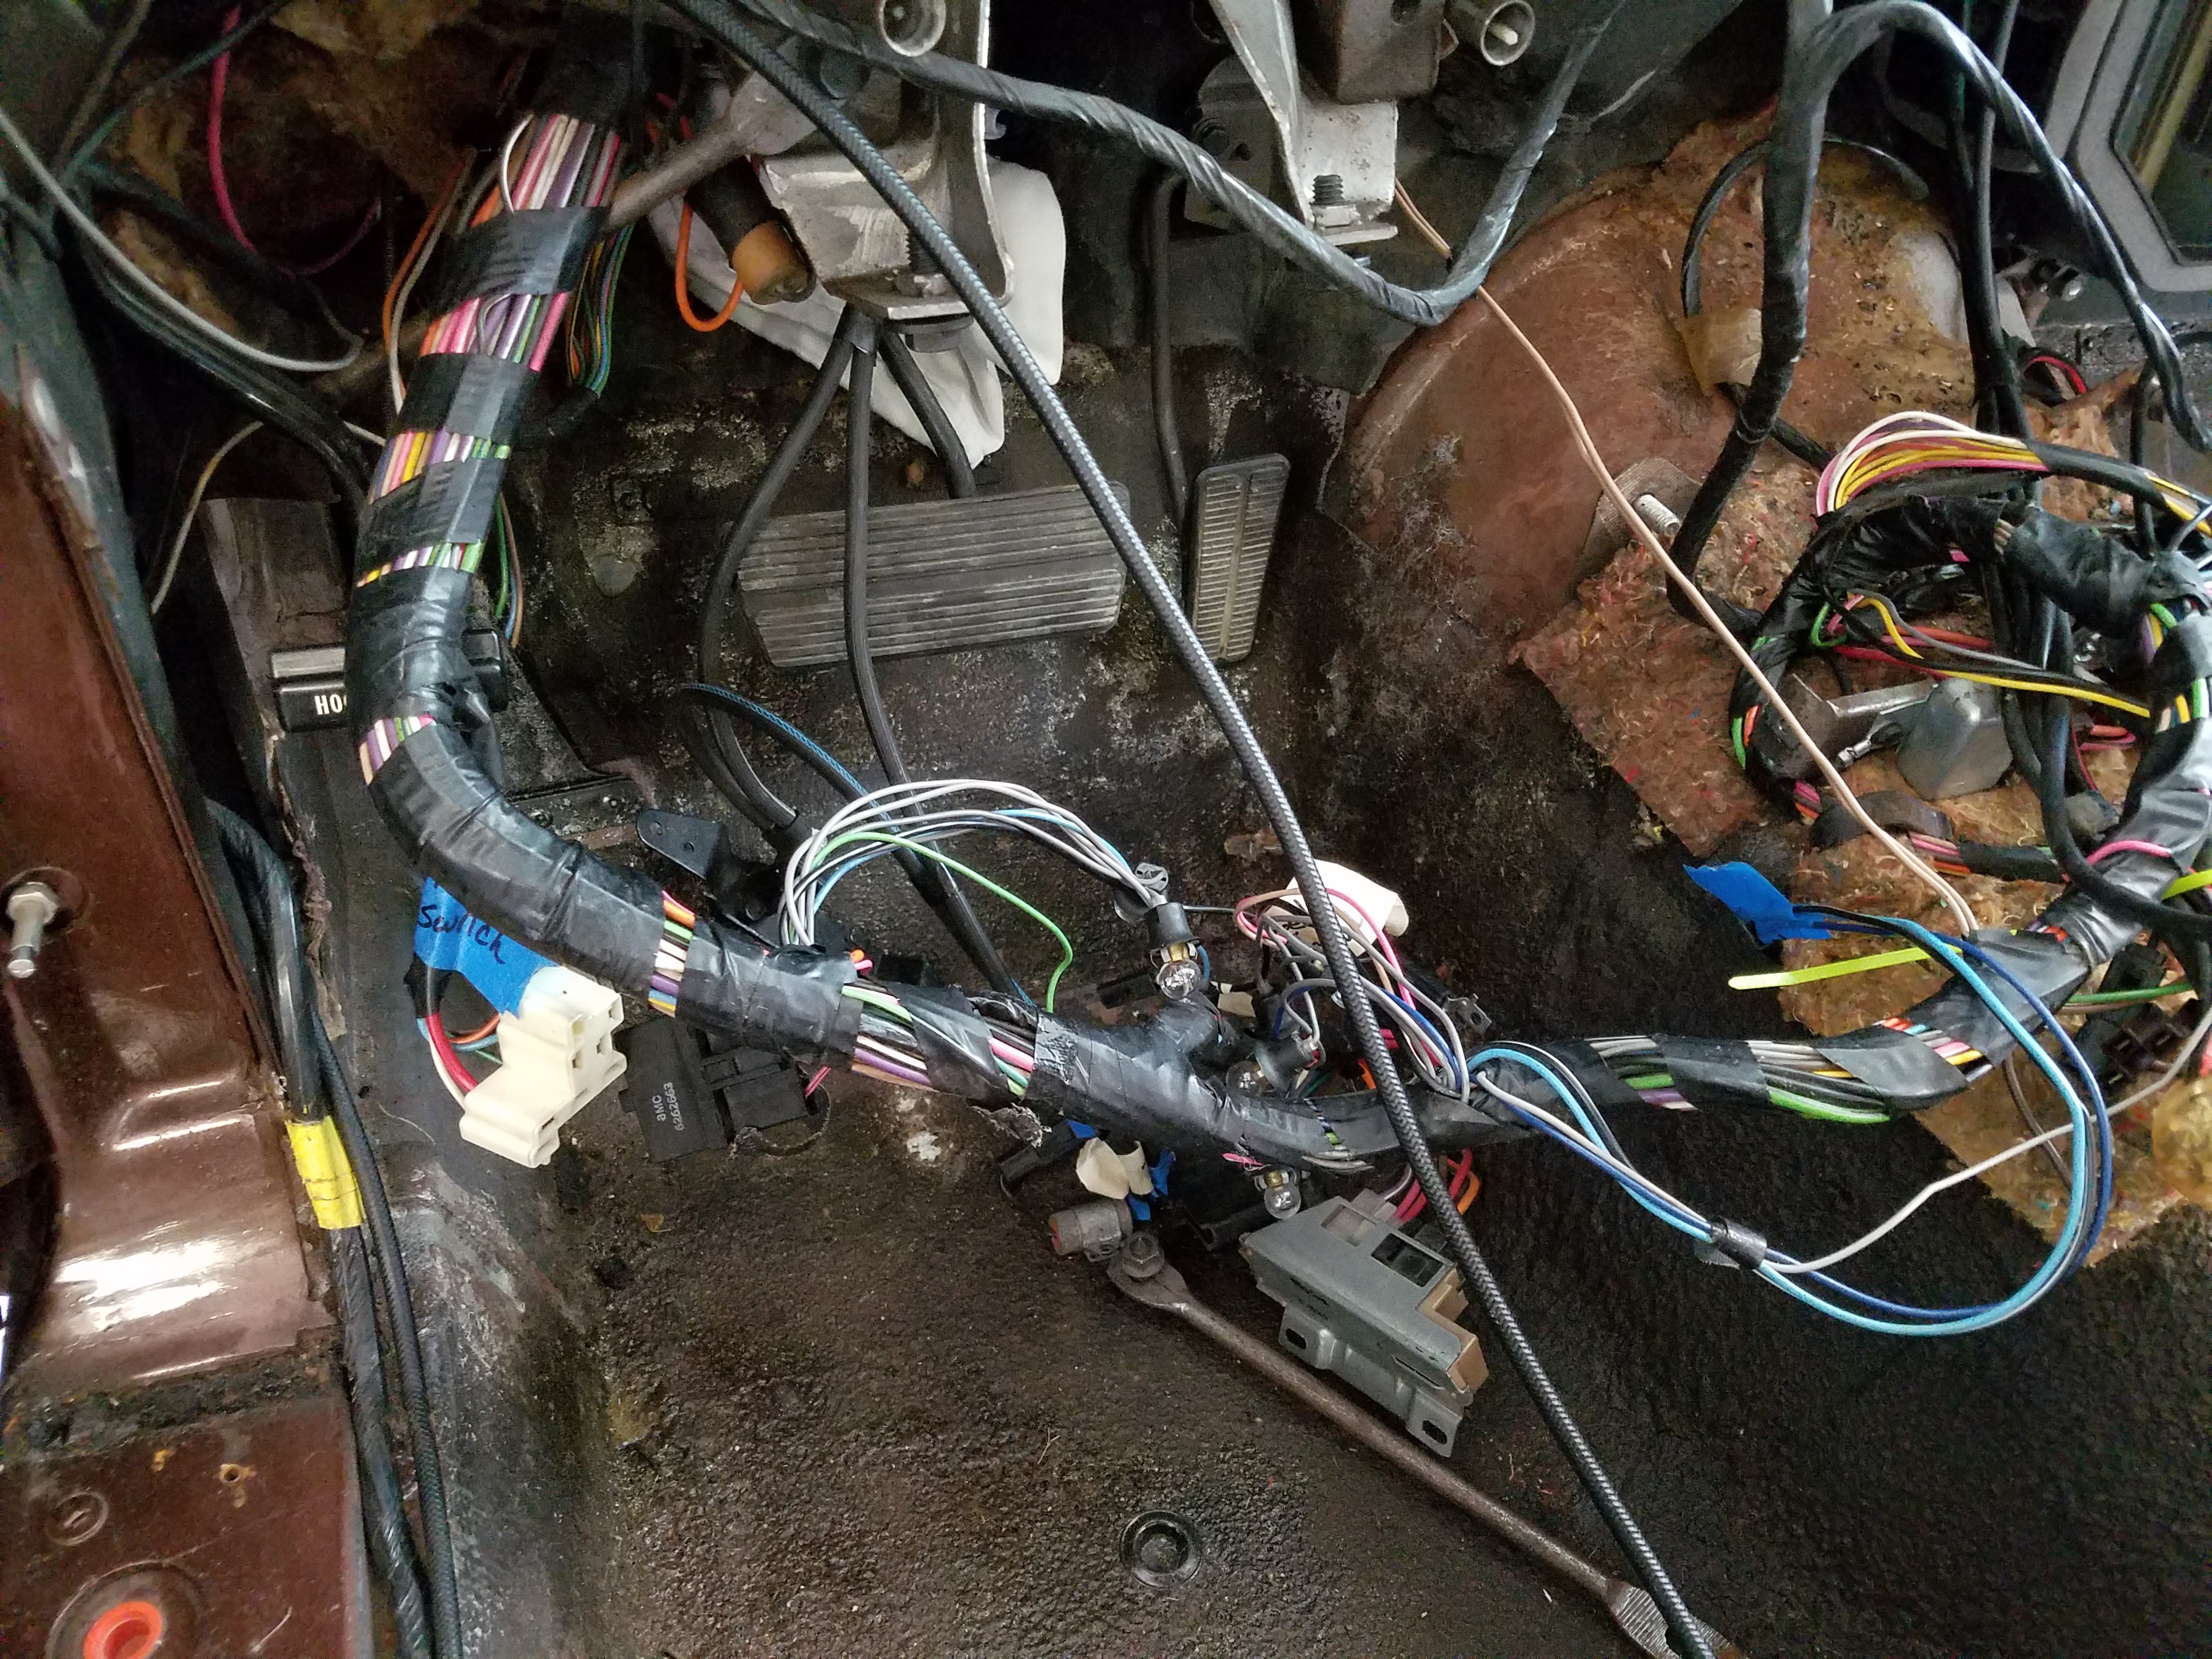
Moving right along with more work on the 74 today. Presently in the process of wiping down every wire in the wiring harness that I can get my fingers on. Not too bad to begin with, but years of dust, slight grime and some electrical tape needing repair needed to be addressed.
Glad I marked everything years ago, otherwise I be in a real mess....lol
Glad I marked everything years ago, otherwise I be in a real mess....lol


 07-13-2017, 12:25 AM
#117
Melting Slicks
Thread Starter
Continuing on in the day, things going well. Took the heater box out again for the last time....lol Connected vacuum hoses to the proper locations and hooked up some of the duct work. Sometimes you learn as you go along, because maybe you have forgotten what you once new from years ago...lol or maybe the instructions were all not that great, or you didn't take certain pics or make notes when things came apart...lol
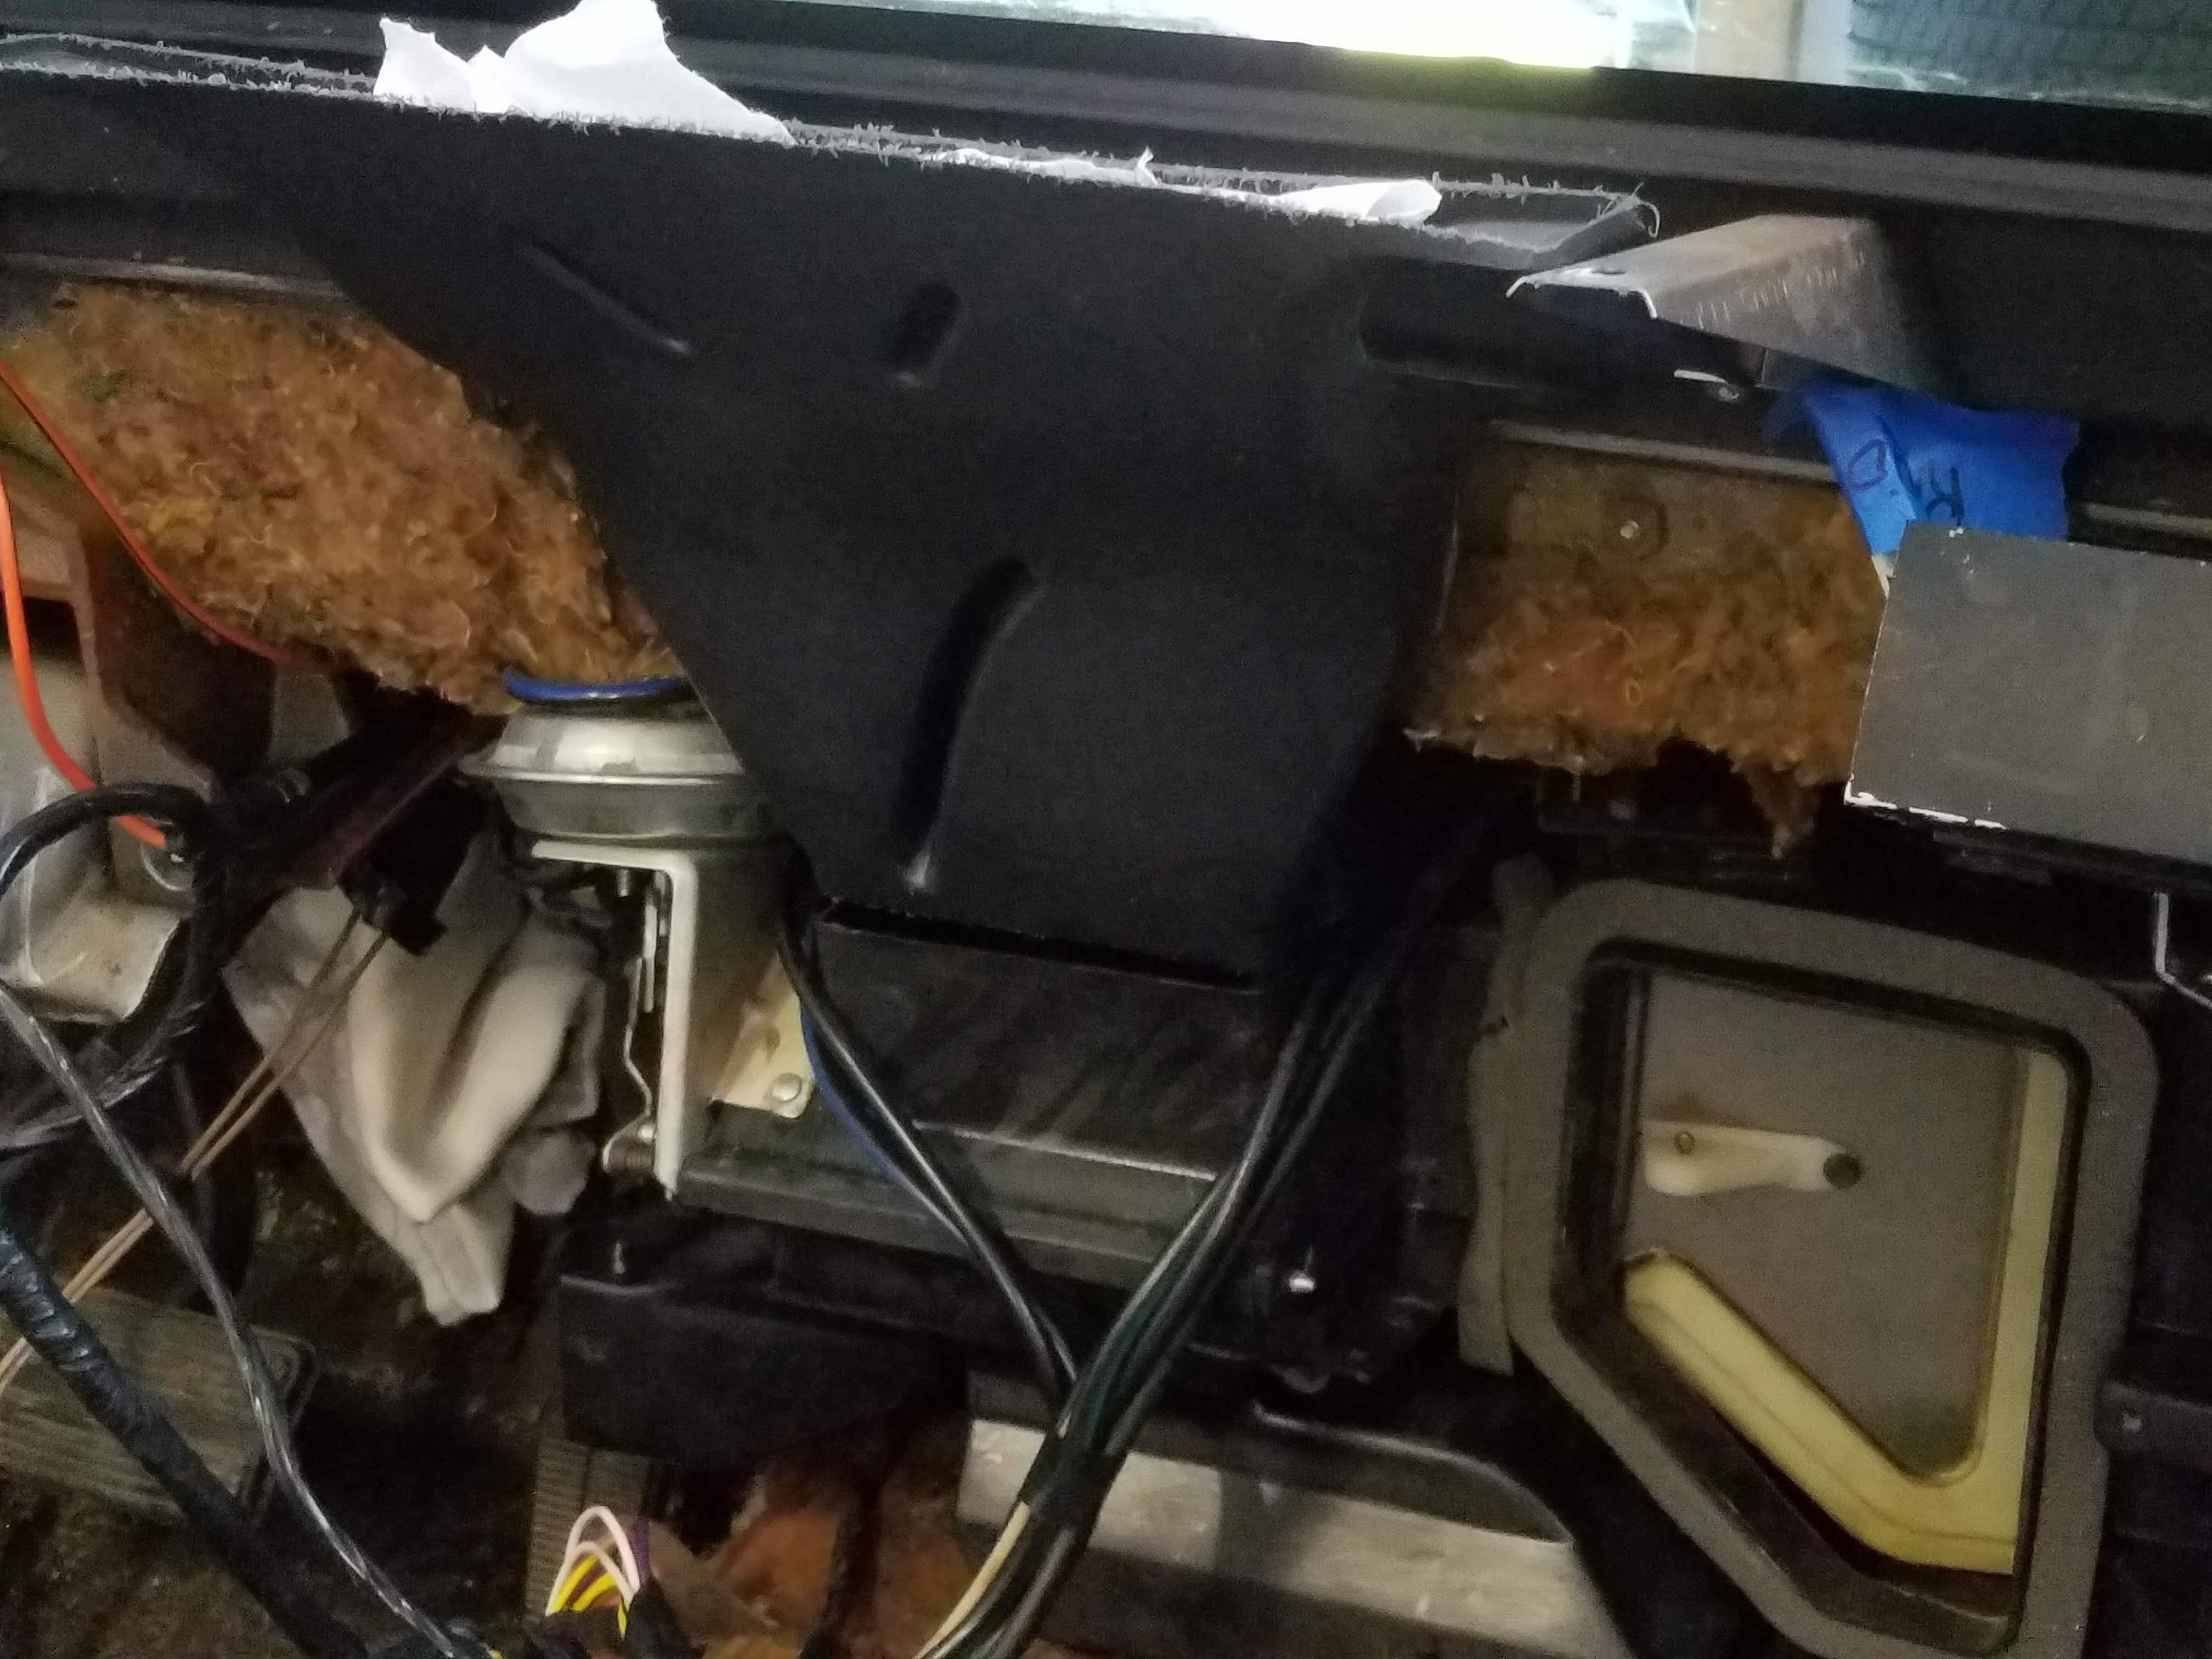
But anyway, as I was putting the duct work back together, I couldn't get the center piece back on to the side the heater box. Of course I installed the foam gaskets ahead of time, and in this particular assembly that was not the correct thing to do. So out comes the gasket and I had to peel off all of the adhesive material used to hold the gasket in place. Thankfully it was still very pliable which helped out tremendously....whew....
Got it all cleaned off and proceeded as planned. So far so good. Also dropped the top for more working room and it is starting to stretch, as it took very minimal effort to get it back in place....
getting the vacuum hoses in their correct locations...
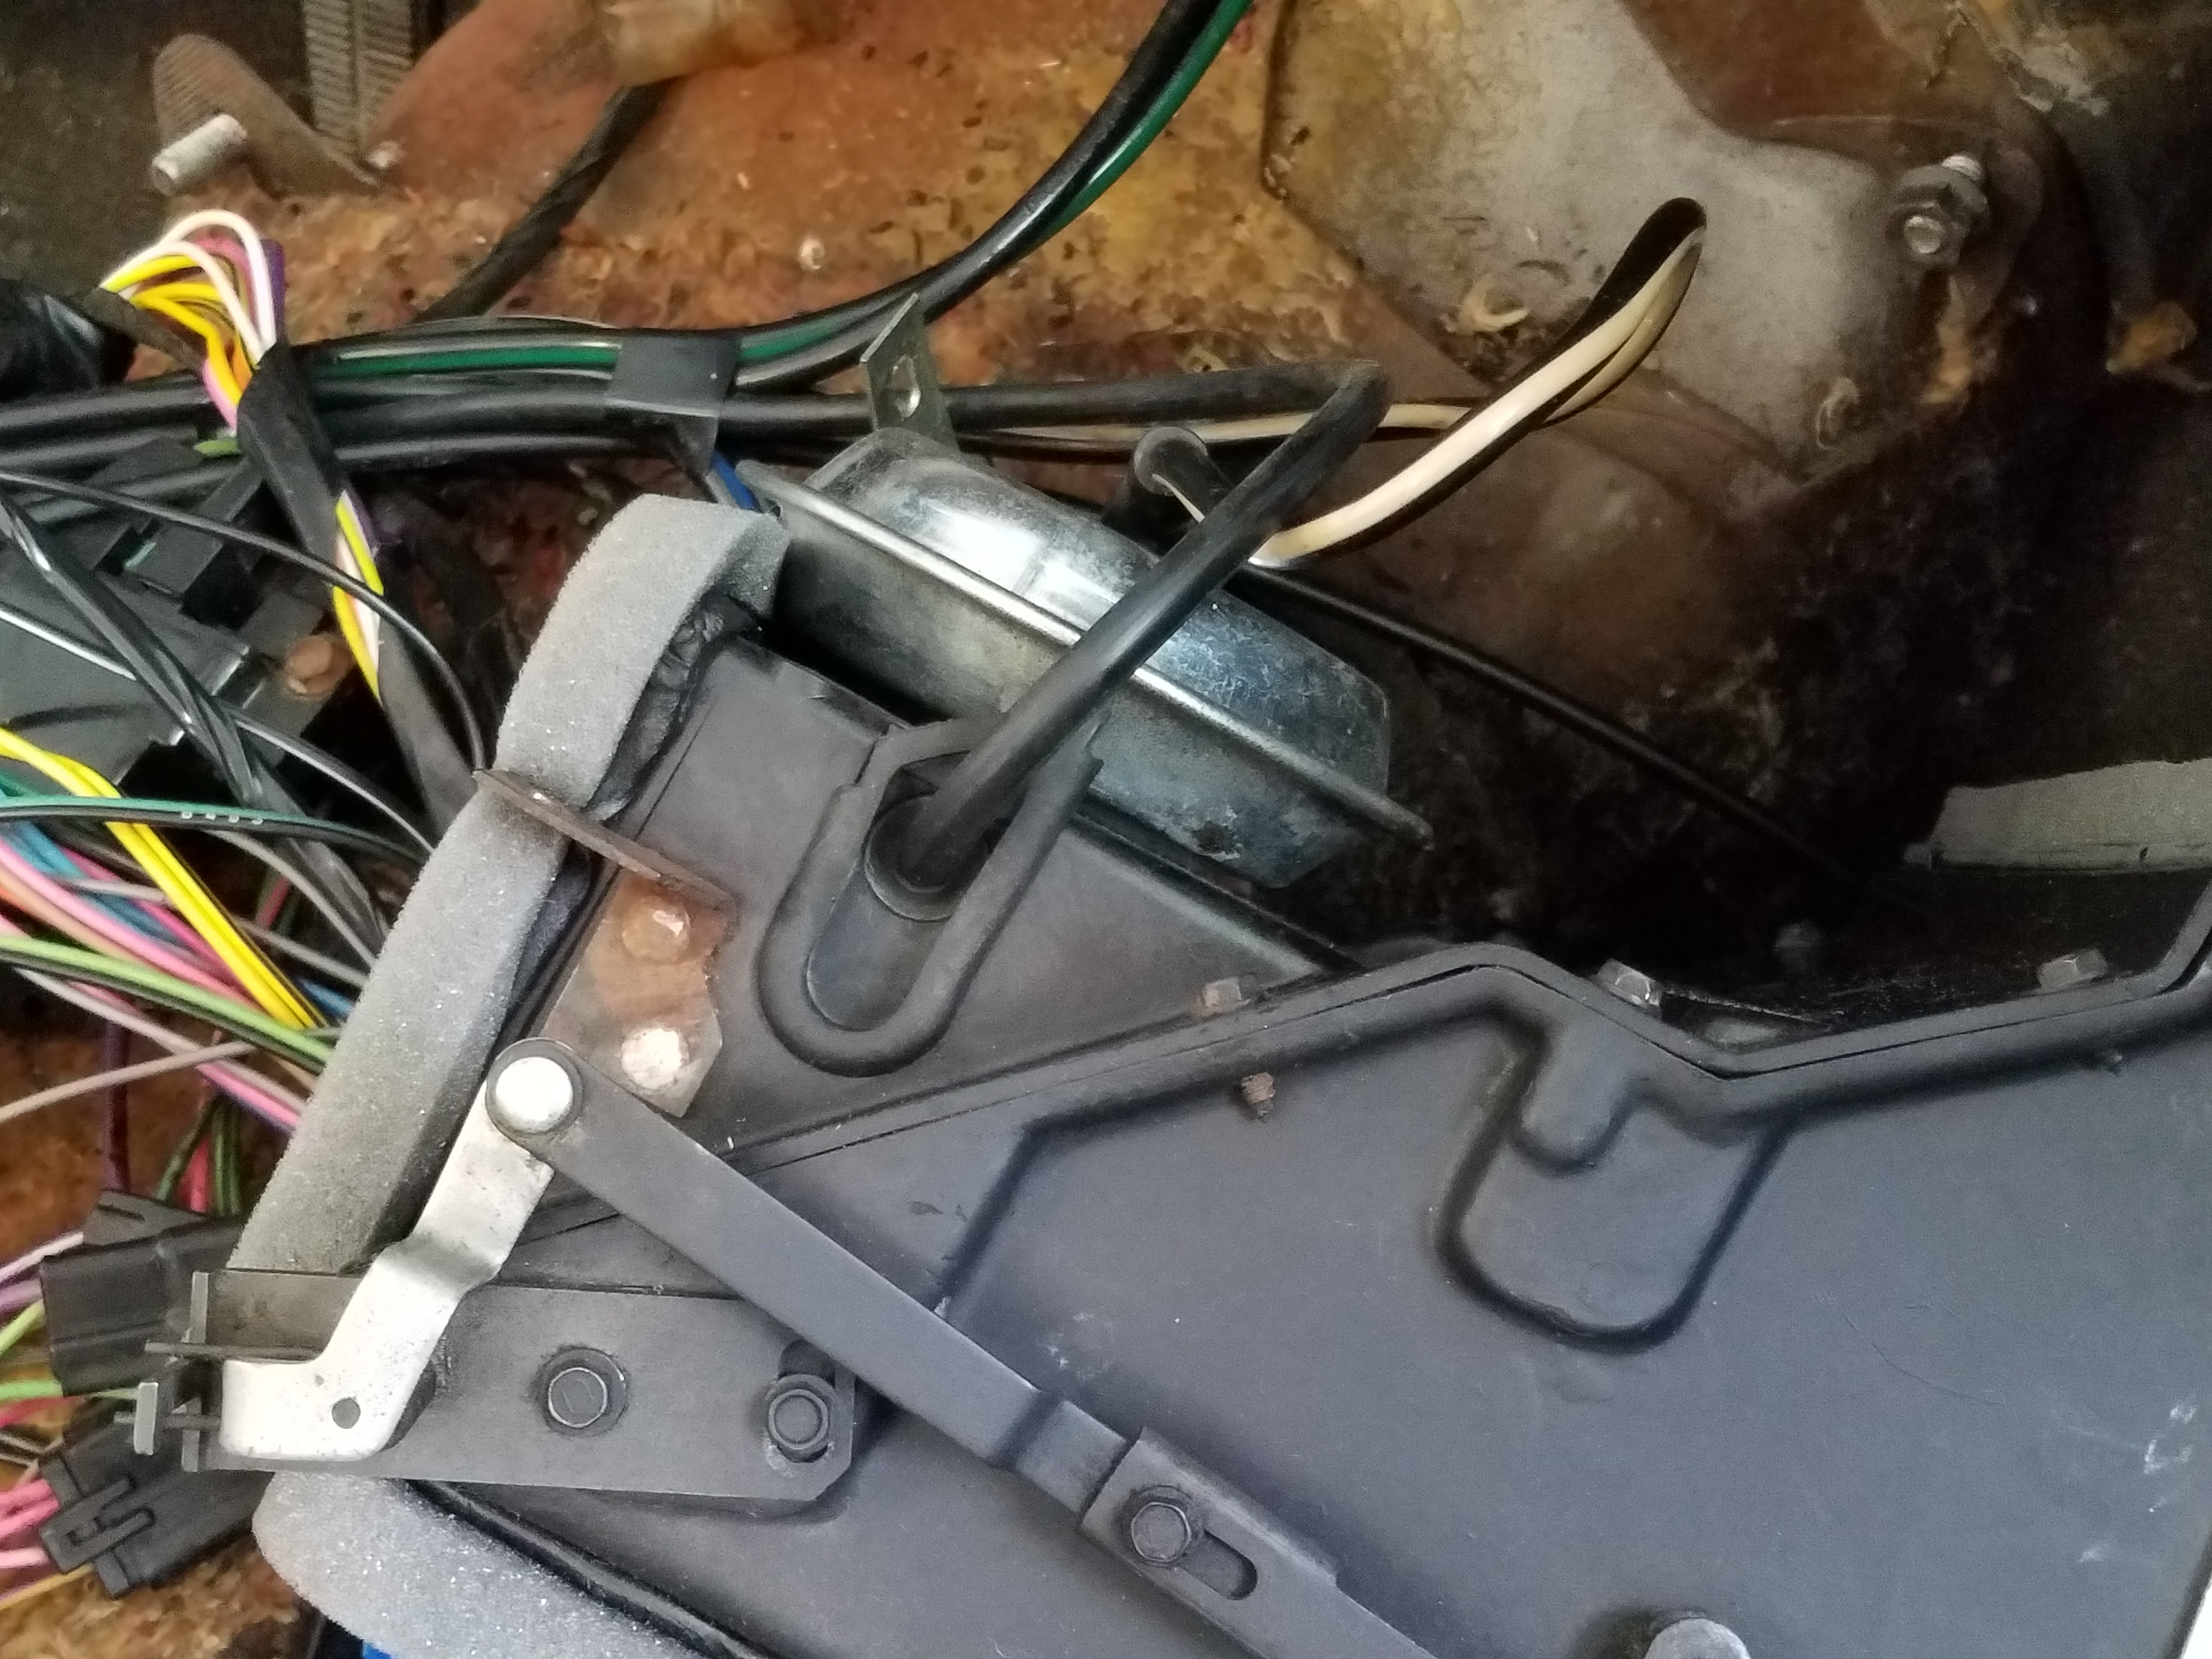
heater box in for the last time...lol
part that would not fit onto the box until I moved the gasket...
sealant I had to peel off...
But anyway, as I was putting the duct work back together, I couldn't get the center piece back on to the side the heater box. Of course I installed the foam gaskets ahead of time, and in this particular assembly that was not the correct thing to do. So out comes the gasket and I had to peel off all of the adhesive material used to hold the gasket in place. Thankfully it was still very pliable which helped out tremendously....whew....
Got it all cleaned off and proceeded as planned. So far so good. Also dropped the top for more working room and it is starting to stretch, as it took very minimal effort to get it back in place....
getting the vacuum hoses in their correct locations...

heater box in for the last time...lol

part that would not fit onto the box until I moved the gasket...

sealant I had to peel off...
 07-13-2017, 12:28 AM
#118
Melting Slicks
Thread Starter
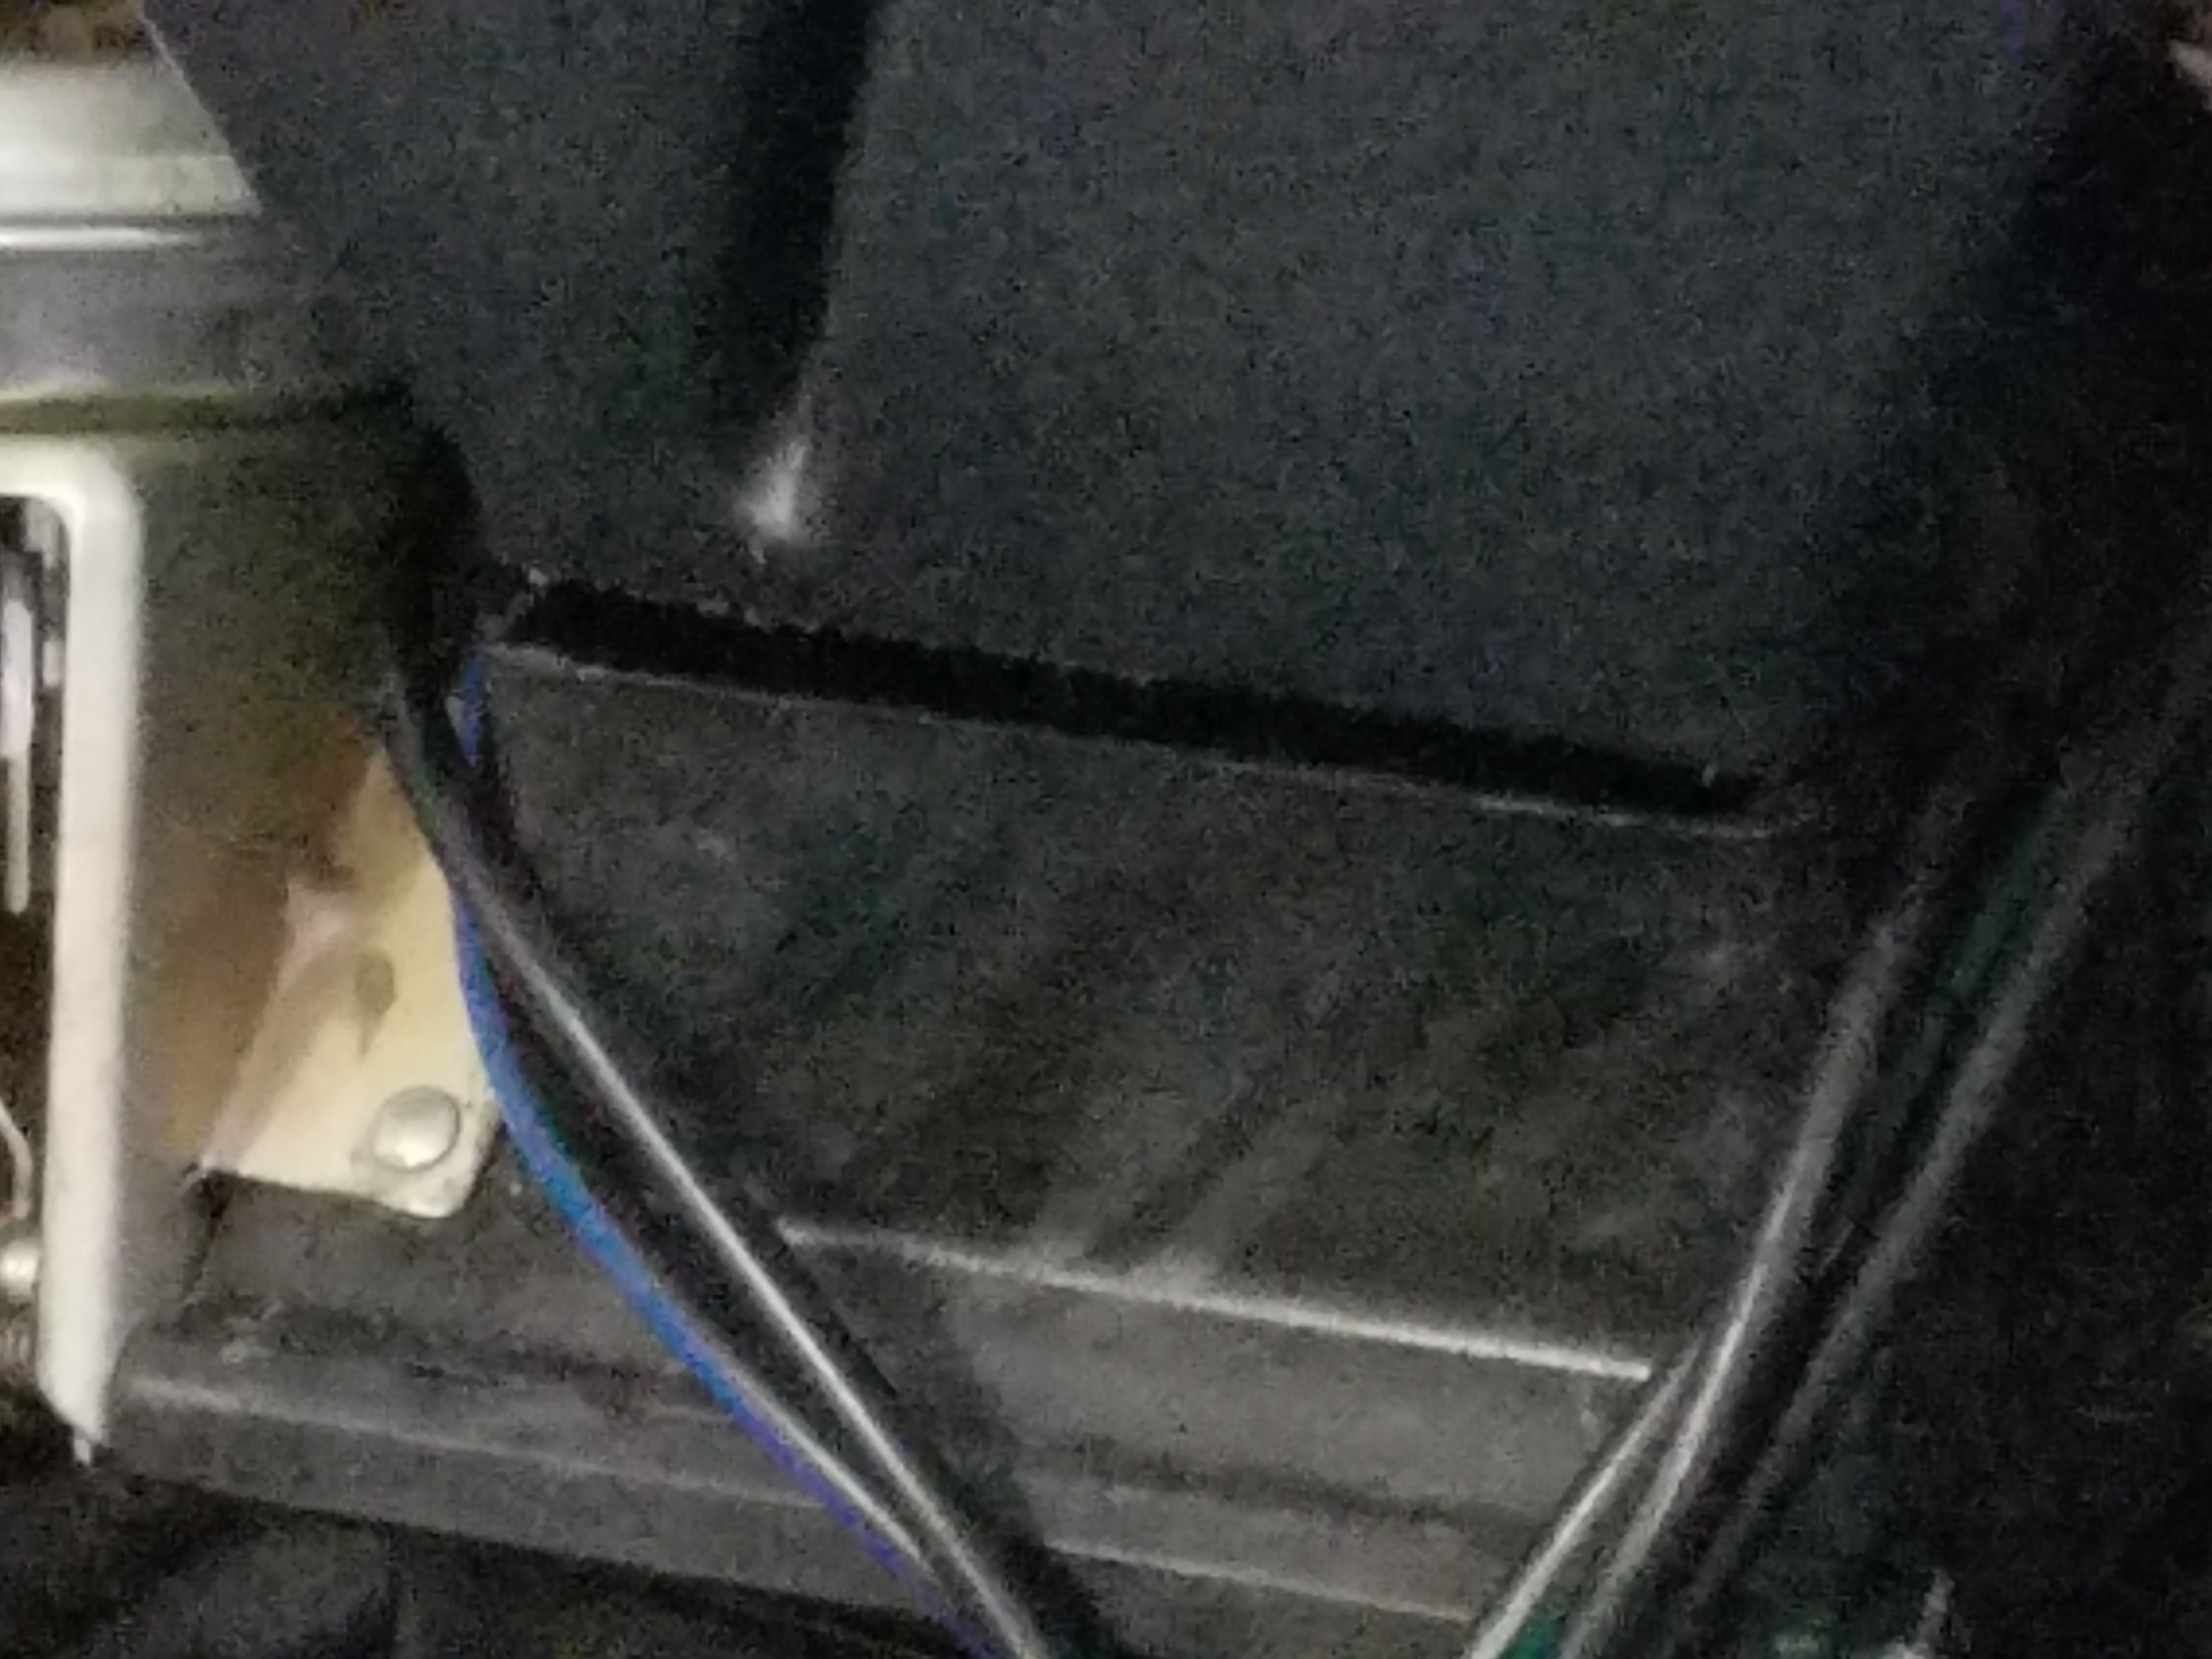
making progress...notice the gap between the center piece and the defroster vent. that will get tape around it to prevent air loss. the quality control wasn't the best back then and we wonder why the HVAC system never worked as intended....lol
a close up of the gap...
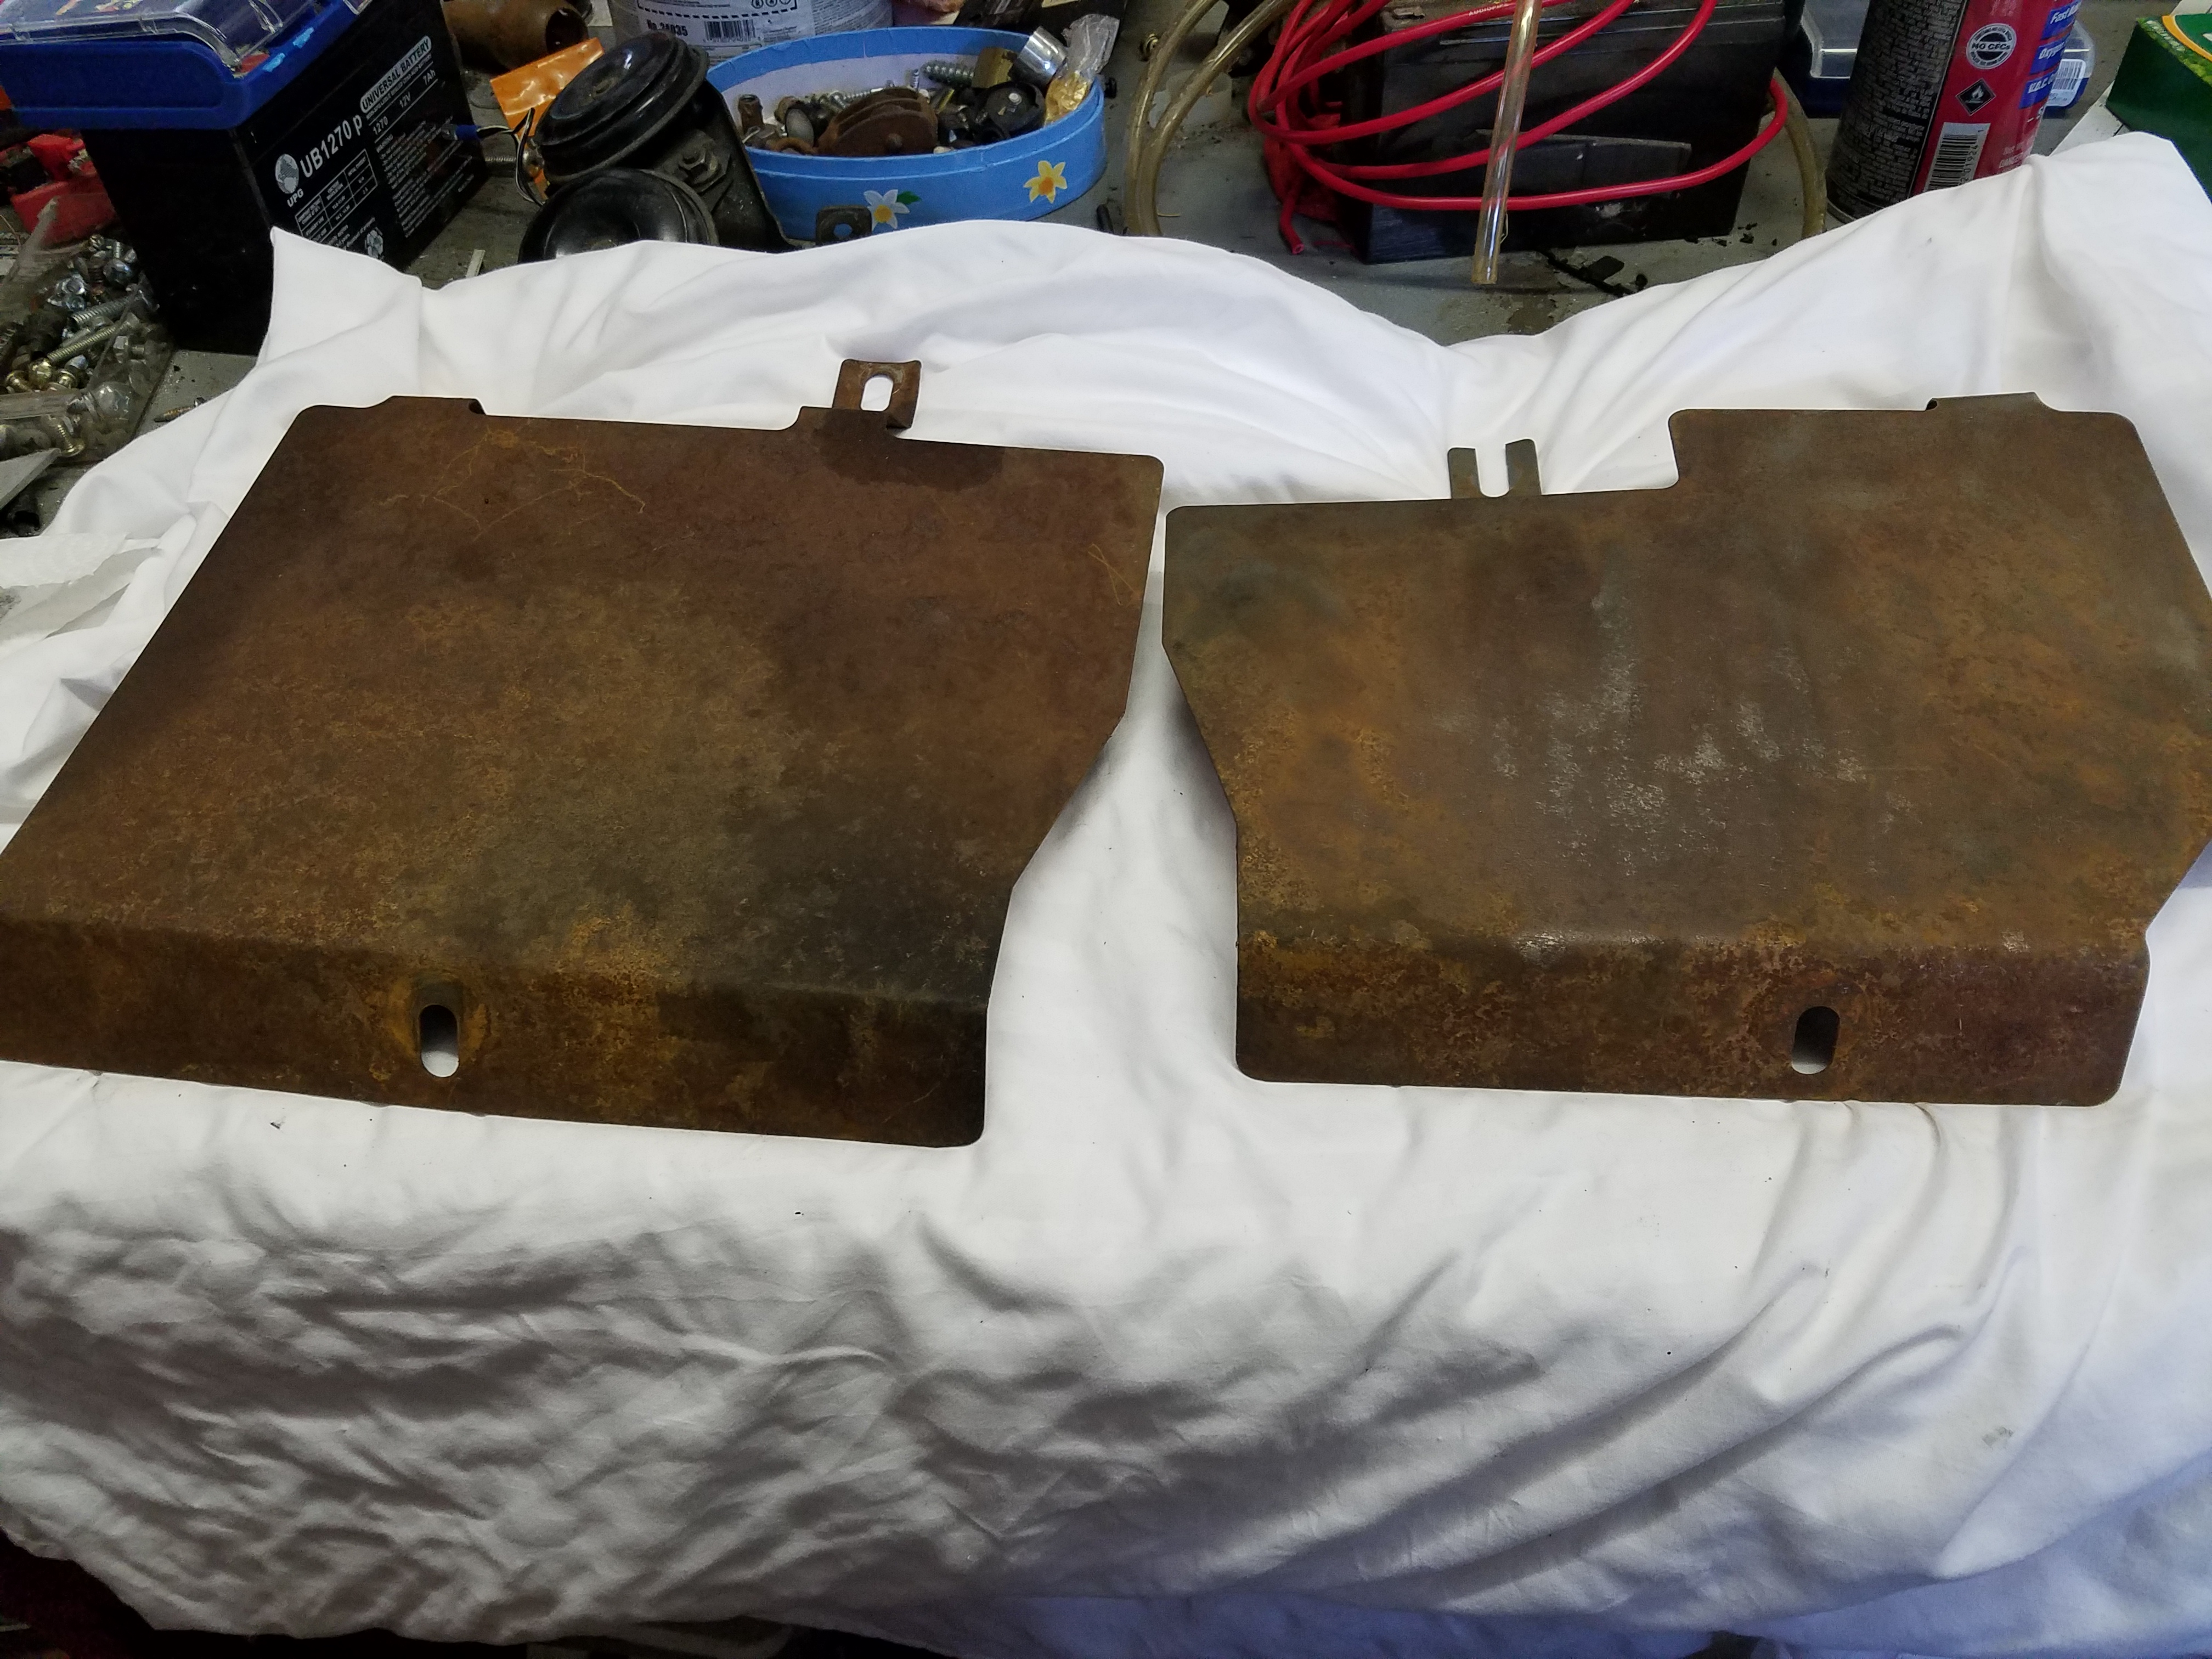
heat shields before...
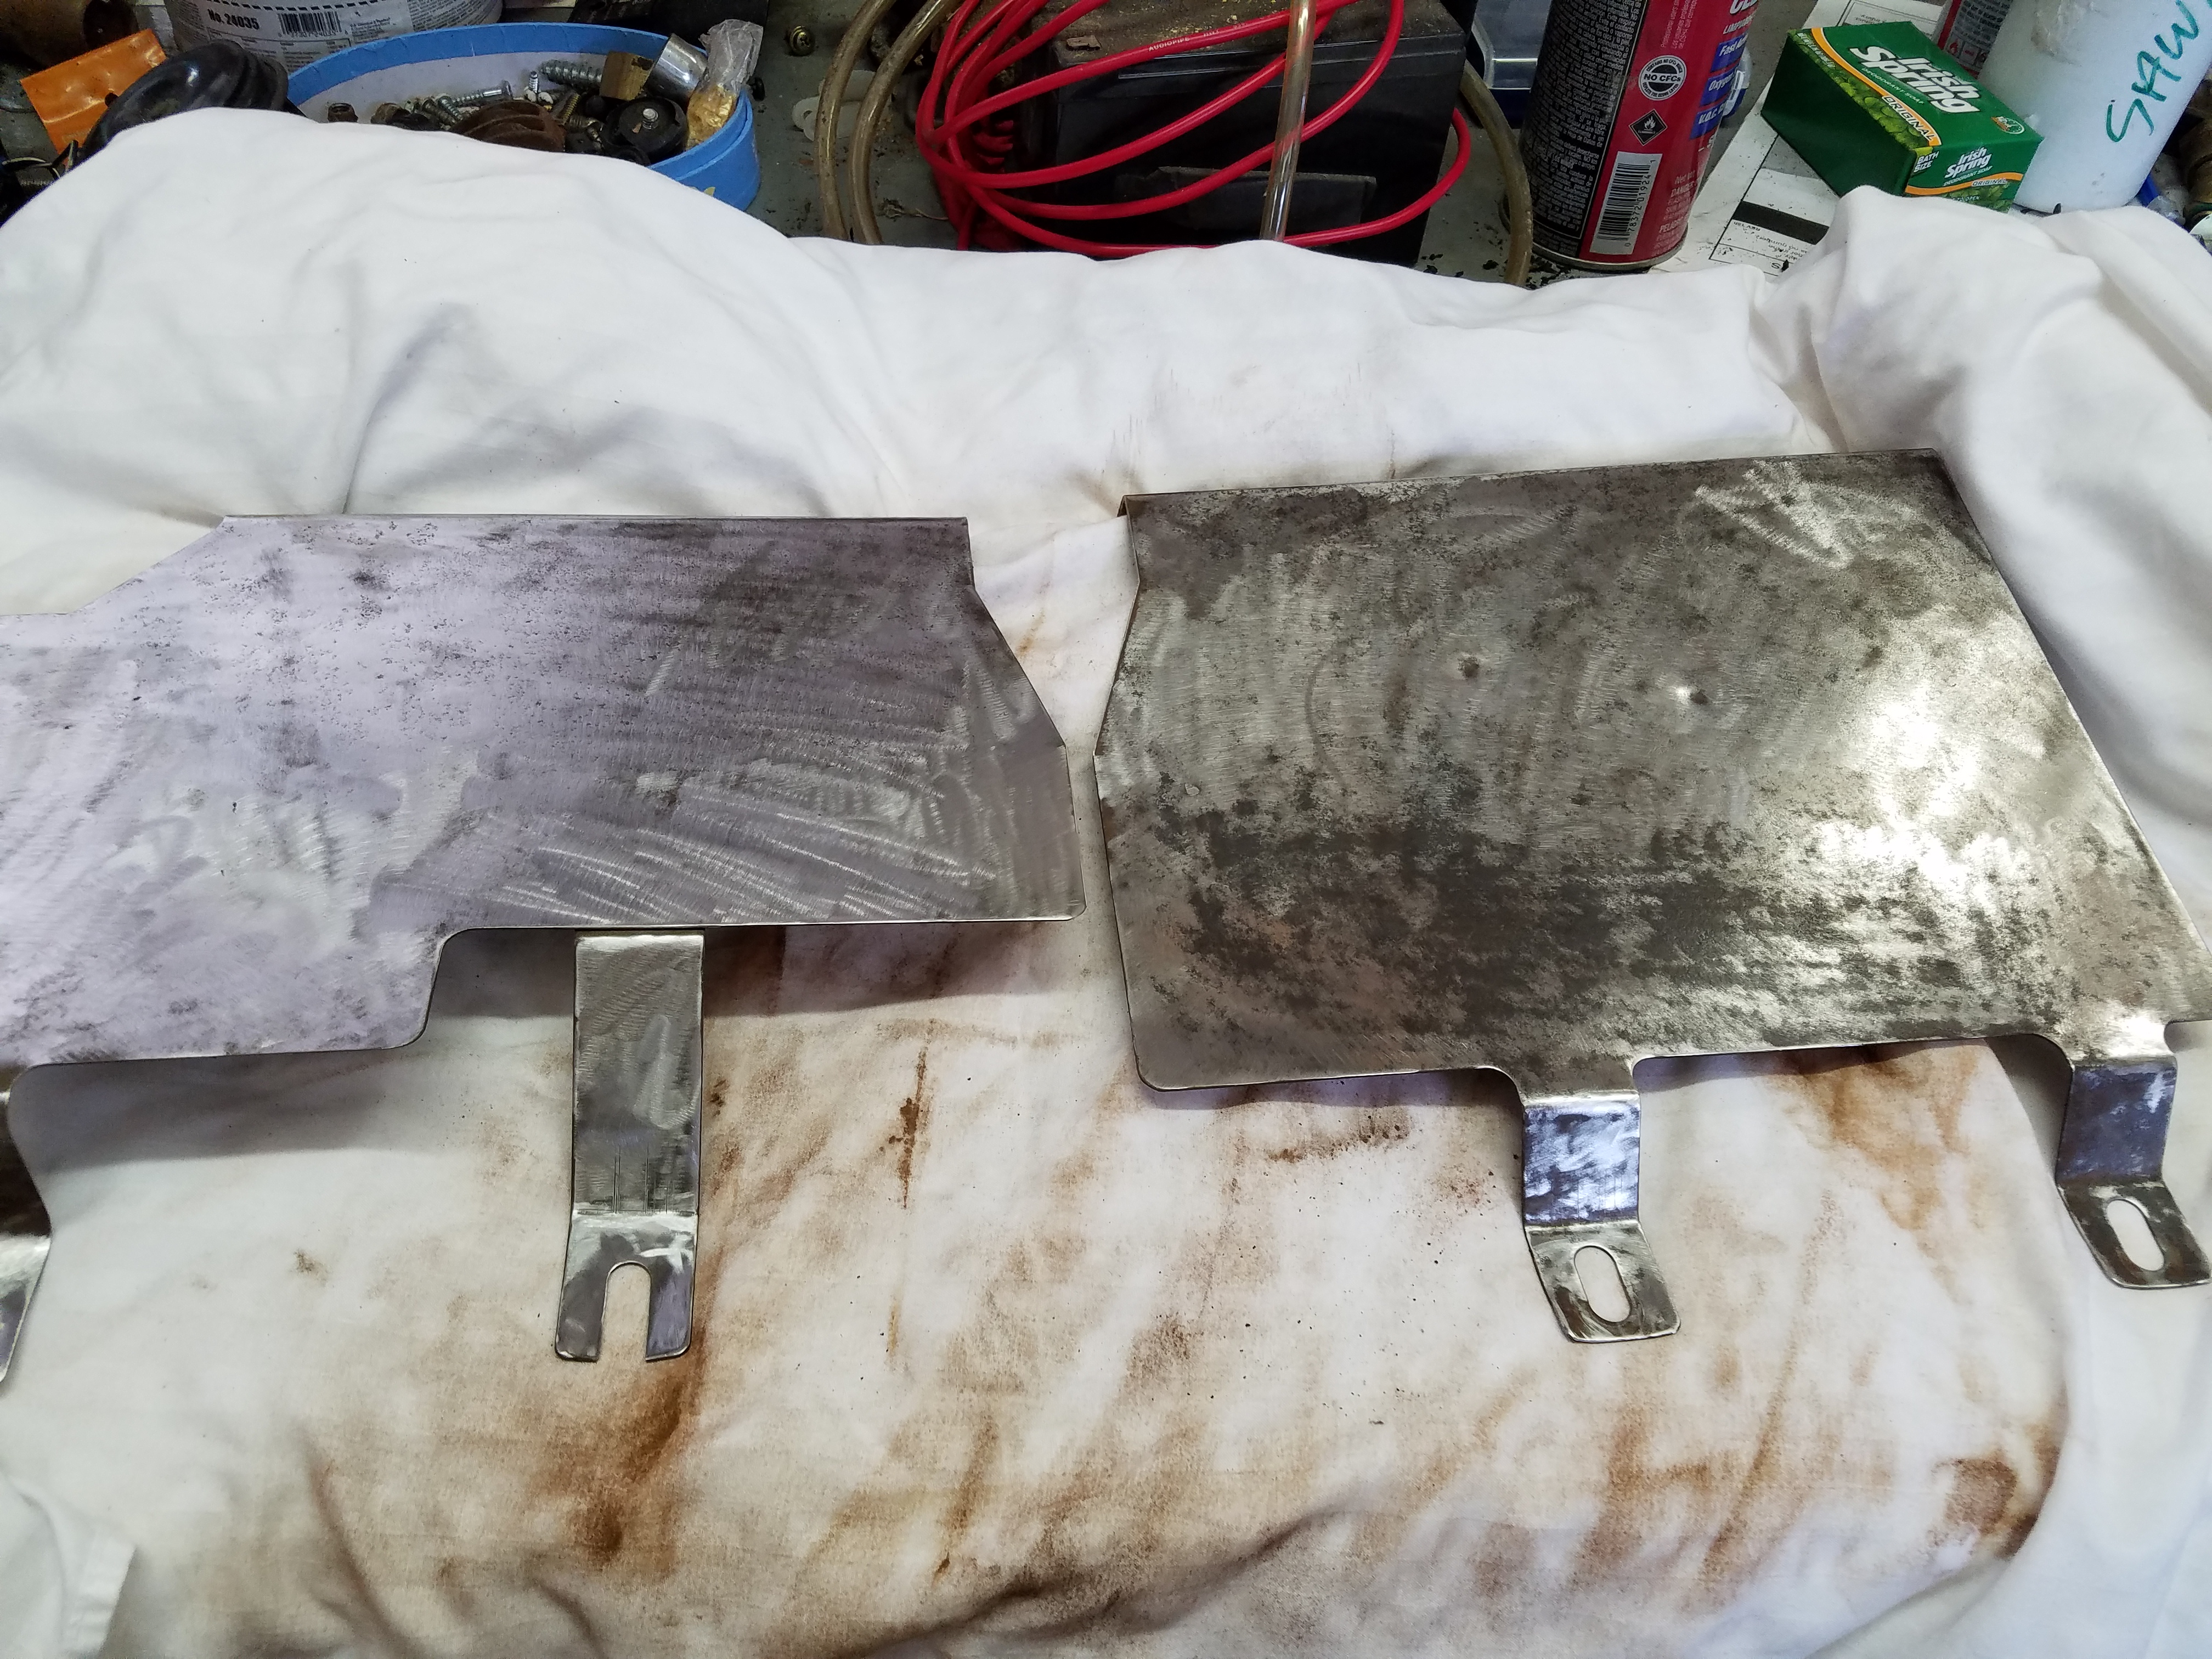
heat shields getting ready for paint...

a close up of the gap...

heat shields before...

heat shields getting ready for paint...


The following users liked this post:
74 LS4-454 (10-14-2017)
09-04-2017, 03:23 PM
#120
What no mice in the ducts!
Great job, hopefully tou will meet your deadline.
RVZIO
Great job, hopefully tou will meet your deadline.
RVZIO
The following users liked this post:
74 LS4-454 (10-14-2017)