When you click on links to various merchants on this site and make a purchase, this can result in this site earning a commission. Affiliate programs and affiliations include, but are not limited to, the eBay Partner Network.
Worry no more, I'm still alive and the project it still going on.
I apologize for leaving you all hanging for so long.
I have the habit of posting something when it's completed , I've been posting several half done side projects in the past that went nowhere and I that kind of suck.
I'm been stuck in some doldrums for quiet a while, and there is many reasons for those things not to get completed.
-Setbacks, knowing I have to get through my fuel piping and my transmission again was a bit discouraging, made me lost some momentum.
-A couple of they are mainly due to the fact that many stuffs I ordered from China never showed up. Waited almost 2 months for parts. I just got refund and proceeded to order those China parts from USA, even if US dollar is not cheap these days.
-A limit to my sub task system : running many sub tasks in parallel made that I could always make progress somewhere. Now that tasks are final (and stalling), the progress is much less visible.
-Mrs Denpo waited long enough, some promised home renovation had to happed.
-Lazyness : Even if winter was mild to Montreal's standard it took its toll. Driveway's last snow patch is melting away, I start to get the urge to take the Vette for a ride again.
That being said, since you're asking, let me wrap up an update of those half baked things.
Windows: I had two sets of door windows, the original ones and a set bought later on. Both sets were scratched. I bought a Porter cable orbital polisher and some cerium oxyde and tried to polish out the scratches. Worked with the dull area but not much with the scratches. After the polish work, I had the original set, that had mild scratches and a couple of rock chips, the bought-after set, without chips but with more and deeper scratches, and the option to buy a new set (boy, those ain't cheap). After much thinking, I decided to go with the original ones, if I have money to spend on the vette, buying new glass is not top priority.
But that mean you have to admit you've wasted time and money for nothing and more importantly that you're settling for a non optimal result. I knew I would get bitten by the painted car syndome and start obsessing about perfection. I think I've overcome this now.
Differential: I happened to have the chance to buy a 3.70 differential, 3.55 would be perfect, but at least it would have been better that the 3.08 I have installed. I made the mistake to take time to sandblast it before opening it, I was trusting the seller too much. I then opened it to a cracked posi case. damn it. I'm not worrying money wise, seller is a good guy we'll fix this, but again it's lost time.
Doors: turn out the door actuator wouldn't cut it, even with the lever arm I added. So I ordered heavy duty set, those with the motor parallel to the actuating shaft, not perpendicular. Well, one of those lost package.
Taillight: they're in, with their backing plate, junction box and everything, but still missing the dedicated brake signal line installed thru the firewall. I could have this done, but I want to mess with the harness one last time, and that will be for installing the door actuator.
Emblem: ok, I have some pics for you :
That's the nose emblem.
I had it 3D printed, with a laser-resin process, which is much finer than the hot plastic one.
I made it with the nose 12� angle for a tight fit.
Then I'm going to cast it (along with the flat emblem I made long time ago) in aluminum.
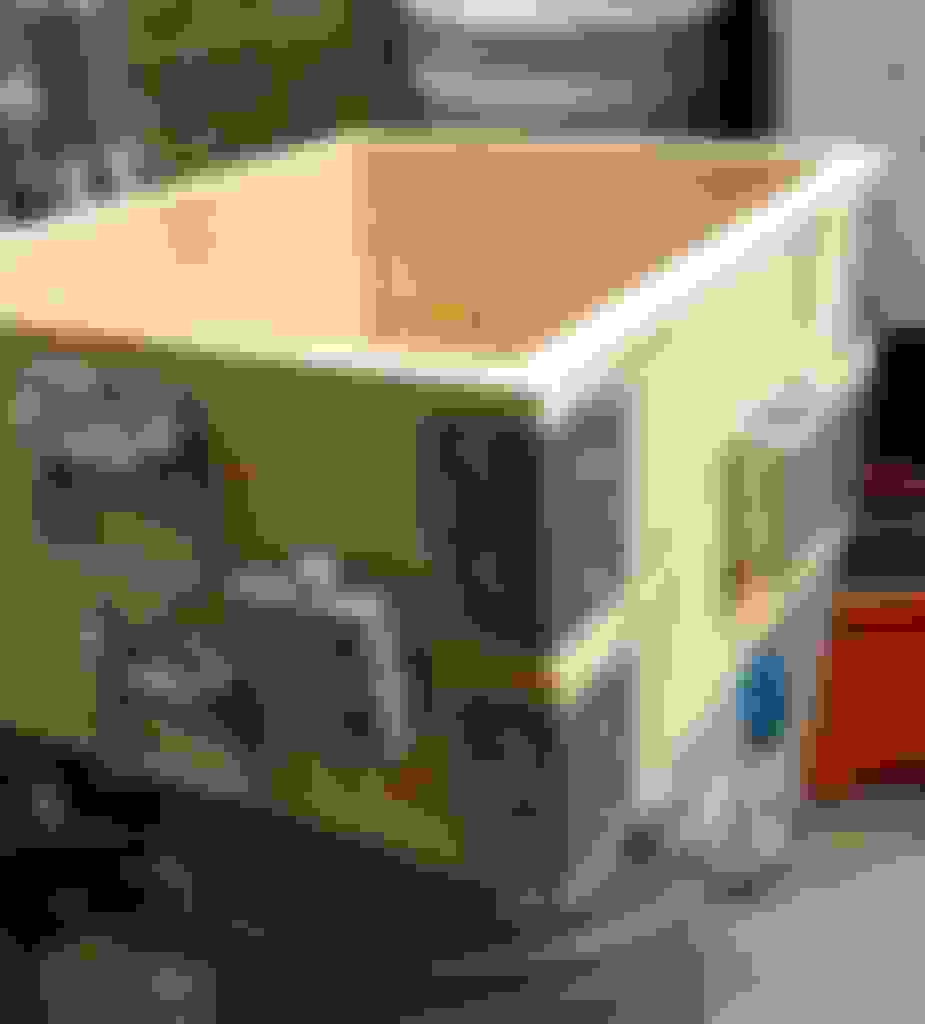
The furnace is in the making :
It's cast in refractory cement, not cheap (150$ in cement alone), but supposed to withstand 3000�F. Youtube's Paris plaster and playsand furnace don't last 10 cycles, this one should fare better.
I've trapped a piece of refratory foam where I'm suppose to drill the burner hole, because this cement a really tough.
Here's my casting flask, which is complete, with the alignement pins.
I decided to go the propane way for heating up my metal.
The pieces for the burner are at my buddy's shop, it need precise drilling and welding I can't do my self. I'll talk about it when it's done.
I have the silted play sand and the bentonite to make casting sand, a box of borax for the flux, and a set of stainless steel kitchenware.
I could probably have been casting as we speak, but the crucible is part of the "never arrived" parts.
Wheels :
I've polished the wheels :
I'm gonna paint the unpolished area flat black. I initially wanted to wait until painted to install the new cooper cobra tires, but miscommunication happened and my buddy guy took them to the tire shop too soon.
He is also currently making custom adapter that will serve as spinner support as well as hub centering ring.
Windshield:
I have collected the urethane and the prep products needed to install it, but I'm still a bit puzzled about the spacer thing. A forum member had a magnificent webpage dedicated to that, alas it's down now.
I'd like to find an image of those spacer, and where it's supposed to go.
I moved forward with the furnace.
It's only missing the gas regulator (0-20 psi), it's waiting at the border, with many other parts.
It's based on Reil's Burner Design and use mostly plumbing hardware.
My buddy Guy stepped up the design with welded support ring to hold the locking screw.
Here you can see the #60 hole from where the propane will come out.
Still need to build some kind of tripod to keep it in place.
Covered the inside of the furnace with sodium silicated based refractory grout to fill all the little air hole in the concrete casting.
Here's how the burner is supposed to shop tangentially to the crucible, to form a vortex around it.
This week I've decided to get to the bottom of that differential affair. The seller proposed me a third differential, which finally have a uncracked posi case. I'm about to make a differential out of three blown ones. From the first I'm taking the housing, so we don't lose the sandblasting job and the time spend machining out the front bracket bolt.
Inner seems undamaged. I have to pickup a 1" 1/8 a Guy's shop to remove the gear.
Looks like it's always the same bolt that freezes in.
With the first housing boys we spent some time trying to push it out. No way, this how it ended after Guy machinied it out.
Here is the diff part graveyard, scrap metal man gonna be happy. I will keep a bad yoke to make a posi turning tool.
So, the three differential had grenaded themselves.
Two of them had their yokes grinding into the posi pin, and mushroomed at the tip, but one had what seem a nice pair that popped out of the differential like butter.
I've sent those images to Gary Ramadei, let see if he think I'm ok reusing those.
This is the only posi that didn't crack, even if it lost 2 ring gear bolt head.
Surely interferences happened lol, again I hope Gary approves it.
I plan to follow Gary's paper and make some upgrade, like ARP RG bolts, a polished posi case, solid left bearing cap and solid steed clutches. Just like Gary recommends.
And to wrap this update, a brilliant example of why I should wait before posting.
If you remember my previous post, I showed my new tires installed onto my polished wheels.
Well, I scored in the classified a set of 4 turbine wheel for 100$, couldn't pass. They are 8.5" and have the very same design than my rear 10.5" (yet, until today my front and rear wheel had different turbine design). I'm gonna take the two nicest of this bought set and use them as front rims in place of the current 7.5".
They are half an inch larger on both side and should fits without problems. We will install the tire on and test fit them.
It's been a pretty productive weekend.
First I decided to switch housing, as Gary spotted the one I took pic of had pretty deep grind mark on the RG bolt side. So we switch the one that still had the frozen bolt. This one is intact.
Let me show you the third housing, the one that didn't crack its posi case, and this is because bolts smacked right into the housing instead.
You see the bulge?
I took the posi case to Guy's shop, and first check for runout. 0.002" a the ring gear surface, we're good. (Pic is before actual measuring)
Guy machined all he could to clean the posi flange, and I used a several kind of grinder. Still rough, but it's coming along.
And, miracle, heavy duty door actuators finally showed up, and now it's doing the job with plenty of torque.
After days if not weeks of tweaking tuning and bending I managed to get both doors aligned with the body, the t-top and the weatherstrip.
I swear I could see the moment I'd post about my finished doors.
After a 4 hours long fight with my driver interior door panel I threw the towel, or actually the panel did.
The panel was totally bent, I don't know who wrote on the quality check sticker in the back but I hope this person got fired and then slowly rolled over by a bus. With the top installed, the bottom would stick out by a good 4 to 5 inches!!!
I tried to bend it back into shape but it just broke the panel backing.
So to the trashcan go the panel along with the weekends spent preparing them. Big bummer.
As good news don't come alone I'm putting the diff rebuild on the shelves, no more money.
If I ever get it to the road this summer, that will be with a 3.08 and no door panels.
If you guys know a source for door panel that don't suck, let me know.
Sold the replacement panels I bought- and in the process of refinishing my original fiberboard backed 45 year old panel.
Bought new felt and a whole cow hide for half of what a set of plastic not so good fitting replacement panels cost!!!
I fitted the panel- wet it so I could bend it- then brushed some fiberglass resin on it. Test fitted again - a little tweeking and I added some mat & resin on the flimsy places and where the fiberboard was damaged and filled the window crank hole as I added power windows
It worked great- fits nice and tight- and going to use the "Magdaddy" magnets to add to the tight fit.
These are modded a bit- but you get the idea. Used some spray foam to form and repair.
Step back, gripe a bit, think it through, look for another course of action, wait for the money to build up then try it again! In the meantime, just be glad you can still make it go zoom zoom. Might be ugly without the door panel, 3:08 might not be ideal, but at least it will move. You are way ahead of a lot of us. Enjoy!
Step back, gripe a bit, think it through, look for another course of action, wait for the money to build up then try it again! In the meantime, just be glad you can still make it go zoom zoom. Might be ugly without the door panel, 3:08 might not be ideal, but at least it will move. You are way ahead of a lot of us. Enjoy!
2020 Corvette of the Year Finalist (appearance mods)
C3 of Year Winner (appearance mods) 2019
glad to see you are still at it!
Sorry to hear about the trouble with your door panels. I had a lot of trouble with mine, but your sound like they were even worse. Don't know why they can't make a panel that fits.
Casting your own emblem is a nice touch. And why not? You have a very impressive skill set, my friend.
We tried casting 2 weeks ago but turned out the burner wasn't tuned properly and we couldn't reach the proper temperature.
In the meantime I explored the possibility of machining the emblems, it's a process that's in its way, again update should come in a week or two.
I'm still determined to give the casting a try, this would open to so much new possibilities.
Originally Posted by The13Bats
so is everyone saying aftermarket door panels suck?
Mine are good high driver condition except the back top drivers side has a dime sized hole...
Well, if you can fix it better keep the original ones.
Updates on the panel: since the backing is cracked I stripped it tonight and I'm experimenting grafting new vinyl onto the old backing and foam. I have nothing to lose at that point. Let's see if I still know the recipe for lemonade....
Wow, just finished the half dozen posts on the diff, the door panels and the castings. I'm going to give you high marks in perseverance! I was thinking that it was almost done after the spectacular paint job and hood mods (little did I know!). It could be a possibility that you might have this done by late Summer, early Fall? I hope so!
Wow, just finished the half dozen posts on the diff, the door panels and the castings. I'm going to give you high marks in perseverance! I was thinking that it was almost done after the spectacular paint job and hood mods (little did I know!). It could be a possibility that you might have this done by late Summer, early Fall? I hope so!
Thanks!
Goal is still taking it to the road this summer. Might not be complete, but at least roadworthy.
On the list of mandatory things I have :
-install the windshield
-fix the fuel line leak
-and then go seal the bearing cup of my T5 counter-shaft.
Paint job is like dropping the body on the frame, it's a big spectacular event but after that much of the work done seems unnoticeable.
So, this Saturday, we finally did it, installing the windshield.
My trusty Jeff came to help, last time he was there that was for the front clip installation.
I don't request his help very often (he's a busy guy), but when I do that's when I need some super reliable helping hands.
Wasn't an easy task but we tackled it finally.
I'll happy with the spacing, trims are hugging the windshield pretty well.
Next is a mod I had in mind for a while but only decided to make happen last week end. I had this indianapolis 500 steering wheel that came with the originally bought car, but it was bubba installed, with the tele locked in place with a regular screw.
I liked this steering wheel as is gives much more room for my legs, but I wanted the tele and stock horn button to remain.
I know, I drilled much more holes than I should have.
Then I asked my machinist to machine the back of the tele lock ring to accommodate the steering wheel dish.
It's pretty tight yet no interference, nice job Guy.
The steering wheel will received a custom leather wrap job eventually just like the stock one I restored.
And among all the little thing I'm taking care of while making the final assembly, I discovered that my front driver and back passenger inner fender had cracked bonding. I took care of it with the usual glue-a-penny-on-moon 3M bonding resin.
You'll notice I tried to stay faithful to the original built quality
(Seriously the flash make is appear all weird, believe me it's way smoother than it seems).
The door panel are coming along, it's quiet a painfull process but I'll make it eventually, I'll make a dedicated update about that.
Now next big thing is tackling the gearbox leak. By that time the hub center/spinner tower hopefully are done, and to my understanding the car is technically roadworthy. not complete, but roadworthy.
This has been quite a transformation. I've been following your build for a while now, and looking at some of the old pics, it's amazing what you've accomplished with your car.
This has been quite a transformation. I've been following your build for a while now, and looking at some of the old pics, it's amazing what you've accomplished with your car.
Just wanted to say congratulations!
From one '76 owner to another.
Thank you very much CFTVette.
Tonight I'm test fitting the windshied interior trims, feels like putting the final piece in a row of a jigsaw puzzle, very satisfying.

 04-13-2016, 08:36 PM