
My 1977 Project - Body off restoration
 05-24-2011, 01:53 PM
#1
Racer


Thread Starter


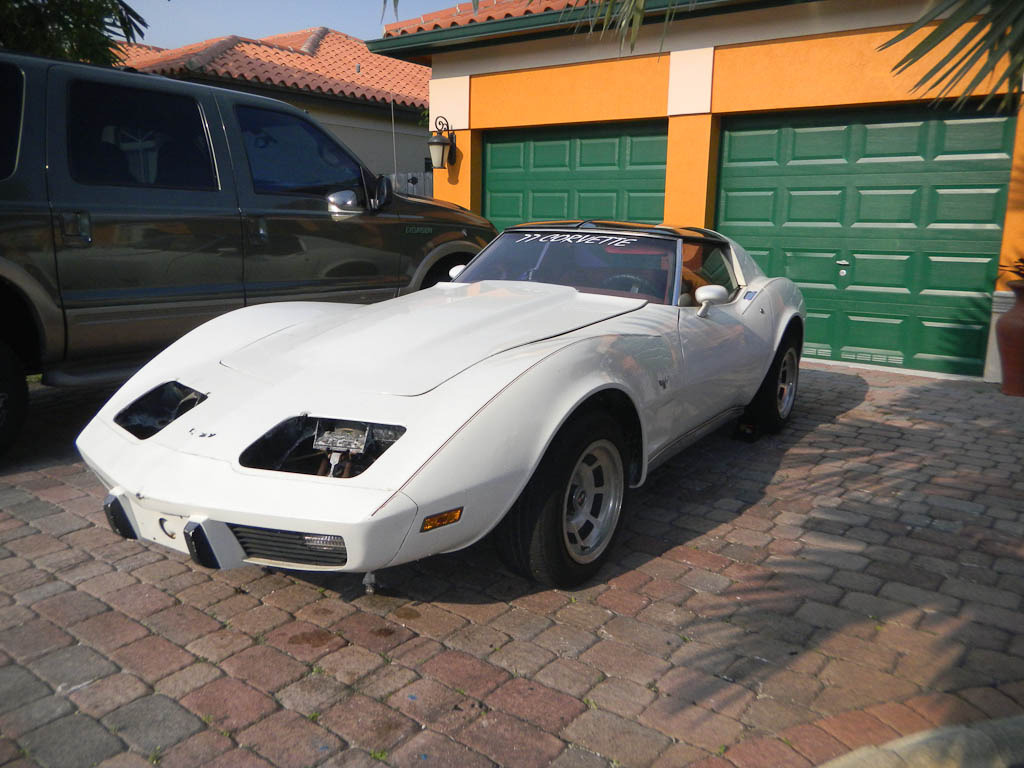
OK.. so we recntly picked up a 1977 here in South Florida and we have begun our quest for the body-off restoration holy grail. 
To give you some more background. The car is a 1977 matching numbers Vette. Some of you may remember the thread where I was asking if we should pull the trigger. Well, needless to say we did. We picked it up about a month ago.
The inital look at the car made us feel good. We had what seemed like the original body with the original complete body, down to the doors. The only real concern was some rust showing through at the driver's side windsheild base.
The chassis looked excellent with nothing but some surface rust. There is no evidence of any accidents. There is some damage to headlights in a parking lot style bump. Truly minimal.
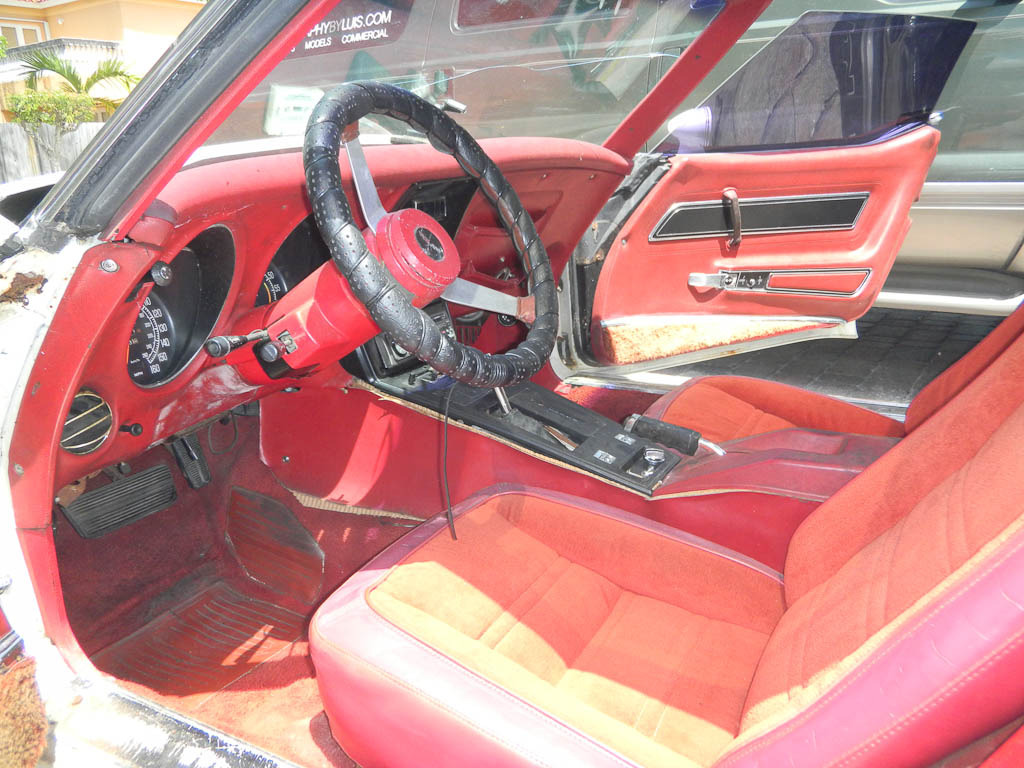
The interior had the "Dynasty" seats with the cloth inserts and the deluxe door panels. Interior is red. Car is classic white.
The engine is an L48 with a T350 trans. Of course, power steering and brakes are in there as they were standard in 1977. We also have the cruise control option. Obviously, we have the 15 Aluminum rims and the owner purchased the glass t-tops after market.
So as with some others, I am going to start a restoration thread to share my experiences and process.... It will take us (wife and I doing the lion's share of the work) a while, but we should end up with a great car in the end.
The car....
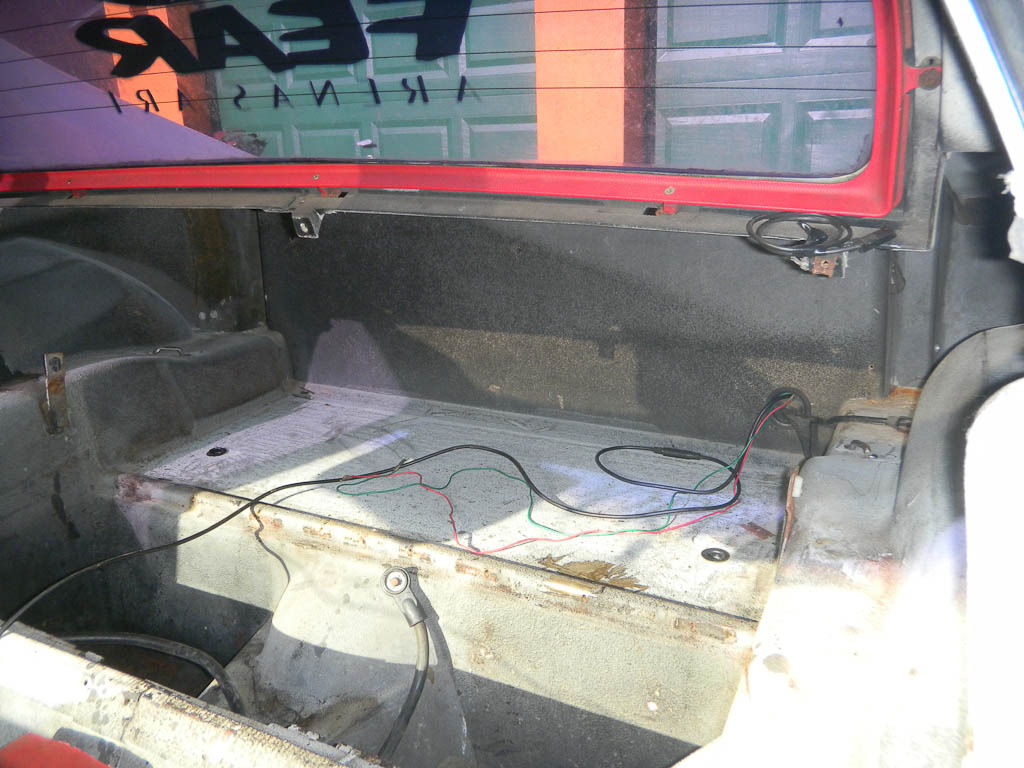
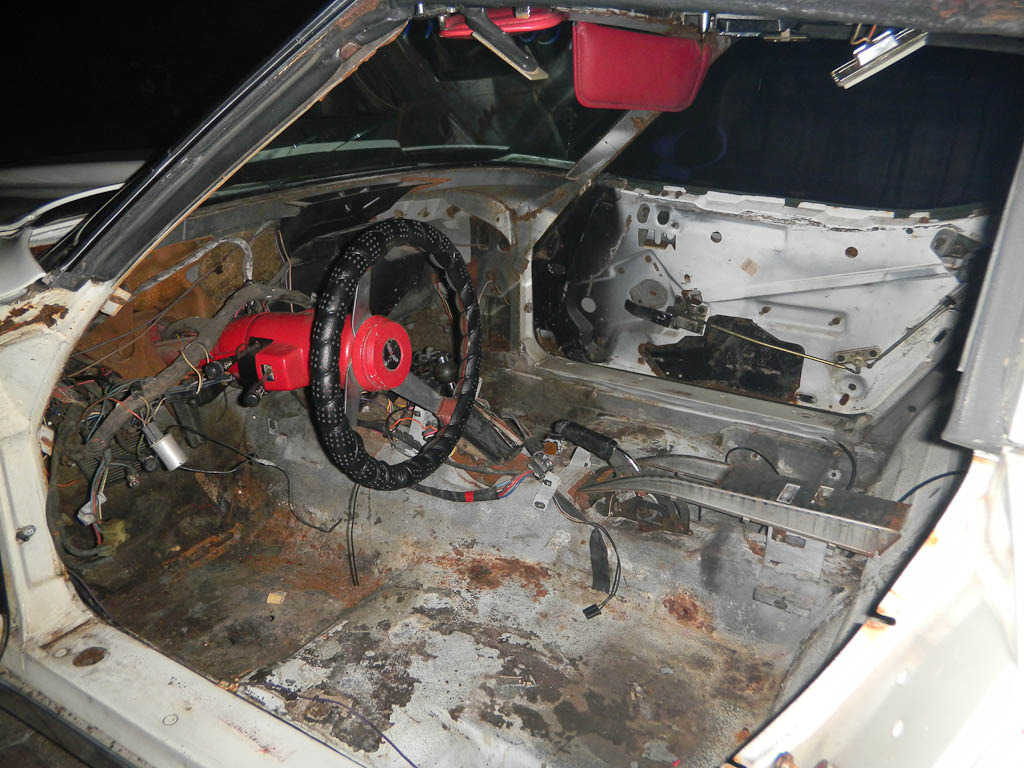
What we started with... interior... We took it apart, threw away the carpet... bagged and tagged everything as we went and also have photographed the deconstruction process to make sure we have shots of everything as it came apart. We also have the 1977 Assembly Instruction Manual.... a great help and something I learned about here... So some before/after looks.
Before:

After:
Stay tuned... we'll keep coming to this thread and give you the play by play....to the best of our ability and time... It's gonna take a long time, but we have plans to do this right...
For now.... the immediate future has us continuing to get down to the chassis and having the birdcage/frame and chassis itself cleaned, repaired (where required) and powder coated.
To give you some more background. The car is a 1977 matching numbers Vette. Some of you may remember the thread where I was asking if we should pull the trigger. Well, needless to say we did. We picked it up about a month ago.
The inital look at the car made us feel good. We had what seemed like the original body with the original complete body, down to the doors. The only real concern was some rust showing through at the driver's side windsheild base.
The chassis looked excellent with nothing but some surface rust. There is no evidence of any accidents. There is some damage to headlights in a parking lot style bump. Truly minimal.
The interior had the "Dynasty" seats with the cloth inserts and the deluxe door panels. Interior is red. Car is classic white.
The engine is an L48 with a T350 trans. Of course, power steering and brakes are in there as they were standard in 1977. We also have the cruise control option. Obviously, we have the 15 Aluminum rims and the owner purchased the glass t-tops after market.
So as with some others, I am going to start a restoration thread to share my experiences and process.... It will take us (wife and I doing the lion's share of the work) a while, but we should end up with a great car in the end.
The car....
What we started with... interior... We took it apart, threw away the carpet... bagged and tagged everything as we went and also have photographed the deconstruction process to make sure we have shots of everything as it came apart. We also have the 1977 Assembly Instruction Manual.... a great help and something I learned about here... So some before/after looks.
Before:
After:
Stay tuned... we'll keep coming to this thread and give you the play by play....to the best of our ability and time... It's gonna take a long time, but we have plans to do this right...
For now.... the immediate future has us continuing to get down to the chassis and having the birdcage/frame and chassis itself cleaned, repaired (where required) and powder coated.
Last edited by luisv; 02-02-2021 at 01:07 PM.
 05-24-2011, 02:01 PM
#2
Racer
Thread Starter
Day 2 in the car... May 10th, 2011
So we continued to tear down the interior. We removed part of the plenum that is up against the firewall. We then tore down the center console and got the wiring harness out as completely as we could and cut it at the firewall. The whole thing is getting replaced so we kept it more for path refernce and plugs/sockets. We bagged and tagged everything that was being kept. We took plenty of shots. Those are kind of the same as above except with wiring everywhere... lol.
So as I was in the process, I was going back into the engine bay and interior. We found that the alternator had been changed.... and Bubba did the work. I was expecting this at some point.... let's face it..... the car is 35 years old and not everyone is a "car freak". Bubba had the wires coming out of the alternator simply twisted (about 1/2 and inch) and then taped.... just a touch of solder... no connector... nothing. zip. zero... OH BOY is this car going to love my wiring.....
Anyway.... the next day we put together our new toy bought just for this..... Holy cr#% am I gonna go nuts with this one! It's a sand blasting cabinet.... absolutely awesome!!!!
check out the first before and afters...
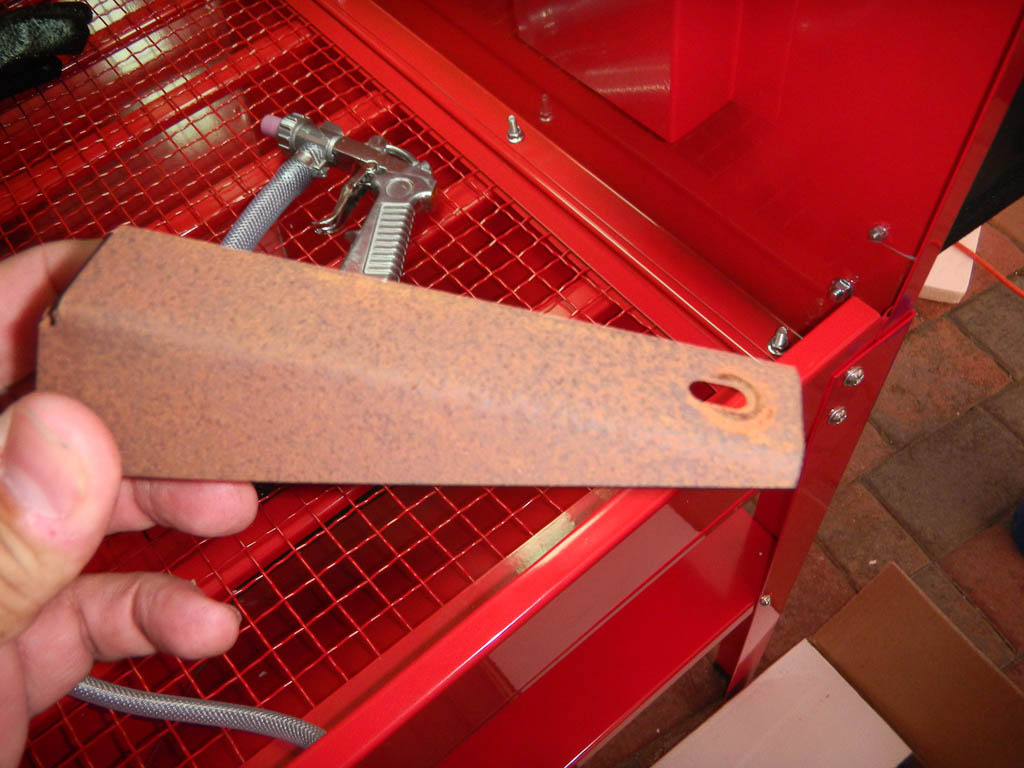
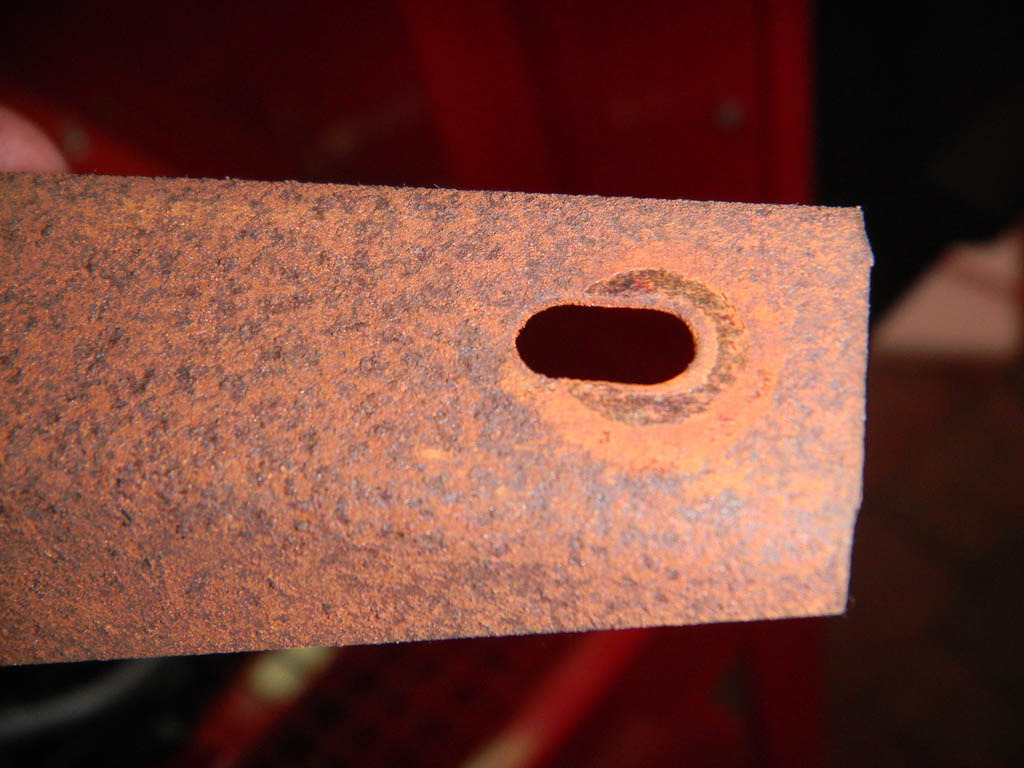
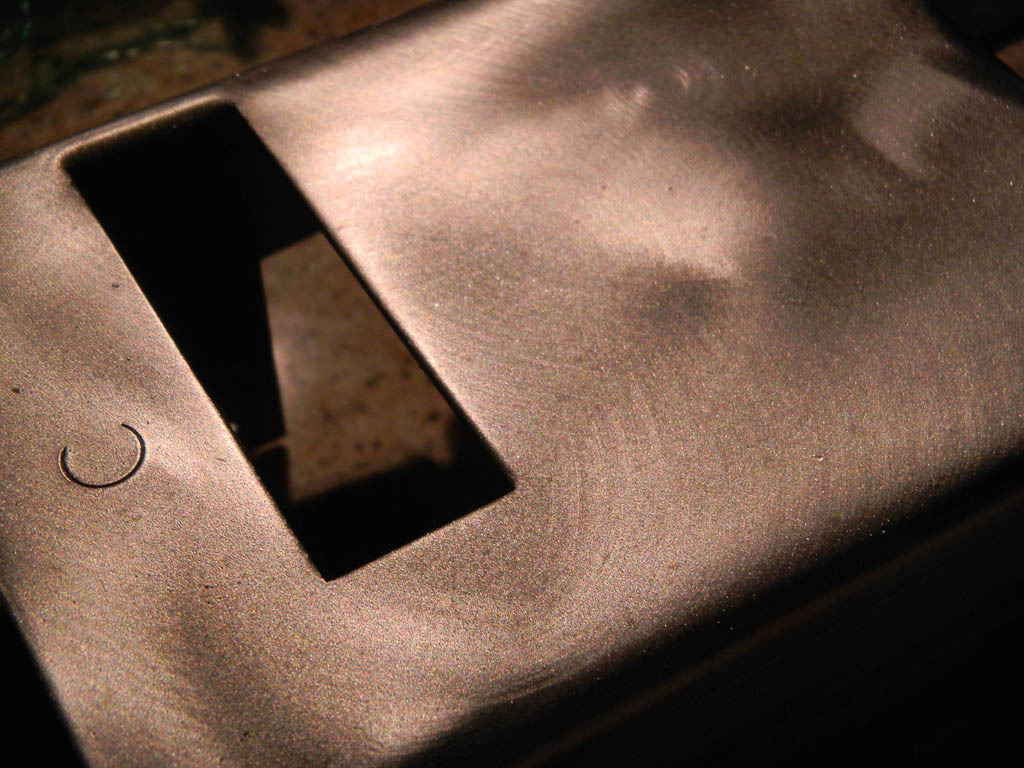
This is just the bracket for the dashboard top pad. It look pretty bad...
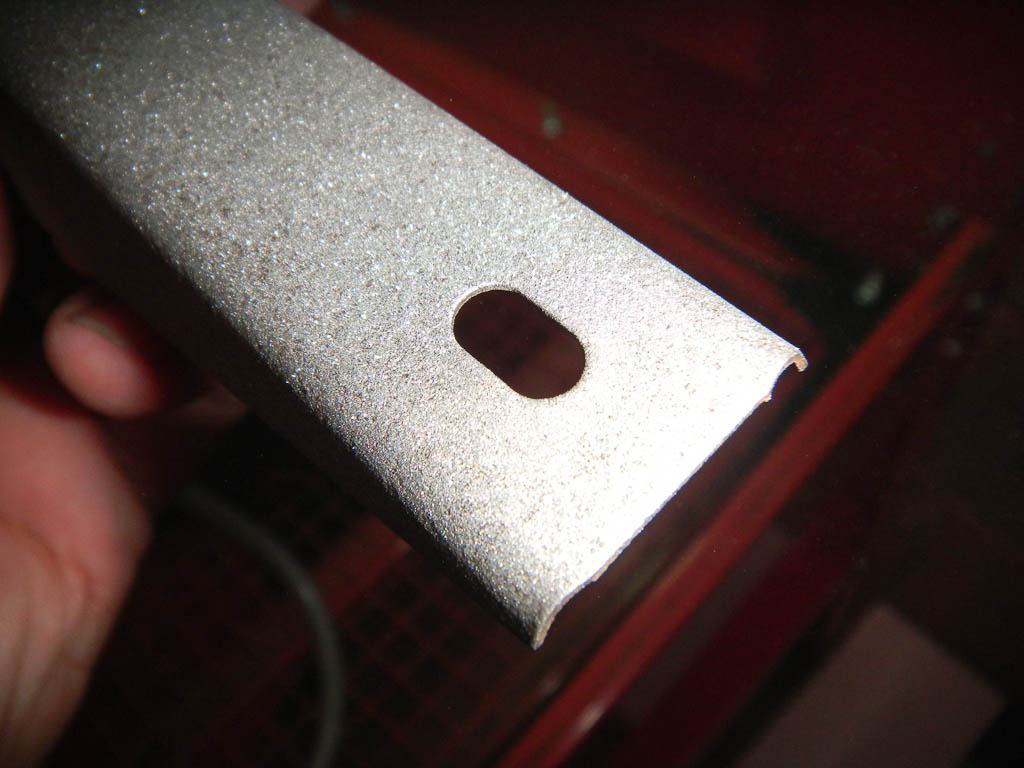
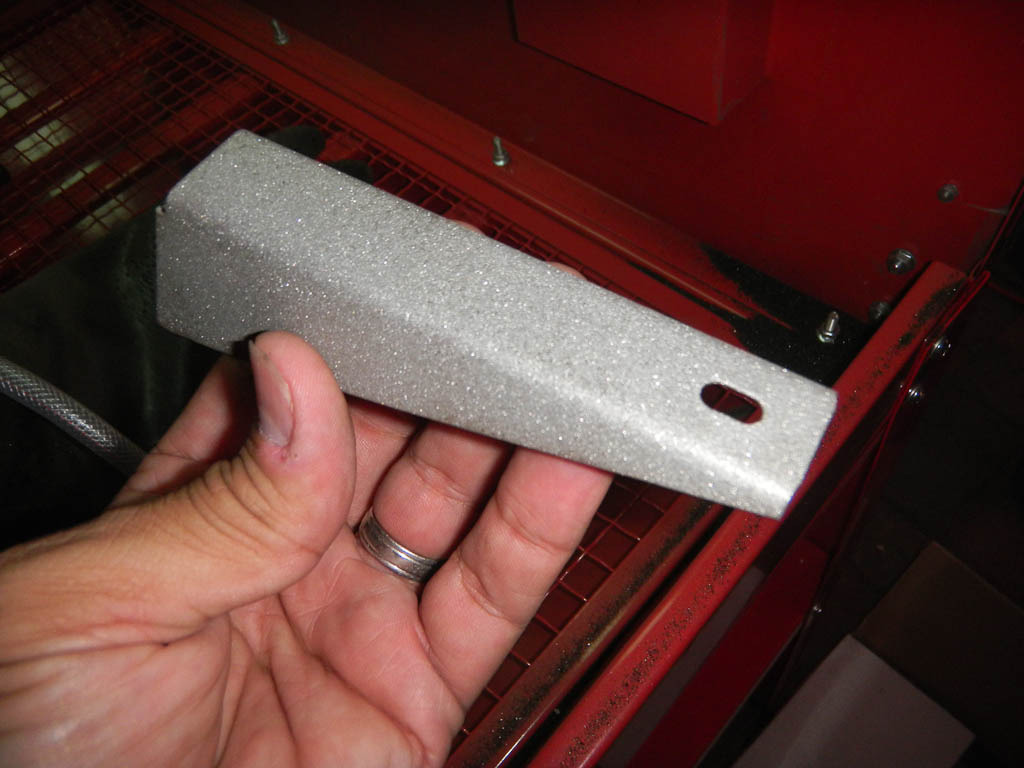
This is after....
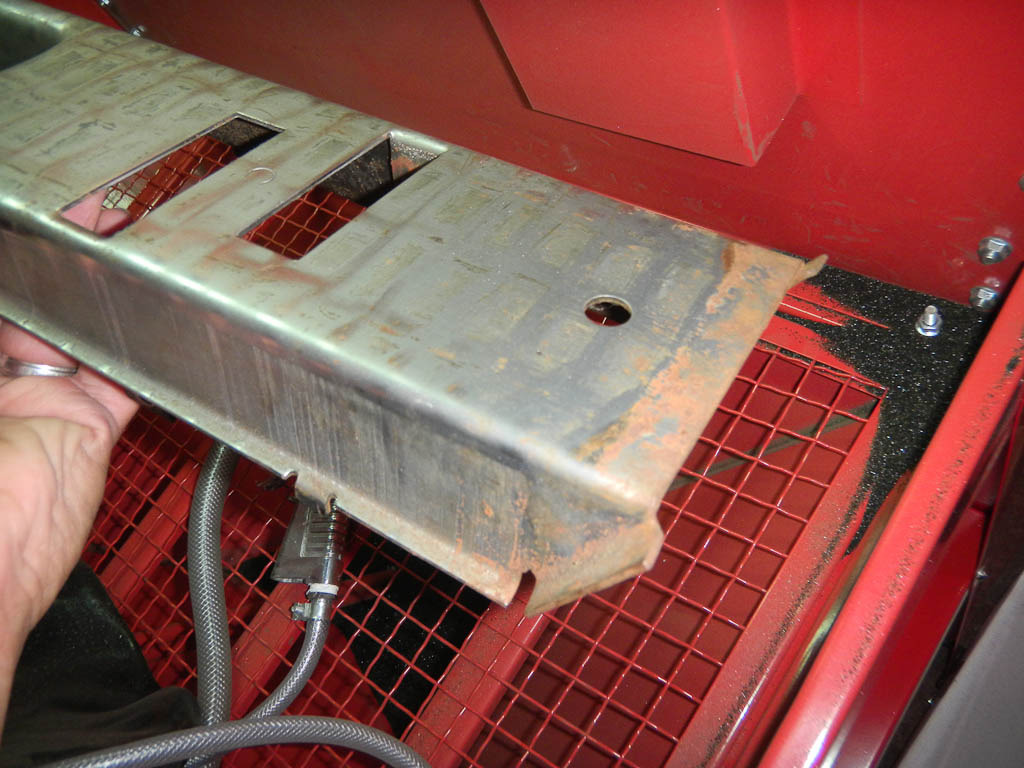
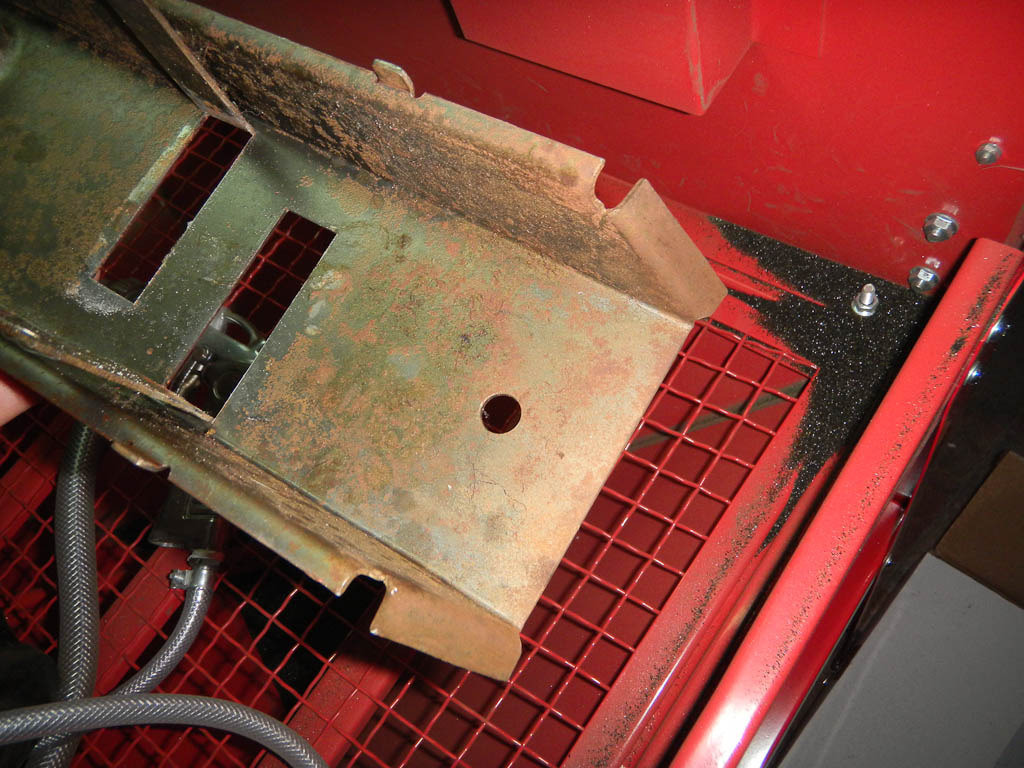
This next part is the center console steel subframe/support....
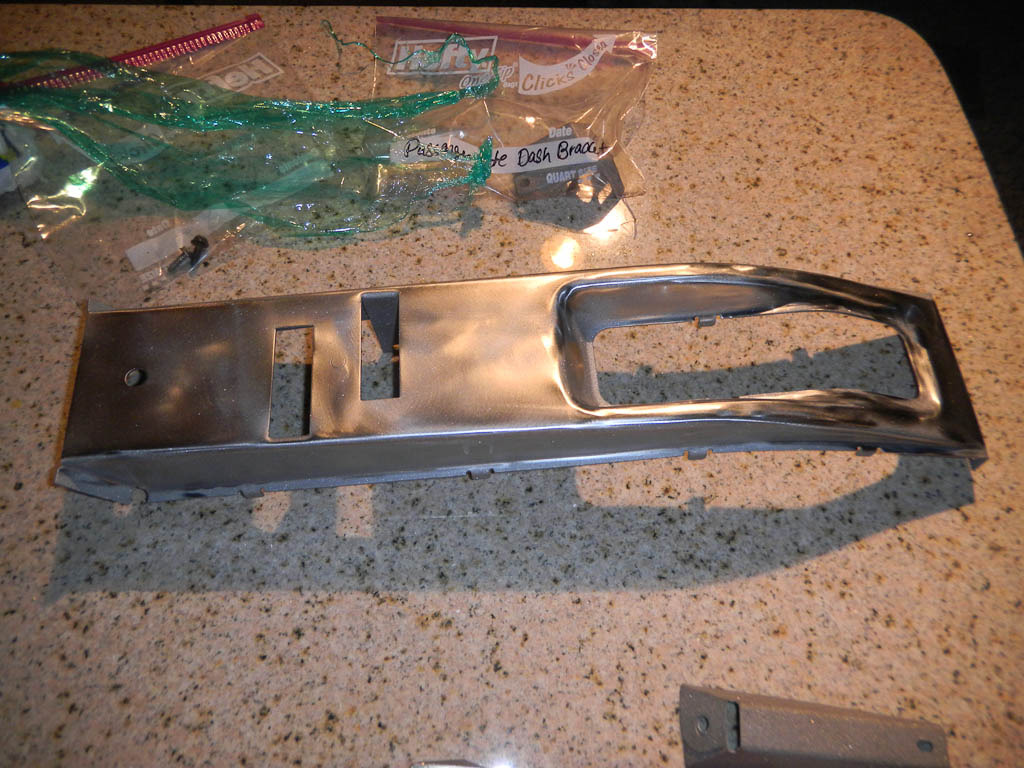
This is the after. Since I was bored.... I hit it with the die grinder fitted with an abrasive pad/cookie.... it took a total of 15 minutes... sandblasted and smoothed.
These will now get primed and painted in black.... We'll probably do this to just about everything. Having the cabinet, the cleaning should be very simple and regardless of whether we will see these parts or not, I rather do it once....
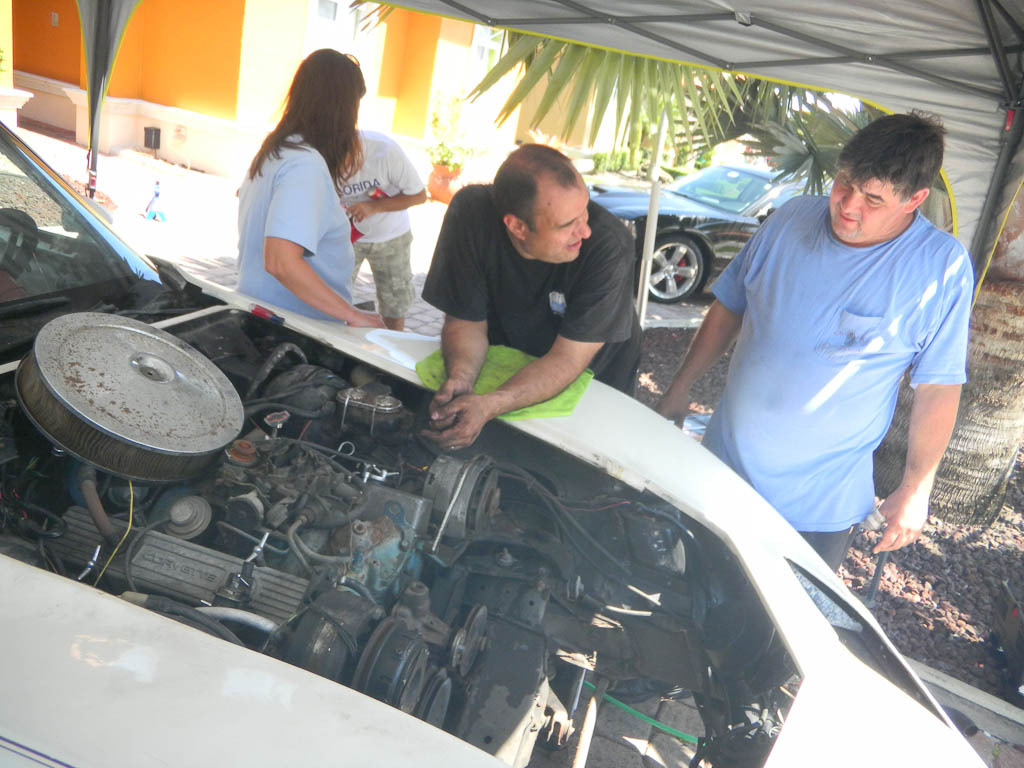
At this point the next thing we had to do.... pull the engine.... pizza party at our place to do it! I am part of a car club in South Florida and a couple of our buddies came by to help!... That's the next post....
So we continued to tear down the interior. We removed part of the plenum that is up against the firewall. We then tore down the center console and got the wiring harness out as completely as we could and cut it at the firewall. The whole thing is getting replaced so we kept it more for path refernce and plugs/sockets. We bagged and tagged everything that was being kept. We took plenty of shots. Those are kind of the same as above except with wiring everywhere... lol.
So as I was in the process, I was going back into the engine bay and interior. We found that the alternator had been changed.... and Bubba did the work. I was expecting this at some point.... let's face it..... the car is 35 years old and not everyone is a "car freak". Bubba had the wires coming out of the alternator simply twisted (about 1/2 and inch) and then taped.... just a touch of solder... no connector... nothing. zip. zero... OH BOY is this car going to love my wiring.....
Anyway.... the next day we put together our new toy bought just for this..... Holy cr#% am I gonna go nuts with this one! It's a sand blasting cabinet.... absolutely awesome!!!!
check out the first before and afters...
This is just the bracket for the dashboard top pad. It look pretty bad...
This is after....
This next part is the center console steel subframe/support....
This is the after. Since I was bored.... I hit it with the die grinder fitted with an abrasive pad/cookie.... it took a total of 15 minutes... sandblasted and smoothed.
These will now get primed and painted in black.... We'll probably do this to just about everything. Having the cabinet, the cleaning should be very simple and regardless of whether we will see these parts or not, I rather do it once....
At this point the next thing we had to do.... pull the engine.... pizza party at our place to do it! I am part of a car club in South Florida and a couple of our buddies came by to help!... That's the next post....
Last edited by luisv; 02-02-2021 at 01:11 PM.
05-24-2011, 02:07 PM
#3
Racer
Thread Starter
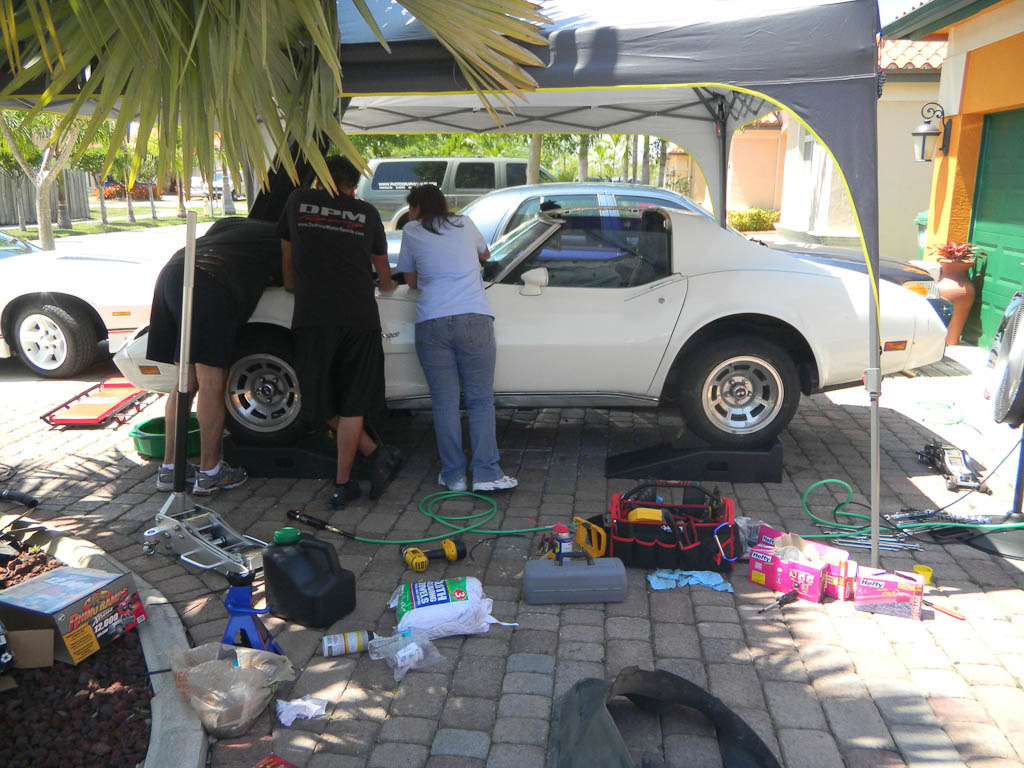
Well.... we continued this pasted Saturday the 21st of May.
First things first..... wanted to thank Manny and Raul, two friends from SSP Miami for coming out Saturday to help. Without their help, I would not have gotten as far as we did Saturday and I would likely have been under the car until midnight and up at 7:00AM Sunday. Instead.... we got everything we could get done by 7:30 and finished picking up by 8:30 or so. Thanks for the help guys!
So yesterday we started making way for the engine pull. We got that a a bit more done.
We pulled:
Disconnected all the hoses and wiring frmo the engine. Including the fuel pump. (Good news.... nothing made it to the driveway! woo hoo!)
Radiator the A/C Condenser (needs to be replaced) with all the brackets and frame.
A/C Compressor and lines
Power steering pump (Bubba was here! You'll see that below)
Altenator (Bubba was here too! Wire was twisted with a solder spot and electrical tape)
Exhaust manifolds (Bubba was here too! Had three different bolt sizes with washers and nuts as spacers.)
Took the driveshaft U-joint straps apart so we can pull the engine
Took off the transmission mount bolts (bracket still there - tranny is free though)
Headlight assemblies
Wiper assembly
Here are some shots.....
That's my ugly mug in the center with the .... ummmmmm.... short hair. LOL....
That's also my baby in the background.... 600+ HP, slightly modified 2010 Charger.... another story... let's get back to the Corvette....
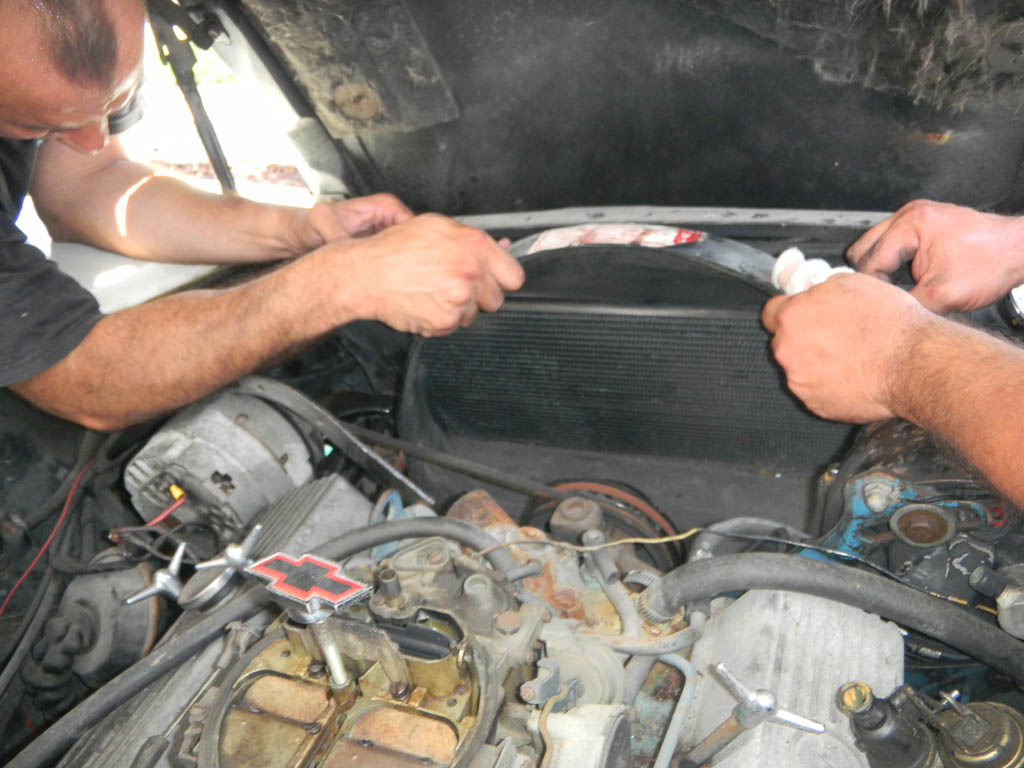
The Radiator and shroud. After this the condenser and the support frame came out. Pretty straight forward and "bubba-less" so far.
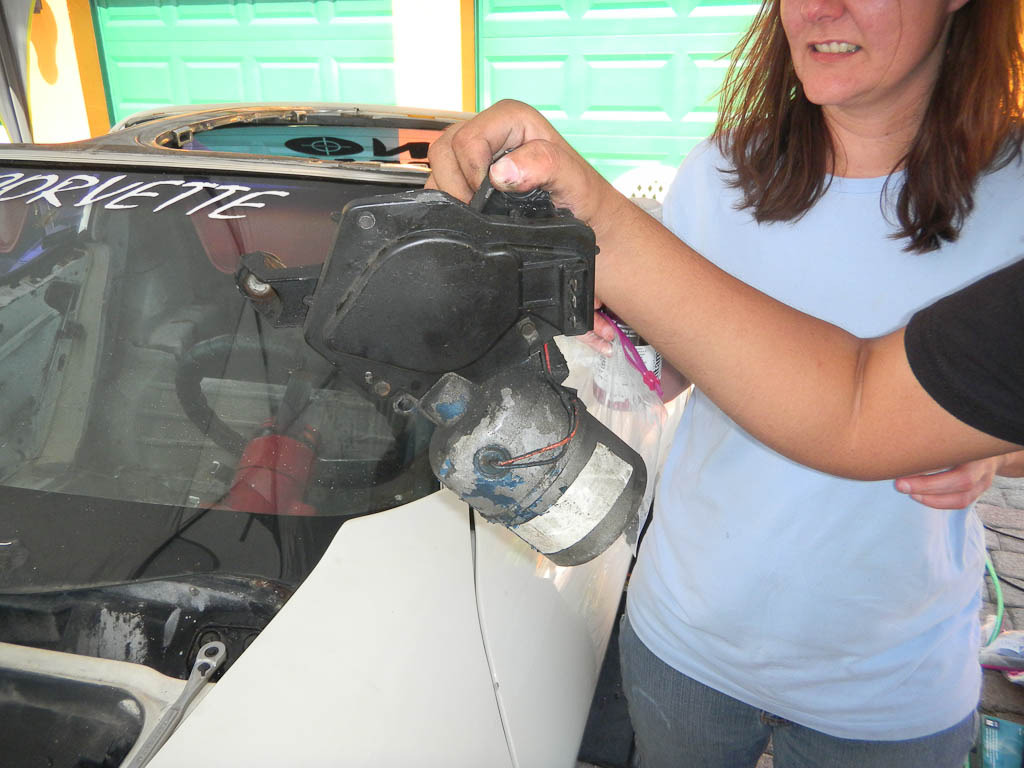
The wiper motor after the assembly was out... Also bubba-less.
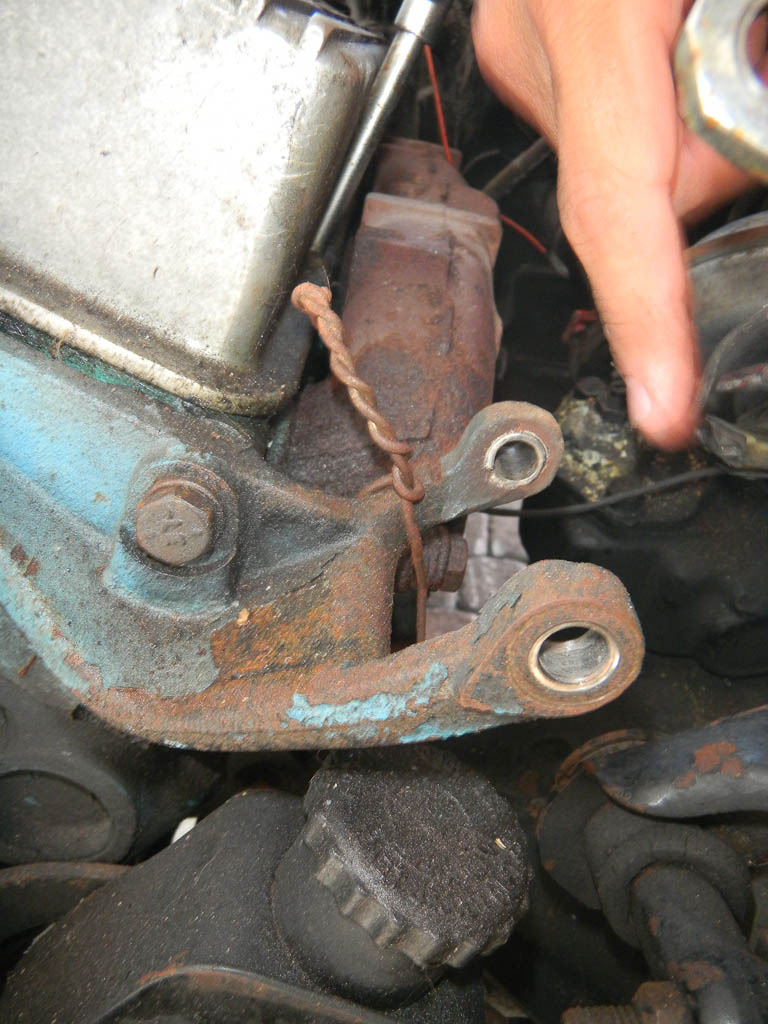
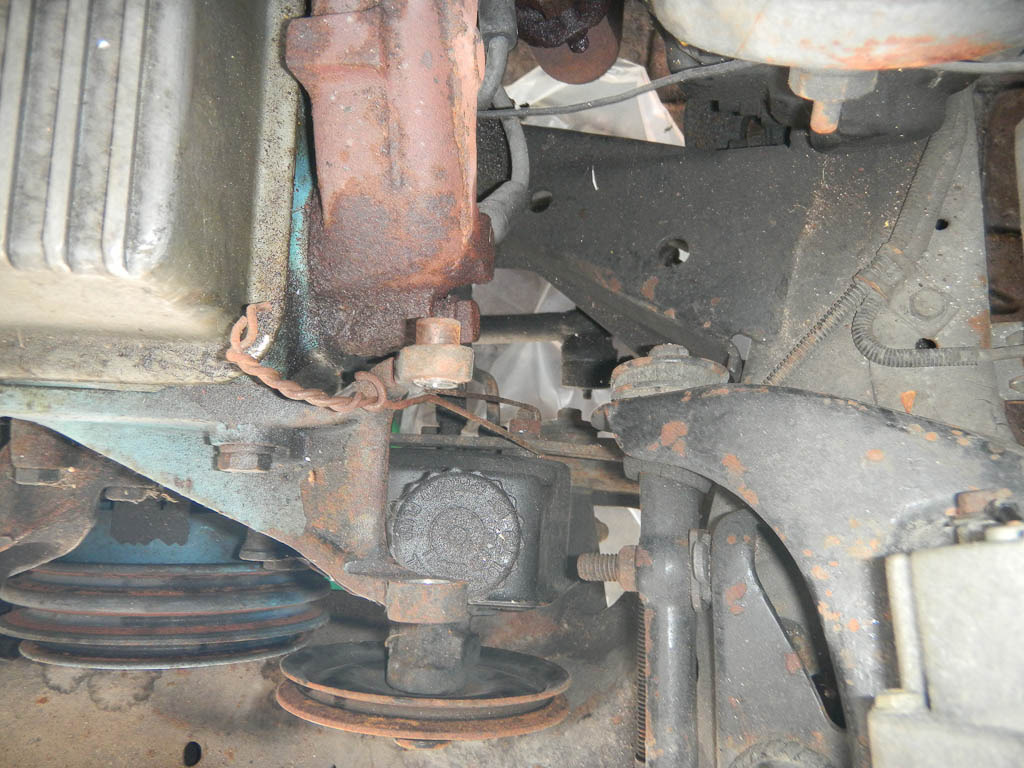
The power steering pump was held up by a wire hanger...... yes.... Bubba was definitely here. How that ever worked without squealing like a pig is a miracle. The pump was held up at the alternator bracket.
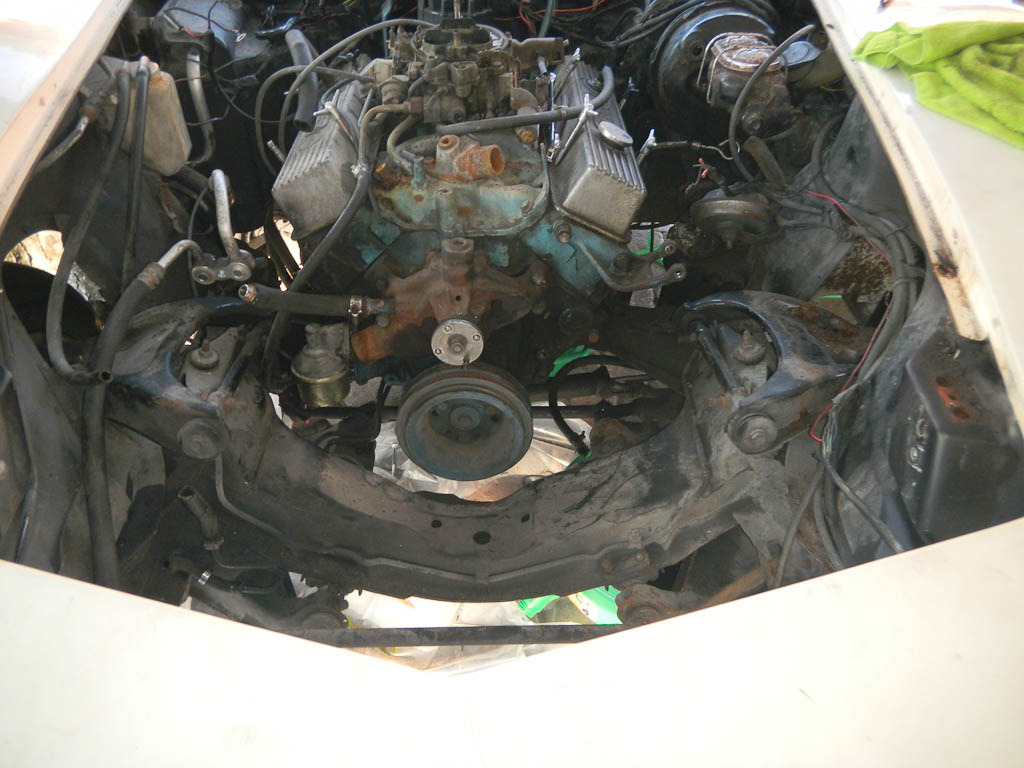
Last.... the final shot of the engine bay with everything out from in front of the engine...
Sunday, the engine and tranny got pulled!
First things first..... wanted to thank Manny and Raul, two friends from SSP Miami for coming out Saturday to help. Without their help, I would not have gotten as far as we did Saturday and I would likely have been under the car until midnight and up at 7:00AM Sunday. Instead.... we got everything we could get done by 7:30 and finished picking up by 8:30 or so. Thanks for the help guys!
So yesterday we started making way for the engine pull. We got that a a bit more done.
We pulled:
Disconnected all the hoses and wiring frmo the engine. Including the fuel pump. (Good news.... nothing made it to the driveway! woo hoo!)
Radiator the A/C Condenser (needs to be replaced) with all the brackets and frame.
A/C Compressor and lines
Power steering pump (Bubba was here! You'll see that below)
Altenator (Bubba was here too! Wire was twisted with a solder spot and electrical tape)
Exhaust manifolds (Bubba was here too! Had three different bolt sizes with washers and nuts as spacers.)
Took the driveshaft U-joint straps apart so we can pull the engine
Took off the transmission mount bolts (bracket still there - tranny is free though)
Headlight assemblies
Wiper assembly
Here are some shots.....
That's my ugly mug in the center with the .... ummmmmm.... short hair. LOL....
That's also my baby in the background.... 600+ HP, slightly modified 2010 Charger.... another story... let's get back to the Corvette....
The Radiator and shroud. After this the condenser and the support frame came out. Pretty straight forward and "bubba-less" so far.
The wiper motor after the assembly was out... Also bubba-less.
The power steering pump was held up by a wire hanger...... yes.... Bubba was definitely here. How that ever worked without squealing like a pig is a miracle. The pump was held up at the alternator bracket.
Last.... the final shot of the engine bay with everything out from in front of the engine...
Sunday, the engine and tranny got pulled!
Last edited by luisv; 02-02-2021 at 01:19 PM.
05-24-2011, 02:10 PM
#4
Racer
Thread Starter
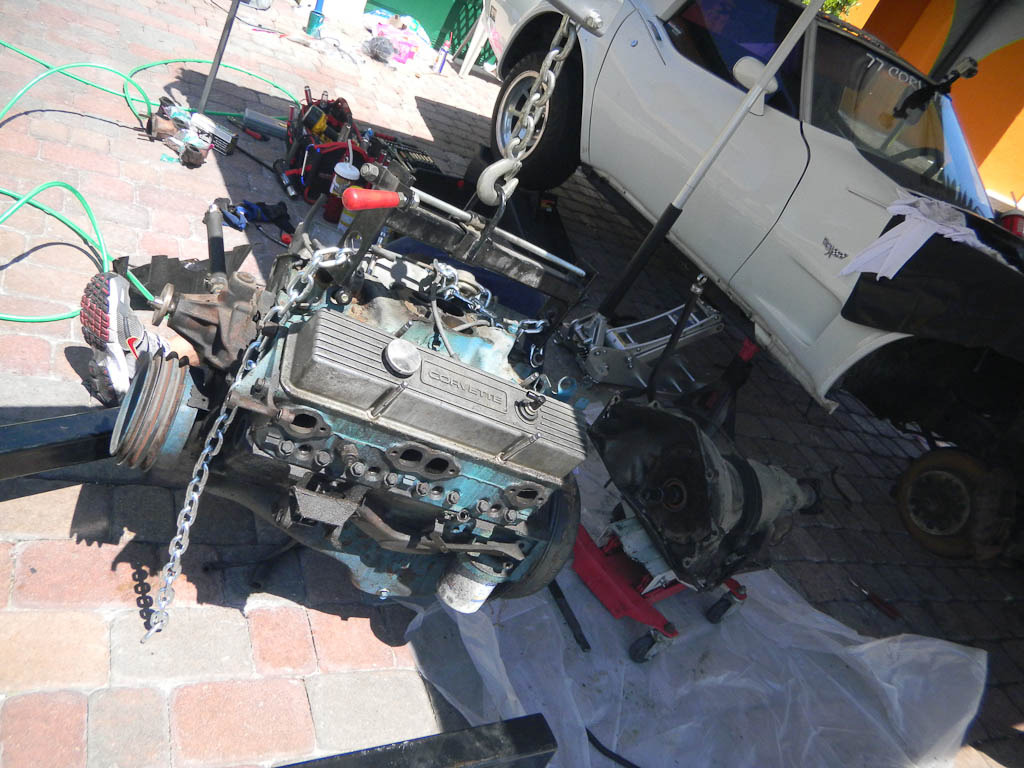
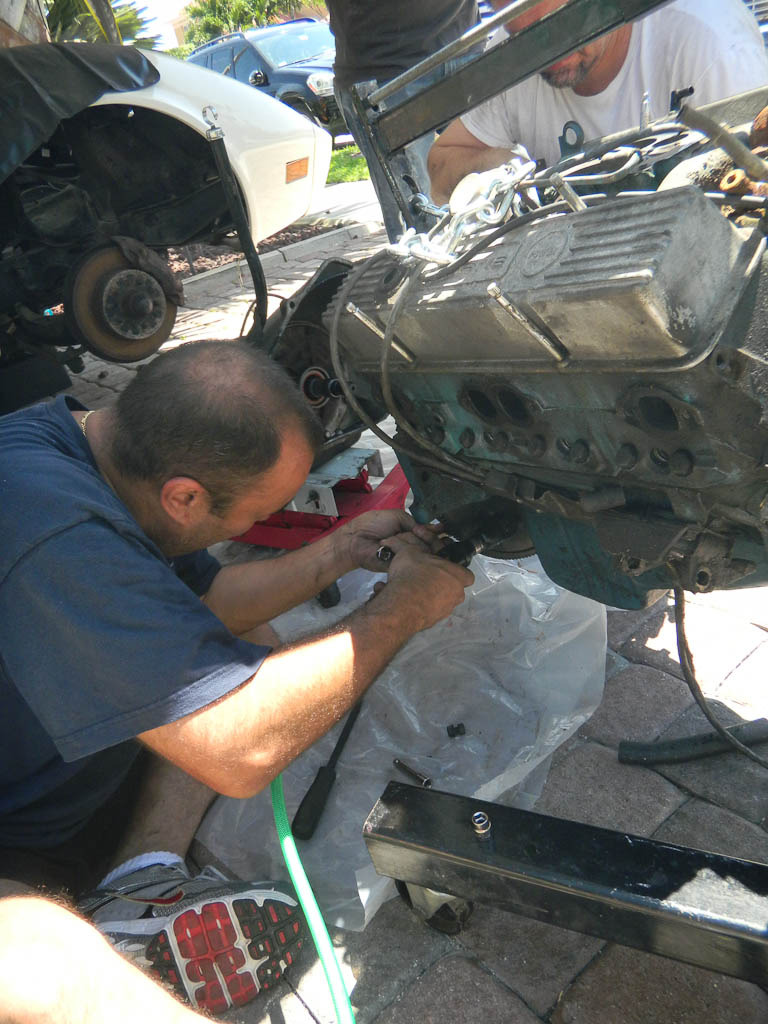
Well Sunday, May 22nd, came the big step.... Manny and Myron (SSP Miami members) came over and we got the engine and tranny out. We had very few small items left to disconnect/remove. We pulled the plugs, the carb, the distributor cap, some small vacuum lines, a couple of cables to the tranny (shifter and downshift cable) and the throttle cables. Other than that, I think we had gotten most of it done Saturday. We were able to get the engine pulled in about 2 hours and we had the engine on the stand with the tranny off and wrapped within three hours. Not too shabby!
Thanks again to Manny and Myron!
Some photos and a video... enjoy...
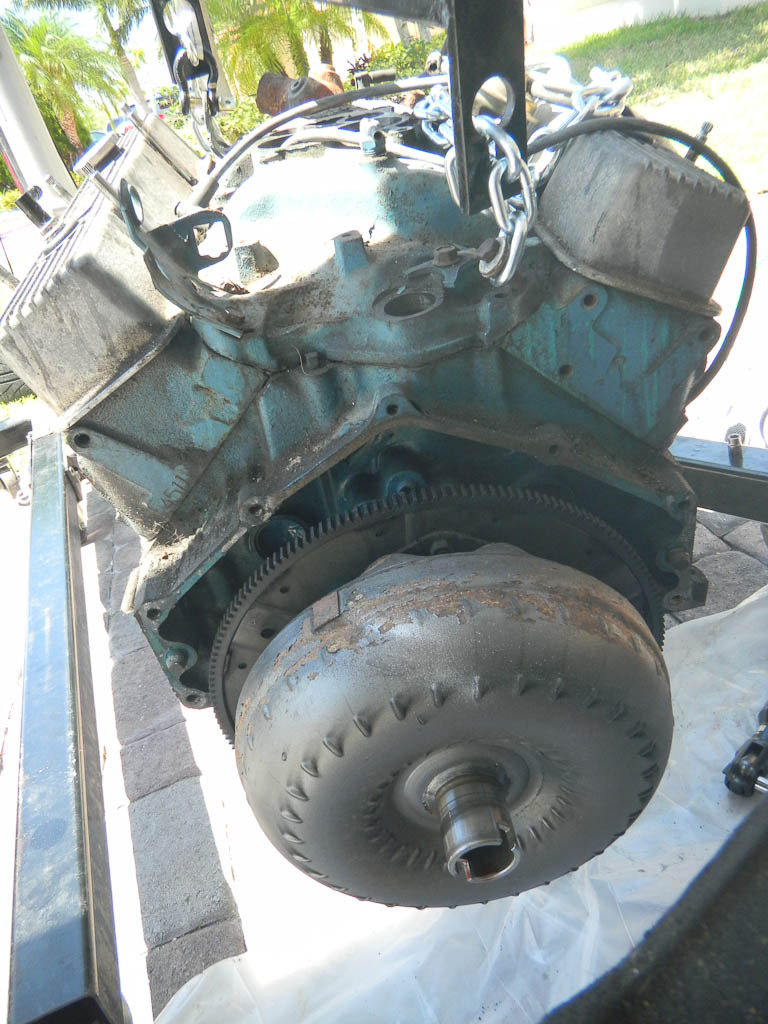
After all the "bubba was here" deals we found on the way...... the engine was the original, VIN confrmed block.
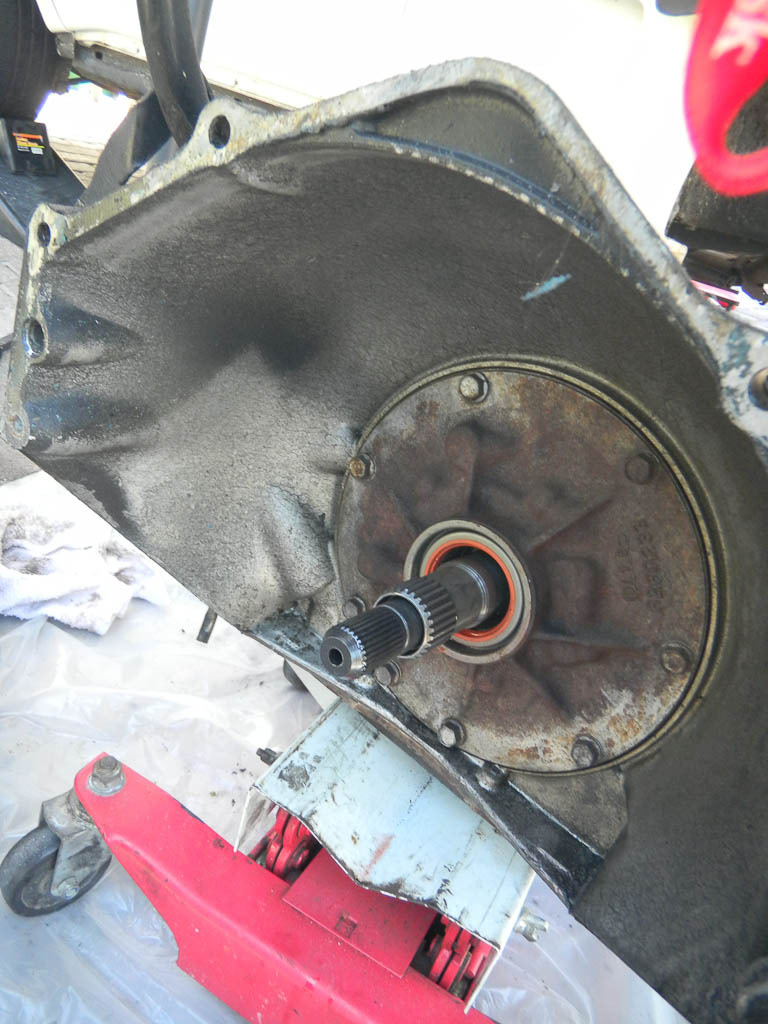
Getting the Torque converter out...
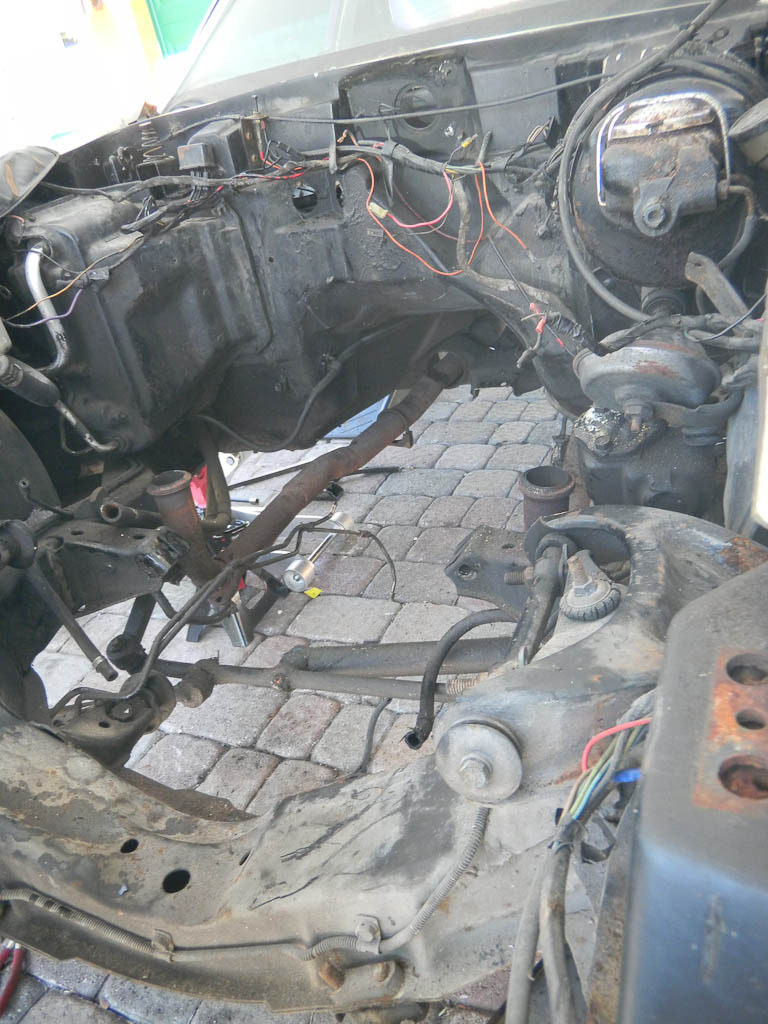
Wow.... the engine bay looks HUGE now...
TC and tranny seals look relatively new compared to the block. Most likely... it was rebuilt just before it hit storage years ago....

And..... just for fun........
Thanks again to Manny and Myron!
Some photos and a video... enjoy...
After all the "bubba was here" deals we found on the way...... the engine was the original, VIN confrmed block.
Getting the Torque converter out...
Wow.... the engine bay looks HUGE now...
TC and tranny seals look relatively new compared to the block. Most likely... it was rebuilt just before it hit storage years ago....
And..... just for fun........
Last edited by luisv; 02-02-2021 at 01:23 PM.
05-24-2011, 02:17 PM
#5
Racer
Thread Starter
So.... next steps... we continue to move forward with the process... before we get to the body removal we will have to finish up on the engine bay. We need to pull the brake master and booster, A/C and heater box, the rest of the A/C system. We need to dump the exhaust and remove the stock brakes.
The plans for the car are about 80% laid out. That 20% will ebb and flow as we move forward.
So.... enjoy the thread.... hopefully I can shed more light on these things for others considering the process in the future. Where I can, I will identify the stuimbling blocks and hurdles we will face. I will also be looking to learn a great deal from you guys as we go. In the end.... I hope to get a great car done.
Feel free to sound off....... and thanks in advance for the help we get...
05-24-2011, 02:55 PM
#6
Burning Brakes

Looking great and you are moving along nicely! I hope to follow your progress so I don't miss something on my 73 demolition/rebuild...
05-24-2011, 03:43 PM
#7
Team Owner

Well, it's time to consider whether you want to replace the THM-350 with a 200-4R or 700R4 overdrive tranny while you're at it. The tranny won't be 'original' to the car (you can rebuild and/or keep the original for posterity, if you want), but it will be so much more enjoyable...not to mention much more fuel efficient...when doing any highway touring.
I think you have a 'jewel' on your hands. You are going about it the right way and cleaning/rebuilding/repainting everything as you go. You might think about shooting the exhaust manifolds with Seymour "Cast Blast" ceramic cast-iron color paint before you reinstall them. They will forever look like fresh cast iron and never rust again. Also, give thought to painting and/or coating all bare metal parts so that they stay looking good for a long time, too. By the time you get done with that car, the mid-70's C3's will start becoming popular [because of limited supply of earlier C3 years vehicles] and the value will be much better than now--especially because of the refurb job you are doing.
I think you have a 'jewel' on your hands. You are going about it the right way and cleaning/rebuilding/repainting everything as you go. You might think about shooting the exhaust manifolds with Seymour "Cast Blast" ceramic cast-iron color paint before you reinstall them. They will forever look like fresh cast iron and never rust again. Also, give thought to painting and/or coating all bare metal parts so that they stay looking good for a long time, too. By the time you get done with that car, the mid-70's C3's will start becoming popular [because of limited supply of earlier C3 years vehicles] and the value will be much better than now--especially because of the refurb job you are doing.
05-24-2011, 04:31 PM
#8
TheCorvetteBen
Sweet I wish I had the time a space (not to mention money) to do such an indepth resto.
btw I parted out a 75 76 and 77 coupe, so i could have some parts that you need, and ill sell them to you cheap. PM me with what you need
btw I parted out a 75 76 and 77 coupe, so i could have some parts that you need, and ill sell them to you cheap. PM me with what you need
05-24-2011, 04:49 PM
#9
Drifting


Not sure if body off resto includes refreshing the front suspension and all. I would highly recommend it while you have easy access with the engine out and body off.
Good luck with your quest......
05-24-2011, 04:58 PM
#10
Team Owner
Member Since: Sep 2006
Location: Westminster Maryland
Posts: 30,173
Likes: 0
Received 2,878 Likes
on
2,515 Posts

Hi l,
VERY interesting pictures!
It's always interesting to see what people are working on.
In the first picture showing the engine to the right of the car... I see a foot and sneaker!!! Were you holding the motor on your chest?
Having Fun?
Regards,
Alan
VERY interesting pictures!
It's always interesting to see what people are working on.
In the first picture showing the engine to the right of the car... I see a foot and sneaker!!! Were you holding the motor on your chest?
Having Fun?
Regards,
Alan
05-24-2011, 05:00 PM
#11
Racer
Thread Starter
Well, it's time to consider whether you want to replace the THM-350 with a 200-4R or 700R4 overdrive tranny while you're at it. The tranny won't be 'original' to the car (you can rebuild and/or keep the original for posterity, if you want), but it will be so much more enjoyable...not to mention much more fuel efficient...when doing any highway touring....
The trans is a weak point. We are looking at options but are looking at two main possibilities. Either an overdrive automatic or a 4-speed manual conversion if we can get it at a good price.... that is actually the thing we are looking into right now.
I think you have a 'jewel' on your hands. You are going about it the right way and cleaning/rebuilding/repainting everything as you go. You might think about shooting the exhaust manifolds with Seymour "Cast Blast" ceramic cast-iron color paint before you reinstall them. They will forever look like fresh cast iron and never rust again. Also, give thought to painting and/or coating all bare metal parts so that they stay looking good for a long time, too. By the time you get done with that car, the mid-70's C3's will start becoming popular [because of limited supply of earlier C3 years vehicles] and the value will be much better than now--especially because of the refurb job you are doing.
As for the prices.... hopefully you are 100% right. We have been blessed to allow us to make a purchase now (when everything is cheaper) and hopefully when things get better, we'll see more value!
05-24-2011, 05:01 PM
#12
Racer
Thread Starter
Will do.... I do have some items I'll be needing... I'll hit you up.
05-24-2011, 05:02 PM
#13
Racer
Thread Starter
05-24-2011, 05:03 PM
#14
Racer
Thread Starter
LOL..... yeah.... my foot.... under there getting the TC off the flywheel!
05-24-2011, 05:30 PM
#15
Le Mans Master

Member Since: Apr 2001
Location: Was New Orleans but swam to Baton Rouge LA
Posts: 5,928
Received 275 Likes
on
232 Posts
Cruise-In IX Veteran

Good luck with your project! I started mind about 6 years ago and still have not began to reassemble the car. Something always comes up and takes my cash for parts.
Doing it yourself is the best bet. You learn the car and how it goes together, not to mention you can do it the way you want and no one has to read your mind.
Doing it yourself is the best bet. You learn the car and how it goes together, not to mention you can do it the way you want and no one has to read your mind.
05-24-2011, 08:15 PM
#16
Team Owner
Changing over the front suspension can be costly...and, if you aren't going to actually road race the car, the benefits are questionable for the money invested. If you put Bilstein 'heavy duty' gas shocks on a stock suspension, I doubt that you will have any handling complaints (again, unless you will be racing the car). Larger wheels and wider/shorter profile tires will also help considerably. Then, a fiberglass monoleaf spring in back will round-out a nice [and affordable] suspension package.
05-24-2011, 08:43 PM
#17
Safety Car

Member Since: Aug 2001
Location: North Easton Mass
Posts: 4,883
Likes: 0
Received 8 Likes
on
8 Posts
I would keep all of the original parts. You won't get a lot of money for many of them - exhaust manifolds for example- and if you ever want to return the car to stock or sell it you might have a hard time locating a replacement set.

Rick B.
Rick B.
05-25-2011, 09:24 AM
#18
Racer
Thread Starter
Changing over the front suspension can be costly...and, if you aren't going to actually road race the car, the benefits are questionable for the money invested. If you put Bilstein 'heavy duty' gas shocks on a stock suspension, I doubt that you will have any handling complaints (again, unless you will be racing the car). Larger wheels and wider/shorter profile tires will also help considerably. Then, a fiberglass monoleaf spring in back will round-out a nice [and affordable] suspension package.
The most helpful vendor I spoke to was Van Steel. They opened our eyes to a few things. One is the need to change a few things to optimize the 40 year old suspension for modern tires. Stability at higher highway speeds, lower profile tires, etc. In the end about half our budget is going to suspension, brakes and steering. However, I come from the ground up mindset. I will get more enjoyment out of a car that handles well with 300 HP as opposed to a cheaper setup with 450 HP.... The coil overs will also let me adjust the car and ride height to suit our needs.
05-25-2011, 01:42 PM
#19
Great looking start to your restoration. Thanks for sharing and I look forward to following the updates!
05-27-2011, 01:39 PM
#20
Racer
Thread Starter
Talked to my powder coater... was asking about options we had... he made a couple of suggestions, but I wanted some opinions... point of views... etc...
OK.. We have three choices... all black. We have Gloss, semi-gloss and matte. The issue is that the matte is an Epoxy that is the strongest. However, the finish is not my favorite. The other choices are semi-gloss and gloss. My move would be to the semi gloss as it will match most of the suspension parts well. (Sidenote: Does anybody know if the suspensions folks sell "unfinished" parts? )
We are having the cage/frame and chassis done. Most likely, the diff and driveshafts as well. We have to see....
What say you? ;-)