
1971 Journey
 10-15-2017, 05:01 PM
#1021
Team Owner

Member Since: Sep 2006
Location: Westminster Maryland
Posts: 30,173
Likes: 0
Received 2,878 Likes
on
2,515 Posts

Hi Craig,
You're right.
They weren't perfect but they will still pretty nicely put together originally.
It's a pleasure to see the work you're putting into it.
Regards,
Alan
You're right.
They weren't perfect but they will still pretty nicely put together originally.
It's a pleasure to see the work you're putting into it.
Regards,
Alan

The following users liked this post:
CraigH (10-15-2017)
10-19-2017, 01:10 AM
#1022
Melting Slicks

Thread Starter

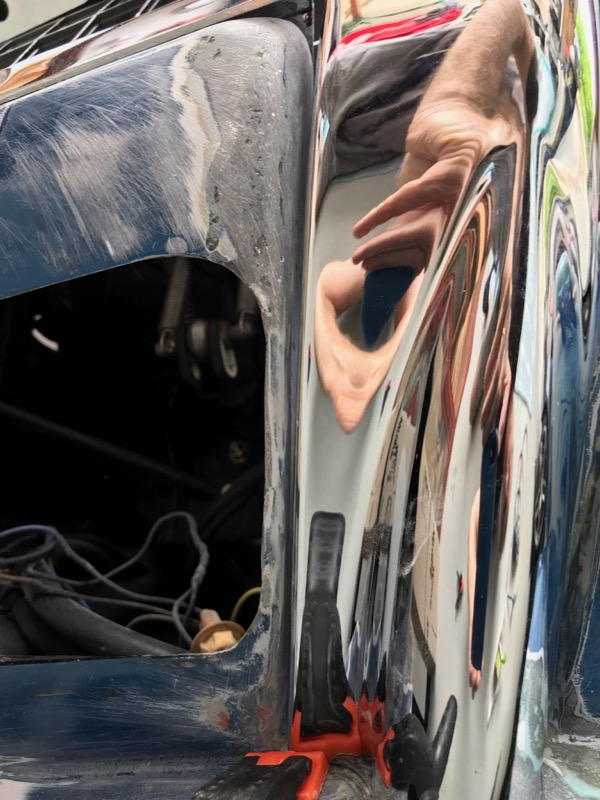
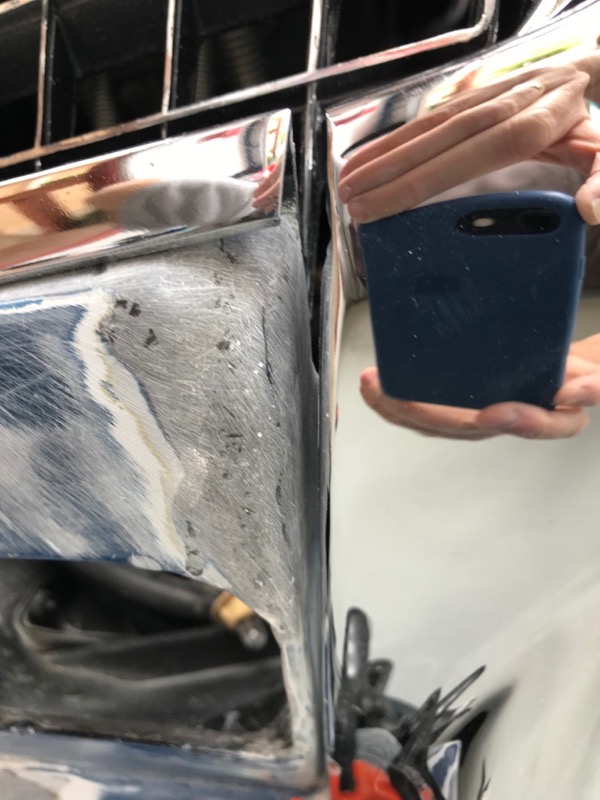
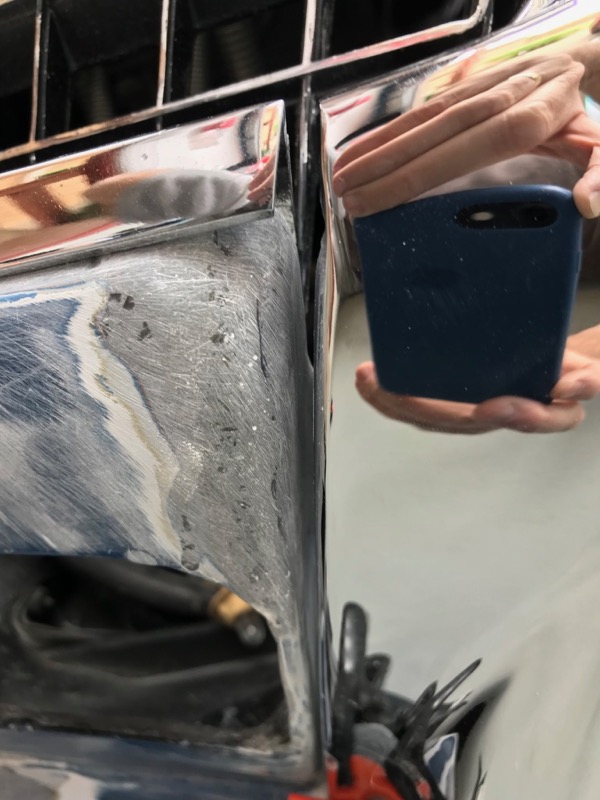
Laid up glass and put the sectioned front apron back together
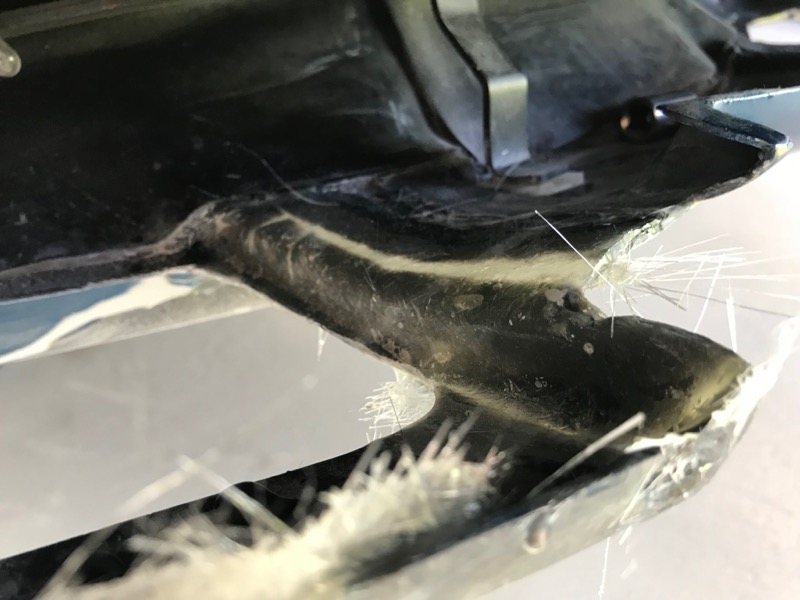
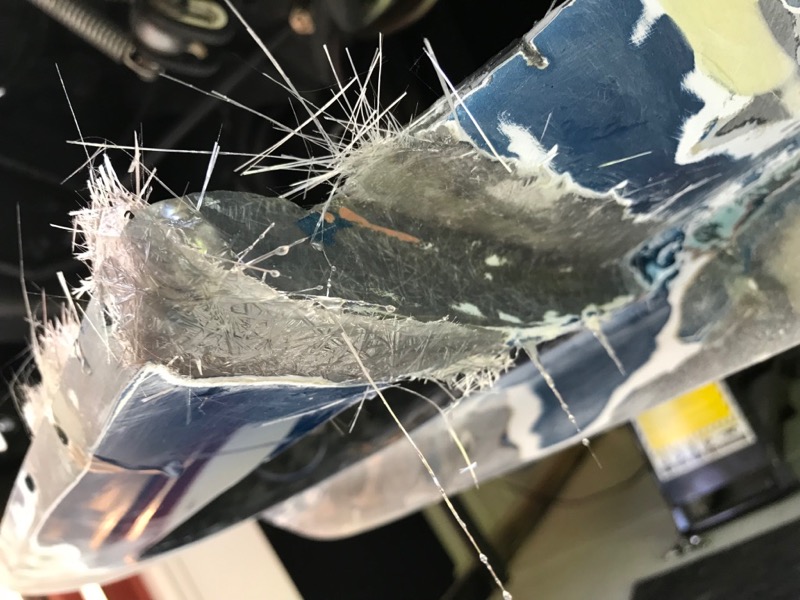
Has all been sanded smooth now but not these shots
Has all been sanded smooth now but not these shots
Last edited by CraigH; 04-10-2023 at 05:35 AM.
10-19-2017, 01:18 AM
#1023
Melting Slicks
Thread Starter
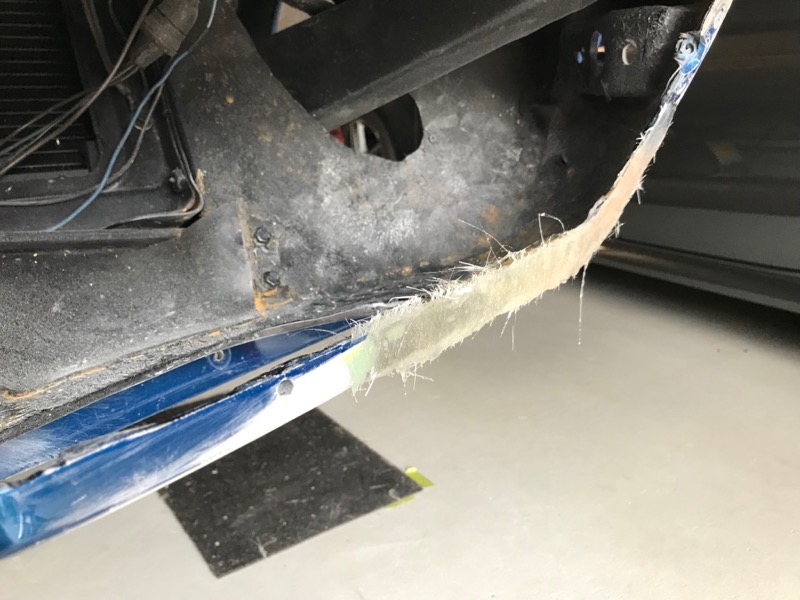
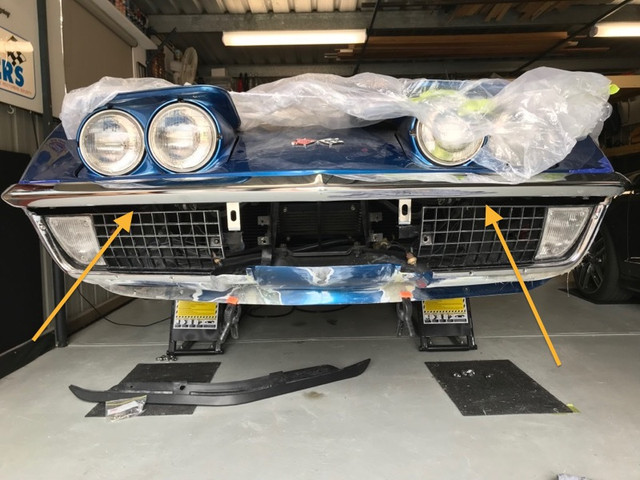
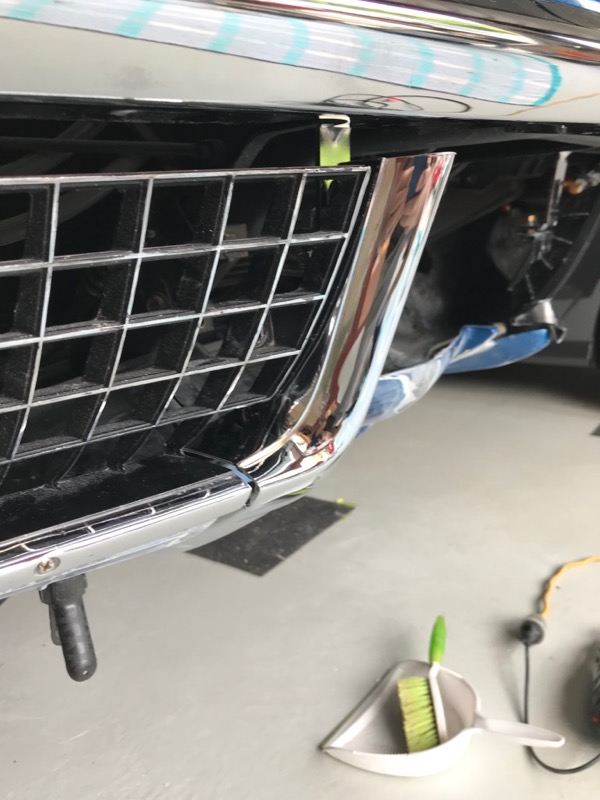
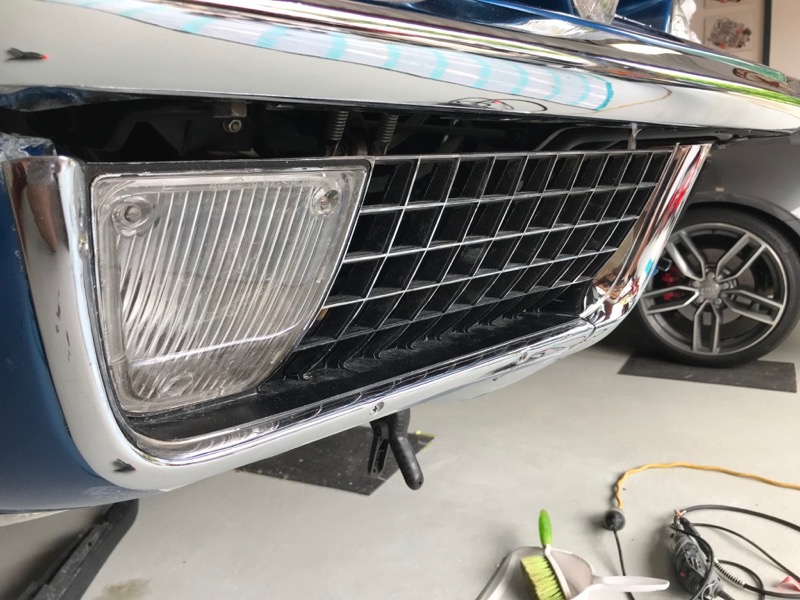
To get both grills to sit properly and align with the line of the bumper i needed to change the shape of the grill opening on the drivers side.
I also found an over supply of bog or VPA in the lower valence so it came out and got glassed.
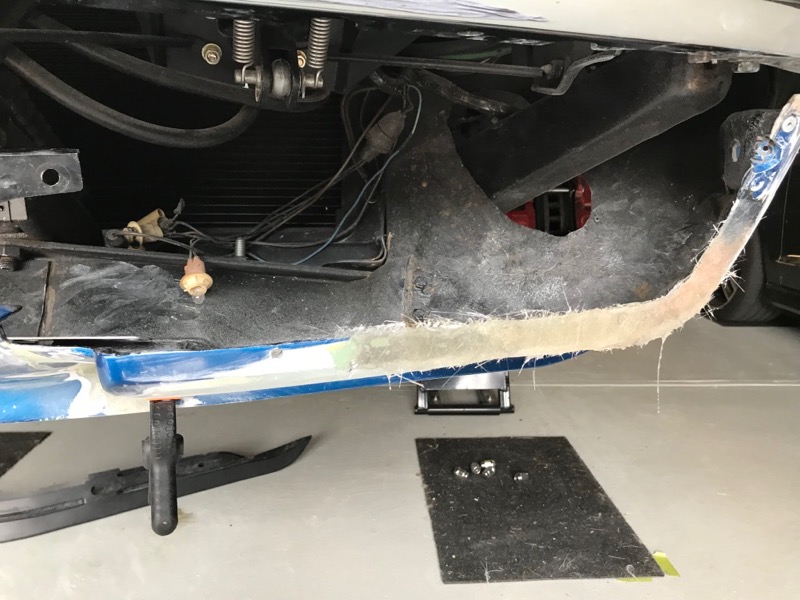
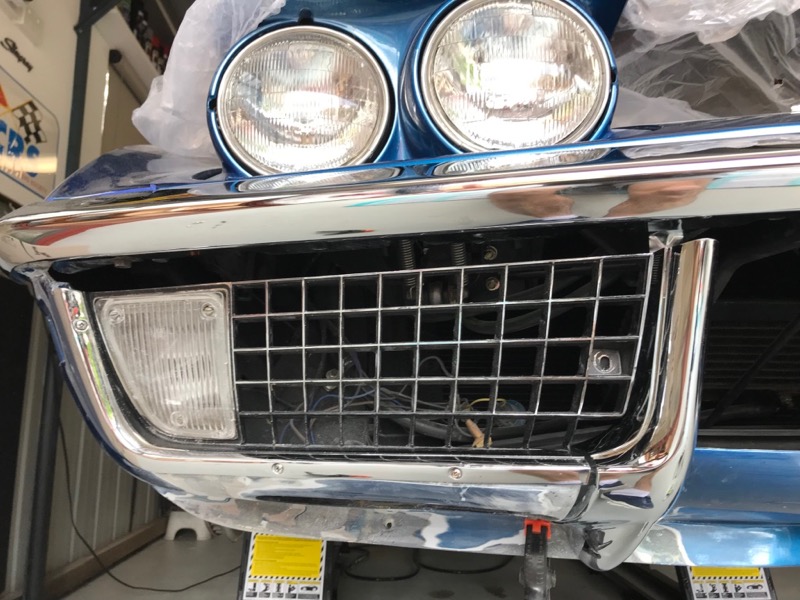
Mocked up the grill to see if its close.
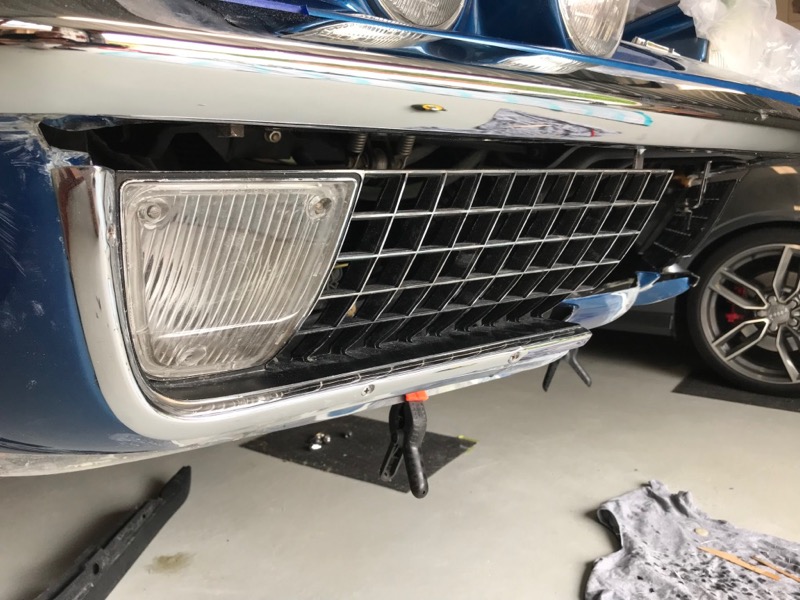
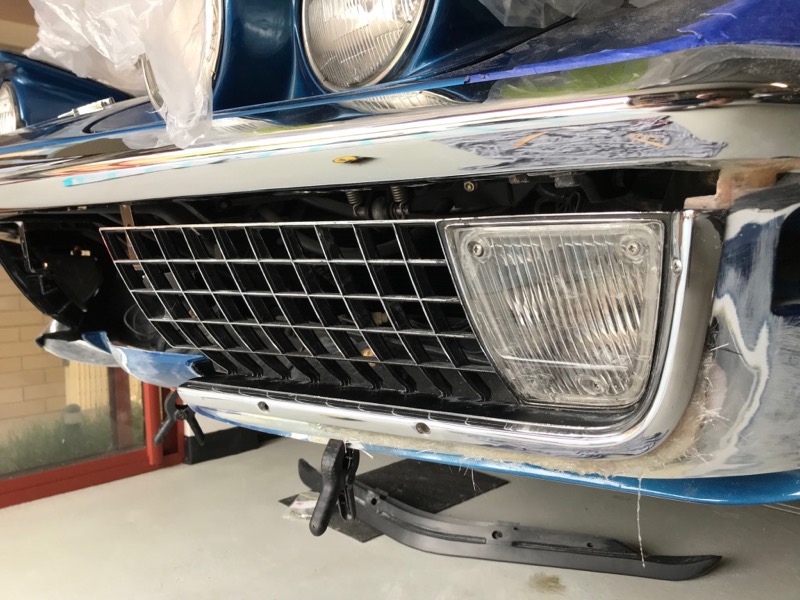


Very close, and once I work the new glass flat will see if i need to add any more.
Can run my eye along the grills from all angles and it aligns with bottom of bumper nicely.
In the end I needed to move the mounting glass out byp 2-5 mm in the lower corner and front to sit even.
Next step will be to modify the bumper brackets for the bumperettes as they both hit the headlights by a few mm when the swing down.
Always something else but I feel I am getting closer.
I also found an over supply of bog or VPA in the lower valence so it came out and got glassed.
Mocked up the grill to see if its close.
Very close, and once I work the new glass flat will see if i need to add any more.
Can run my eye along the grills from all angles and it aligns with bottom of bumper nicely.
In the end I needed to move the mounting glass out byp 2-5 mm in the lower corner and front to sit even.
Next step will be to modify the bumper brackets for the bumperettes as they both hit the headlights by a few mm when the swing down.
Always something else but I feel I am getting closer.
Last edited by CraigH; 04-10-2023 at 05:34 AM.
10-19-2017, 03:02 AM
#1024
Racer


Looking really good Craig 
I think it's worth the extra effort to get it all lined up and even.
Be interested to see how much of a gap you end up with between the bottom of the bumper and bumperette. I think mine is about 10 mil or so.
I think it's worth the extra effort to get it all lined up and even.
Be interested to see how much of a gap you end up with between the bottom of the bumper and bumperette. I think mine is about 10 mil or so.
10-19-2017, 07:14 AM
#1026
Team Owner
Member Since: Sep 2006
Location: Westminster Maryland
Posts: 30,173
Likes: 0
Received 2,878 Likes
on
2,515 Posts
Hi Craig,
This fit looks especially nice!!!
On a nice car it's so important to settle these things NOW and NOT just rush to get the primer on!
Have you thought about taking a few minutes to put the wheels back on so you can put the car back on the ground?
This will give you a slightly different perspective and you might spot something you're not seeing now.
Regards,
Alan
Last edited by Alan 71; 10-20-2017 at 06:56 AM.
10-20-2017, 05:53 AM
#1027
Melting Slicks
Thread Starter
Thanks Alan,
Am very happy with the progress.
I will be dropping it down after I get it fully mocked up and go for a drive to settle suspension etc, then check it all again.
I agree, I was hoping to have it to painter before now but have decided to focus more on fixing a few other issues and not worry about if I get it done by the year end.
If I do great but If not.....
Last edited by CraigH; 10-20-2017 at 05:54 AM.
10-21-2017, 09:16 PM
#1028
Melting Slicks
Thread Starter
Spent some time on the first bumperette. Drilled a new 16mm hole on the chin glass then adjusted to grille.
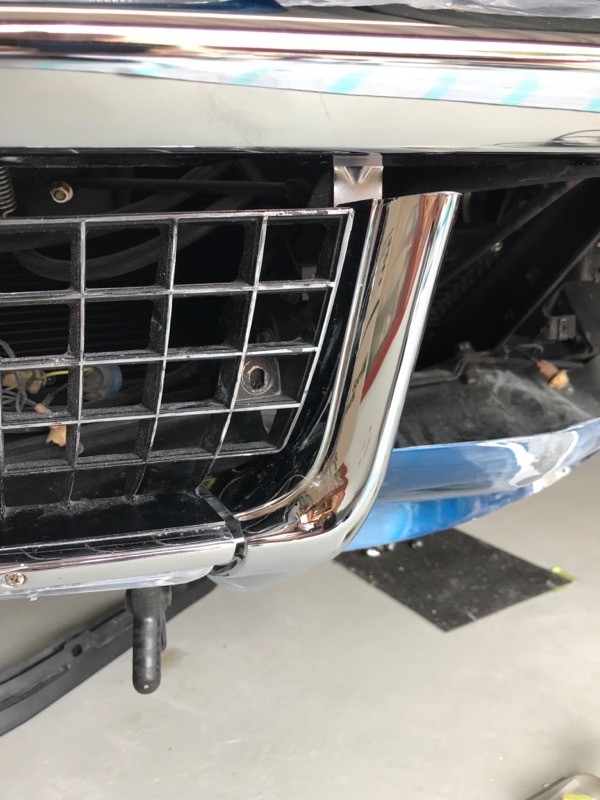
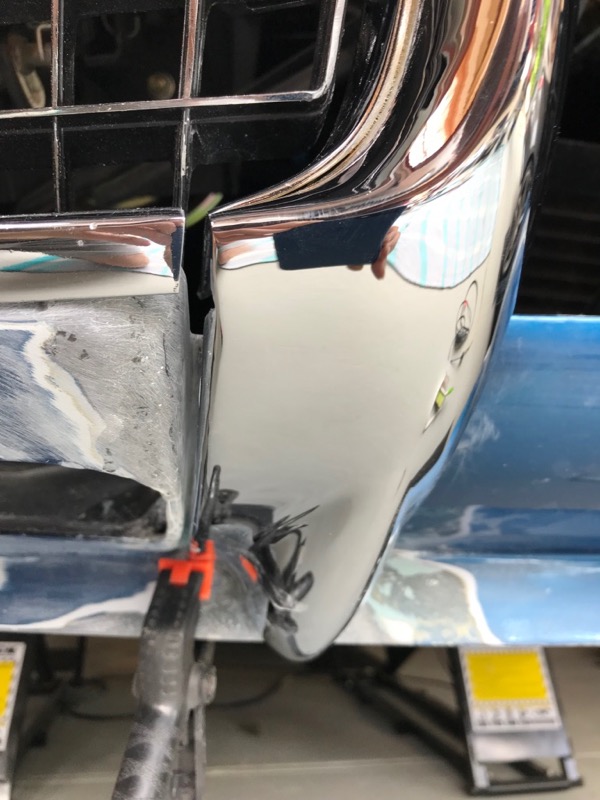
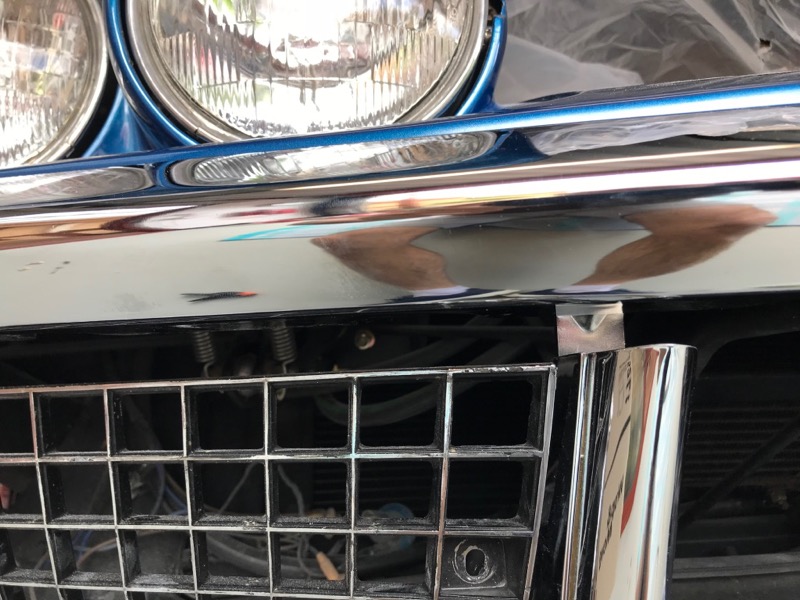
Will add some aluminium tubing to the bolts so they tighten down but don't crush the glass on the chin. (thanks for that tip Alan re factory washer)
Will also have to make 2 new reinforcing brackets between frame and bottom bolt as existing ones are bent wrong and don't align properly.
Will add some aluminium tubing to the bolts so they tighten down but don't crush the glass on the chin. (thanks for that tip Alan re factory washer)
Will also have to make 2 new reinforcing brackets between frame and bottom bolt as existing ones are bent wrong and don't align properly.
Last edited by CraigH; 04-10-2023 at 05:33 AM.
10-21-2017, 10:13 PM
#1029
Nam Labrat

Member Since: Sep 2013
Location: New Orleans Loo-z-anna
Posts: 33,881
Received 4,153 Likes
on
2,726 Posts

CraigH.........you never would have lasted on the assembly line.......
your parts fit together properly as opposed to GM specs.
your parts fit together properly as opposed to GM specs.
The following users liked this post:
CraigH (10-22-2017)
10-22-2017, 03:22 AM
#1030
Instructor
 10-22-2017, 04:32 AM
#1031
Burning Brakes


Member Since: Jul 2012
Location: Slovenia, EU
Posts: 1,116
Received 263 Likes
on
128 Posts
2017 C3 of Year Finalist
Craig NCRS wouldn't like you either! 
That is way too pedantic if you compare to original build quality.
I know when I repainted my car the bumperettes were all over the place!
That is way too pedantic if you compare to original build quality.
I know when I repainted my car the bumperettes were all over the place!
10-22-2017, 04:33 AM
#1032
Instructor
 10-22-2017, 04:51 AM
#1034
Melting Slicks
Thread Starter
Authenticity is one thing but I am also trying to correct some bad work that was done on the drivers front corner in the cars previous lives.
When I first got it in 2009 and tried to fit the chin spoiler I noticed how far out the two sides were.
I did some surgery back then to lower one side but was limited in where i could cut it as it needed to be hidden by the bumperette etc.
However this time around I am trying to make both sides at least the same :-)
Be assured there are still so many faults etc with the Vette but I can live with them.
I have certainly seen my share of badly aligned front grills, bumpers and bumperette but unfortunately now I have started I can’t stop till they are at least aligned and look pleasing to my eye -
That’s the problem with being **** retentive -
Last edited by CraigH; 10-22-2017 at 04:56 AM.
The following users liked this post:
mysticpete (10-23-2017)
10-22-2017, 09:02 AM
#1036
Le Mans Master


Spent some time on the first bumperette. Drilled a new 16mm hole on the chin glass then adjusted to grille.


Will add some aluminium tubing to the bolts so they tighten down but don't crush the glass on the chin. (thanks for that tip Alan re factory washer)
Will also have to make 2 new reinforcing brackets between frame and bottom bolt as existing ones are bent wrong and don't align properly.
Will add some aluminium tubing to the bolts so they tighten down but don't crush the glass on the chin. (thanks for that tip Alan re factory washer)
Will also have to make 2 new reinforcing brackets between frame and bottom bolt as existing ones are bent wrong and don't align properly.
Thanks for posting all your great work.
 10-22-2017, 04:40 PM
#1037
Melting Slicks
Thread Starter
Happy for all comments guys and certainly no disrespect in what is said.
As I said I can see from behind the panels exactly where new parts have been fitted over time on the front drivers corner and apron.
While I was relatively happy with the appearance before, now its about to get the front painted again for another reason I was certainly not going to miss the opportunity to improve on things.
A new bumper showed that the old repair was made to fit a misshaped bumper etc etc.
It is true that I take things to extreme on occasion but the work is certainly not flawless.
I only wish I had the skills as seen in the thread mentioned by Alan that cut and sectioned the bumpers to make them fit so smoothly.
Any US car built in the 70's certainly had quality and consistency issues but there are so many points in the front to adjust the bars etc that it often becomes too much of a pain when trying to refit it all 40 years down the track and easier to say they were all misaligned and that adds character.
In the factory i assume they had jigs or alignment processes to get them all relatively similar.
I will just keep plodding away at it and welcome all views
Last edited by CraigH; 10-22-2017 at 04:43 PM.
The following users liked this post:
mysticpete (10-23-2017)
10-23-2017, 03:11 AM
#1038
Instructor
Happy for all comments guys and certainly no disrespect in what is said.
As I said I can see from behind the panels exactly where new parts have been fitted over time on the front drivers corner and apron.
While I was relatively happy with the appearance before, now its about to get the front painted again for another reason I was certainly not going to miss the opportunity to improve on things.
A new bumper showed that the old repair was made to fit a misshaped bumper etc etc.
It is true that I take things to extreme on occasion but the work is certainly not flawless.
I only wish I had the skills as seen in the thread mentioned by Alan that cut and sectioned the bumpers to make them fit so smoothly.
Any US car built in the 70's certainly had quality and consistency issues but there are so many points in the front to adjust the bars etc that it often becomes too much of a pain when trying to refit it all 40 years down the track and easier to say they were all misaligned and that adds character.
In the factory i assume they had jigs or alignment processes to get them all relatively similar.
I will just keep plodding away at it and welcome all views
As I said I can see from behind the panels exactly where new parts have been fitted over time on the front drivers corner and apron.
While I was relatively happy with the appearance before, now its about to get the front painted again for another reason I was certainly not going to miss the opportunity to improve on things.
A new bumper showed that the old repair was made to fit a misshaped bumper etc etc.
It is true that I take things to extreme on occasion but the work is certainly not flawless.
I only wish I had the skills as seen in the thread mentioned by Alan that cut and sectioned the bumpers to make them fit so smoothly.
Any US car built in the 70's certainly had quality and consistency issues but there are so many points in the front to adjust the bars etc that it often becomes too much of a pain when trying to refit it all 40 years down the track and easier to say they were all misaligned and that adds character.
In the factory i assume they had jigs or alignment processes to get them all relatively similar.
I will just keep plodding away at it and welcome all views
 10-23-2017, 03:57 AM
#1039
Melting Slicks
Thread Starter
I understand what your saying and I was all set to get out and drive the Vette more in March this year. In fact I was so happy with the way it was driving after the last front suspension upgrades I went for another quick spin with my son to show him and “bang” damage from a moron tossing beer bottles at 80kph.
Since then I have been talking with insurer , and doing extra bits and pieces before it gets some paint repair.
Hopefully back on road by end this year or early next.
The big issue is work family etc seem to get in the way :-)
Since then I have been talking with insurer , and doing extra bits and pieces before it gets some paint repair.
Hopefully back on road by end this year or early next.
The big issue is work family etc seem to get in the way :-)
10-23-2017, 07:23 AM
#1040
Instructor
