
1971 Journey
 04-09-2018, 02:00 AM
#1281
Melting Slicks

Thread Starter

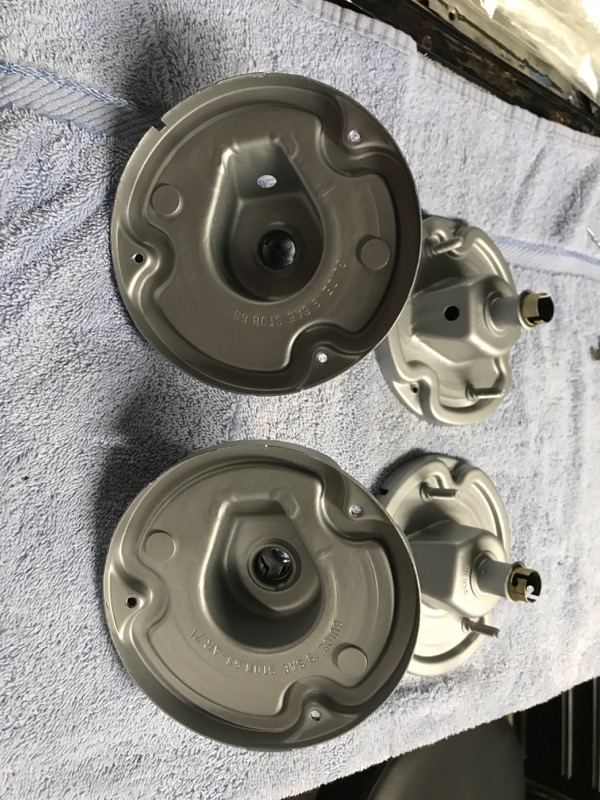
Headlights lids out.
Was amazed how easy they came out. Just removed the 3 bolts holding the end bearings and one front bolt a little twist while they are up and out they come.


Putting them back after the paint will be a lot slower
Was amazed how easy they came out. Just removed the 3 bolts holding the end bearings and one front bolt a little twist while they are up and out they come.
Putting them back after the paint will be a lot slower
Last edited by CraigH; 04-10-2023 at 06:14 AM.


 04-09-2018, 02:05 AM
#1283
Melting Slicks
Thread Starter
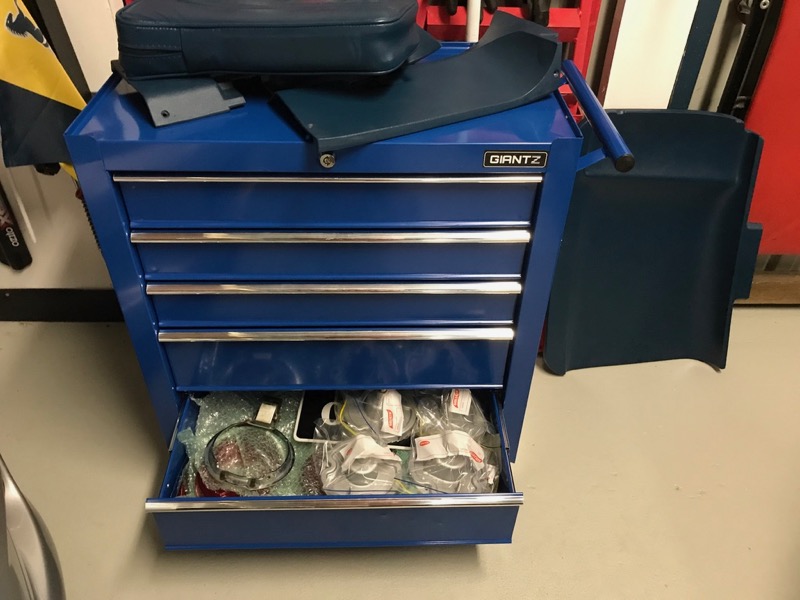
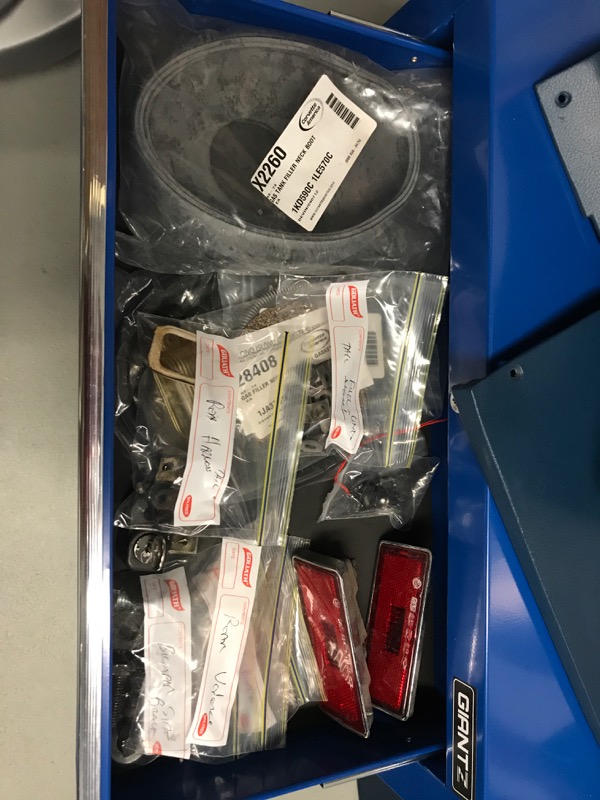
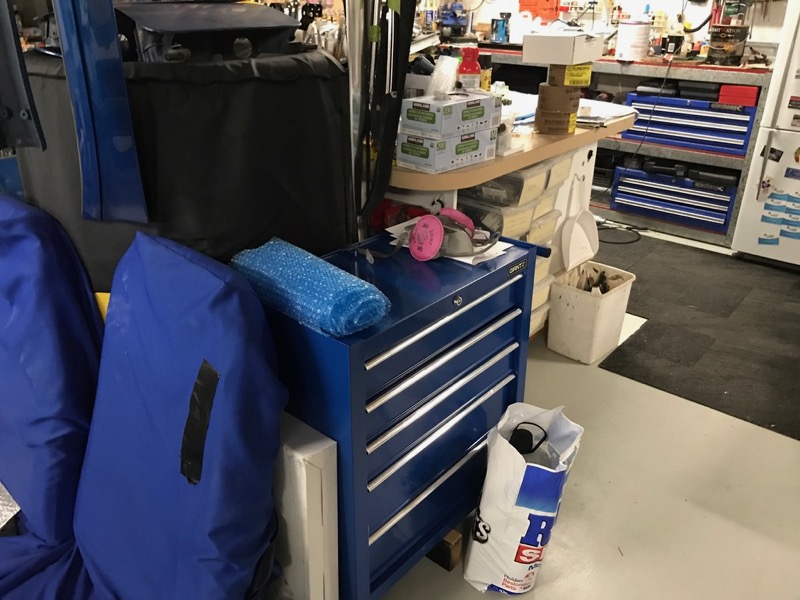
And storage of parts has become a pain. Things everywhere so i went online and orders some cheap metal tool drawers.
Then i put all the restored and bagged parts in drawers for each area of the car.
I was getting concerned with so many its in so many seperate spots etc so this is way better.
Once its done i will move them to my shed for general storage.
Then i put all the restored and bagged parts in drawers for each area of the car.
I was getting concerned with so many its in so many seperate spots etc so this is way better.
Once its done i will move them to my shed for general storage.
Last edited by CraigH; 04-10-2023 at 06:14 AM.
04-09-2018, 04:28 AM
#1284
Racer


Looking real good Craig. Just about ready for paint.
I was wondering if you had enough VPA, hopefully it doesn't run out before you finish.
Your right about the headlight covers. Just take your time putting them back in.
I masked up the edges of the top surround panel to try protect them. If you do this only lay the masking lightly on the edge, you don't want to peel off any fresh paint when removing the tape.
Also remove the vacuum actuator pushrods and springs from the linkage and carefully cycle the covers up and down by hand. This will also make it easier to adjust the position of the hinges/collars to get it central and flush in the opening.
I found on mine that the gap had to be slightly larger at the rear of the covers compared to the front. This is why I suggest cycling the covers by hand as it's possible to clip an edge if there is any binding (don't ask me how I know this).
04-09-2018, 06:45 AM
#1285
Team Owner

Member Since: Sep 2006
Location: Westminster Maryland
Posts: 30,173
Likes: 0
Received 2,878 Likes
on
2,515 Posts

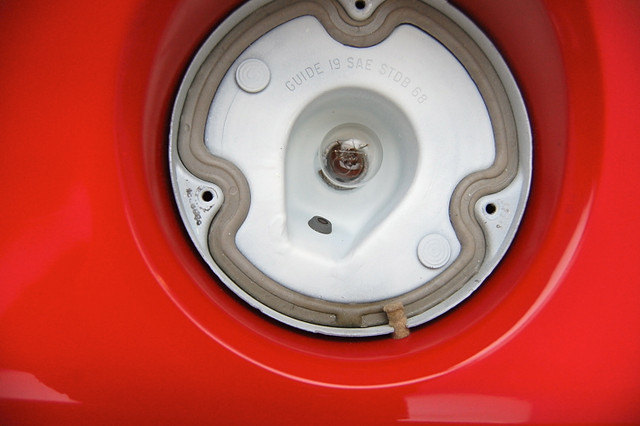
Hi Craig,
Having restored parts carefully packed away ready for when you'll need them is a GOOD thing!
All 4 tail-light housings originally had a bright white coating on their inside surfaces. I don't see it on your housings... maybe you still intend to add it?
It was heavy bodied and seems to have a bit of iridescence to it.
I think the intent of this coating may have been to brighten the level of illumination?
Regards,
Alan
Last edited by Alan 71; 04-09-2018 at 06:49 AM.
The following users liked this post:
CraigH (04-09-2018)
04-09-2018, 07:01 AM
#1286
Melting Slicks
Thread Starter
Hi Craig,
Having restored parts carefully packed away ready for when you'll need them is a GOOD thing!
All 4 tail-light housings originally had a bright white coating on their inside surfaces. I don't see it on your housings... maybe you still intend to add it?
It was heavy bodied and seems to have a bit of iridescence to it.
I think the intent of this coating may have been to brighten the level of illumination?
Regards,
Alan
Having restored parts carefully packed away ready for when you'll need them is a GOOD thing!
All 4 tail-light housings originally had a bright white coating on their inside surfaces. I don't see it on your housings... maybe you still intend to add it?
It was heavy bodied and seems to have a bit of iridescence to it.
I think the intent of this coating may have been to brighten the level of illumination?
Regards,
Alan
Mine were blue !!!!
So is it just the surface inside the gasket so it reflects or the entire side.
Easy enough to add it a this stage.
04-09-2018, 07:07 AM
#1287
Team Owner
Member Since: Sep 2006
Location: Westminster Maryland
Posts: 30,173
Likes: 0
Received 2,878 Likes
on
2,515 Posts
Hi Craig,
There is some debate as to just how much of the housing was painted white.
Some folks feel the gasket was in place when the paint was applied....paint on the gasket but not under it.
I'd remove the gasket, paint the whole surface, and put the gasket in place.
Regards,
Alan
There is some debate as to just how much of the housing was painted white.
Some folks feel the gasket was in place when the paint was applied....paint on the gasket but not under it.
I'd remove the gasket, paint the whole surface, and put the gasket in place.
Regards,
Alan


 04-09-2018, 12:39 PM
#1289
Nam Labrat

Member Since: Sep 2013
Location: New Orleans Loo-z-anna
Posts: 33,893
Received 4,173 Likes
on
2,735 Posts

It's going to look great when finished! 
04-09-2018, 01:06 PM
#1290
Team Owner
Member Since: Sep 2006
Location: Westminster Maryland
Posts: 30,173
Likes: 0
Received 2,878 Likes
on
2,515 Posts
Hi Craig,
Looking at your photos.....saw the Quick-Jack in one of them....
Remember when all there was to talk about was THAT.... who would have thought you had these ADVENTURES waiting for you!
Regards,
Alan
Looking at your photos.....saw the Quick-Jack in one of them....
Remember when all there was to talk about was THAT.... who would have thought you had these ADVENTURES waiting for you!
Regards,
Alan
04-09-2018, 05:04 PM
#1291
Melting Slicks
Thread Starter
Oh yes Alan. The last 12 months have certainly been interesting.
And like another recent thread I have certainly felt “over my head” many times but have just stepped back, walked away, thought it through, researched and then continued.
When I first got the Vette in 2009 the paint was one of its strong points and I thought I would just work on all the other systems.
How things change.
Last edited by CraigH; 04-09-2018 at 05:04 PM.
04-09-2018, 06:10 PM
#1292
Intermediate
This thread is a gold mine for me. I have just finished a complete rebuild of the entire rear suspension & drive units on my '68 coupe. Interior removal and full-on wiring is next. It will be a while before I get to the body work, so the above posts are very timely. Craig, all the detail work and the personal "do it right" attitude you are doing is close to my heart. I appreciate all the recommendations from the other members, too.
04-10-2018, 12:12 PM
#1293
Race Director

This is an excellent thread.
Thanks again for all the hints on how to do it the right way.
Thanks again for all the hints on how to do it the right way.
04-11-2018, 12:28 AM
#1295
Melting Slicks
Thread Starter
I decided to test fit the reinforcing brackets for the rear shocks that are used with the VanSteel coiler rear end setup.
A little bit of cleaning up ready for welding got out of hand.
Initial scrape off of the under body treatment put there previously.

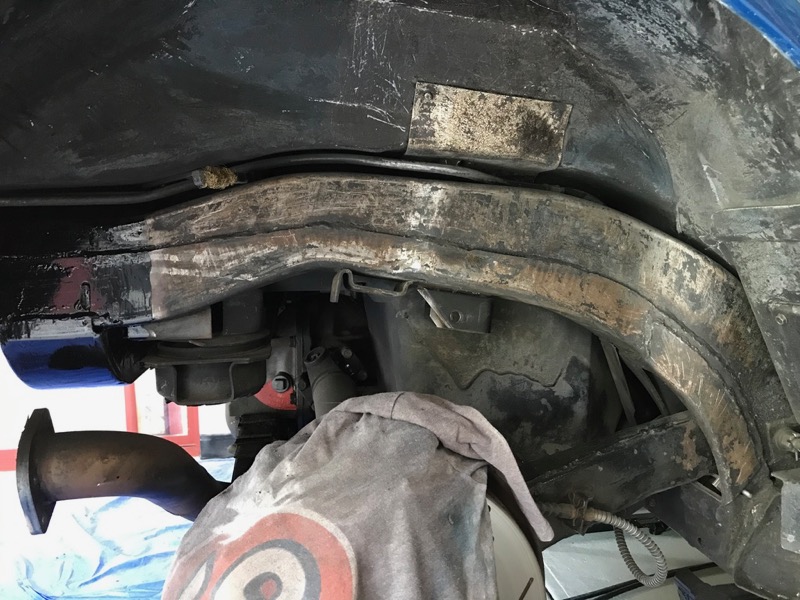
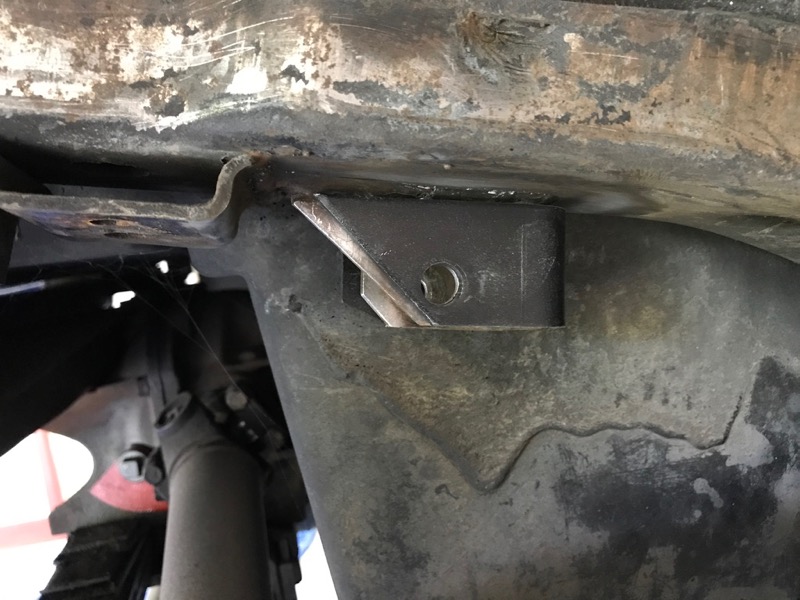
Cleaning up each rear arch area will take a bit of time but at least it is started.
A little bit of cleaning up ready for welding got out of hand.
Initial scrape off of the under body treatment put there previously.
Cleaning up each rear arch area will take a bit of time but at least it is started.
Last edited by CraigH; 04-10-2023 at 06:14 AM.
 04-12-2018, 08:46 AM
#1298
Team Owner
Member Since: Sep 2006
Location: Westminster Maryland
Posts: 30,173
Likes: 0
Received 2,878 Likes
on
2,515 Posts
Hi Craig,
"Thanks again for all the hints on how to do it the right way."
You have a pretty good hold on doing it the right way!
I didn't realize a coil-over system was in your future!
Very nice!!!!
Regards,
Alan
"Thanks again for all the hints on how to do it the right way."
You have a pretty good hold on doing it the right way!
I didn't realize a coil-over system was in your future!
Very nice!!!!
Regards,
Alan
The following users liked this post:
wabco40 (04-12-2018)
04-12-2018, 04:46 PM
#1300
Melting Slicks
Thread Starter
It�s Vansteels while the front is Global West.
Decided that once I get it back from paint I will swap it over.