
1971 Journey
 01-19-2019, 03:43 PM
#1401
Melting Slicks

Thread Starter

Thanks guys, am looking forward to the reassembly.
A little nervous about the headlight doors but should be fun.
Lots if masking tape needed to protect things.
A little nervous about the headlight doors but should be fun.
Lots if masking tape needed to protect things.
 01-19-2019, 05:53 PM
#1402
Burning Brakes


Member Since: Jul 2012
Location: Slovenia, EU
Posts: 1,116
Received 263 Likes
on
128 Posts
2017 C3 of Year Finalist


Last edited by Primoz; 01-19-2019 at 05:53 PM.
The following users liked this post:
CraigH (01-19-2019)


The following users liked this post:
Primoz (01-20-2019)
01-21-2019, 04:10 AM
#1404
Melting Slicks
Thread Starter
I think Bridgehampton Blue has some more green tones than Targa blue.
however as someone said before there are so many different tones to it if you look at cars that have been re shot.
however as someone said before there are so many different tones to it if you look at cars that have been re shot.


 01-29-2019, 11:07 AM
#1407
Race Director

Very nice.
02-12-2019, 12:49 AM
#1409
Melting Slicks
Thread Starter
I fitted new door sticker pins.
They were nice stainless steel ones with 2 washers under each.
All worked well after some minor adjustment then I put the Vette up on the jack.....
There is always some minor flex but the passenger door would hardly open as the pin was too short by less than half a mm
Had not seen this before.
Placed my crossmember jack under the front and gave it a few turns by hand and then all worked great.
I measured the new one piece stainless door pins and found they were about 2 mm shorter than the originals.
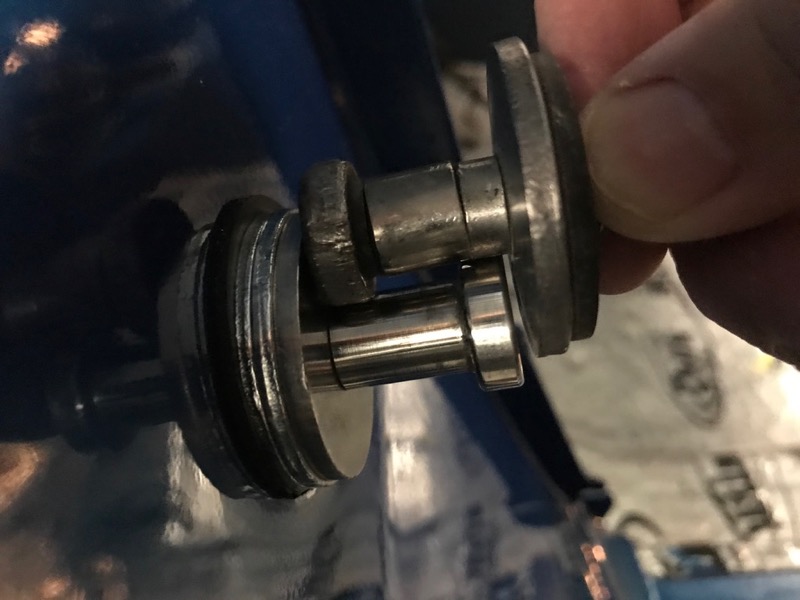
When compared the black aftermarket ones about 4-5 mm shorter.
Possibly a third washer or thicker ones is needed :-)
They were nice stainless steel ones with 2 washers under each.
All worked well after some minor adjustment then I put the Vette up on the jack.....
There is always some minor flex but the passenger door would hardly open as the pin was too short by less than half a mm
Had not seen this before.
Placed my crossmember jack under the front and gave it a few turns by hand and then all worked great.
I measured the new one piece stainless door pins and found they were about 2 mm shorter than the originals.
When compared the black aftermarket ones about 4-5 mm shorter.
Possibly a third washer or thicker ones is needed :-)
Last edited by CraigH; 04-10-2023 at 06:28 AM.
02-12-2019, 12:52 AM
#1410
Le Mans Master


I fitted new door sticker pins.
They were nice stainless steel ones with 2 washers under each.
All worked well after some minor adjustment then I put the Vette up on the jack.....
There is always some minor flex but the passenger door would hardly open as the pin was too short by less than half a mm
Had not seen this before.
Placed my crossmember jack under the front and gave it a few turns by hand and then all worked great.
I measured the new one piece stainless door pins and found they were about 2 mm shorter than the originals.
Possibly a third washer or thicker ones is needed :-)
 02-12-2019, 12:59 AM
#1411
Melting Slicks
Thread Starter
I spent a bit of time on the front apron today.
Looked fairly good but on close inspection it could do with some more work.
Started by sanding it all flat with 2000 wet and dry.
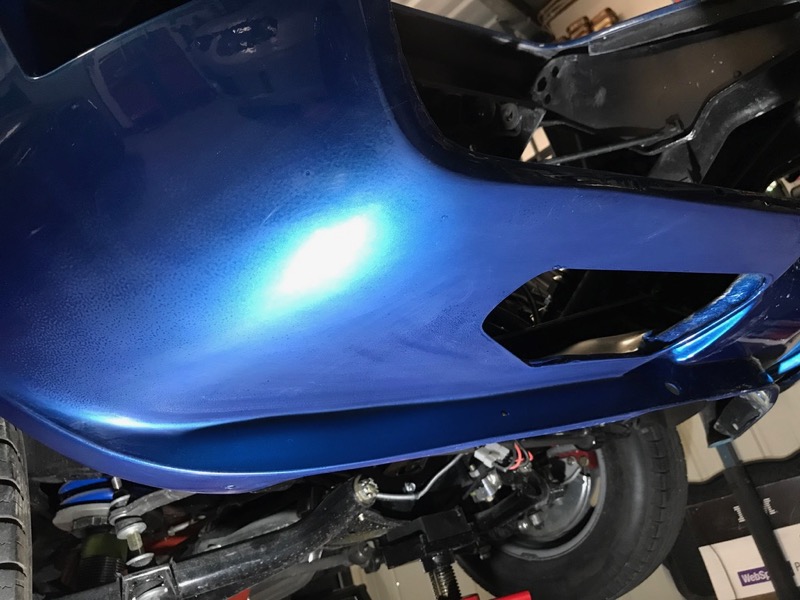
Followed by 3000 wet and dry, then some buffing compound. you can see the progress.
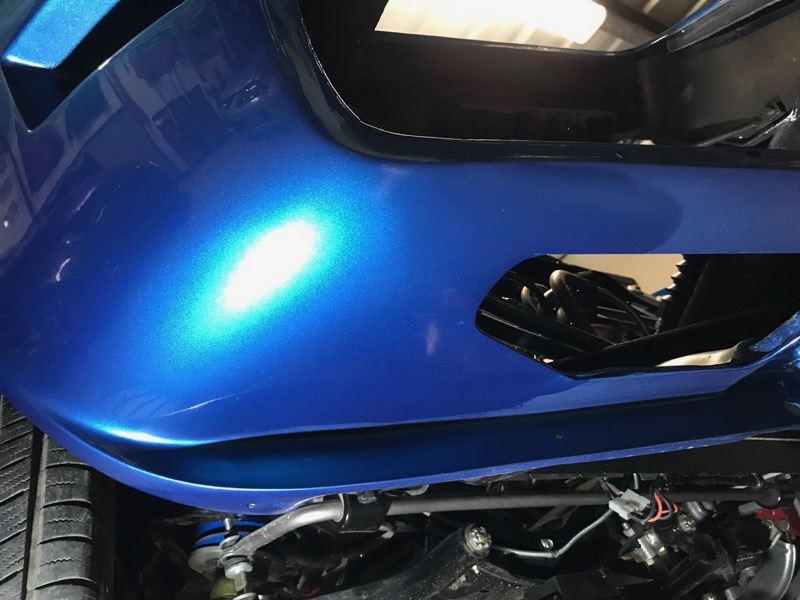
After an hour or two I am happy with how it looks..

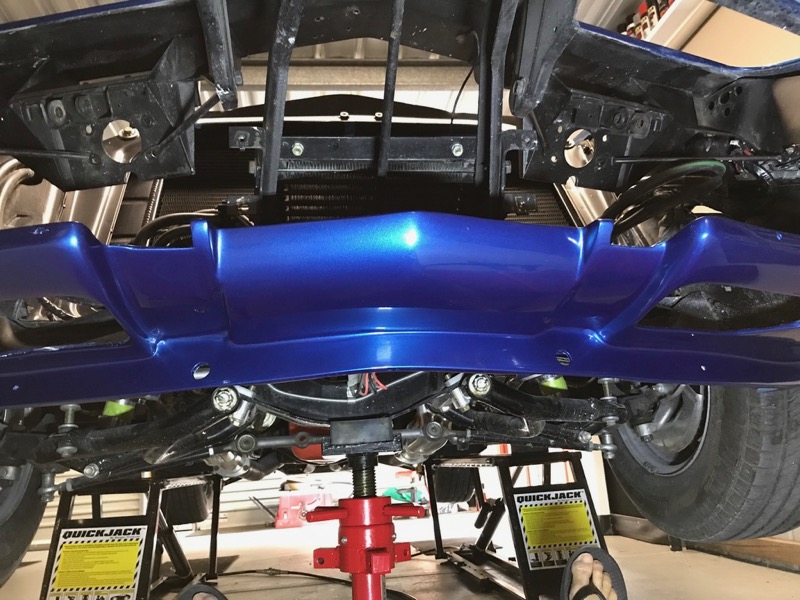
Shame it won't be seen once bars etc are on and car is back down.
Looked fairly good but on close inspection it could do with some more work.
Started by sanding it all flat with 2000 wet and dry.
Followed by 3000 wet and dry, then some buffing compound. you can see the progress.
After an hour or two I am happy with how it looks..
Shame it won't be seen once bars etc are on and car is back down.
Last edited by CraigH; 04-10-2023 at 06:28 AM.
02-12-2019, 04:12 AM
#1413


I spent a bit of time on the front apron today.
Looked fairly good but on close inspection it could do with some more work.
Started by sanding it all flat with 2000 wet and dry.

Followed by 3000 wet and dry, then some buffing compound. you can see the progress.

After an hour or two I am happy with how it looks..


Shame it won't be seen once bars etc are on and car is back down.
Looked fairly good but on close inspection it could do with some more work.
Started by sanding it all flat with 2000 wet and dry.
Followed by 3000 wet and dry, then some buffing compound. you can see the progress.
After an hour or two I am happy with how it looks..
Shame it won't be seen once bars etc are on and car is back down.
Last edited by SB64; 02-12-2019 at 04:14 AM.
02-12-2019, 04:18 AM
#1414
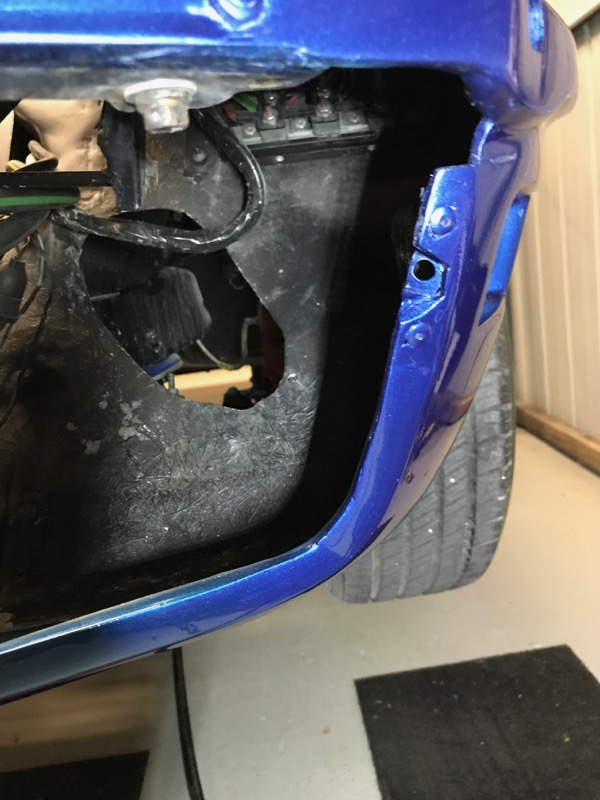
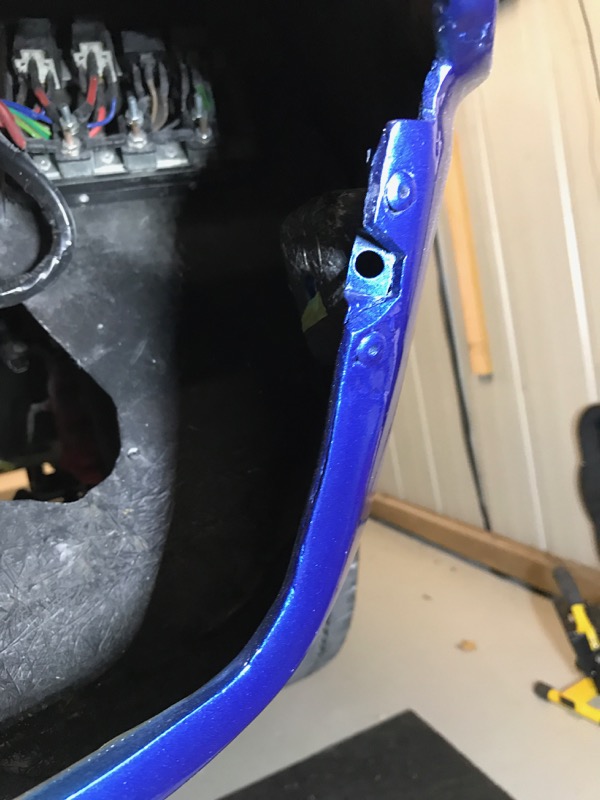
Craig, is there a riveted small plate attached to that panel for screwing the end of the outer part of the grill. That is all missing on my 71 I think and I was trying to remember what it all looked like.

 02-12-2019, 05:40 AM
#1416

 02-12-2019, 05:47 AM
#1417
Melting Slicks
Thread Starter
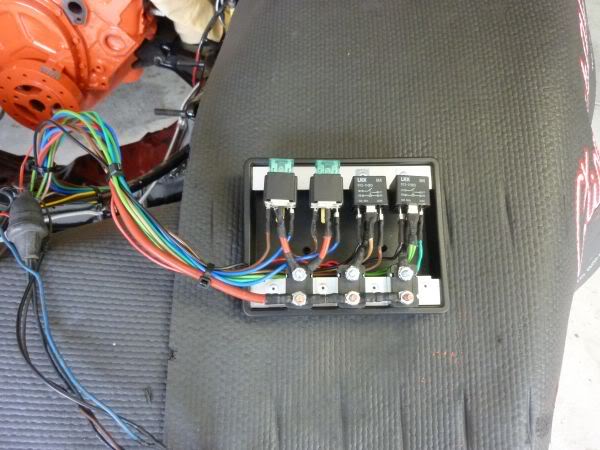
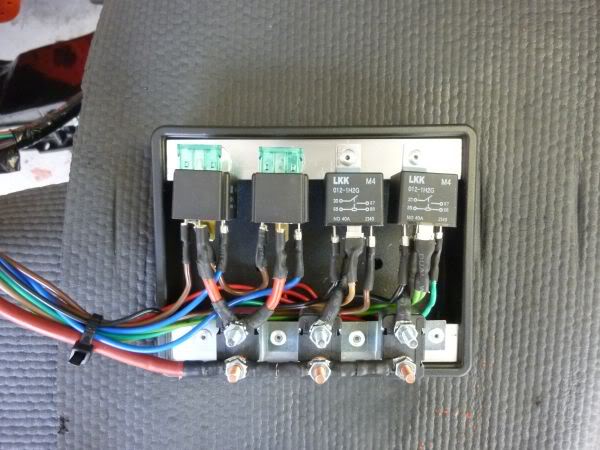
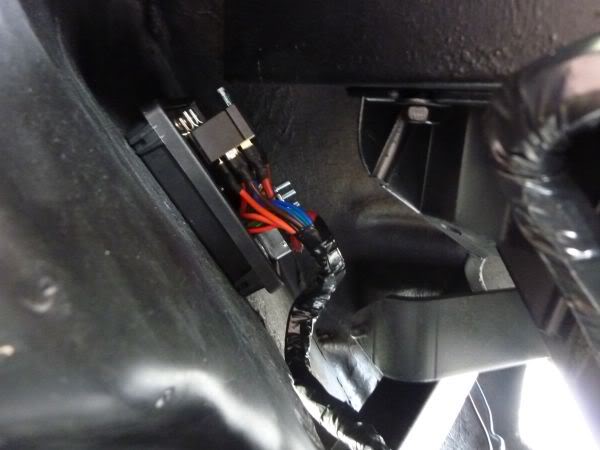
It’s my fuse and relay box for headlights and thermo fans Roger
its integrated into original harness the wrapped again.
its integrated into original harness the wrapped again.
Last edited by CraigH; 04-10-2023 at 06:27 AM.
02-12-2019, 10:53 AM
#1418
Burning Brakes
Member Since: Jul 2012
Location: Slovenia, EU
Posts: 1,116
Received 263 Likes
on
128 Posts
2017 C3 of Year Finalist
Craig nice work. I suggest good quality wax or sealant for that front apron so you can protect it as best as you can.
Craig can you please look at the front driver side at the radiator support if there are any wires bolted to the support for ground?
I have some wires there that looks like they are detached and I don't know where they should go.
Craig can you please look at the front driver side at the radiator support if there are any wires bolted to the support for ground?
I have some wires there that looks like they are detached and I don't know where they should go.
Last edited by Primoz; 02-12-2019 at 10:53 AM.
02-12-2019, 11:16 AM
#1419
Race Director
Very nice!