
1971 Journey
 02-12-2019, 02:54 PM
#1421
Melting Slicks

Thread Starter

Craig nice work. I suggest good quality wax or sealant for that front apron so you can protect it as best as you can.
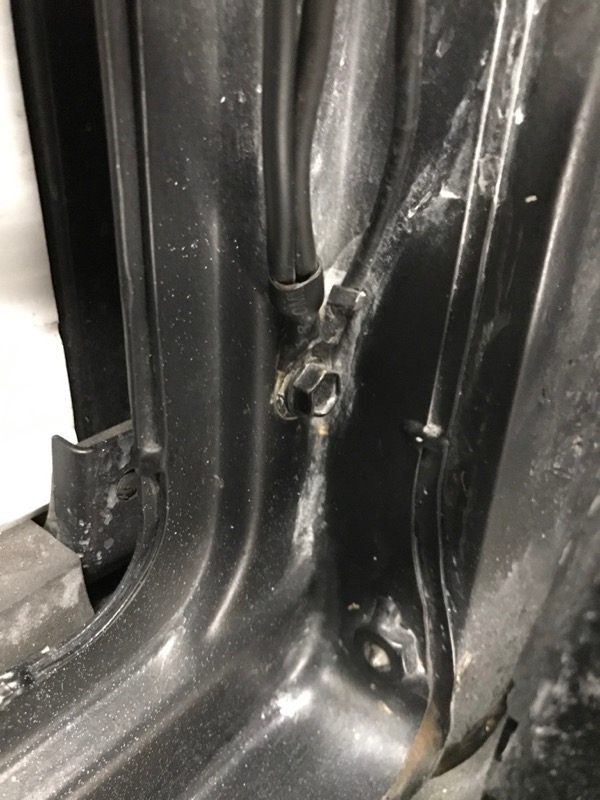
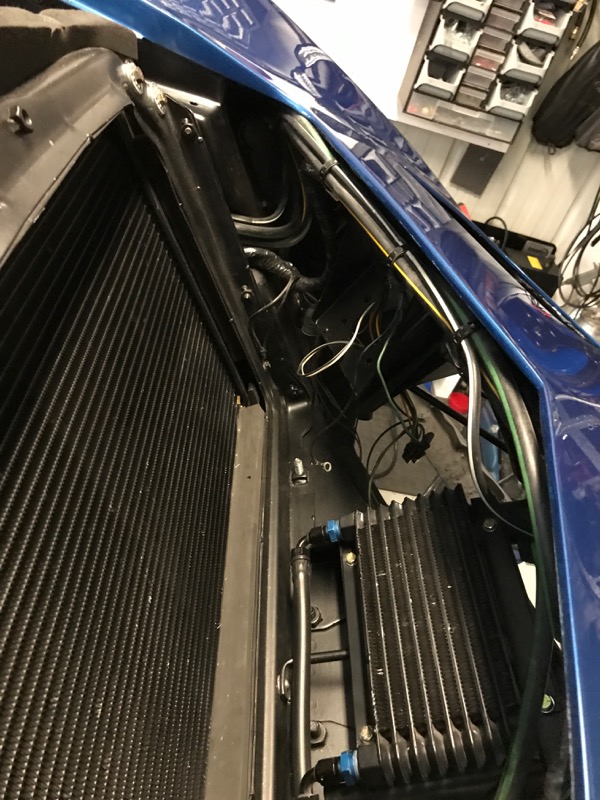
Craig can you please look at the front driver side at the radiator support if there are any wires bolted to the support for ground?
I have some wires there that looks like they are detached and I don't know where they should go.
Craig can you please look at the front driver side at the radiator support if there are any wires bolted to the support for ground?
I have some wires there that looks like they are detached and I don't know where they should go.

The following users liked this post:
Primoz (02-12-2019)
 02-19-2019, 11:18 PM
#1423
Melting Slicks
Thread Starter
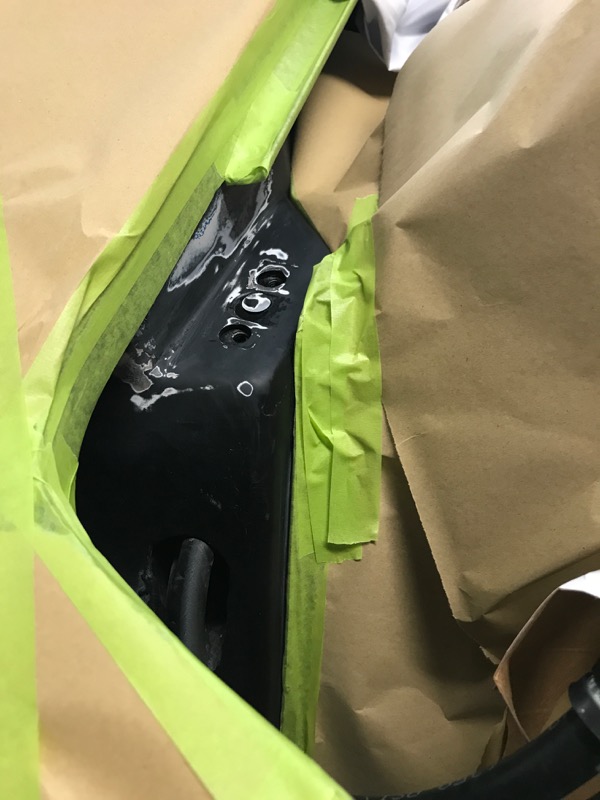
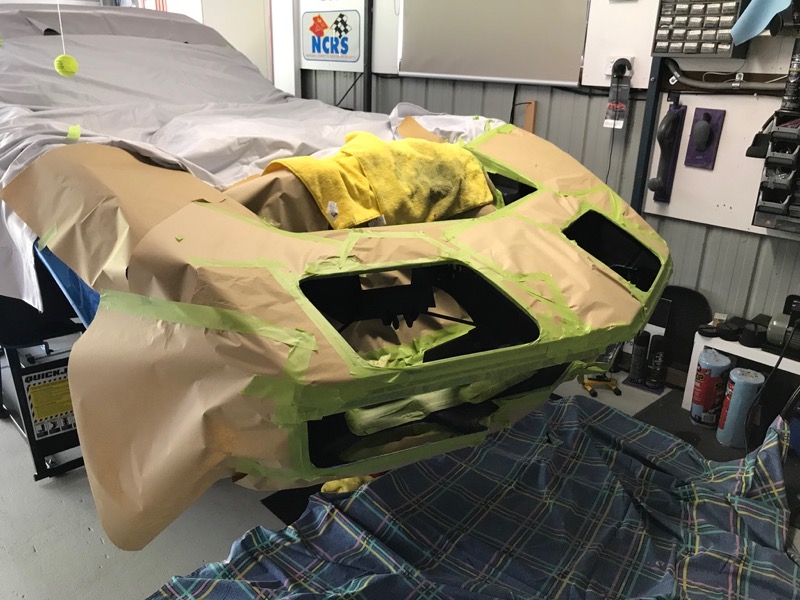
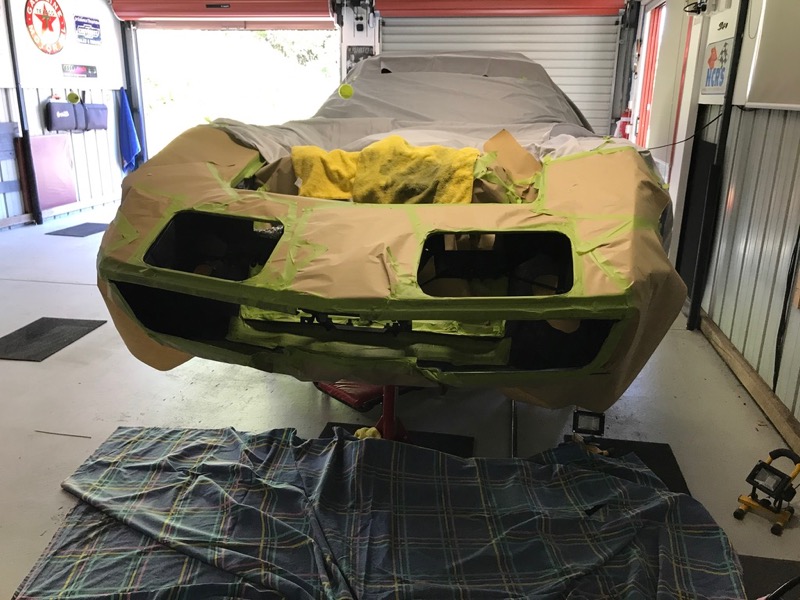
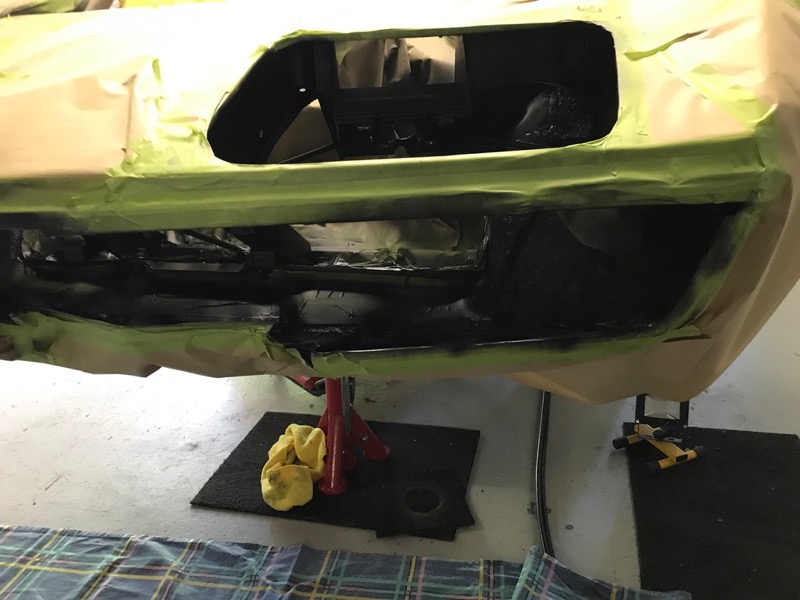
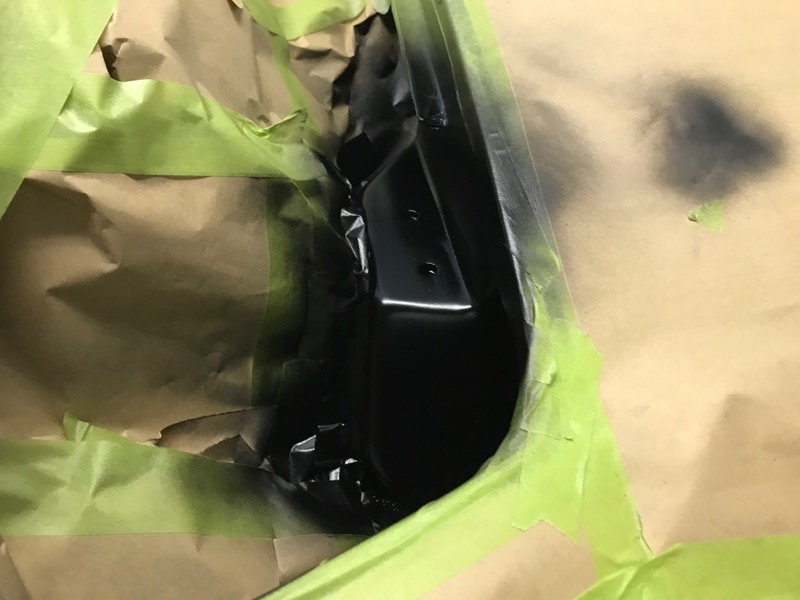
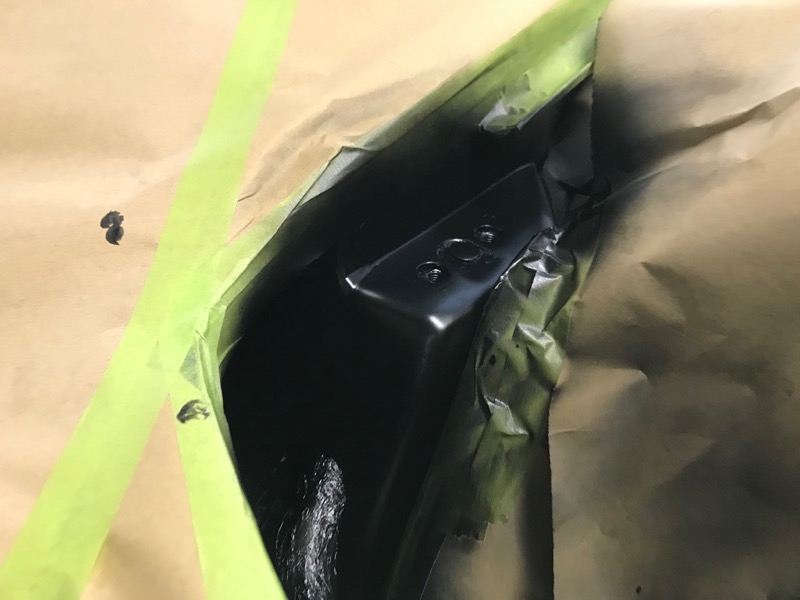
Started doing some touch on the engine bay, headlight area and front apron so i can start re assembling things.

Last edited by CraigH; 04-10-2023 at 06:30 AM.
The following users liked this post:
Primoz (02-19-2019)
The following users liked this post:
Metalhead140 (02-20-2019)
02-19-2019, 11:24 PM
#1425
Melting Slicks
Thread Starter
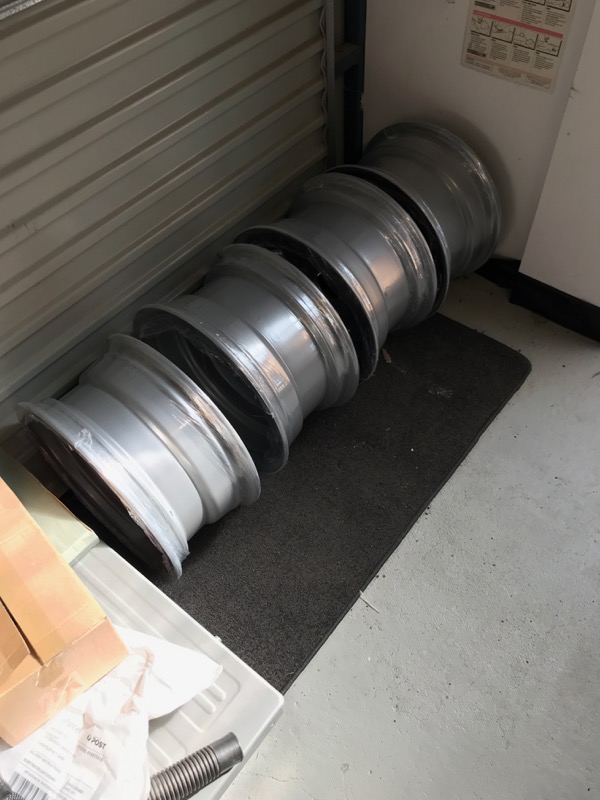
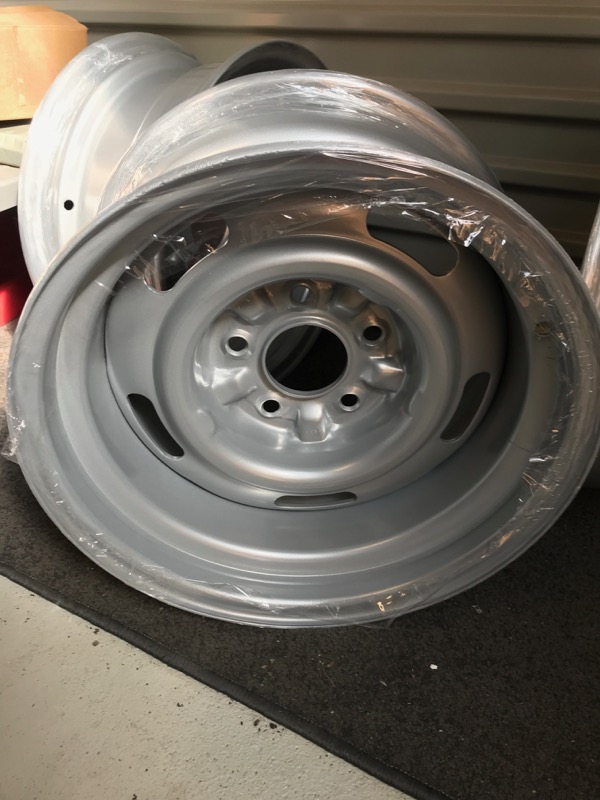
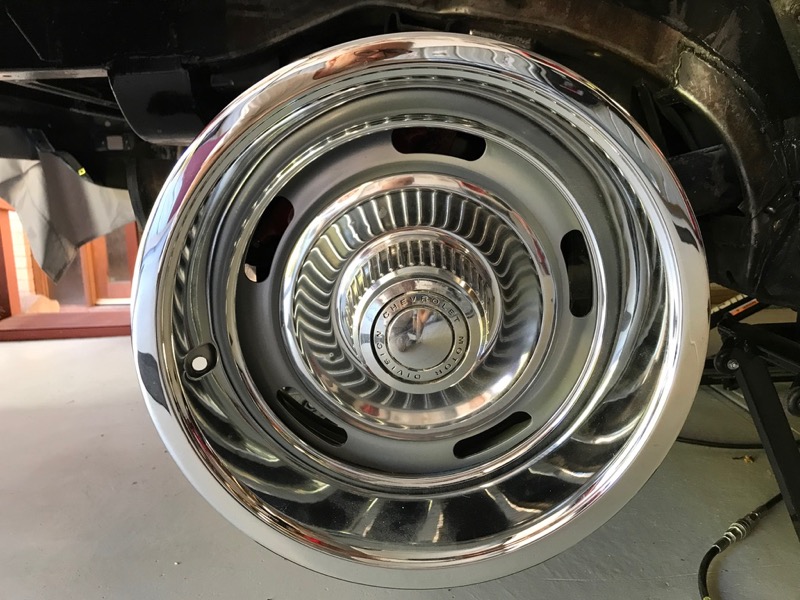
While I am putting Vette back together i thought I would get the 15' rims media blasted and powder coated.
Don't use them that much but thought they deserved some treatment.
Started by getting them stripped of tyres etc.
What do i find. !!!!
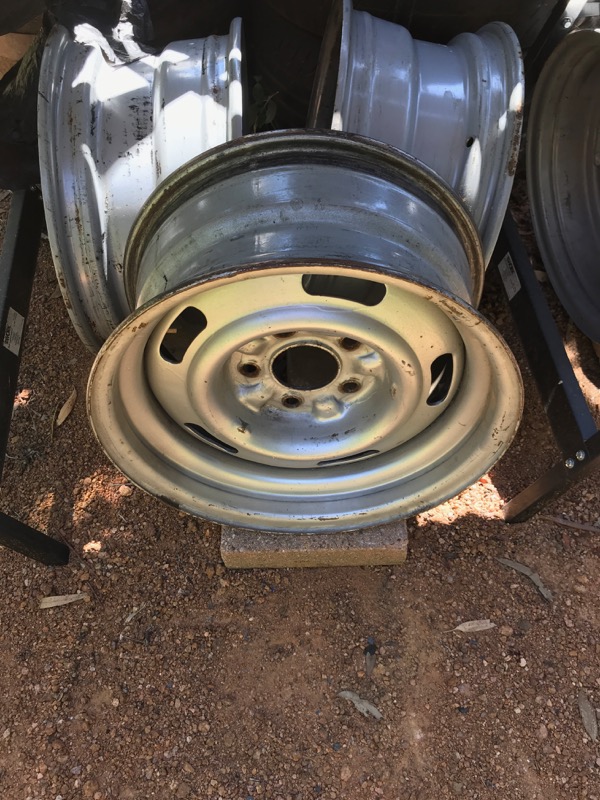

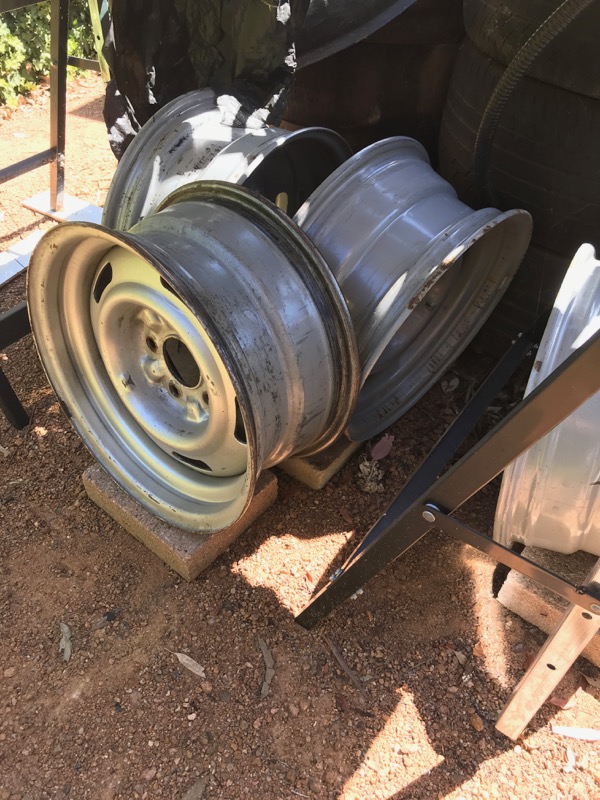
They are all 15x7" rims.
Correct offsets but an aftermarket set.
The spare was a Chevy rim but not for a corvette and also 15x7"
Luckily I had another Vette set i was given by a friend who upgraded his rims.
Got them stripped off and now I will have 4 15x8" rims for the Vette and a spare that is 15x7"
All at the powder coater to get done now.
Don't use them that much but thought they deserved some treatment.
Started by getting them stripped of tyres etc.
What do i find. !!!!
They are all 15x7" rims.
Correct offsets but an aftermarket set.
The spare was a Chevy rim but not for a corvette and also 15x7"
Luckily I had another Vette set i was given by a friend who upgraded his rims.
Got them stripped off and now I will have 4 15x8" rims for the Vette and a spare that is 15x7"
All at the powder coater to get done now.
Last edited by CraigH; 04-10-2023 at 06:29 AM.
02-19-2019, 11:28 PM
#1426
Le Mans Master


While I am putting Vette back together i thought I would get the 15' rims media blasted and powder coated.
Don't use them that much but thought they deserved some treatment.
Started by getting them stripped of tyres etc.
What do i find. !!!!


They are all 15x7" rims.
Correct offsets but an aftermarket set.
The spare was a Chevy rim but not for a corvette and also 15x7"
Luckily I had another Vette set i was given by a friend who upgraded his rims.
Got them stripped off and now I will have 4 15x8" rims for the Vette and a spare that is 15x7"
All at the powder coater to get done now.
Don't use them that much but thought they deserved some treatment.
Started by getting them stripped of tyres etc.
What do i find. !!!!
They are all 15x7" rims.
Correct offsets but an aftermarket set.
The spare was a Chevy rim but not for a corvette and also 15x7"
Luckily I had another Vette set i was given by a friend who upgraded his rims.
Got them stripped off and now I will have 4 15x8" rims for the Vette and a spare that is 15x7"
All at the powder coater to get done now.
 02-20-2019, 02:46 PM
#1427
Melting Slicks
Thread Starter
Yes very lucky years back i grabbed the set of rims that were destined for the trash.
also lucky I checked my rims for numbers etc once they were stripped and found they were wrong.
also lucky I checked my rims for numbers etc once they were stripped and found they were wrong.
02-22-2019, 02:53 AM
#1428
Melting Slicks
Thread Starter
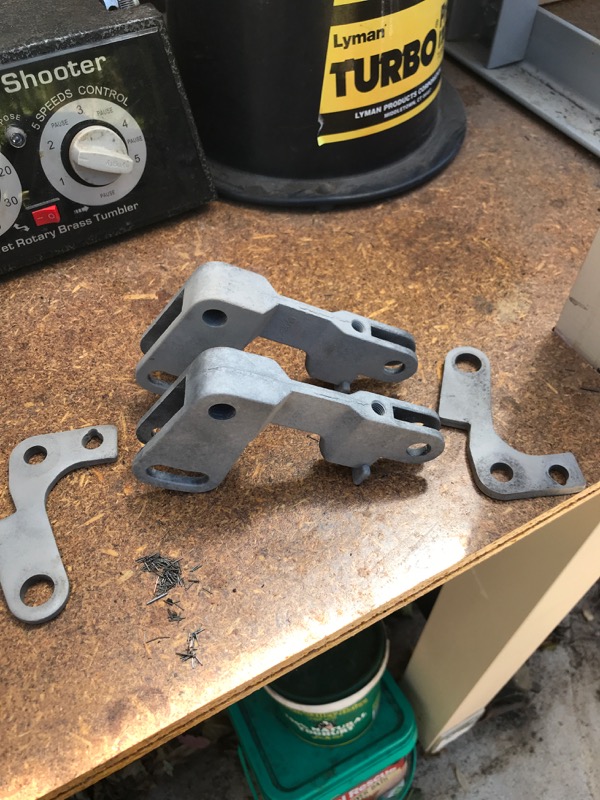
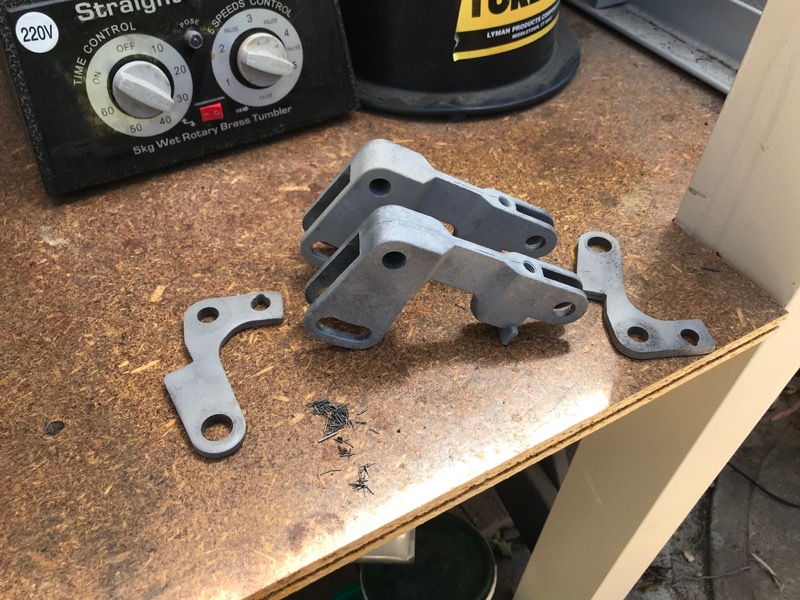
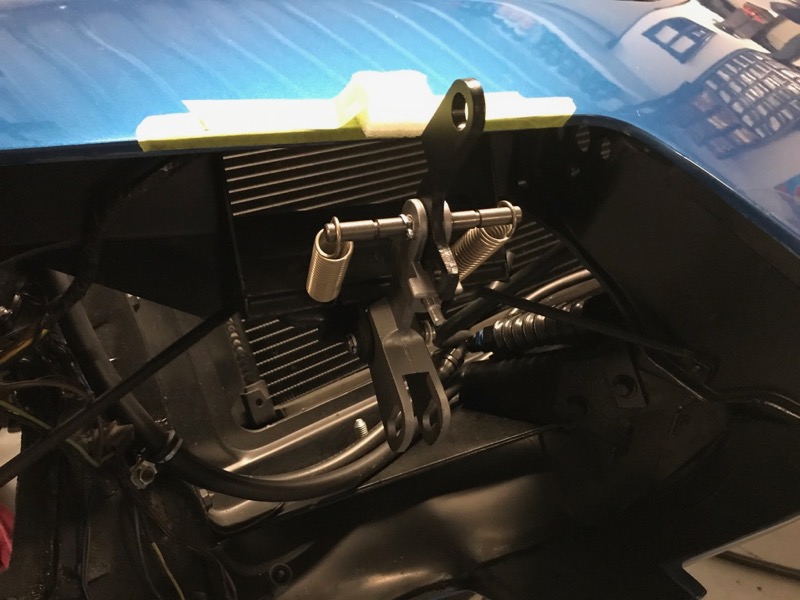
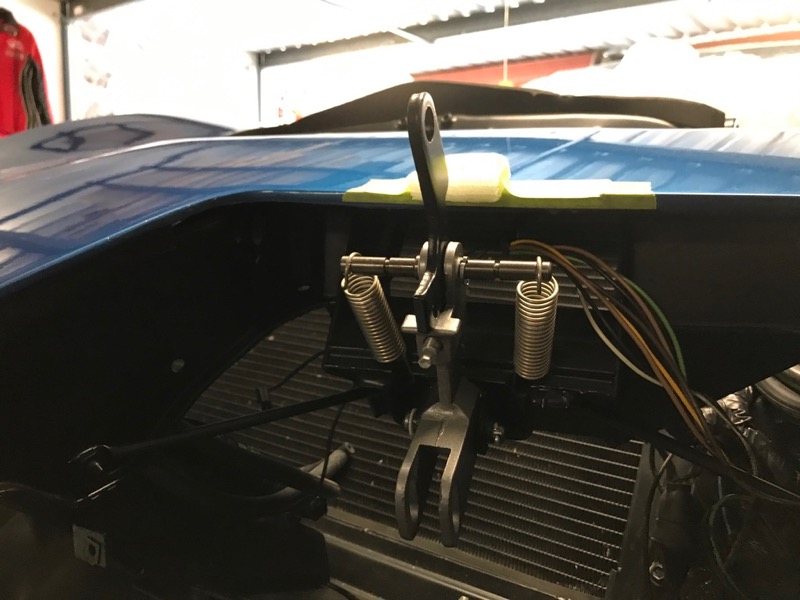
A bit of progress on the headlight mechanism parts.
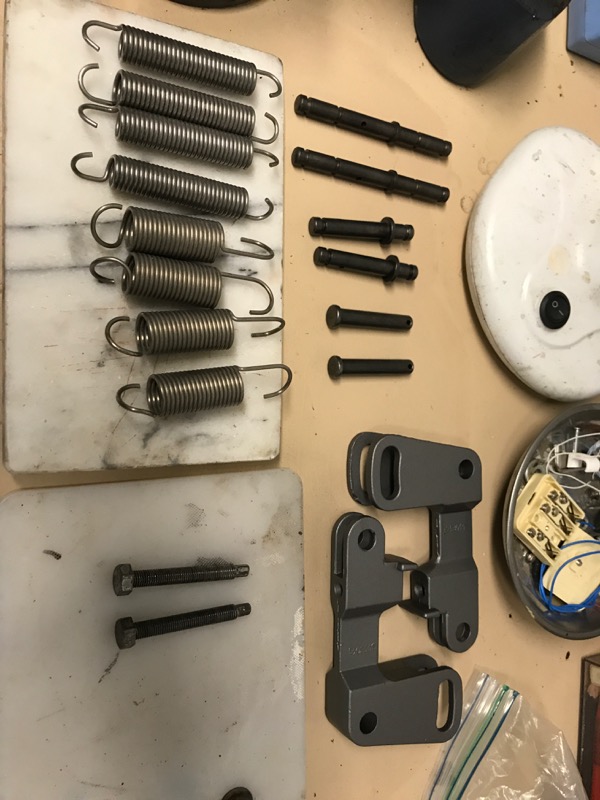
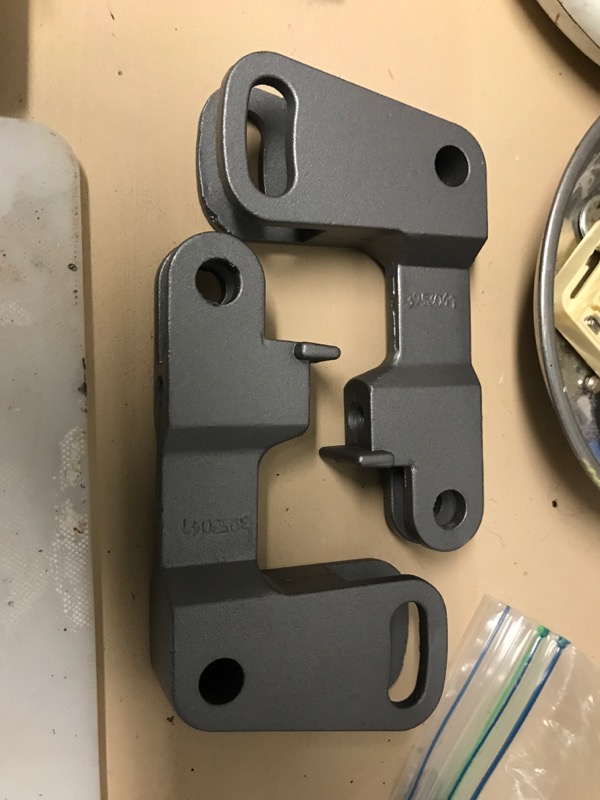
Should get more time next week so hope to have better progress.
Should get more time next week so hope to have better progress.
Last edited by CraigH; 04-10-2023 at 06:29 AM.
The following users liked this post:
Primoz (02-22-2019)
02-22-2019, 10:18 AM
#1429
Burning Brakes


Member Since: Jul 2012
Location: Slovenia, EU
Posts: 1,116
Received 263 Likes
on
128 Posts
2017 C3 of Year Finalist

Nice work Craig. I finally "beat" you on one thing. I did this couple of years ago on my 71. Be aware when you screw on the headlight actuators on how many turns you will screw them on, because if you make a couple of rounds too much your headlights won't rise enough and you will have problems adjusting the beam of the headlights and also mounting the headlight surround. And of course they won't be aligned with the rest of the body when they are retracted.
Just to warn you a bit. BTW how is your headlight support bar? Is it in good shape?
Just to warn you a bit. BTW how is your headlight support bar? Is it in good shape?
02-22-2019, 03:24 PM
#1430
Melting Slicks
Thread Starter
Nice work Craig. I finally "beat" you on one thing. I did this couple of years ago on my 71. Be aware when you screw on the headlight actuators on how many turns you will screw them on, because if you make a couple of rounds too much your headlights won't rise enough and you will have problems adjusting the beam of the headlights and also mounting the headlight surround. And of course they won't be aligned with the rest of the body when they are retracted.
Just to warn you a bit. BTW how is your headlight support bar? Is it in good shape?
Just to warn you a bit. BTW how is your headlight support bar? Is it in good shape?
my headlight support bar is fairly good condition.
The following users liked this post:
Primoz (02-22-2019)

The following users liked this post:
Primoz (03-06-2019)
03-10-2019, 09:56 PM
#1433


just came across this thread, very impressive. Your work along with the detail in your thread is great! Thanks for doing this. It can def help those of us starting out see how involved some aspects can be!
The following users liked this post:
CraigH (03-23-2019)
04-13-2019, 01:58 AM
#1434
Melting Slicks
Thread Starter
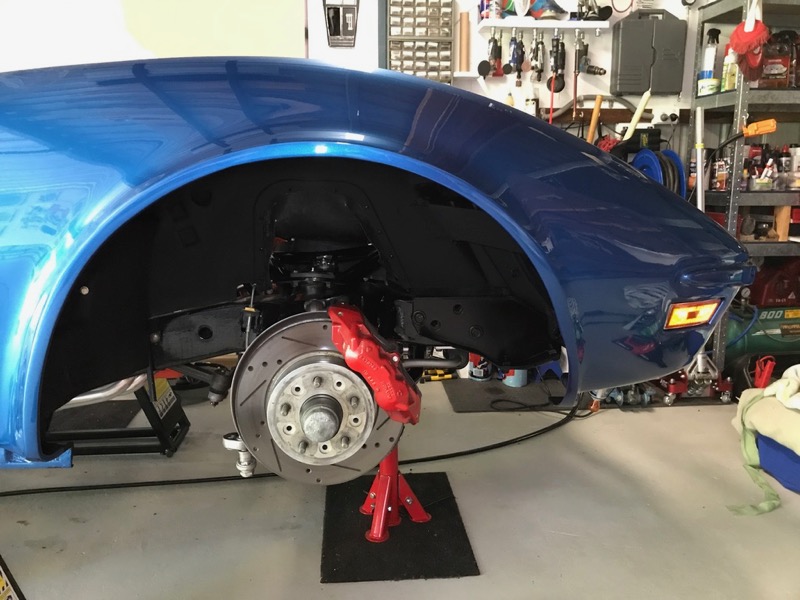
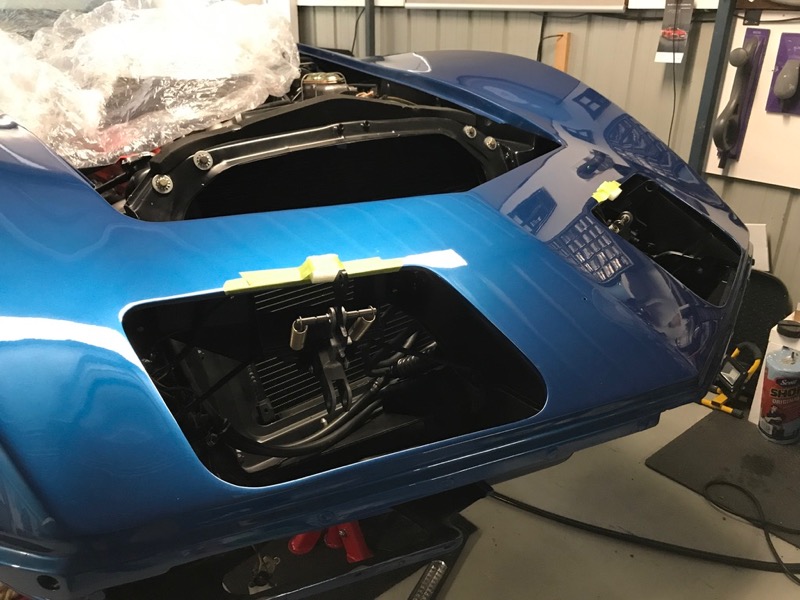
Started to do some more work for reassembly.
I cleaned up inside the front guards, replaced some of the missing seals, seam sealed it all then gave them a spray with bed-liner.
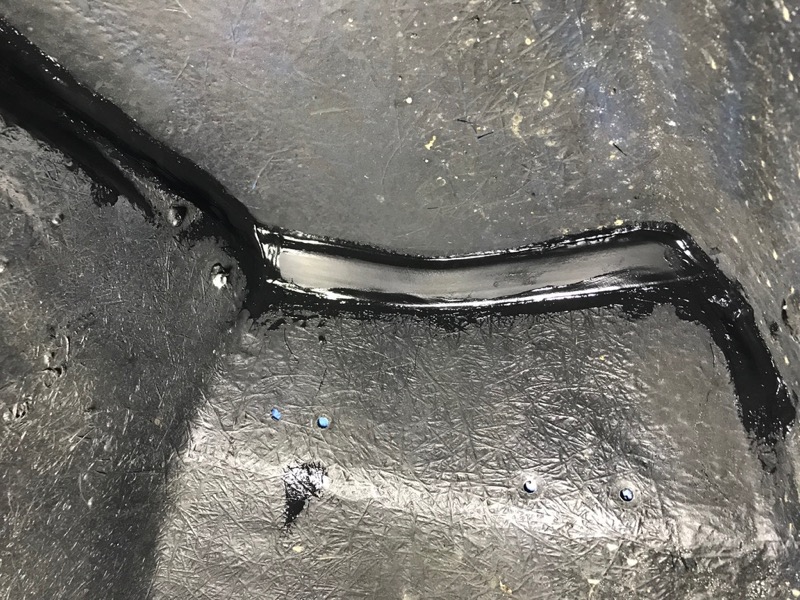
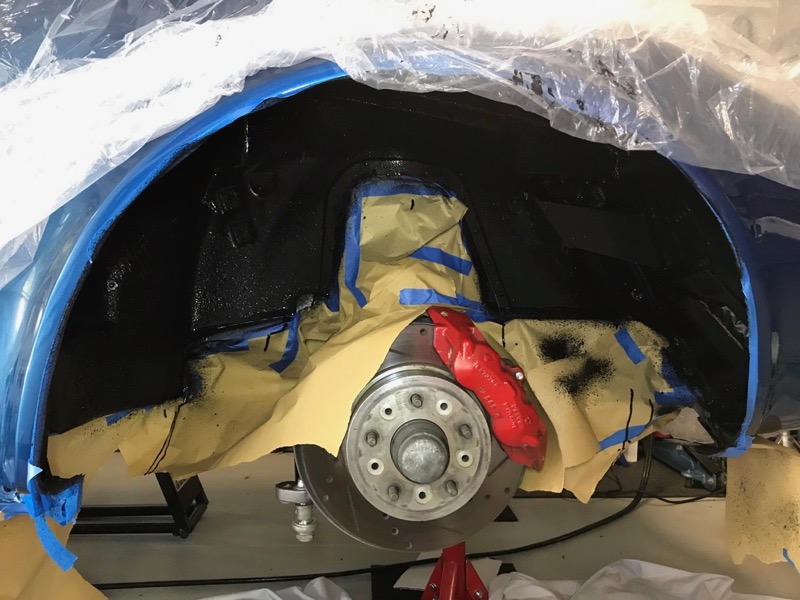
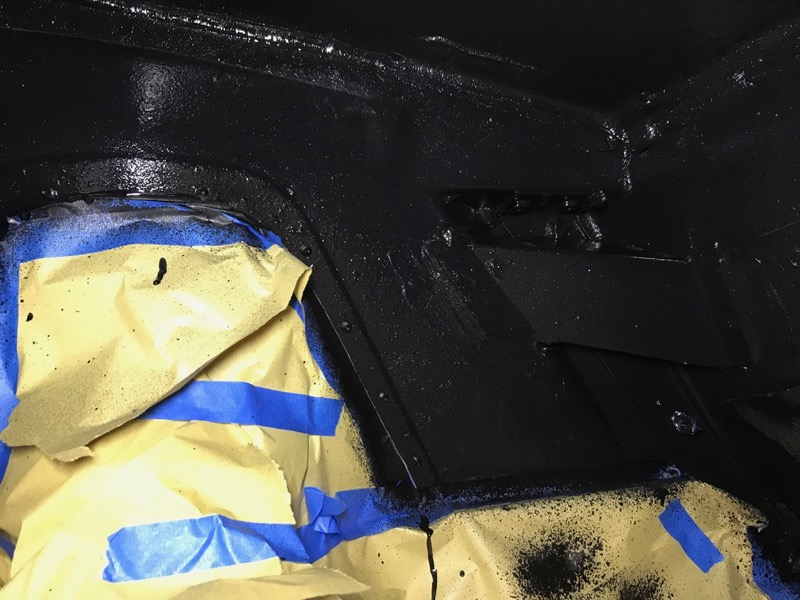
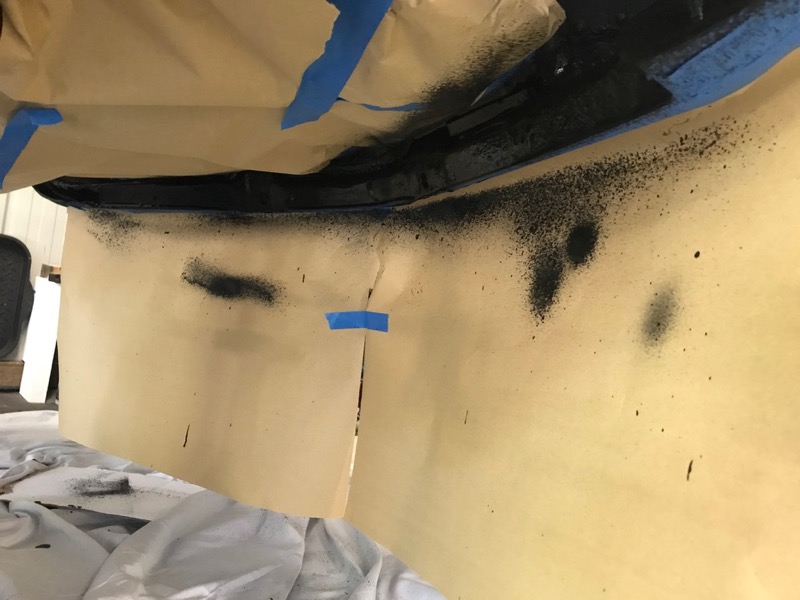
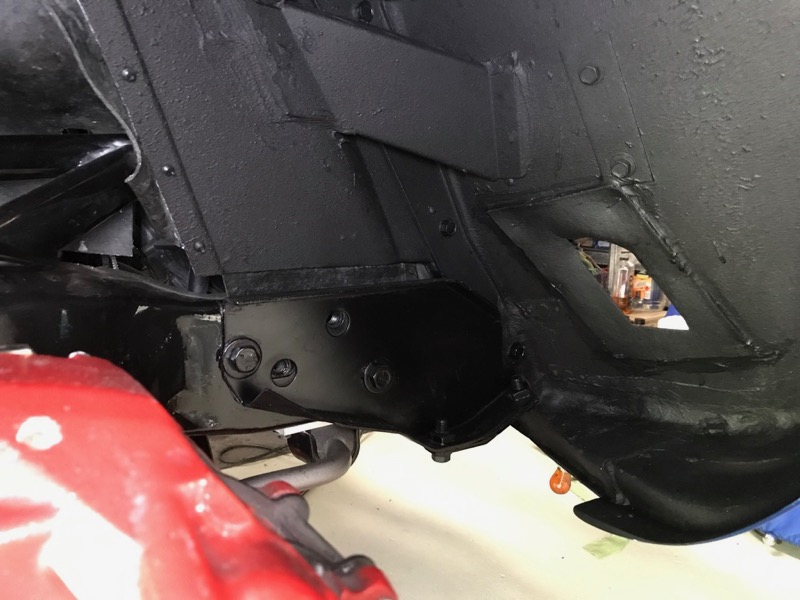
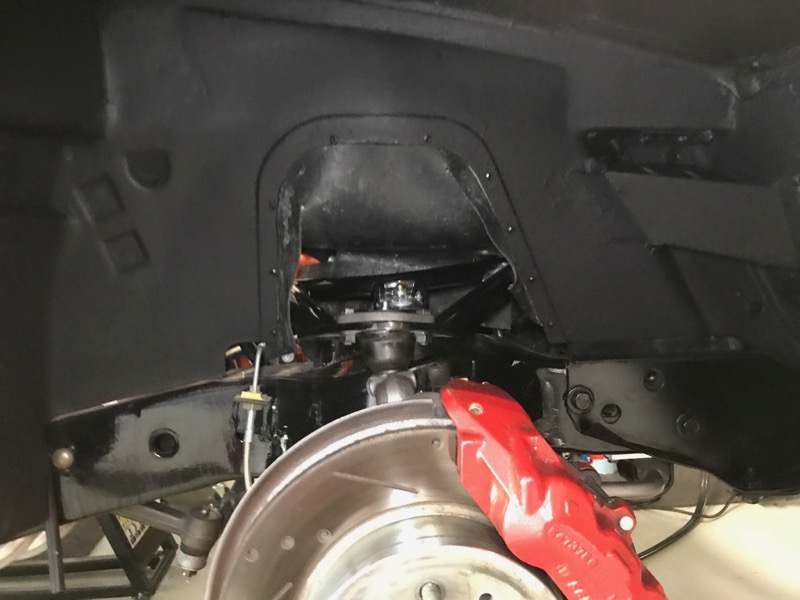
Also fitted the front side markers.
I cleaned up inside the front guards, replaced some of the missing seals, seam sealed it all then gave them a spray with bed-liner.
Also fitted the front side markers.
Last edited by CraigH; 04-10-2023 at 06:29 AM.
The following users liked this post:
PainfullySlow (04-30-2019)
The following users liked this post:
Primoz (04-13-2019)
The following 2 users liked this post by CraigH:
PainfullySlow (04-30-2019),
Primoz (04-13-2019)
04-13-2019, 06:52 AM
#1437


All looks great H, touchup work may be coming to an end? Really makes the beaitiful paint color pop! WOW
RVZIO
RVZIO
04-13-2019, 08:01 AM
#1438
Senior Member

Member Since: Jan 2008
Location: Easton, PA
Posts: 12,154
Received 2,031 Likes
on
1,103 Posts
St. Jude Donor '10

I appreciate the pictures, so thank you for posting. I am impressed with your paper prep for painting, and realize I need to do a better job of this myself. Thanks for the help.
David Howard
AllVettes4Me
David Howard
AllVettes4Me
04-13-2019, 10:05 AM
#1439
Race Director

A tip I�ve noticed on the forum in past threads that looks to work better than paper, is wrapping with aluminum foil.

