
First Timer - 1979 L82 Corvette Frame Off Restoration Thread - LOTS OF PICTURES!
 10-13-2013, 04:24 AM
#41
Safety Car


While you're thinking about next steps...take a minute and tell us about the tools you've used to pull the frame apart? Looks like you have three aluminum jacks so you must have access to some nice stuff. It would be interesting to learn what specialty items you've had to use during your frame off.
 10-13-2013, 11:29 AM
#42
Instructor

Thread Starter
Member Since: Feb 2005
Location: Asheville NC
Posts: 231
Likes: 0
Received 0 Likes
on
0 Posts

I Think the best thing to do is work on getting a rolling frame, makes it much easer to move around the shop and you can put wheel rollers under it once the suspension is back together. Are you going to make any mods to the suspension? No sense in doing work twice. Are you going to rebuild the Trailing arms? Are you leaving the stock rear and front springs? You have lots of choices to make.
While you're thinking about next steps...take a minute and tell us about the tools you've used to pull the frame apart? Looks like you have three aluminum jacks so you must have access to some nice stuff. It would be interesting to learn what specialty items you've had to use during your frame off.
Last edited by Chadillac2000; 01-09-2014 at 11:43 AM.
10-13-2013, 12:20 PM
#43
Burning Brakes

Keep the post coming with lots of pictures.. I'm in the middle of a frame off on my 73 here is what I did.
I sent the trailing arms and rear diff off to have rebuilt. The trailing arms went to vansteel
http://www.vansteel.com/index.cfm?fu...&SubGroup=1810
I sent the Rear diff to Vtech for rebuilding. I used their Box service (they sent me a box to ship it in)
http://www.vtechcorvette.com/
The rear spring I used a composite spring from VBP
The Front spring I used a coil over spring also from VBP
http://www.vbandp.com/
All 3 companies did a good job and are very responsive.
I'm not advertising for any of the companies just letting you know what I did and my experience with the company.
10-20-2013, 11:43 AM
#44
Instructor
Thread Starter
Member Since: Feb 2005
Location: Asheville NC
Posts: 231
Likes: 0
Received 0 Likes
on
0 Posts
I spent most of Monday and Tuesday getting the last bits removed from the frame, removing all attached bushings and disassembling the upper and lower control arms. But the good news is that this morning I was able to drop the car off to get sandblasted and powder-coated. $700 for the entire frame, cross-members, front tube, upper control arms, and lower control arms. Should be done early next week.


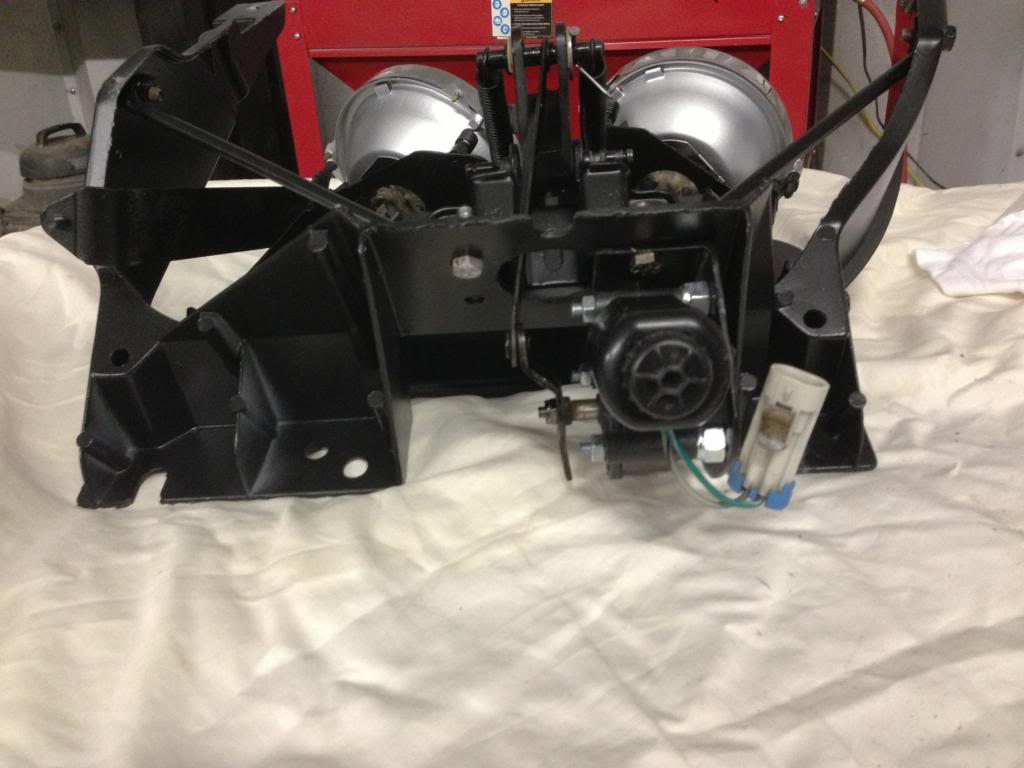
I was also able to remove the front bumper and headlight/bumper assembly.


I was also able to remove the front bumper and headlight/bumper assembly.
Last edited by Chadillac2000; 08-04-2014 at 12:12 PM.
10-24-2013, 02:29 PM
#45
Instructor
Thread Starter
Member Since: Feb 2005
Location: Asheville NC
Posts: 231
Likes: 0
Received 0 Likes
on
0 Posts
I should be getting the frame and other components back from being sandblasted and powder coated here in the next few days, so I thought it was time to start ordering some parts so we could start assembling a rolling frame here soon.
I went with the deluxe front rebuild kit with rubber bushings (didn't want to deal with the noise problems down the road and I'm looking for comfort over performance in this case) which includes: 4 Tie Rods Ends, 2 Tie Rod Sleeves, 4 Ball Joints, Ball Joint Rivets, 8 “A” Arm Shaft Bushings, Front Stabilizer Link Kit, 2 Upper Control Arm Bumpers, 2 Lower Control Arm Bumpers & 1 Heavy Duty Idler Arm.
With the 10% forum discount I opted for a set of KYB GR-2 shocks all around as well.
I'll be sure to post pictures as the parts start arriving and when we receive back the freshly powder-coated pieces.
Last edited by Chadillac2000; 08-04-2014 at 12:13 PM.
10-24-2013, 09:03 PM
#46
Burning Brakes
Don't forget your fuel lines and brake lines. I put these items on before putting the suspension on. If yours were in the shape like mine were I did not have a choice but replacing them. I believe having the suspension out of the way makes it easer with the brake/fuel lines. Also remember you have 3 lines part of the fuel lines. When I ordered mine I somehow forgot the line on the Drivers side.
10-25-2013, 02:21 PM
#47
Instructor
Thread Starter
Member Since: Feb 2005
Location: Asheville NC
Posts: 231
Likes: 0
Received 0 Likes
on
0 Posts
Don't forget your fuel lines and brake lines. I put these items on before putting the suspension on. If yours were in the shape like mine were I did not have a choice but replacing them. I believe having the suspension out of the way makes it easer with the brake/fuel lines. Also remember you have 3 lines part of the fuel lines. When I ordered mine I somehow forgot the line on the Drivers side.
Mine weren't in awful shape, but it'd much easier to just replace them and have peace of mind rather than spending all the time cleaning the old ones and making sure they aren't clogged, cracked, leaking, etc.
Last edited by Chadillac2000; 01-09-2014 at 11:44 AM.
10-28-2013, 01:36 AM
#48
Instructor
Thread Starter
Member Since: Feb 2005
Location: Asheville NC
Posts: 231
Likes: 0
Received 0 Likes
on
0 Posts
I didn't have too much time to dedicate to the Vette this weekend, but I was pretty excited to receive a portion of my first shipment from Willcox. Only took a few days for the deluxe rubber bushing kit for the front end to arrive and hopefully the shocks will show up soon.

I was also able to liquidate some of the stuff we had taking up stuff in our garage, so I was able to pick up some new tools. With a 20% off coupon, I was able to pick up this full size sandblasting cabinet for only about $160 dollars. Unfortunately, assembly was required and took forever, but eventually it was complete. Still need to rig up the shop vac to the dust port and rewire the power for the light. The AC adaptor was broken out of the box, but Harbor Freight refused to exchange just the power adaptor. They wanted the whole unit back, which just wasn't an option after I'd spent so much time assembling everything. Hopefully this will help cleaning up some of the smaller parts for painting, etc.

I was also able to liquidate some of the stuff we had taking up stuff in our garage, so I was able to pick up some new tools. With a 20% off coupon, I was able to pick up this full size sandblasting cabinet for only about $160 dollars. Unfortunately, assembly was required and took forever, but eventually it was complete. Still need to rig up the shop vac to the dust port and rewire the power for the light. The AC adaptor was broken out of the box, but Harbor Freight refused to exchange just the power adaptor. They wanted the whole unit back, which just wasn't an option after I'd spent so much time assembling everything. Hopefully this will help cleaning up some of the smaller parts for painting, etc.
Last edited by Chadillac2000; 08-04-2014 at 12:13 PM.
10-28-2013, 06:32 PM
#49
Burning Brakes
I got the same unit from HF and my adapter was also bad.. I had to chance the siphon tube as it would collapse and not allow media to the gun.
I just ordered my AC system from Vintage Air this morning. Hope it arrives so I can get the inside in and wired.
I just ordered my AC system from Vintage Air this morning. Hope it arrives so I can get the inside in and wired.
10-28-2013, 07:47 PM
#50
Instructor
Thread Starter
Member Since: Feb 2005
Location: Asheville NC
Posts: 231
Likes: 0
Received 0 Likes
on
0 Posts
I haven't done any research on the air components of my project yet. I'm interested to see how much of the OEM equipment still works properly as I continue through this process. It's always exciting receiving more parts.
Speaking of, my KY-B Excel shocks for all four corners came in today. Still waiting on the powdercoater though so we can go retrieve the frame...

Last edited by Chadillac2000; 08-04-2014 at 12:14 PM.
10-28-2013, 08:06 PM
#51
Burning Brakes
I used flexible wire conduit. It will not collapse. You can get at Home depot. I have removed all the vacuum systems in my 73 so I have to replace the system with a all electric AC system. I'm wiring the dash so its a good time to get all the AC systems in. I put coil overs in the front by VBP, Have not put shocks on the rear yet but plan on purchasing bilistein shocks
Last edited by Tim 1973; 10-28-2013 at 08:18 PM.
10-28-2013, 09:49 PM
#52
Instructor
Thread Starter
Member Since: Feb 2005
Location: Asheville NC
Posts: 231
Likes: 0
Received 0 Likes
on
0 Posts
I used flexible wire conduit. It will not collapse. You can get at Home depot. I have removed all the vacuum systems in my 73 so I have to replace the system with a all electric AC system. I'm wiring the dash so its a good time to get all the AC systems in. I put coil overs in the front by VBP, Have not put shocks on the rear yet but plan on purchasing bilistein shocks
I've contemplated getting rid of the vacuum system in this one as well.
All those VBP goodies look very nice, but most of their stuff (or the HD Bilstein shocks) don't really fit my bill when I'm just looking to flip this car ultimately.
Last edited by Chadillac2000; 01-09-2014 at 11:44 AM.
10-28-2013, 10:40 PM
#53
Burning Brakes
Mine will be another Sunday driver.. Putting a 454 LSX in it..
Changing the headlights to electric is easy.. about 2 hours of work.
Changing the headlights to electric is easy.. about 2 hours of work.
Last edited by Tim 1973; 10-28-2013 at 10:58 PM.
 10-28-2013, 11:04 PM
#55
Drifting

I was also able to liquidate some of the stuff we had taking up stuff in our garage, so I was able to pick up some new tools. With a 20% off coupon, I was able to pick up this full size sandblasting cabinet for only about $160 dollars. Unfortunately, assembly was required and took forever, but eventually it was complete. Still need to rig up the shop vac to the dust port and rewire the power for the light. The AC adaptor was broken out of the box, but Harbor Freight refused to exchange just the power adaptor. They wanted the whole unit back, which just wasn't an option after I'd spent so much time assembling everything. Hopefully this will help cleaning up some of the smaller parts for painting, etc.

Nice work by the way. I'm envious as I don't think doing a body off the frame will be in the cards for me financially. Looking forward to the ongoing progress.
10-28-2013, 11:10 PM
#56
Burning Brakes
Last edited by Tim 1973; 10-28-2013 at 11:16 PM.
 10-29-2013, 11:56 AM
#58
Instructor
Thread Starter
Member Since: Feb 2005
Location: Asheville NC
Posts: 231
Likes: 0
Received 0 Likes
on
0 Posts
I've been looking at this same unit for a while now. Let me know what you think of it. I plan on tearing into my car next summer when it gets too hot to drive it here in Florida.
Nice work by the way. I'm envious as I don't think doing a body off the frame will be in the cards for me financially. Looking forward to the ongoing progress.
Nice work by the way. I'm envious as I don't think doing a body off the frame will be in the cards for me financially. Looking forward to the ongoing progress.
here is a link to help
http://http://mcspeed.homestead.com/Our_Products.html
[IMG]http://i1267.photobucket.com/albums/jj557/tims_place/hed4.jpg[IMG]
http://http://mcspeed.homestead.com/Our_Products.html
[IMG]http://i1267.photobucket.com/albums/jj557/tims_place/hed4.jpg[IMG]
It looks like they are out of business.
[IMG]http://i240.photobucket.com/albums/ff122/Maverickmk/McSpeed_zpsdaab0217.jpg[IMG]
[IMG]http://i240.photobucket.com/albums/ff122/Maverickmk/McSpeed_zpsdaab0217.jpg[IMG]
Last edited by Chadillac2000; 01-09-2014 at 11:45 AM.
10-29-2013, 01:04 PM
#59
Burning Brakes
I posted the link as it gives you step by step instructions, brackets are easy to make. You can go to the Junk yard or get the motors o on ebay. I went to pick and pull and got everything I needed for $20.00 took mine off a 93 firebird.
10-29-2013, 02:30 PM
#60
Instructor
Thread Starter
Member Since: Feb 2005
Location: Asheville NC
Posts: 231
Likes: 0
Received 0 Likes
on
0 Posts
Last edited by Chadillac2000; 01-09-2014 at 11:46 AM.