When you click on links to various merchants on this site and make a purchase, this can result in this site earning a commission. Affiliate programs and affiliations include, but are not limited to, the eBay Partner Network.
I spent between an absurd and stupid amount of time prepping the underside of the hand laid high-rise hood. Went through an entire quart of VPA. The result is not perfect but I'll stop here with the VPA. There comes a time when you must declare things good enough.
I recommend that you put on your dentist hat while doing this kind of prepping. With a little pick, poke around the pin holes you might find. You may discover large hidden cavities underneath the surface that need to be taken care of. I found a few as you can see in the pictures.
Also started to graft the old fender opening onto the flared fender. I'm currently doing the VPA phase on the outside, and then I'll do the glassing and VPA on the inside.
Surprise: All this takes a lot of time.
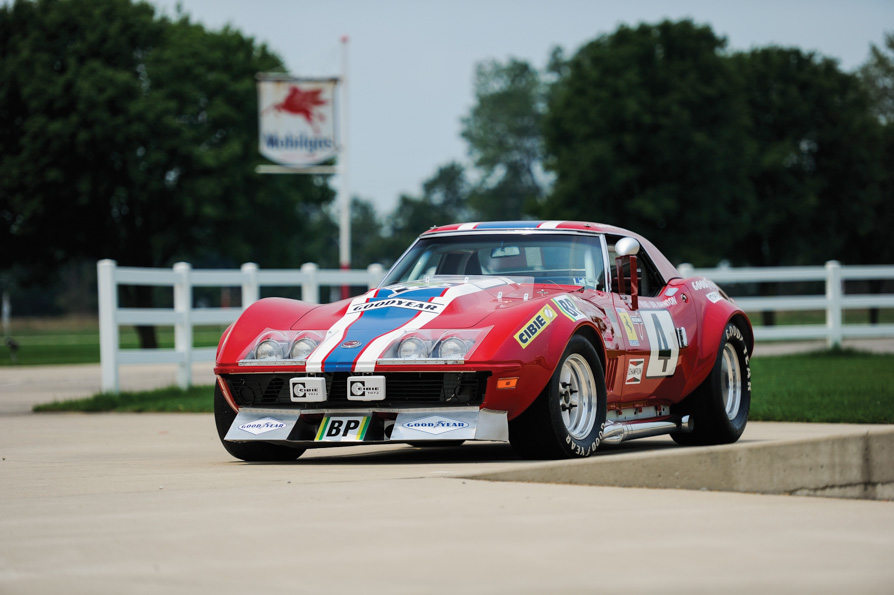
Lastly, I'm excited about a gift I received yesterday from my sister in France. It's a complete Cibi� fog lights kit - original, unused, made in France. The bumperettes and center fiberglass will be chopped off for a single wide opening. I'm trying to copy the look of those icons.
Hey Dave, man the underside of the hood was a massive space to VPA and sand. I know you are glad to see that done. Great gift from your sister also. Side vents are coming along. I know what you mean about pin holes and small repairs. I have been going over the body for a second week. In and out of the sun to find repairs. Anyway what do say, the beat goes on?
RVZIO
Hey RVZIO, yep I covered and sanded that hood several times. The beat goes on, every evening for an hour at least.
Good luck with your '69 project. -R�gis
Not this time......I learned to wear painter's cover-alls before looking at build threads (of course, it took three years to figure out the itching was related to fiberglass)
Hey RVZIO, yep I covered and sanded that hood several times. The beat goes on, every evening for an hour at least.
Good luck with your '69 project. -R�gis
Don't know where I got Dave from. Sorry about that. I'll just stick to the post name RBrid. Thanks for the heads up!
We had a bit of snow here and it got too cold to work in the unheated garage for a few days. It's a problem for glassing and VPAing which require a minimum ambient temperature, and it's a problem in general for skinny moi So I decided to build a little heatable booth. Final exterior size is 72"W x 81"D x 77"H and it heats up within minutes. Winters will be more productive from now on.
Grafting of the fender opening on the driver side is almost complete. The glassing on the inside is done. Just a little VPA fine tuning is still required. Be careful with hidden air pockets in the body parts you buy. When I see a little hole, I poke around with a pick like a dentist and discover cavities here and there. Then I sand them and fill them with VPA - without local anesthesia. I also strengthened the wheel well edges by adding about 3/16" of VPA. Still a lot of prepping to do on this fender, like grafting the front flange from my original fender.
It was Christmas before Christmas this week. I bought Doug's D380-SS and D930-SS. Beauties for the beast. And I know many of you wonder if headers can be used in lieu of a french horn and the answer is no
This has got to be one of the best body off rebuilds i have ever followed. Mine took me two years to complete. I like the direction you took with the car, can't wait to see the finished product.
I think there's been some horn tooting... it's even a french tooting that horn.
I beg to differ. I'm building a 95 decibels vette with a flashy race livery, but I don't like to show off, really.
Originally Posted by Grumpy 427
This has got to be one of the best body off rebuilds i have ever followed. Mine took me two years to complete. I like the direction you took with the car, can't wait to see the finished product.
Thank you sir! Two years is quick. With my ~400 hours/year pace, I'm far from done.
What I did next was bracing the inner skirt with wood supports. It's not glued on yet but positioned where I think it should be, and not moving because of those wooden jigs. A coming challenge will be to glue it on exactly as it is positioned now.
Then I cut off the top of the flared fender and made it thinner where it's backing against the bonding strip (otherwise it would stick out too much).
Because the fender did not come with the front flange, I decided to cut off a piece from the original fender to graft it to the new one. It required a lot of meticulous measuring, cutting and grinding. I used a few stainless steel brackets (that are meant to attach fiberglass bumpers) and washers to align the old and new pieces. Then I added some temporary VPA to fuse the 2 together. Glassing the inside comes next, and then the outside.

 10-21-2017, 06:03 PM


 So I decided to build a little heatable booth. Final exterior size is 72"W x 81"D x 77"H and it heats up within minutes. Winters will be more productive from now on.

