C3 General General C3 Corvette Discussion not covered in Tech
Sponsored by:
Sponsored by:

What did you do to your C3 today?

Thread Tools
 
Search this Thread
 
Old 02-10-2016, 09:47 AM
  #1001  
MSGT-R
Pro
 
MSGT-R's Avatar
 
Member Since: Oct 2013
Location: Denver CO
Posts: 560
Received 85 Likes on 65 Posts

Default

Originally Posted by mardyn
Next on my agenda is to get the car over on the lift and replace all the rusted up/frozen
parking brake hardware in the rear rotors...

Any advice or tips would certainly be welcomed before I get started.

mardyn
Needle nose pliers to reach the hold-down springs through those little bitty holes. Replace with the stainless steel hardware. If the star wheels are stuck, don't waste your time trying to free them, they come in the kit.
Old 02-11-2016, 11:22 AM
  #1002  
madam
Instructor
 
madam's Avatar
 
Member Since: Feb 2013
Location: Illinois
Posts: 193
Received 2 Likes on 2 Posts
Default

Originally Posted by slickfx3
i like your tires, size? can you still get those?
Size is P235/60 R15
Tiger Paw CTS (ralley edition)

Diameter = 26.1 (my speedo reads around 5 mph to high)
Width = 9.25''
Sidewall height = 5.55''
Circumference = 82''
Rev per Mile = 772

Not sure if they are still avail. I went to Uniroyal's site. Looks like they still sell Tiger Paws but not sure if they are available in raised white letter.
Old 02-11-2016, 03:16 PM
  #1003  
Strokemyaxe
Burning Brakes
 
Strokemyaxe's Avatar
 
Member Since: Jul 2014
Location: Arlington TX
Posts: 829
Received 52 Likes on 50 Posts
Default

Installed Flowtech Headers. Fit Perfectly. Only thing needed to mod is the starter ground wire.
Old 02-11-2016, 04:32 PM
  #1004  
tonak
Safety Car
 
tonak's Avatar
 
Member Since: Nov 2008
Location: Colorado
Posts: 4,356
Received 9 Likes on 4 Posts

Default

I drove mine
Old 02-11-2016, 09:54 PM
  #1005  
313hitman
Instructor
 
313hitman's Avatar
 
Member Since: Jul 2014
Location: clinton township Michigan
Posts: 138
Received 3 Likes on 3 Posts
Default

cleaned up the differential carrier and coated it with alodine to prevent future oxidation.
Old 02-11-2016, 11:55 PM
  #1006  
doorgunner
Nam Labrat

Support Corvetteforum!
 
doorgunner's Avatar
 
Member Since: Sep 2013
Location: New Orleans Loo-z-anna
Posts: 33,897
Received 4,174 Likes on 2,736 Posts

Default

I installed the floor extension on my Cargo modification......

(Only because the car was a basket case)


Last edited by doorgunner; 02-11-2016 at 11:59 PM.
Old 02-12-2016, 11:11 AM
  #1007  
tyancey00
Burning Brakes
Support Corvetteforum!
 
tyancey00's Avatar
 
Member Since: Jan 2006
Location: St. Louis MO
Posts: 1,019
Likes: 0
Received 17 Likes on 17 Posts

Default

We have been fitting and sanding. Got everything to fit and ready for primer!!


Yup, that is me taking a picture of my buddy doing the work. Perfect!!
Old 02-12-2016, 11:22 AM
  #1008  
AboveTheLogic
Burning Brakes
 
AboveTheLogic's Avatar
 
Member Since: Apr 2013
Location: Las Vegas NV
Posts: 1,175
Received 102 Likes on 82 Posts

Default

Originally Posted by tyancey00
Yup, that is me taking a picture of my buddy doing the work. Perfect!!
I have more pictures of my wrenching buddy working on my car than I do of me
Old 02-12-2016, 12:20 PM
  #1009  
chazde3
Drifting
 
chazde3's Avatar
 
Member Since: Mar 2013
Location: Lansing MI
Posts: 1,927
Received 310 Likes on 254 Posts

Default

I removed the brake line from the master cylinder, removed the parking brake cable and assembly and removed the seat belt cable that connected the belts to the chassis. Everything is looking to be on track for removing the chassis from the car tomorrow.
Old 02-12-2016, 12:48 PM
  #1010  
doorgunner
Nam Labrat

Support Corvetteforum!
 
doorgunner's Avatar
 
Member Since: Sep 2013
Location: New Orleans Loo-z-anna
Posts: 33,897
Received 4,174 Likes on 2,736 Posts

Default

I finished the cargo extension.....now there is plenty of room for my wife's suitcases on those long road trips.........


Old 02-12-2016, 12:52 PM
  #1011  
MSGT-R
Pro
 
MSGT-R's Avatar
 
Member Since: Oct 2013
Location: Denver CO
Posts: 560
Received 85 Likes on 65 Posts

Default The battle continues

Still working on my Frankenvette. Boy, I am really sick of cleaning! I think my garage floor will never be the same.

After the rear suspension goes back in, I start on brakes.
Attached Images  
Old 02-12-2016, 01:40 PM
  #1012  
brit vet
Melting Slicks
 
brit vet's Avatar
 
Member Since: Mar 2003
Location: Manchester
Posts: 2,532
Received 488 Likes on 267 Posts
2023 C2 of the Year Finalist - Unmodified
2021 C2 of the Year Finalist - Unmodified
2020 C3 of the Year Finalist - Unmodified
2019 C3 of Year Finalist (stock)
2017 C3 of Year Finalist
St. Jude Donor '13

Default

72 had a full service, new Lloyds mats and got rid of the 11/2" exhaust for this beast


And new door weather stripping. It's all set for the summer and the exhaust note with the lopey cam is just what I wanted.

Old 02-13-2016, 01:04 AM
  #1013  
CFLVette
Racer
 
CFLVette's Avatar
 
Member Since: Jan 2015
Location: Ocala, FL
Posts: 342
Received 63 Likes on 54 Posts
Default

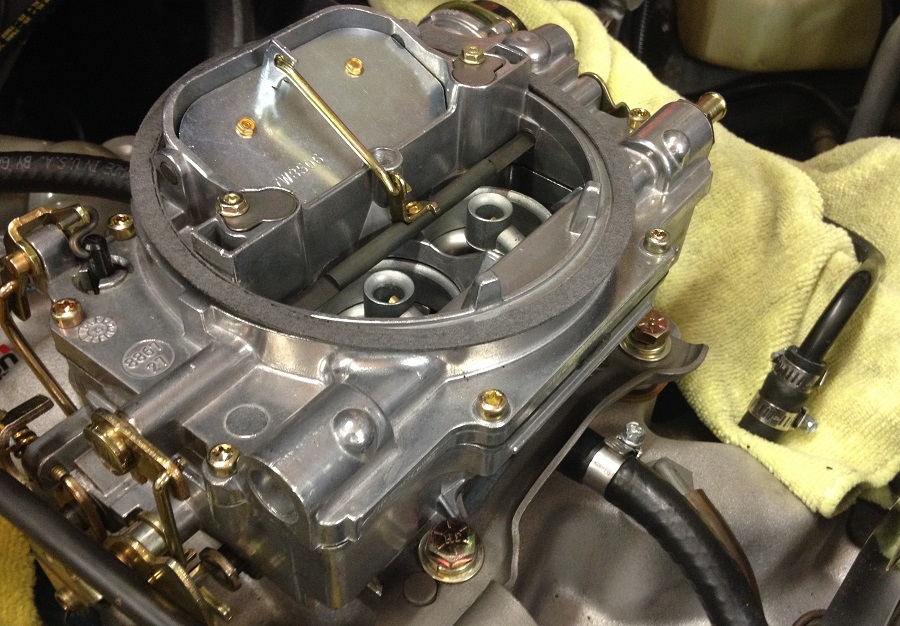
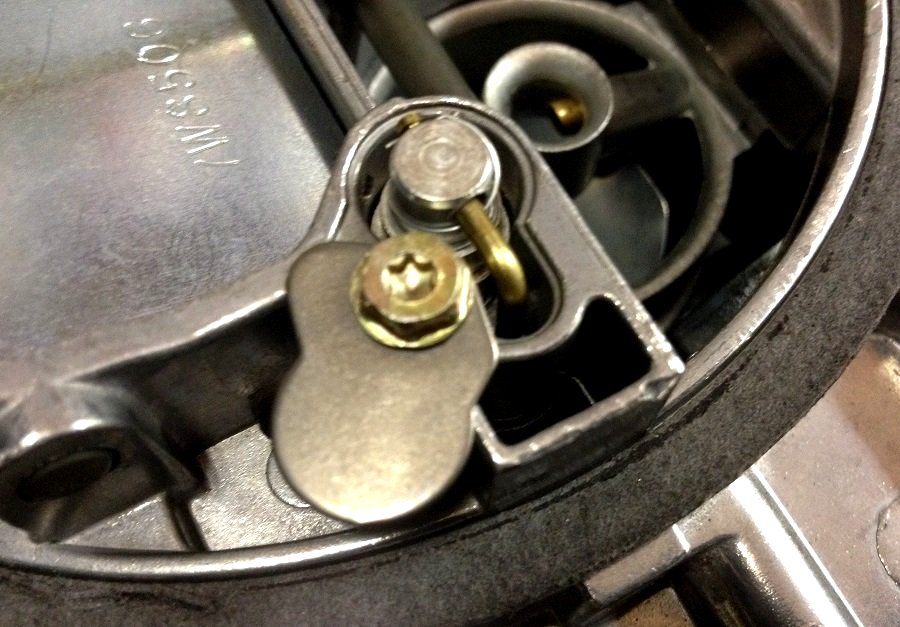
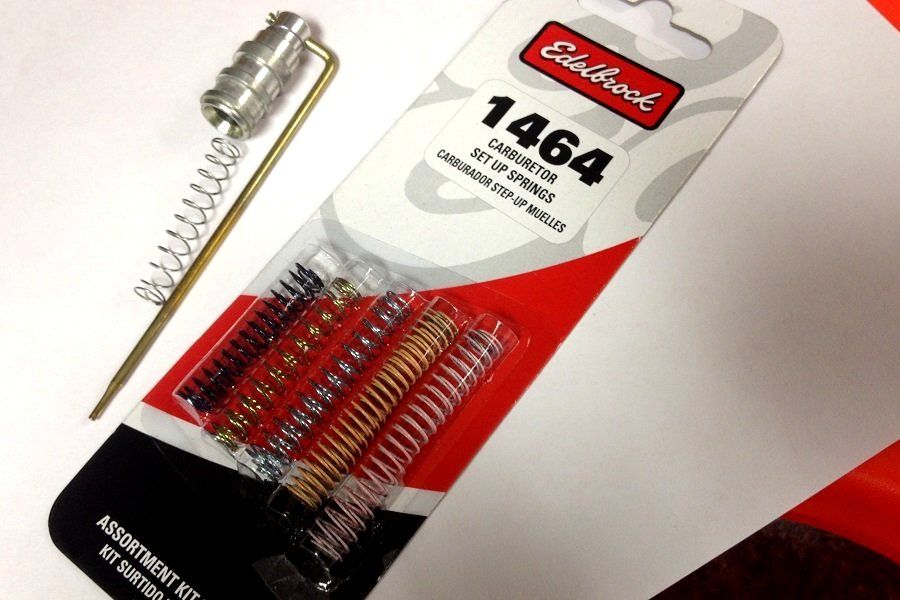
Replaced the metering rods and step-up springs on my Edelbrock 1406. Used the same ones that come standard in the 1405 carb and that eliminated a flat spot both on acceleration from a full stop and at 60-70 mph. Also adjusted the idle speed and it now idles nicely at 600 rpm. I plan to install new .100" primary main jets next.

Name:  IMG_0411.jpg
Views: 506
Size:  238.4 KB

Name:  Img_0447.jpg
Views: 512
Size:  107.9 KB

Name:  Img_0454.jpg
Views: 525
Size:  85.4 KB


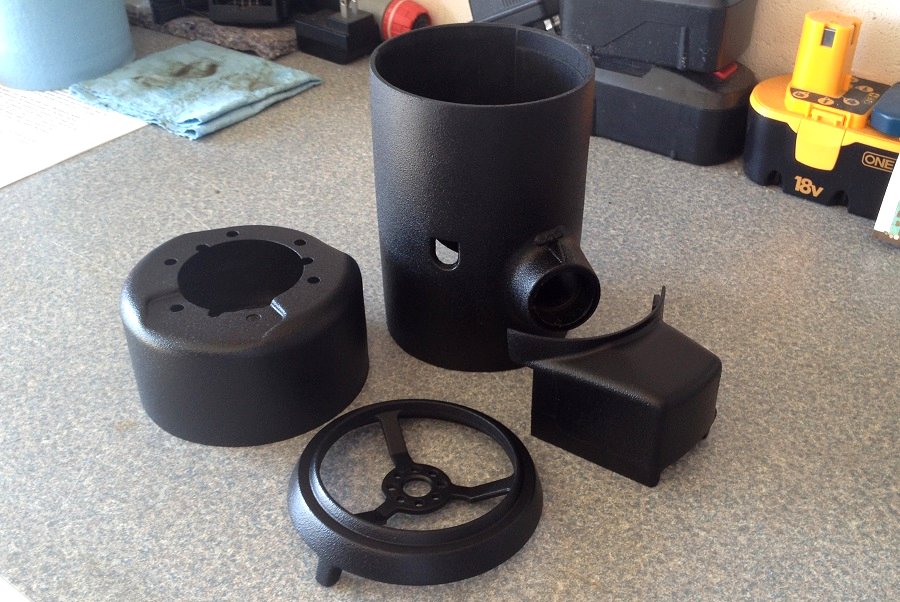
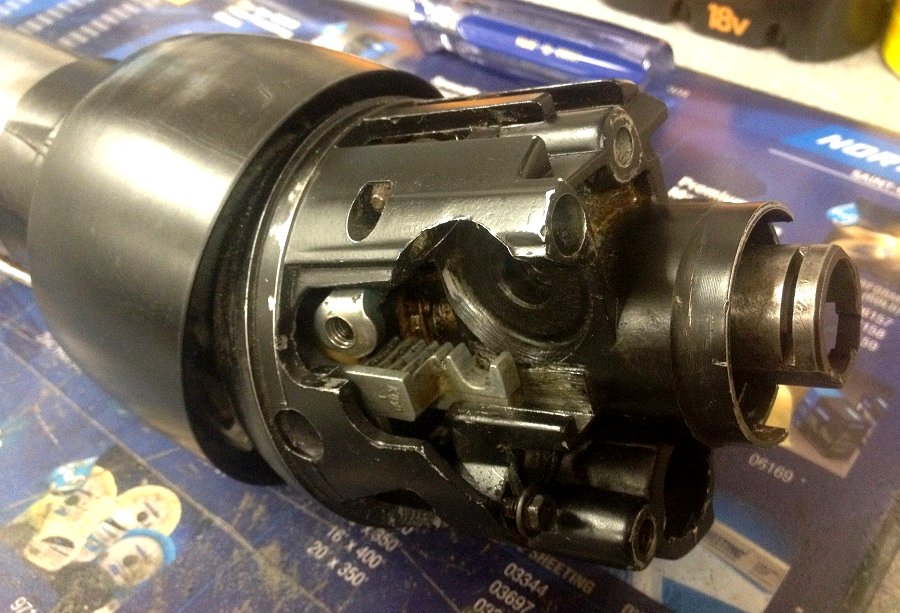
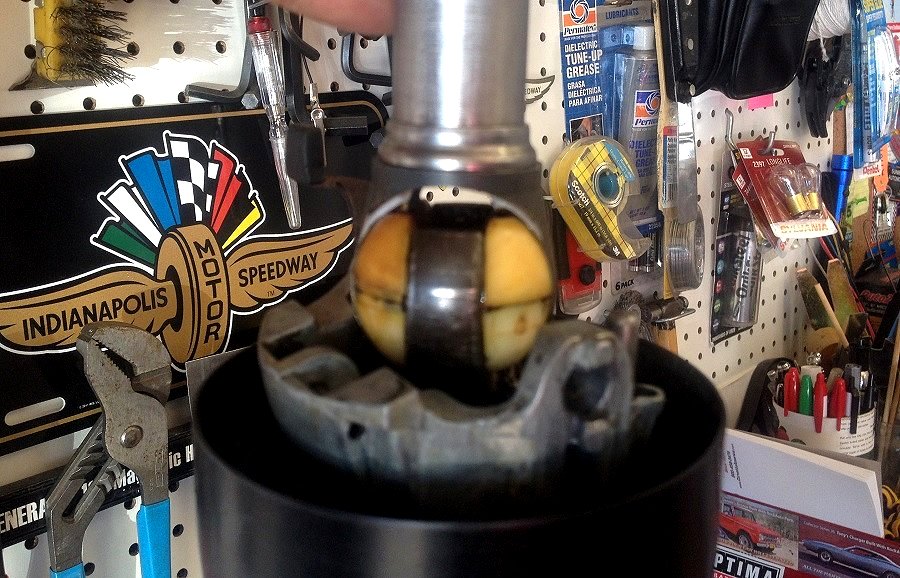
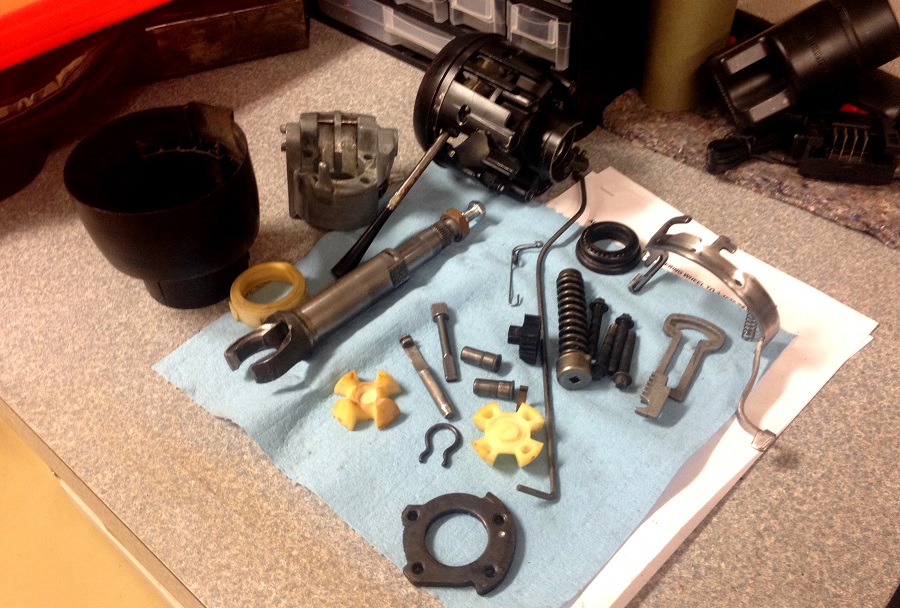
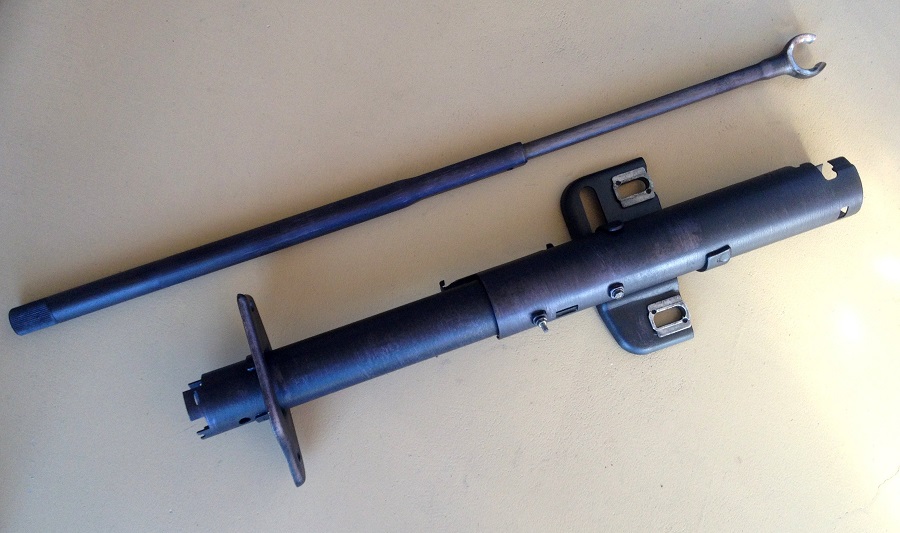
Also been working on my 1978 steering column and am making good progress. I have it all apart and will finish painting some of the covers so when the last pieces I've ordered come in, I will be ready to start reassembling it. It's been quite a learning experience and I hope it will turn out okay. I even fixed the stub shaft and got the telescopic part working again.

I opted for a camera-case finish for the housing covers which I think looks great.

Name:  Img_0386.jpg
Views: 485
Size:  126.0 KB

Name:  Img_0463.jpg
Views: 532
Size:  130.6 KB

Name:  Img_0465.jpg
Views: 551
Size:  130.4 KB


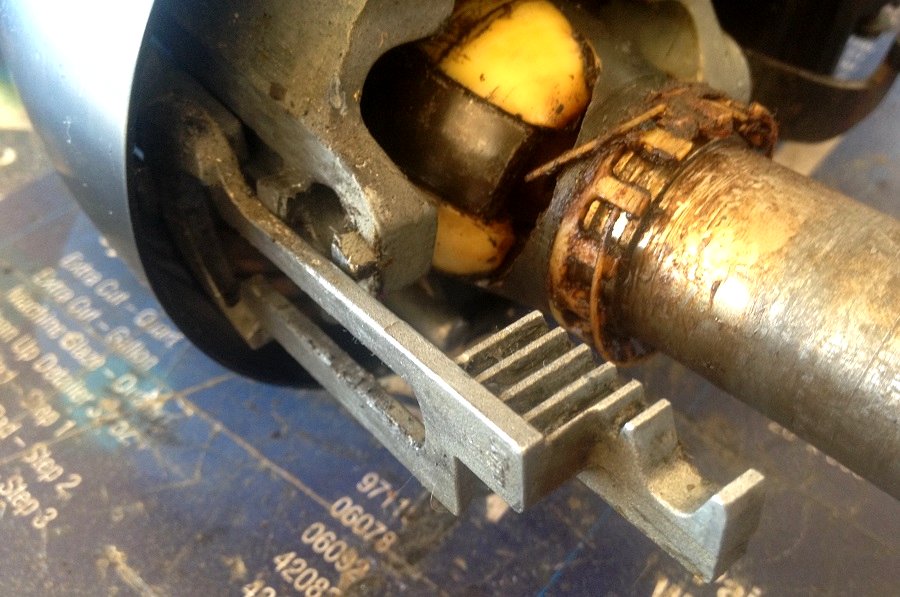
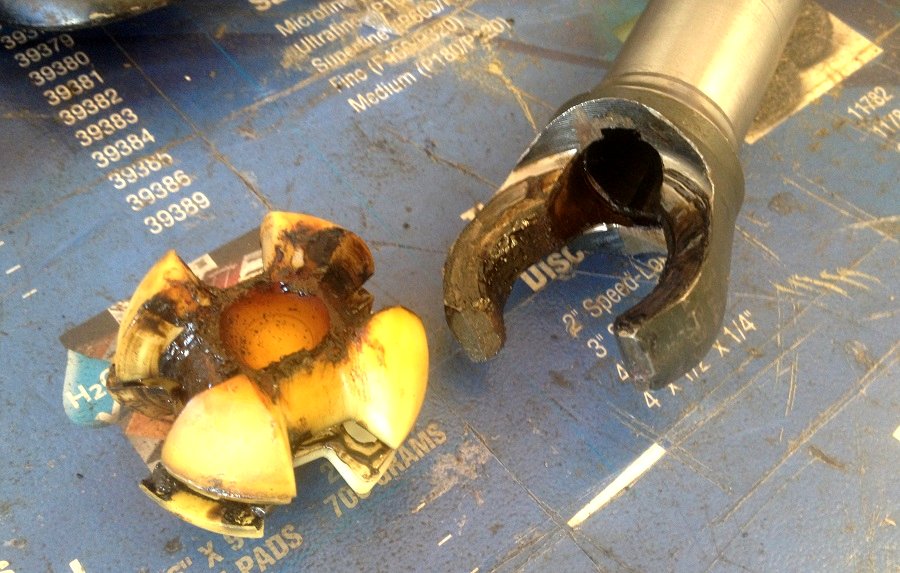
This used to be a bearing at some point. I will install all new bearings.

Name:  Img_0468.jpg
Views: 548
Size:  113.2 KB

Name:  Img_0470.jpg
Views: 510
Size:  121.9 KB

Name:  Img_0473.jpg
Views: 507
Size:  159.5 KB

Name:  Img_0478.jpg
Views: 478
Size:  122.0 KB

Name:  IMG_0481.jpg
Views: 493
Size:  193.8 KB


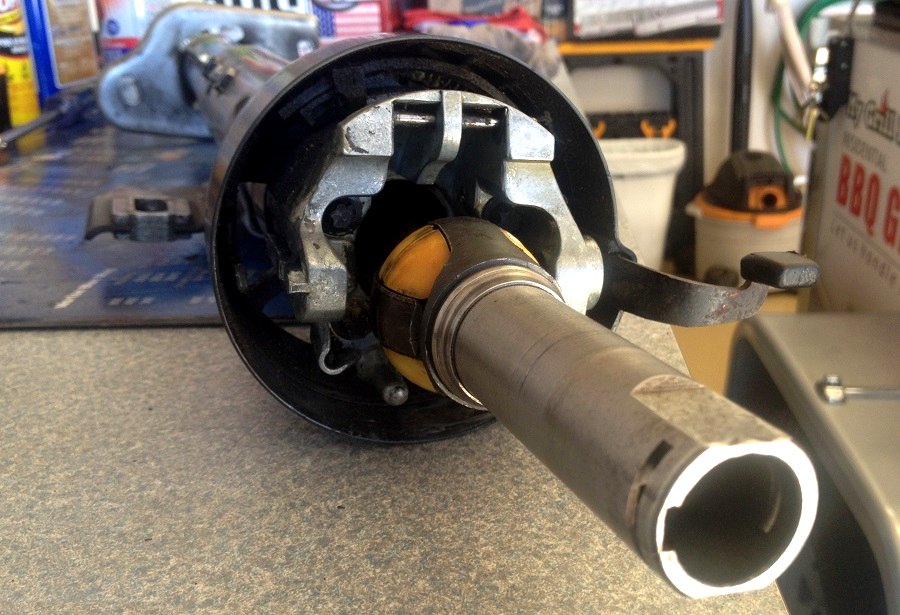
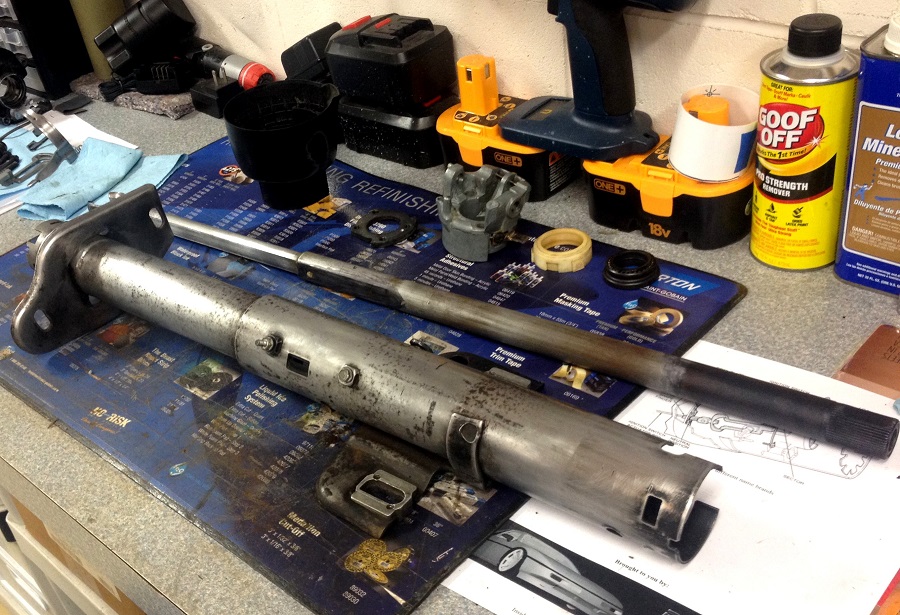
The main steering shaft had some surface rust. I prepped a few parts with rust neutralizer, which I brushed on.

Name:  Img_0518.jpg
Views: 352
Size:  250.7 KB


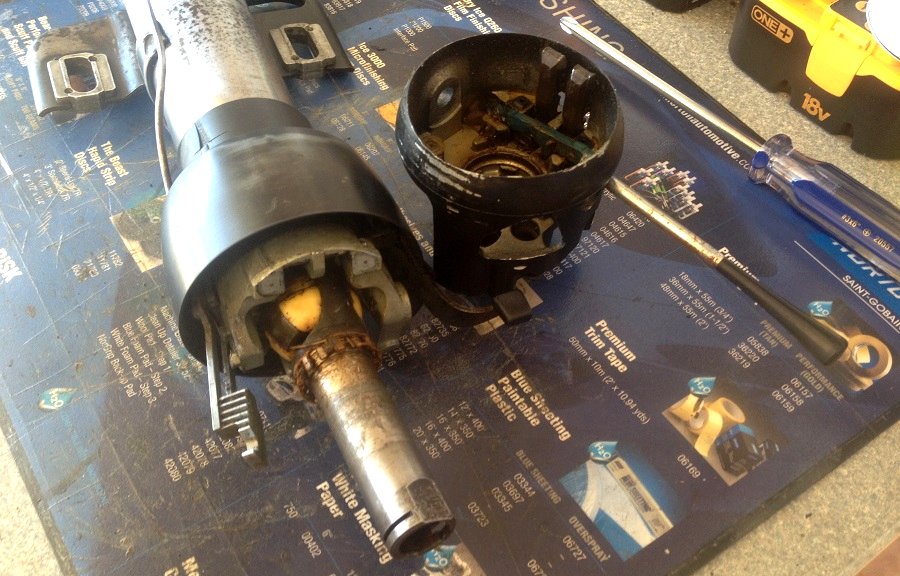
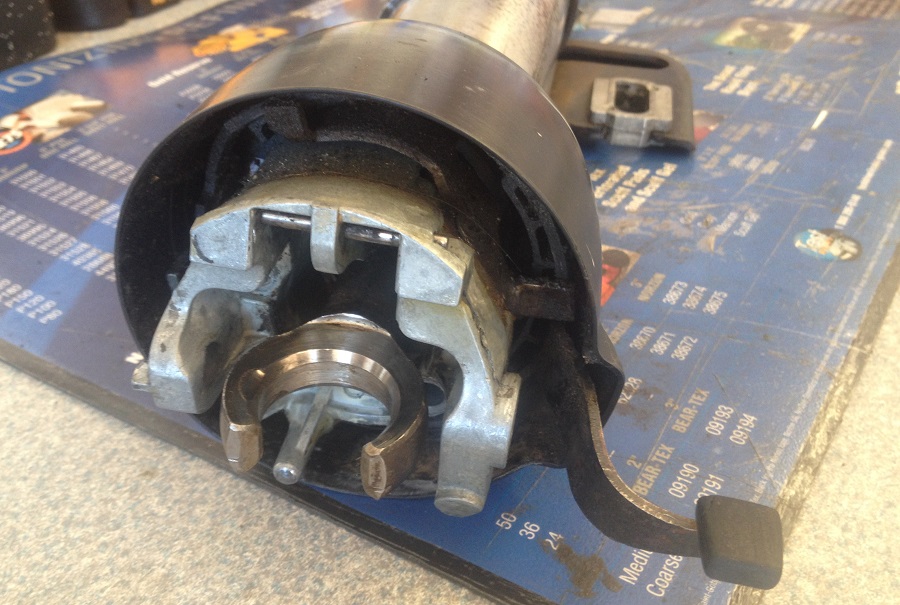
These are just a few of the guts of the T&T steering column. A lot of engineering went into these things.

Name:  Img_0520.jpg
Views: 541
Size:  218.7 KB


And here's the main steering shaft and housing after rust neutralizer was applied.

Name:  Img_0522.jpg
Views: 513
Size:  141.8 KB
Old 02-13-2016, 08:38 AM
  #1014  
Street Rat
Le Mans Master
Support Corvetteforum!
 
Street Rat's Avatar
 
Member Since: Aug 2010
Location: Central Texas
Posts: 5,311
Received 529 Likes on 396 Posts

Default

I have a new found respect for you guys that tackle the intricate steering column rebuilds. I just got into mine to replace the key buzzer. That was enough for me. And that's easy. Right?
Old 02-13-2016, 09:02 AM
  #1015  
MSGT-R
Pro
 
MSGT-R's Avatar
 
Member Since: Oct 2013
Location: Denver CO
Posts: 560
Received 85 Likes on 65 Posts

Default

When in doubt, take pictures; fill the frame.
Old 02-13-2016, 09:23 AM
  #1016  
CFLVette
Racer
 
CFLVette's Avatar
 
Member Since: Jan 2015
Location: Ocala, FL
Posts: 342
Received 63 Likes on 54 Posts
Default

Originally Posted by Street Rat
I have a new found respect for you guys that tackle the intricate steering column rebuilds. I just got into mine to replace the key buzzer. That was enough for me. And that's easy. Right?
There's nothing "easy" about these steering columns.

If you went into the belly of the beast and came out alive...
Old 02-13-2016, 04:28 PM
  #1017  
slickfx3
Safety Car
 
slickfx3's Avatar
 
Member Since: Oct 2008
Location: Los Angeles CA
Posts: 4,022
Received 30 Likes on 28 Posts

Default

that was sarcasm...mine still turns the wheels.....

going to let sleeping dogs lie, i don't want no steering column project or rather a steering column basket case

Get notified of new replies

To What did you do to your C3 today?

Old 02-17-2016, 06:58 PM
  #1018  
doorgunner
Nam Labrat

Support Corvetteforum!
 
doorgunner's Avatar
 
Member Since: Sep 2013
Location: New Orleans Loo-z-anna
Posts: 33,897
Received 4,174 Likes on 2,736 Posts

Default

I sanded on this.................................... ..................


Until I found this.................................... ............................


Old 02-17-2016, 07:13 PM
  #1019  
AboveTheLogic
Burning Brakes
 
AboveTheLogic's Avatar
 
Member Since: Apr 2013
Location: Las Vegas NV
Posts: 1,175
Received 102 Likes on 82 Posts

Default

What are we looking at? Did you sand your C3 until it turned into a convertible?
Old 02-17-2016, 08:14 PM
  #1020  
Jack605
Burning Brakes
Support Corvetteforum!
 
Jack605's Avatar
 
Member Since: Dec 2013
Location: Schaumburg IL
Posts: 985
Received 189 Likes on 118 Posts

Default

That's great Door Gunner, glad to see it was an easy find. lid looks good.

Jack


Quick Reply: What did you do to your C3 today?


All times are GMT -4. The time now is 01:03 AM.