
Air vent Cables hook up..Need help
 01-26-2015, 11:12 AM
#1
Cruising

Thread Starter
Member Since: Sep 2011
Posts: 13
Likes: 0
Received 0 Likes
on
0 Posts
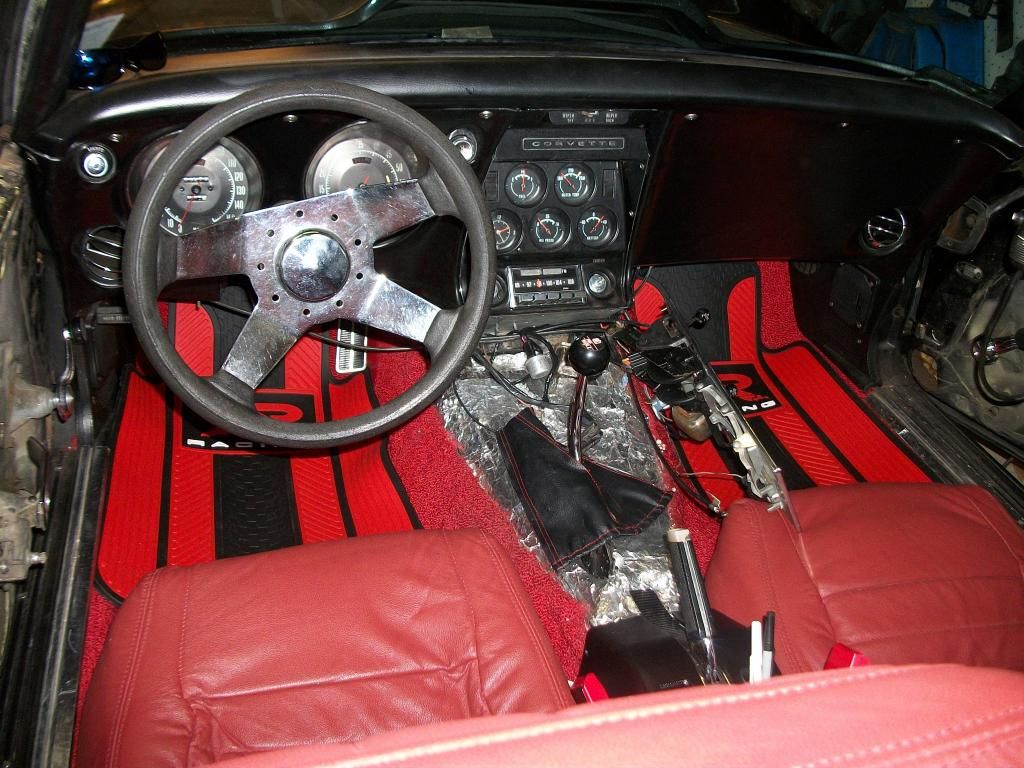
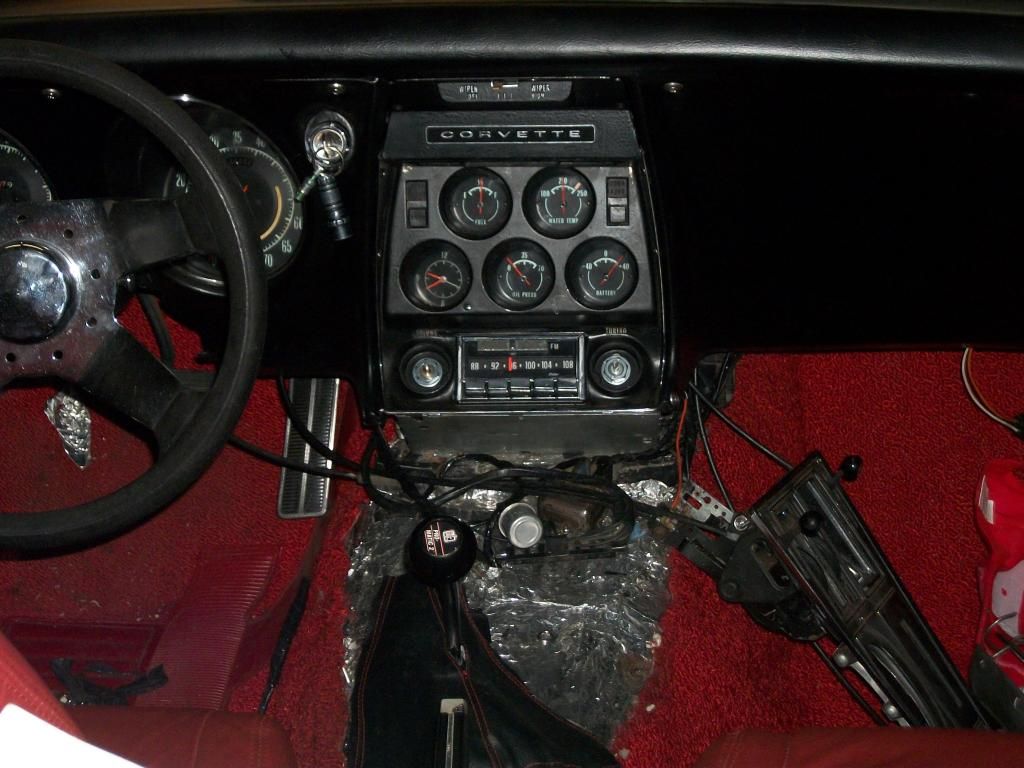
Hello gang, i have a 73 with no A/C...i working on a project to re-do the interior console and forgot how the vent cables work and were they attach. I'm thinking that they attach to the top of the shifter shroud but not sure. If they are in the top of the shroud how do they attach to the shroud? Also how do the cables run into the brackets...inside of the lever of outside of the lever? Are these cables adjustable and where?
Any help would be appreciated
thanks
King!
Any help would be appreciated
thanks
King!
 01-26-2015, 11:27 AM
#2
Nam Labrat


Member Since: Sep 2013
Location: New Orleans Loo-z-anna
Posts: 33,883
Received 4,154 Likes
on
2,727 Posts

I don't know if my '68 is the same as your car. Take a cable and pull/push on the wire-end to see what the cable operates...then label the cable with a piece of masking tape. Do all the cables that way....then take one cable at a time and attach it to it's correct lever...try for the best fit when attaching the cable bracket to the housing so that the end of the cable is not in a bind where it connects to the operating lever or wheel slider.
My cables are (left to right):
Driver's kick panel vent door to **** on console control
Drivers thumbwheel to left side of air-box under dash
Passengers thumbwheel to right side of air-box
Passengers kick panel vent door to **** on console control
My cables are (left to right):
Driver's kick panel vent door to **** on console control
Drivers thumbwheel to left side of air-box under dash
Passengers thumbwheel to right side of air-box
Passengers kick panel vent door to **** on console control
01-26-2015, 11:35 AM
#3
Team Owner

Member Since: Sep 2006
Location: Westminster Maryland
Posts: 30,173
Likes: 0
Received 2,878 Likes
on
2,515 Posts

Hi King,
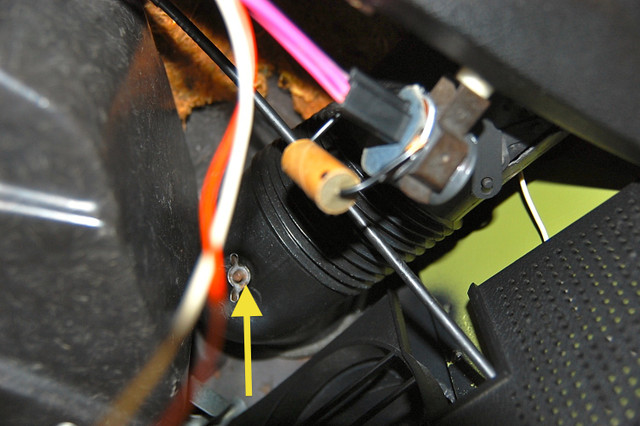
Each cable has a nylon 'flag' near each end.
The one at the console end is screwed to the underside of the top of the shifter console.
The loop at the end of the cable is fastened to the pin on the vent control lever with a slide nut.
The flag at the vent door end of the cable fastens to the a-pillar bracket with a screw and the loop at the cable end is held onto the vent door with another slide nut.
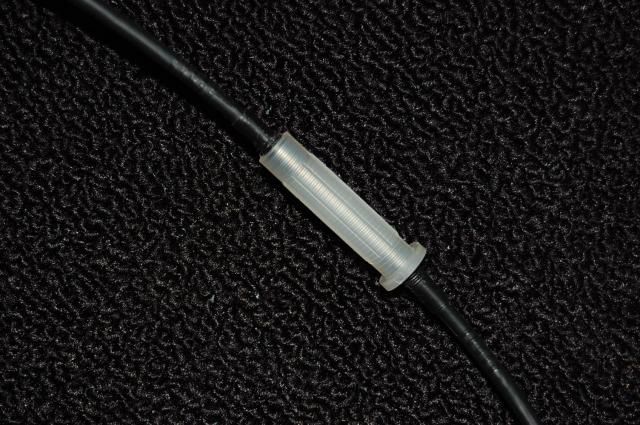
There's an adjustment point on each cable
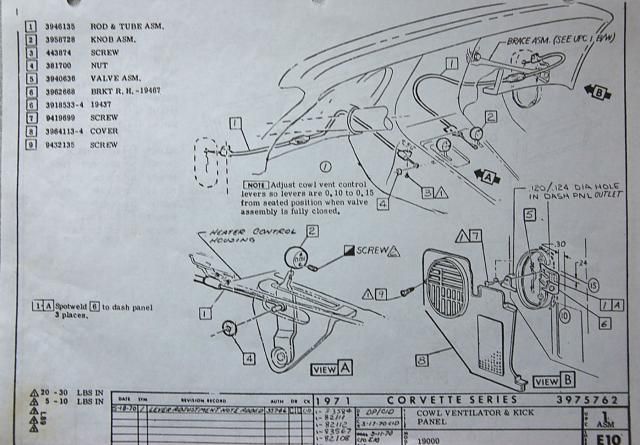
If you don't have an AIM for your car you should really consider buying one.
Regards,
Alan
The flag and cable loop at the vent door end of the cable.
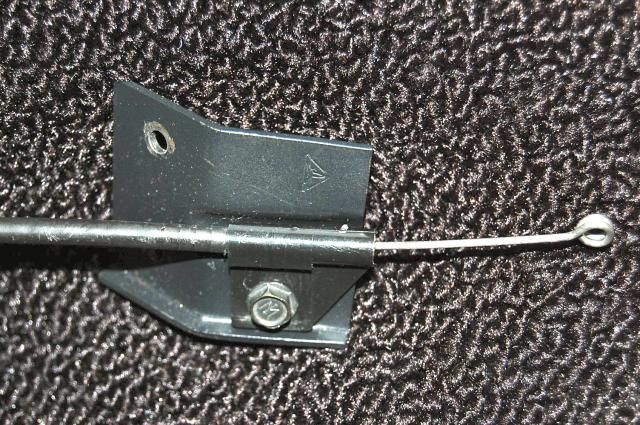
The adjuster for the cable.
Each cable has a nylon 'flag' near each end.
The one at the console end is screwed to the underside of the top of the shifter console.
The loop at the end of the cable is fastened to the pin on the vent control lever with a slide nut.
The flag at the vent door end of the cable fastens to the a-pillar bracket with a screw and the loop at the cable end is held onto the vent door with another slide nut.
There's an adjustment point on each cable
If you don't have an AIM for your car you should really consider buying one.
Regards,
Alan
The flag and cable loop at the vent door end of the cable.
The adjuster for the cable.
Last edited by Alan 71; 01-26-2015 at 11:44 AM.
01-26-2015, 11:38 AM
#4
Team Owner

Member Since: Jun 2000
Location: Southbound
Posts: 38,928
Likes: 0
Received 1,468 Likes
on
1,247 Posts
Cruise-In II Veteran

Do you have the assembly instruction manual (AIM)? The sheathing on the cable mounts to the underside of the console with screws. Inside or outside of the lever depends on which side the pin is on. Cable ends slip over the pins. AIM shows how the cables route over to the vent doors behind the kick panels.

02-26-2017, 02:42 PM
#5
Instructor

Member Since: Aug 2014
Location: Torrance Ca
Posts: 119
Likes: 0
Received 0 Likes
on
0 Posts
Do you have the assembly instruction manual (AIM)? The sheathing on the cable mounts to the underside of the console with screws. Inside or outside of the lever depends on which side the pin is on. Cable ends slip over the pins. AIM shows how the cables route over to the vent doors behind the kick panels.
02-26-2017, 02:59 PM
#6
Team Owner
Member Since: Sep 2006
Location: Westminster Maryland
Posts: 30,173
Likes: 0
Received 2,878 Likes
on
2,515 Posts
Hi W,
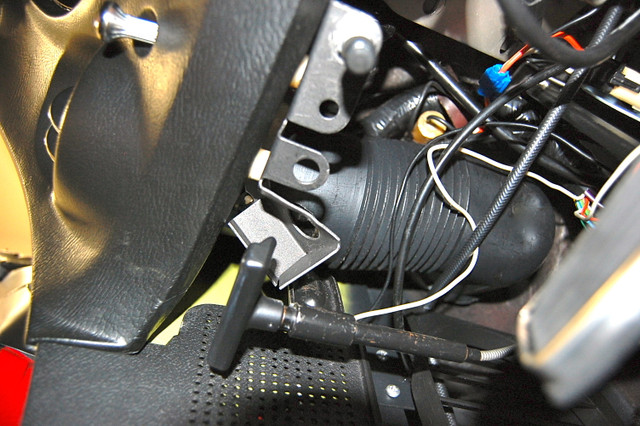
There is a bracket on each side of the cowl that the elbows slip over and a wing-nut is used to secure the elbow in place.
These brackets/wing-nuts hold the duct steady enough so the dash pads can be moved into place.
You may be able to get the left side elbow in place with the dash pad already there by starting the elbow on the astro-vent body and then rotating the elbow onto the cowl air outlet. (I can't believe I just wrote that!)
Regards,
Alan
This is the right side but the left side is done the same. There are left and right elbows and they need to be on the correct side.
Left side.
Last edited by Alan 71; 02-26-2017 at 03:11 PM.
02-27-2017, 10:05 AM
#7
Instructor
Member Since: Aug 2014
Location: Torrance Ca
Posts: 119
Likes: 0
Received 0 Likes
on
0 Posts
Thanks Alan, I was afraid that was how it has to be installed, probably explains why the end that slips over vent ball housing was pretty messed up. Good picture of yours. Is the kick panel vent cable on your car running over the column or under the column, and if it does go over the column, does it do so in front of the bracket that holds the column or behind it.