
Iiiiiitttttttsssss back!!
 04-18-2017, 05:58 PM
#101
Drifting

Thread Starter
Moving through the Vintage Air install I have had to pick up a few parts designed to work with the Corvette application, the A/C compressor brackets for instance as the Pontiac brackets would not work on the SBC. Other items to make my life easy were the aluminum condenser lines, though they were just a tad lower than plan they still worked out, I also picked up the plastic cover where they run through the outer wheel well.
The one upgrade that was a must, replacing the solenoid heater line valve with the newer updated motorized plug (Ball) valve. The solenoid valve when energized came in with a operating temperature of 190 deg F. In the engine compartment no worries under the dash ... Corvette kindling, the new valve generates no heat at all.

Coming off the diamond pattern bulkhead fitting.

Let the weave begin.


Let the conflict begin, the manifold heater hose and the fuel line are now fighting for real estate ... huuum heat or go?


Well its back to drawing board on the fuel line, anyway I wanted to use the crimped "O" ring lines for consistency, the line off the pump required an extension as there was no way the nut "O" ring fitting would fit up close. As the car has the tilt on it the fender section has been installed and removed multiple times it will be bonded permanent once my go to body guy Frank comes by, so that's it for now I'm doing the final install on the Gen 4 unit this evening.
... and the beat goes on ...
Dave
PS Thanks to Paul at Hortons Hot Rods for the crimps and Forum supporter Northern Corvette for the A/C brackets.
Last edited by The Phantom; 04-19-2017 at 04:45 PM.

The following 2 users liked this post by The Phantom:
Metalhead140 (04-18-2017),
MISTERZ06 (05-23-2017)
05-07-2017, 06:04 PM
#102
Drifting
Thread Starter
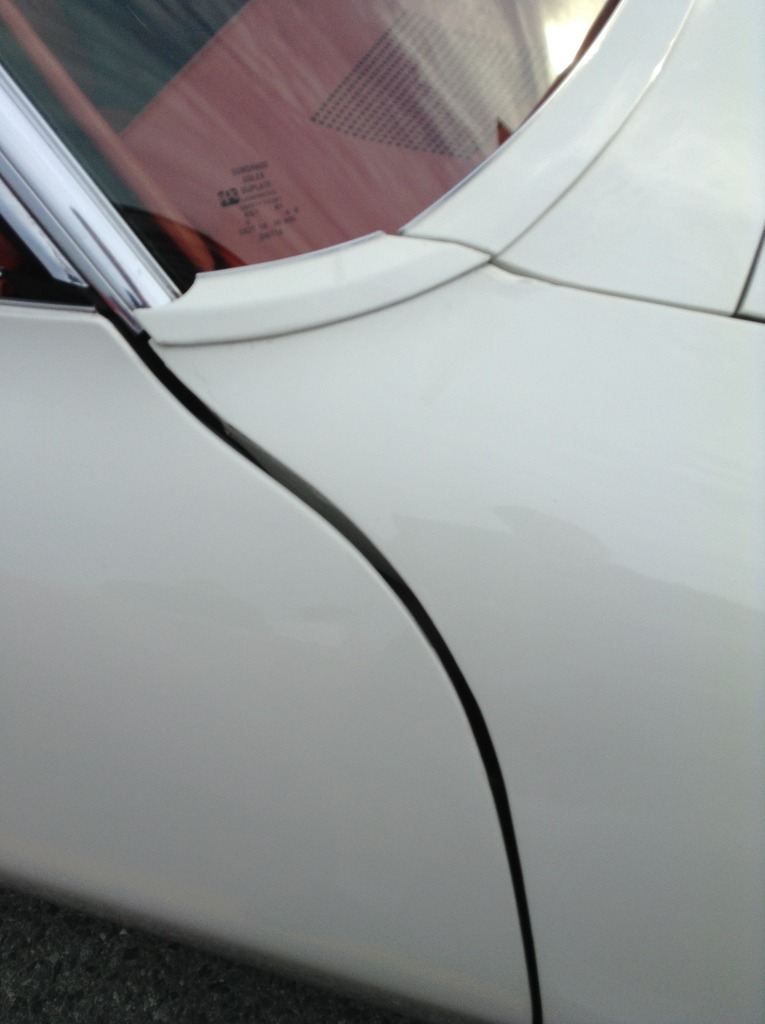
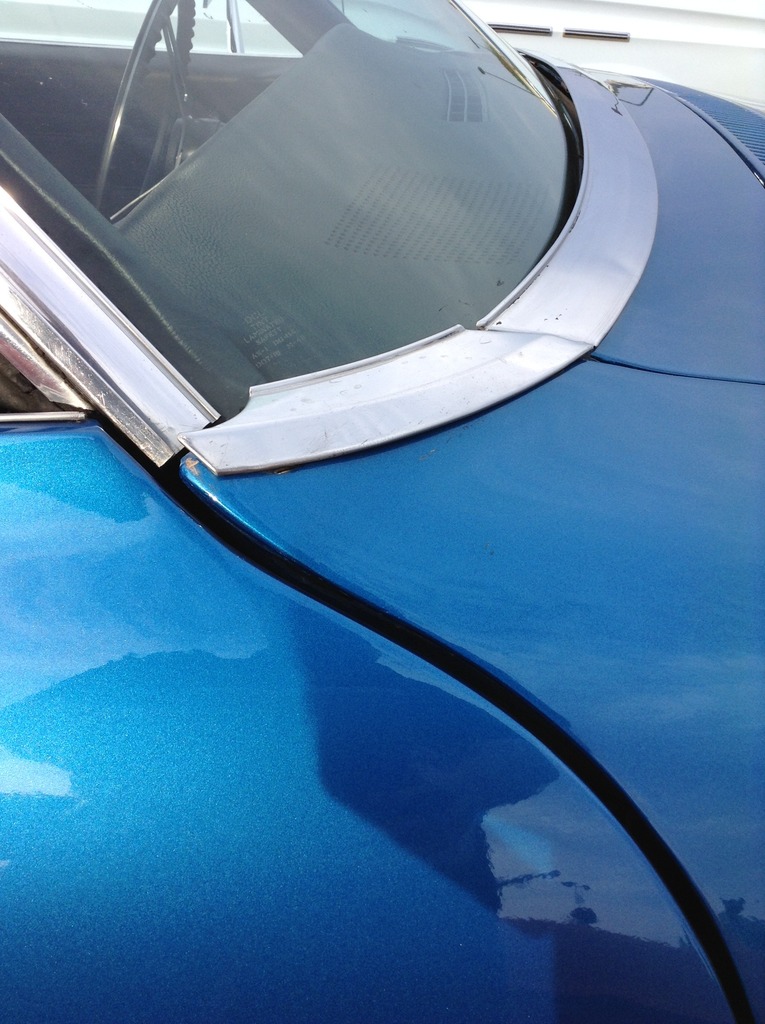
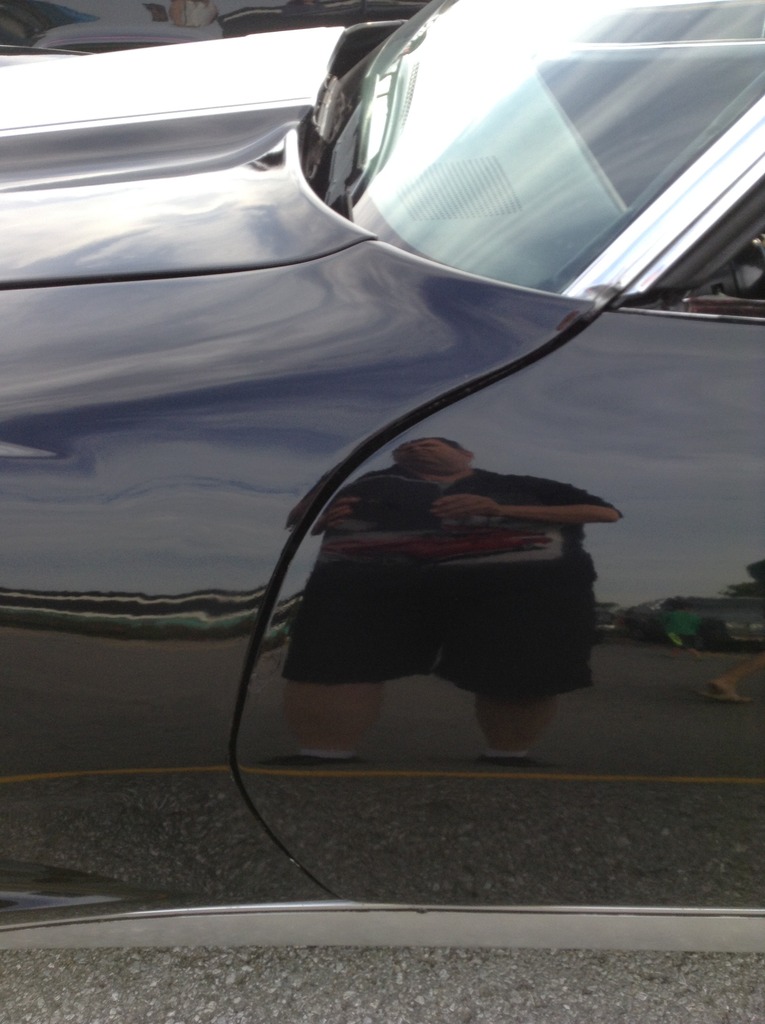
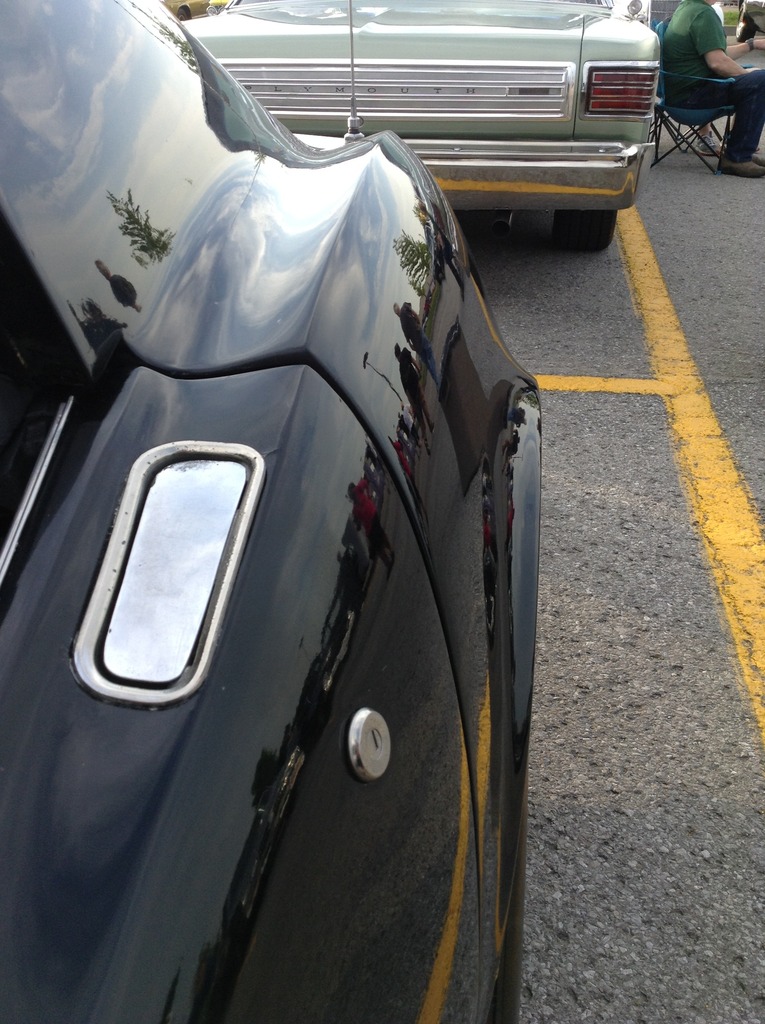
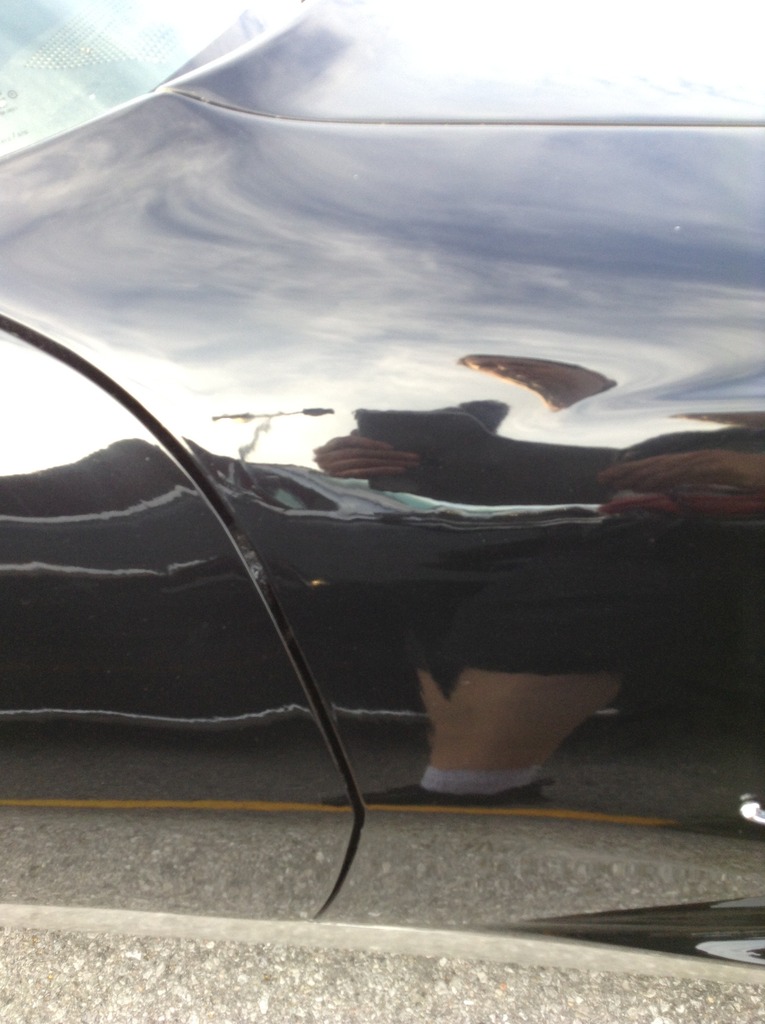
Can you see a difference?

I can't see a difference?

A little test fitting ... I will use these to fire up and maybe a drive or two but the long term is goal is to pipe them into some electric cutouts.


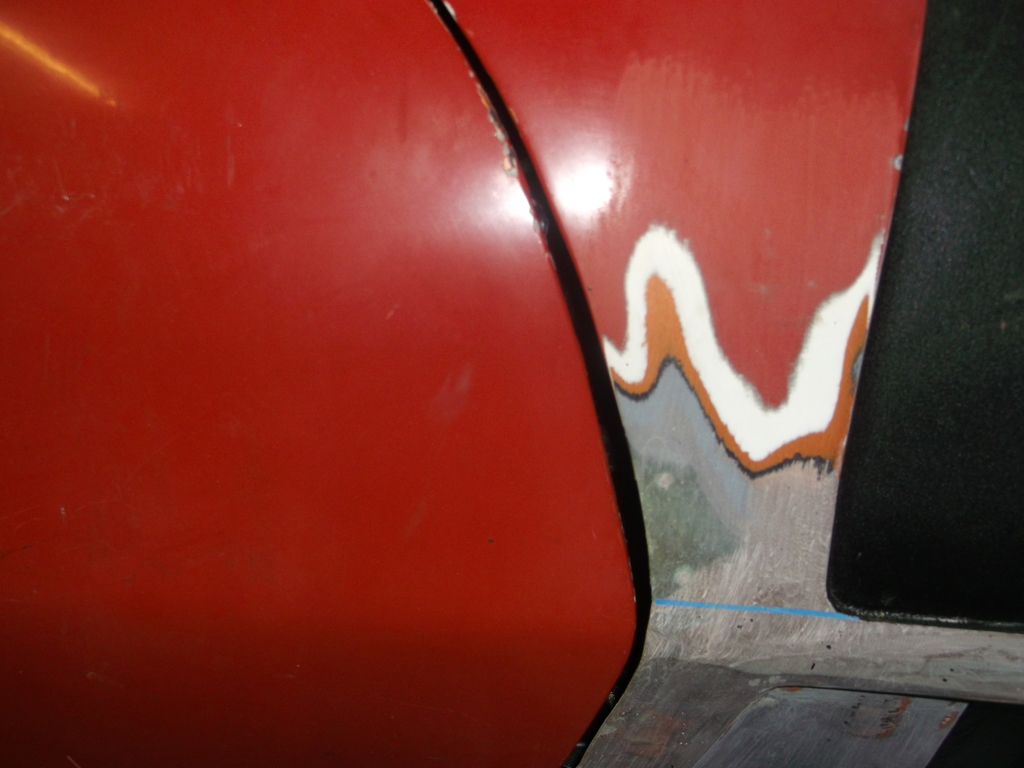
And ... more glass damage repair.


and the hits just keep on com'in, and the beat goes on!
Dave

I can't see a difference?

A little test fitting ... I will use these to fire up and maybe a drive or two but the long term is goal is to pipe them into some electric cutouts.


And ... more glass damage repair.


and the hits just keep on com'in, and the beat goes on!
Dave
The following users liked this post:
MISTERZ06 (05-23-2017)
05-08-2017, 06:11 AM
#103


Can you see a difference?
I can't see a difference?
A little test fitting ... I will use these to fire up and maybe a drive or two but the long term is goal is to pipe them into some electric cutouts.
And ... more glass damage repair.
and the hits just keep on com'in, and the beat goes on!
Dave
I can't see a difference?
A little test fitting ... I will use these to fire up and maybe a drive or two but the long term is goal is to pipe them into some electric cutouts.
And ... more glass damage repair.
and the hits just keep on com'in, and the beat goes on!
Dave
RVZIO
05-08-2017, 11:15 AM
#104
Drifting
Thread Starter
05-22-2017, 07:58 PM
#105
Drifting
Thread Starter
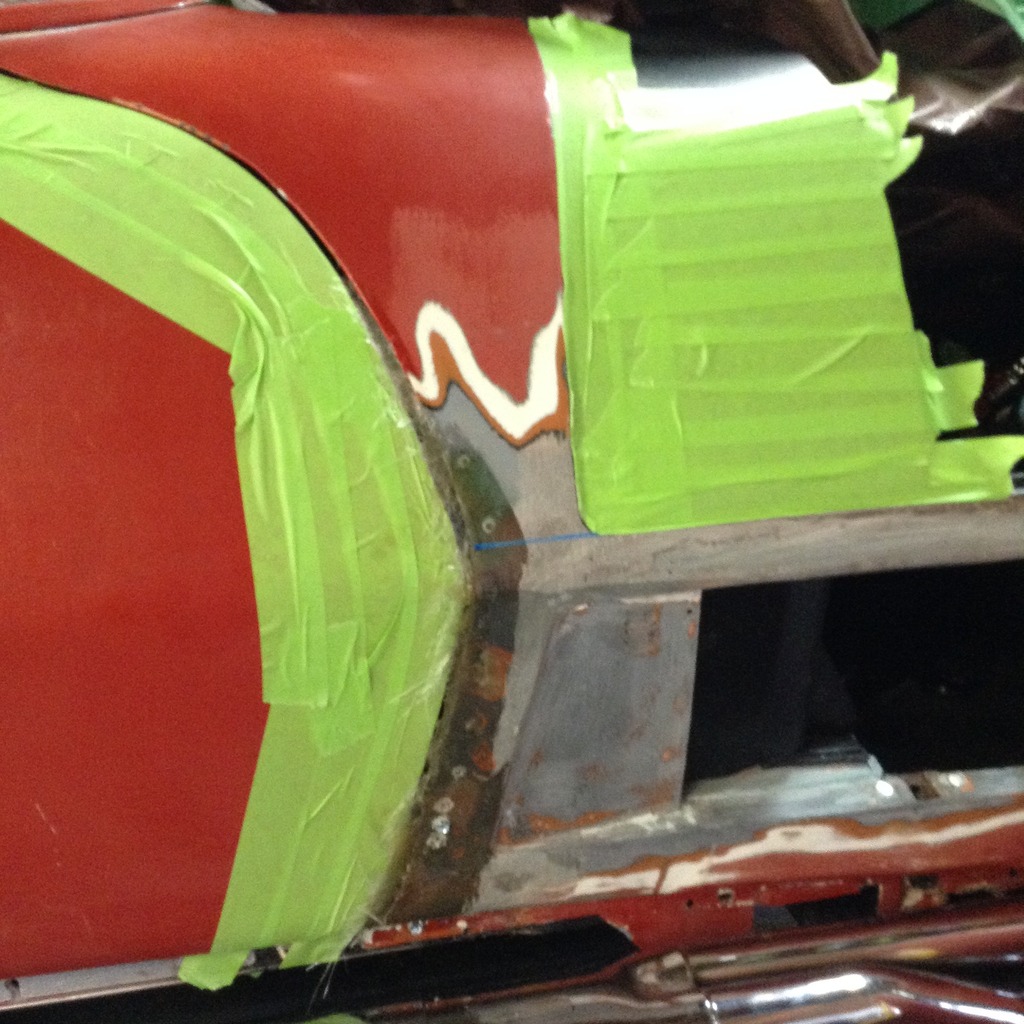
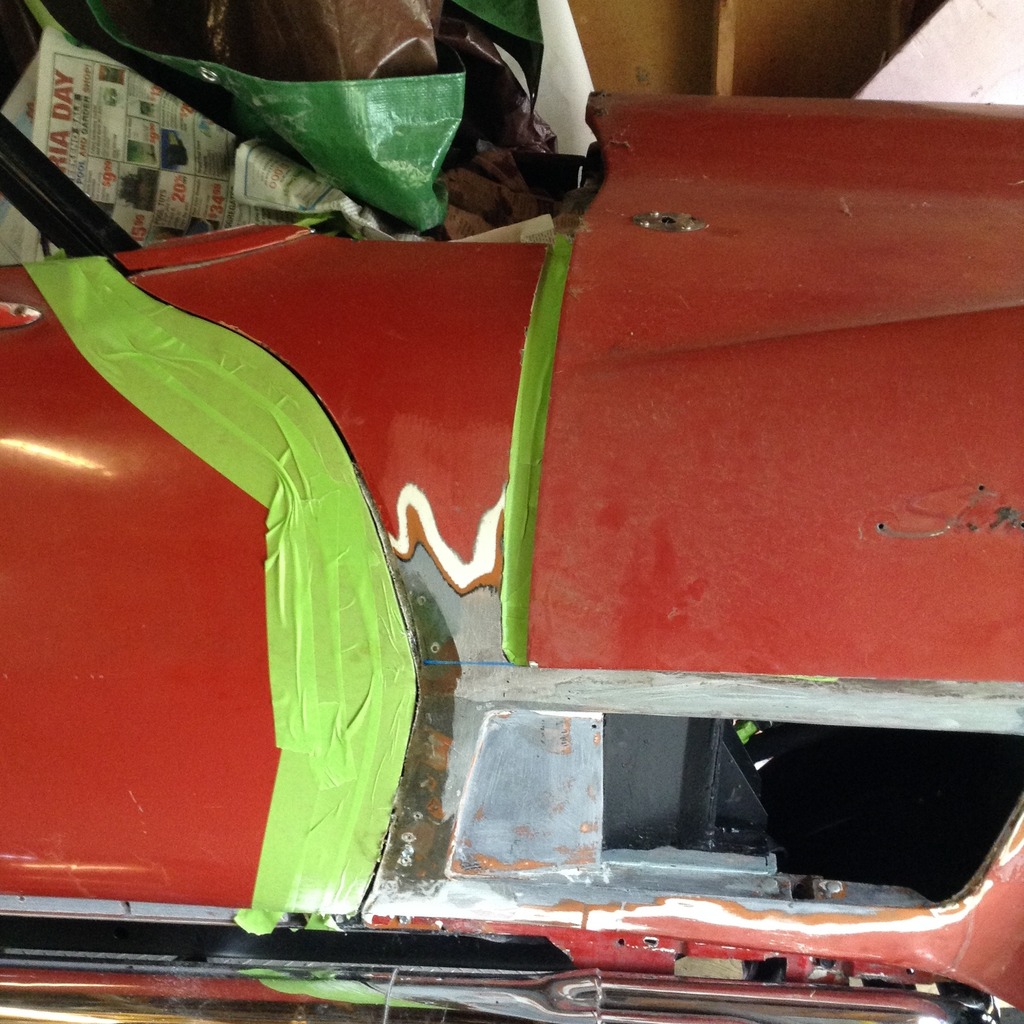
Well the passengers door is back on, and this to facilitate the installation of the front fender section so I can finish wiring and piping etc ... and its amazes me how much things have changed since removal. I have looked back at photos pre removal and I have to say, though butchered and filled with gallons of ... well ... fill, the panels looked closer than they do now. I'm sure there is some tweaking left to do but overall I have some work ahead of me.
Surprisingly the rear door gap is pretty good.


The lower door is inset not quite sure how to make this adjustment.


There was some damage to the lower section of the fender when removed I repaired this damage but without a template, so I have to undo and redo the repair.

... and the beat .... yup it goes on ...
Dave
Last edited by The Phantom; 05-22-2017 at 08:36 PM.
The following users liked this post:
MISTERZ06 (05-23-2017)
05-22-2017, 08:31 PM
#106
Drifting
Thread Starter
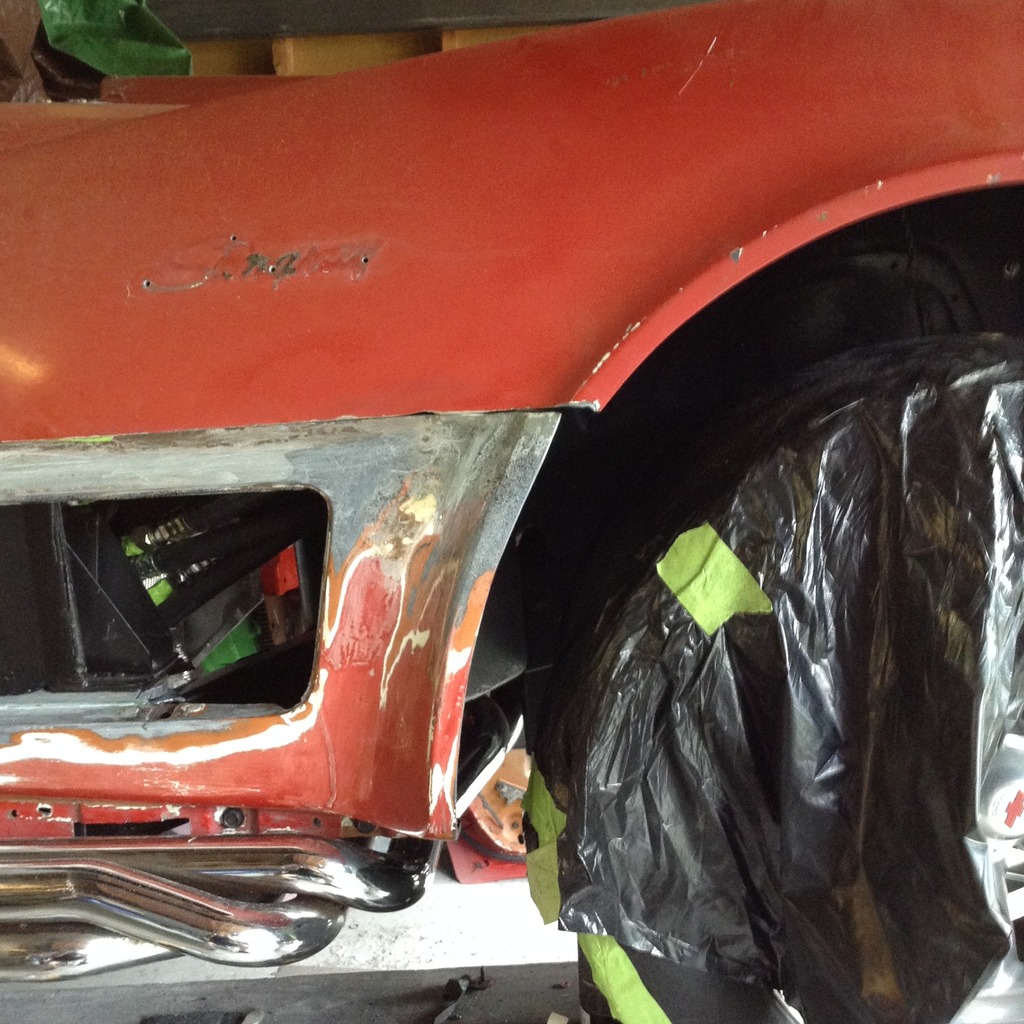
To be sure that the fender section ends up in the right location before bonding the panel, I thought it prudent to install the tilt clip as its original mounting points would not have changed from removal. So when I brought it out of storage in the pool gazebo (odd how this has made my wife much happier ... huh go figure) I remember now why I took the time to reinforce it. The lower front valance took some damage somewhere along the way pre removal, not to mention the rather large crack and chunk missing from the right front bumper mount.


The tilt structure underneath was vintage 1970's Ecklers, the fibre cloth and vette bond mud were de-laminating from age.


Some time spent grinding out the the damaged and aged areas then glassing stabilized the damage.


The focus here is again to stabilize these sections so I can install it back on the car without further damage.
... and the beat goes on.
Dave
Last edited by The Phantom; 05-23-2017 at 07:10 AM.
The following users liked this post:
MISTERZ06 (05-23-2017)
05-22-2017, 08:45 PM
#107
Nam Labrat


Member Since: Sep 2013
Location: New Orleans Loo-z-anna
Posts: 33,881
Received 4,153 Likes
on
2,726 Posts

All those pieces and parts are going to turn into a car!

05-23-2017, 04:13 AM
#109
Hey Dave, yes the beat does go on. Now that's a big job you have going on their. I think your on the right track by putting the clip on to see what you see. Having fun yet?????
RVZIO
I'll bet the neighbors can hear you when you start that sucker up!

RVZIO
I'll bet the neighbors can hear you when you start that sucker up!
05-23-2017, 07:05 AM
#110
Drifting
Thread Starter
Getting closer to turning the key, I need to turn the car around soon so motion under her own power is a definite advantage pushing gets old real fast!
Dave
05-23-2017, 08:38 AM
#111
Having a riot can't you tell, truly when we take our cars down to this level we must have a sickness! My neighbour just walks in the garage and shakes his head ... he and the wife are retired so they spend lots of time travelling, he misses most of the excitement and loud moments.
Getting closer to turning the key, I need to turn the car around soon so motion under her own power is a definite advantage pushing gets old real fast!
Dave
Getting closer to turning the key, I need to turn the car around soon so motion under her own power is a definite advantage pushing gets old real fast!
Dave
RVZIO
05-24-2017, 05:20 PM
#112
Race Director


I replied to your PM.
DUB
DUB
06-18-2017, 08:36 PM
#113
Drifting
Thread Starter
Well this has been a learning experience ... door gap 101, I have been at our local cruise nights sampling as many door gaps as I can find and if I were to have a word it would be inconsistent! From the factory ... after the factory, body off they all seem to vary from car to car. Don't get me wrong I'm just saying that they are all over the place, maybe its a symptom of the glass flexing ... who knows the cars in the photos are all beautiful examples of the C3 body style.
So I am going my own way on this and try to lock it down, I started by shimming the #3 mount and getting the rear gap close and adjusted the hinges and Nader bolt to get the gap to this level. And once again not trying for perfection at this time just as close as I can so I can re-secure the front partial clip all the fine tuning will happen when body and paint time comes along.

The front partial clip gaps are terrifying ...
So the process of rebuilding them has begun there will be much sanding and leveling to do ...
I created and in welded a new adjustable support bracket to the frame so I can position and solidify the inner wheel well structure, if the Ecklers original kit addressed this design weakness, the support structure is long since gone ...
Looks like tomorrow will be bonding day for the right front, well we'll see how that goes.
And the beat goes on ...
Dave


So I am going my own way on this and try to lock it down, I started by shimming the #3 mount and getting the rear gap close and adjusted the hinges and Nader bolt to get the gap to this level. And once again not trying for perfection at this time just as close as I can so I can re-secure the front partial clip all the fine tuning will happen when body and paint time comes along.

The front partial clip gaps are terrifying ...
So the process of rebuilding them has begun there will be much sanding and leveling to do ...

I created and in welded a new adjustable support bracket to the frame so I can position and solidify the inner wheel well structure, if the Ecklers original kit addressed this design weakness, the support structure is long since gone ...

Looks like tomorrow will be bonding day for the right front, well we'll see how that goes.
And the beat goes on ...
Dave
Last edited by The Phantom; 06-18-2017 at 08:52 PM.
The following users liked this post:
MISTERZ06 (06-20-2017)
06-19-2017, 12:29 PM
#114
Well this has been a learning experience ... door gap 101, I have been at our local cruise nights sampling as many door gaps as I can find and if I were to have a word it would be inconsistent! From the factory ... after the factory, body off they all seem to vary from car to car. Don't get me wrong I'm just saying that they are all over the place, maybe its a symptom of the glass flexing ... who knows the cars in the photos are all beautiful examples of the C3 body style.


So I am going my own way on this and try to lock it down, I started by shimming the #3 mount and getting the rear gap close and adjusted the hinges and Nader bolt to get the gap to this level. And once again not trying for perfection at this time just as close as I can so I can re-secure the front partial clip all the fine tuning will happen when body and paint time comes along.

The front partial clip gaps are terrifying ...
So the process of rebuilding them has begun there will be much sanding and leveling to do ...

I created and in welded a new adjustable support bracket to the frame so I can position and solidify the inner wheel well structure, if the Ecklers original kit addressed this design weakness, the support structure is long since gone ...

Looks like tomorrow will be bonding day for the right front, well we'll see how that goes.
And the beat goes on ...
Dave
So I am going my own way on this and try to lock it down, I started by shimming the #3 mount and getting the rear gap close and adjusted the hinges and Nader bolt to get the gap to this level. And once again not trying for perfection at this time just as close as I can so I can re-secure the front partial clip all the fine tuning will happen when body and paint time comes along.
The front partial clip gaps are terrifying ...
So the process of rebuilding them has begun there will be much sanding and leveling to do ...
I created and in welded a new adjustable support bracket to the frame so I can position and solidify the inner wheel well structure, if the Ecklers original kit addressed this design weakness, the support structure is long since gone ...
Looks like tomorrow will be bonding day for the right front, well we'll see how that goes.
And the beat goes on ...
Dave
RVZIO
06-19-2017, 05:49 PM
#115
Drifting
Thread Starter
So the front tilt mounts have not been adjusted from when the car was dismantled, $700 for frame repair was a good call I think ... A 1/4" there has translated to ..... WOW good thing I had it checked!
Oh a lot of alignment and fitting to do!
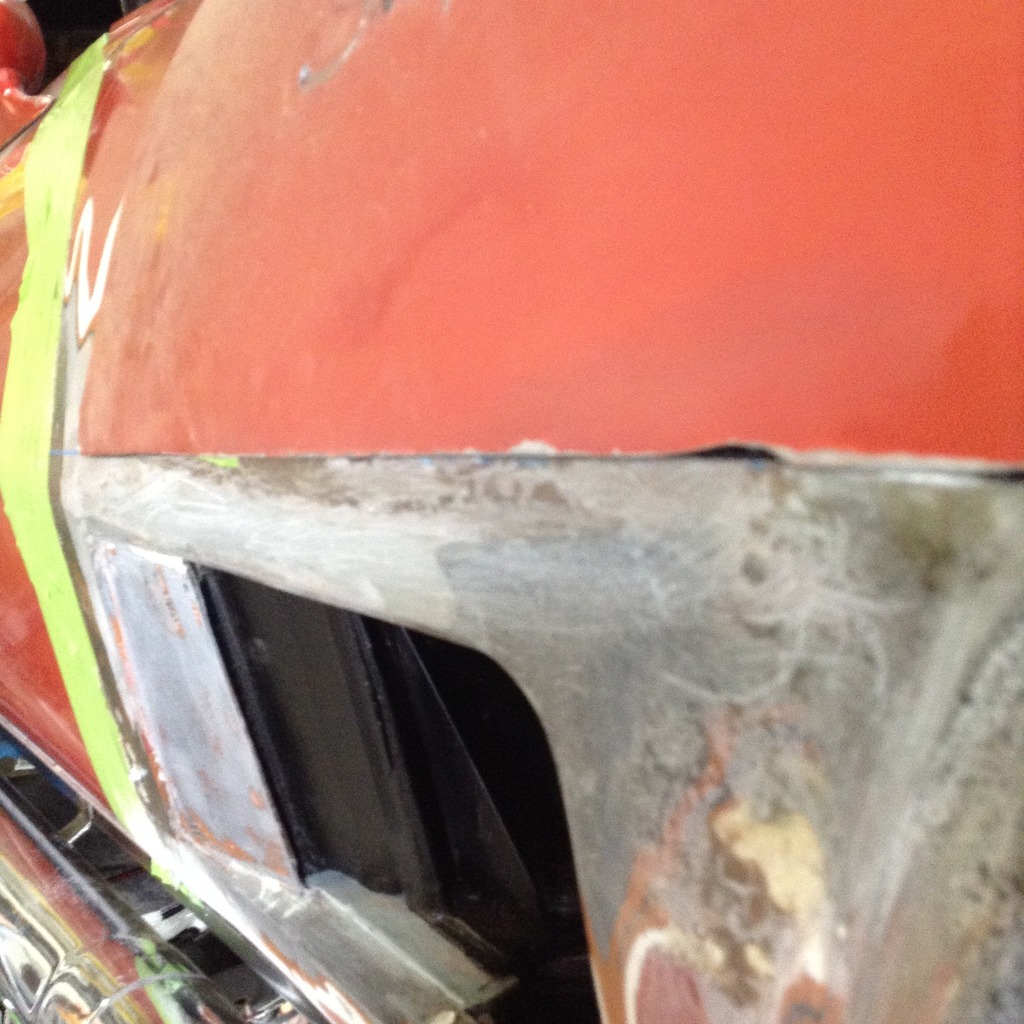
... maybe I can rework a stock grill into the plan?
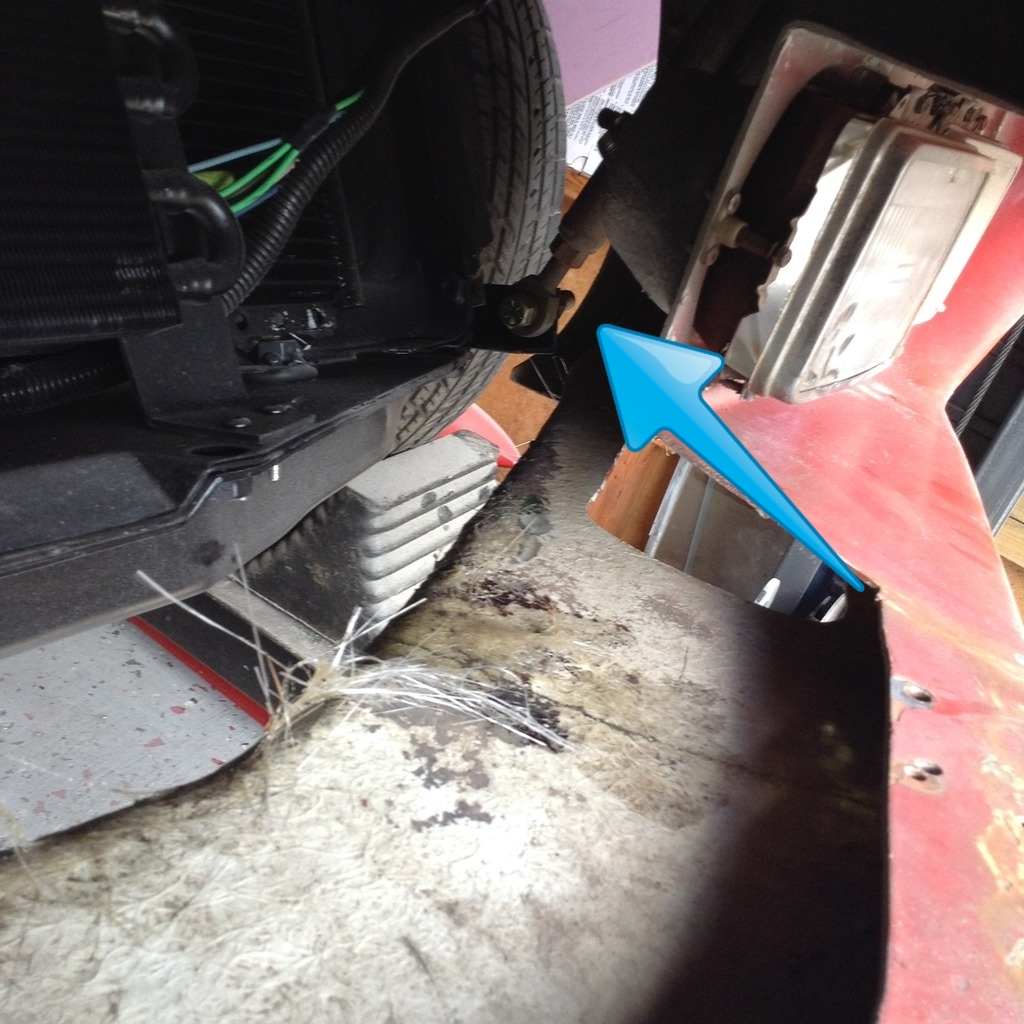
A look at the tilt arm, simple but effective.
... and the beat goes on ...
Dave


Oh a lot of alignment and fitting to do!

... maybe I can rework a stock grill into the plan?

A look at the tilt arm, simple but effective.

... and the beat goes on ...
Dave
The following users liked this post:
MISTERZ06 (06-20-2017)
06-19-2017, 07:14 PM
#116
Race Director
All is looking good....and YES...I am SURE you are glad you checked to see how things fit after frame repairs were made.
AS for all of the door gaps that were all over the place...you have to remember that these areas have been on the road and may have issues from accidents or being improperly supported with jack stands ,etc. So...getting your gaps to where you like them is normal.....because I know when I do the door gaps... I seem to always need to fix something to get the gaps right.
Just to throw you an idea....unless you have figured it out and got it to where you are happy. BUT...On a 1984 to 1996 Corvette...GM uses a guide pin that threads into the hood itself and a bushing that is installed in a bracket mounted on the hinge post area that aids pulling the hood side areas IN....so they will be flush with the doors BEFORE it is fully closed.
DUB
06-20-2017, 07:53 AM
#117
Drifting
Thread Starter
All is looking good....and YES...I am SURE you are glad you checked to see how things fit after frame repairs were made.
AS for all of the door gaps that were all over the place...you have to remember that these areas have been on the road and may have issues from accidents or being improperly supported with jack stands ,etc. So...getting your gaps to where you like them is normal.....because I know when I do the door gaps... I seem to always need to fix something to get the gaps right.
Just to throw you an idea....unless you have figured it out and got it to where you are happy. BUT...On a 1984 to 1996 Corvette...GM uses a guide pin that threads into the hood itself and a bushing that is installed in a bracket mounted on the hinge post area that aids pulling the hood side areas IN....so they will be flush with the doors BEFORE it is fully closed.
DUB
AS for all of the door gaps that were all over the place...you have to remember that these areas have been on the road and may have issues from accidents or being improperly supported with jack stands ,etc. So...getting your gaps to where you like them is normal.....because I know when I do the door gaps... I seem to always need to fix something to get the gaps right.
Just to throw you an idea....unless you have figured it out and got it to where you are happy. BUT...On a 1984 to 1996 Corvette...GM uses a guide pin that threads into the hood itself and a bushing that is installed in a bracket mounted on the hinge post area that aids pulling the hood side areas IN....so they will be flush with the doors BEFORE it is fully closed.
DUB
Dave
(The area in question is right behind the door handle, I'll post a pic later.)
Last edited by The Phantom; 06-20-2017 at 12:38 PM.
06-20-2017, 08:10 AM
#118
Drifting
Thread Starter
Dave
06-20-2017, 07:22 PM
#119
Race Director
I will wait on your photo becasue I really need to see it....and I am aware of what you are concerned about....assuming that the doors are correct for the year model.
You 'kinda' have to be careful in using the door hinge shims to 'correct' the rear of the door. I know many people 'say' to try it and it worked for them ( which it might have)....but there are variables that can come into 'play' that come back and haunt you that they may not have mentioned or disregarded and accepted.
DUB
06-20-2017, 09:06 PM
#120
Drifting
Thread Starter
I will wait on your photo becasue I really need to see it....and I am aware of what you are concerned about....assuming that the doors are correct for the year model.
You 'kinda' have to be careful in using the door hinge shims to 'correct' the rear of the door. I know many people 'say' to try it and it worked for them ( which it might have)....but there are variables that can come into 'play' that come back and haunt you that they may not have mentioned or disregarded and accepted.
DUB
You 'kinda' have to be careful in using the door hinge shims to 'correct' the rear of the door. I know many people 'say' to try it and it worked for them ( which it might have)....but there are variables that can come into 'play' that come back and haunt you that they may not have mentioned or disregarded and accepted.
DUB


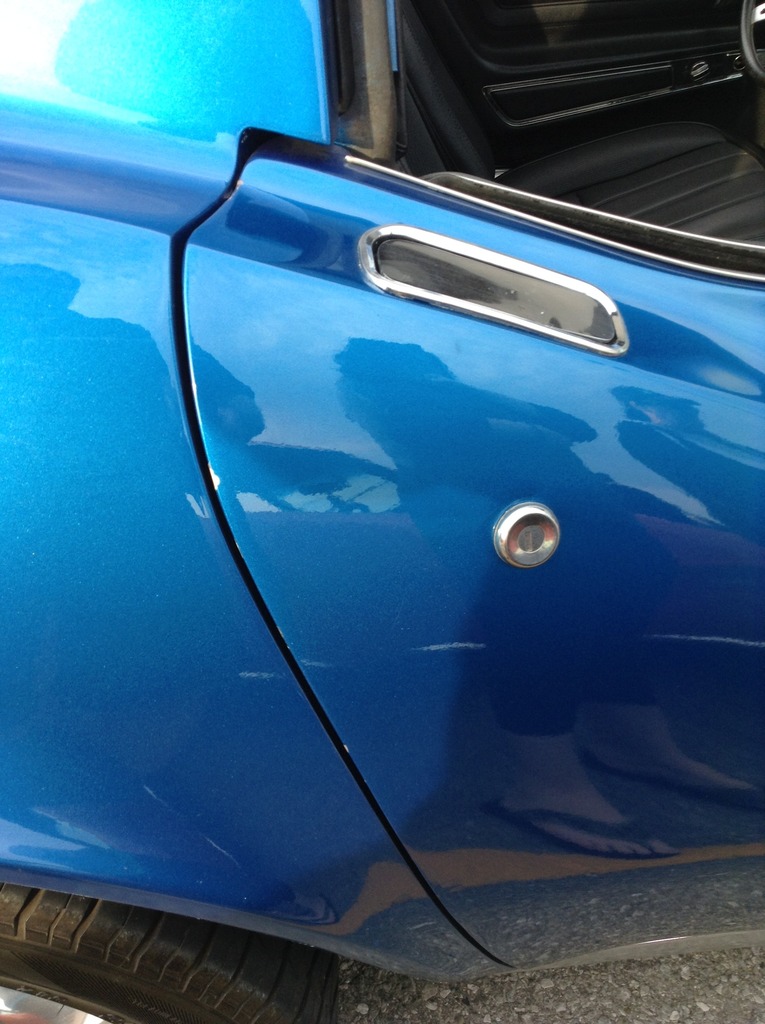
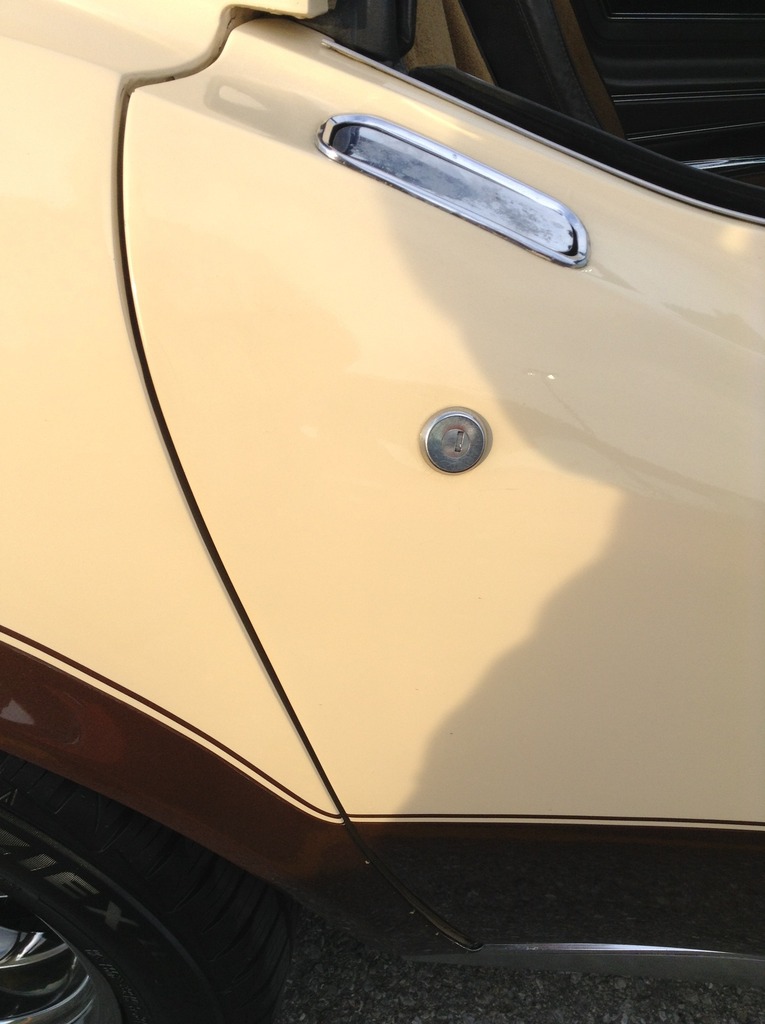
Not sure how to suck this in so it aligns with the sail panel. The car had 2 shims top and bottom I added one more to push it out a bit.
Dave
Last edited by The Phantom; 06-20-2017 at 09:22 PM.