When you click on links to various merchants on this site and make a purchase, this can result in this site earning a commission. Affiliate programs and affiliations include, but are not limited to, the eBay Partner Network.
1975 Coupe. I have the rear suspension all out and working on detailing and rebuilding everything. While I was under there I noticed that the hinge reinforcement for the rear storage compartment was all rusted out and falling apart. So while I have the room to work under there with the cross member out I figured I would replace it. I removed the storage compartment doors and the frame. Horrible job, I had to drill out every screw as they were all rusted and stripped. I drilled out all of the rivets. I have several questions. I was planning on doing interior work last after everything was done underneath and with the drive train. It appears that the hinges get riveted to the frame but to install the new compartment hinge reinforcement to the body do the rivets go through the compartment frame, through the body, and through the reinforcement where they get set with the rivet setting tool from the underside of the body? I have read several articles on interior restoration and one article in a Chey magazine where they were replacing the interior on a 1972 said that to replace the compartment frame only requires the removal of the screws and doesn't mention the rivets going through the frame. Did they do it differntly on different year C3's? I would like to do this correctly because I have a good stock of the correct rivets but once the suspensiion is back in place I don't see a way to get the rivets set with the cross member in the way so hence I will need to at least work on the rear carpet because I don't see a way of replacing the storage compartment frame without setting in the carpet first. I found the jack label on the inside of the compartment door. The date on the label is 1972. Is this a label from a 1972 C3 or did they just print those labels and use them for several years after? Hard to tell what is going on with this car because it has been bubba'd to death over it's life. They installed a different carpet from who knows where and glued the crap out of it in the rear storage area. I found the hooks for the t-top straps under the carpet on both sides. Not sure if the front one is there yet.
I have a 68 coupe, but I am positive that you would only rivet the reinforcement to the fiberglass. I think that there are even recesses for the rivets to be out of the way of the rear compartment frame. I have had to change my frame twice in the 43 1/2 years that I have owned my "rain magnet", and did not have to touch those rivets. Lou.
It appears that the hinges get riveted to the frame
YES...the compartment door hinges for the rear compartments DO get riveted to the FRAME....and they are held in by the CORRECT LENGTH SOLID ALUMINUM RIVETS that you have to buck. I DO NOT use pop rivets so I know the hinge will close down correctly. SO..the large round FLAT head of the aluminum rivet is on the outside of the frame and you will buck the rivet on the steel portion side of the hinge. That way...the FLAT HEAD of the aluminum rivet will not impair how the frame goes into the area to be installed.
Originally Posted by teamo
but to install the new compartment hinge reinforcement to the body do the rivets go through the compartment frame, through the body, and through the reinforcement where they get set with the rivet setting tool from the underside of the body?
NO. You rivet the steel retainer that is on the underside of the body with rivets. THEN..the compartment frame and be installed and new holes drilled for the screws that hold it in place.
Originally Posted by teamo
I have read several articles on interior restoration and one article in a Chey magazine where they were replacing the interior on a 1972 said that to replace the compartment frame only requires the removal of the screws and doesn't mention the rivets going through the frame.
THEY ARE CORRECT
Originally Posted by teamo
Did they do it differntly on different year C3's?
NO.
Originally Posted by teamo
I would like to do this correctly because I have a good stock of the correct rivets but once the suspension is back in place I don't see a way to get the rivets set with the cross member in the way so hence I will need to at least work on the rear carpet because I don't see a way of replacing the storage compartment frame without setting in the carpet first.
You are correct!
ATTENTION: When you get the new piece of steel retainer for the compartment screws in the rear. WHEN you go and drill the outer 2 screws...you will notice that the metal retainer strip you installed CAN BEND OUTWARDS when you are drilling these two outer holes....due to NO RIVETS being at the end of the metal retainer. SO...you will either..need to take you time and NOT apply a lot of pressure when drilling these two holes...OR..have a helper who can be under the car and APPLY pressure to the end of the metal retainer so it does not move.
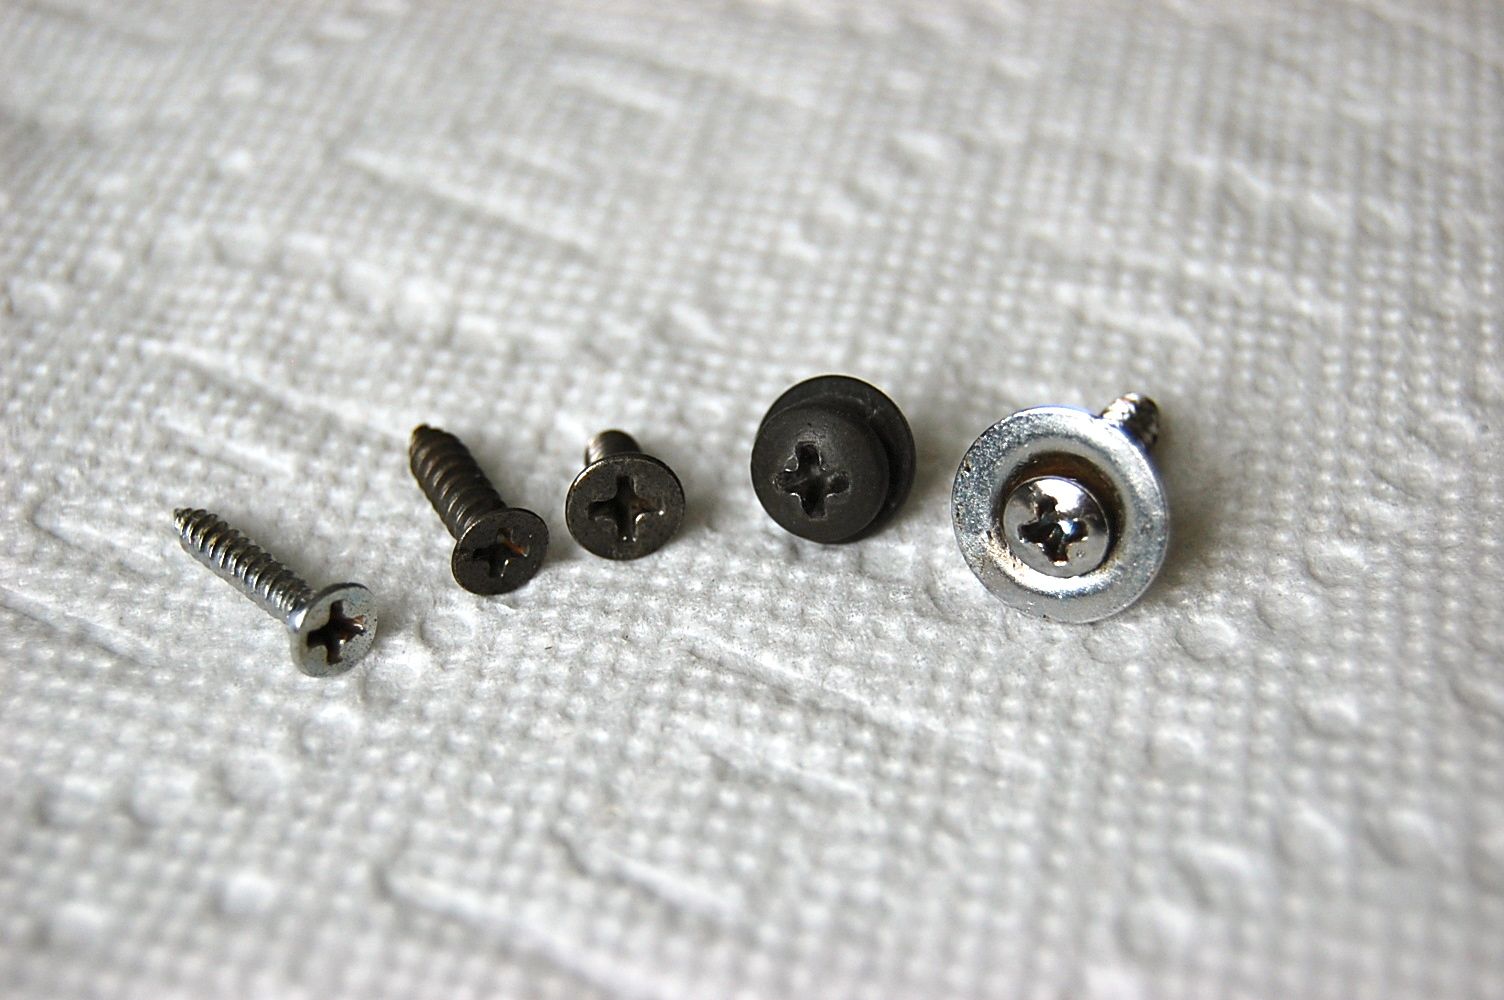
ALSO...be aware of the shallow head design of the screws that you need at the rear of the compartment when you put it all back together, I use the SAME TYPE of screws that are used to hold in a license plate light for a 1975-1982 Corvette. They have the exact same type of washer and head.
Hi,
I find it a bit amazing to see the variety of fasteners GM used for the hinges, frame, doors, surrounds, and latches!
I'm not sure how far into the 70's this assortment continued?!?
Regards,
Alan
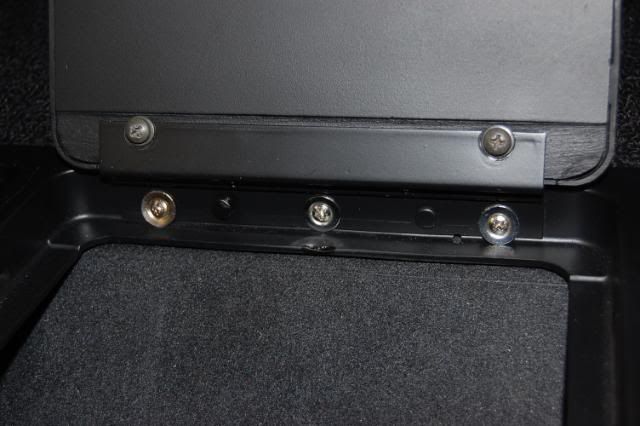
Thanks Dub and Alan. That's good news I can rivet the new reinforcement in place and leave the interior for later. I am debating whether to buy all of the parts for the compartment and rebuild it or just buy the whole door set with the carpet already installed ready to go. The hinges and latches are salvageable as well as the doors. I Will need a new main frame and door bezels and screw hardware. The screw hardware that I have is like the variety that Alan's pictures depict with the chrome washers around the hinge screws. The picture of the inside of the doors with the GM label looks like it is a composite/fiberglass door. Is this correct for 1975? Most of the parts catalogs seem to show plastic doors for 1975. IF I decide to rebuild the door set and frame where do I cut the carpet pieces from? does the rear carpet set come as one large piece and the doors get cut out of it? Attachment 47972289
The rear carpet set will come with the carpet pieces for the door pre-cut...BUT...they will need to be trimmed once you get them on due to being a bit larger.
YES....I believe almost 100% that the doors are the composite plastic design....and NOT the fiber boards design.
I have done COUNTLESS rear compartment frames and door assemblies. AND I can tell you that you will spend some time on getting this RIGHT. IF you do not trim the carpets correctly and get the doors shaped and sanded so the door bezels slide on and NOT bulge out...and then get the screws to hold the bezels on. What can happen is that when you bolt the door to the hinge..the door binds up when you close it all the way.
THEN...when you put the rear compartment assembly in the car...getting the carpet cut and trimmed correctly is also important becasue it then can cause the frame to close in on itself a little bit and your door bind up again.
Then it is getting the push buttons adjusted and work flawlessly.
I can say that there are a lot of things going on here and I can also say that the pull loops that were original are much thicker and stouter than many that I have had come in where they are really 'cheesy' and seem to not have any body to them. I have pulled up on a door when it had a slight bind and the pull loop failed and came apart....which is what has now caused me to look at them really good.
Lou,
I suspected that the door with the label was a replacement. The one with the label was the center door which had a different color carpet (although the whole interior color was changed at some point). The door with the label also had the bezel pressed on and there were notches in the door to accept tabs to hold it in place. The bezel was cracked so I removed it. Had to break it away with a putty knife. The other two doors had rivets holding the bezels onto the doors.
I know this is an old thread but I am working on fixing a 72 couple which the rear storage compartment door frame is broken. I see the large rivets and I can get those from Zip along with the frame but how does one fasten them? In a thread from 2016 Dub said that you "buck" them in does anyone know what that means? My hinges and doors are fine just need a new frame and I want it as factory as possible, pardon the interruption and thank you for your time. Keep well and safe Kevin
The factory rivets weren't "pop" rivets so they needed to be supported on the "head" side with a steel "buck" while they were hit on the other side to mushroom that end of the rivet over to hold everything.
On large things they needed two people, one to hold the buck and the other to operate the "riveter" which is like an air-chisel with a flat (concave) end, on the smaller things sometimes one guy could reach around and hold the buck in one hand and run the gun with the other
M
It is worth getting the air chisel. I bought a cheap one at HF and the concave chisel attachment online. The chisel makes the job very easy. I have been using some lead bars as the bucking tool, but anything that is solid and has some weight to it will work.

 04-13-2016, 06:40 PM