When you click on links to various merchants on this site and make a purchase, this can result in this site earning a commission. Affiliate programs and affiliations include, but are not limited to, the eBay Partner Network.
1972 Rear bumper, filler panel and bracket alignment issues
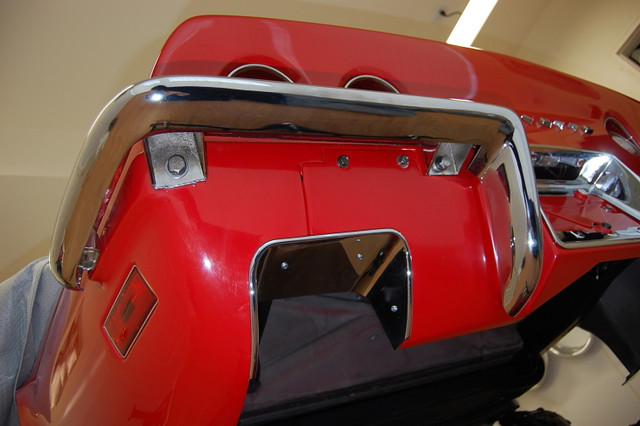
Hello all working on the 1972 Vette. I noticed the rear bumpers were loose. Upon closer examination I see that some of the bolts had not been installed. I also saw that some of the brackets mainly those involve with the license plate area were also not connected. Also both bumper brace rods were not bolted onto the bumpers
So OF COURSE I need to correct this , but I soon found out why they were not. There is a lot of misalignment between the bumpers, the rear exhaust filler panel and the bracket. I ran out of time and was missing some bolts so I will be tackling this over the weekend. The bumpers appear to be after market.
So any advise or suggestions as to how to align all these components? What order do I install them in? Sorry the only photo of the area that I took.
Thanks Ike
By the way the metal had some surface rust so I tried "1" step rust killer, with some very minimal scraping of the surface rust. I want to see how it will hold up.
Hi Ike,
The position and fit of the exhaust filler panel needs to be done first, then the bumpers and their brackets can be installed and aligned.
Because there are so many fasteners and parts this is a very involved process.
I start with the license bezel and exhaust bezels off since these limit how the filler can be aligned,
You really need to get everything in place and the fasteners just started then gradually tightened the fasteners while continuing to adjust the fit and alignment.
Regards,
Alan
Thanks all, Alan you must have an extensive library of photos at your finger tips. Great for everyone looking for some insights . Thank you for them !!
The main aim issue is the bumper brace rods. They don't seem to be long enough or angled properly to clear the filler panel slots and bolt in. I will loosen all the bolts involved and reassemble them hopefully getting them to align. Ike
Last edited by general ike; 04-18-2017 at 01:08 PM.
Hi Ike,
The 2 bumper 'rods' are tricky because they must be attached and torqued before the bumper is put into place.
Once the bumper is installed there is no access to the bolts.
I'm unsure if the rod has an 'up' and 'down'. You'll need to check that before you begin to install the bumpers.
Good Luck!
Regards,
Alan
Alan, perhaps it was because the bumpers were not on tight but I seem to be able to access to the screw on the bumper that holds the rods by going up the from the bottom thru the bumpers downward extension with a socket on a extension. The bolt must be in place however but not torqued. Again it may be because o the misalignment that is allowing me to do so.
There does seem to be a "up and down" to the rod, the ends are not identical. I am pretty sure they were in correct but I will check. I may need to bend the end of the rod's angle to make this happen.
I will see how it goes this weekend.
Doorgunner were you able to align everything in the end on your 68?
Thanks Ike
Last edited by general ike; 04-18-2017 at 10:11 PM.
Hi Ike,
I believe that typically the bolt for the rod on the bumper can't be reached once the bumper is in place. I can't even get my little finger in the space between the vertical part of the bumper and the exhaust filler panel.
If the bumper isn't 'level', or if the filler panel is tucked under in the middle, a 'gap' between the bumper and fill panel can be the result.
Perhaps you'll find that the case as you work on aligning your exhaust filler panel and bumpers.
Regards,
Alan
Alan As always thank you!!!! Yes mine has a gap, probably because of the misalignment.
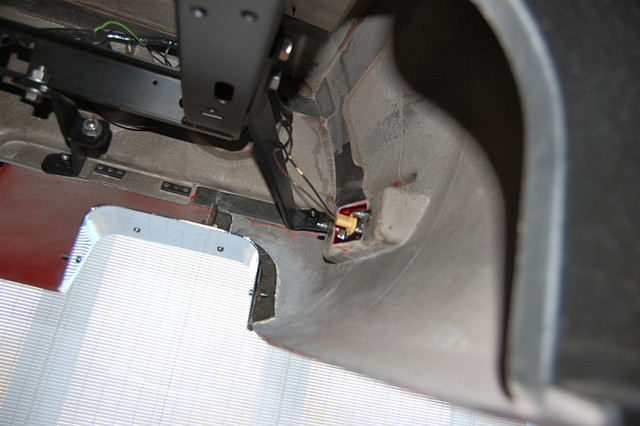
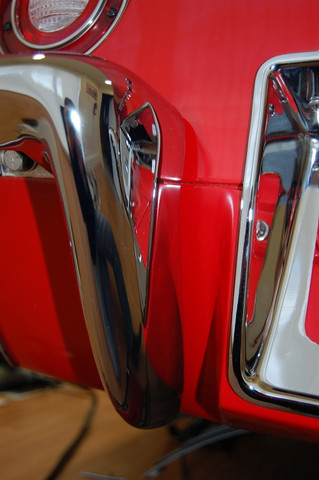
Here is a picture before I disassembled it, Not the best of angles to ascertain the gap. Your photos will help me with the alignment.
Notice that the alarm lock has been removed. Was that common? I saw a few from this period that had the lock removed and the opening closed up. The alarm internals seem to still be there but I have not checked its function. I am debating if I will restore it. Thoughts about restoring the alarm everyone?
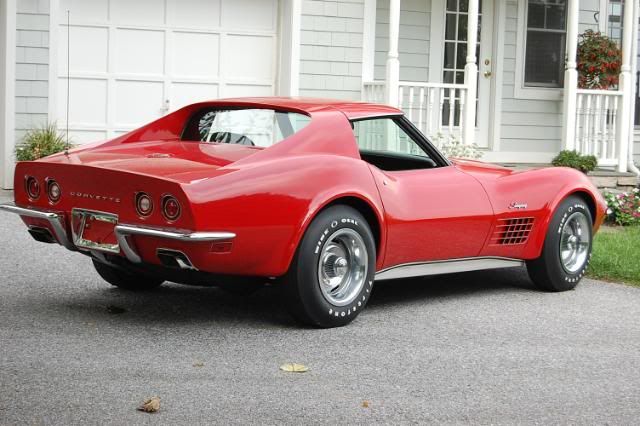
Alan Your Vette is breathtakingly gorgeous. Was it a frame off restoration? What condition was it to begin with? Is there a post about it on the forum?
Thanks ike
Last edited by general ike; 04-19-2017 at 04:50 PM.
Hi Ike,
From the photo you posted I'm surprised you can reach the bolt�. the fit doesn't appear to all that different than what I'm seeing on my car.
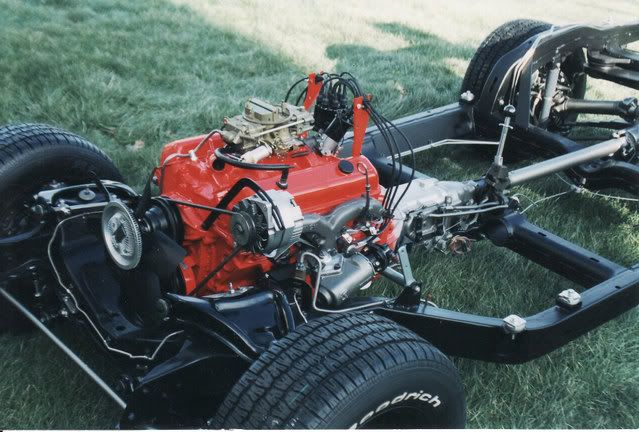
I'm the original owner of my car.
It has a little over 46,000 miles on it.
I did the restoration in my basement garage, but didn't do the exterior painting. It has acrylic lacquer on it.
It was in good condition, hadn't ever been hit, and was VERY complete.
It was an easy, relatively cheap, but time consuming, restoration.
Regards,
Alan
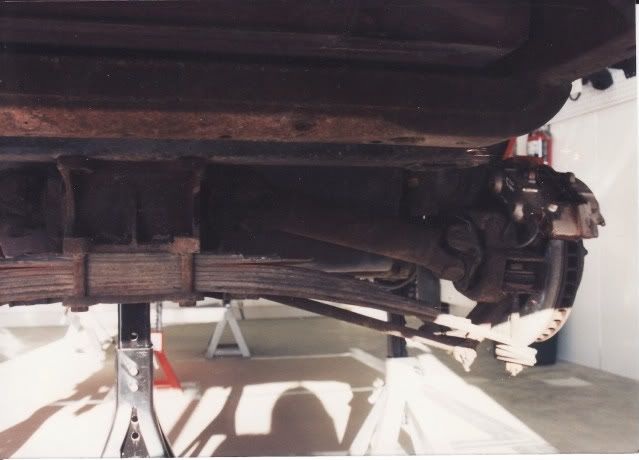
Beautiful. You should be quite proud of that!!! I will attempt something similar with the under carriage, next fall. Not as extensive as yours but just to clean it up a bit.
Was it a frame off or on restoration?
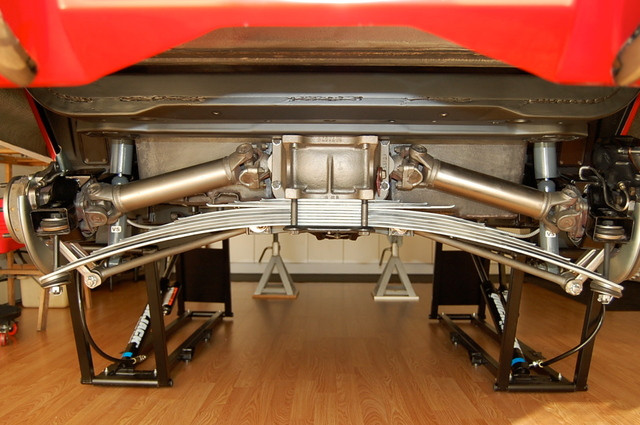
Don't the jacks embed into the wooden floor?
As usual the bumpers was a last minute thing when I was working on the car last, so I did not have a chance to really get into it. The car is not here were I am currently so it will need to wait till this weekend to sort it out. The bumpers were positioned well but missing some of the bolts. I am not sure why I was able to get to the vertical one but I may have tighten it to the rod then first then attached the other end of the rod??!??
I am very grateful for everyone's help, especially yours and especially all your great photos. I download them to use as reference later.
Hi Ike,
Each of the Quick Jack lifts have 8 rubber feet that spread the load.
I do have to be careful using jack stands. I have 12"x12" particle board squares that I put under the stands when I use them.
Yes, the body was off�.. for a long time!
Regards,
Alan
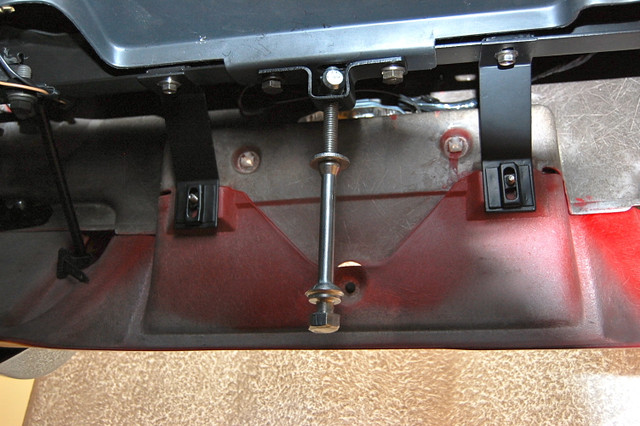
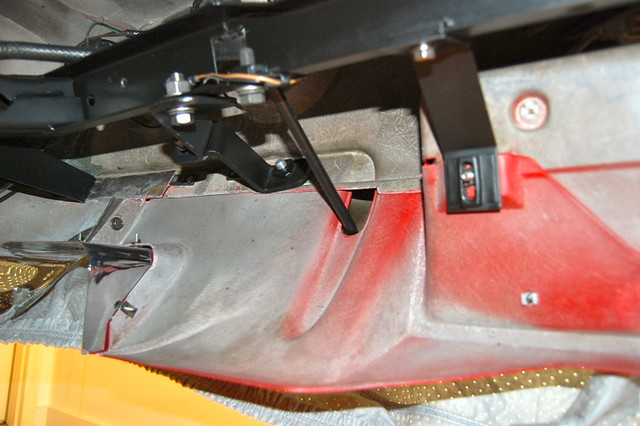
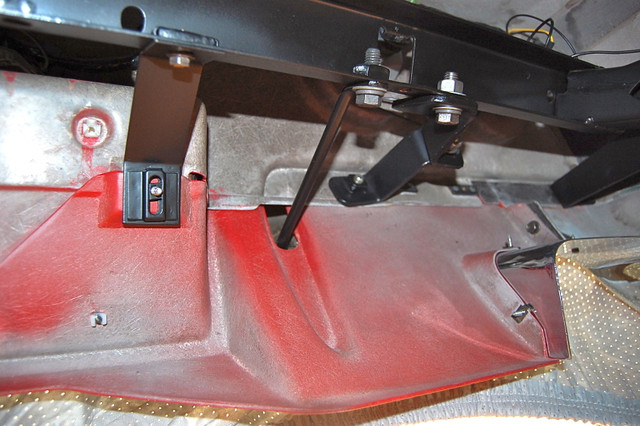
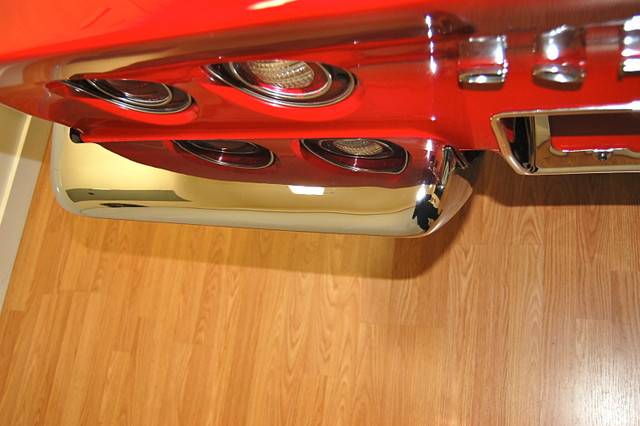
Well all here is a conclusion if anyone is interested. It appears that it is the "fault " of the after market bumpers fit up. The car is definitely straight and has never been hit so I know the Vette is straight. Lining everything up was impossible. Perhaps if I was to disassemble everything and start from scratch maybe.
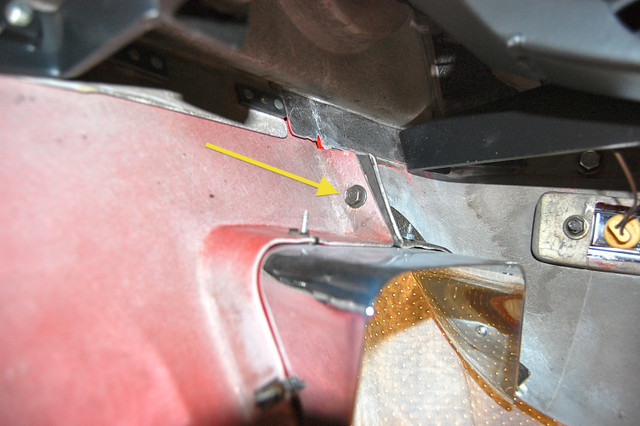
So my only option was to bend and "customize my two bumper rods that attach to the vertical section of the bumper. The only other option was to leave them of.
You can still see a gap on the passengers side. The past owner had replaced them unfortunately the originals are gone.
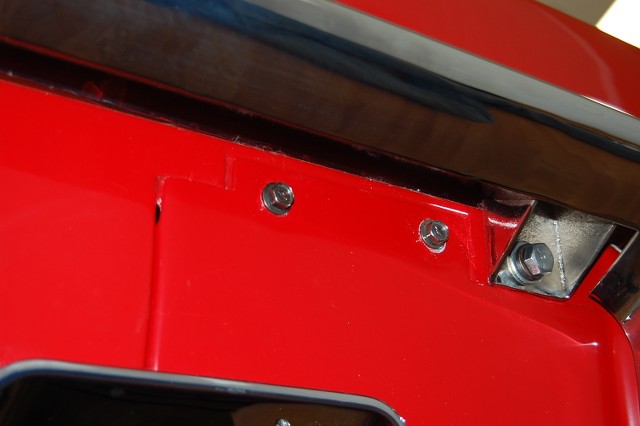
Alan with regards to the gap between the downward arm of the bumper and the exhaust filler panel was still present until I engage the bracket by the license plate bezel (marked #2 in the pic). They really pushed the panel up closer to the bumper closing the gap. (#1 are the bent bumper rods.)
Again thanks to all for the advise and assistance!!! Ike
Last edited by general ike; 04-26-2017 at 08:17 PM.
Hi Ike,
The position and fit of the exhaust filler panel needs to be done first, then the bumpers and their brackets can be installed and aligned.
Because there are so many fasteners and parts this is a very involved process.
I start with the license bezel and exhaust bezels off since these limit how the filler can be aligned,
You really need to get everything in place and the fasteners just started then gradually tightened the fasteners while continuing to adjust the fit and alignment.
Regards,
Alan
Don't forget these.
Or these.
Alan, what kind of screws did you use to connect the Frame Bracket - Rear to License Plate? They're the two on your first photo - see attached. Thanks in advance!
Yeah Baby 63 old thread you might want to start a new one. But to answer your question, there appears to be a captured nut in the bracket that drops down from its attachment at the frame above. Sorry not by the car to verify. Ike.
Last edited by general ike; 05-16-2021 at 11:21 PM.
Thanks Ike - I know it's an old thread, but this is the only link that shows these screws - anywhere. Was worth a shot to see if anyone had information on the mystery screws. All the best to you!

 04-17-2017, 09:31 PM