When you click on links to various merchants on this site and make a purchase, this can result in this site earning a commission. Affiliate programs and affiliations include, but are not limited to, the eBay Partner Network.
Longer story short, several life events have been a factor in me not making this project a priority. I've come to realize that dealing with the trials of tribulations of unexpected loss and dealing with aging family members are the new normal. It's taught me that like so many have posted here, there's no time like the present.
So I am considering embarking on this project. In fact I've already started in some ways but want some advice from the many knowledgeable folks on the forum. Many who've been there done that....
When I first got this car, I thought I could just plunk the #'s matching drivetrain in and clean up the interior adding back many components under the dash and just drive it. Yeah right!
I've done a thorough review on the car after putting it on a new lift that I bought and am now re-thinking the project. Despite what feels like a daunting project, I am thinking of pulling the body off the frame.
Ready to tear into it.
I've purchased the service manuals, have hard and soft copies of the AIM, and purchased the book "How to restore a C3" by Walt Thurn - the latter one seems to have a lot of good insight.
Since the car based on what I've been able to gather, has been sitting for over a decade, I've noticed the #4 body bushings are in pretty bad shape despite #1 and 2 looking pretty good. I started thinking I need to replace the bushings and I know this can be done without lifting the body completely but the car is already torn apart to a great degree and...well we all know why the term "project creep" exists!
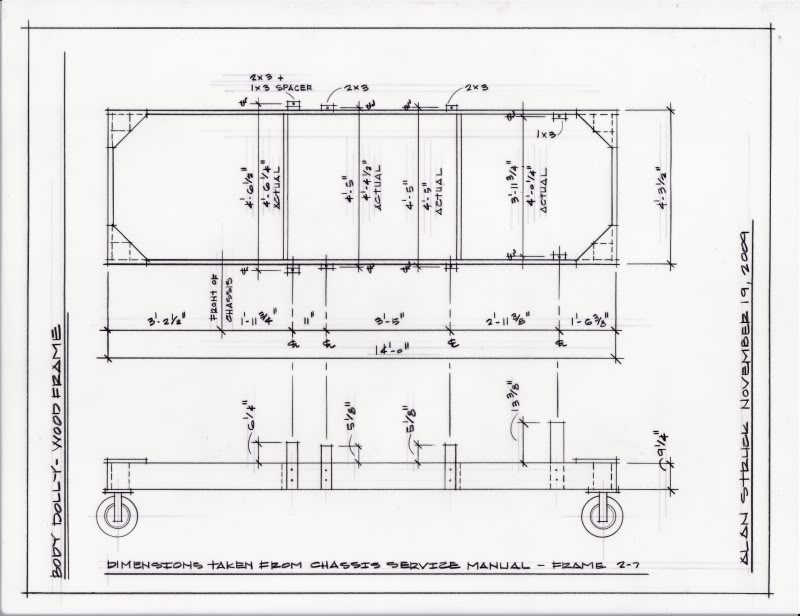
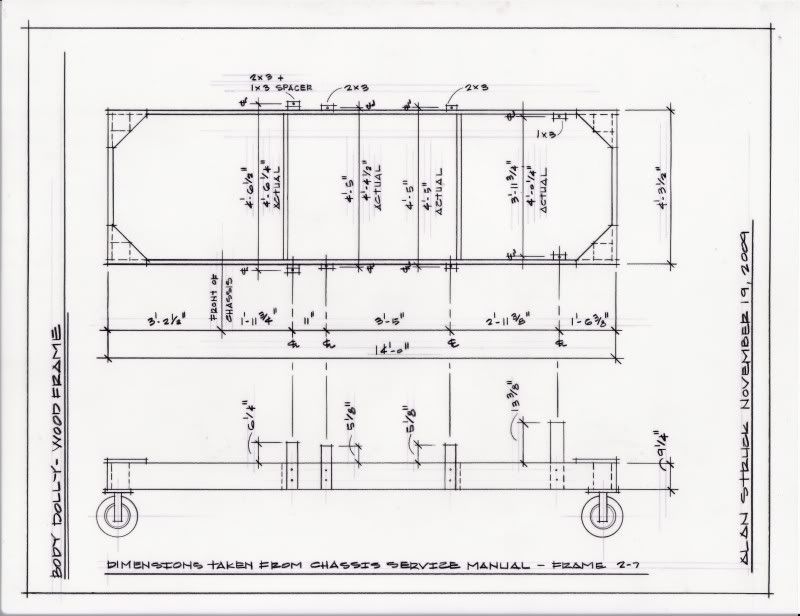
Walt Thurn's book has the materials needed to build a body dolly but not the illustrations... I will search the forum to see if anyone has some plans they have shared...
I don't want to write endlessly, so I'll try to convey some specifics. The car was a running low mileage #'s matching car needing paint when purchased in the early 2000's by the owner who accidentally caught it on fire when installing a new carb and intake. This wasn't known to me at the time of purchase because of the new windshield and firewall repair.
Repaired firewall sectioned in from near Master Cyl mount on drivers side to just shy of the A/C box mount on Pass side
The interior was undamaged except the wiring harness and I've since purchased lots of new parts many from CF members including a new dash from Willcox to replace the heavily cracked one since it has to come out in order to reinstall all the A/C components. Despite supposedly a replacement harness already installed - it looks like a salvage sourced one, so I think I want to replace it with a known good one.
One last question When looking at the rear transverse spring the other day, it's shifted forward on the drivers side and backward on the pass side. Anyone have any ideas as to what or why? Also is this a big deal?
Drivers side Rear spring - moved forward
Pass side shifted opposite
I am fully aware that 15,000+ of these were made in this color combo and despite being a true #'s matching L82/4 spd/3:36 rear car that it will likely never be a money maker for me. Skies not the limit either, I want to be sensible Also please know I want to do it "right" but am not interested in making it full-on NCRS e.g. I am not interested in putting 30-40K in it. I bought it to drive it and want to fulfill that dream. There are better cars available and I have even seen two similarly optioned in the last year selling in the mid to high teens- probably what will be less than what this car will cost me, but I didn't bite. This car shows evidence that it was pretty well cared for most of the years it ran and I feel compelled to get it back there.
That being said, you guys are the experts and your opinions and advice will be considered.
Finally, this is on my profile page- but here is the car...
Swap out the entire exhaust system. Sound deaden and heat barrier the interior. Replace all the old rubber bushings. Swap over to 18" wheels and tires.
Hi 25T,
You're right in thinking that taking the body off the chassis opens the door to a lot of possibilities� most all of which involve time, work, and money.
There are dimensioned drawings for various body dollies available� have you done a search?
The rear spring leaf's are typically held in alignment by the 4 bolts in the center and perhaps with 2 vertical spacers� are they there?
Good luck as you get going.
Regards,
Alan
Here are 2 of the 4 spring mounting bolts.
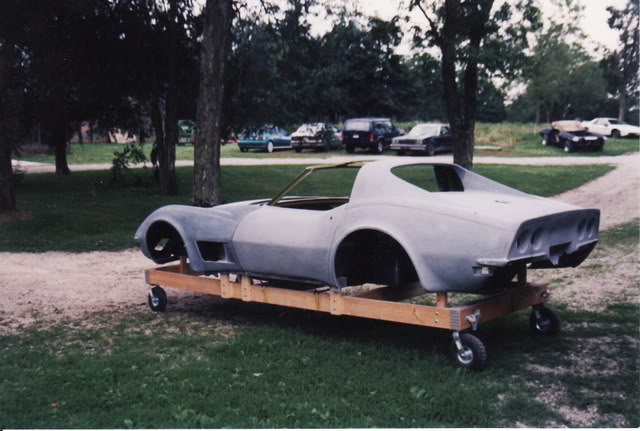
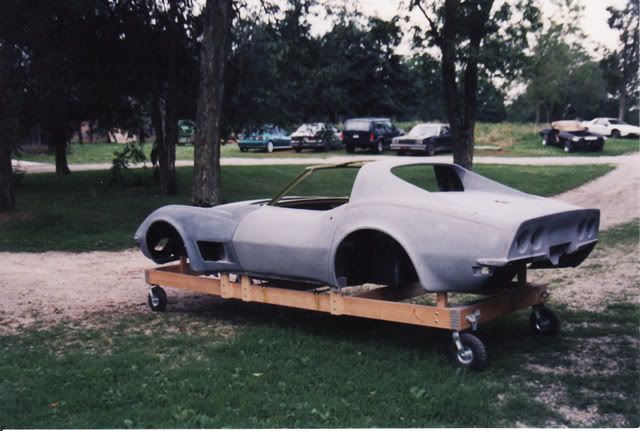
Here are the plans for an easy to build wooden dolly. It supports the body at the 8 body mount bolts.
Hi 25T,
You're right in thinking that taking the body off the chassis opens the door to a lot of possibilities� most all of which involve time, work, and money.
There are dimensioned drawings for various body dollies available� have you done a search?
The rear spring leaf's are typically held in alignment by the 4 bolts in the center and perhaps with 2 vertical spacers� are they there?
Good luck as you get going.
Regards,
Alan
Here are 2 of the 4 spring mounting bolts.
Here are the plans for an easy to build wooden dolly. It supports the body at the 8 body mount bolts.
Hi Alan,
Thanks for both the photos and the plans. I've seen your many posts on here and you are wealth of info sir!
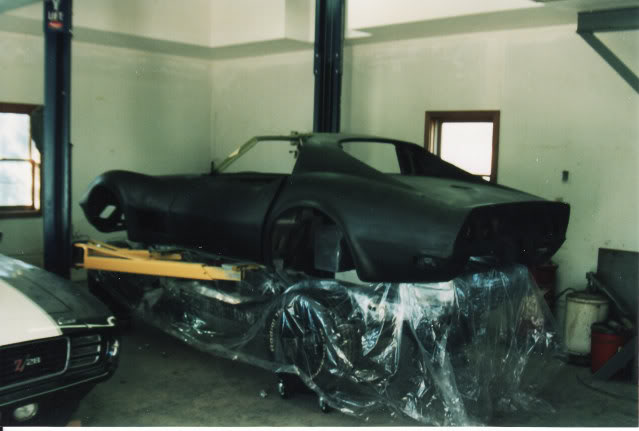
I have searched and seen some body dolly's. Regarding the one you built, I am presuming it's low enough for the body shop to be able to work on the body while separated from the frame? I really feel like I will have the paint and bodywork done concurrent to my efforts on the frame.
I was at the shop today but will look and take a picture of the spring mount area tomorrow, to see if anything looks amiss
Thanks for both the photos and the plans. I've seen your many posts on here and you are wealth of info sir!
....but will look and take a picture of the spring mount area tomorrow, to see if anything looks amiss
Thanks again!
Alan,
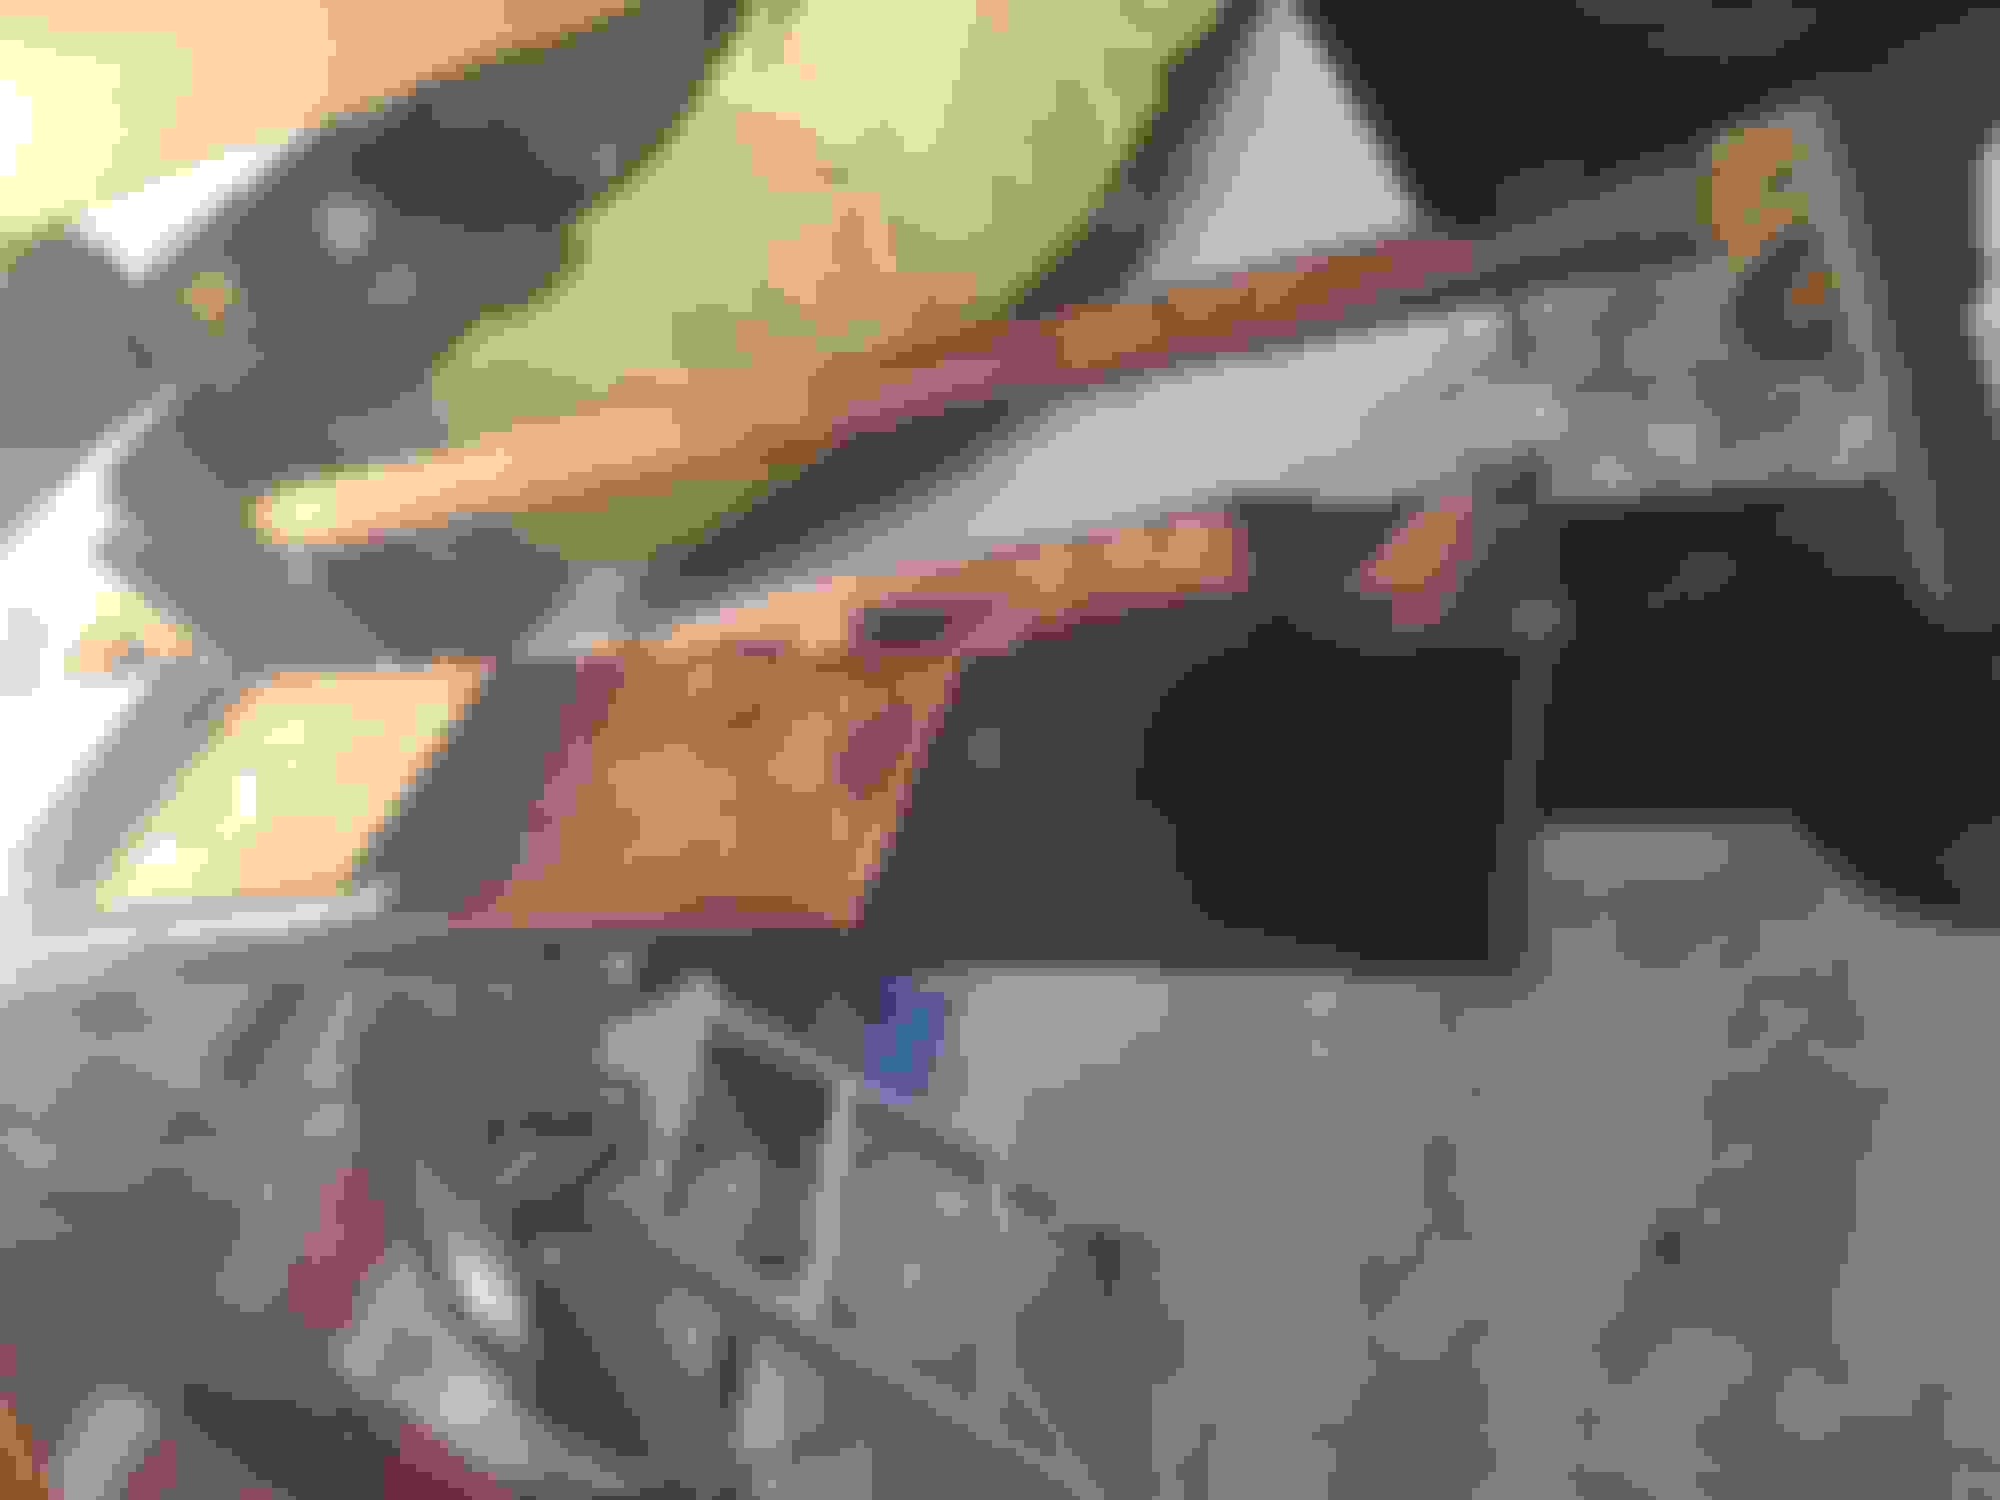
Dropped the Spare tire tub and cover yesterday - found another massive pack of mud dauber nests
These bugs built nests everywhere in this car!
I am now able to see the differential and leaf spring mount very well as you describe and honestly have no idea why it's shifted - it looks like it's only at the attach points to the trailing arms where the leaves have shifted.
More really old mud dauber nests!! All bolts are in place and looks secure -
leaves are shifted back on right
Moved forward on the left
It's all coming apart so I am not sure it matters at this point, but I was not planning to do anything but refurbish and restore the spring.
Hi Toi,
The spring leafs have a 5/16" bolt that runs through hole in the center of each leaf.
If the bolt is in place the leafs must pivot on that bolt.
The 4 bolts that mount the spring are far enough from the center bolt and far enough from the bolt to prevent the spring leafs from pivoting when the spring is mounted.
Talk to your painter� many painters prefer that the rough paint prep and body repair be done on a dolly but the final setting of gaps, prep for paint, and paint be done with the body back on the chassis.
Regards,
Alan
Going back on the chassis.
Address door and hood gaps/transistions, and then paint.

 06-10-2017, 02:03 PM