1979 C3 LS3 Swap w/classic auto air....
 07-25-2017, 07:19 PM
#1
Drifting

Thread Starter
Member Since: Nov 2004
Posts: 1,624
Received 287 Likes
on
128 Posts
2020 C3 of the Year Finalist - Modified

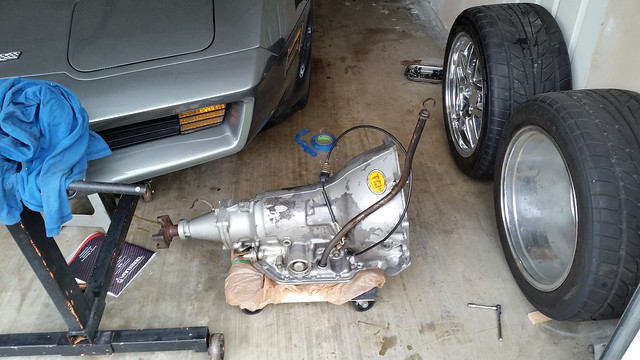
I recently sold my perfectly good drivetrain to a local C3 guy (383 stroker motor (with a bunch of goodies), TCI th350 trans w/b&m stall, OBX side pipe headers (kept sidepipes and mufflers for LS engine). I began this a little while back and at another place so that's why all the pictures/commentary are at once here.
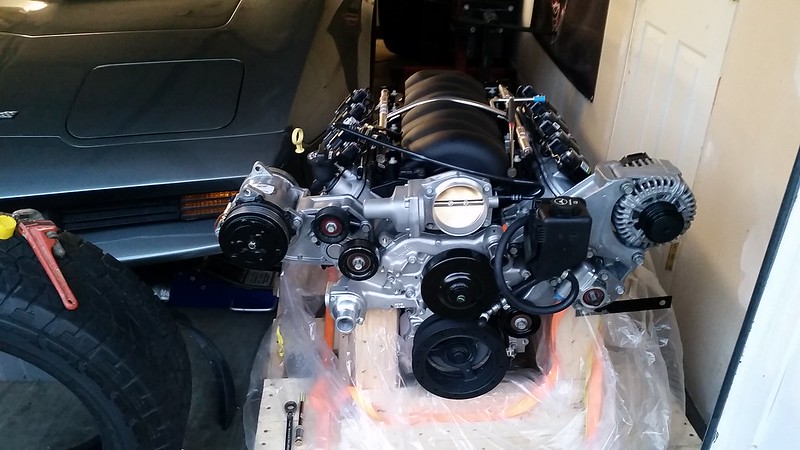
I'm planning on the LS3 525 crate motor with a 4L70e trans and stall. I'll also be going installing a classic auto air setup along the way.
Here's some pictures from a little while back.
Out with the old....

I'm planning on the LS3 525 crate motor with a 4L70e trans and stall. I'll also be going installing a classic auto air setup along the way.
Here's some pictures from a little while back.
Out with the old....
Last edited by bluegtp; 05-24-2023 at 12:47 AM.
 07-25-2017, 07:20 PM
#2
Drifting
Thread Starter
Member Since: Nov 2004
Posts: 1,624
Received 287 Likes
on
128 Posts
2020 C3 of the Year Finalist - Modified
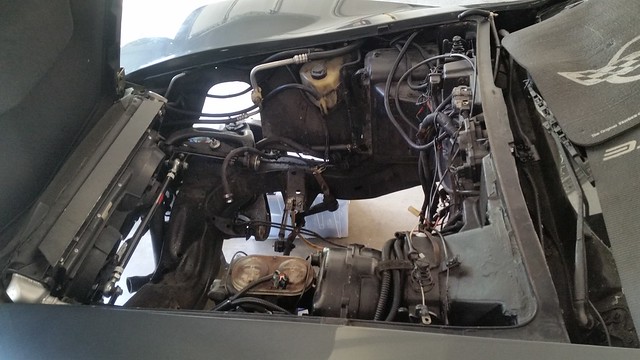
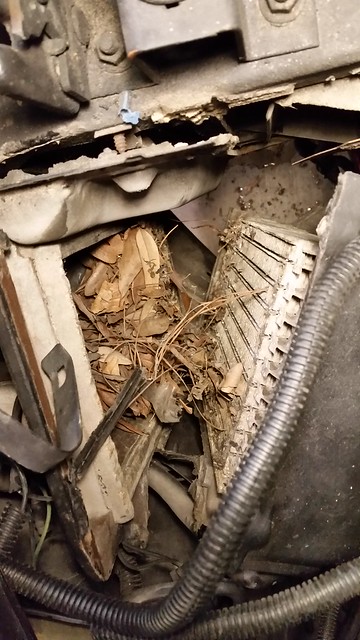
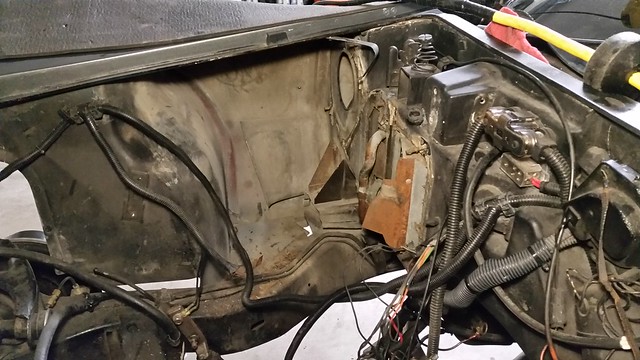
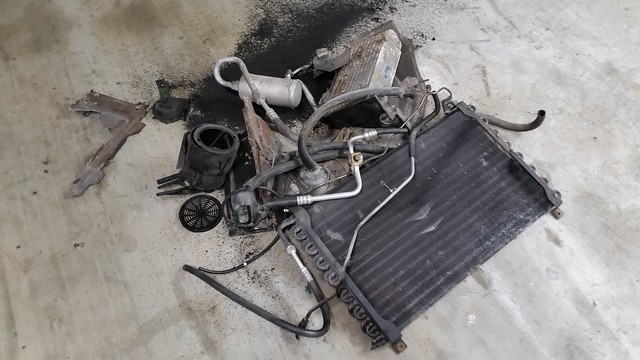
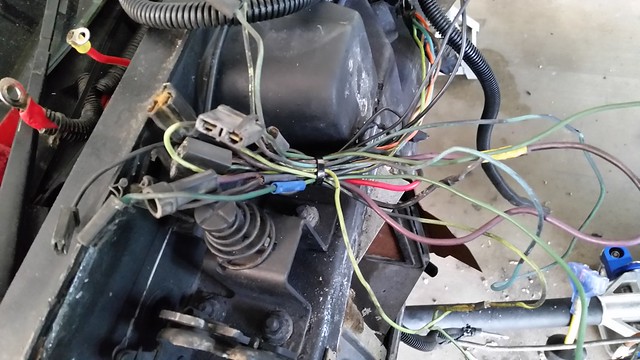
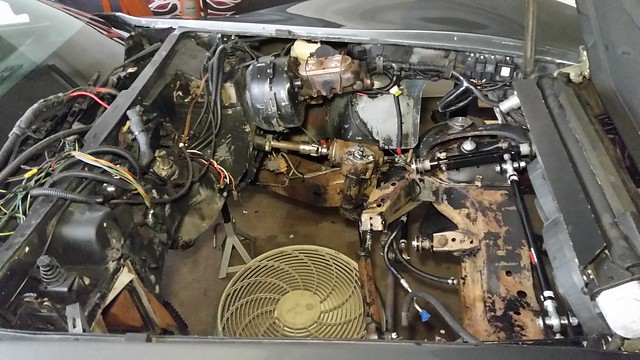
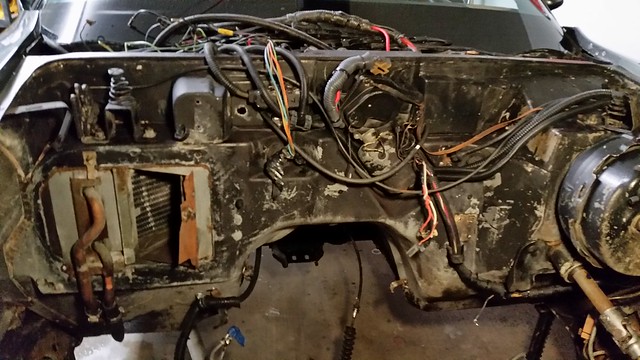
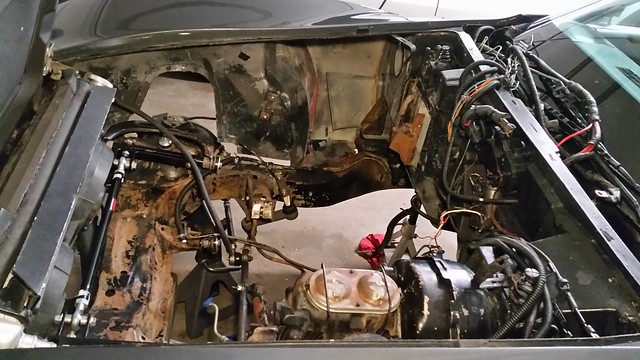
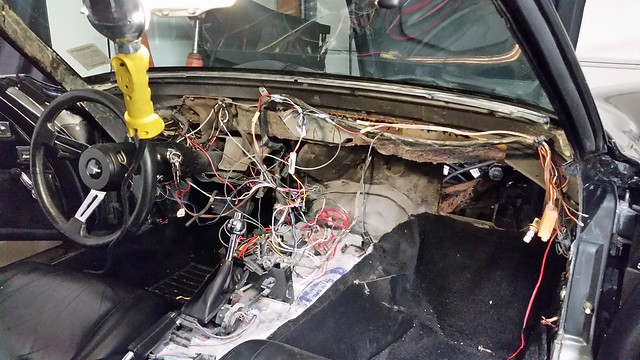
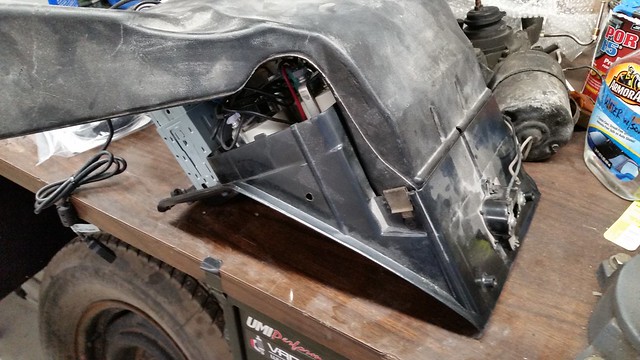
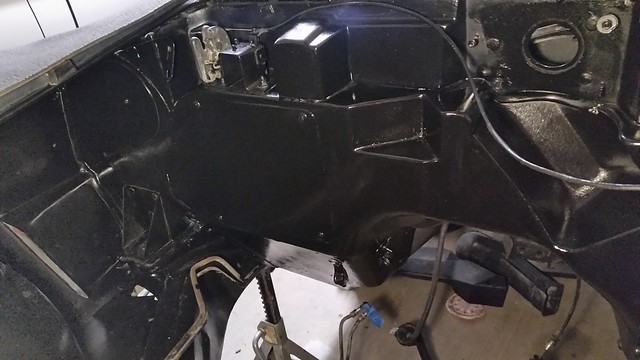
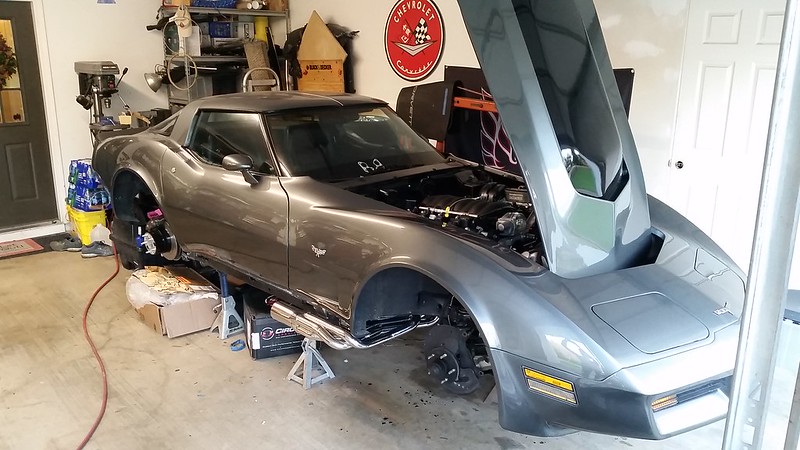
A little bit of degreaser and pressure washing along with demo of the old ac setup and pulling dash. Engine bay will get some fresh paint and some new wiring harnesses (car had an engine bay fire at some point and random splices in the engine harness, starter and ac). I think I will really like the additional space in the engine bay though.


07-25-2017, 07:22 PM
#3
Drifting
Thread Starter
Member Since: Nov 2004
Posts: 1,624
Received 287 Likes
on
128 Posts
2020 C3 of the Year Finalist - Modified
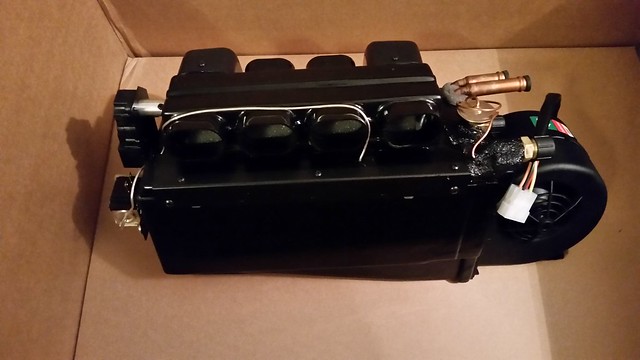
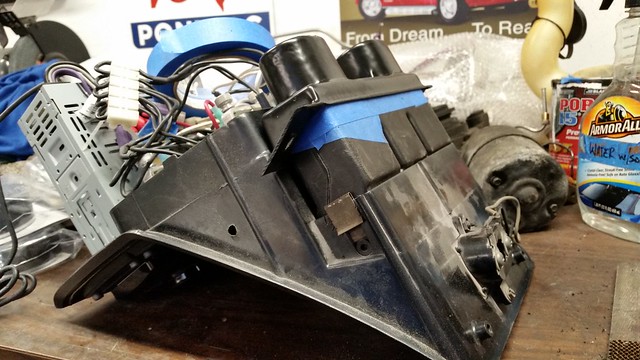
classic auto air system came in last week. Hopefully it performs well and everything looks nicely laid out. Not sure exactly what to think about other than that. The company gave me a "custom kit" since they don't make one for the 79. I figured they would've started with the 68-76 kit and worked out the differences. (which maybe I should've just ordered the older setup and dealt with the differences myself, we'll see) Instead this way I had to make my own block off plates on the firewall. Not that hard and came out clean looking (see below).
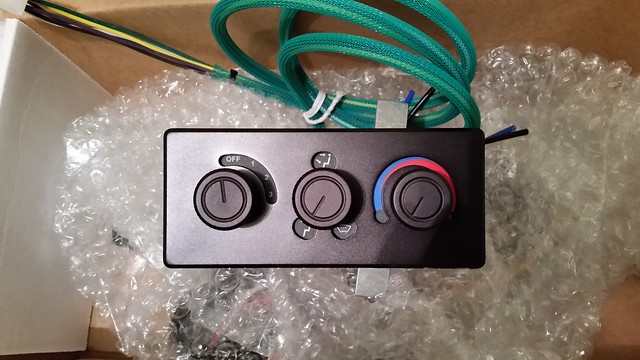
I sent back the cheesy looking controller for the system. 1: cheesy looking 2: ***** are too large and you can't see the symbols, 3: way too large 4: goofy way of mounting.
I returned the defrost vent they send because it doesn't match up to the factory defrost and not close to the dimensions I gave for fitment. If they provide something close to the right size for the factory vent duct I can modify to make it work. Not a big deal and expected.
I also had to order some bulkhead fittings because with this kit they give you grommets to route your lines through the firewall. Kinda cheesy looking on this build in my opinion. I wasn't told this when I ordered the kit either.
I called last thursday to return the controller and get some bulkhead fittings and the guy never returned my call. I called the following tuesday and he said he received the controller I shipped back to them and will get the bulkhead fittings and new slimline controller out the following day (wednesday). I had to call again Thursday to check in on the status. I was really hoping to have these parts in by the weekend so I can get this thing tested and installed on the interior side over the 4th of July holidays. It's very apparent I'm going to have to call again today to confirm my parts were shipped. Sigh........

controller:
defrost vent sent (yeah, that's not gonna work):
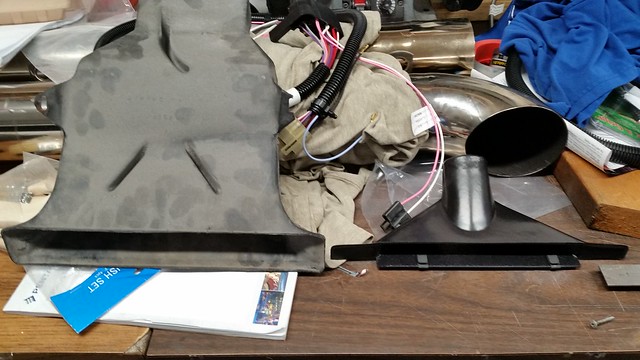
The vent connections they sent over for the sides worked out perfect for my 79 dash:
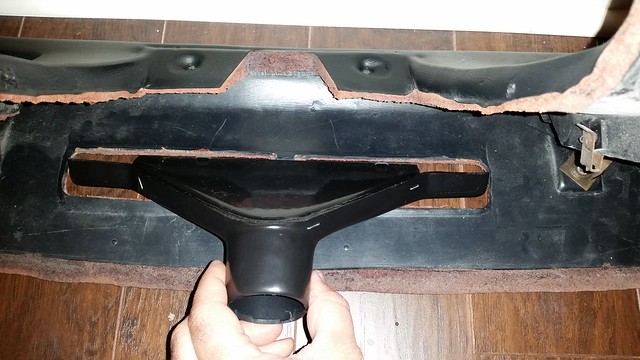
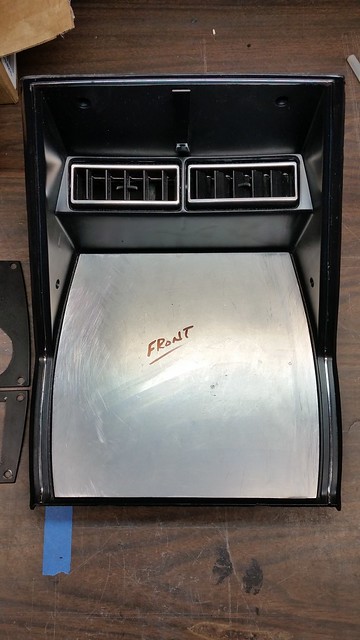
the center vent will work just fine. Luckily I kept the factory ducts to modify for the center vents and defrost vents.
factory:
modified factory/CAA:
I sent back the cheesy looking controller for the system. 1: cheesy looking 2: ***** are too large and you can't see the symbols, 3: way too large 4: goofy way of mounting.
I returned the defrost vent they send because it doesn't match up to the factory defrost and not close to the dimensions I gave for fitment. If they provide something close to the right size for the factory vent duct I can modify to make it work. Not a big deal and expected.
I also had to order some bulkhead fittings because with this kit they give you grommets to route your lines through the firewall. Kinda cheesy looking on this build in my opinion. I wasn't told this when I ordered the kit either.
I called last thursday to return the controller and get some bulkhead fittings and the guy never returned my call. I called the following tuesday and he said he received the controller I shipped back to them and will get the bulkhead fittings and new slimline controller out the following day (wednesday). I had to call again Thursday to check in on the status. I was really hoping to have these parts in by the weekend so I can get this thing tested and installed on the interior side over the 4th of July holidays. It's very apparent I'm going to have to call again today to confirm my parts were shipped. Sigh........
controller:
defrost vent sent (yeah, that's not gonna work):
The vent connections they sent over for the sides worked out perfect for my 79 dash:
the center vent will work just fine. Luckily I kept the factory ducts to modify for the center vents and defrost vents.
factory:
modified factory/CAA:
07-25-2017, 07:26 PM
#4
Drifting
Thread Starter
Member Since: Nov 2004
Posts: 1,624
Received 287 Likes
on
128 Posts
2020 C3 of the Year Finalist - Modified
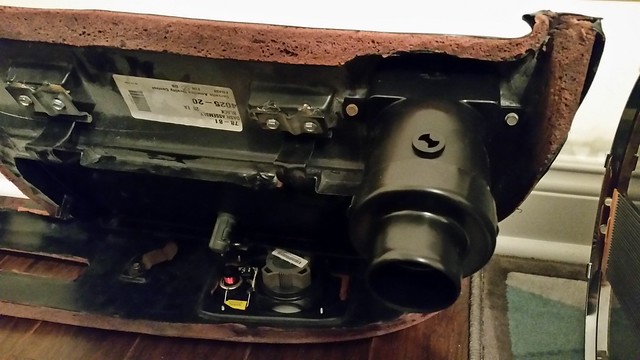
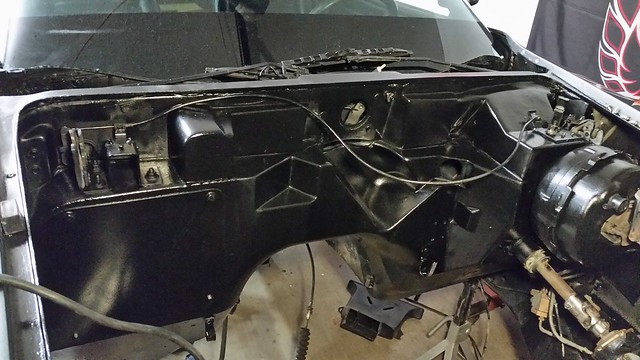
Here's the block off plates I cutout for the old unit and blower. I also had a rusted out plate on the drivers side wiper area I went ahead and made.
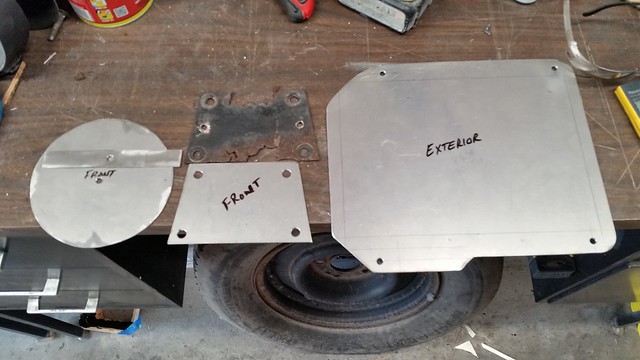
Painted up and bolted on along with the slightly cleaned up firewall (still have to clean hinges):
[


Painted up and bolted on along with the slightly cleaned up firewall (still have to clean hinges):
[
07-25-2017, 07:29 PM
#5
Drifting
Thread Starter
Member Since: Nov 2004
Posts: 1,624
Received 287 Likes
on
128 Posts
2020 C3 of the Year Finalist - Modified
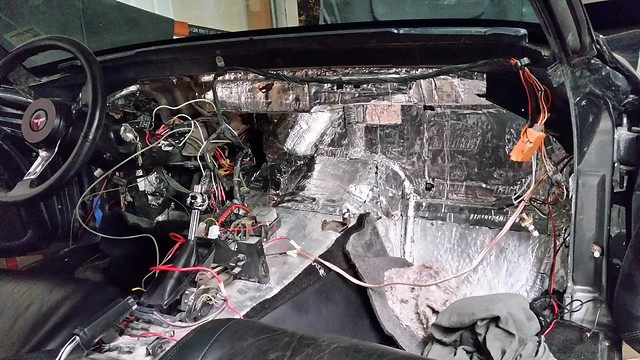
I covered the rest of the firewall with some insulation. I did the rest of the interior of the car about 10 years ago and didn't bother with the firewall area. I used coolmat back then and upon patro46's mention and reading good reviews on it I used the stinger roadkill this time. It seems slightly thicker, and went in easily with a roller (minus a few cuts on my fingers). Installed some new ss brake lines for the front pass. & drivers side, ss braided brake lines on all 4 corners and painted the front calipers grey. Along with a bunch of other little items.

07-25-2017, 07:32 PM
#6
Drifting
Thread Starter
Member Since: Nov 2004
Posts: 1,624
Received 287 Likes
on
128 Posts
2020 C3 of the Year Finalist - Modified
Now for the fun part.....the classic auto air system that was sold to me in place of a modified 68-76 kit hasn't worked out too well. I post this to help someone out in the future should they go with the caa system.
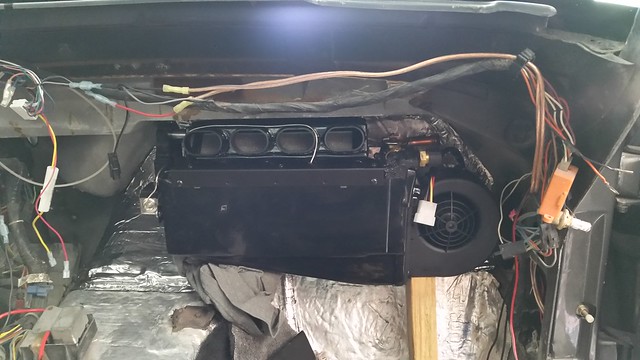
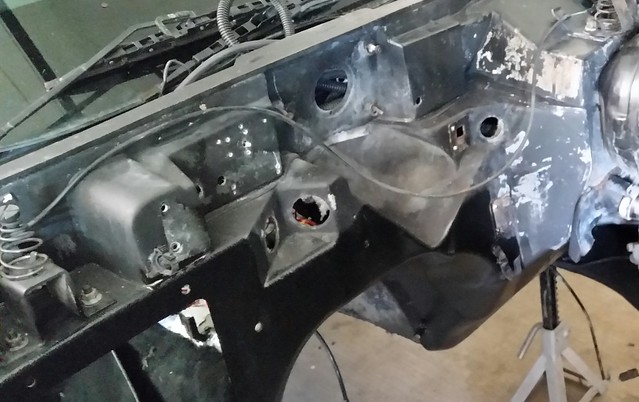
I've had to make my own block off plates (evap and blower). Pull measurements and make my own stand off brackets because the evap will not mount to the firewall without the brackets (other option would be to modify the firewall where the old ac harness/vacuum cables ran through, might save about 3" or so). After a few hours of mocking up stuff yesterday, I've come to realize the bulkhead fittings are way to large to use in our c3's. There's just not enough room. Heater hoses touch the evap/blower and there isn't enough room to route ac lines. Luckily I mocked all of this stuff up and didn't drill through my new block off plate only to find out none of the hoses fit. The guy I spoke with said "I thought it'd be a tight fit." He did say he'd sell me (of course) the hard lines that they supply with the 68-76 kits. This would have saved me hours of time and now money for shipping and whatever percentage they charge for their "restock" fee. I'll probably get a quote to have someone bend up some pieces locally and compare to try to save some cash.
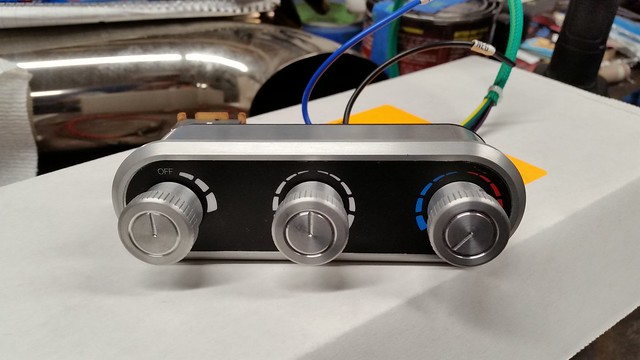
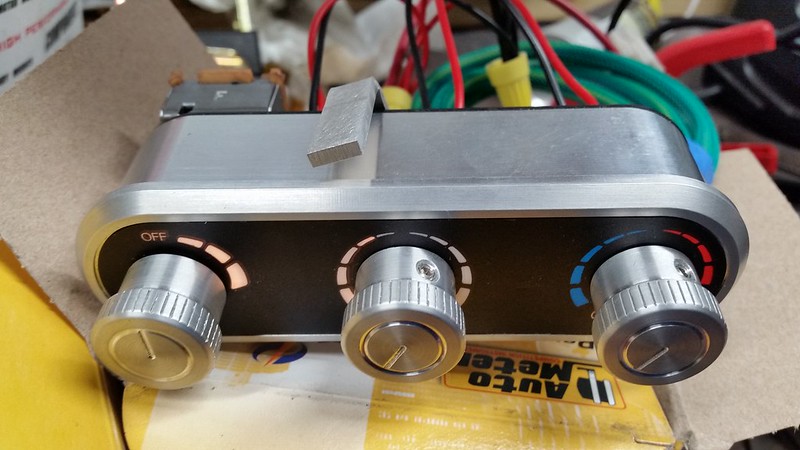
It is what it is. Here's some pictures. The Bulkhead fittings and new slimline controller do look nice. The controller was missing a light and they said they'd ship another out quickly. I had to peel back the cover on the controller and realign it because it wasn't lined up straight with the buttons and the machined lip. the new defrost adapter looks like it'll sort of work. I'll have to be creative with it. Easy fix though and expected.
slimline vs normal controller:
mounted up, this is as far to the drivers side as I can manage.
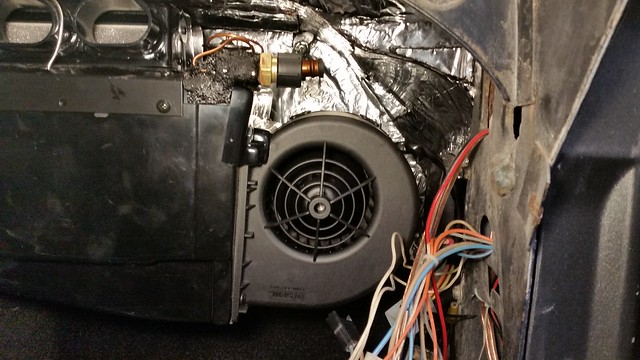
mock up of firewall:


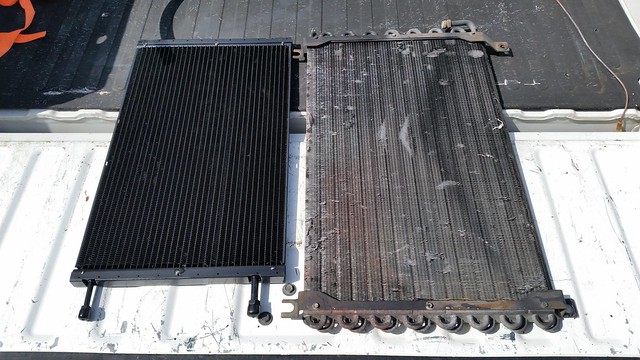
I'll also add the condenser fittings/lines do not fit either. Condenser is pushed as far to drivers side as possible and barely fits. Not acceptable at all.
ac bulkhead bulkhead fittings inside the car....can't go vertical with them, can't go down (you'll see them in the foot well) and obviously not enough room to go through the side. Thanks caa, this would've been a lot easier with the hard lines made for the corvette like I mentioned when I first called. It's only money and time time right? Definitely would've been easier starting off with a 76 kit and figure what fits or is the same and working our way back from there. Not to mention the money in shipping and their "restock" fee for something they recommend and say will fit.
I guess I'll get to the LS swap one day!!!!!.....at this point it seems like that'll be easier.
Ryan
I've had to make my own block off plates (evap and blower). Pull measurements and make my own stand off brackets because the evap will not mount to the firewall without the brackets (other option would be to modify the firewall where the old ac harness/vacuum cables ran through, might save about 3" or so). After a few hours of mocking up stuff yesterday, I've come to realize the bulkhead fittings are way to large to use in our c3's. There's just not enough room. Heater hoses touch the evap/blower and there isn't enough room to route ac lines. Luckily I mocked all of this stuff up and didn't drill through my new block off plate only to find out none of the hoses fit. The guy I spoke with said "I thought it'd be a tight fit." He did say he'd sell me (of course) the hard lines that they supply with the 68-76 kits. This would have saved me hours of time and now money for shipping and whatever percentage they charge for their "restock" fee. I'll probably get a quote to have someone bend up some pieces locally and compare to try to save some cash.
It is what it is. Here's some pictures. The Bulkhead fittings and new slimline controller do look nice. The controller was missing a light and they said they'd ship another out quickly. I had to peel back the cover on the controller and realign it because it wasn't lined up straight with the buttons and the machined lip. the new defrost adapter looks like it'll sort of work. I'll have to be creative with it. Easy fix though and expected.
slimline vs normal controller:
mounted up, this is as far to the drivers side as I can manage.
mock up of firewall:
I'll also add the condenser fittings/lines do not fit either. Condenser is pushed as far to drivers side as possible and barely fits. Not acceptable at all.
ac bulkhead bulkhead fittings inside the car....can't go vertical with them, can't go down (you'll see them in the foot well) and obviously not enough room to go through the side. Thanks caa, this would've been a lot easier with the hard lines made for the corvette like I mentioned when I first called. It's only money and time time right? Definitely would've been easier starting off with a 76 kit and figure what fits or is the same and working our way back from there. Not to mention the money in shipping and their "restock" fee for something they recommend and say will fit.
I guess I'll get to the LS swap one day!!!!!.....at this point it seems like that'll be easier.
Ryan
The following users liked this post:
AboveTheLogic (07-28-2017)
07-25-2017, 08:10 PM
#7
Burning Brakes

Great choice, I also went with the LS3 525 crate motor.... Getting some popcorn and will be watching.. I went with the Vintage Air and fits great on my 73 
Tim
Tim
Last edited by Tim 1973; 07-25-2017 at 08:12 PM.
The following users liked this post:
bluegtp (07-27-2017)
 07-27-2017, 02:53 PM
#9
Drifting
Thread Starter
Member Since: Nov 2004
Posts: 1,624
Received 287 Likes
on
128 Posts
2020 C3 of the Year Finalist - Modified
https://www.corvetteforum.com/forums...tyle-pics.html
07-27-2017, 03:13 PM
#10
Drifting
Thread Starter
Member Since: Nov 2004
Posts: 1,624
Received 287 Likes
on
128 Posts
2020 C3 of the Year Finalist - Modified
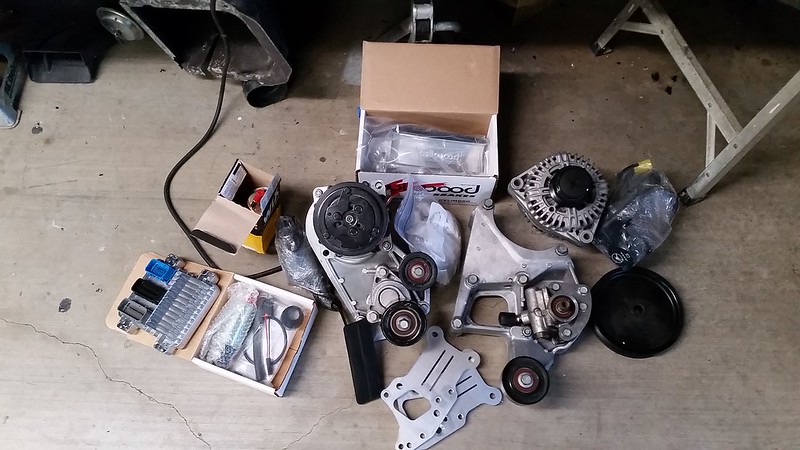
little more work done along with some new presents:
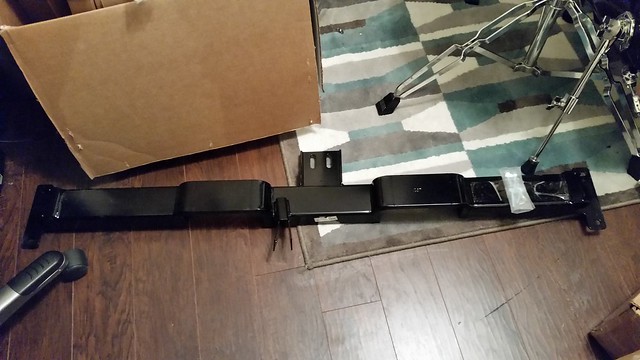
new transmission crossmember came in, solid piece of work.
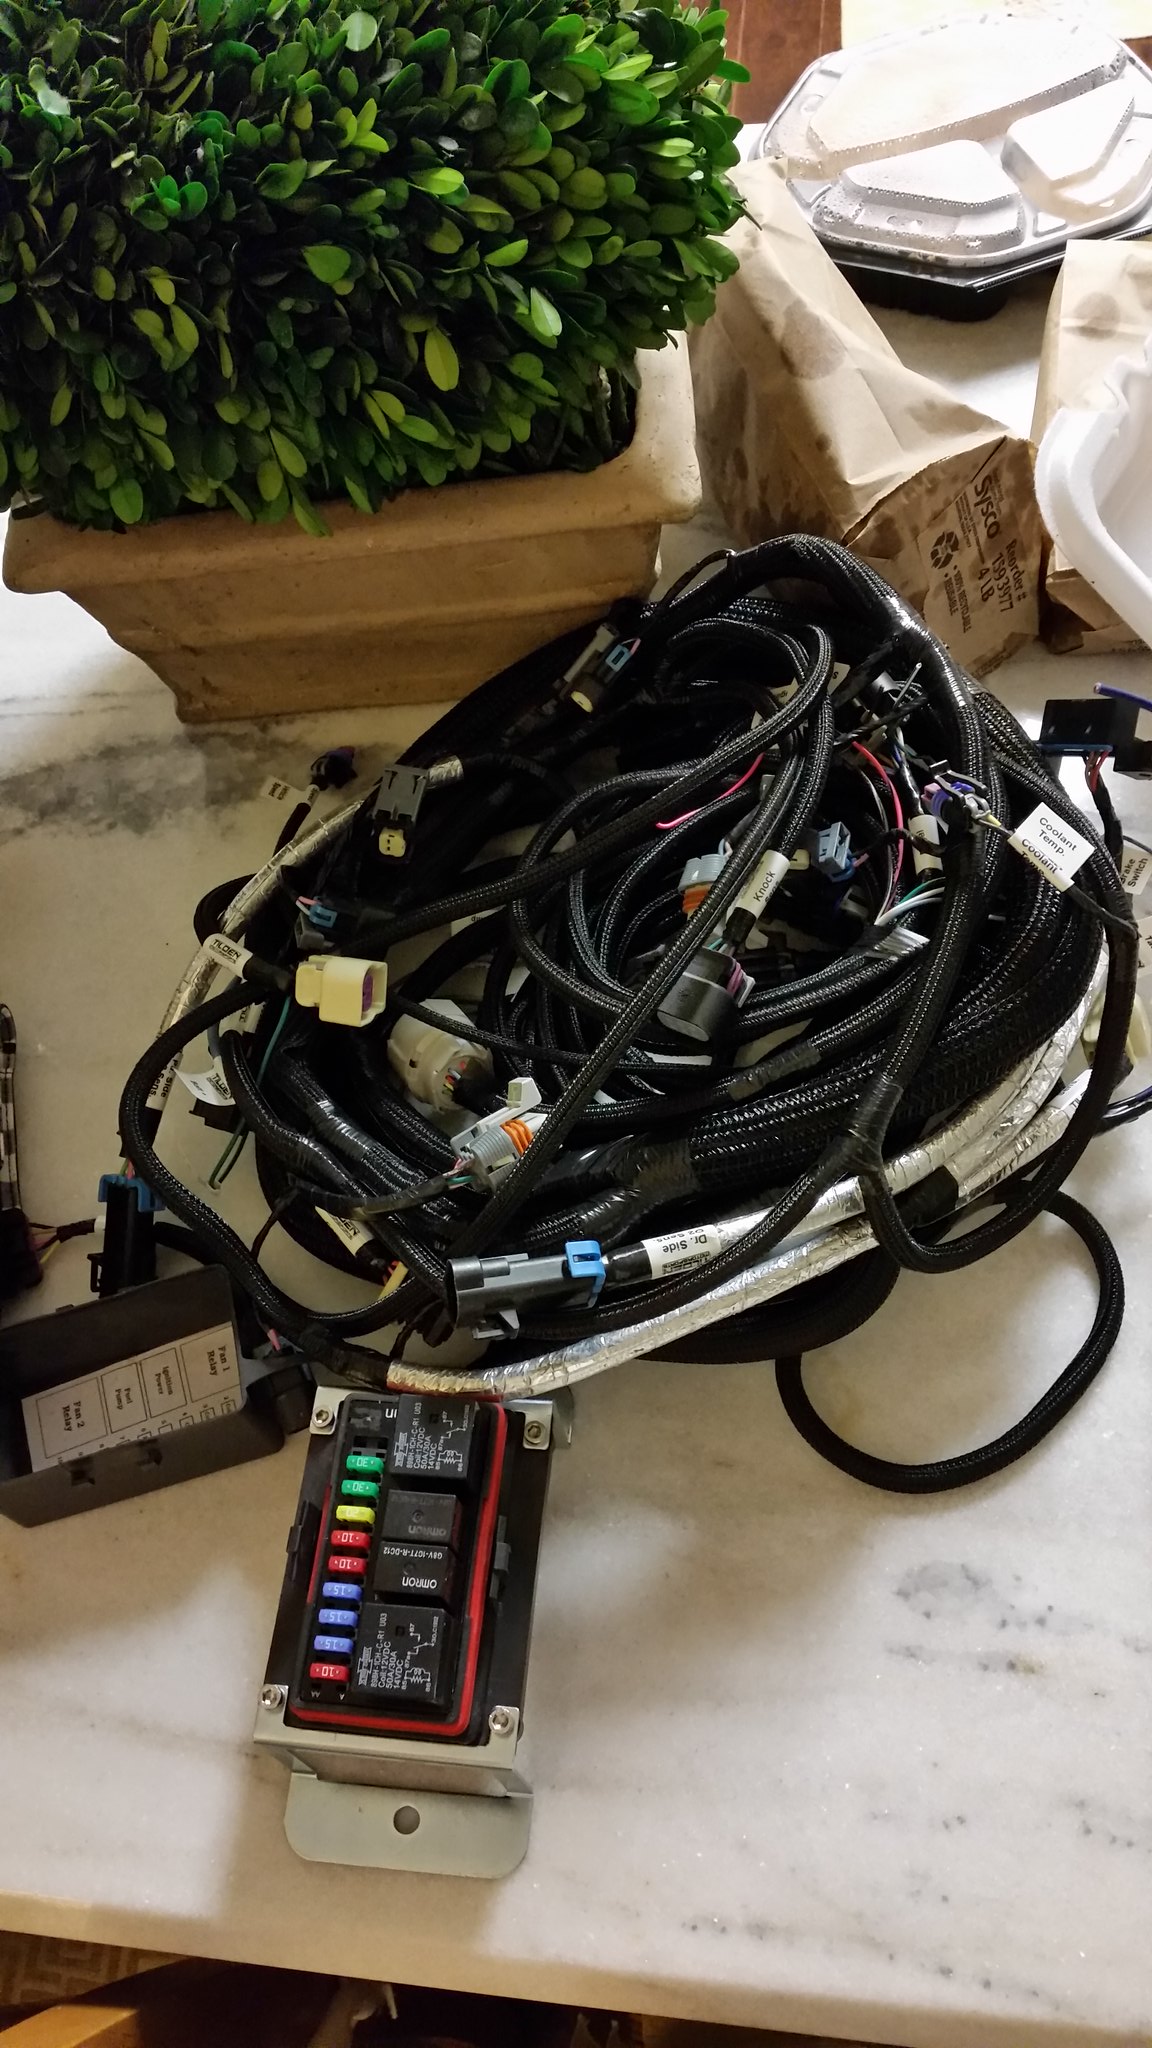
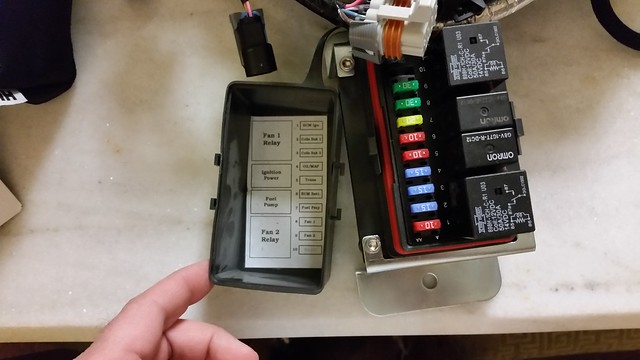
new harness came in and made to go with the E67 ECM that comes already tuned for the ls3/525 gmpp. I'll be running the T42 TCM and have it reprogramed to work with the ecm and tire/rear end ratio. Everything looks like it's laid out nicely and the bussman fuse box is sturdy and on the smaller side.
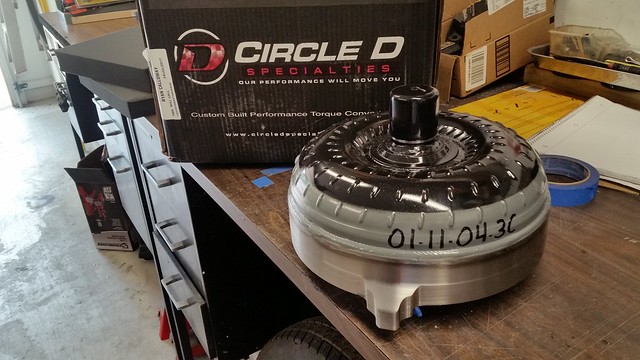
My stall was built and arrived from circle d a few days ago.
new transmission crossmember came in, solid piece of work.
new harness came in and made to go with the E67 ECM that comes already tuned for the ls3/525 gmpp. I'll be running the T42 TCM and have it reprogramed to work with the ecm and tire/rear end ratio. Everything looks like it's laid out nicely and the bussman fuse box is sturdy and on the smaller side.
My stall was built and arrived from circle d a few days ago.
07-27-2017, 03:14 PM
#11
Drifting
Thread Starter
Member Since: Nov 2004
Posts: 1,624
Received 287 Likes
on
128 Posts
2020 C3 of the Year Finalist - Modified
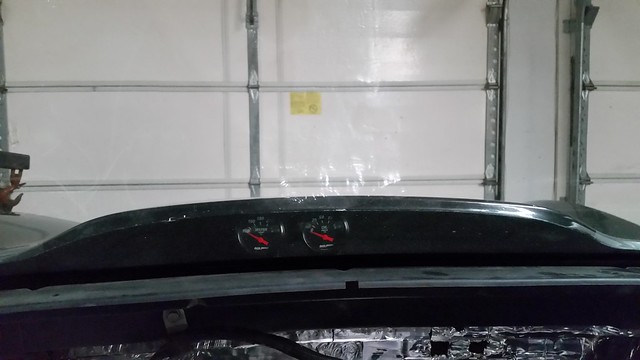
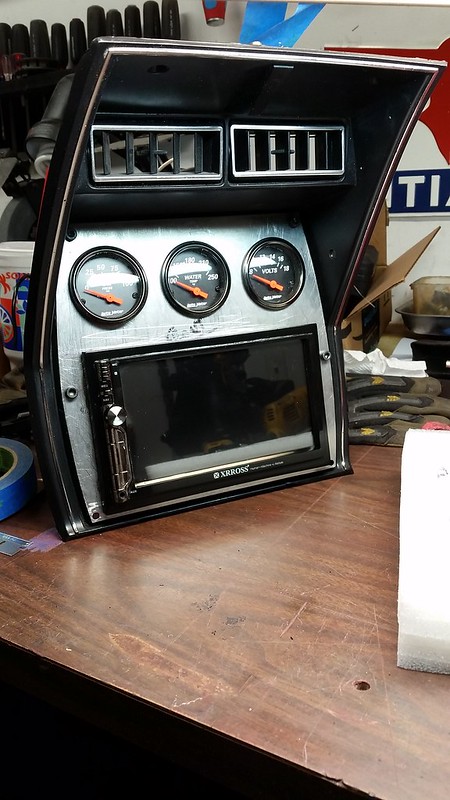
I'm also reworking some of the interior so I can put a double din screen in my c3. Looks like I'll be sending off my gauges to have new bezels put on because the autometer bezels are starting to pit some. They're about 10 years old. I made a new plate for my gauges. the old lexan began to warp a little around the gauges a few years ago. It'll get a coat of black paint to help blend in with the interior for a stock kind of look.
old setup:

new plate cutout:

autometer gauge pitting:


I also plan to add a trans temp and a/f ratio gauge and maybe another of some kind under the hood cowl...should look nice. I'll probably go with white face gauges though.
old setup:
new plate cutout:
autometer gauge pitting:
I also plan to add a trans temp and a/f ratio gauge and maybe another of some kind under the hood cowl...should look nice. I'll probably go with white face gauges though.
 07-29-2017, 12:54 AM
#13
Drifting
Thread Starter
Member Since: Nov 2004
Posts: 1,624
Received 287 Likes
on
128 Posts
2020 C3 of the Year Finalist - Modified

Last edited by bluegtp; 07-29-2017 at 12:56 AM.
07-29-2017, 10:41 PM
#14
Drifting
Thread Starter
Member Since: Nov 2004
Posts: 1,624
Received 287 Likes
on
128 Posts
2020 C3 of the Year Finalist - Modified
Polished out the old OBX sidepipes with some classic chambered mufflers to go along with whats below.

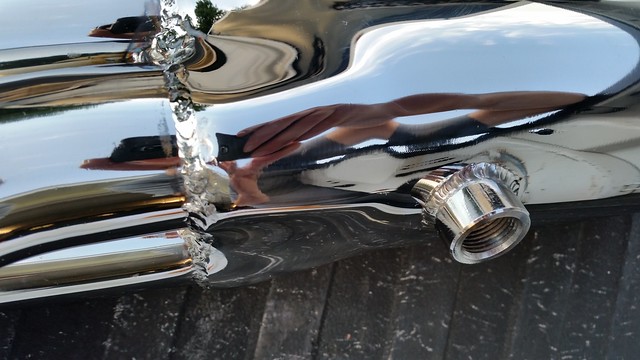
And these came in too.:partyon: Stainless Steel LS side mount headers. Welds around the flanges and o2 bungs look great! Hopefully I'll found out how they fit soon enough.
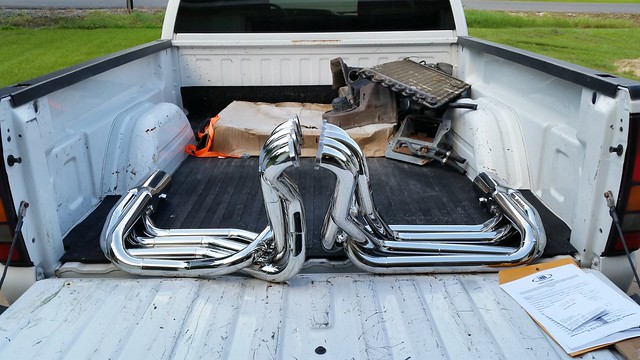
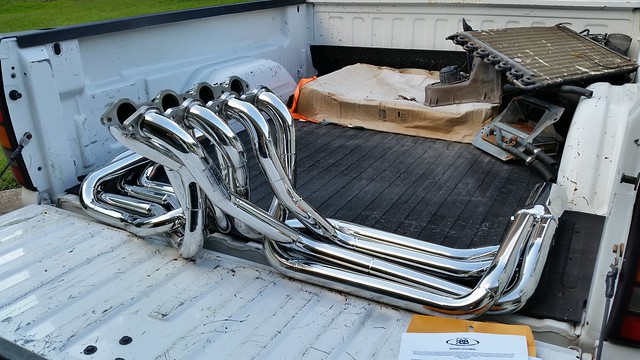

welds at the collectors are a little rough looking. Not sure if these are existing headers that are modified to fit the LS C3 or if someone else was welding on the collector. Overall though they look great and happy with them.
And these came in too.:partyon: Stainless Steel LS side mount headers. Welds around the flanges and o2 bungs look great! Hopefully I'll found out how they fit soon enough.
welds at the collectors are a little rough looking. Not sure if these are existing headers that are modified to fit the LS C3 or if someone else was welding on the collector. Overall though they look great and happy with them.
10-02-2017, 07:29 PM
#15
Drifting
Thread Starter
Member Since: Nov 2004
Posts: 1,624
Received 287 Likes
on
128 Posts
2020 C3 of the Year Finalist - Modified
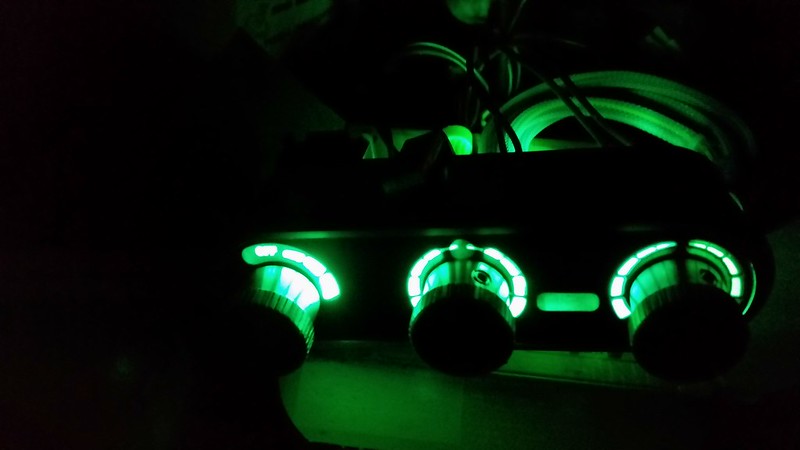
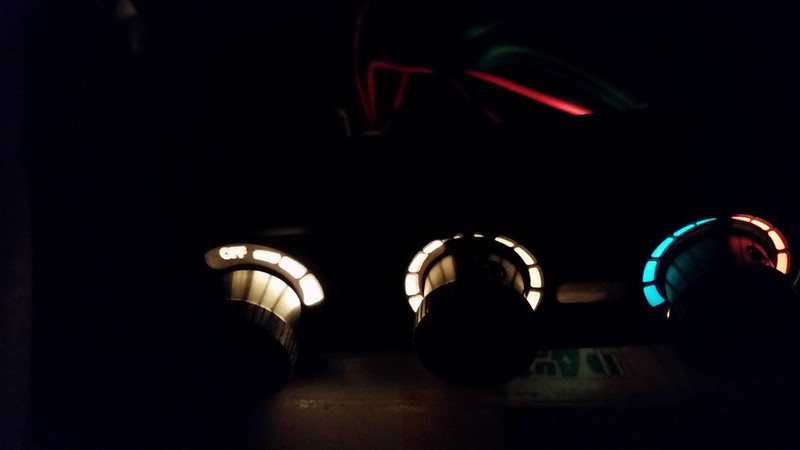
maybe my expectations are too high for some of these companies. This classic air controller that I paid an extra 100 for sure doesn't look great once lite up at night. Poorly designed faceplate and the aluminum behind it. You can clearly see where the cutouts are in the aluminum with the black face plate on it that is supposed to "block the light". It's even more obvious with the green leds in there (which I can't run because they didn't put a divider for the lights inside there). I guess I'll have to run white leds (incandescent bulbs are shown) in the controller which won't match all of my other gauges. I know I'm being picky, but it is all about the details. 
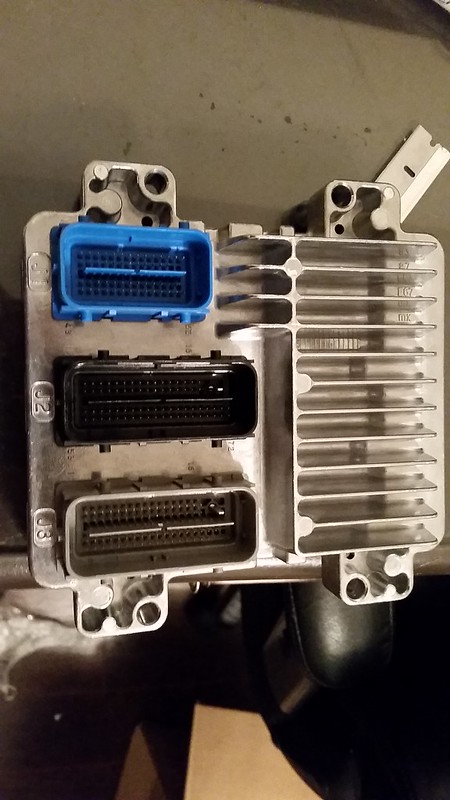
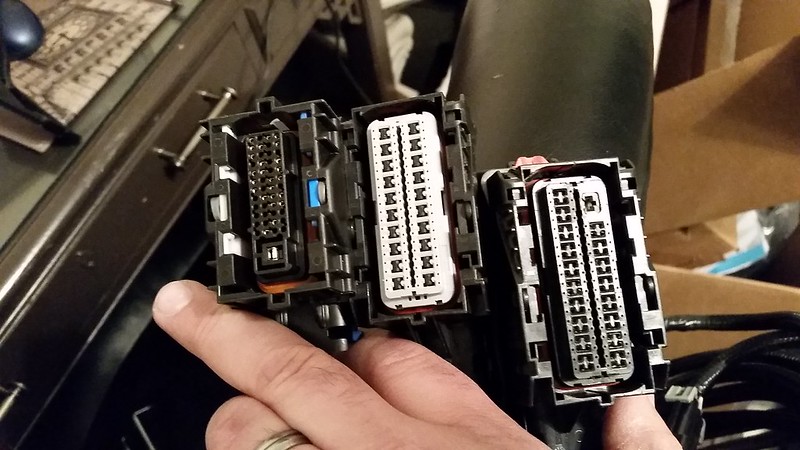
ok onto more fun with the LS swap. Here's my harness from Tilden motorsports. I went with them because they made a harness for an ls3 with an E67 ecm. I'm not familiar with the ls's and come to find out when I got my GMPP E67 ECM in, the harness Tilden sent me is for an E38 ECM and obviously not what I ordered. Back it goes to get made right. Notice the blade pins in the connectors don't match and I'm missing a whole connector to the ecm. I'm getting them to reprogram a TCM to run with the bmpp e67 ecm while the harness is over there.
GMPP E67 ECM for the LS3/525:
Tilden harness connections, the smaller goes to the TCM :
and on a plus note my other toys came in from CIC.
Here's my android double din 7" wide screen and unfinished new gauge layout for my center console. I'll be moving the fuel between the speed & tach area soon. I can download an app on the head unit to run digital gauges if I even need to read anything else specifically. Cool, but not sure how much I'lll actually use that app.
 10-02-2017, 07:30 PM
#16
Drifting
Thread Starter
Member Since: Nov 2004
Posts: 1,624
Received 287 Likes
on
128 Posts
2020 C3 of the Year Finalist - Modified
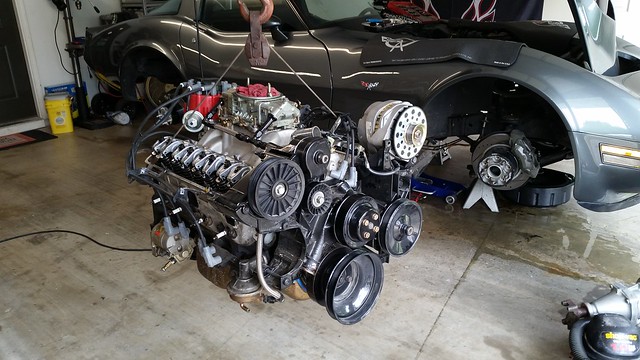
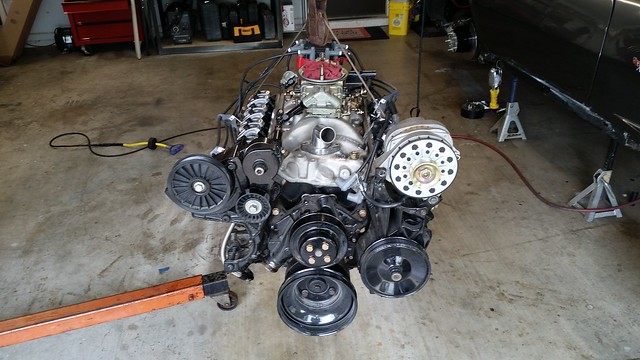
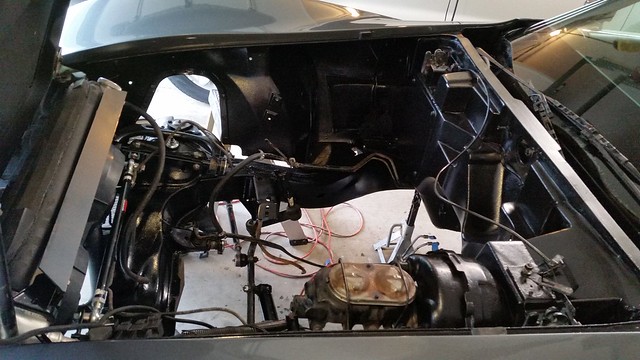
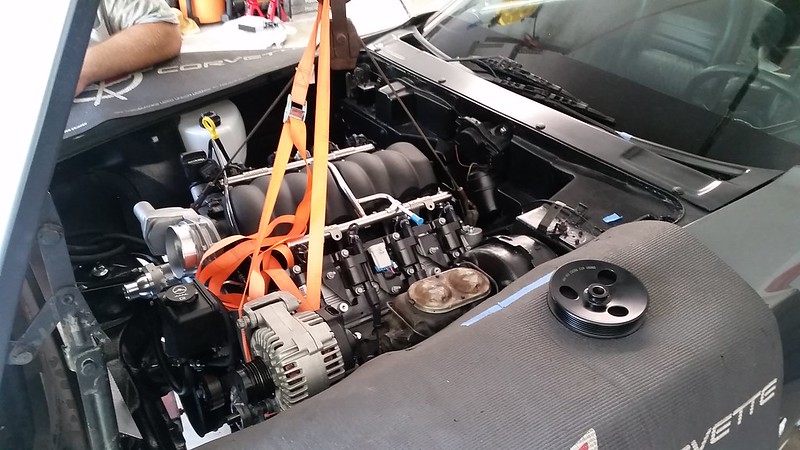
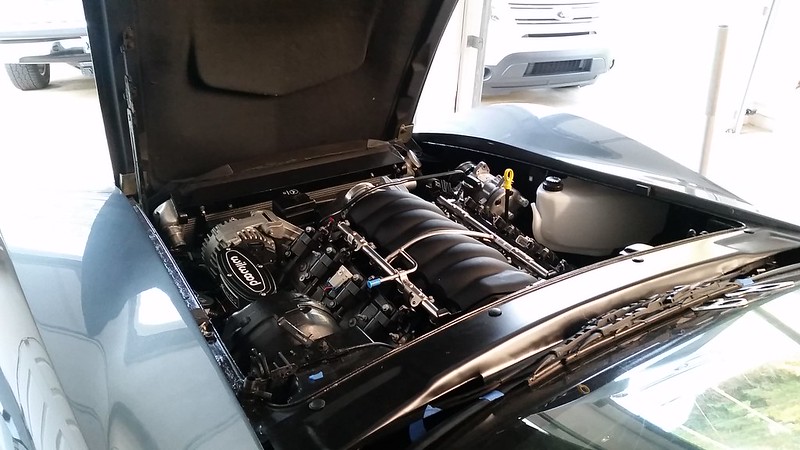
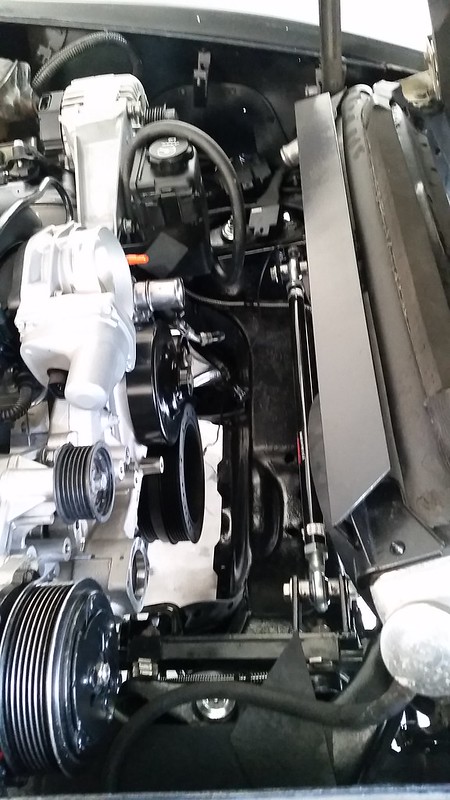
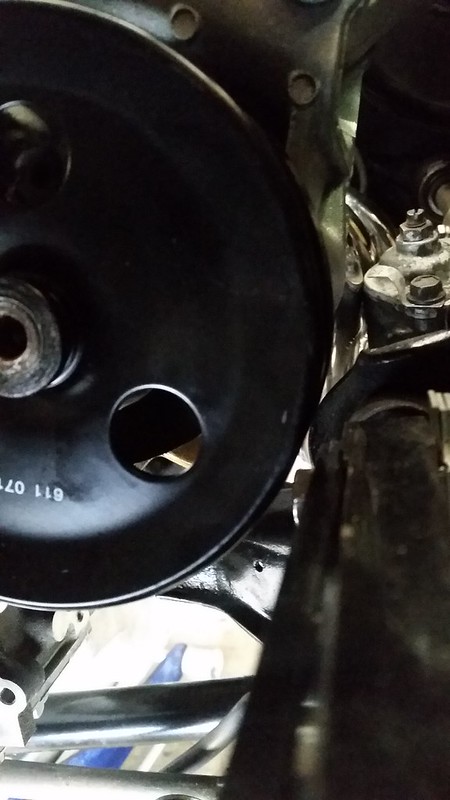
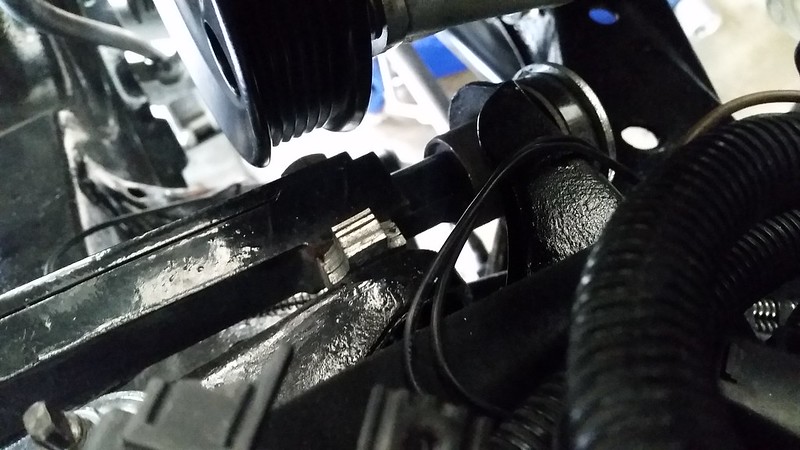
Got some work done over the weekend thanks to a good friend. :partyon:F-body oil pan swap and dropped it in. I'm still waiting on my ecm, tcm and harness to be reworked. I plan on routing new fuel lines, trans cooler lines with aux trans cooler and after going through a couple of dorman power steering pump pulley options I just ordered a dirty dingo 5" billet pulley from them. The dorman 300-301 has the .66 hub and is about 5-5/16" od but offset is a little different and will not align. The dorman 300-126 is same hub size and 5-3/4" od is a little closer to alignment but still a little off and much closer to my control arm. I'll post some pictures a little later of clearances at the p/s pump area. I'm sure my wife's happy, I cleared out much of the extra bedroom that was/is storage for ls swap parts.
plenty of room up front:
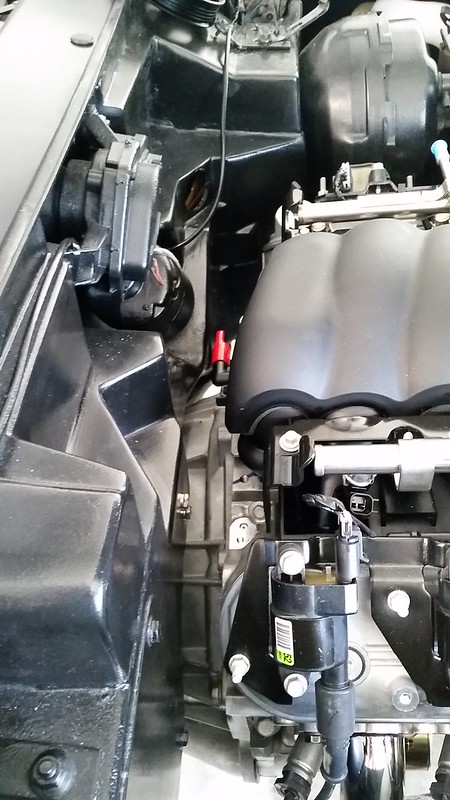
good bit at the firewall:
decent underneath:
I had a few clearance issues but nothing major:
I had to modify the trans crossmember for 4L70E
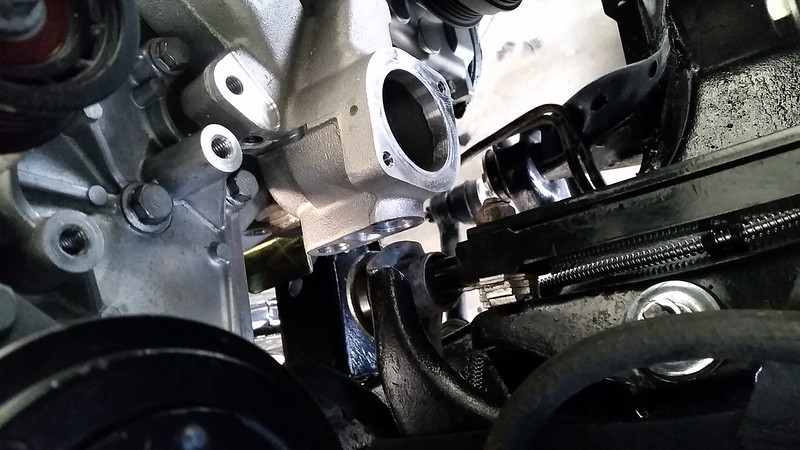
Modify the water pump (not too sure exactly where i want to put my fittings yet for the heater core supply/return). I'm running poly motor mounts so I'm not sure how much the motor with torque over toward the control arm.
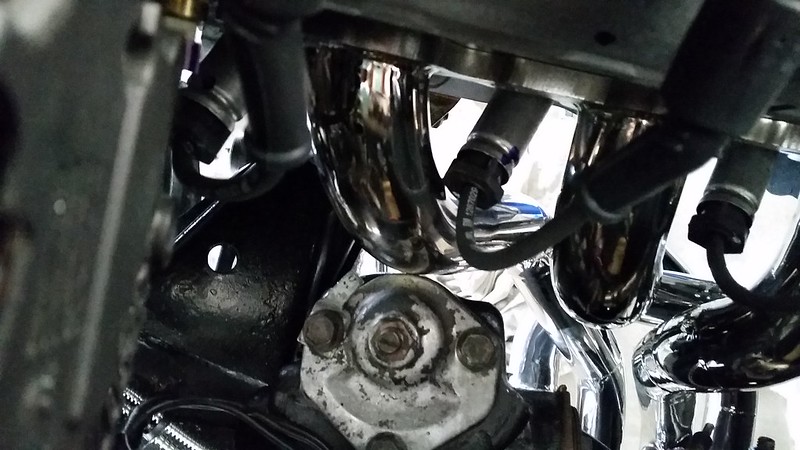
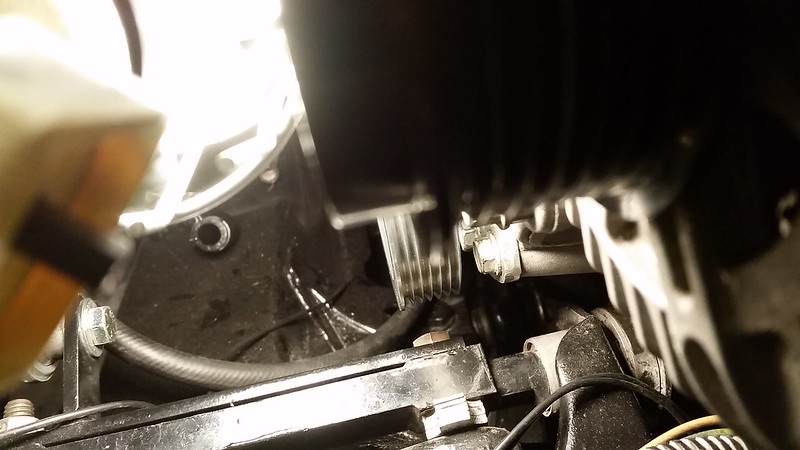
Headers fit really nice considering each car is slightly different. These things just barely touch. I'll have to "clearance" them, but still very pleased!

plenty of room up front:
good bit at the firewall:
decent underneath:

I had a few clearance issues but nothing major:
I had to modify the trans crossmember for 4L70E

Modify the water pump (not too sure exactly where i want to put my fittings yet for the heater core supply/return). I'm running poly motor mounts so I'm not sure how much the motor with torque over toward the control arm.
Headers fit really nice considering each car is slightly different. These things just barely touch. I'll have to "clearance" them, but still very pleased!
 10-16-2017, 12:38 PM
#17
Drifting
Thread Starter
Member Since: Nov 2004
Posts: 1,624
Received 287 Likes
on
128 Posts
2020 C3 of the Year Finalist - Modified
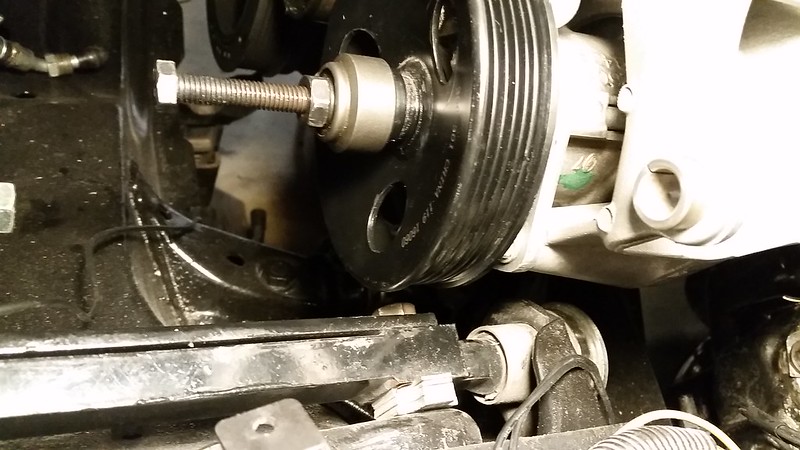
I ended up with ordering a smaller from dirty dingo and put in pressure reducing spacers. For anyone looking at going the little cheaper route I listed the other pulleys I tried out from dorman. #300-301 (.66 hub, 5-5/16" od) and #300-126 (.66 hub, 5-3/4" od, similar to the smaller pulley holley offers). 300-301 had good clearance at the control arm but the hub offset was slightly different than the factory and wouldn't line up well w/out machining the hub or shims on everything else. The 300-126 was still slightly off and I wasn't comfortable with how close it was to the control arm. Also note on the 300-126 my ps pulley puller tool would not work on this one. It wouldn't fit under the notch on the hub so I had to get creative with pulling it. I've read these pulleys have worked for others so I'm not sure why my stuff was slightly off so I just went ahead and returned the dormans and ordered the dirty dingo. Hopefully this will help someone out in the future.
Dorman 300-126
300-301
Dirty Dingo
[url=https://flic.kr/p/C6ocXU]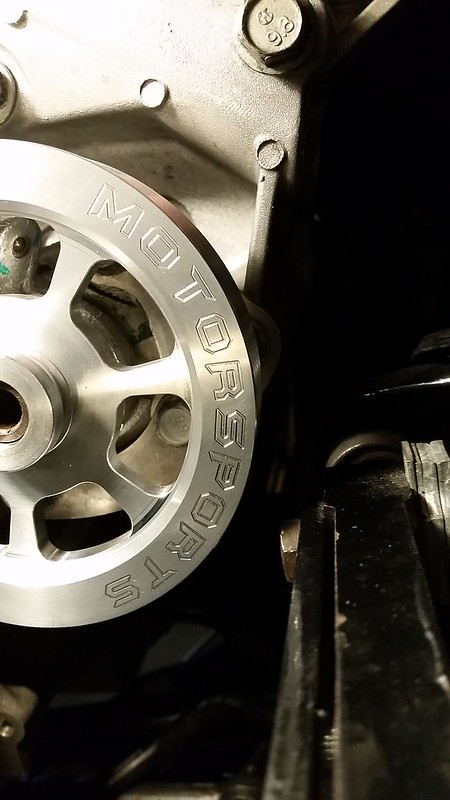
Dorman 300-126
300-301

Dirty Dingo
[url=https://flic.kr/p/C6ocXU]
 10-16-2017, 12:38 PM
#18
Drifting
Thread Starter
Member Since: Nov 2004
Posts: 1,624
Received 287 Likes
on
128 Posts
2020 C3 of the Year Finalist - Modified
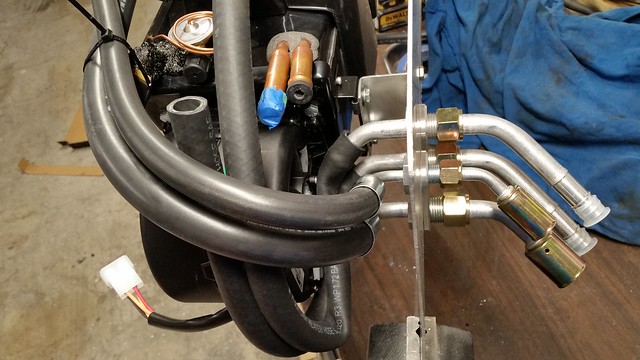
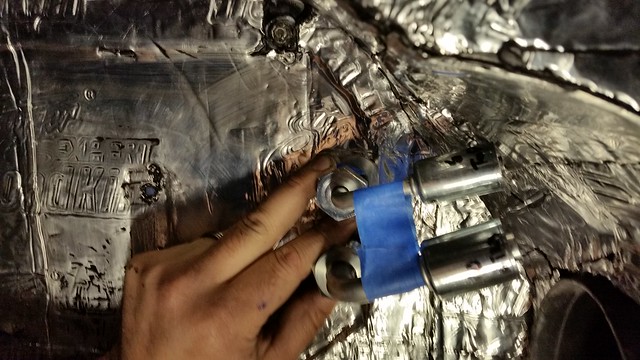
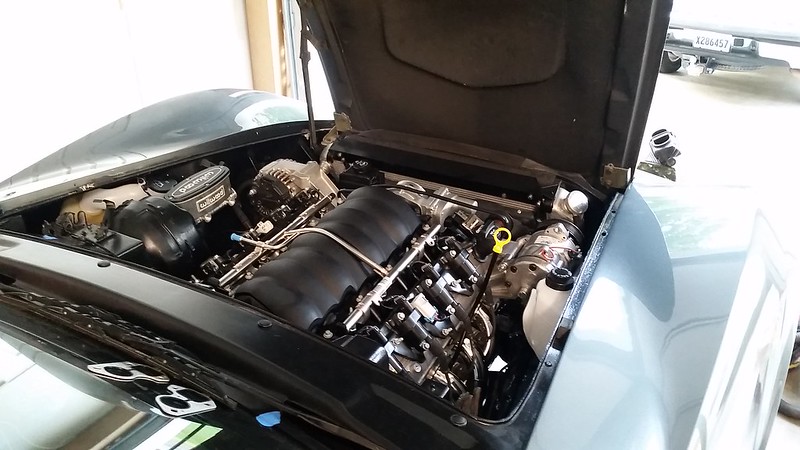
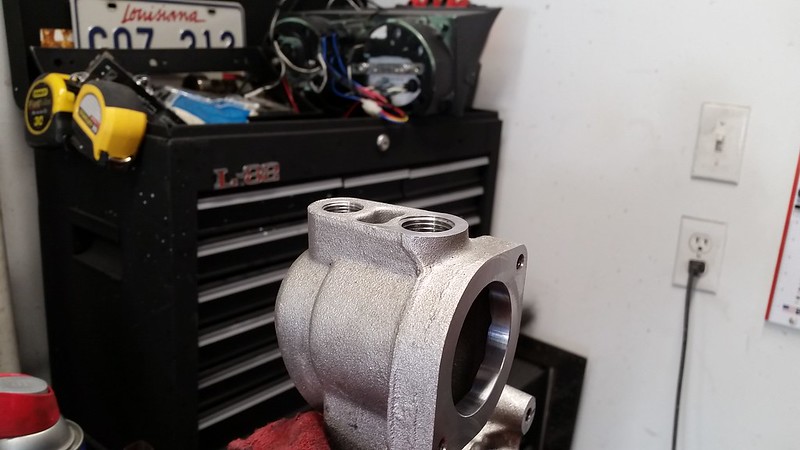
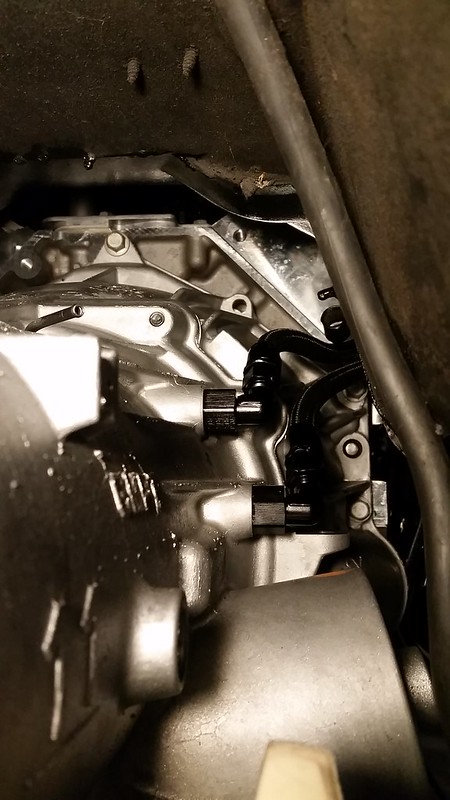
Back to it this weekend. I got around to drilling and tapping the water pump.
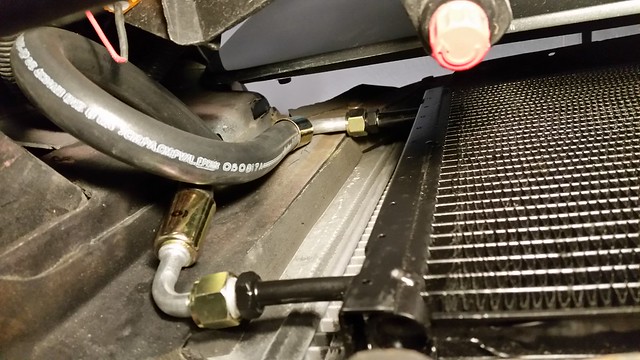
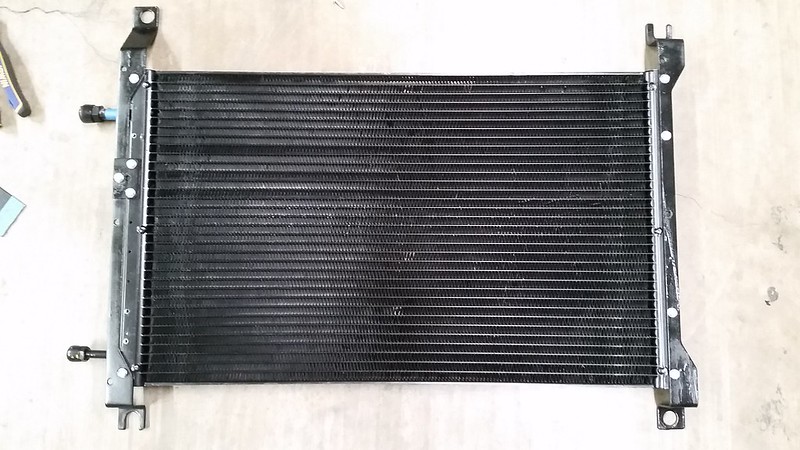
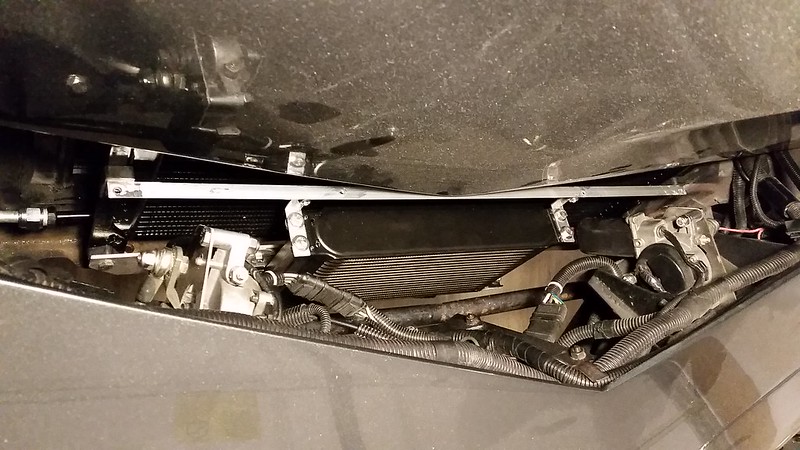
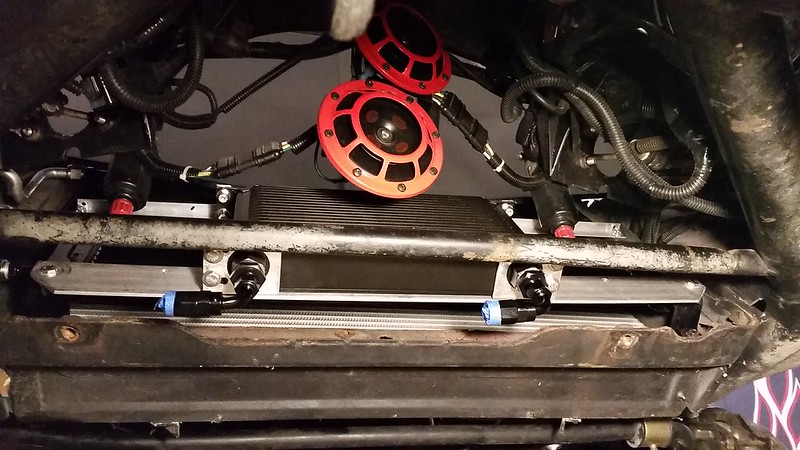
Mounted the classic auto air condenser, trans cooler and started routing new braided lines. Condenser came with some mounting plates but I ended up using the factory condenser brackets (flipped drivers side around to fit). Came out nice and clean and I didn't have to drill and new holes. I didn't really want to pull the hood.
I'm bypassing the radiator cooler (dewitts radiator) and going straight to the new cooler. Comments are welcome on the mounting and if this trans cooler will/should be sufficient for my higher stall speed. Cooler is a Derale 13403 Series 10000 Stacked Plate Transmission Oil Cooler 19 Row (37,000 BTU's Per Hour).
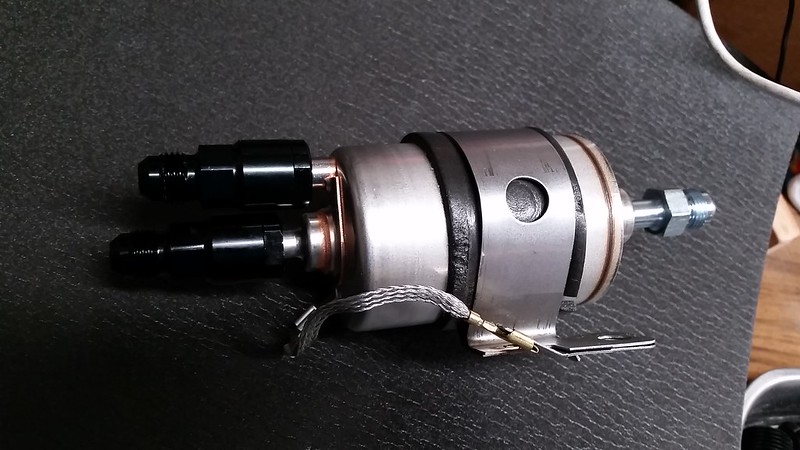
Barely had time to start working with the new fuel setup.


Mounted the classic auto air condenser, trans cooler and started routing new braided lines. Condenser came with some mounting plates but I ended up using the factory condenser brackets (flipped drivers side around to fit). Came out nice and clean and I didn't have to drill and new holes. I didn't really want to pull the hood.
I'm bypassing the radiator cooler (dewitts radiator) and going straight to the new cooler. Comments are welcome on the mounting and if this trans cooler will/should be sufficient for my higher stall speed. Cooler is a Derale 13403 Series 10000 Stacked Plate Transmission Oil Cooler 19 Row (37,000 BTU's Per Hour).
Barely had time to start working with the new fuel setup.