When you click on links to various merchants on this site and make a purchase, this can result in this site earning a commission. Affiliate programs and affiliations include, but are not limited to, the eBay Partner Network.
I need to remove and redo this. PO would try to replace cigarette lighter without looking, and burned several spots along the control wheels. Plus, it needs to be repainted. etc.
Any tips on removal? Least trauma to console, cables, etc.? Tips on reinstall?
Thanks
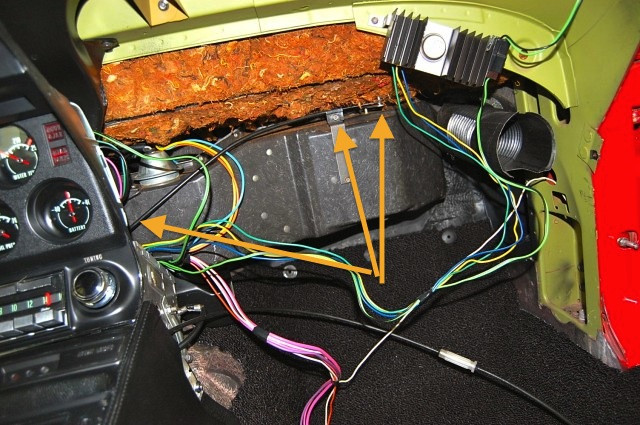
You need to disconnect the Bowden cable at the right-forward corner of the heater control head before trying to remove it. There are also vacuum lines on the left side that need to be tagged and pulled. You can find the electrical connections and the lamp/socket.
Then (I think) you can remove the 3 screws from the mounting frame, twist the head so you can remove that metal frame and pull the head.
FWIW: it might be easier to remove the controls and the console as a unit. Remove the console trim screws, disconnect the bowden cables at the vent doors, disconnect the fiber optics harness, and disconnect the HVAC connections. At that point, the console should lift up and out.
Hi Mike,
Very pretty.
I think I'd disconnect the cable at the hot/cold door on the heater box and remove/replace the controller with the cable attached at the controller….access at the flapper door is good….might be a little easier.
Regards,
Alan
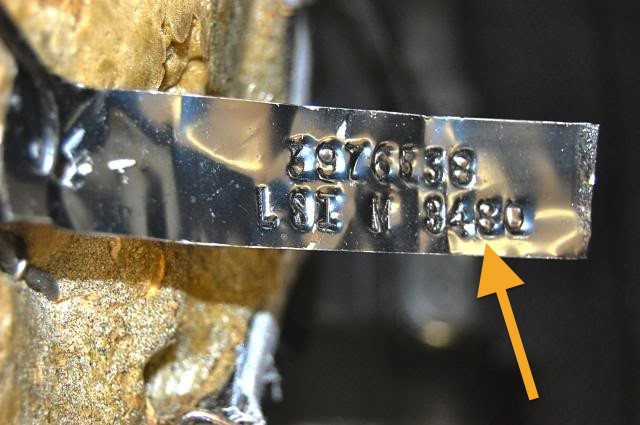
PS: Have you been doing any tracking of the info on the metal tags attached to the bottom of seat springs? Specifically the Julian date codes.
ARE the last digits Julian code?

 09-30-2017, 07:13 PM