When you click on links to various merchants on this site and make a purchase, this can result in this site earning a commission. Affiliate programs and affiliations include, but are not limited to, the eBay Partner Network.
PS, the first shot of you in focus in the foreground, while the background is out of focus is very cool. I can see why it's one of your favorites. It's amazing how much many of us have in common, with the bikes, Corvettes, music, etc. Personally, even though you might not be able to teach right now (to your standards), I'm thinking that jumping into an admin role where you are at least back in the arena would be a really good thing. Might let you get out of your own head for a while, being around the sport that's been such a big part of your life. You never know--while doing that, a different cycle sports opportunity might present itself.
Looking good PS! i always look forward to seeing what you do next. meanwhile I've spent the last couple opportunities in the garage trying to beat the power steering ram ball stud out of my steering linkage. not much to show for it.
Thanks Hayes. I've heard that the ball stud can be a bit of a bitch and am not looking forward to it myself. At least you are making progress!
Originally Posted by EarlyC34me
Very cool stuff. I did penguin with Jerry Wood in the early 90's. A few races and did some corner work in the bowl behind the tree on the exit up the hill from the bowl. It was way too expensive for me to race as much as I wanted to.
Hang in there. Your project is looking amazing
Always good to know a local guy. Jerry is still insanely fast, even approaching 50. His brother Eric now runs the school and teaches the advanced racing course.
Cornerworking can be fun; I've done more than my share of it in the past. Incidentally that last picture was taken from the bowl. I absolutely hear you about the expense of racing and it has only gotten worse now with inflation and speed. I got to the point where I would have to change rear tires every race...ouch. My 2015 race season cost me about quadruple of what I have into this C3 already...
So now that I have done a little bit of bodywork, I can see that this is going to take me significant time. Sanding is very hard on my hands and wrists; I can only sustain it for about an hour or so...and there is a LOT of sanding needed.
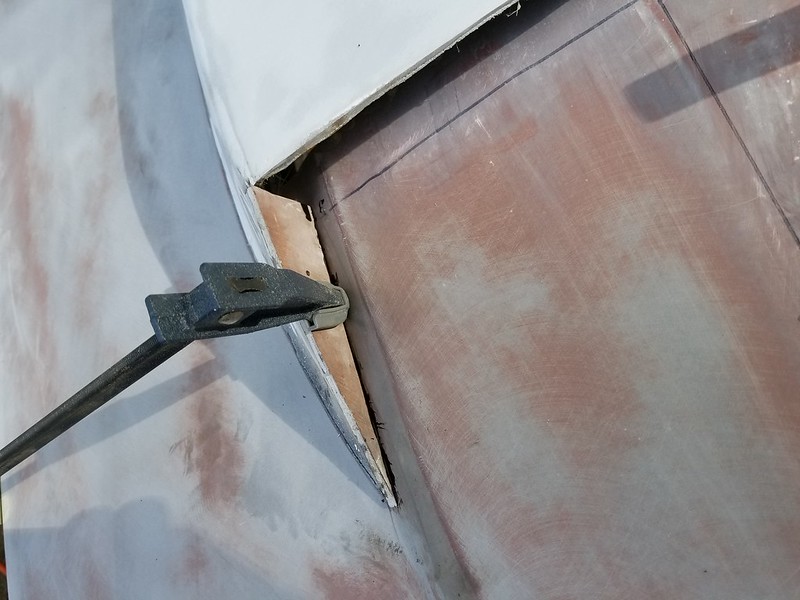
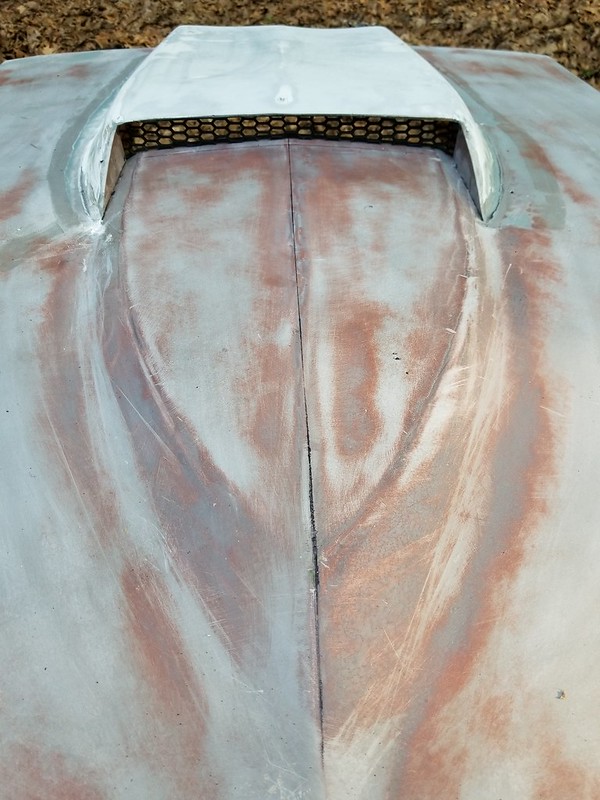
Anyway, I continued to work on my hood yesterday afternoon. I needed to close off the sides of the scoop which I did with some flat fiberglass that I got from the piece that I cut out of the hood earlier.
I started with a flat section, traced out the profile of the scoop, cut it, and then bonded it to the hood.
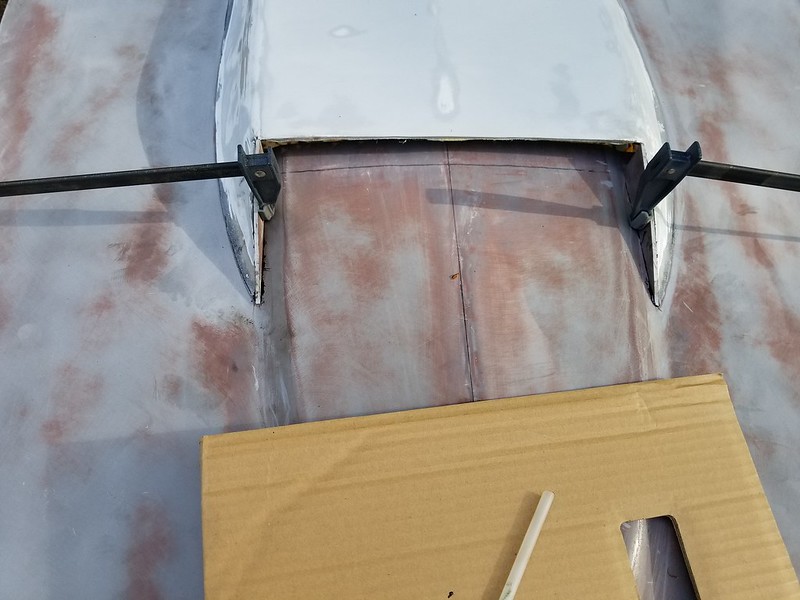
I was able to remove the clamps after curing and I am pretty happy with the results. Now I have to shape the inserts to the scoop which I will try to tackle today.
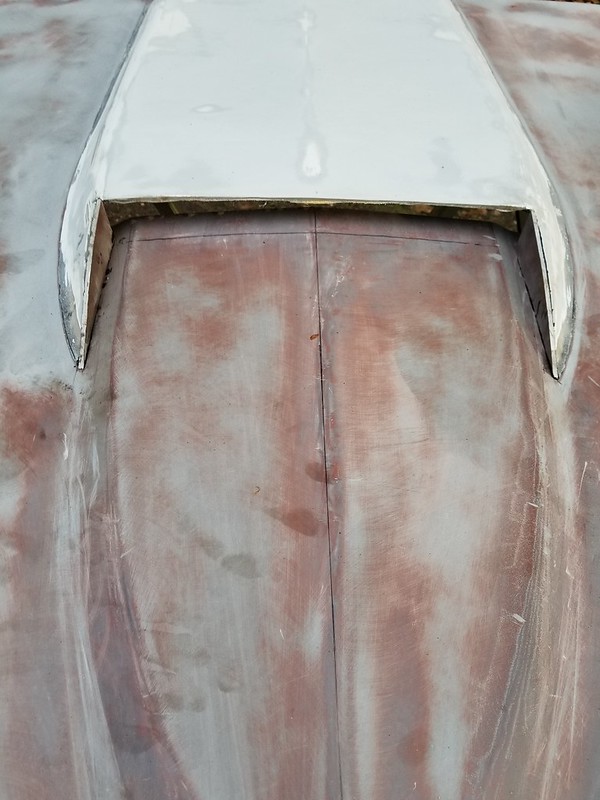
I also need to figure out what I am going to do with the top lip of the inlet. It is pretty messy right now so I am not sure if I am going to try to shape it into something more uniform or put a small 'lip' piece on there to give it a little more of a finished appearance. I will likely do the latter but not yes sure what form that will take.
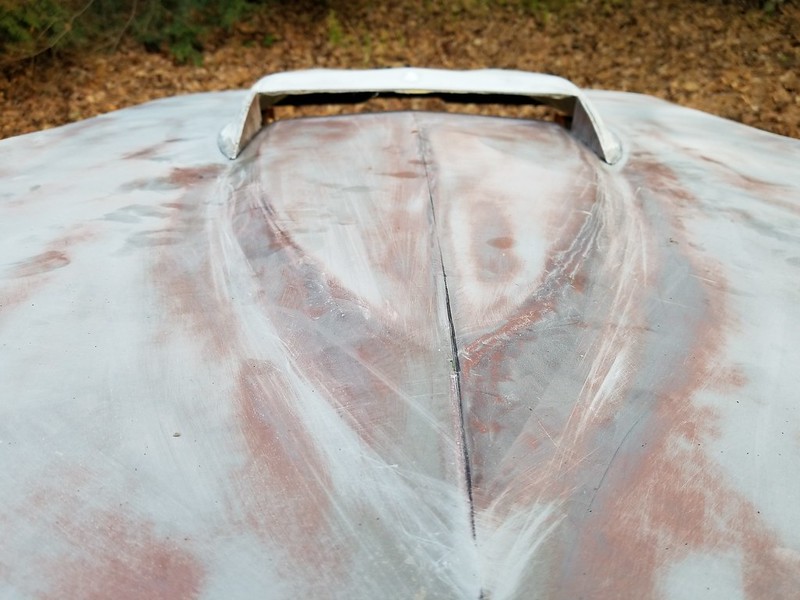
I also block sanded the entire hood using a rigid long block for the flat parts and a flexible sanding block for the curved sections. There is definitely a learning curve here but I think I am getting the hang of it.
I was kind of surprised that the OEM hood had some pretty significant low spots from the factory. I understand that this was a mass produced vehicle but I kind of expected better.
The bodymen here can correct me if I am wrong but I believe the next step is to skim coat the low spots with filler and block sand until uniform. Is that right?
That's a good look with those side pieces. Looking ahead.....would it be possible to finish the edge on the two sides using the same technique that you will use across the leading edge of the top?
PS, the first shot of you in focus in the foreground, while the background is out of focus is very cool. I can see why it's one of your favorites. It's amazing how much many of us have in common, with the bikes, Corvettes, music, etc. Personally, even though you might not be able to teach right now (to your standards), I'm thinking that jumping into an admin role where you are at least back in the arena would be a really good thing. Might let you get out of your own head for a while, being around the sport that's been such a big part of your life. You never know--while doing that, a different cycle sports opportunity might present itself.
Thanks ZRX. It is truly incredibly how much we all share in common and it is one of the reasons why I continue to post here.
As for getting back to the track, I am sure that I will at some point. Our team sponsors a massive benefit BBQ there every year. I will be there to help out with that at the very least. Last year we raised 24k for a local fund that we have for assisting injured riders and we intend to top it this year.
Originally Posted by doorgunner
That's a good look with those side pieces. Looking ahead.....would it be possible to finish the edge on the two sides using the same technique that you will use across the leading edge of the top?
Thanks DG, it is my intention to put a perforated grille just slightly inset of the opening. Once I have a firmer idea of what that will be, I will modify the sides and top to accommodate. In hindsight I probably should have notched the piece I was installing to handle the inset in one piece instead of now where I will have to bond a small insert there.
Thanks for the checks and balances, I truly appreciate it.
Last edited by PainfullySlow; 05-19-2018 at 10:19 AM.
I have been doing some random bits of work here and there but not much to write home about. I have been removing the rear body panel where the license plate pocket is which of course requires me to remove the exhaust bezels, which require me to remove the rusted out exhaust...
So I have been on my back with a saw cutting the mufflers off so that I can get to the bezel screws.
I did do a few other cosmetic things trying to finish up the engine.
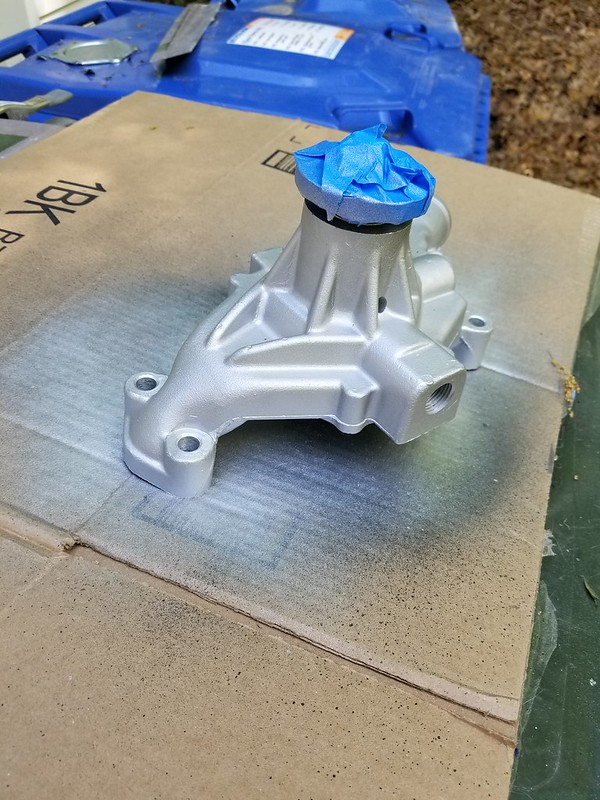
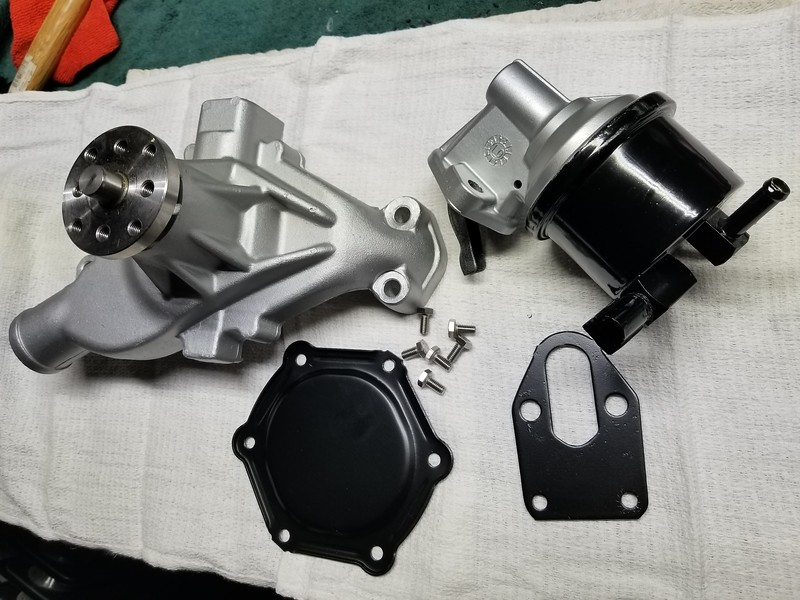
I received my aluminum water pump and decided to paint it aluminum as well so that it would be protected as well as match everything else. Also the back plate on it is galvanized steel so I was concerned about corrosion. Since I had to powder coat a few other pieces it was easy to just add this to the mix.
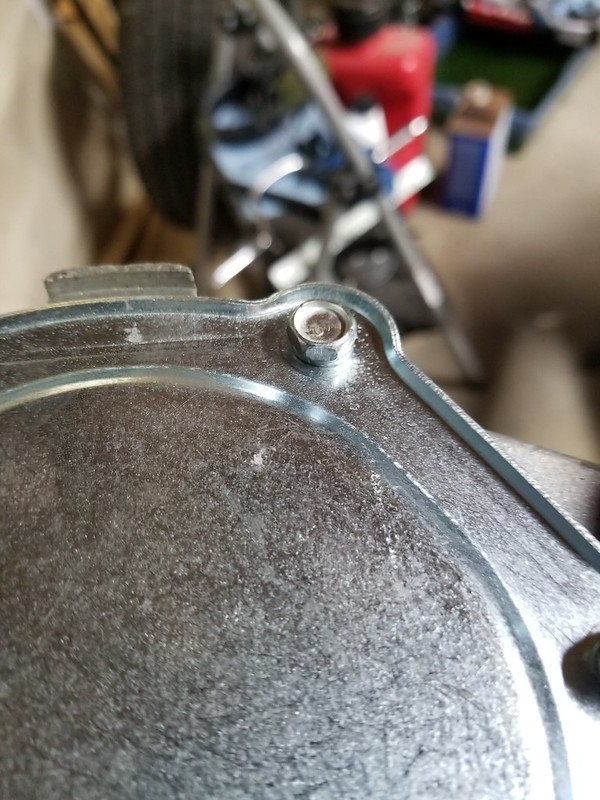
So, to answer an earlier question: the short water pump does not clear the timing cover...at least not in its stock form. It is off by about 1/16" which comes from the thickness of the bolt heads and lock washers on the back plate. You can see the culprits here.
The remedy is easy: replace the bolts with stainless, lower profile ones and remove the lock washers entirely, using loctite instead.
Also I reconditioned the fuel pump. It was pretty grungy but relatively new. After I cleaned it up and hit it with aluminum and black engine paint it looks brand new!
[QUOTE=PainfullySlow;1597273344]I have been doing some random bits of work here and there but not much to write home about. I have been removing the rear body panel where the license plate pocket is which of course requires me to remove the exhaust bezels, which require me to remove the rusted out exhaust...
So I have been on my back with a saw cutting the mufflers off so that I can get to the bezel screws.
I did do a few other cosmetic things trying to finish up the engine.
I received my aluminum water pump and decided to paint it aluminum as well so that it would be protected as well as match everything else. Also the back plate on it is galvanized steel so I was concerned about corrosion. Since I had to powder coat a few other pieces it was easy to just add this to the mix.
So, to answer an earlier question: the short water pump does not clear the timing cover...at least not in its stock form. It is off by about 1/16" which comes from the thickness of the bolt heads and lock washers on the back plate. You can see the culprits here.
The remedy is easy: replace the bolts with stainless, lower profile ones and remove the lock washers entirely, using loctite instead.
FYI, I recently called Edelbrock and asked them if their aluminum water pump would clear their aluminum timing cover without shimming.
Their answer was yes and that they designed the water pump so the back plate was counter sunk and they use flat head counter sunk screws.
I have been doing some random bits of work here and there but not much to write home about. I have been removing the rear body panel where the license plate pocket is which of course requires me to remove the exhaust bezels, which require me to remove the rusted out exhaust...
So I have been on my back with a saw cutting the mufflers off so that I can get to the bezel screws.
I did do a few other cosmetic things trying to finish up the engine.
I received my aluminum water pump and decided to paint it aluminum as well so that it would be protected as well as match everything else. Also the back plate on it is galvanized steel so I was concerned about corrosion. Since I had to powder coat a few other pieces it was easy to just add this to the mix.
So, to answer an earlier question: the short water pump does not clear the timing cover...at least not in its stock form. It is off by about 1/16" which comes from the thickness of the bolt heads and lock washers on the back plate. You can see the culprits here.
The remedy is easy: replace the bolts with stainless, lower profile ones and remove the lock washers entirely, using loctite instead.
FYI, I recently called Edelbrock and asked them if their aluminum water pump would clear their aluminum timing cover without shimming.
Their answer was yes and that they designed the water pump so the back plate was counter sunk and they use flat head counter sunk screws.
Doh! That is great information that I would have liked to have known a couple of weeks ago. Oh well, this one will work just fine and I feel better knowing that the hardware is stainless and it is coated.
Thanks for the tip OCB, I am sure that will be useful for some forum members.
Today I tried my first shot at bodywork. I used VPA as a filler (as many have done) and here are my thoughts:
1) this stuff sets up very fast, even going light on the hardener. Making several small batches will do better than a single, larger one.
2) there is a nice stage during the hardening process where you can shape it quite easily with a razor blade. Since I am still very new to body work this allowed me to get excess filler off of places where it should not be.
3) this stuff goes a LONG way. Make less than you think you will need, chances are it will be more than enough.
4) Sanding is hard work, or at least it is for me. Try to get it as close to how you want it while it is still malleable.
in all, not bad for my first attempt at it. I filled a low spot on the hood and also was attempting to blend the scoop into the hood surface. I will likely have to do another coat in the scoop but the low spot came out great.
Also, while I was out there I addressed the front opening area. After a lot of research and trial and error with different materials I finally found a nice hexagonal plastic grille that I could trim to fit the opening. It came our pretty nice if I do say so myself.
I may leave it satin black as it is now or I may experiment with putting a chrome edge on the front of it, sort of like the lower side grilles.
I fortunately have a junkyard near me that has newer cars-like only a few years old- but they have pulled all the motors/trans. It's a smorgasbord for finding all sorts of plastic grilles to cut up. And I'll get some of the chrome edging and see if I can make it fit where I want it.
I did as much work as I could over the last couple of days to try to take advantage of the good weather.
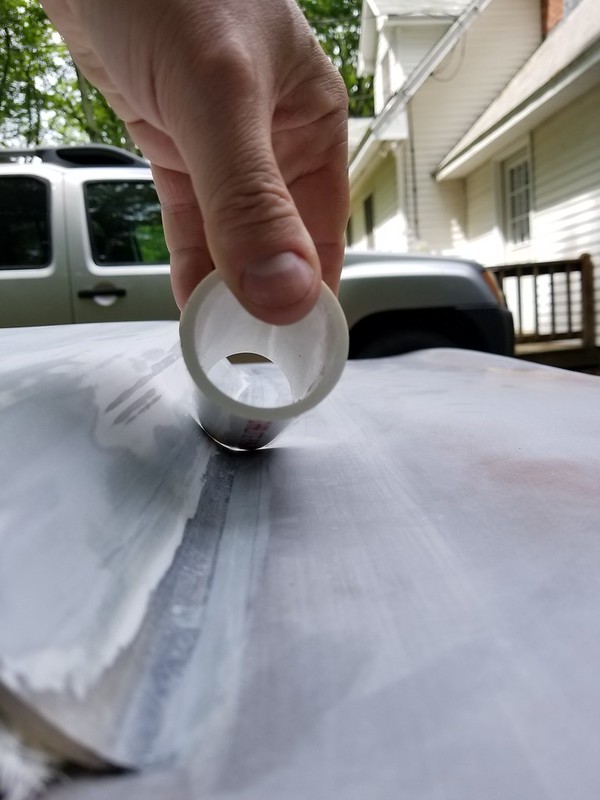
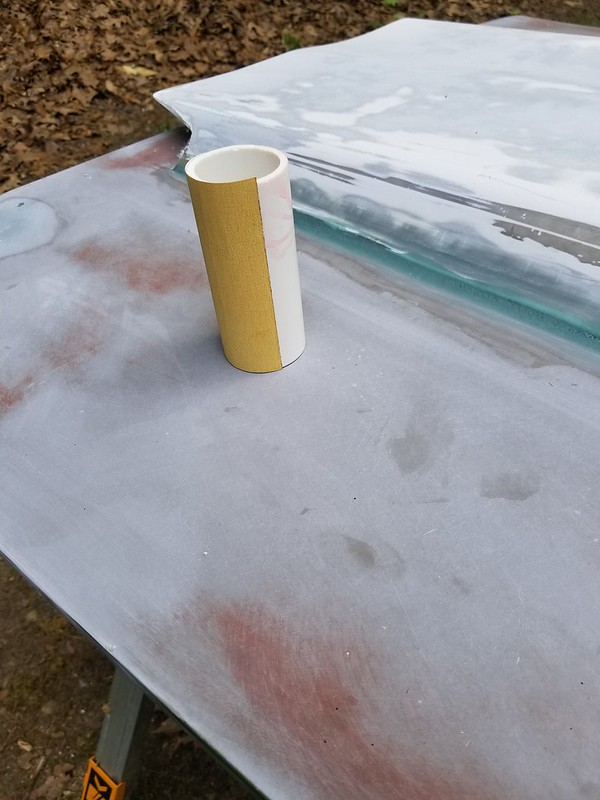
To begin, I continued work on my hood scoop mod. Since I am new to bodywork in general I was trying to figure out how to make a consistent curve where the scoop meets the hood until I had a bright idea to use a small piece of PVC pipe as a shaping tool.
This worked very well giving me a consistent curve as well as ensuring that I did not lay on too much filler. It also doubled as a sanding tool once the filler hardened and worked great.
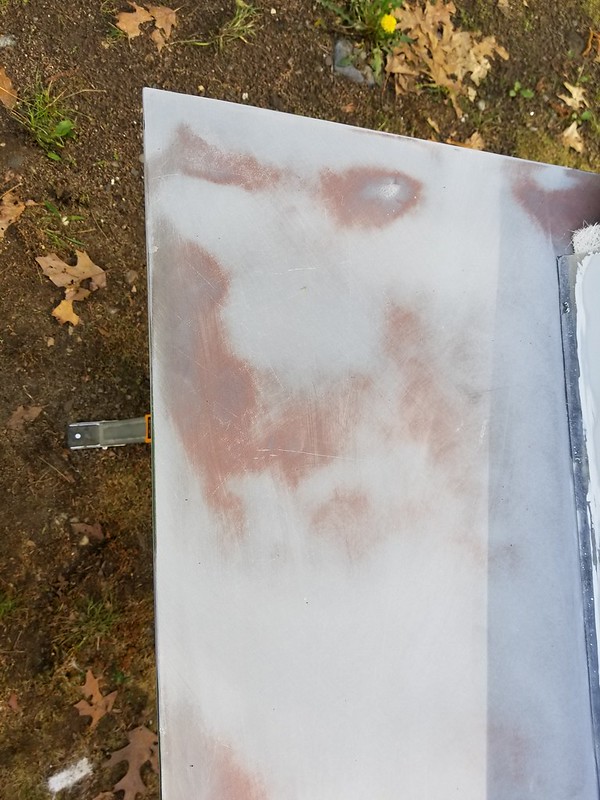
Then it was a bunch of time spent disassembling more stuff to get the body off of the frame. I began with all of the front frame supports which were pretty grungy and had some surface rust but no real damage.
This is after they were degreased, cleaned, and media blasted. I sadly did not take a 'before' picture.
There is something very therapeutic about taking something rusty and ugly and making it look a lot better. I spent at least 2 hours working with the blast cabinet. Here is the left side done and the right side is next.
Once that was done I was kind of shocked to see just how light the nose of the car is, and how easily it moves around without all the supporting bracketry. It was a little disconcerting and I will have to be careful not to lean on anything for fear of breaking the fiberglass.
It made the next part a little scary although pretty easy: removal of all of the headlight vacuum components. Since I am going with an electric motor conversion, this was a no brainer and really helps to clean up the engine compartment.
I think I am going to weld up a rack to use in my powder coating oven which should make it much easier to load parts in and out.
I did as much work as I could over the last couple of days to try to take advantage of the good weather.
To begin, I continued work on my hood scoop mod. Since I am new to bodywork in general I was trying to figure out how to make a consistent curve where the scoop meets the hood until I had a bright idea to use a small piece of PVC pipe as a shaping tool.
This worked very well giving me a consistent curve as well as ensuring that I did not lay on too much filler. It also doubled as a sanding tool once the filler hardened and worked great.
Then it was a bunch of time spent disassembling more stuff to get the body off of the frame. I began with all of the front frame supports which were pretty grungy and had some surface rust but no real damage.
This is after they were degreased, cleaned, and media blasted. I sadly did not take a 'before' picture.
There is something very therapeutic about taking something rusty and ugly and making it look a lot better. I spent at least 2 hours working with the blast cabinet. Here is the left side done and the right side is next.
Once that was done I was kind of shocked to see just how light the nose of the car is, and how easily it moves around without all the supporting bracketry. It was a little disconcerting and I will have to be careful not to lean on anything for fear of breaking the fiberglass.
It made the next part a little scary although pretty easy: removal of all of the headlight vacuum components. Since I am going with an electric motor conversion, this was a no brainer and really helps to clean up the engine compartment.
I think I am going to weld up a rack to use in my powder coating oven which should make it much easier to load parts in and out.
Stay tuned...
Way to use the old' bean and come up with the shaping tool ! Looks great.
I for one really enjoy what different things people come up with to get the results they are looking for. Great idea with the PVC. Like the hood and scoop also.
Got a lot done yesterday (and I am paying for it now) but not a lot of pictures to show for is since I was on my back for most of it.
I managed to remove the bolt heads on two of the three remaining body mounts. All that remains now is the #3 left side which I will do today. It took a combination of cutoff wheels, die grinders, and air chisels to do this which was exhausting and painful on my hands, but at least it is done.
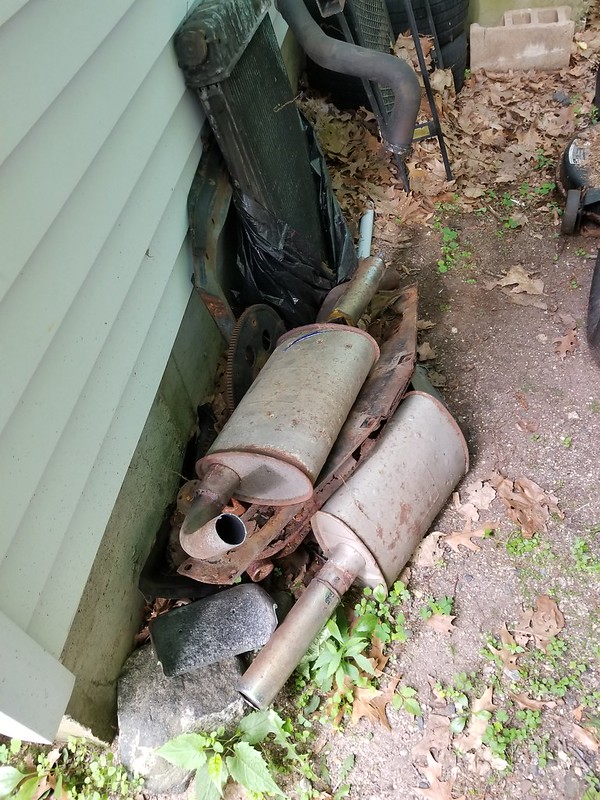
I had been trying to remove the rear lower valence but could not since the exhaust bezels were rusted in place and I could not get to the screws so I finished removing the mufflers. Since I am not re-using these it was quickly accomplished with a sawsall. My pile of scrap metal is growing...
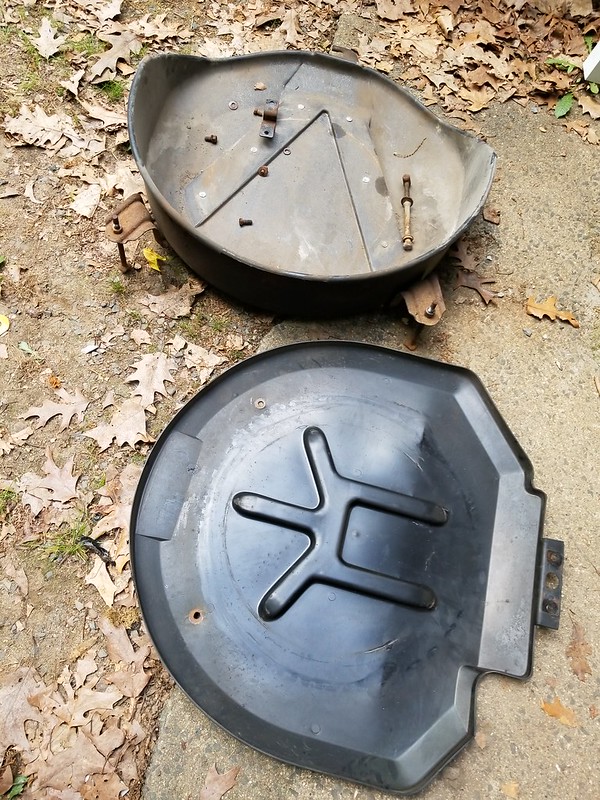
From there I was able to remove the exhaust bezels and moved on to the spare tire carrier. Grueling work being on my back and although the parts were a bit rusty (not too bad) it came out with a little penetrating oil and what little muscle I could muster.
This finally allowed me access to all of the bolts holding on the rear fascia which came out without too much trouble. One side of the piece was torn up pretty badly and the other side had a non-oem bolt in it (different size and look) which further confirms that what I thought was a no-hit body was stuffed decently in the rear at some point. Oh well, it doesn't change much and I have no choice but to continue onward.
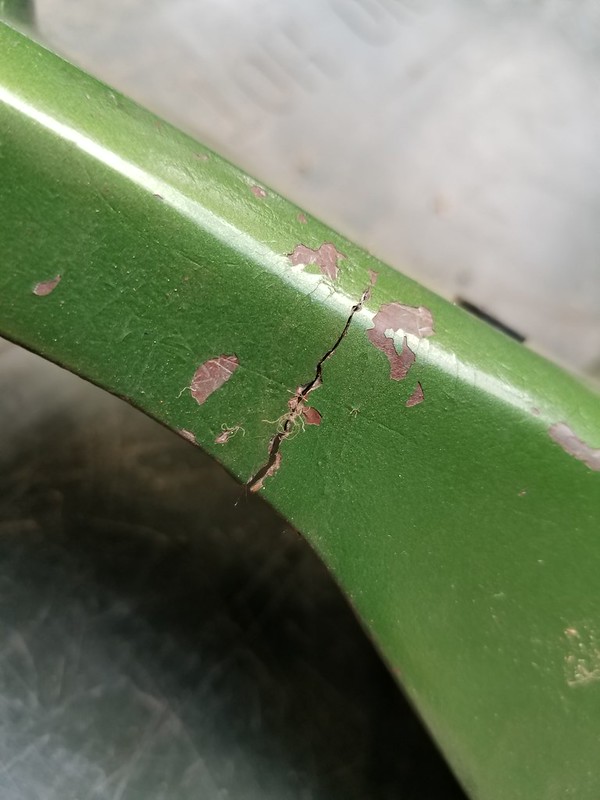
I cut out the damaged area and will get to the repair the next time I break out the epoxy and fiberglass. There is also one area about an inch and a half long where there is a crack which will also need fixing. At least these should be fairly simple repairs.
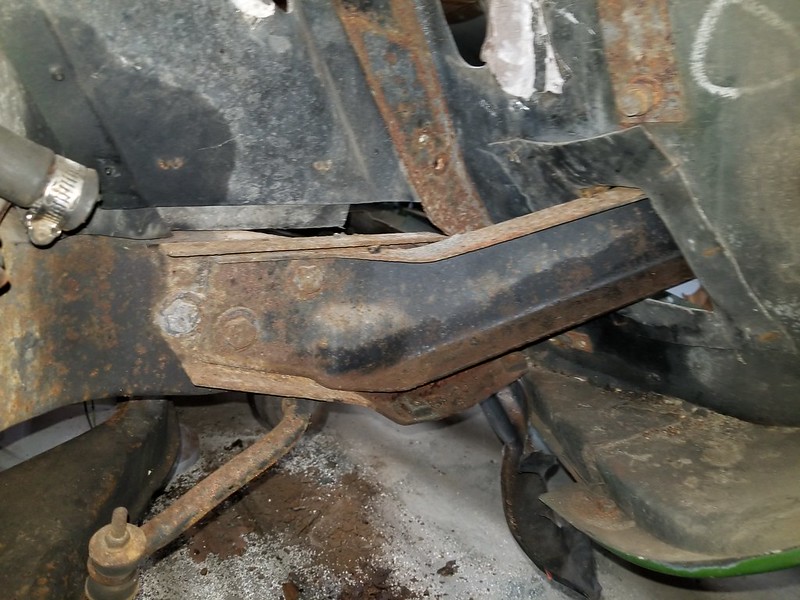
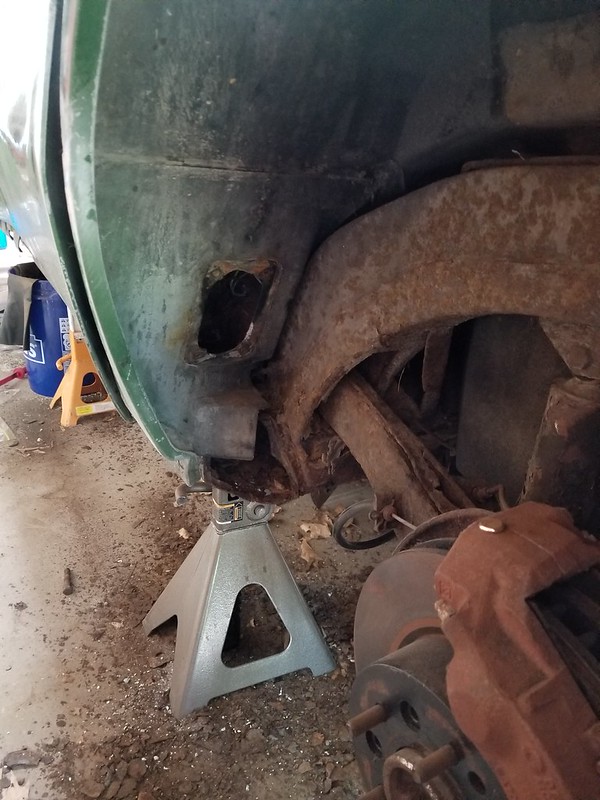
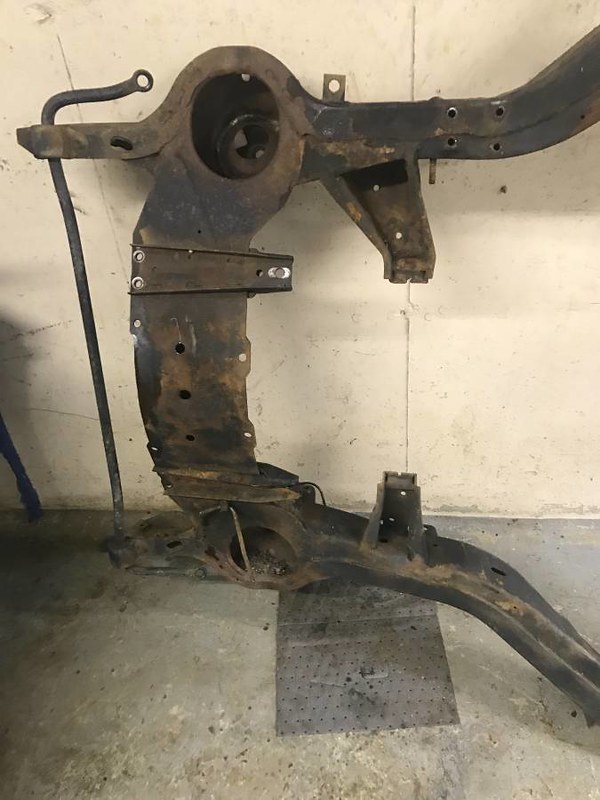
It is so weird how the rust on this car is contained almost entirely to the rear. The differential and all of the frame from the #3 back is in pretty rough shape (as I knew when I bought the car). You can see where it has eaten through the top of the trailing arm here.
Due to continued medical expenses, my budget for this car is shrinking fast. My search for a frame that I can afford continues...
Our hobby is expensive.
Life seems to dictate how much we can invest into our hobby.
Some paydays I can purchase parts some paydays I can't.
Time is on our side.
Don't let the absent of funds discourage you.
I save, I purchase parts and then save some more.
Some day I'll pull the plug and start disassembling my 73, but I'll wait until I have all my major components sitting on the shelf.
Keep up with the good spirits and the excellent work.
You are much farther ahead than many of us.
It is funny how the universe always seems to be able to provide. I was really sweating when/where/how much this frame was going to cost me. While I am not on a fixed budget per se, I have absolutely zero income with my hands like this so anything that I spend is not getting replenished...
I am the person who always gives to charity. I organize and assist in various fundraisers/benefits throughout the year. I am the guy that stops on the side of the road to help when someone is stuck. When asked why, I have always said that I believe in karma and that being a racer I felt that I needed as much good karma in the bank as possible. Today I made a withdrawl.
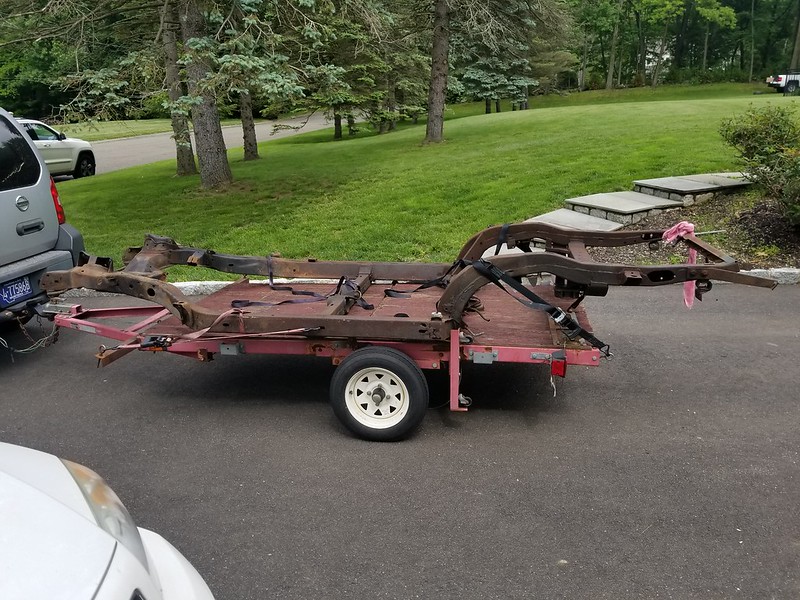
Every week or so I browse ebay and craigslist looking for a frame for this car but never came up with anything substantial...until today. On a whim I checked this morning and saw an ad on craigslist for a frame for $500 that was only two hours away from me.
I saw that the ad was posted 6 days ago and thought to myself that it couldn't possibly be real, and even if it was it HAD to be long gone at that price. It was 6 a.m. my time and since I did not want to call that early, I sent him an email and got an almost immediate response to call.
I spoke with him briefly to confirm that he still had it and that it was indeed the one in the pictures. He mentioned that he had gotten literally hundreds of contacts about it but all wanted him to ship it and he simply wanted it gone. I said that I could be at his place with cash in hand at any point so he said that it was first come, first serve and that someone from Rhode Island said that they may be down on Saturday to take a look at it. I asked what time he got off work (3pm) and said I would be there at that time to take it.
When I got there, the gentleman explained that he had several C3 projects going on and that this particular project came with this frame but that he was going to put a SRIII frame on it so he had no need of it. We chatted for a bit about his various cars and my project and in the end we closed the deal and I made a new friend in the process.
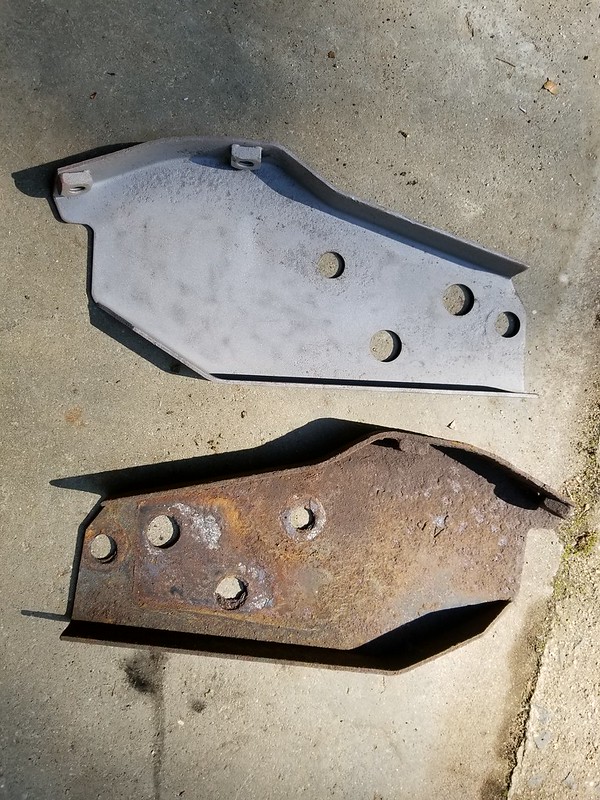
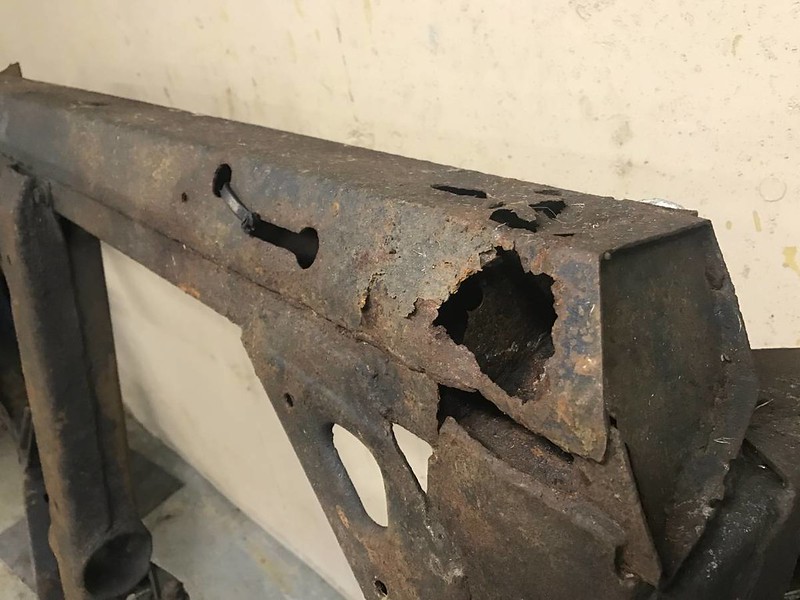
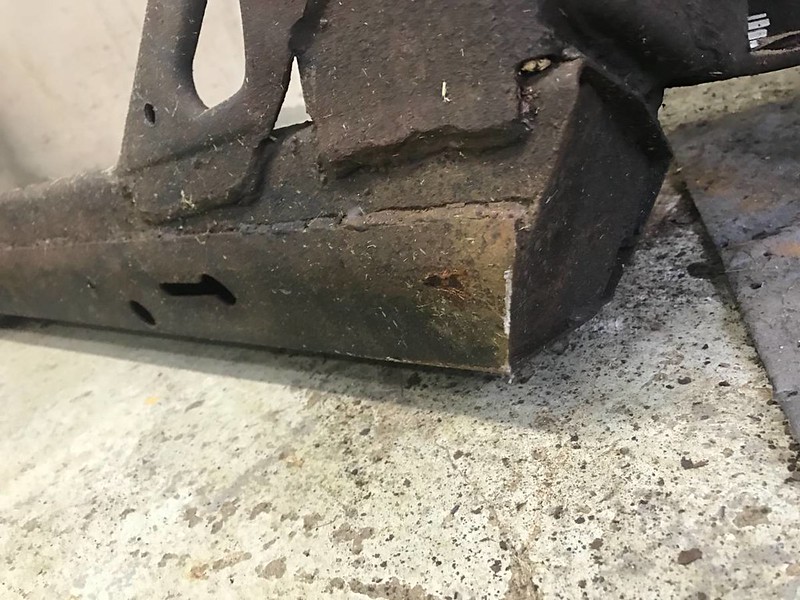
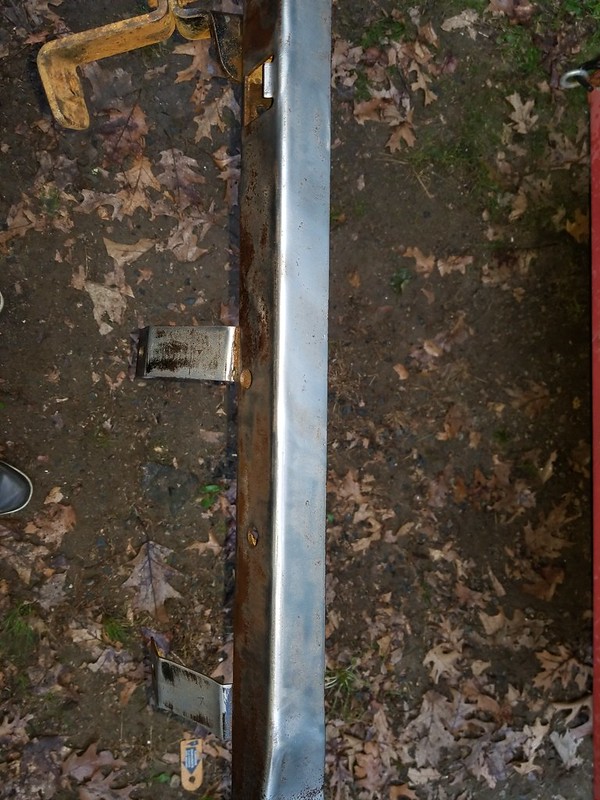
I went over the frame with a ball peen hammer and the only place that did not give a very satisfying ring when struck was the area pictured. A simple patch piece from one of the various vendors will weld in place and make this thing whole again.
The C3 community will have to correct me if I am wrong but I believe this to be a 68 or early 69 frame since it does not have the kick-up gussets? I am assuming that I can simply get replacement parts and weld them into place?
All in all it was a tremendous stroke of luck for me and I thank the stars (and Randy) for his generosity. What a cool guy (and a really nice 69 vert project that he is working on as well!).
The only bad spot on the frame
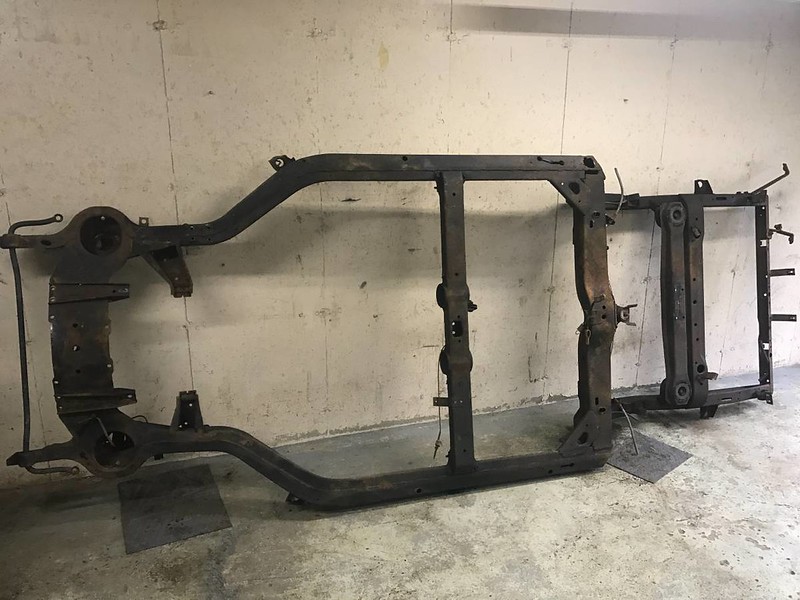
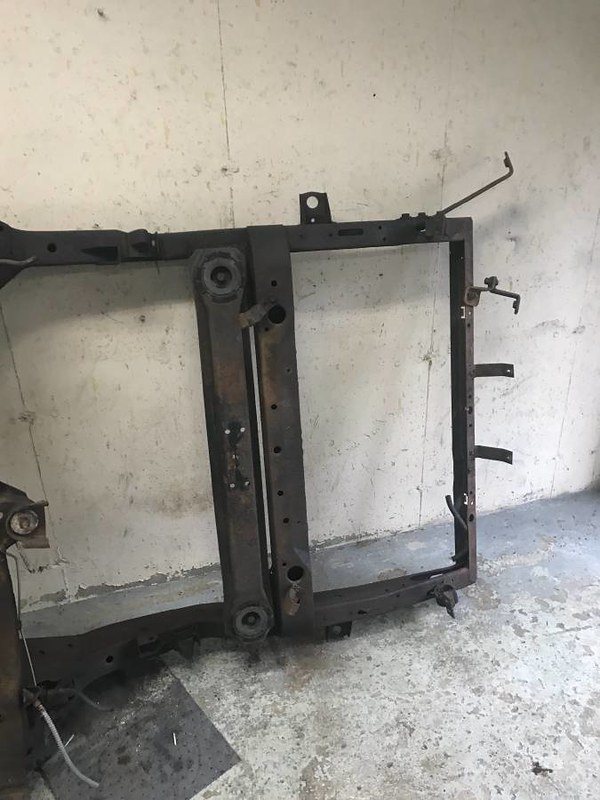
The whole thing is straight as an arrow with absolutely no signs of impact anywhere. Even the engine cradle does not have the typical crush spot from a floor jack.
The other side is solid as a rock.
It even came with a bunch of the bumper and rear fascia mounting brackets. While I have these from my own car, these are in MUCH better shape.
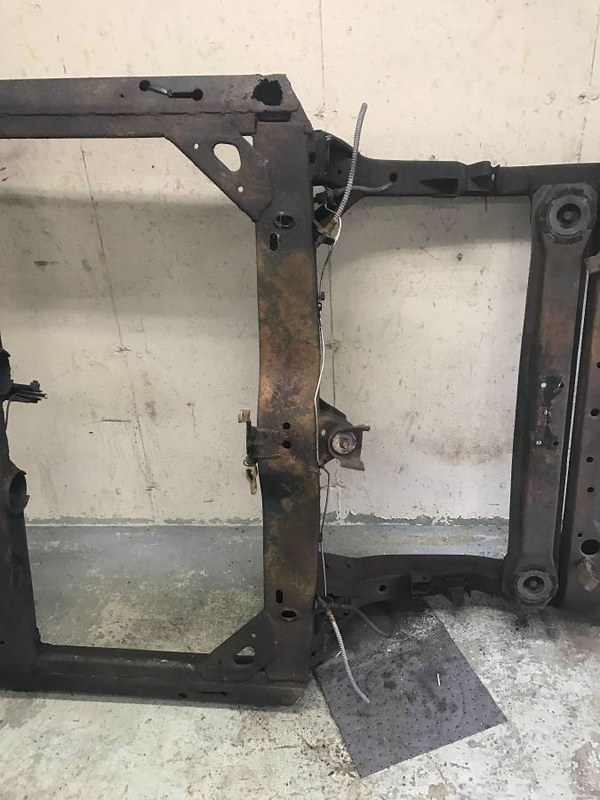
When I got home I had to rest for a bit but couldn't wait to dig into the frame. After only a few minutes with a roloc disk got the rear cross bar close to bare metal.
A second pass with a wire brush got what little remained. It is all good steel under that little bit of surface rust. I am super excited!!
I did a quick coat of Afterblast on it (phosphate) and will let it sit until tomorrow as I am too tired and it is too dark to do much more.
I will then start working section by section to clean up the frame, coat it with phosphoric acid, and then for good measure I will put down a base coat of rust encapsulator to serve as a primer before the top coat.
This should ensure that I have a rust free frame for many years to come.
Last edited by PainfullySlow; 06-01-2018 at 08:44 PM.

 05-17-2018, 05:21 PM