
PSlow's '72 Restomod Project
 12-28-2017, 07:21 PM
#61
Burning Brakes

Thread Starter
 12-29-2017, 10:27 PM
#62
Burning Brakes
Thread Starter
At what point does attention to detail become obsessive/compulsive disorder?
The next part out of the box was the center console shift plate which was in sad need of some help. I started by disassembling all of the components from the back which was pretty easy to do as it is just phillips screws which thankfully were not frozen solid.

The car has deluxe interior but the woodgrain insert here was in very bad shape and had to go. I removed it using plastic razor blades which allowed me to gently pry it off.

The car is originally an automatic but will receive a T56 6-speed transplant so I set about converting the trim plate to manual. I started by drilling out the rivets and removing the shifter surround.

I then used my dremel and some cut-off wheels to remove the center of the shifter area since the manual transmission requires this entire area to be open.

The glue from the wood trim was a real pain to get rid of as it had turned very hard. A bath in lacquer thinner finally softened it enough that I was able to remove it with a hand held brass wire brush. It also helped me to remove all of the old, faded black paint.

Masking off this piece with my hands the way they are took several hours but it was worth it in the end. Naturally this is the point where my wife walked in and accused me of being OCD.

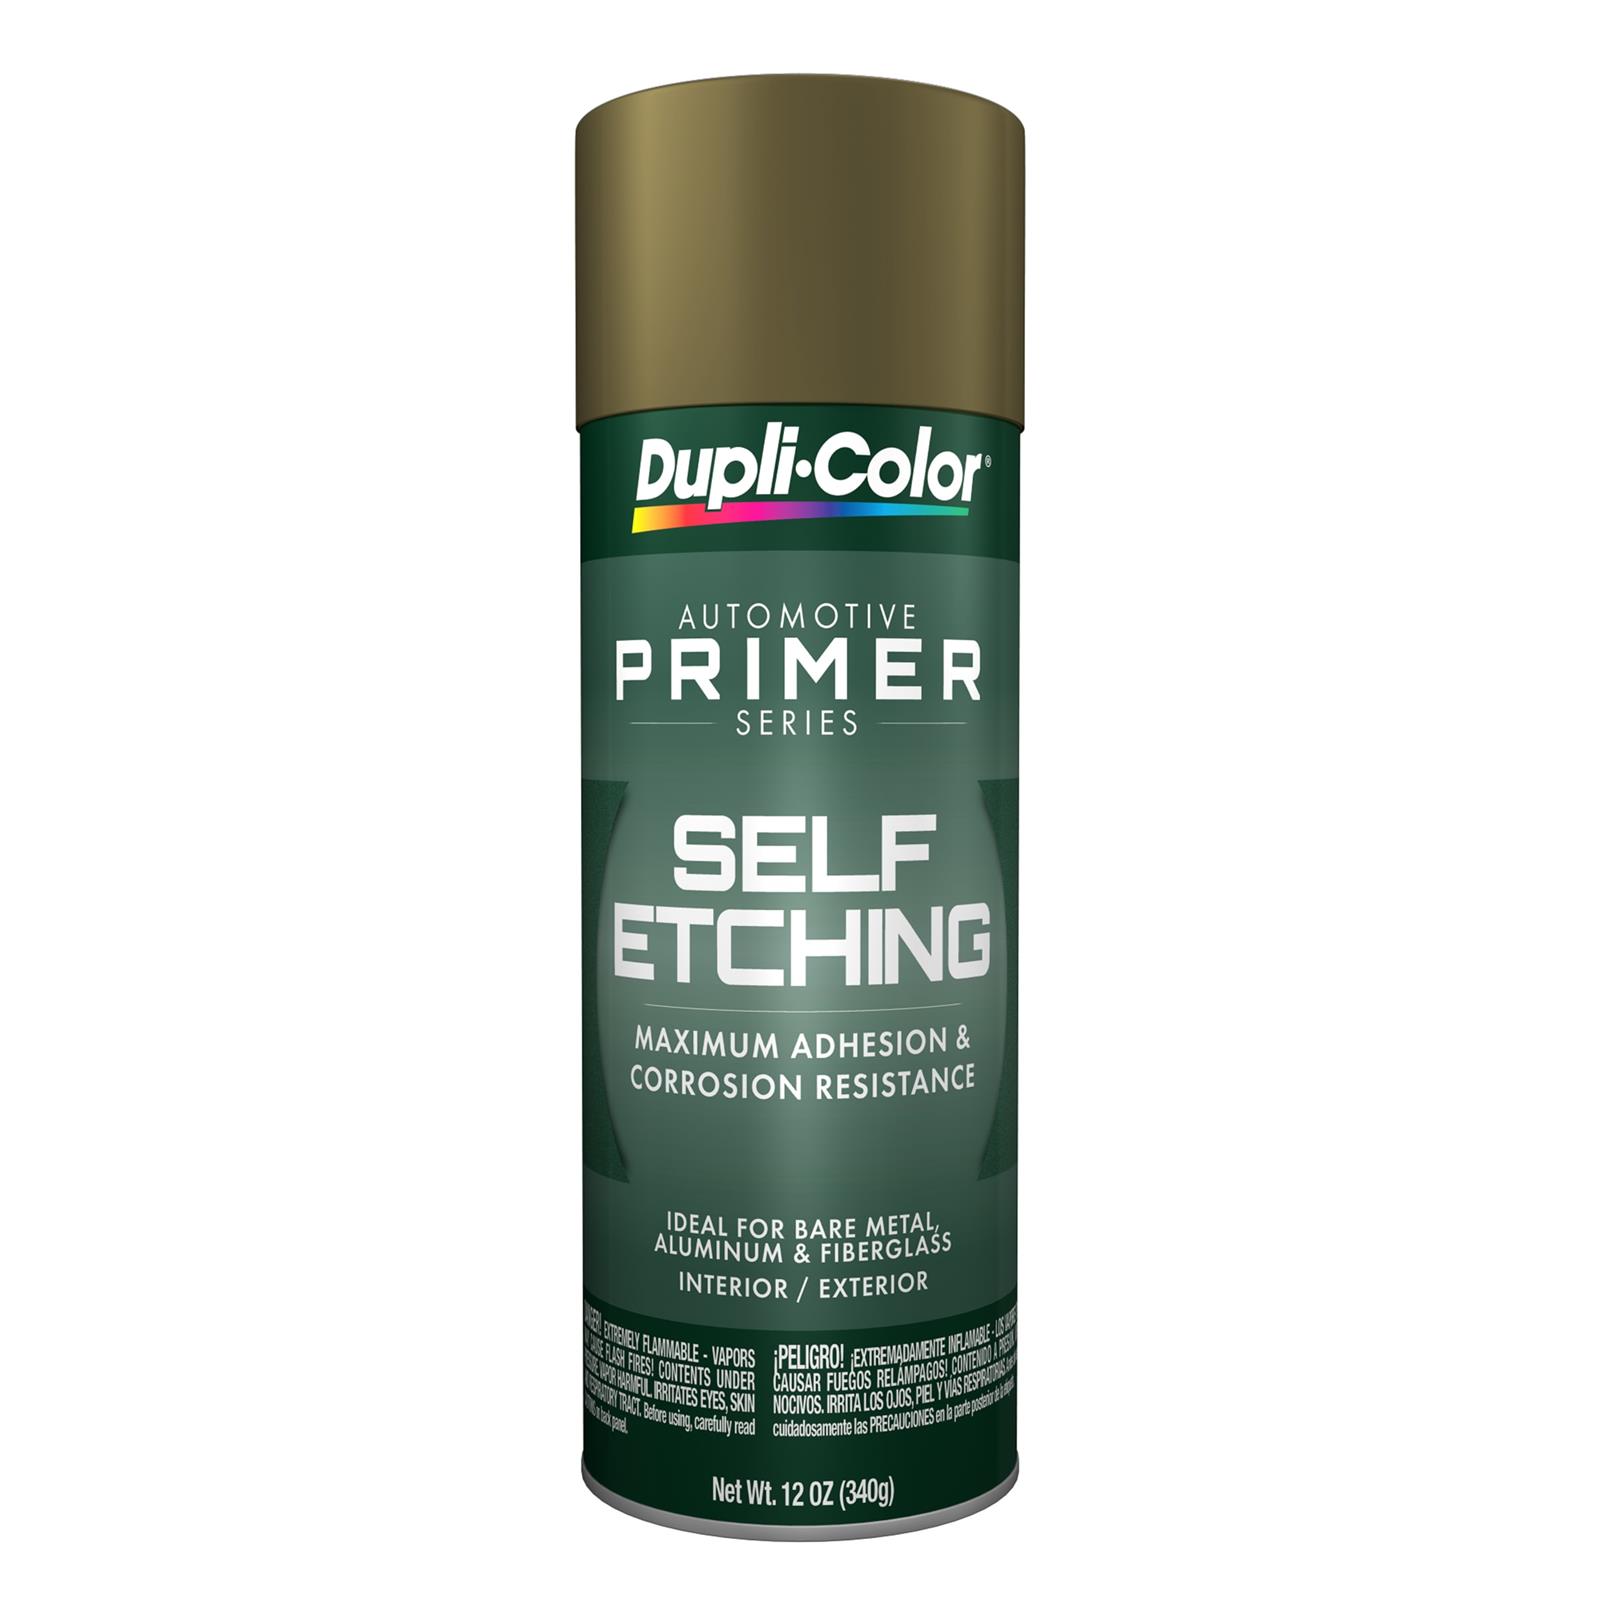
A light coat of self-etching primer to make sure that the paint adheres to all that shiny metal...

And finally I coated it with a few light coats of the satin black that I have chosen for the interior of this project. Waited an hour and then removed the mask. Poof! Reconditioned and modified console trim.

That is all that I was able to do today with my hands so tomorrow I will finish the small bits and reassemble it.
The next part out of the box was the center console shift plate which was in sad need of some help. I started by disassembling all of the components from the back which was pretty easy to do as it is just phillips screws which thankfully were not frozen solid.
The car has deluxe interior but the woodgrain insert here was in very bad shape and had to go. I removed it using plastic razor blades which allowed me to gently pry it off.
The car is originally an automatic but will receive a T56 6-speed transplant so I set about converting the trim plate to manual. I started by drilling out the rivets and removing the shifter surround.
I then used my dremel and some cut-off wheels to remove the center of the shifter area since the manual transmission requires this entire area to be open.
The glue from the wood trim was a real pain to get rid of as it had turned very hard. A bath in lacquer thinner finally softened it enough that I was able to remove it with a hand held brass wire brush. It also helped me to remove all of the old, faded black paint.
Masking off this piece with my hands the way they are took several hours but it was worth it in the end. Naturally this is the point where my wife walked in and accused me of being OCD.
A light coat of self-etching primer to make sure that the paint adheres to all that shiny metal...
And finally I coated it with a few light coats of the satin black that I have chosen for the interior of this project. Waited an hour and then removed the mask. Poof! Reconditioned and modified console trim.
That is all that I was able to do today with my hands so tomorrow I will finish the small bits and reassemble it.
Last edited by PainfullySlow; 12-29-2017 at 10:29 PM.
12-29-2017, 10:59 PM
#63
Le Mans Master

Member Since: May 2003
Location: Fernandina Beach FL
Posts: 8,472
Received 3,216 Likes
on
1,729 Posts
2023 Restomod of the Year finalist
2020 C3 of the Year Winner - Modified

That turned out great!!!
My wife really gets pissed when I put a freshly painted piece in the toaster oven at 180-200� for 30 minutes to cure the paint!!!
BTW- next time you are at Lowes/Home Depot go ahead and buy the blue painter's tape in bulk- a lot cheaper that way!!!
Richard
My wife really gets pissed when I put a freshly painted piece in the toaster oven at 180-200� for 30 minutes to cure the paint!!!
BTW- next time you are at Lowes/Home Depot go ahead and buy the blue painter's tape in bulk- a lot cheaper that way!!!
Richard

The following users liked this post:
PainfullySlow (01-01-2018)


 12-30-2017, 11:03 AM
#65
Burning Brakes
Thread Starter
That turned out great!!!
My wife really gets pissed when I put a freshly painted piece in the toaster oven at 180-200� for 30 minutes to cure the paint!!!
BTW- next time you are at Lowes/Home Depot go ahead and buy the blue painter's tape in bulk- a lot cheaper that way!!!
Richard
My wife really gets pissed when I put a freshly painted piece in the toaster oven at 180-200� for 30 minutes to cure the paint!!!
BTW- next time you are at Lowes/Home Depot go ahead and buy the blue painter's tape in bulk- a lot cheaper that way!!!
Richard
And thank you for the suggestion on the tape. I already have a sleeve of the 2" wide blue tape =)
Oh, and I am using this stuff
Last edited by PainfullySlow; 12-30-2017 at 11:05 AM.
The following users liked this post:
caskiguy (12-30-2017)
12-30-2017, 01:26 PM
#66
Burning Brakes
Thread Starter
Testing out one of the colors I chose for powdercoating. I thought I would start with something small so I am using the brake pedal return spring.
I am very happy with the way it came out. This color will match the paint color nicely and will be used as a tasteful accent color throughout the car to contrast with the satin black that the vast majority of the parts will be.

Now I can finally re-assemble the clutch pedals...
I am very happy with the way it came out. This color will match the paint color nicely and will be used as a tasteful accent color throughout the car to contrast with the satin black that the vast majority of the parts will be.
Now I can finally re-assemble the clutch pedals...
Last edited by PainfullySlow; 12-30-2017 at 05:28 PM.
12-30-2017, 05:18 PM
#67
Burning Brakes
Thread Starter
And everything is assembled and in place. I am missing the pedal pads and one rubber pedal bumper to finish this off and then I can mark it off the list.
My wishlist of parts is growing every day :-p

My wishlist of parts is growing every day :-p
01-01-2018, 03:29 PM
#69
Safety Car

Michael, with that cam you appear to be using (Post 39), do you need to machine the block or timing gear for the "wear plate" that it requires if being used in a "non roller cam" factory block?
01-01-2018, 04:59 PM
#70
Burning Brakes
Thread Starter
https://www.summitracing.com/int/par...6700/overview/
Last edited by PainfullySlow; 01-01-2018 at 04:59 PM.
01-01-2018, 05:55 PM
#71
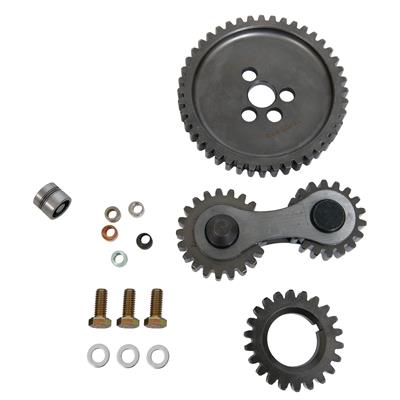
The cam is part of a retrofit kit for non-roller blocks and I actually changed my mind and went with a gear driven timing gear set which comes with the cam lock plate and thrust button. Nothing else is needed and it will work with the OEM steel timing cover.
https://www.summitracing.com/int/par...6700/overview/
https://www.summitracing.com/int/par...6700/overview/
 01-01-2018, 07:32 PM
#72
Burning Brakes
Thread Starter
Yep! I wanted it that way =)
Well, it is 0 degrees Fahrenheit here and my garage is not heated however I got sick of sitting on my butt so I braved the cold for an hour today to start some actual work. I am itching to get the engine and trans out however I am going to wait for it to warm up just a bit for that as it will take several hours in the garage.
So since the entire car will be coming apart I decided to start with the front brakes. My plan is to powdercoat and then rebuild the calipers, clean up the rotors, and load the calipers up with new pads so that they are all ready to go back when the time comes. It gives me something to do while I am waiting on the weather.
It only took me 30+ years of doing brakes but I finally wizened up and clamped off the front brake hose so that I did not leak fluid everywhere.

The brakes are in surprisingly good shape, it is almost a shame to have to take them apart as clearly someone was in here not too long ago.
I put some PB Blaster on the bolts that hold the caliper halves together as well as the brake hose and then gave each of them a little twist, just enough to break them loose. It is a whole lot easier to do this while the calipers are still mounted.
Anyway, then it came to removing the two caliper mounting bolts.

The car has been sitting for several years, untouched but whomever had the car before the previous owner must have done the brakes as the rotors are brand new. You can still see the cross hatch on the rotor surface. I will clean these up, powder coat the black areas and prep the rotor surface with phosphate to prohibit rust while they wait to be put back.

I cannot tell what brand the pads are as they are not marked so I am assuming some lower end parts house brand however they are brand new. I already have a new set of Hawks sitting on my bench to go back in. Also the seals and dust shields are brand new. I am not sure if these calipers were rebuilt or if they are replacement calipers.

The rest of the area has some surface rust. I need the chassis to roll so this is as far as I will go for now.

I did take the dust cap off to check it out. Fresh grease however I can feel the bearings hanging up so those will get replaced. At least whomever did the work did it right and greased the front end when they did the brakes.

The calipers themselves came apart easily and looked pretty decent. The fluid was clear and not yellow.

The pistons and seals are new. I checked them with a magnet and they are stainless. I am a little concerned about the gelled brake fluid that you can see on the spring. Not sure how that got there. The entire system is being rebuilt or replaced so I am not going to lose any sleep over it.

The piston bores look fantastic.

That's all for now, my hands are killing me. Tomorrow will be an acetone bath to clear them up then it will be off to the blast cabinet to prep them for coating.
Well, it is 0 degrees Fahrenheit here and my garage is not heated however I got sick of sitting on my butt so I braved the cold for an hour today to start some actual work. I am itching to get the engine and trans out however I am going to wait for it to warm up just a bit for that as it will take several hours in the garage.
So since the entire car will be coming apart I decided to start with the front brakes. My plan is to powdercoat and then rebuild the calipers, clean up the rotors, and load the calipers up with new pads so that they are all ready to go back when the time comes. It gives me something to do while I am waiting on the weather.
It only took me 30+ years of doing brakes but I finally wizened up and clamped off the front brake hose so that I did not leak fluid everywhere.
The brakes are in surprisingly good shape, it is almost a shame to have to take them apart as clearly someone was in here not too long ago.
I put some PB Blaster on the bolts that hold the caliper halves together as well as the brake hose and then gave each of them a little twist, just enough to break them loose. It is a whole lot easier to do this while the calipers are still mounted.
Anyway, then it came to removing the two caliper mounting bolts.
The car has been sitting for several years, untouched but whomever had the car before the previous owner must have done the brakes as the rotors are brand new. You can still see the cross hatch on the rotor surface. I will clean these up, powder coat the black areas and prep the rotor surface with phosphate to prohibit rust while they wait to be put back.
I cannot tell what brand the pads are as they are not marked so I am assuming some lower end parts house brand however they are brand new. I already have a new set of Hawks sitting on my bench to go back in. Also the seals and dust shields are brand new. I am not sure if these calipers were rebuilt or if they are replacement calipers.
The rest of the area has some surface rust. I need the chassis to roll so this is as far as I will go for now.
I did take the dust cap off to check it out. Fresh grease however I can feel the bearings hanging up so those will get replaced. At least whomever did the work did it right and greased the front end when they did the brakes.
The calipers themselves came apart easily and looked pretty decent. The fluid was clear and not yellow.
The pistons and seals are new. I checked them with a magnet and they are stainless. I am a little concerned about the gelled brake fluid that you can see on the spring. Not sure how that got there. The entire system is being rebuilt or replaced so I am not going to lose any sleep over it.
The piston bores look fantastic.
That's all for now, my hands are killing me. Tomorrow will be an acetone bath to clear them up then it will be off to the blast cabinet to prep them for coating.
01-01-2018, 09:24 PM
#73
Racer

Chuck
Charlotte, NC
01-02-2018, 06:09 AM
#74
Burning Brakes
Thread Starter
Just found your thread and thank you for the very detailed pictures/comments! I'm currently building a 69 Restomod with LS3/Tremec Magnum 6sp. I have a question.....are you going to run a hydraulic clutch with your 6sp? If so have you decided what master cylinder/ bracket you are going to use? Thanks in advance for your response to my question!
Chuck
Charlotte, NC
Chuck
Charlotte, NC
I believe that the rod will need to be shortened and threaded for a heim joint (which I also ordered) but that is the only modification needed. I will do a writeup on that when the time comes however that is likely some time off.
01-02-2018, 08:42 AM
#75

Well my hands were really painful today after spending a day loading and unloading my truck with parts so I had to take it easy. I thought that I could do some cleaning and refinishing of some interior parts without it taking too big of a toll on my hands.
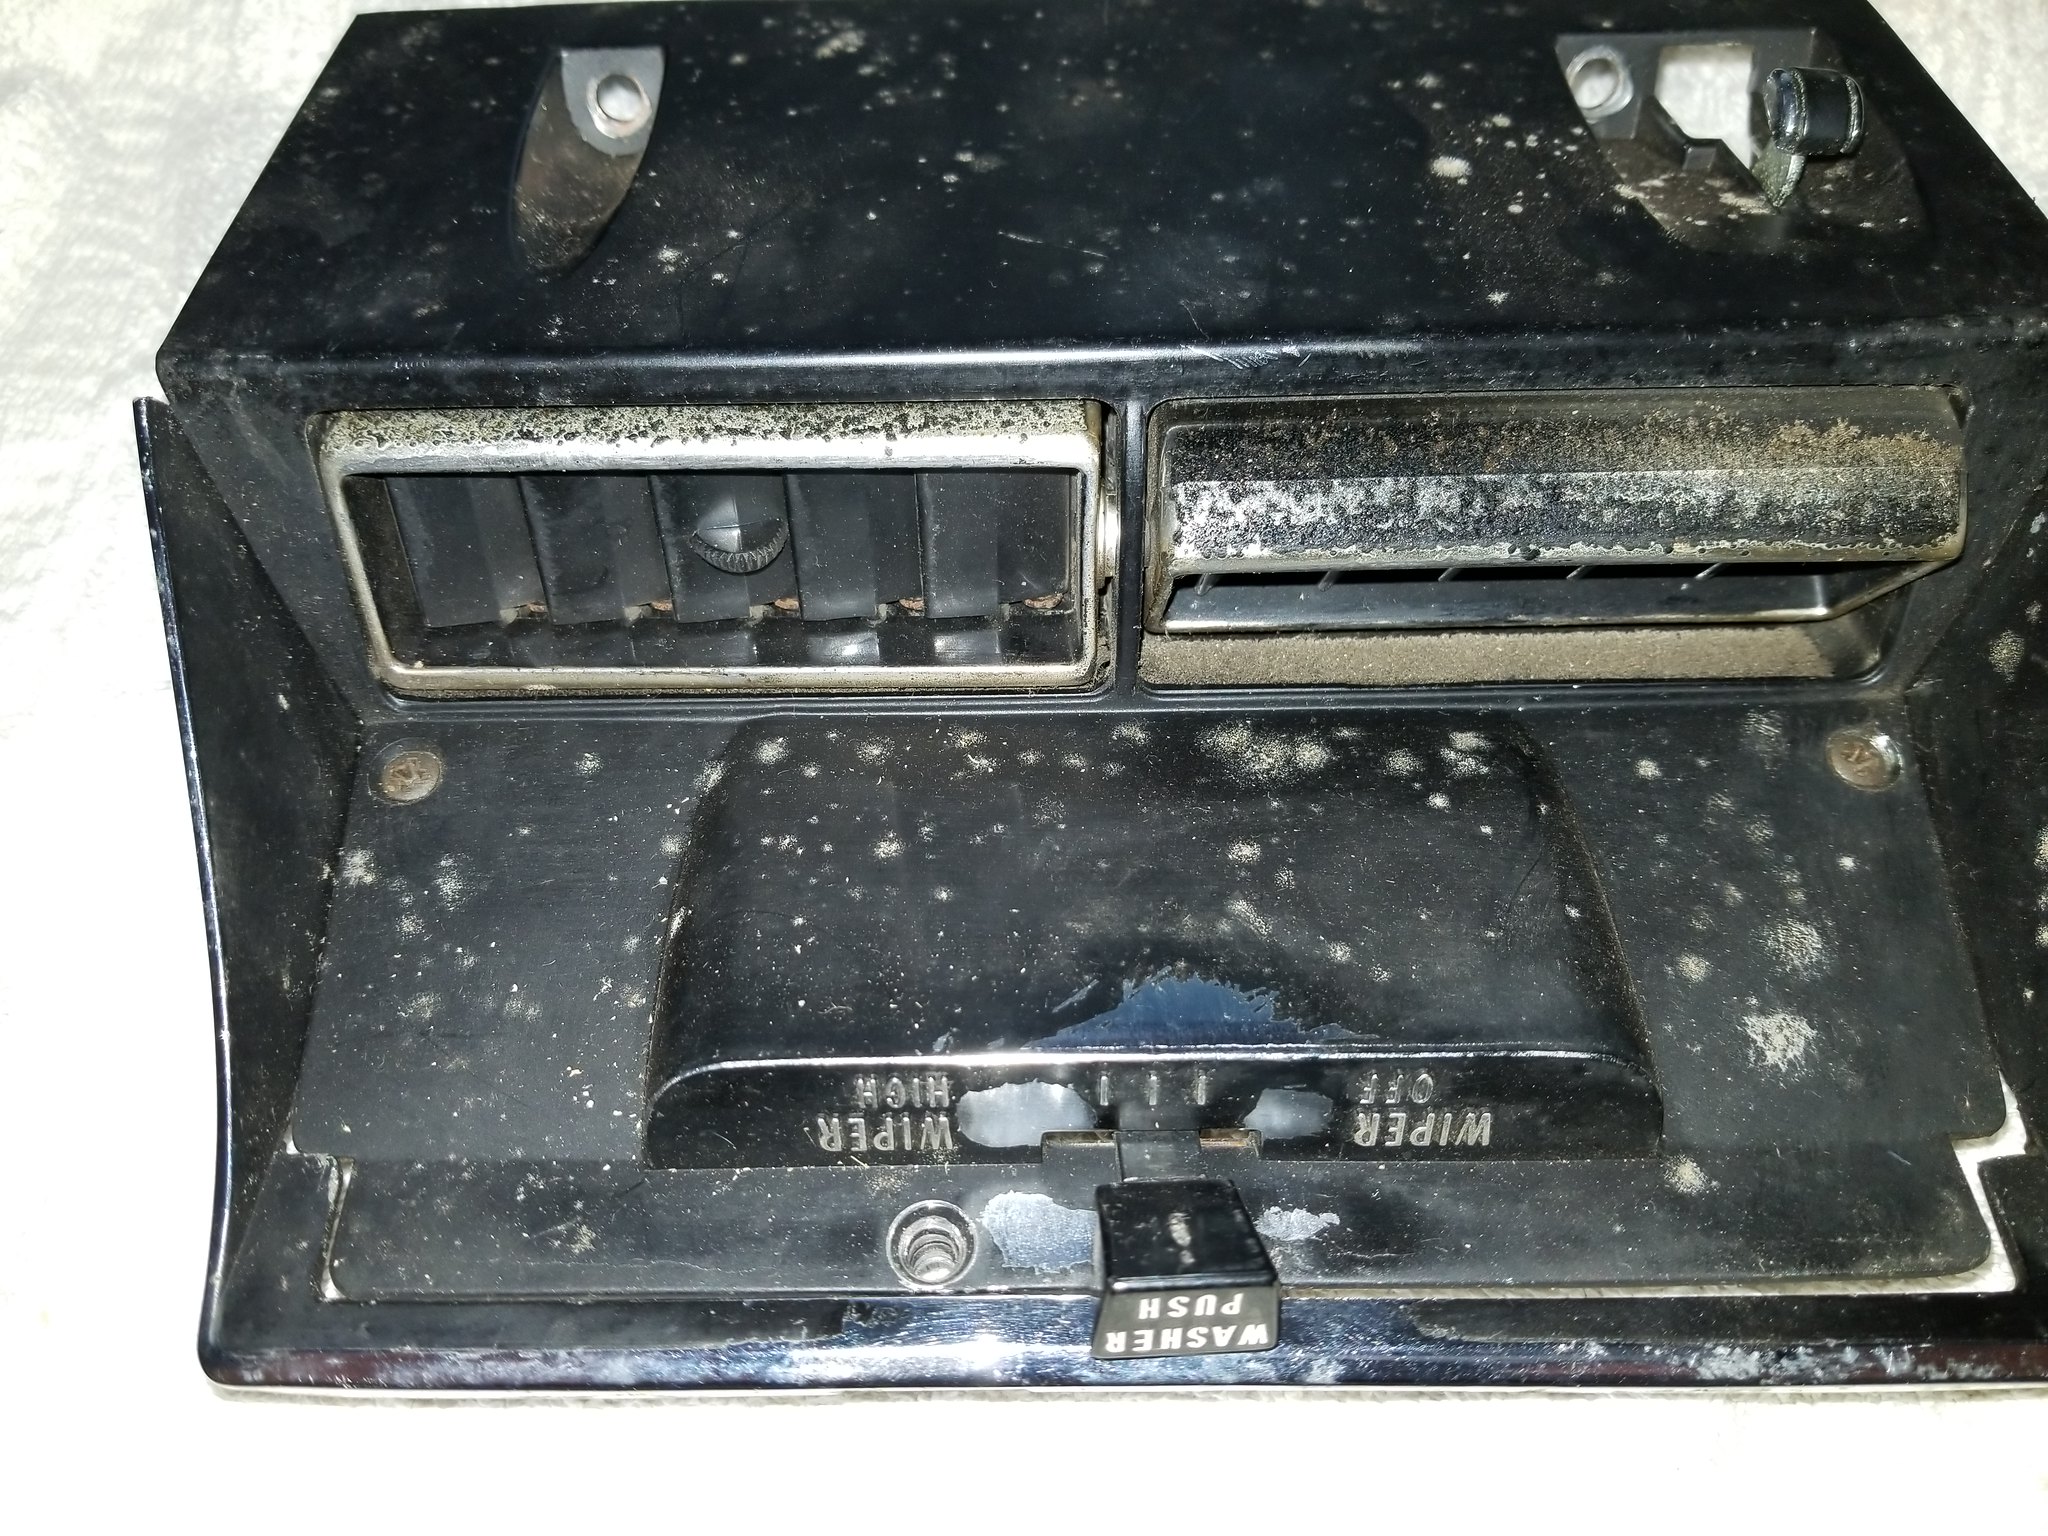
I decided to start with the wiper switch console plate which was in need of some love. Here is how I found it:
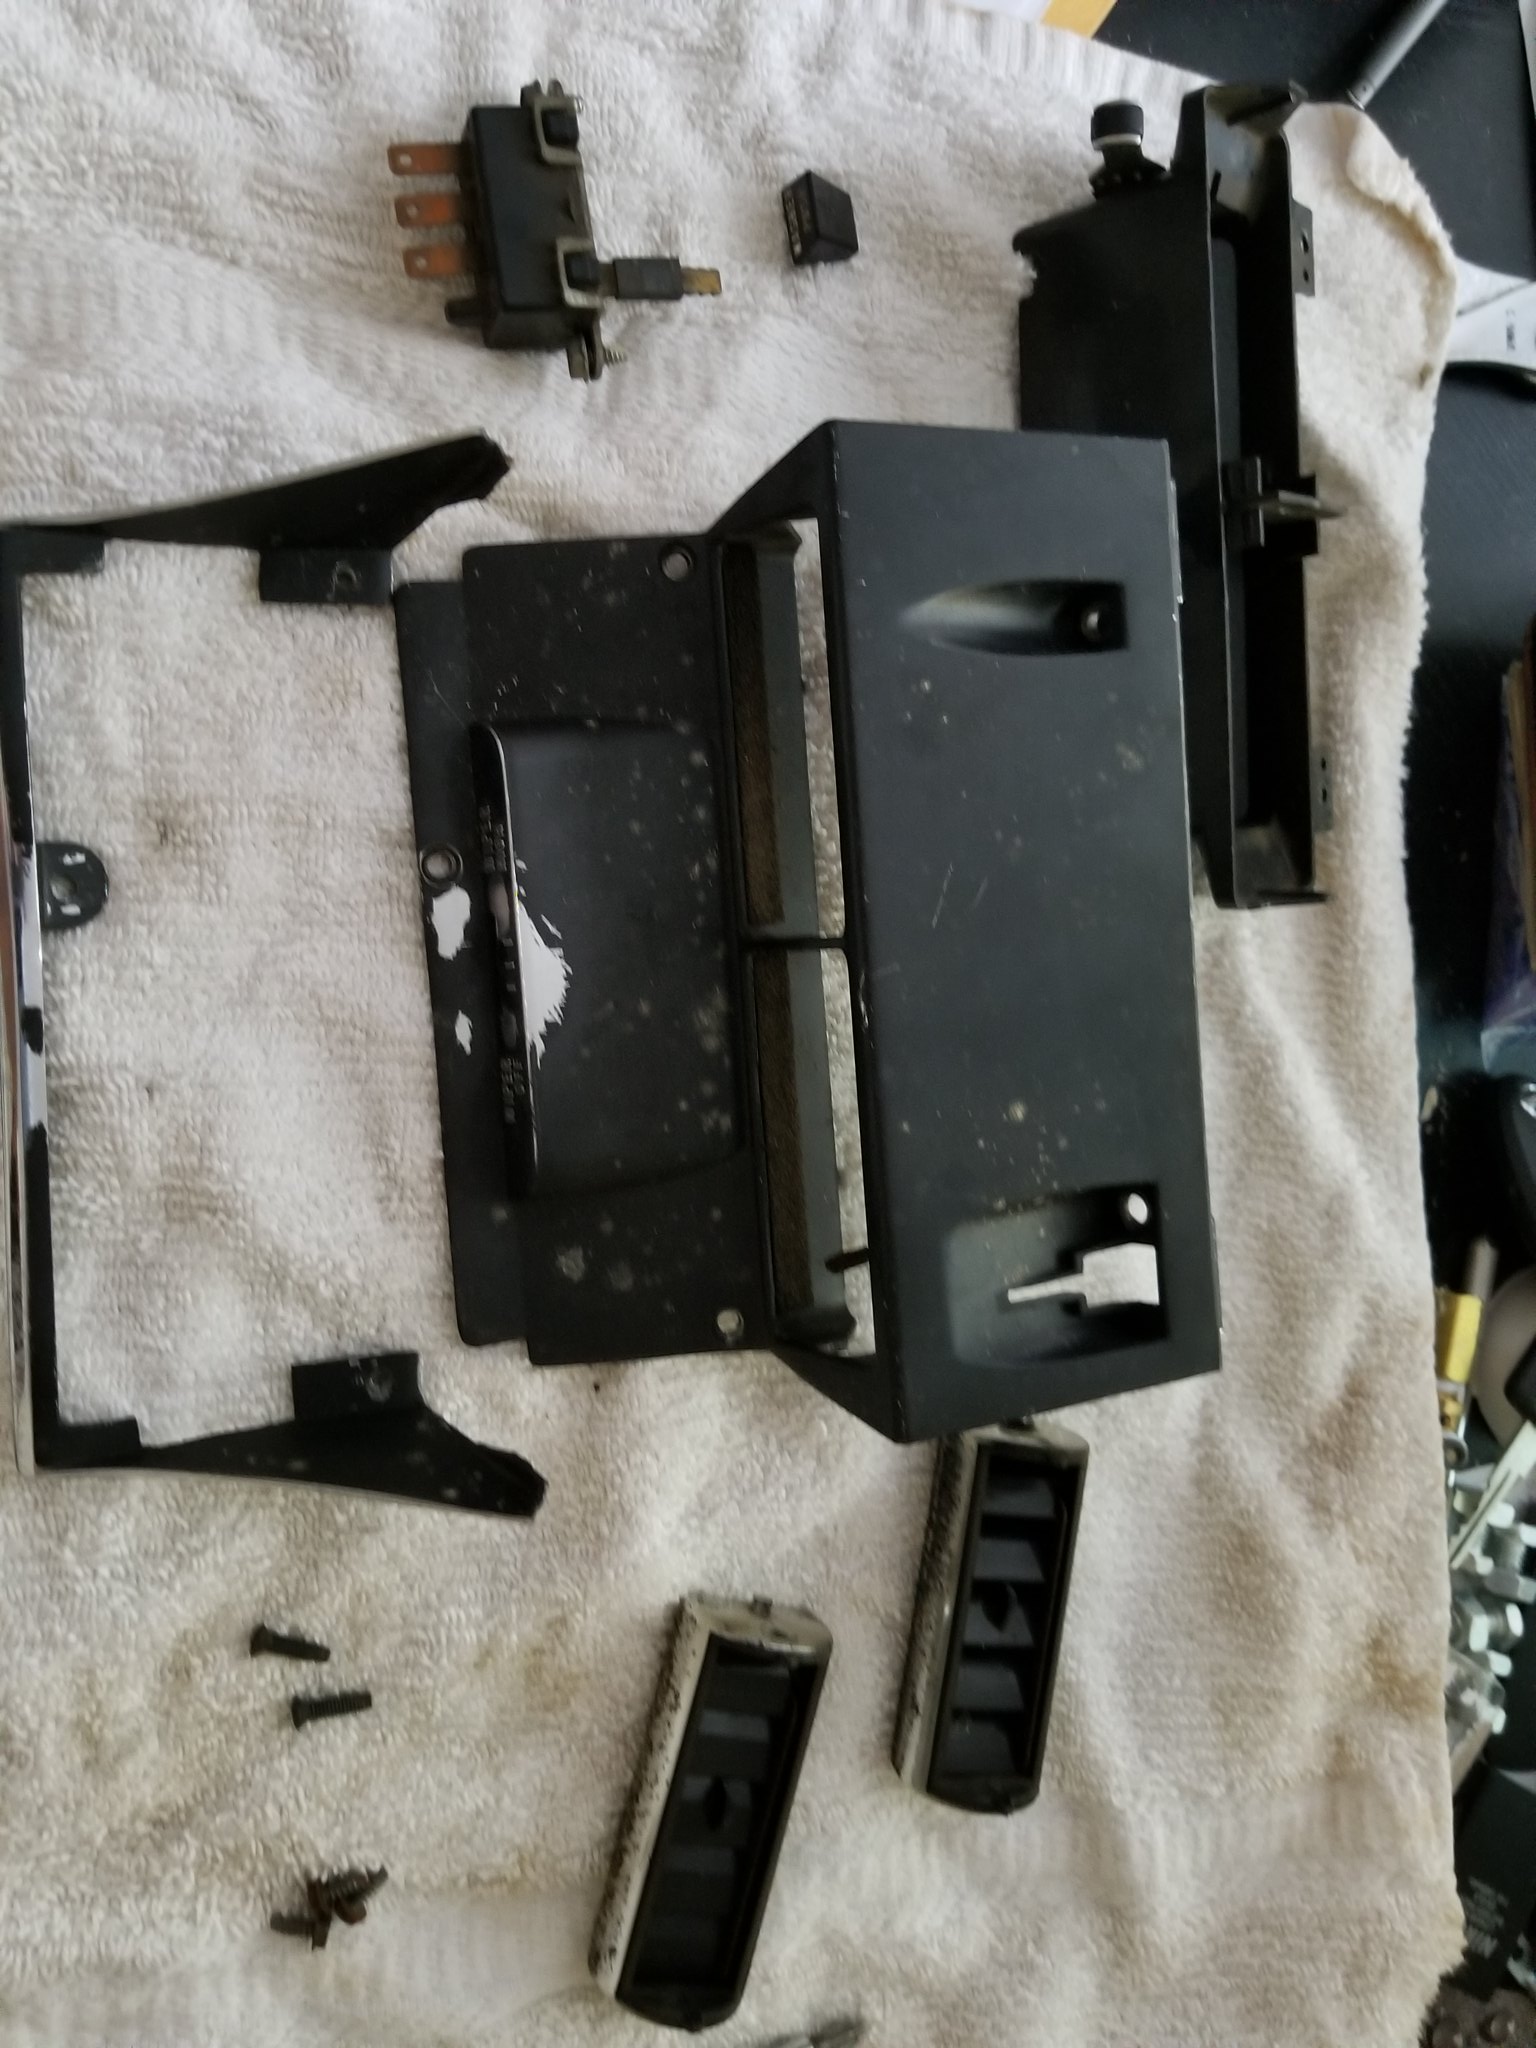
The first step was disassembly so that I could clean the individual parts.
I washed the metal bits with warm, soapy water to get rid of as much gunk as I could. A cold water rinse followed by blowing them off with compressed air to dry them quickly.
After that I needed to remove the old paint which was easily done with lacquer thinner and a few rags. It is important to note that you should always rotate the rag to use a clean spot, otherwise you just end up smearing old paint everywhere.
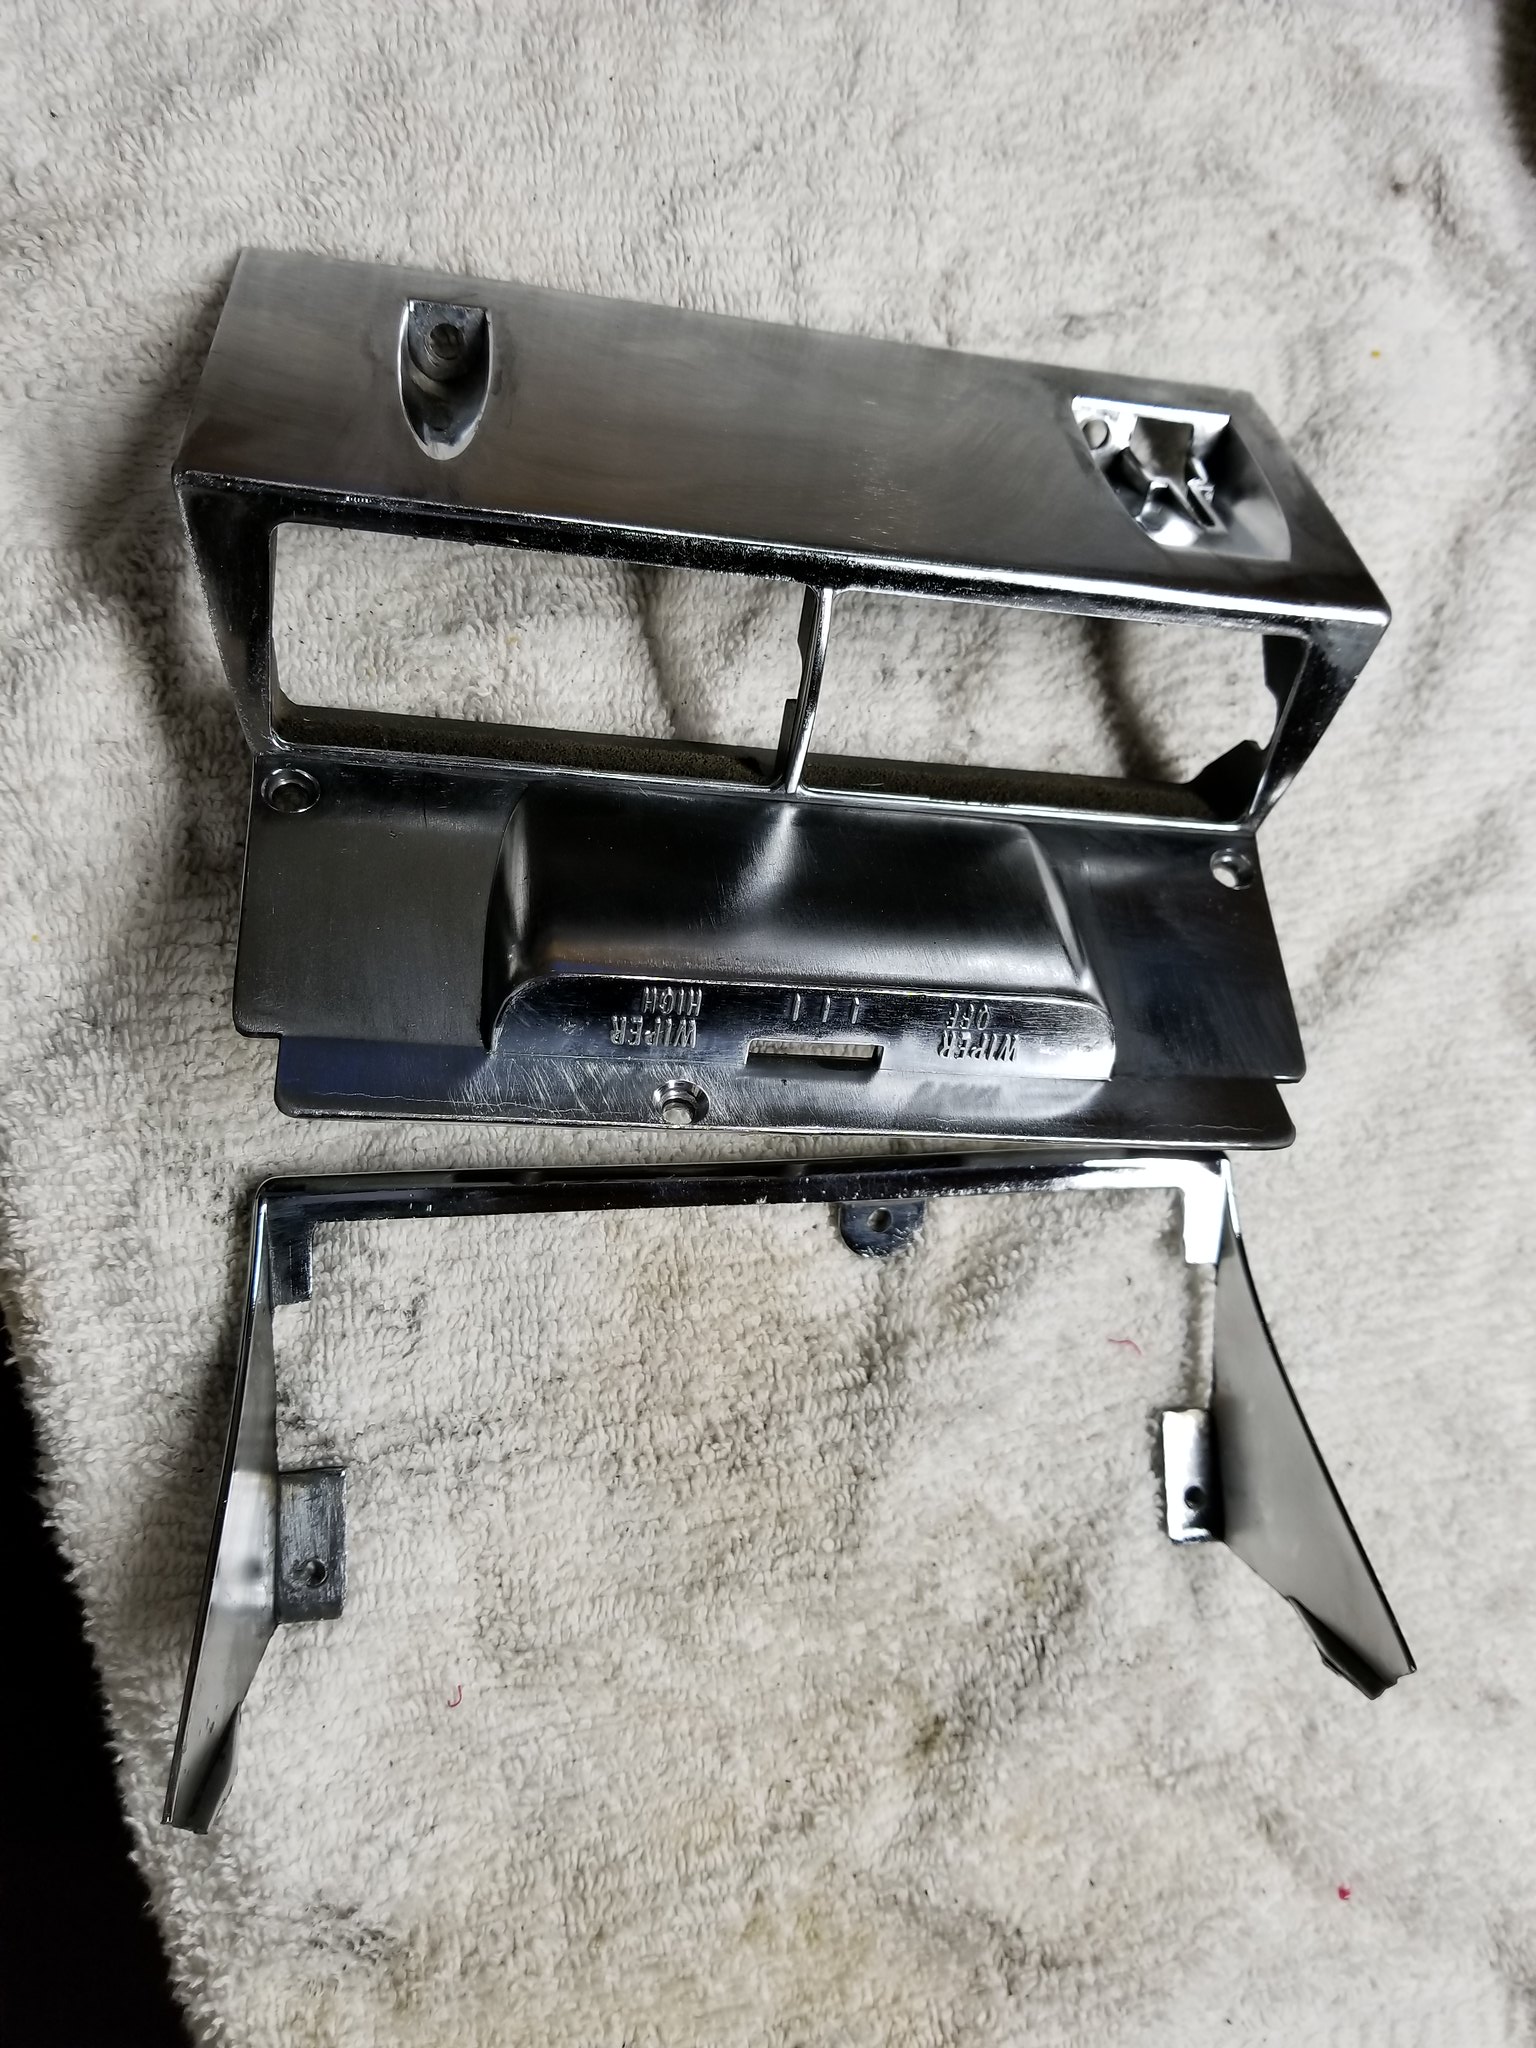
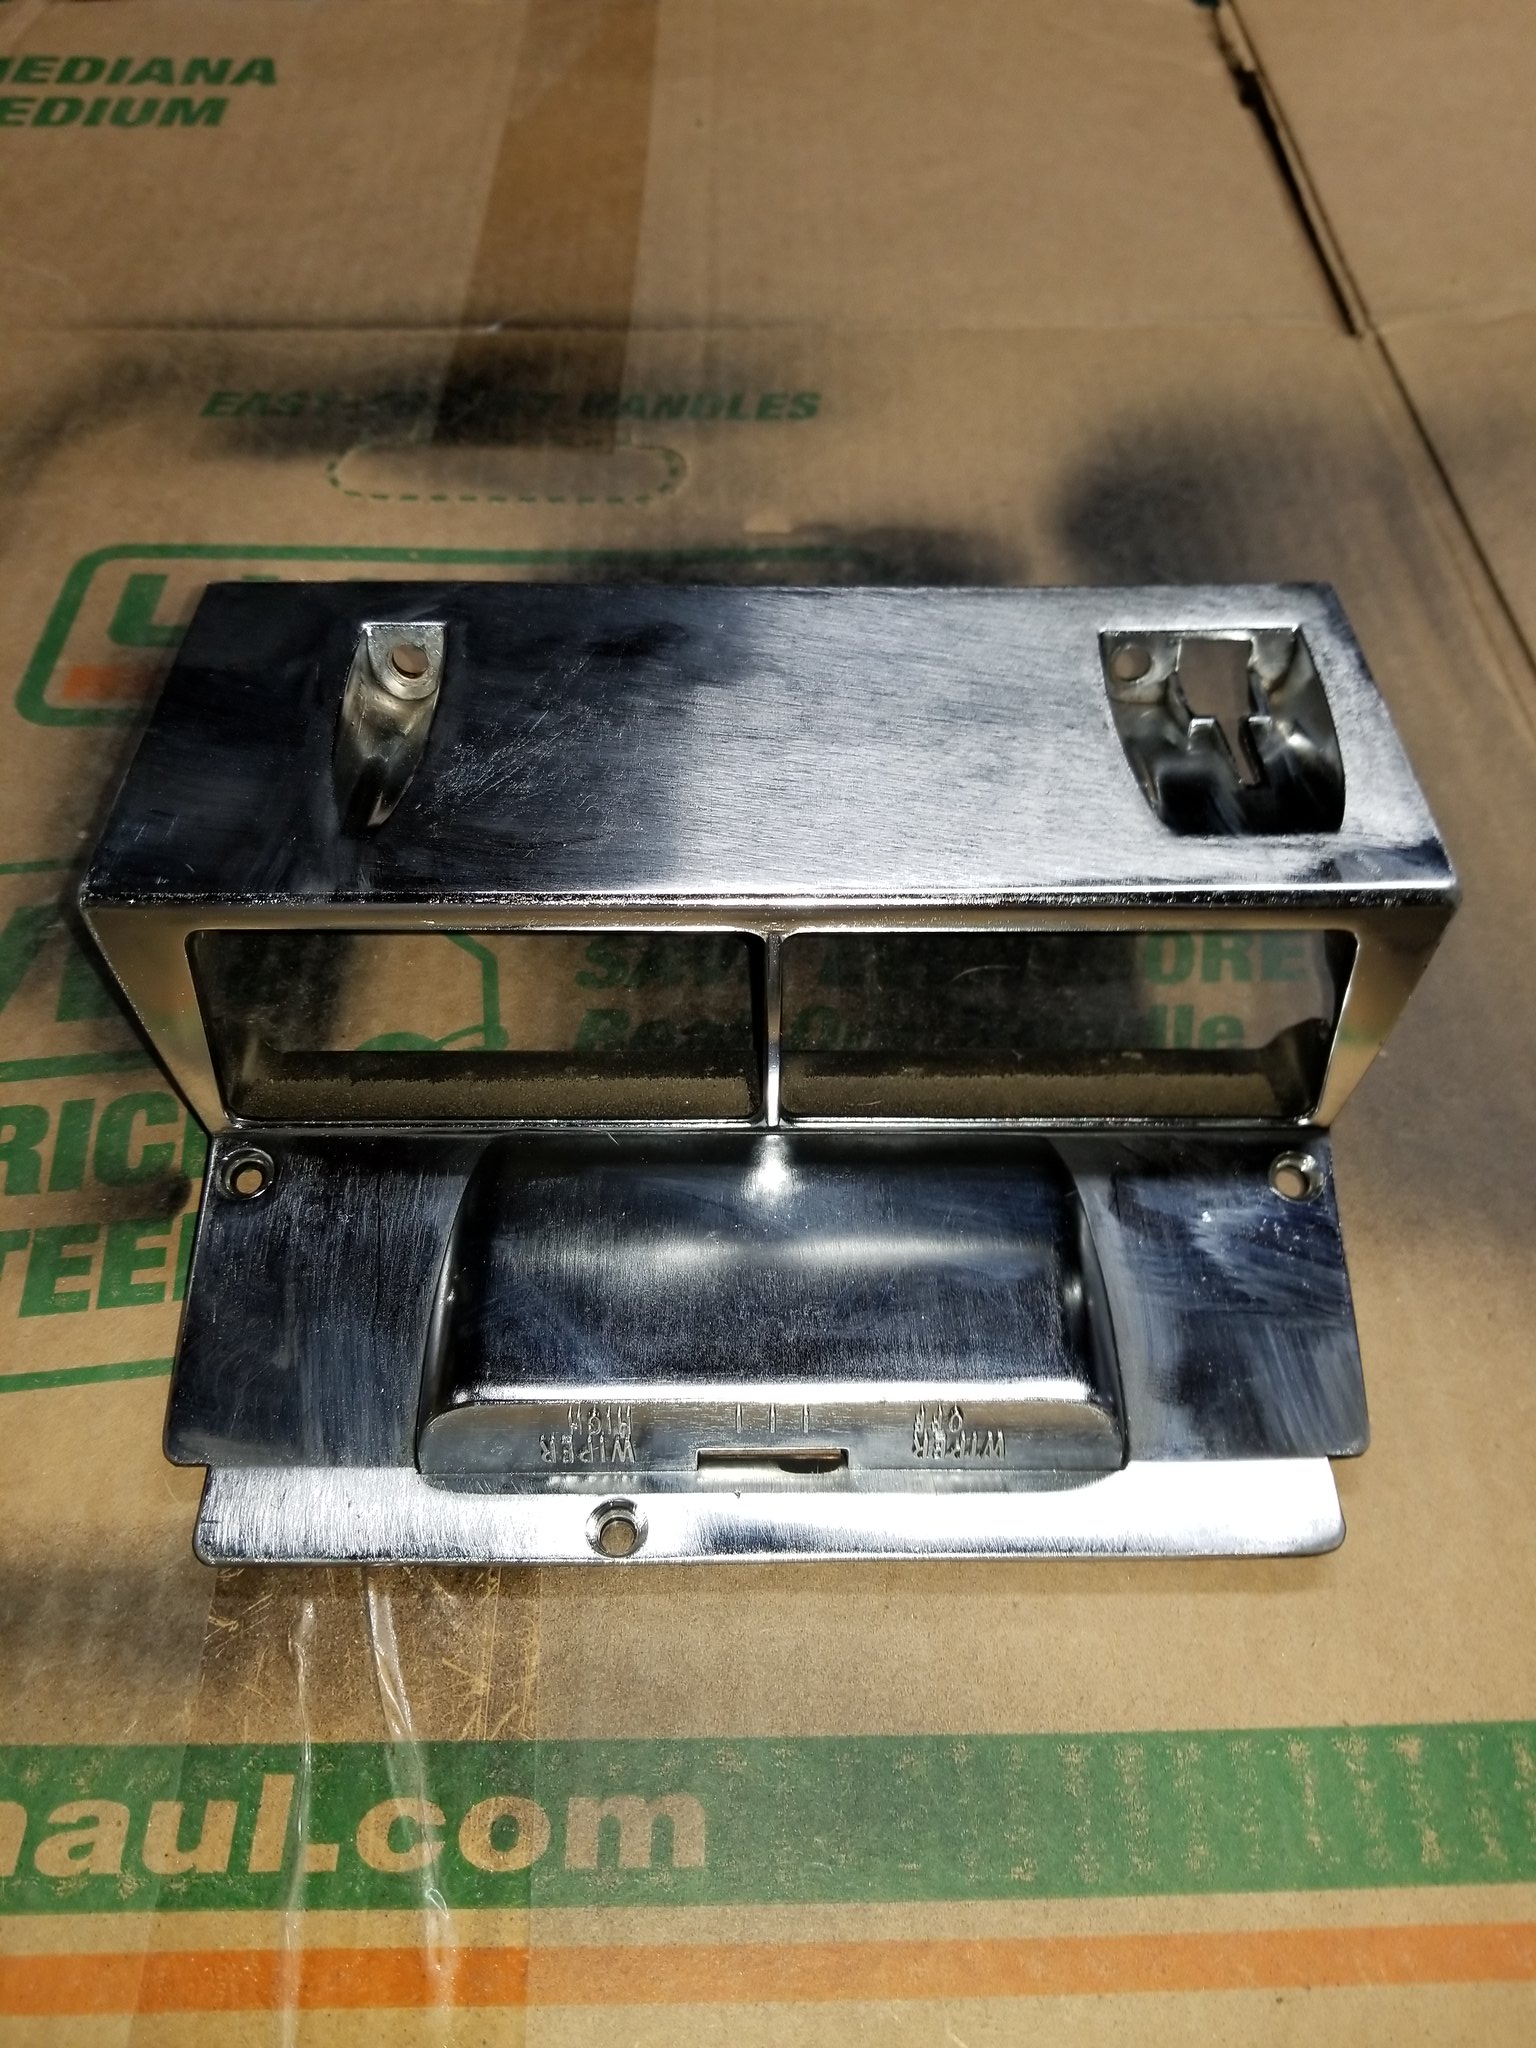
I masked off the areas where I was going to keep the polished edge and then put down a light coat of self etching primer. This is necessary to ensure that the top coat sticks.
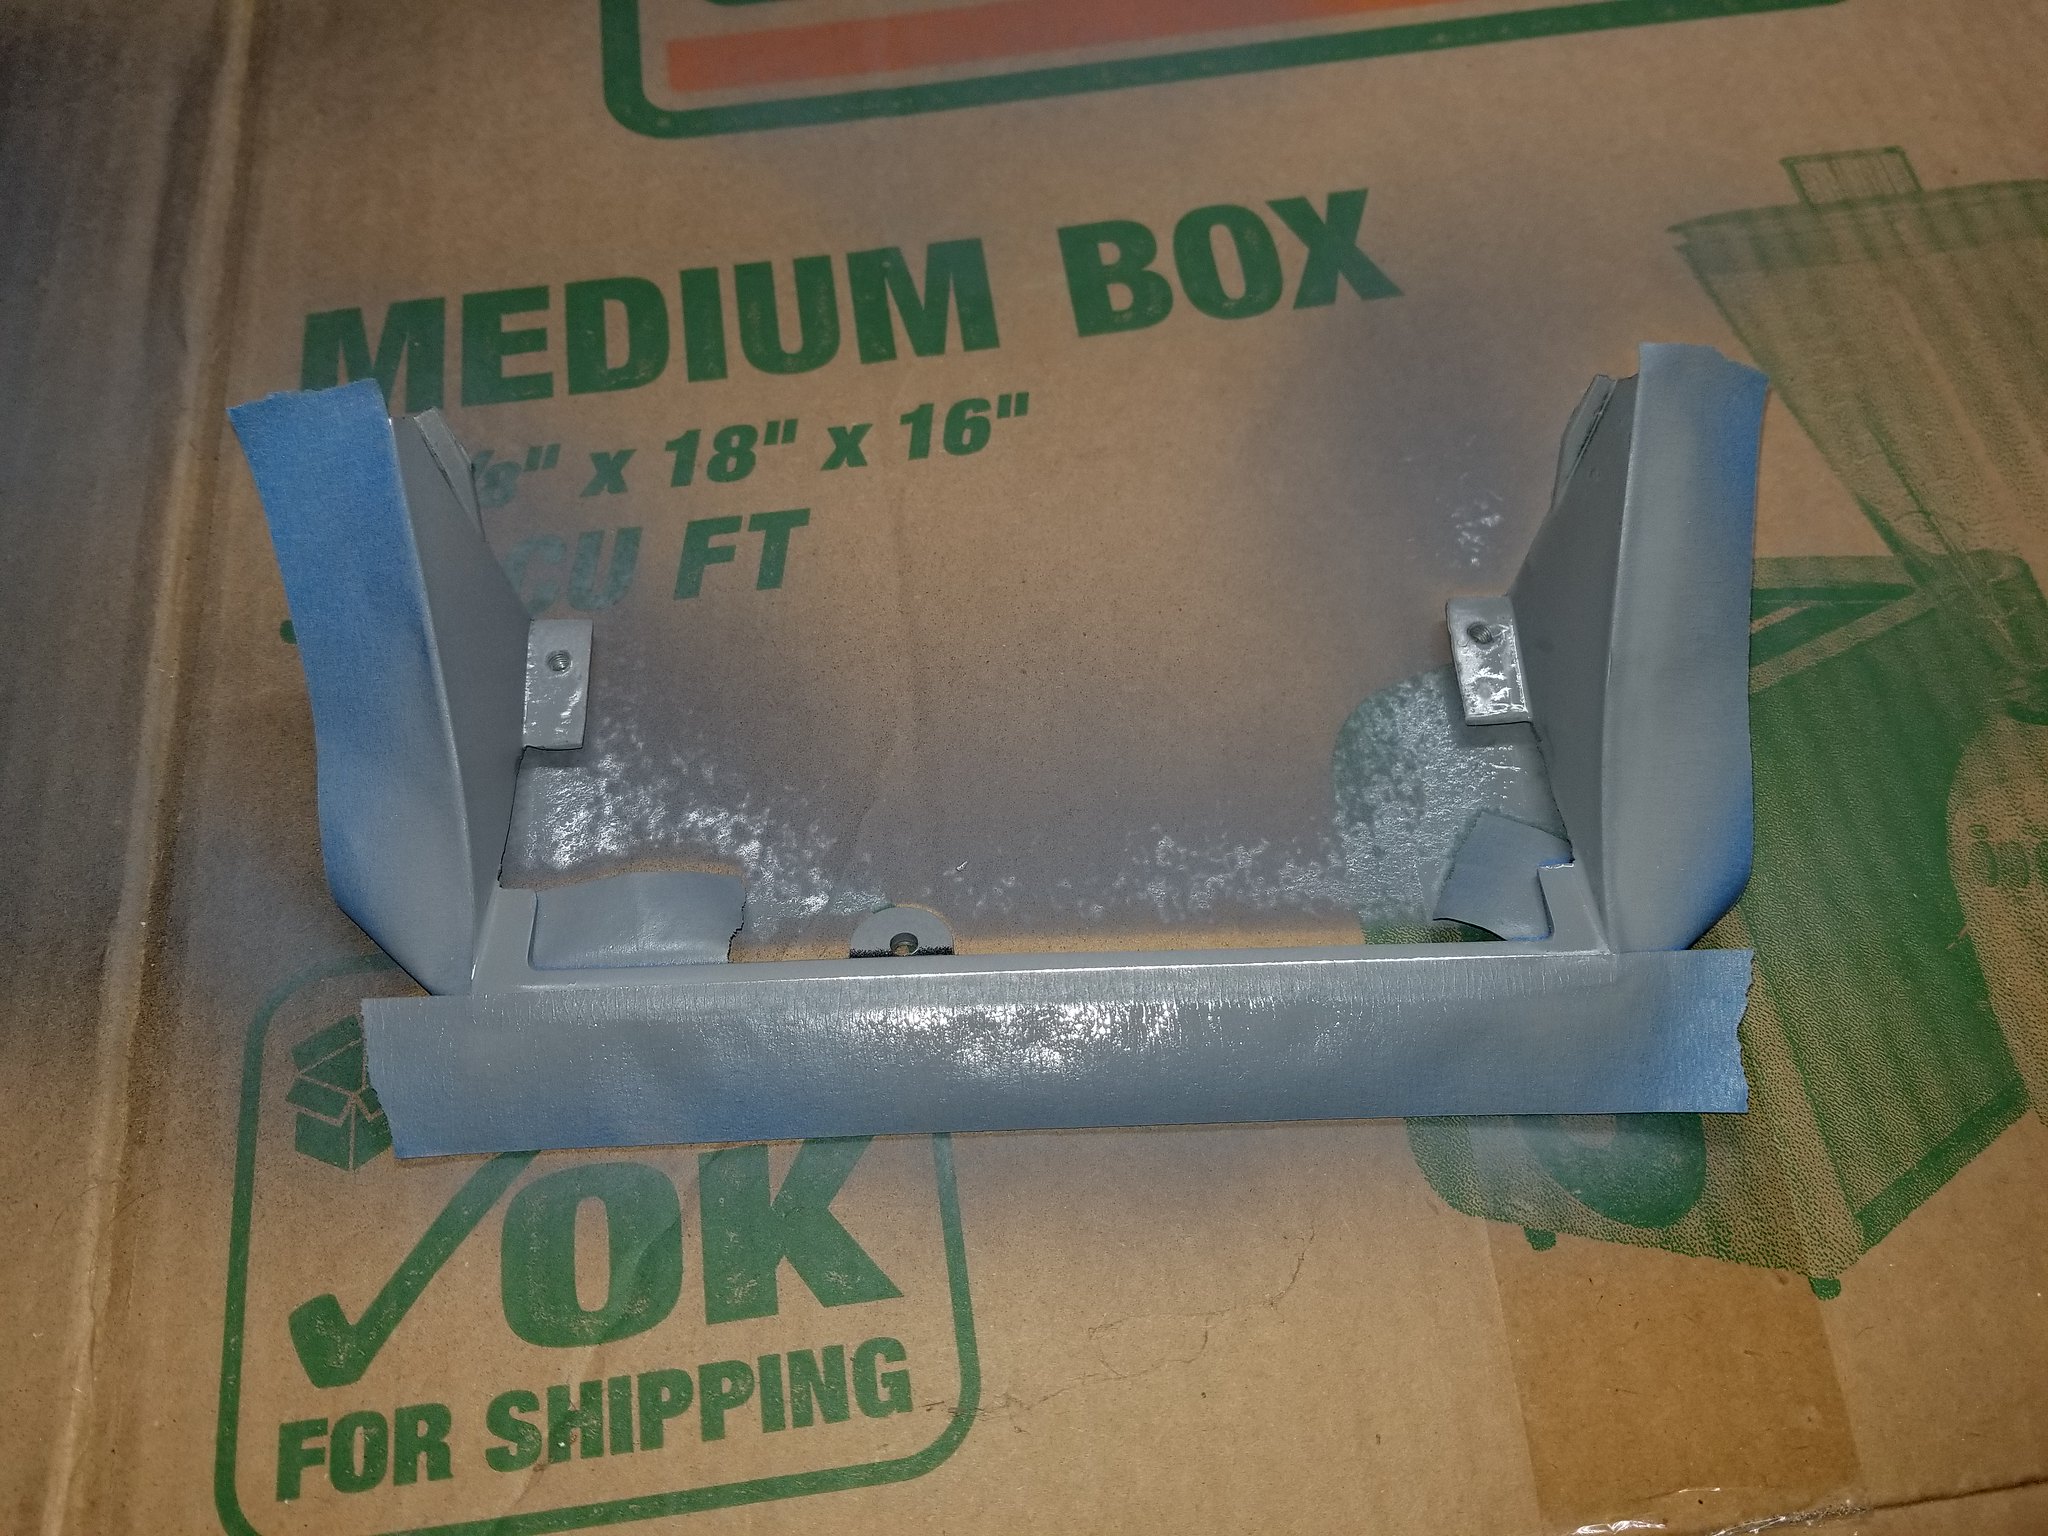
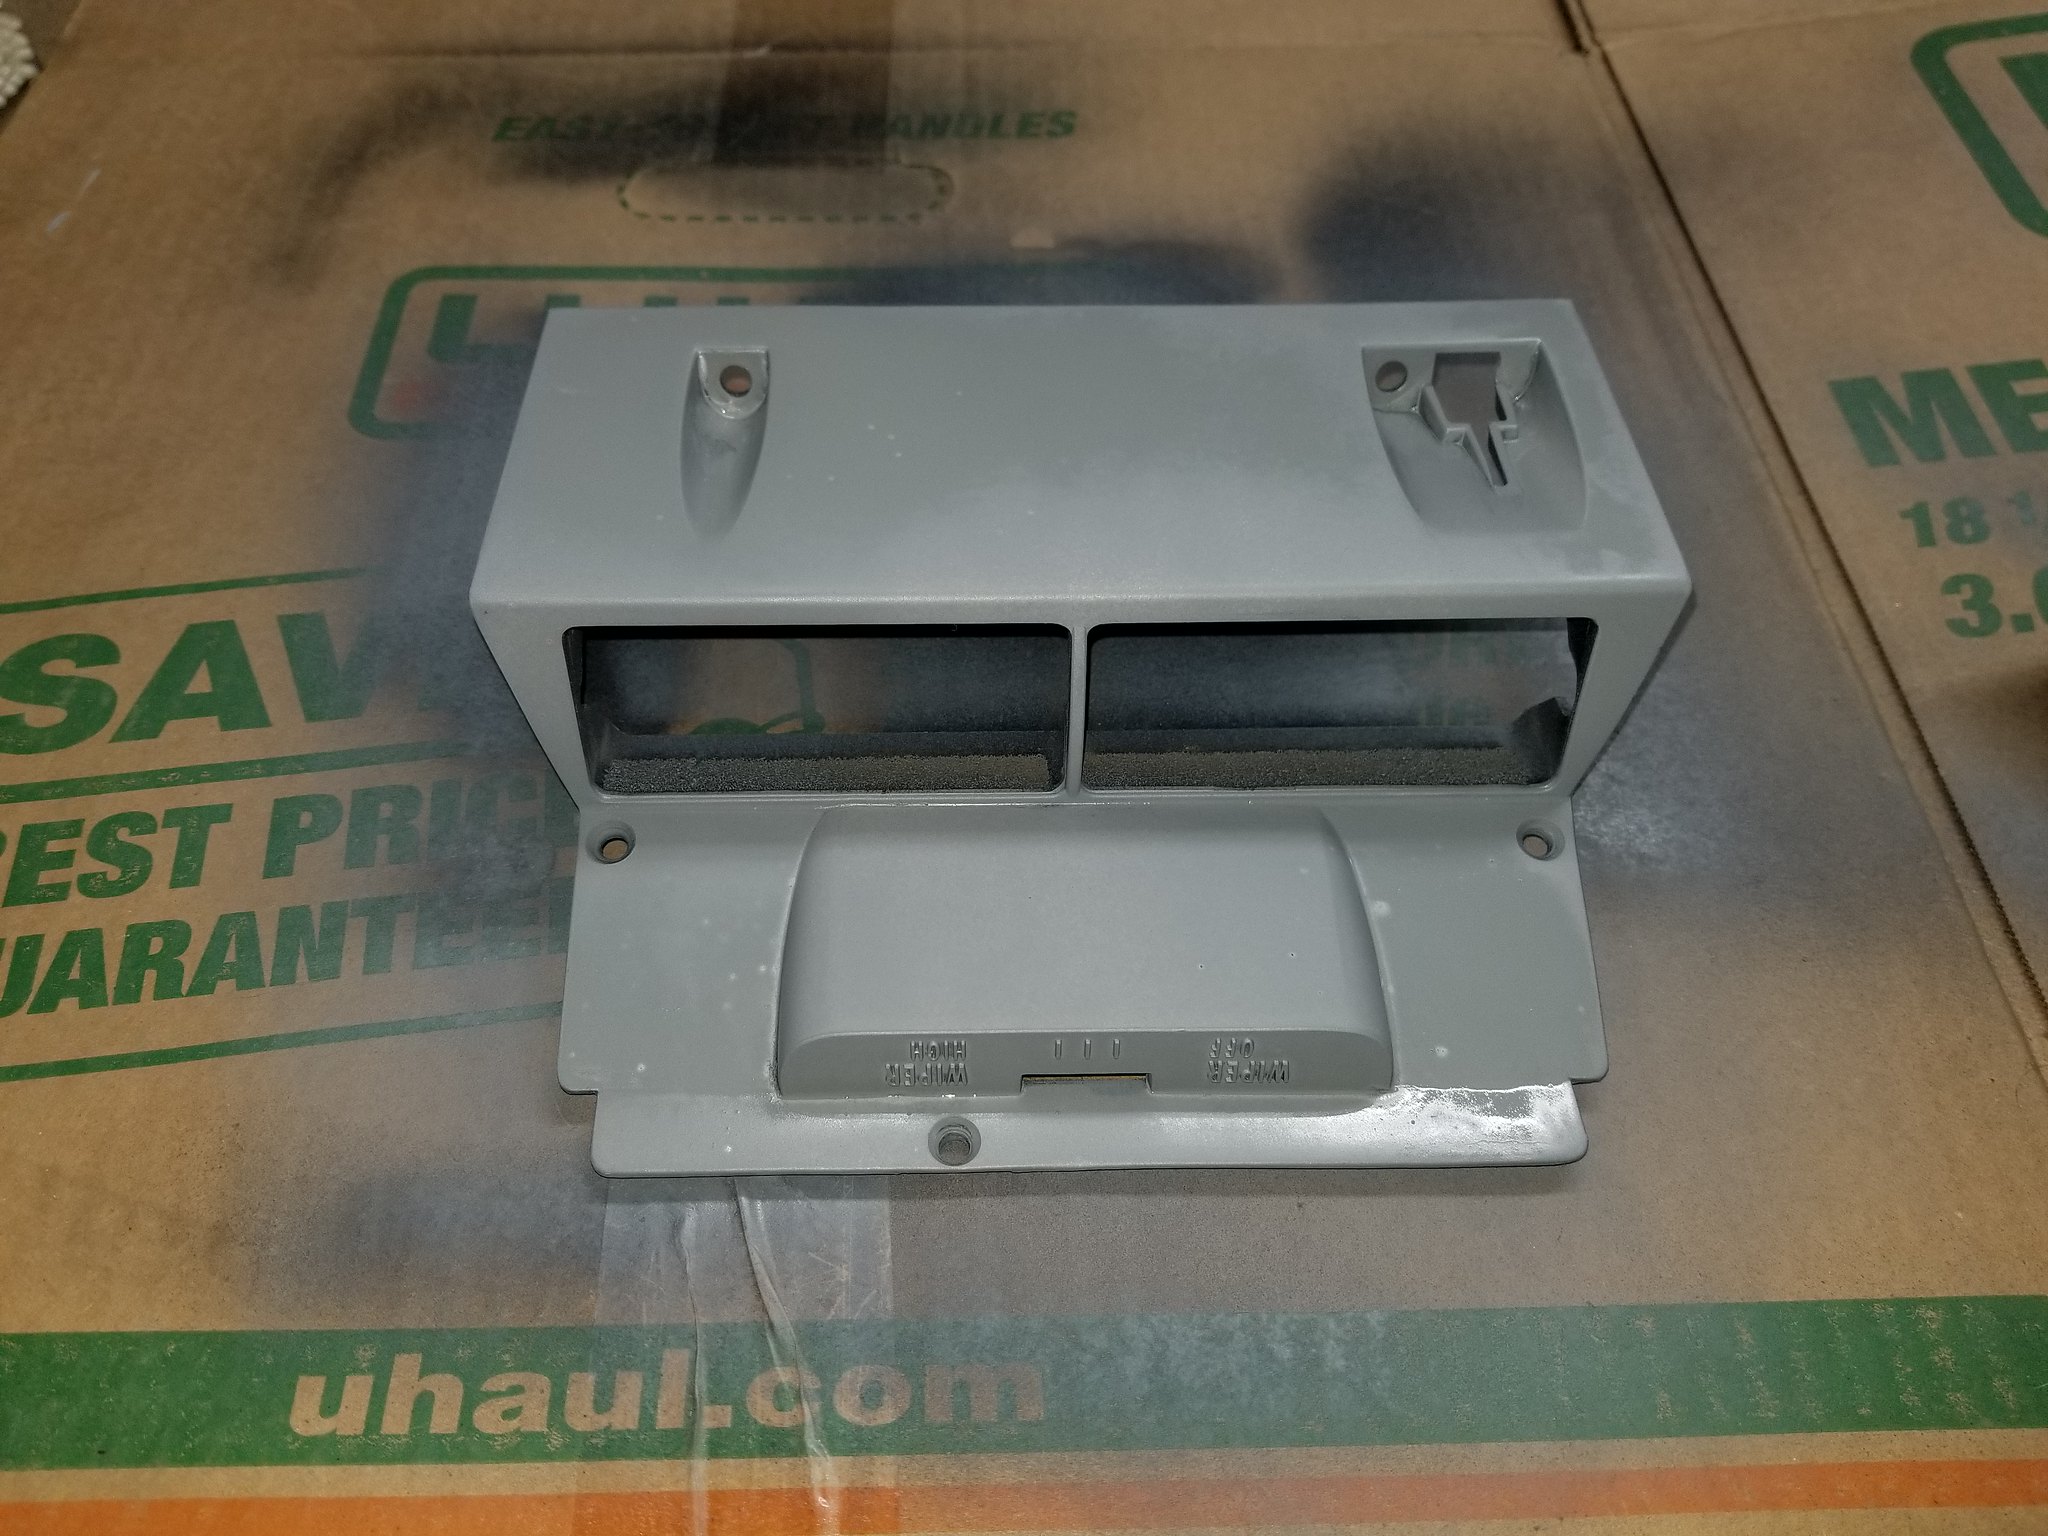
Once that flashed I put down a light coat of satin black and followed up with detailing the lettering using a metallic silver paint pen after the black had dried.
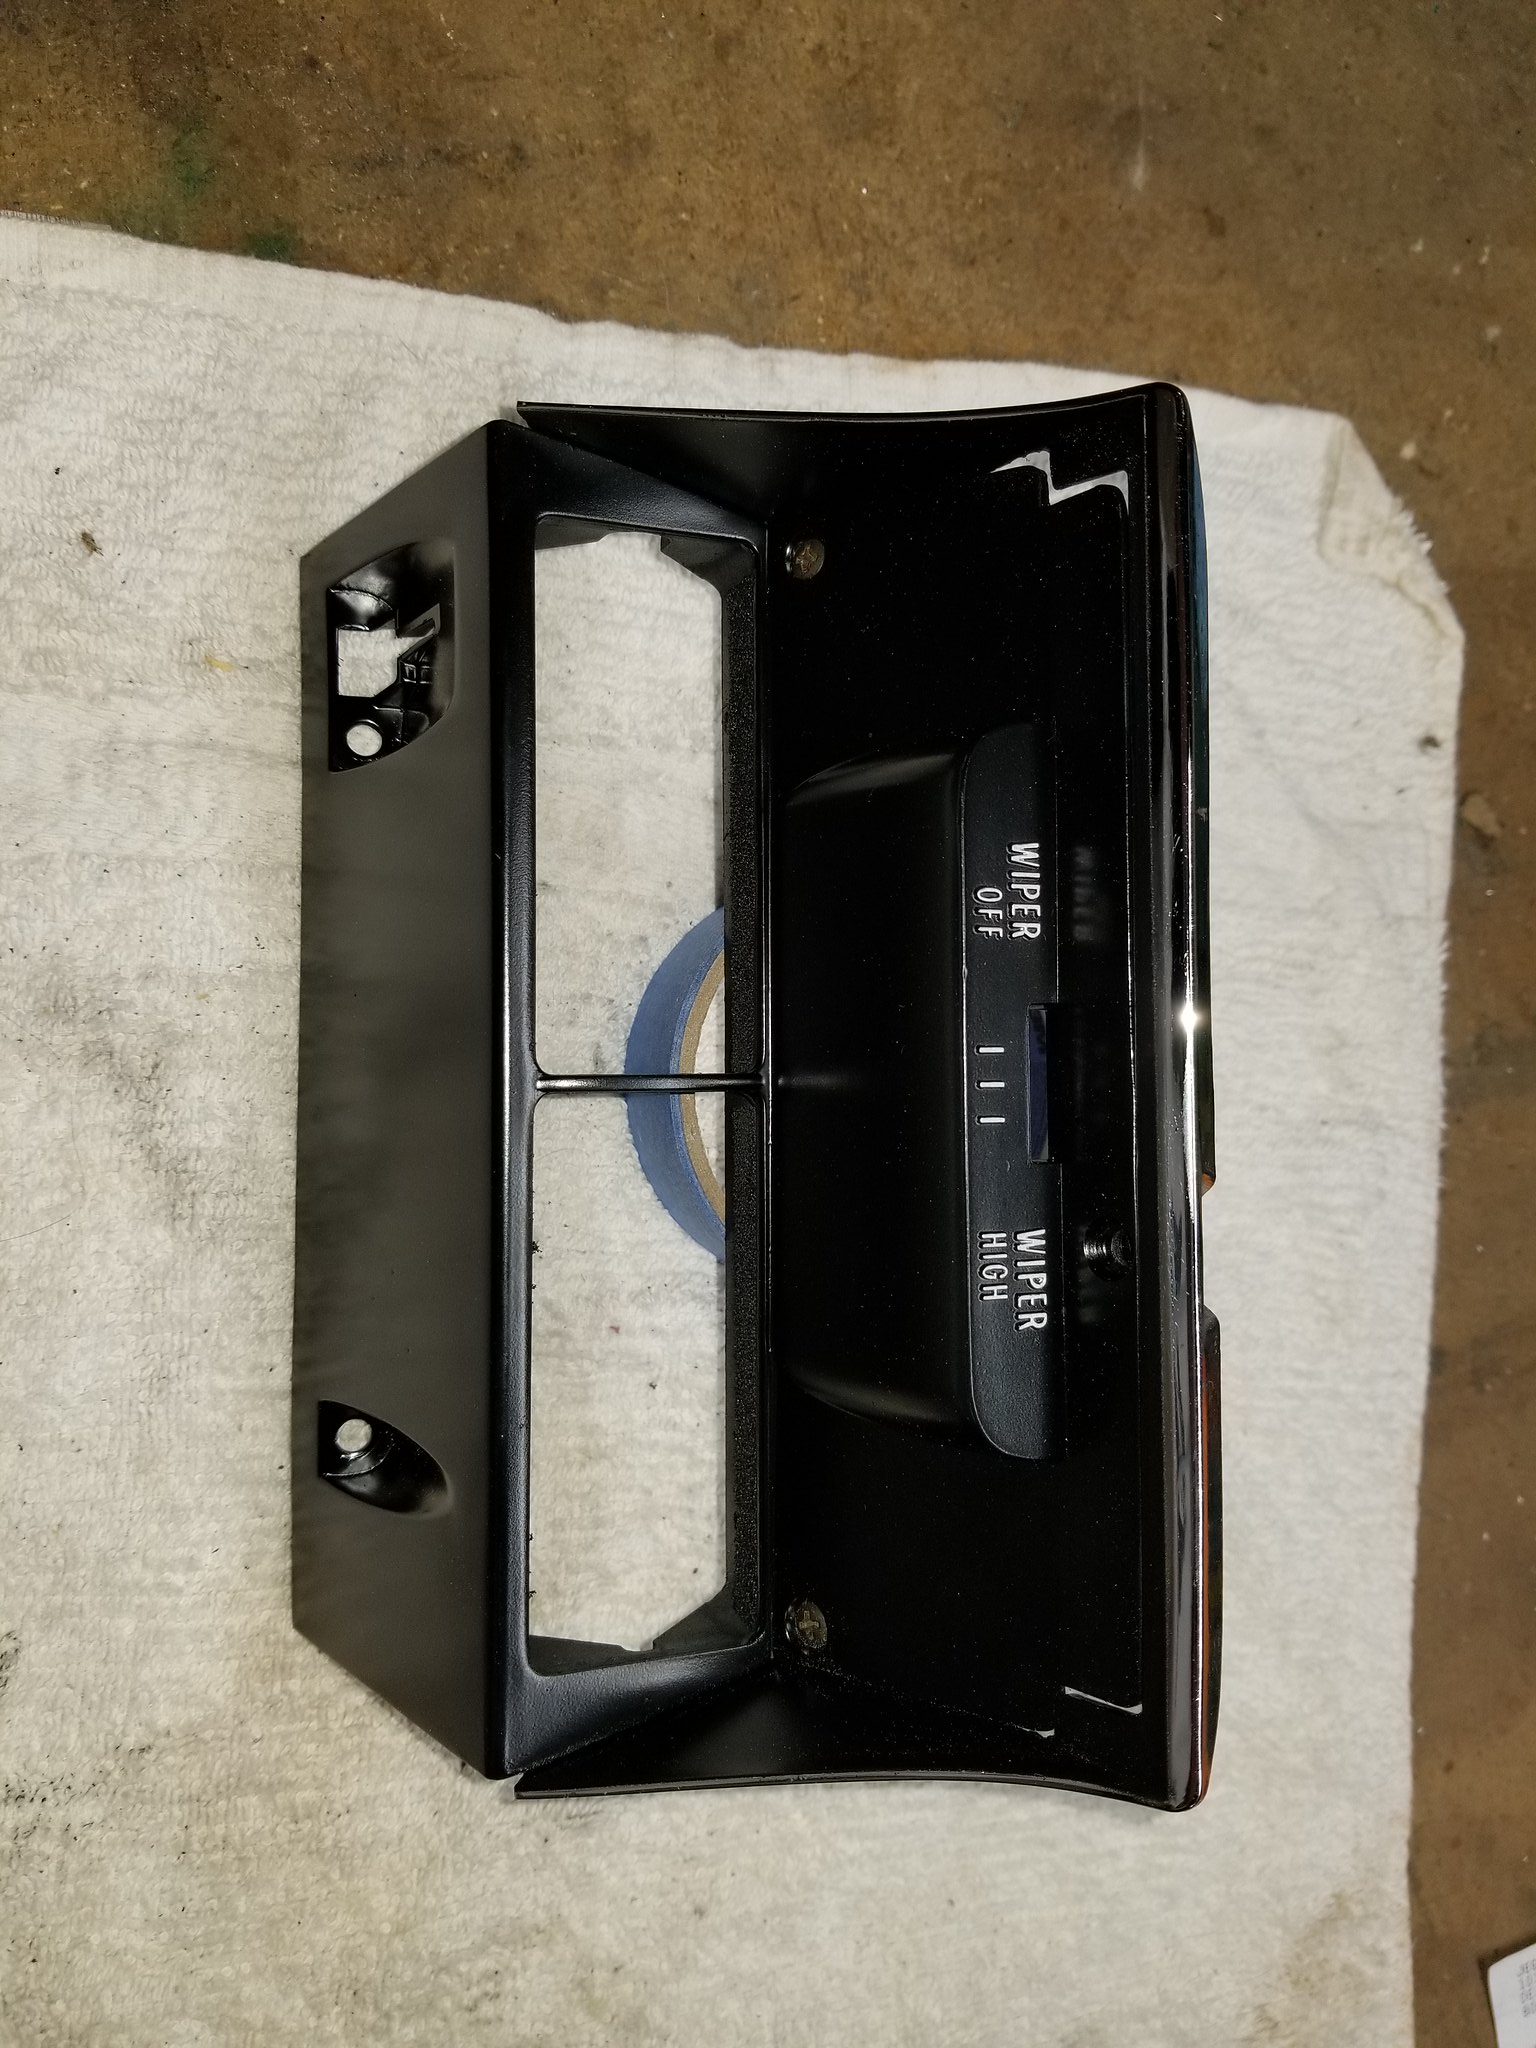
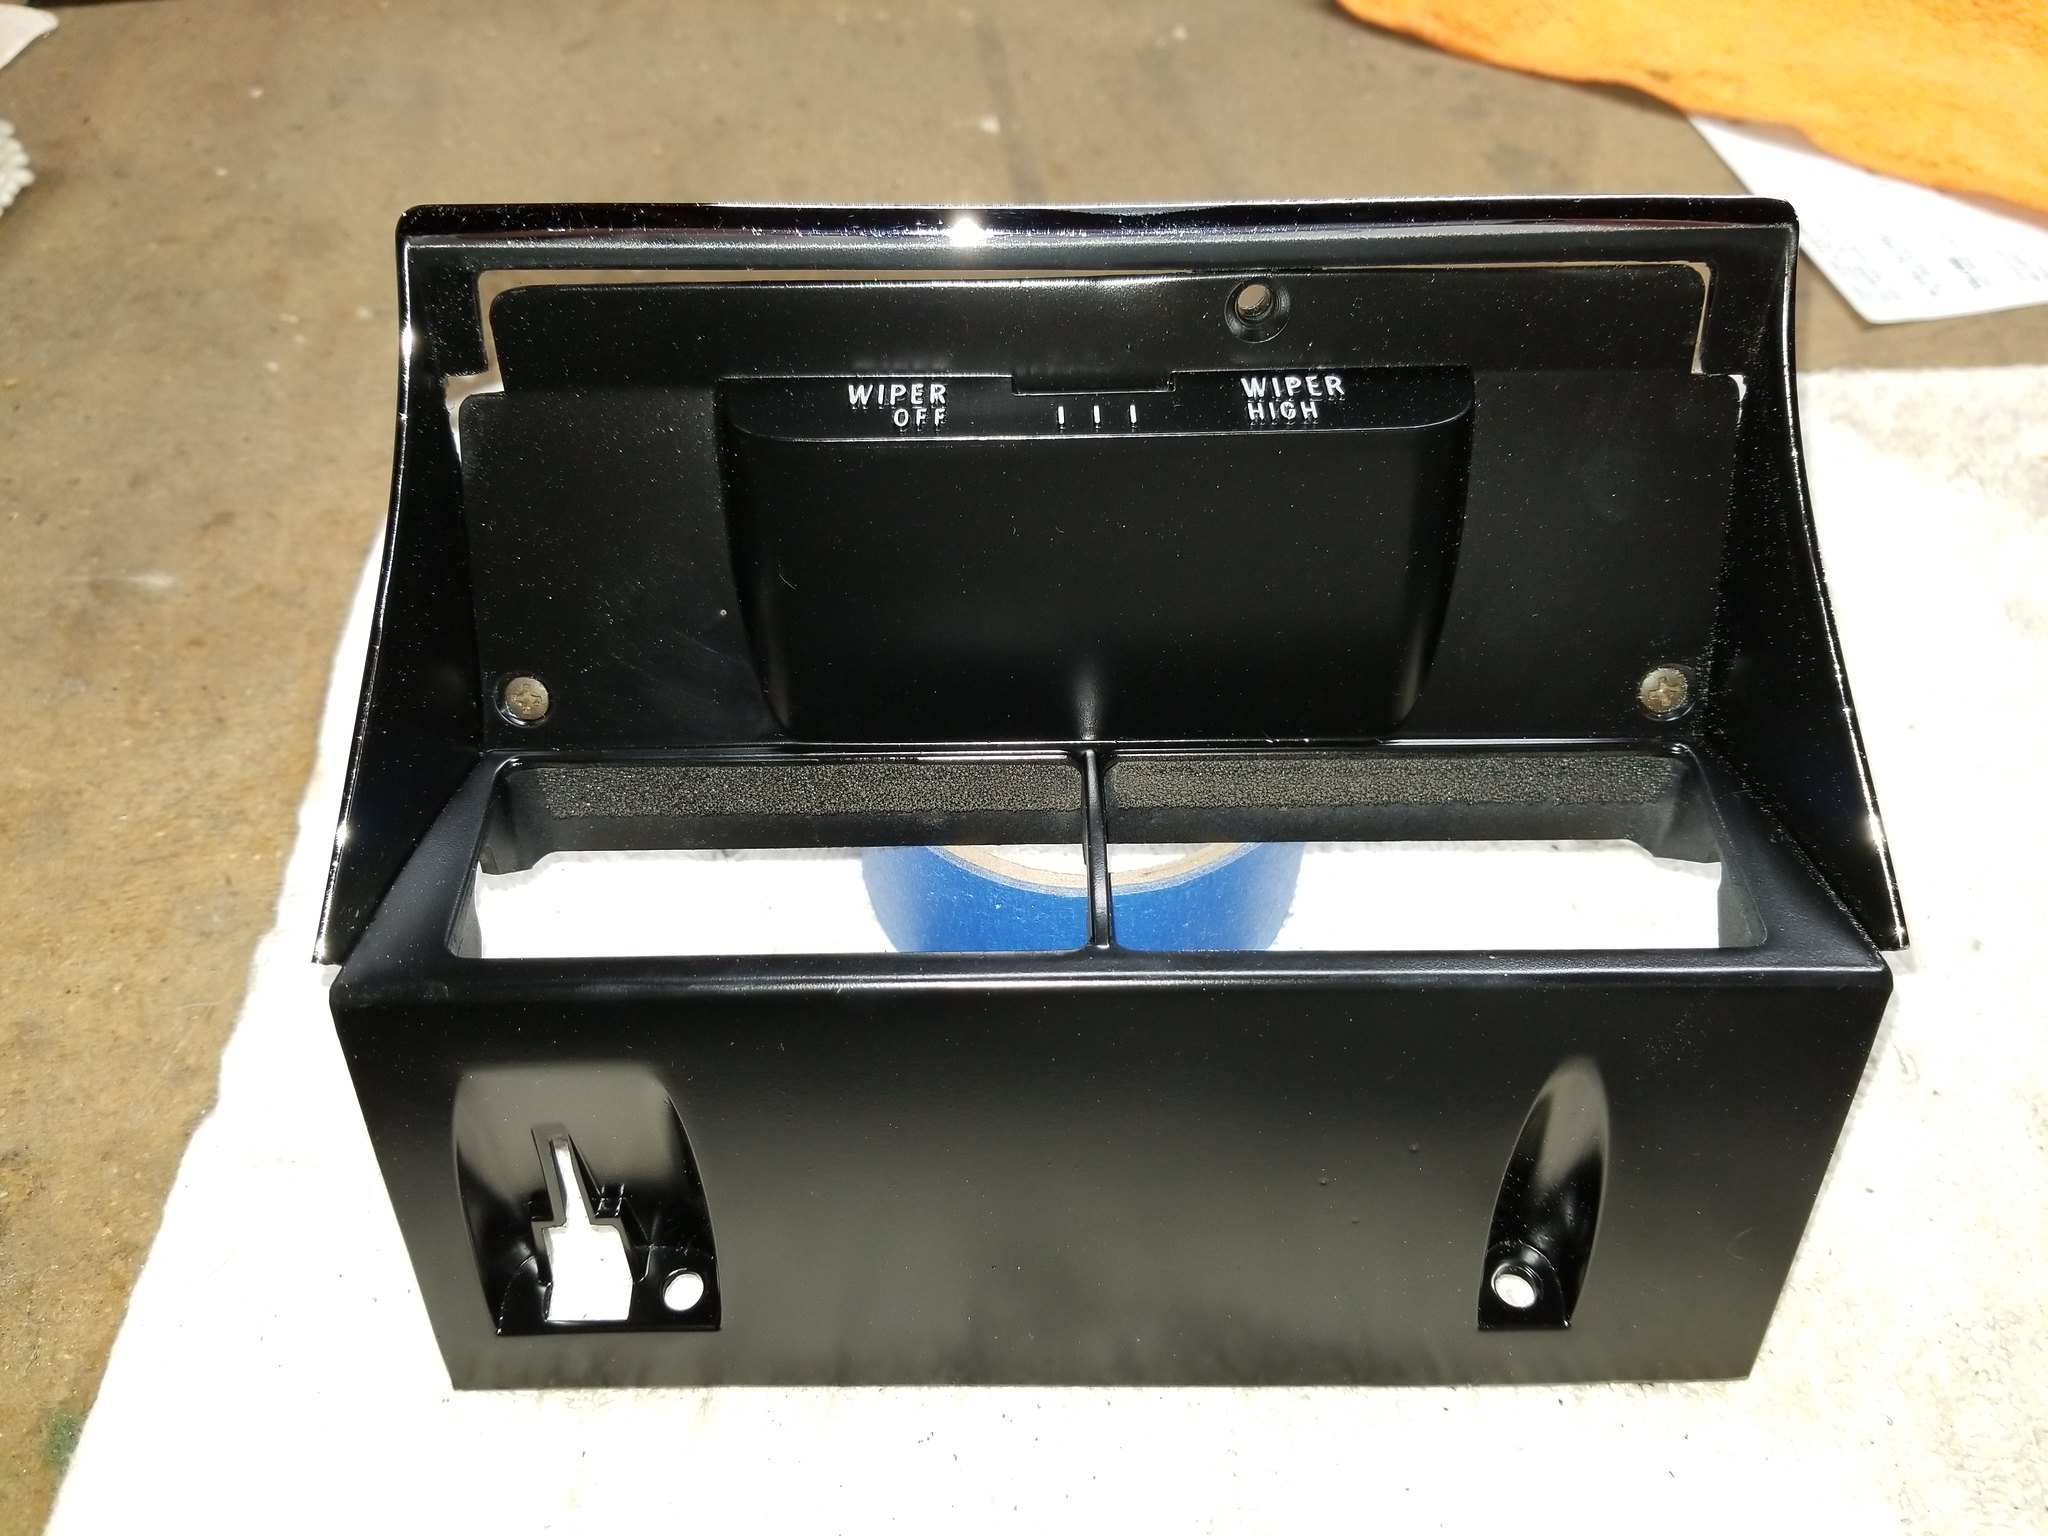
That is as far as I could get before my hands started to hurt worse...
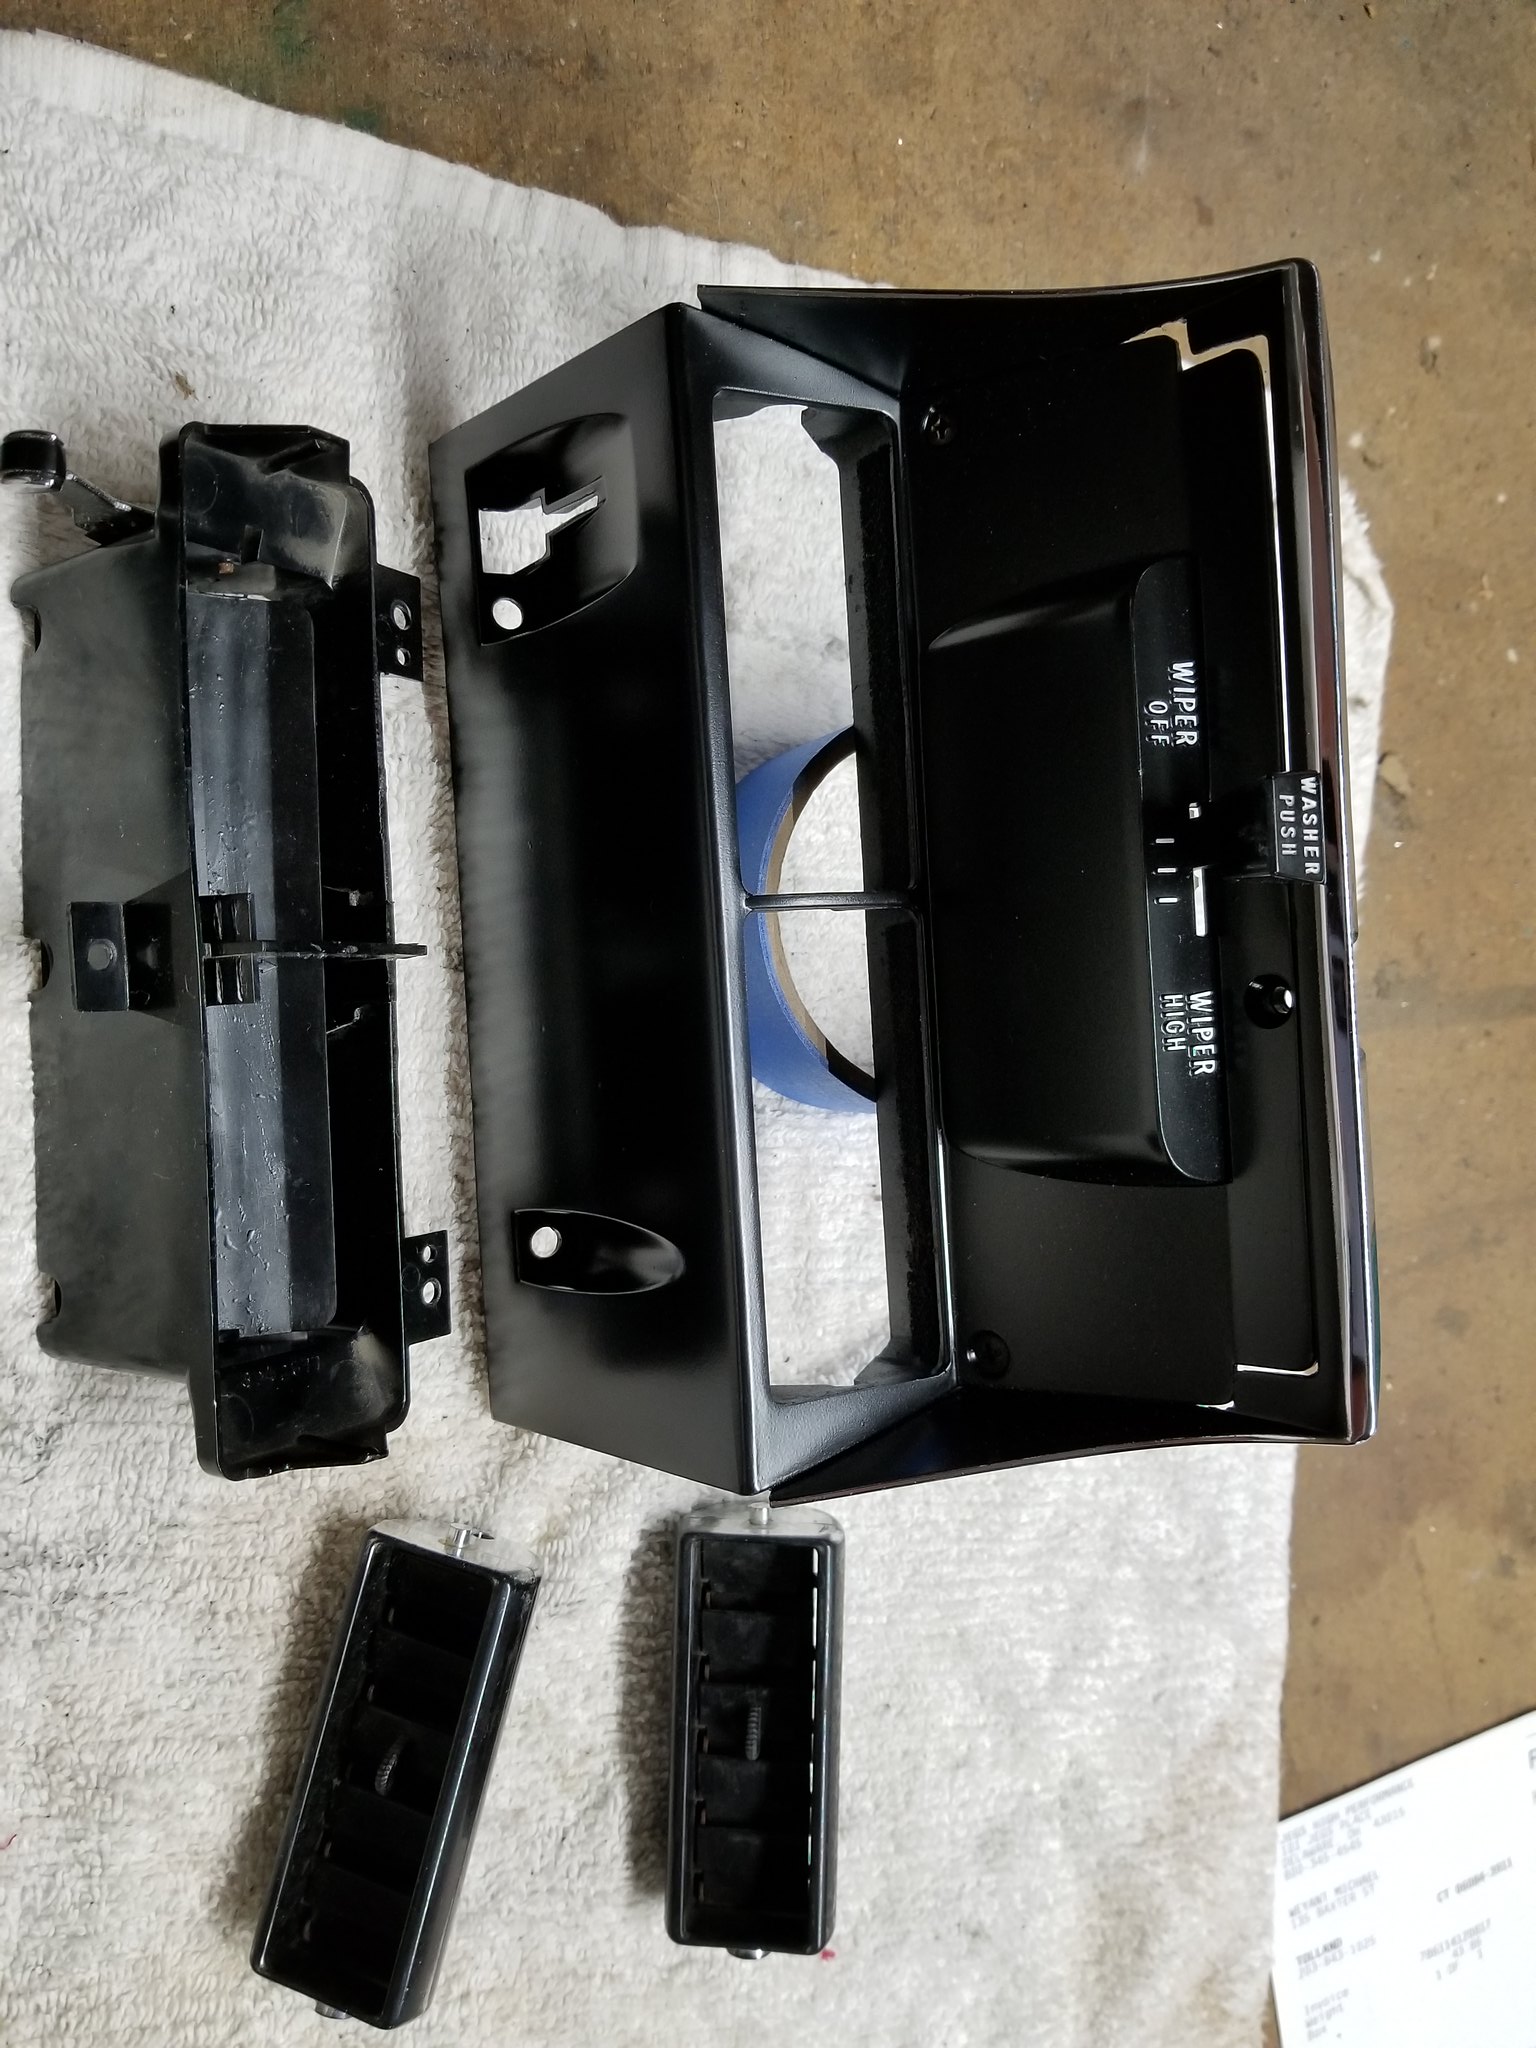
More to come tomorrow!
I decided to start with the wiper switch console plate which was in need of some love. Here is how I found it:
The first step was disassembly so that I could clean the individual parts.
I washed the metal bits with warm, soapy water to get rid of as much gunk as I could. A cold water rinse followed by blowing them off with compressed air to dry them quickly.
After that I needed to remove the old paint which was easily done with lacquer thinner and a few rags. It is important to note that you should always rotate the rag to use a clean spot, otherwise you just end up smearing old paint everywhere.
I masked off the areas where I was going to keep the polished edge and then put down a light coat of self etching primer. This is necessary to ensure that the top coat sticks.
Once that flashed I put down a light coat of satin black and followed up with detailing the lettering using a metallic silver paint pen after the black had dried.
That is as far as I could get before my hands started to hurt worse...
More to come tomorrow!
This Marker Comes very Close to Chrome... Used a lot in model building. It gets a mirror shine, and ist great to touch up on the interior parts lines and lettering... Much more Chrome like than what you used...
MOLOTOW LIQUID CHROME Marker (search on ebay)

The following 2 users liked this post by Alex66:
PainfullySlow (01-03-2018),
Stroh (01-09-2020)
01-03-2018, 06:28 AM
#76
Burning Brakes
Thread Starter
Thanks for the tip! I will check it out.
01-03-2018, 08:45 AM
#77
Burning Brakes
Thread Starter
I got back onto the calipers today and left off where I had basically just removed and disassembled the front calipers. I spent some time cleaning these with acetone to remove any of the old, gelled brake fluid and built up grease and grime.
I just have a shallow plastic container that I pour a little acetone in and then use a combination of brushes and soft rags to do the cleaning. If you do this at home be sure to do it in a well ventilated area and wear safety glasses and a respirator!

Once clean it was time for the blast cabinet however I did not want any blast media to get into the piston bores or fluid passages so I needed to seal them off. A little creativity goes a long way, or so I am told.
Thanks to my racing days I have a vinyl cutter (always changing graphics and sponsor logo's) and happened to have some high-temp blast masking vinyl laying around. I measured the diameter of the dust seals and cut out 8 circles.

I placed the cutouts into the piston bore. This material is semi-rigid and adhesive backed.

I then cleaned and used the old dust seals to hold the material in place. Voila! Piston bores are now protected from blasting.

I used a brass pipe fitting to seal off where the brake hose goes and used small silicone plugs (not shown) to seal off the fluid passages between the caliper halves. Once that was done it was off to the blast cabinet. A little before and after for you all.

Once all 4 caliper halves were blasted I coated them in "After Blast" which removes any remaining oil or imperfections, etches the surface, and gives it a zinc phosphate coating which prevents rust. It serves as a perfect start to paint or powdercoating. Note the uniform gray appearance of the zinc phosphate.

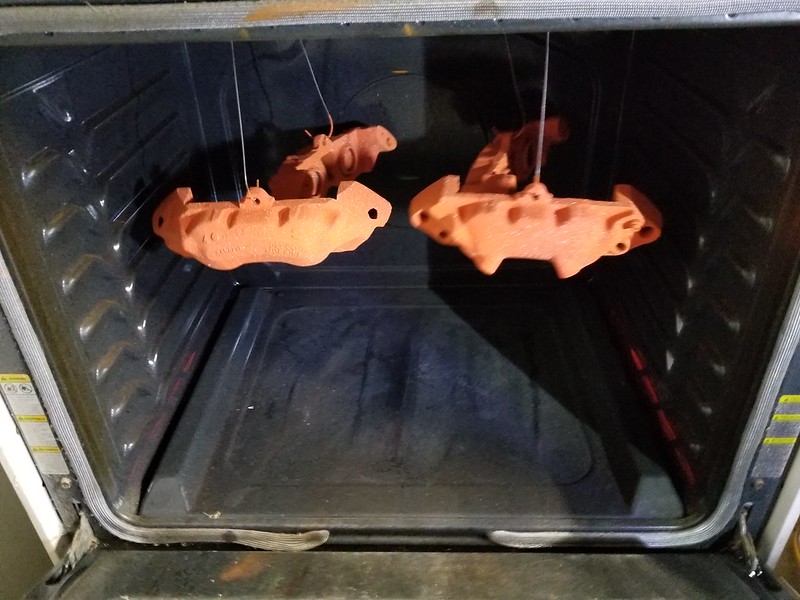
I did not want to put any powder onto the mating surfaces of the caliper halves which means masking them off. Since powder has to be cured ~400 degrees you cannot use conventional tape. Instead there is a high temperature tape that we use and can see here. I simply applied the tape and trimmed to fit before hanging the parts in my coating cabinet. Incidentally, I love being able to do my own powder coating!
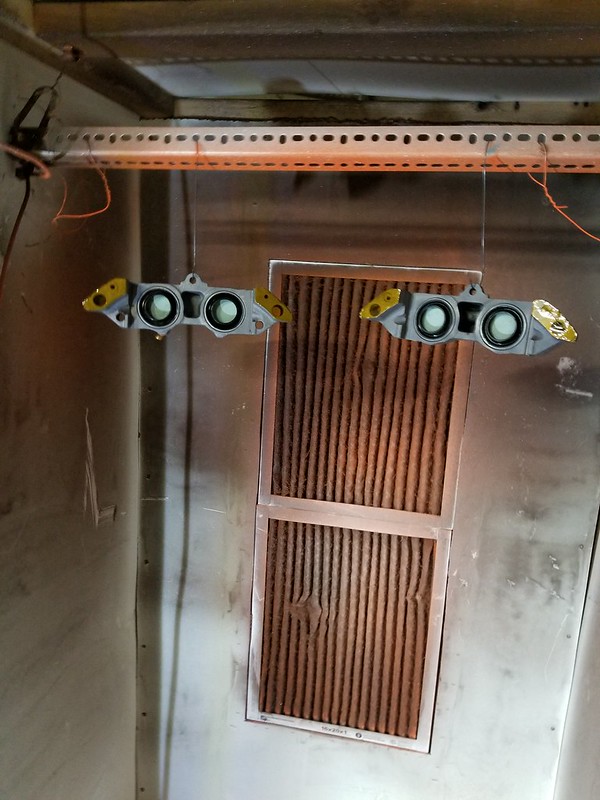
Rather than go with black or the typical red of brake calipers I am using the same metallic orange pearl that I tested on the brake pedal return spring earlier. This is after coating but before baking...

I have an old electric oven (NEVER gas, powder is flammable) in my garage used just for coating. It should be noted that powder coating releases fumes that will render that oven unfit for food prep so do not do this in your home oven. I also have a small toaster oven dedicated to coating for smaller parts. Anyway, parts in and ready for baking.
This is a two stage powder (much like pearl paints) that requires a topcoat to bring out the true beauty of the color so I allowed the parts to cool a little bit and then back into the cabinet for their clear coat. Interesting to note that clear powder coat goes on white.

I really prefer powder coating to paint, any day. It is far more durable and no long waiting for paint to dry, we just have to wait long enough for the parts to cool down (about 20-30 minutes) and they can be immediately put into service. Anyway, they came out beautifully! These pictures do not do them justice.


Post-coating cleanup is as simple as removing the tape on the mating surfaces and popping out the old seals and masking vinyl. My OCD then takes over and I thoroughly go through the caliper with brushes, a vacuum, and compressed air blown through every passage. We cannot take the chance that even a single grain of blast media gets into the system.


That is as far as I have gotten. I will give my hands a rest and if I am able I will finish the rebuild of the calipers later today.
I just have a shallow plastic container that I pour a little acetone in and then use a combination of brushes and soft rags to do the cleaning. If you do this at home be sure to do it in a well ventilated area and wear safety glasses and a respirator!
Once clean it was time for the blast cabinet however I did not want any blast media to get into the piston bores or fluid passages so I needed to seal them off. A little creativity goes a long way, or so I am told.
Thanks to my racing days I have a vinyl cutter (always changing graphics and sponsor logo's) and happened to have some high-temp blast masking vinyl laying around. I measured the diameter of the dust seals and cut out 8 circles.
I placed the cutouts into the piston bore. This material is semi-rigid and adhesive backed.
I then cleaned and used the old dust seals to hold the material in place. Voila! Piston bores are now protected from blasting.
I used a brass pipe fitting to seal off where the brake hose goes and used small silicone plugs (not shown) to seal off the fluid passages between the caliper halves. Once that was done it was off to the blast cabinet. A little before and after for you all.
Once all 4 caliper halves were blasted I coated them in "After Blast" which removes any remaining oil or imperfections, etches the surface, and gives it a zinc phosphate coating which prevents rust. It serves as a perfect start to paint or powdercoating. Note the uniform gray appearance of the zinc phosphate.
I did not want to put any powder onto the mating surfaces of the caliper halves which means masking them off. Since powder has to be cured ~400 degrees you cannot use conventional tape. Instead there is a high temperature tape that we use and can see here. I simply applied the tape and trimmed to fit before hanging the parts in my coating cabinet. Incidentally, I love being able to do my own powder coating!
Rather than go with black or the typical red of brake calipers I am using the same metallic orange pearl that I tested on the brake pedal return spring earlier. This is after coating but before baking...
I have an old electric oven (NEVER gas, powder is flammable) in my garage used just for coating. It should be noted that powder coating releases fumes that will render that oven unfit for food prep so do not do this in your home oven. I also have a small toaster oven dedicated to coating for smaller parts. Anyway, parts in and ready for baking.
This is a two stage powder (much like pearl paints) that requires a topcoat to bring out the true beauty of the color so I allowed the parts to cool a little bit and then back into the cabinet for their clear coat. Interesting to note that clear powder coat goes on white.
I really prefer powder coating to paint, any day. It is far more durable and no long waiting for paint to dry, we just have to wait long enough for the parts to cool down (about 20-30 minutes) and they can be immediately put into service. Anyway, they came out beautifully! These pictures do not do them justice.
Post-coating cleanup is as simple as removing the tape on the mating surfaces and popping out the old seals and masking vinyl. My OCD then takes over and I thoroughly go through the caliper with brushes, a vacuum, and compressed air blown through every passage. We cannot take the chance that even a single grain of blast media gets into the system.
That is as far as I have gotten. I will give my hands a rest and if I am able I will finish the rebuild of the calipers later today.
Last edited by PainfullySlow; 01-03-2018 at 09:08 AM.
01-03-2018, 10:37 AM
#78
Le Mans Master

I got back onto the calipers today and left off where I had basically just removed and disassembled the front calipers. I spent some time cleaning these with acetone to remove any of the old, gelled brake fluid and built up grease and grime.
I just have a shallow plastic container that I pour a little acetone in and then use a combination of brushes and soft rags to do the cleaning. If you do this at home be sure to do it in a well ventilated area and wear safety glasses and a respirator!
Once clean it was time for the blast cabinet however I did not want any blast media to get into the piston bores or fluid passages so I needed to seal them off. A little creativity goes a long way, or so I am told.
Thanks to my racing days I have a vinyl cutter (always changing graphics and sponsor logo's) and happened to have some high-temp blast masking vinyl laying around. I measured the diameter of the dust seals and cut out 8 circles.
I placed the cutouts into the piston bore. This material is semi-rigid and adhesive backed.
I then cleaned and used the old dust seals to hold the material in place. Voila! Piston bores are now protected from blasting.
I used a brass pipe fitting to seal off where the brake hose goes and used small silicone plugs (not shown) to seal off the fluid passages between the caliper halves. Once that was done it was off to the blast cabinet. A little before and after for you all.
Once all 4 caliper halves were blasted I coated them in "After Blast" which removes any remaining oil or imperfections, etches the surface, and gives it a zinc phosphate coating which prevents rust. It serves as a perfect start to paint or powdercoating. Note the uniform gray appearance of the zinc phosphate.
I did not want to put any powder onto the mating surfaces of the caliper halves which means masking them off. Since powder has to be cured ~400 degrees you cannot use conventional tape. Instead there is a high temperature tape that we use and can see here. I simply applied the tape and trimmed to fit before hanging the parts in my coating cabinet. Incidentally, I love being able to do my own powder coating!
Rather than go with black or the typical red of brake calipers I am using the same metallic orange pearl that I tested on the brake pedal return spring earlier. This is after coating but before baking...
I have an old electric oven (NEVER gas, powder is flammable) in my garage used just for coating. It should be noted that powder coating releases fumes that will render that oven unfit for food prep so do not do this in your home oven. I also have a small toaster oven dedicated to coating for smaller parts. Anyway, parts in and ready for baking.
This is a two stage powder (much like pearl paints) that requires a topcoat to bring out the true beauty of the color so I allowed the parts to cool a little bit and then back into the cabinet for their clear coat. Interesting to note that clear powder coat goes on white.
I really prefer powder coating to paint, any day. It is far more durable and no long waiting for paint to dry, we just have to wait long enough for the parts to cool down (about 20-30 minutes) and they can be immediately put into service. Anyway, they came out beautifully! These pictures do not do them justice.
Post-coating cleanup is as simple as removing the tape on the mating surfaces and popping out the old seals and masking vinyl. My OCD then takes over and I thoroughly go through the caliper with brushes, a vacuum, and compressed air blown through every passage. We cannot take the chance that even a single grain of blast media gets into the system.
That is as far as I have gotten. I will give my hands a rest and if I am able I will finish the rebuild of the calipers later today.

The following users liked this post:
PainfullySlow (01-03-2018)
01-03-2018, 03:21 PM
#79
Burning Brakes
Thread Starter
Couldn't wait so I popped 800mg ibuprofen and got back to finishing the calipers.
Cleaning, cleaning, and more cleaning. These are the weapons of the OCD!

You may have heard the expression "The Devil is in the details" which is a creed that I live by. While I was in the process of cleaning the pistons I thought that I should powder coat the bolts as well. Something that is easily done and literally took less than 5 minutes of work (it is easy when everything is set up already).
I wanted to coat only the head of the bolt so I needed to mask off the rest which is easily done with aluminum foil.

I quickly coated them and popped them in the oven to bake. For small parts I will often use my little toaster oven.

While the powder was curing I set about cleaning the pistons and springs. The pistons got an acetone bath and the springs got tossed into the ultrasonic cleaner for a few minutes. One of the calipers on my car is OEM and the other is an aftermarket replacement. You can easily see the difference in quality here. The OEM pistons are coated and the quality of the material and machining is superior. The OEM ones are on the left.

By this time the bolts were done so I popped them out of the oven (after a short cool-down) and removed the foil. Bingo! They look great.

At this point it was time for re-assembly which unfortunately I did not get any pictures of as my gloves were covered with brake fluid. The process is simple though:
A word of caution
Brake fluid eats through paint fairly quickly so if your calipers are painted you need to take extra care not to get any fluid on them. This is another reason why powder coating is superior as it is very resilient to brake fluid (and pretty much everything else).
1) coat the piston bores with clean brake fluid
2) coat the lip seals in clean brake fluid and install them on the piston. It is important to make sure that they are on properly. The wider part of the seal faces where the spring goes...
3) coat the springs with clean brake fluid and install them onto the pistons.
4) gently press the pistons into the bore. The lip seal will be hung up, do not force it in. I ran the tip of a pick around the inside edge of the piston bore which guided the seal into place.
5) push the piston down into the bore a bit and install the dust seal by pushing the rubber seal into the top groove of the piston
6) push the piston down into the bore and then tap the dust seal into place
7) coat the two o-rings with clean brake fluid and set them into the recessed half of the caliper. Note that one side does not have a recessed area for the o-ring. Set the caliper half on your bench with the o-rings facing straight up
8) take the other half of the caliper and place the two bolts through the mounting holes
9) hold the 2nd half of the caliper above the first and begin threading the bolts into the first half. Do not allow the two caliper halves to touch until you have a few threads in place on each bolt. This ensures that the caliper halves will come together properly and minimize the risk of the o-rings moving out of place
10) finish tightening the bolts and torque to spec
11) apply grease to the lips of the brake pistons
12) apply grease to the brake pad pin
13) install the brake pads and pin into the caliper. affix the pin with the required retaining clip
That's it. You're done!
I threw some new bleeder screws on there and then put them in a plastic bag with some dessicant packs to await re-installation.

Onto the next part to refinish...
Cleaning, cleaning, and more cleaning. These are the weapons of the OCD!
You may have heard the expression "The Devil is in the details" which is a creed that I live by. While I was in the process of cleaning the pistons I thought that I should powder coat the bolts as well. Something that is easily done and literally took less than 5 minutes of work (it is easy when everything is set up already).
I wanted to coat only the head of the bolt so I needed to mask off the rest which is easily done with aluminum foil.
I quickly coated them and popped them in the oven to bake. For small parts I will often use my little toaster oven.
While the powder was curing I set about cleaning the pistons and springs. The pistons got an acetone bath and the springs got tossed into the ultrasonic cleaner for a few minutes. One of the calipers on my car is OEM and the other is an aftermarket replacement. You can easily see the difference in quality here. The OEM pistons are coated and the quality of the material and machining is superior. The OEM ones are on the left.
By this time the bolts were done so I popped them out of the oven (after a short cool-down) and removed the foil. Bingo! They look great.
At this point it was time for re-assembly which unfortunately I did not get any pictures of as my gloves were covered with brake fluid. The process is simple though:
A word of caution
Brake fluid eats through paint fairly quickly so if your calipers are painted you need to take extra care not to get any fluid on them. This is another reason why powder coating is superior as it is very resilient to brake fluid (and pretty much everything else).
1) coat the piston bores with clean brake fluid
2) coat the lip seals in clean brake fluid and install them on the piston. It is important to make sure that they are on properly. The wider part of the seal faces where the spring goes...
3) coat the springs with clean brake fluid and install them onto the pistons.
4) gently press the pistons into the bore. The lip seal will be hung up, do not force it in. I ran the tip of a pick around the inside edge of the piston bore which guided the seal into place.
5) push the piston down into the bore a bit and install the dust seal by pushing the rubber seal into the top groove of the piston
6) push the piston down into the bore and then tap the dust seal into place
7) coat the two o-rings with clean brake fluid and set them into the recessed half of the caliper. Note that one side does not have a recessed area for the o-ring. Set the caliper half on your bench with the o-rings facing straight up
8) take the other half of the caliper and place the two bolts through the mounting holes
9) hold the 2nd half of the caliper above the first and begin threading the bolts into the first half. Do not allow the two caliper halves to touch until you have a few threads in place on each bolt. This ensures that the caliper halves will come together properly and minimize the risk of the o-rings moving out of place
10) finish tightening the bolts and torque to spec
11) apply grease to the lips of the brake pistons
12) apply grease to the brake pad pin
13) install the brake pads and pin into the caliper. affix the pin with the required retaining clip
That's it. You're done!
I threw some new bleeder screws on there and then put them in a plastic bag with some dessicant packs to await re-installation.
Onto the next part to refinish...


