When you click on links to various merchants on this site and make a purchase, this can result in this site earning a commission. Affiliate programs and affiliations include, but are not limited to, the eBay Partner Network.
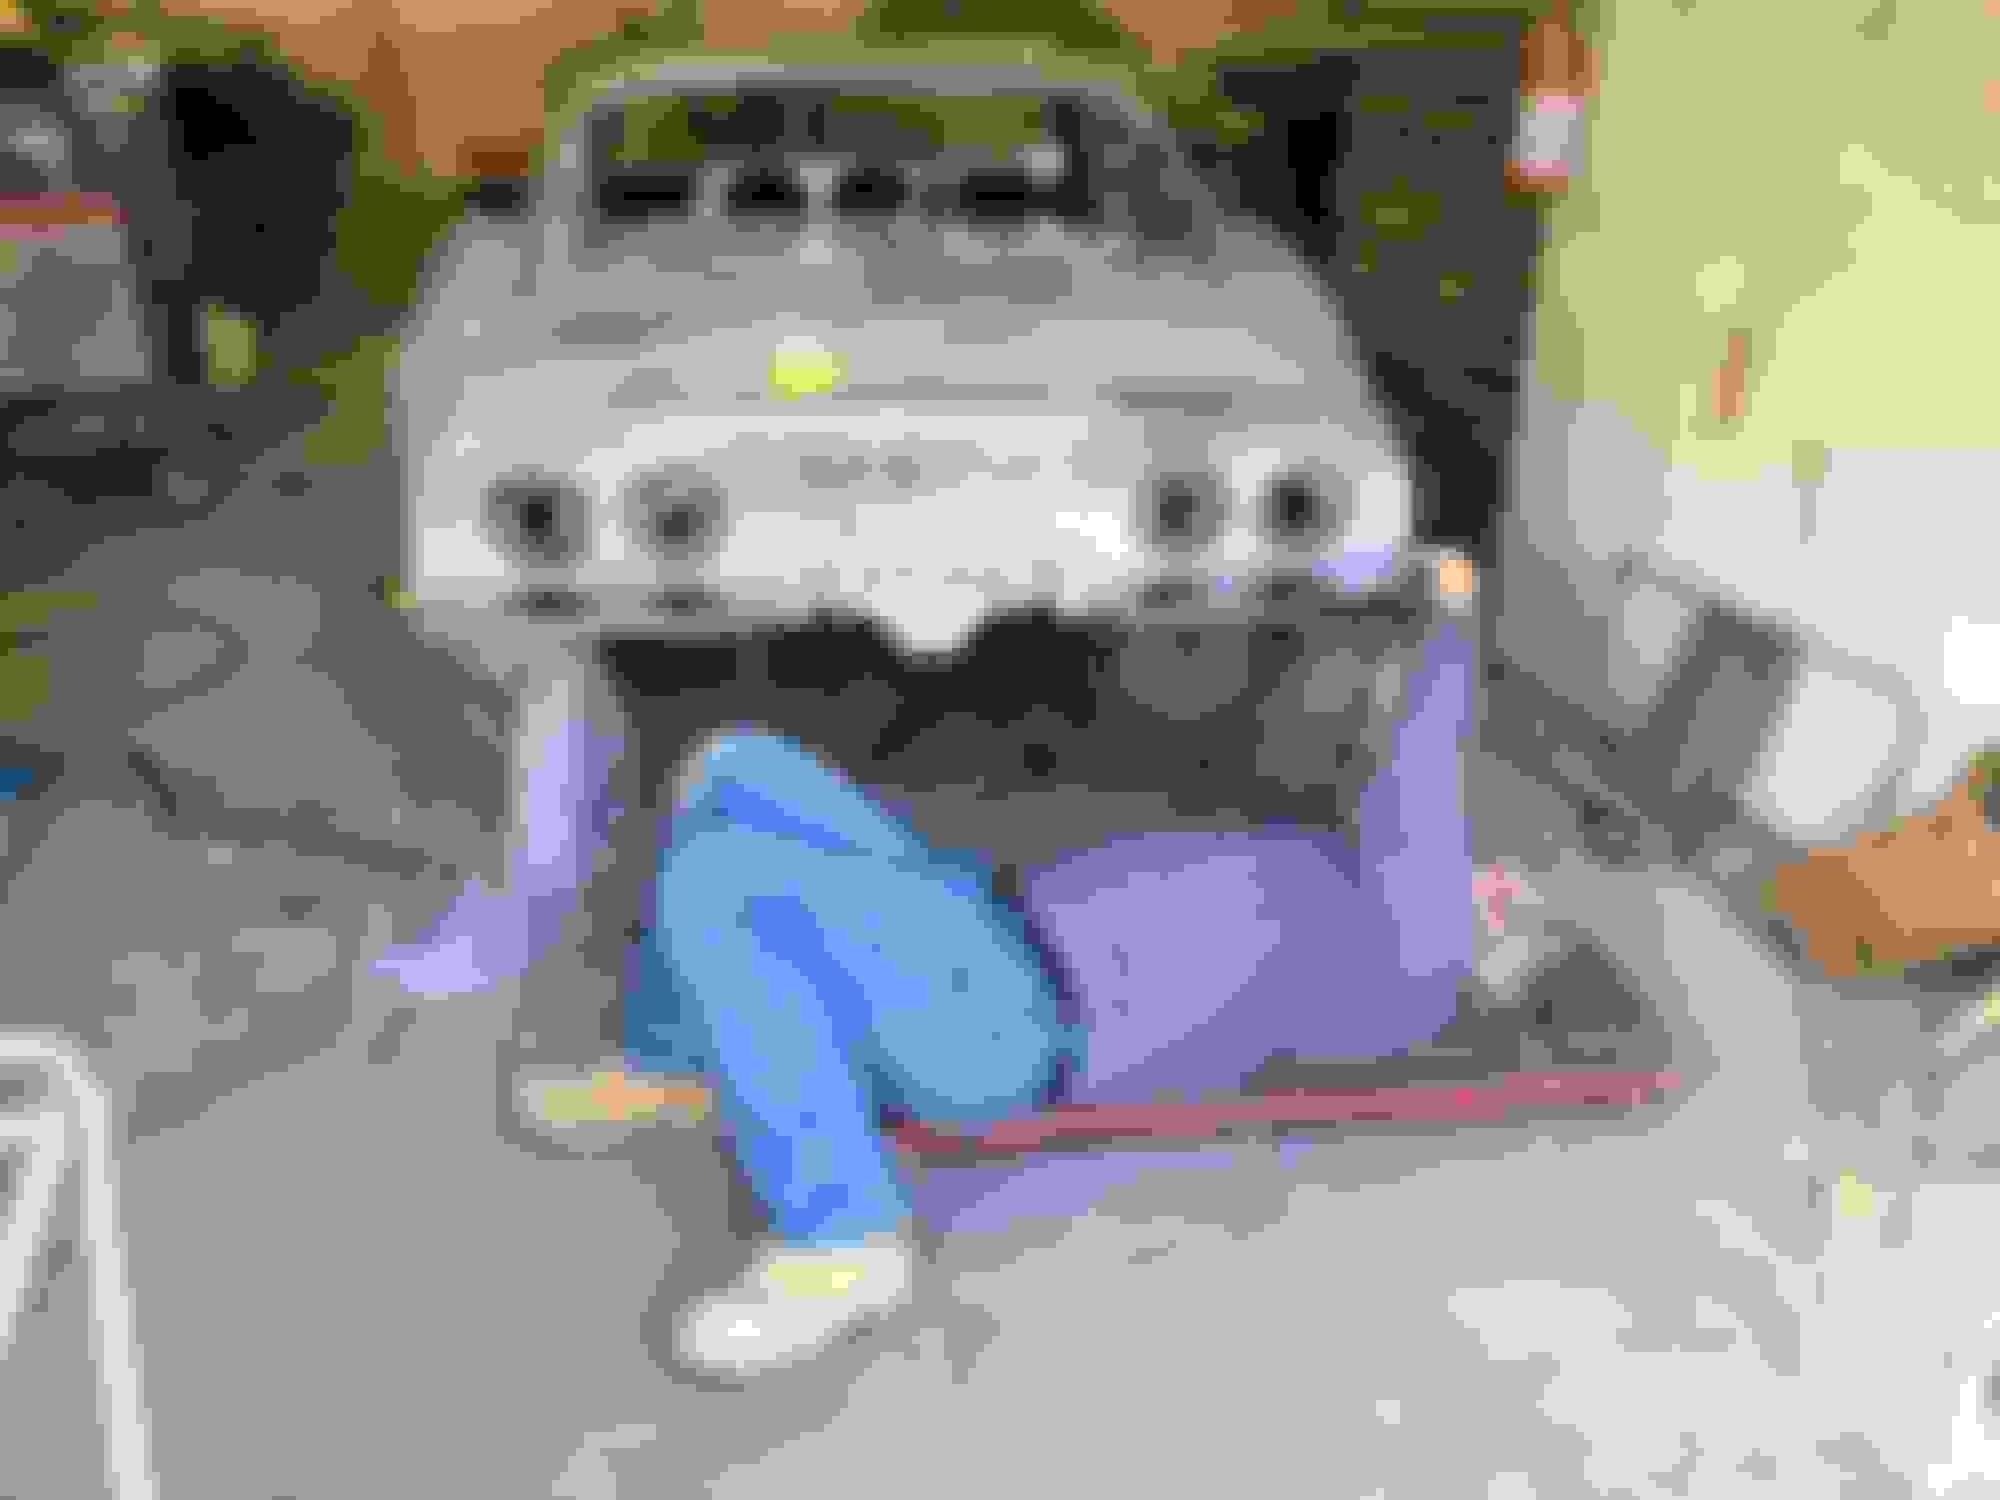
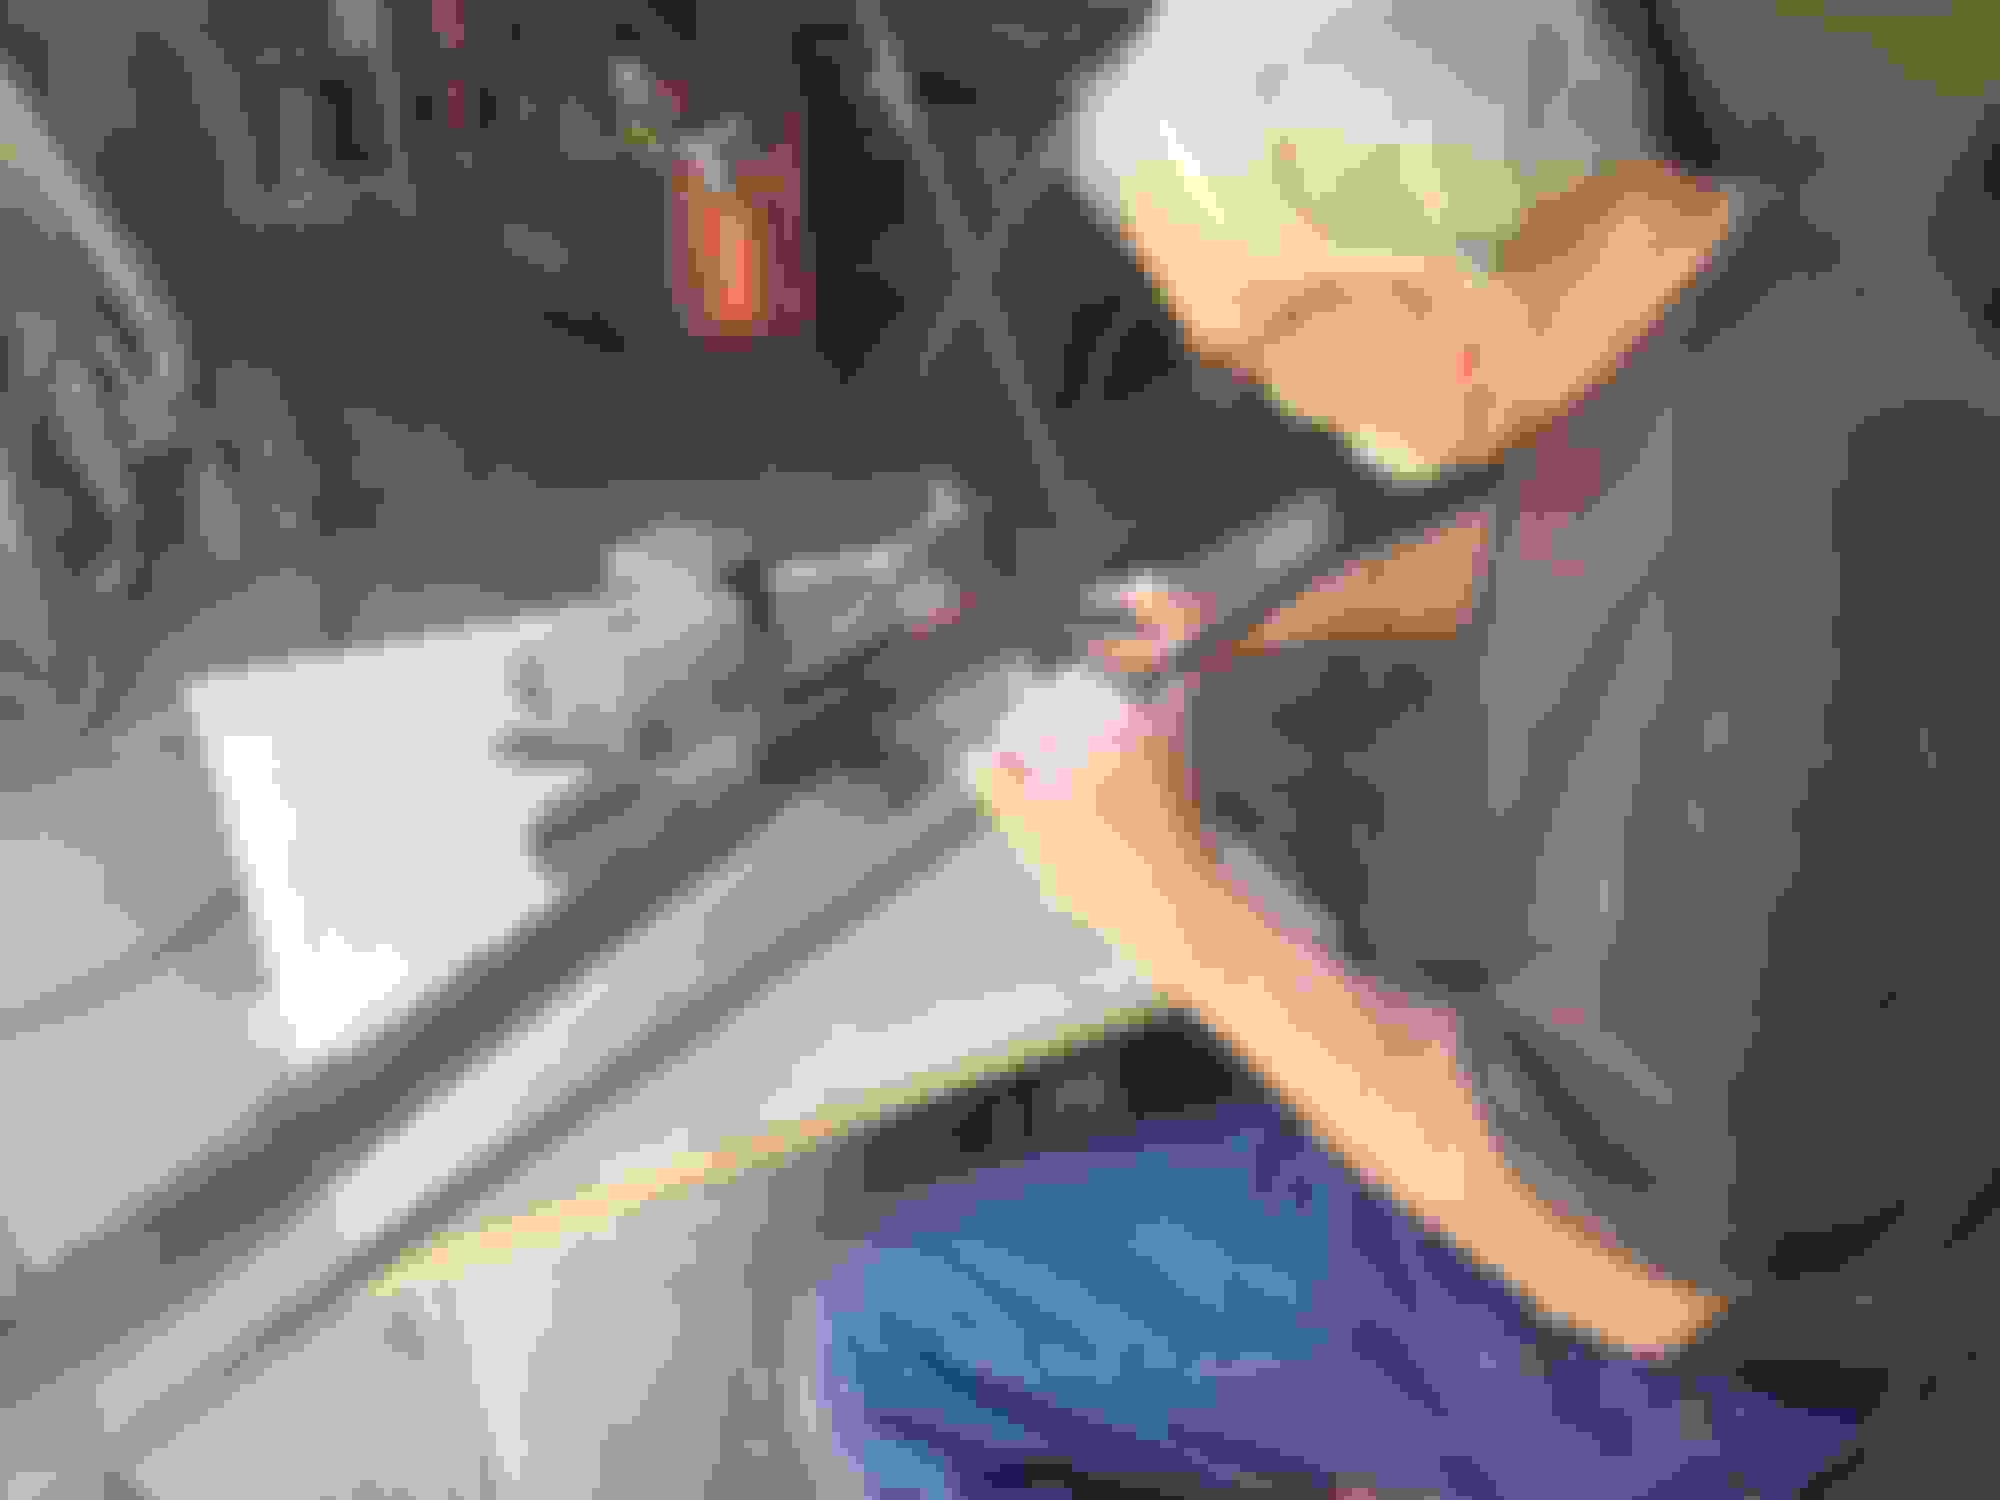
Today Richard moved to the rear of the car to check the fitment of the rear bumpers. These are aftermarket bumpers I got relatively inexpensively from Zip corvette that supposedly are manufactured abroad and then chromed in the US.
The brackets needed to fiddling with, and there was an area that needed to be ground down a bit and spacers needed to be added, but in the end they look pretty good.
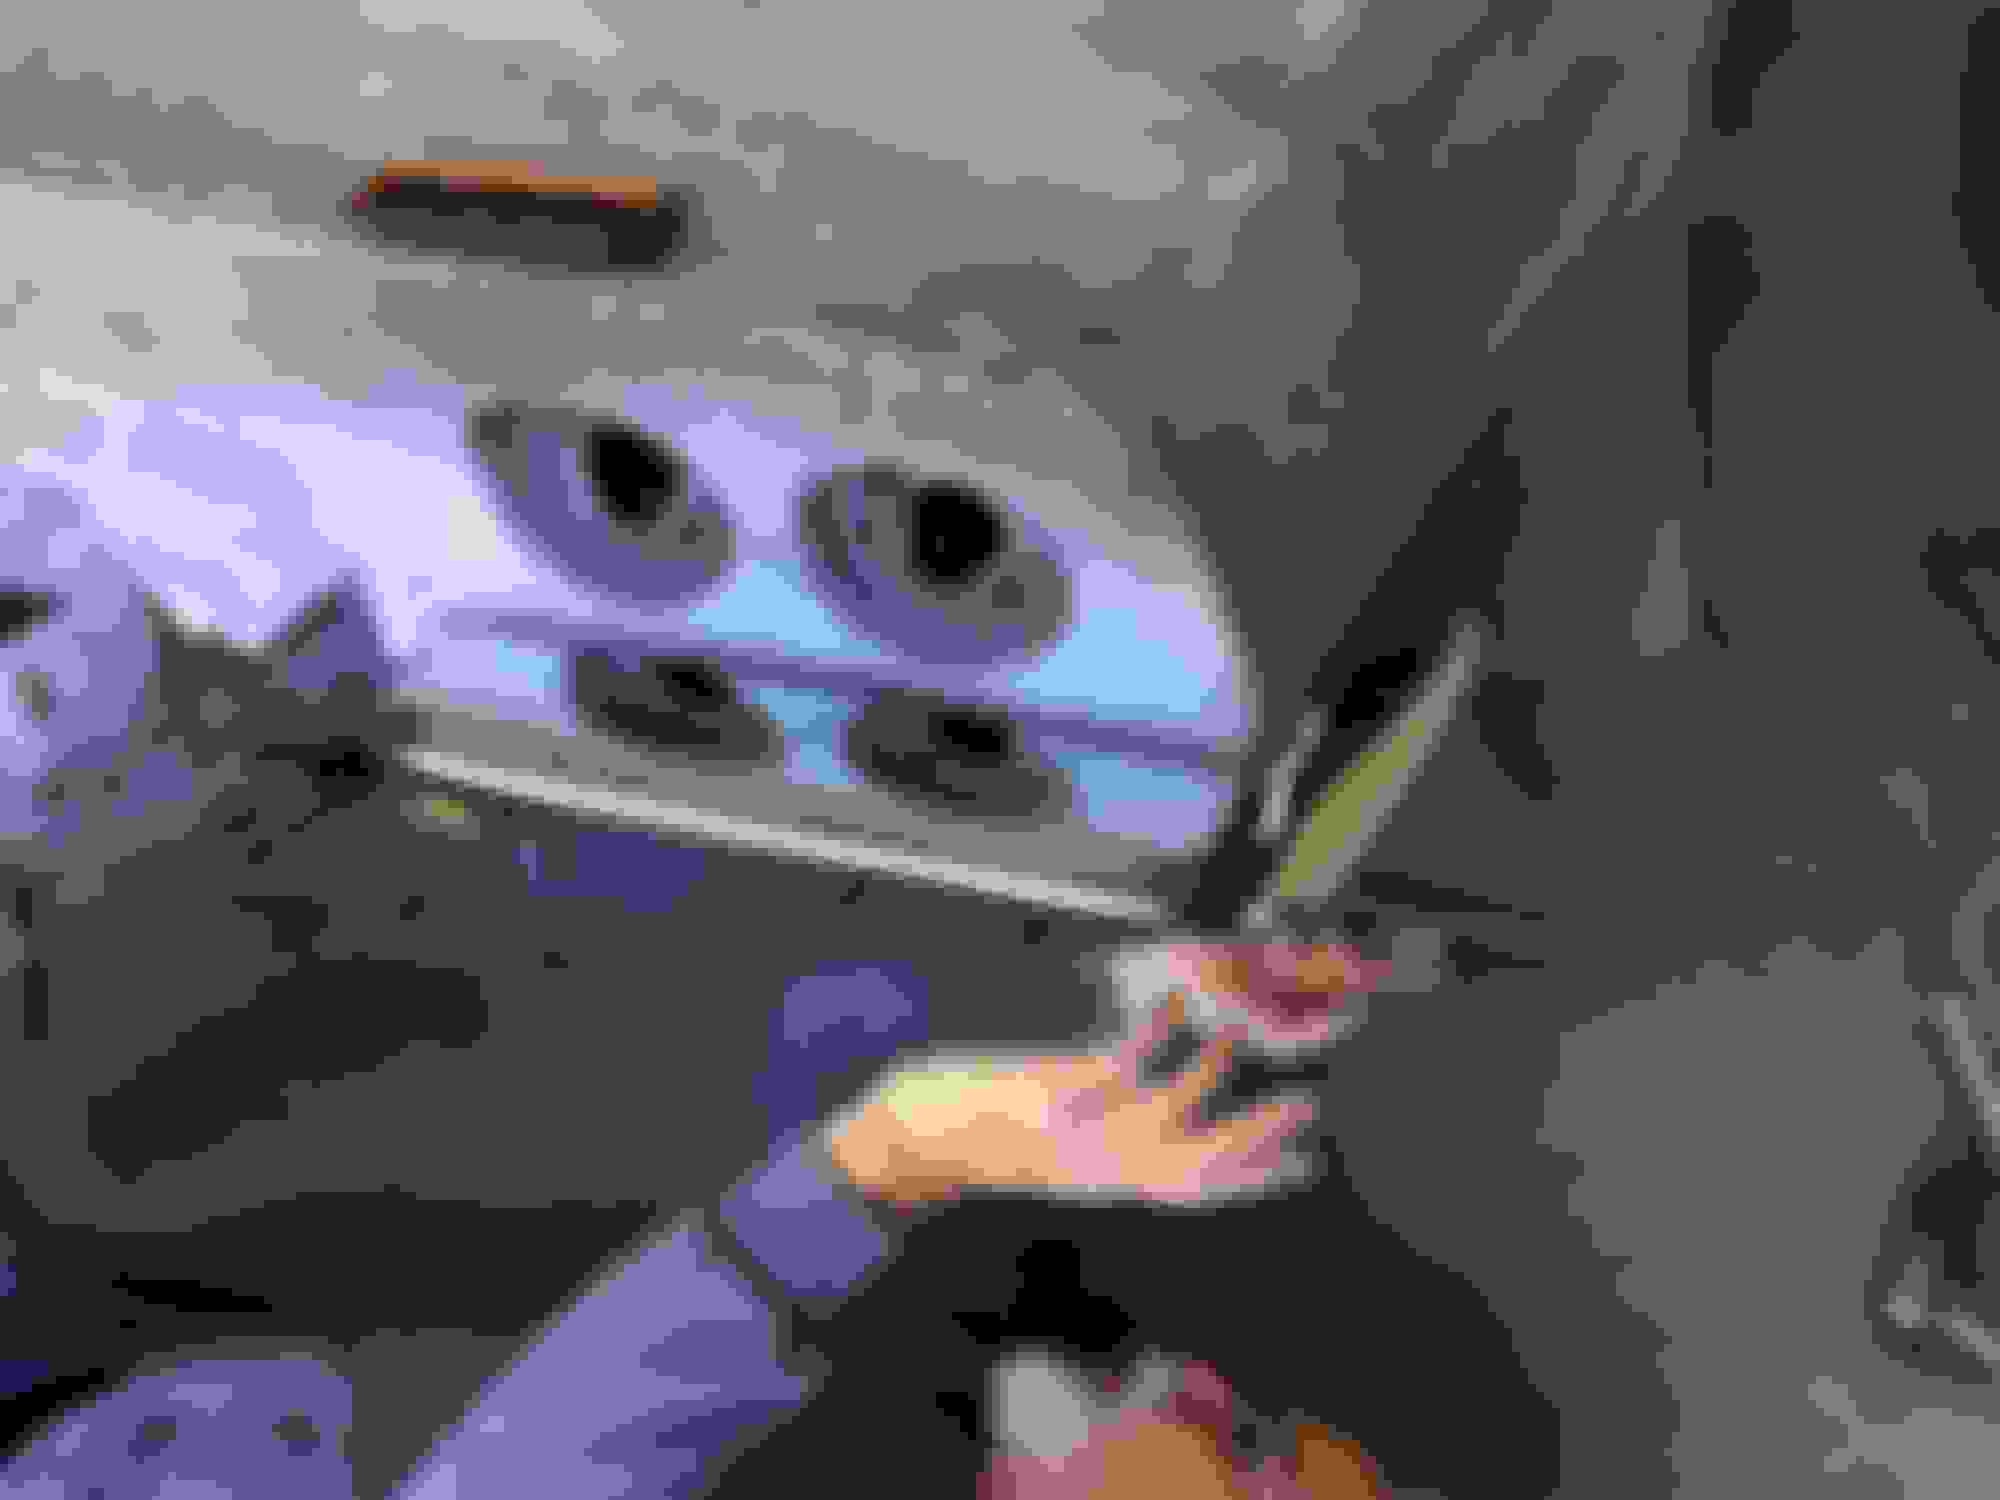
We also check fit the rear license plate bezel, door handles, exhaust bezels and a few other items for fitment
Better know and fix now than after the paint is on.
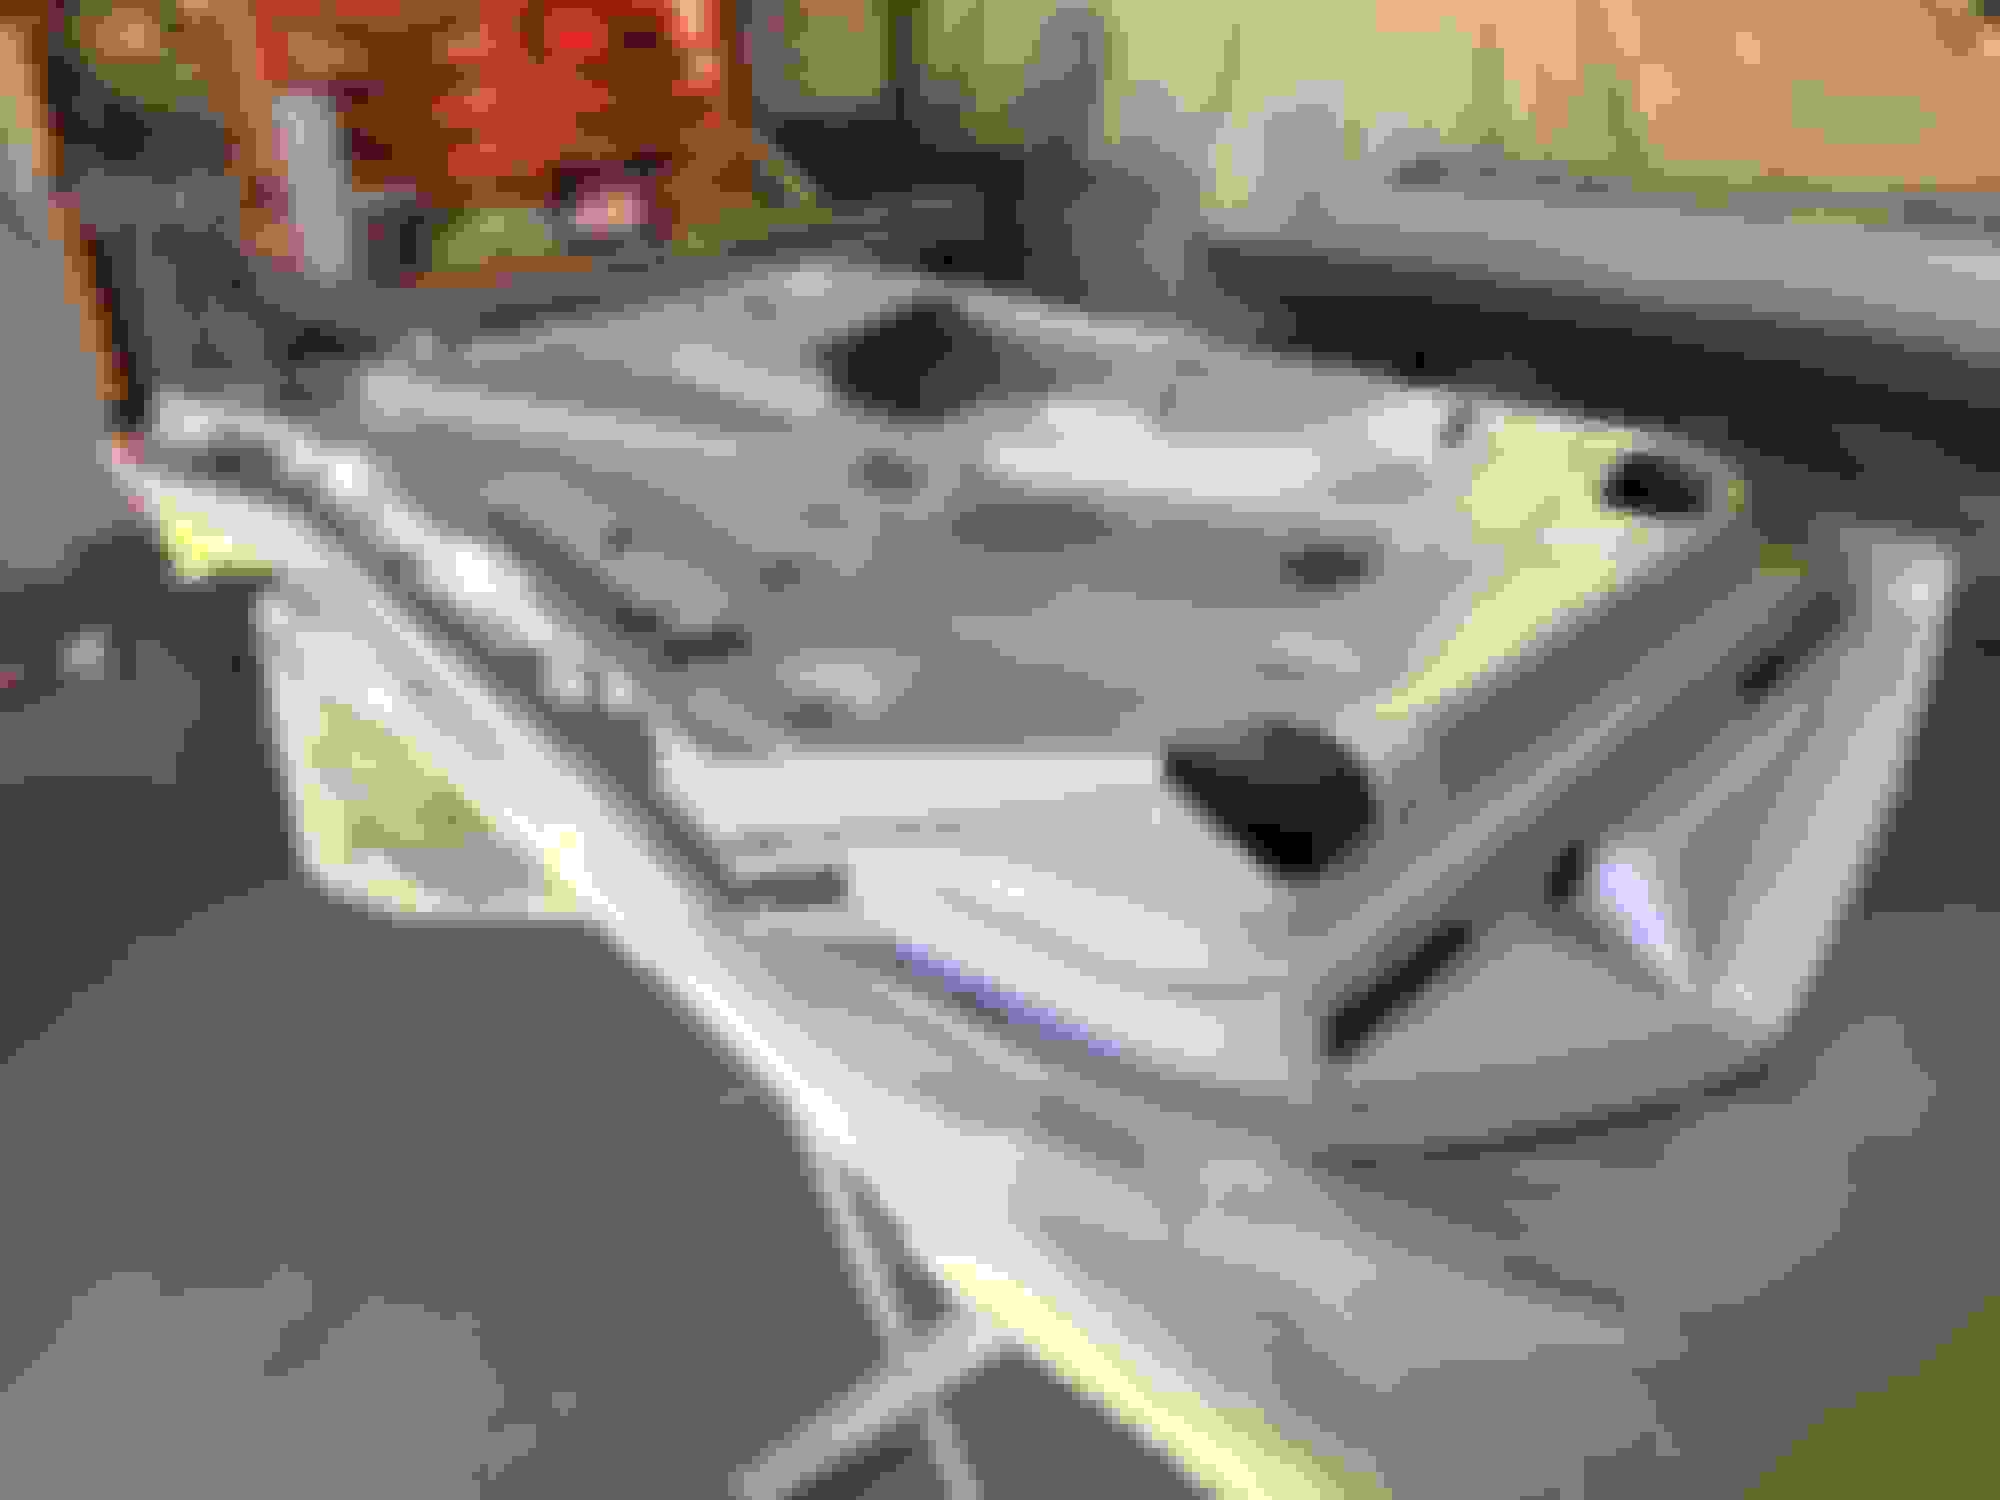
They look good even with no paint. FYI: keep a coat of car wax or some type of protectant on them.
I also primed and painted the inside of each bumper with gloss black for rust prevention.....trust me
I just scrolled thru this whole thread. Amazing work you are doing and this has to be one of the best photo/documentations that have been done. When I got my '68 the frame off work and most mechanical component work had been done by the PO. He had put the body back on and installed the drive train and then the car sat for years. I have been SLOWLY and intermittently trying to complete the assembly. It is inspiring to see what you have done and how quickly you are doing it. Thanks for this "graduate" level class on a restoration.
Hi Glenn,
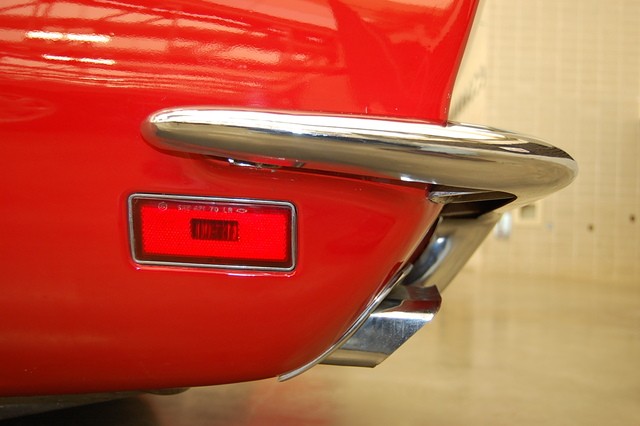
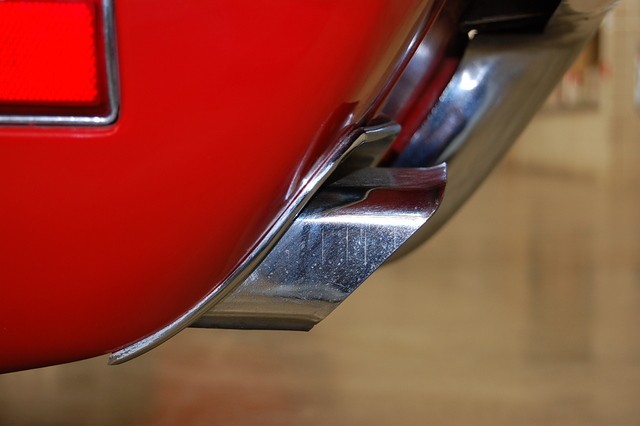
Often the 'curves' on the license bezel and exhaust bezels don't quite match the curve of the tail light panel, exhaust filler panel, and lower quarters....even on original cars and with original parts.
I'm not sure what can be done about the bezels since they're a cast material?
So maybe the only option is to massage the fiberglass?
Regards,
Alan
Hi Glenn,
Often the 'curves' on the license bezel and exhaust bezels don't quite match the curve of the tail light panel, exhaust filler panel, and lower quarters....even on original cars and with original parts.
I'm not sure what can be done about the bezels since they're a cast material?
So maybe the only option is to massage the fiberglass?
Regards,
Alan
Exactly
Although since this is going to be a hot rod
I went with stainless steel exhaust bezels
Fortunately we are not going to have to do anything.
As we are close enough with these pieces
As you know, some of the aftermarket parts out there don't fit
like the originals in any way shape or form.
I have had to send some other pieces back because of their bad quality and fitment.
So we are just making sure these pieces are in the ball park.
Last edited by gleninsandiego; 03-16-2018 at 04:23 PM.
Hi Glenn,
Fortunately the license bezel, and especially the exhaust bezels, are tilted enough when installed that unless you get down on the ground it's difficult to assess the fit.
Regards,
Alan
Today was a significant day, although it may not look like it
I started by torquing down the body bolts
Richard has been pre fitting the bumpers and modifying brackets
We also pre fit the pop up headlight brackets, chrome trim around the
windshield and t tops and weatherstrip.
Lots of minor tweaking that will make a huge difference when it goes together.
Richard putting some finishing touches on the front bumper
Notice the bar in his hand.
He tacked it on each end of the bumper to keep everything straight while he was working on it
At the end of the day, I took all the parts home, the front bumper is headed out to chrome, other parts including the radiator support are going to out for sandblast and powder coating.
Richard's next task is to start shooting color (white) for the first time on the door hinges door jambs.
Progress is definitely being made.
Last edited by gleninsandiego; 03-20-2018 at 01:37 AM.
Your last photo illustrates an important difference in 1968 and later year Vettes. The lip area under the surround in the nose extends thru the radius and helps truss up the corner. This stopped short on the 1968. One of the major Corvette shops in our area told me this sometimes led to an issue in that corner with it being weaker. Extending that lip and adding a support piece on the 1969 and up models was a design improvement. I had both the lip and brace added to my '68 to help with a drooping nose problem. When I saw your photo of that area it just kinda jumped out at me. Your guy is doing some excellent work on that body.
Your last photo illustrates an important difference in 1968 and later year Vettes. The lip area under the surround in the nose extends thru the radius and helps truss up the corner. This stopped short on the 1968. One of the major Corvette shops in our area told me this sometimes led to an issue in that corner with it being weaker. Extending that lip and adding a support piece on the 1969 and up models was a design improvement. I had both the lip and brace added to my '68 to help with a drooping nose problem. When I saw your photo of that area it just kinda jumped out at me. Your guy is doing some excellent work on that body.
While I have been working on seat tracks for my seats, Richard has sprayed the first bit of color (white, it looks blue in the pictures) on the door jambs. He also epoxy primed the metal part of the doors, hinges and some other trim parts.
We are getting closer.....
Last edited by gleninsandiego; 03-30-2018 at 12:56 AM.
As Richard had been getting things prepped for paint, I have been working on the sliders.
When they came off of the original seats they were dirty and rusty and would not budge. I joked earlier that I would need a bathtub of Evaporust and that is essentially what I did - I soaked them for a week.
First I got the dirt off with soapy water
At this point I got them sliding again. It took a lot of elbow grease to get them free.
Now comes a week of Evaporust. It was fun to peek in every day to see the progress
I am giving them a first coat of Rustoleum to keep them from flash rusting
Sorry these are upside down, I will try to fix them soon
Awesome work on the bumpers! Mine are already re-chromed... I hope they fit!
Great work on the sliders. Do you think you were able to get full paint coverage on them without disassembling?
I usually only let parts sit for 24-48 hours with evaporust, but looking at your pictures, I think I will let me next batch sit longer
I didn't get full paint coverage on the inside. So far there has been no flash rusting on the inside and I plan on putting some grease in there too.
I have some other lotions and potions I am going to try to spray in there as well. Hopefully these won't get submerged in water like they did with the previous owner. LOL
Question
Why did you put the body on the chassis?
Why didnt you paint the body on the dolly
Just asking
Great question.
I agonized a ton on what to do here. I kept going back and forth.
I think they painted the body apart from the chassis at the factory, and I have seen a number of people do that here on the forum.
The advantage for me doing it that way was I could get the engine in and running before putting the body on and saving a ton of grief trying to put the engine in later.
But the thought of trying to put a freshly painted body back on the chassis without scratching it or cracking it, plus wanting to check the door alignment and bumper fitment before paint tipped the scales in putting it back on not before painting it.
We had taken the body off with an engine hoist, which was really shaky, and I didn't realize how smooth it would be go on with the two post lift.
I am glad we did the bumper fitment because we had to do a few mods to the body.
That said, I am not excited about putting the engine in the days to come. LOL
Last edited by gleninsandiego; 03-30-2018 at 11:00 PM.

 03-16-2018, 02:18 AM