When you click on links to various merchants on this site and make a purchase, this can result in this site earning a commission. Affiliate programs and affiliations include, but are not limited to, the eBay Partner Network.
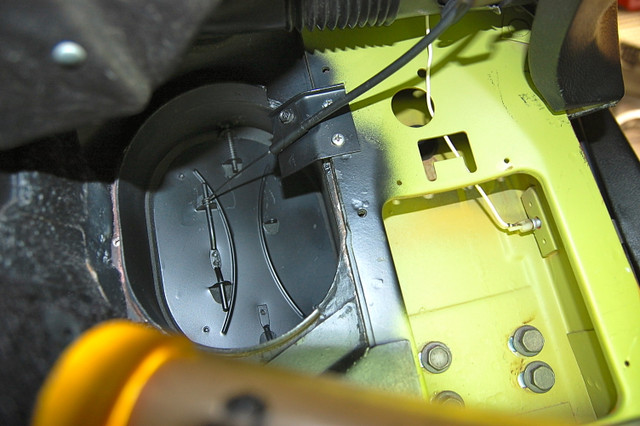
I am restarting my work on my '71 and I decided to start with the wiper bay for a few reasons. After pulling the vast majority of the hardware out of it and removing 2" deep of spray rubber coating, I have a coupe of questions I hope someone can answer.
Is the wiper bay a mix of fiberglass and metal?
#2: This is on the passenger side of the bay, I assume it supposed to be smooth and flat. I have a theory but i would like to hear other opinions.
#3. I looked at the assembly manual and I am unable to find the mounting locations for the vacuum switch that is in the wiper bay.
This guy:
And if anyone has any good methods on removing spray rubber I am open to hearing about it. Here are a couple of my in progress pictures.
I just did my '71 and to remove the existing sealer I took a couple of old screwdrivers to the grinder to sharpen the cutting edge and just scraped away and vacuumed it out regularly. I resealed it with underseal, allowed to dry then ran over it with Rustolium matt black.
It's mostly fibreglass but there is metal which is the bulkhead.
When reinstalling the wiper door, I used a small blob of silicon to hold the 8 washers to the cover as it's very fiddly getting the bolts back in.
Stuart
I'll see if I have a pic of the vacuum switch mount but I doubt it.
Hi,
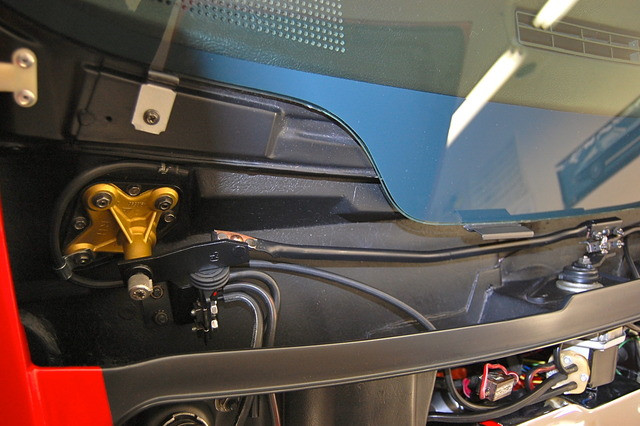
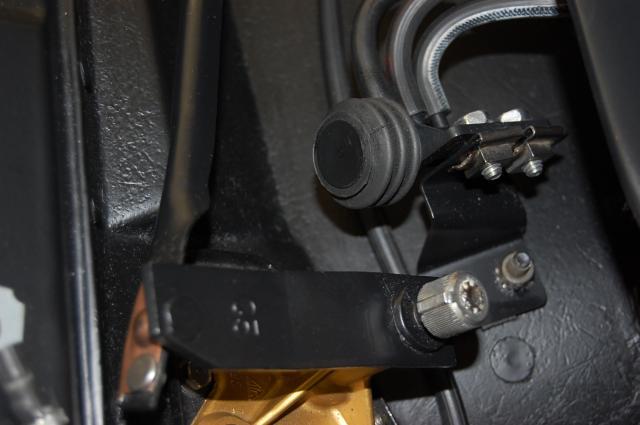
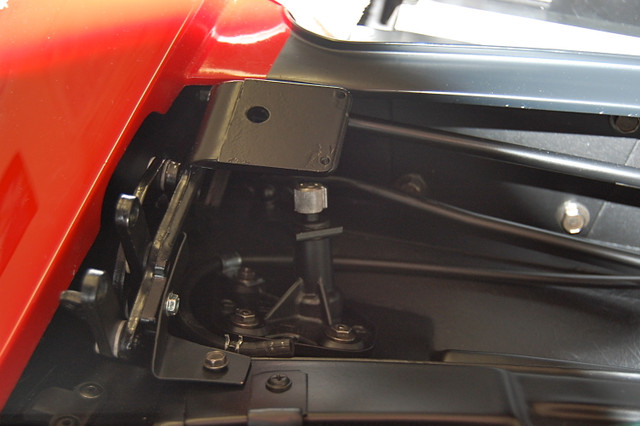
Here's the wiper door interlock switch mounted in place below the right side wiper transmission arm.
Regards,
Alan
The switch mounts to a small bracket with 2 bolts/nuts and the bracket to 2 studs the floor of the wiper bay. (You can see 1 of the studs and it's nut in this photo.)
Hi,
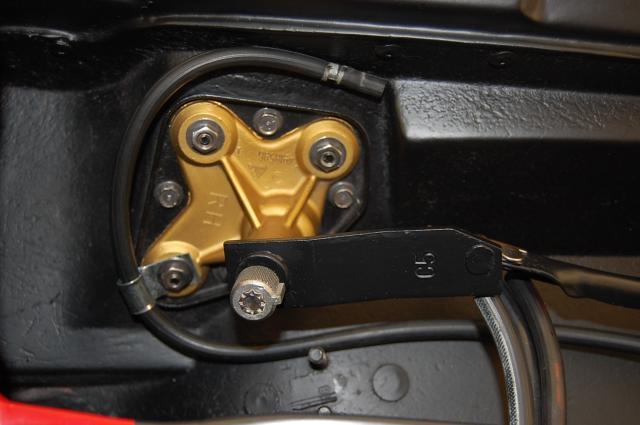
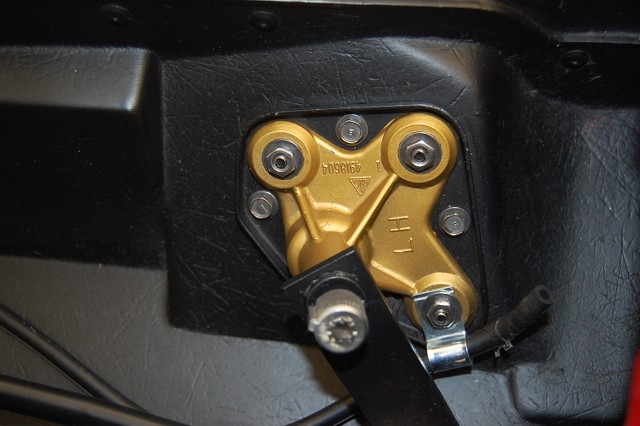
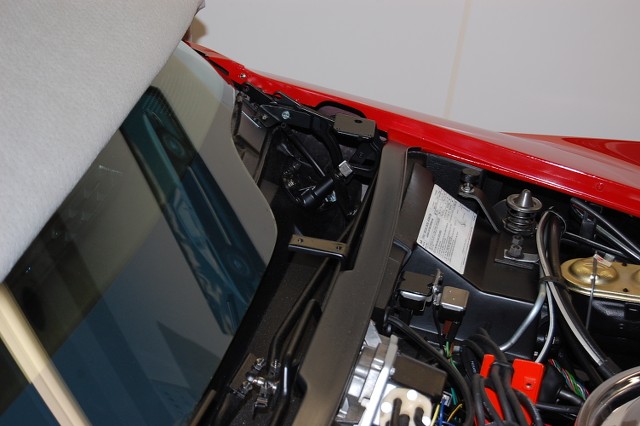
Here are the mounting plates for the wiper transmissions
The plates are through bolted from the interior of the cowl.
Regards,
Alan
You can see the studs for the interlock switch bracket in this photo too
And a word of warning, there�s a drain hole on the passenger side that there�s no access to so don�t drop anything down there like I did. Had to lower a magnet on a string to retrieve my 5/16th spanner..
Great pics as usual Alan and the pride I took in my work is instantly washed away
Hi bv,
It's all a matter of being sick enough to be willing to spend the time needed.
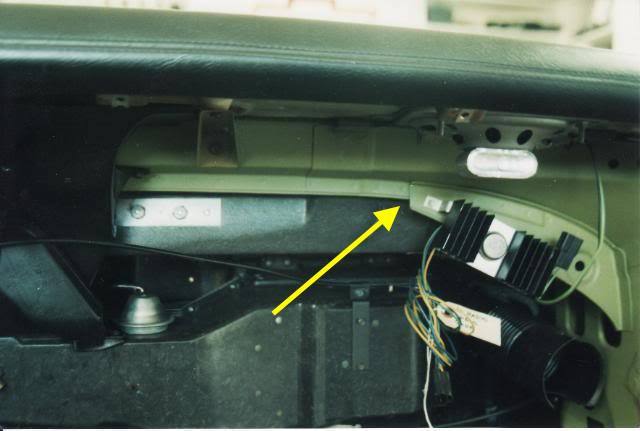
There is 'pretty good' access the the bottomless pit of the cowl on each side (on cars without a/c) by removing the kick panel vent doors and reaching in through the plenum.
Regards,
Alan
The access is through here.... the door can be removed and then replaced.
Hi,
Here's the wiper door interlock switch mounted in place below the right side wiper transmission arm.
Regards,
Alan
The switch mounts to a small bracket with 2 bolts/nuts and the bracket to 2 studs the floor of the wiper bay. (You can see 1 of the studs and it's nut in this photo.)
The switch, bracket and required hardware.
Thanks for the great photos!
How screwed am I if there are no studs on the floor anymore?
Also, does anyone sell that bracket anymore?
I used a razor blade scraper and use a hair dryer to really warm up the gunk and it comes off easier Paragon corvette reproductions sells part of what you need. Part 7669k bracket.
Hi,
You can access the stud plate for the safety switch from inside the car with the right side lower dash pad removed.
You'll likely have to find another plate at a Corvette dismantler....for a few $$. The bracket may be available, I'm not sure.
Here's where the access to it is. The stud plate is riveted in place.
Regards,
Alan
Look for the rectangular plate to the right and above where the arrow points. The plate mounts to the fiberglass cowl not the steel birdcage.
Hi EJ,
There's currently a switch mounting bracket and fasteners for sale on e-bay.
Look through the parts from seller .....originalcorvette....
Regards,
Alan
If you need the bracket, I have the one from my 69 with the original hardware I would sell to you. My switch is no good but I am eliminating all the vacuum so don�t need the bracket.
My '81 was quite frankly a bitch to clean. So much junk was caked in there. I used a can of rubberized spray undercoat after the clean up. If I was going to do it again I would use something like the spray bed liner called Lizard Skin.
Alan,
I'm interested by the painted color of your transmission brackets. Is that simulating an original gold colored anodize? What's the paint? I painted my '77 brackets a cast blast silver, I think, because they looked like that before I touched them. Did you trim the casting flash from them? I was tempted but didn't.
Hi R,
I thought I saw traces of a gold finish on the transmissions when I cleaned them up originally. So I sprayed them with copper paint.
I didn't try to remove the flash that was present.
But it's really a moot point because I believe the transmissions were in place when the black-out in the wiper bay was done.... so they ended up with black on them.
Regards,
Alan
After the black out.
Mine were as original, it seems, and weren't painted. Maybe the treatment changed sometime between the early 70s and '77.
Hi r,
It certainly looks like that transmission didn't get the black out!
The stud plate, and its mounting bolts, under it does look like it was painted in place though.
Maybe I'm wrong about when the transmissions were installed or when the wiper bay was painted black?
???
Regards,
Alan
It's about 25 years since I took the wiper bay contents apart and I just wasn't paying enough attention to what I was seeing then. Next time!!!!

 03-19-2018, 08:40 AM