
Oh CRAP! slow floor board on a 75'
 04-07-2018, 03:22 PM
#1
Racer

Thread Starter
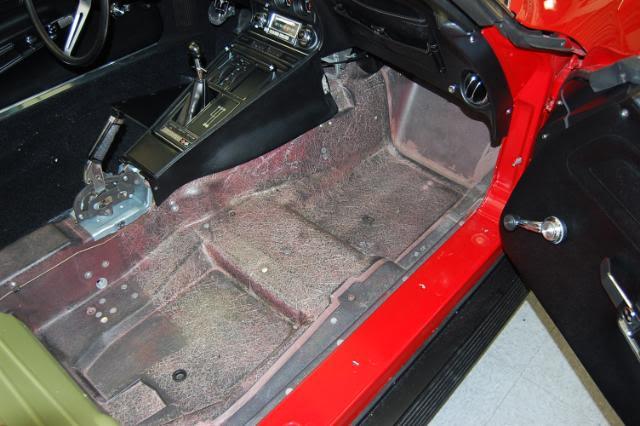
Was removing old carpet and found the part of the fiberglass floorboard was soft...then was able to poke 3 fingers through with ease in one spot...
looked under the car where my fingers went through and looks like a bunch a fiberglass hair underneath on one spot.
Now....how hard is it to reinforce/or repair the floorboard and what would have caused this?
I bought the car used recently...I'm bummed
Meant to type SOFT floorboard .....not slow
looked under the car where my fingers went through and looks like a bunch a fiberglass hair underneath on one spot.
Now....how hard is it to reinforce/or repair the floorboard and what would have caused this?
I bought the car used recently...I'm bummed
Meant to type SOFT floorboard .....not slow
Last edited by Jetglow; 04-07-2018 at 03:22 PM.
 04-07-2018, 04:25 PM
#2
Team Owner

Member Since: Sep 2006
Location: Westminster Maryland
Posts: 30,173
Likes: 0
Received 2,878 Likes
on
2,515 Posts

Hi Jg,
NOT the end of the world! Don't be too bummed!!
The damage to the underbody is often caused by driving over something.... a curb, parking bumper, etc.
The manner in which the damage is repaired will depend on just where the damage is and how extensive it is.
There are certainly folks here that can give advice and guidance.
Some photos of the damage will get things going.
Regards,
Alan
04-07-2018, 05:30 PM
#3
Nam Labrat


Member Since: Sep 2013
Location: New Orleans Loo-z-anna
Posts: 33,897
Received 4,175 Likes
on
2,737 Posts

You can order fiberglass flat panel in different sizes and thicknesses on the internet. Watch a couple YouTube videos about repairing a HOLE in fiberglass. Pick up some supplies at an auto parts store.....and your ready to work on it.
04-07-2018, 09:43 PM
#5

I agree. When I got mine, ages ago, there were chunks punched out of the floor, which I couldn't see ......it's the place where I first practiced patching fiberglass.... I got carried away so it's pretty thick, good thing that's towards the "outside" because otherwise it could interfere with the gas pedal. It's held up for 30+ years and it was my first experiment.
04-08-2018, 12:19 AM
#6
Racer
Thread Starter
Wish I could post pics....the hole is located at the corner where it transitions from the floor to the seat and I can feel it is soft in about a 1 foot squar area. I think the repair needs to be done from bottom and top and I don’t think it needs to be pretty...just sturdy. I’m going to take it in for a professional estimate since I’ve never worked with fiberglass and probably need a lift to get at it properly. I spoke with the seller and they seem to want to work with me on this after I pointed it out. I will tell you more depending on whether they honor resolving this or not.... I’m guessing the damage was probably done by a jack in the wrong place....
Last edited by Jetglow; 04-08-2018 at 08:46 AM.
04-08-2018, 12:27 AM
#8
Racer
Thread Starter
Seems photo bucket doesn�t work... so who should I use to post pics?
04-08-2018, 12:30 AM
#9
Le Mans Master

Member Since: Dec 2009
Location: Saskatoon Saskatchewan
Posts: 6,397
Received 640 Likes
on
463 Posts
IN the reply box you're typing in notice the square yellow icon at the top with the mountain in it. Click on that and you can select photos from your computer and it will load them into the forum and display them when you hit post reply
The following users liked this post:
Jetglow (04-08-2018)
04-08-2018, 07:11 AM
#10
Senior Member


Member Since: Jan 2008
Location: Easton, PA
Posts: 12,154
Received 2,031 Likes
on
1,103 Posts
St. Jude Donor '10
Wish I could post pics....the hole is located at the corner where it transitions from the floor to the seat and I can feel it is soft in about a 1 foot squar area. I think the repair needs to be done from bottom and top and I don�t think it needs to be pretty...just sturdy. I�m going to take it in for a professional estimate since I�ve never worked with fiberglass and probably need a lift to get at it properly. I spoke with the seller and they seem to want to work with me on this after I pointed it out. I will tell you more depending on whether they honor resolving this or not.... let�s just say I got the car from a seller who had inspected it on a lift took photos and did not report it when they had it on the lift. It was there when they sent me photos of the undercarriage... but the photo was at a distance where it was not obvious and damage was never mentioned. When I discovered the hole I went back to the photos and could make out what you think would be dirt in th photo, but was an obvious damage if you were actually underneath unless your an idiot. I�m guessing the damage was probably done by a jack in the wrong place....
Unless you are having the urge to fix it yourself I am with you, find a reputable repair facility that has worked with fiberglass and get it done correctly.
Best of success in your search and repair. Enjoy your car.
David
04-08-2018, 08:51 AM
#11
Racer
Thread Starter


 04-08-2018, 09:14 AM
#12


if your going to do this your self its easy,but ichy,,
your going to need to sand/grind the upper floor and wash with laquer thinner,
then on the underside,
take a sheet metal plate and make the floor flat again,[you might need to use a floor jack to add a little tension to it],
now cut the fiberglass mat to the sizes you need[2-3 sheets],
get a couple 2 qt plastic paint mixing cups,add some resin and hardner,then brush some of the mix on the floor,ad 1 layer of fiberglass mat,now take the brush and work out the air bubbles
repeat these steps to add the 2-3 other flberglass mats,
let dry over-night
now take off the under pieces of steel sheet,grind and wash with thinner
now,add glass as you did on top [1 layer should do] as your just sealing things up
you will need
1.fiberglass mat [1 package 3'x5'?]
2.1-2 qts fiberglass resin
3.2-3 2'' cheap paint brushes
4.1 gal paint thinner [or acetone]
5.a couple 2qt plastic paint mixing cups
6.real cloth shop rags
7.piece of sheet metal [maybe 1'x1'] what ever size to hold-up floor
8.if you can find a 2'' to 4'' fiberglass roller it would help to get a better job[it really works the mat into place]
and some roofing paper to cover your garage floor,resin seems to go everywhere,and try to cover anything inside the car too[resin doesn't come off after it drys
04-08-2018, 09:56 AM
#13
Racer
Thread Starter
And here I thought...."well I don't have steel floorboards so I don't have to worry about holes in my floor...LOL"
I'm tempted to do it and I think I have the skill and tools....but....
I'm tempted to do it and I think I have the skill and tools....but....
04-08-2018, 10:01 AM
#14
Yeah, it's not a big deal. Get bunches of disposable gloves, those little cardboard containers, mixing sticks..... stuff you can discard instead of trying to save. Wear long sleeves and zip your work clothes up to the neck. Use eye protection ... you don't want to deal with the itch. The rest is fairly simple.... you can find various youtube videos on generic fiberglass repair.
04-08-2018, 10:45 AM
#15
Instructor
That patch with the red sealant is exactly the same as in my '75 ragtop. I always thought it was an "after the fact" repair to damage caused by a blocked and overheated catalytic. Factory mod for the new for '75 catalytic converter? Anyone know for sure?
04-08-2018, 11:08 AM
#16
Racer
Thread Starter
Mine is a 75 ragtop too
Last edited by Jetglow; 04-08-2018 at 11:09 AM.
04-08-2018, 11:16 AM
#17
Racer
Thread Starter
I bet that is why they went to steel floorboards after 75... the heat form the converter probably weakened the surrounding fiberglass
04-08-2018, 11:39 AM
#18
Racer
Thread Starter
BTW...like what you did with rear bumper...and like your old and new wheel setup. What did you do with your old wheels?
04-08-2018, 11:41 AM
#19
Team Owner
Member Since: Sep 2006
Location: Westminster Maryland
Posts: 30,173
Likes: 0
Received 2,878 Likes
on
2,515 Posts
Hi jg,
I would begin by cleaning the damaged area of the underbody of paint and other materials using paint remover and lacquer thinner.
This will need to be done to begin the repair regardless.... but it will also allow you to SEE the EXTENT of the damage which may have an influence on whether this is a repair you want to tackle or have someone else do it.
With a little homework first it's likely you can be successful repairing this damage yourself.
Often damage like you have is repaired by working from both the interior of the car and from underneath it.
Regards,
Alan
This shows that area thouroughly cleaned up.
Last edited by Alan 71; 04-08-2018 at 11:43 AM.