When you click on links to various merchants on this site and make a purchase, this can result in this site earning a commission. Affiliate programs and affiliations include, but are not limited to, the eBay Partner Network.
I finally bit the bullet and bought my dream car a red 1980 Corvette in March. I have been working on fixing mostly smalls things over the last few months. The parking brake on the vehicle has never really worked. I went to adjust a few weeks back and realized that there wasn't anything left to adjust in the cables. Assuming the cables had stretched over the last 38 years, I ordered a parking brake rebuild kit from Corvette America. I started installing the new kit this week but today I hit a real snag. After installing new parking brake shoes and cables, I still can't get the parking brake to engage. Near as I can tell, it seems that the parking brake shoe lever, the piece that pushes the two shoes apart inside the drum, doesn't seem to engage very well when pulled by the cables. This is also a new piece. To compound things, there seems to be nipples built into the trailing arm, possibly for adding more grease to the wheel bearing, that gets in the way of the cable and actuator. I have read that the parking brakes don't work very well on these cars but this seems just ridiculous. It's a bigger deal to not have a working parking brake as well since it is a 4-speed manual. Any help would be much appreciated.
The grease fitting ..as you put it...seem to be getting in the way of how the park brakes work...so you need to make a decision on what to do next.
Did you correctly adjust the shoes as outlined in the service manual? They DO need to be set before you go in and adjust the cable.
Then they need to be burnished as outlined...then checked/adjusted again.
Because without being able to see what you see. I have nothing else for you.
DUB
Hey Dub,
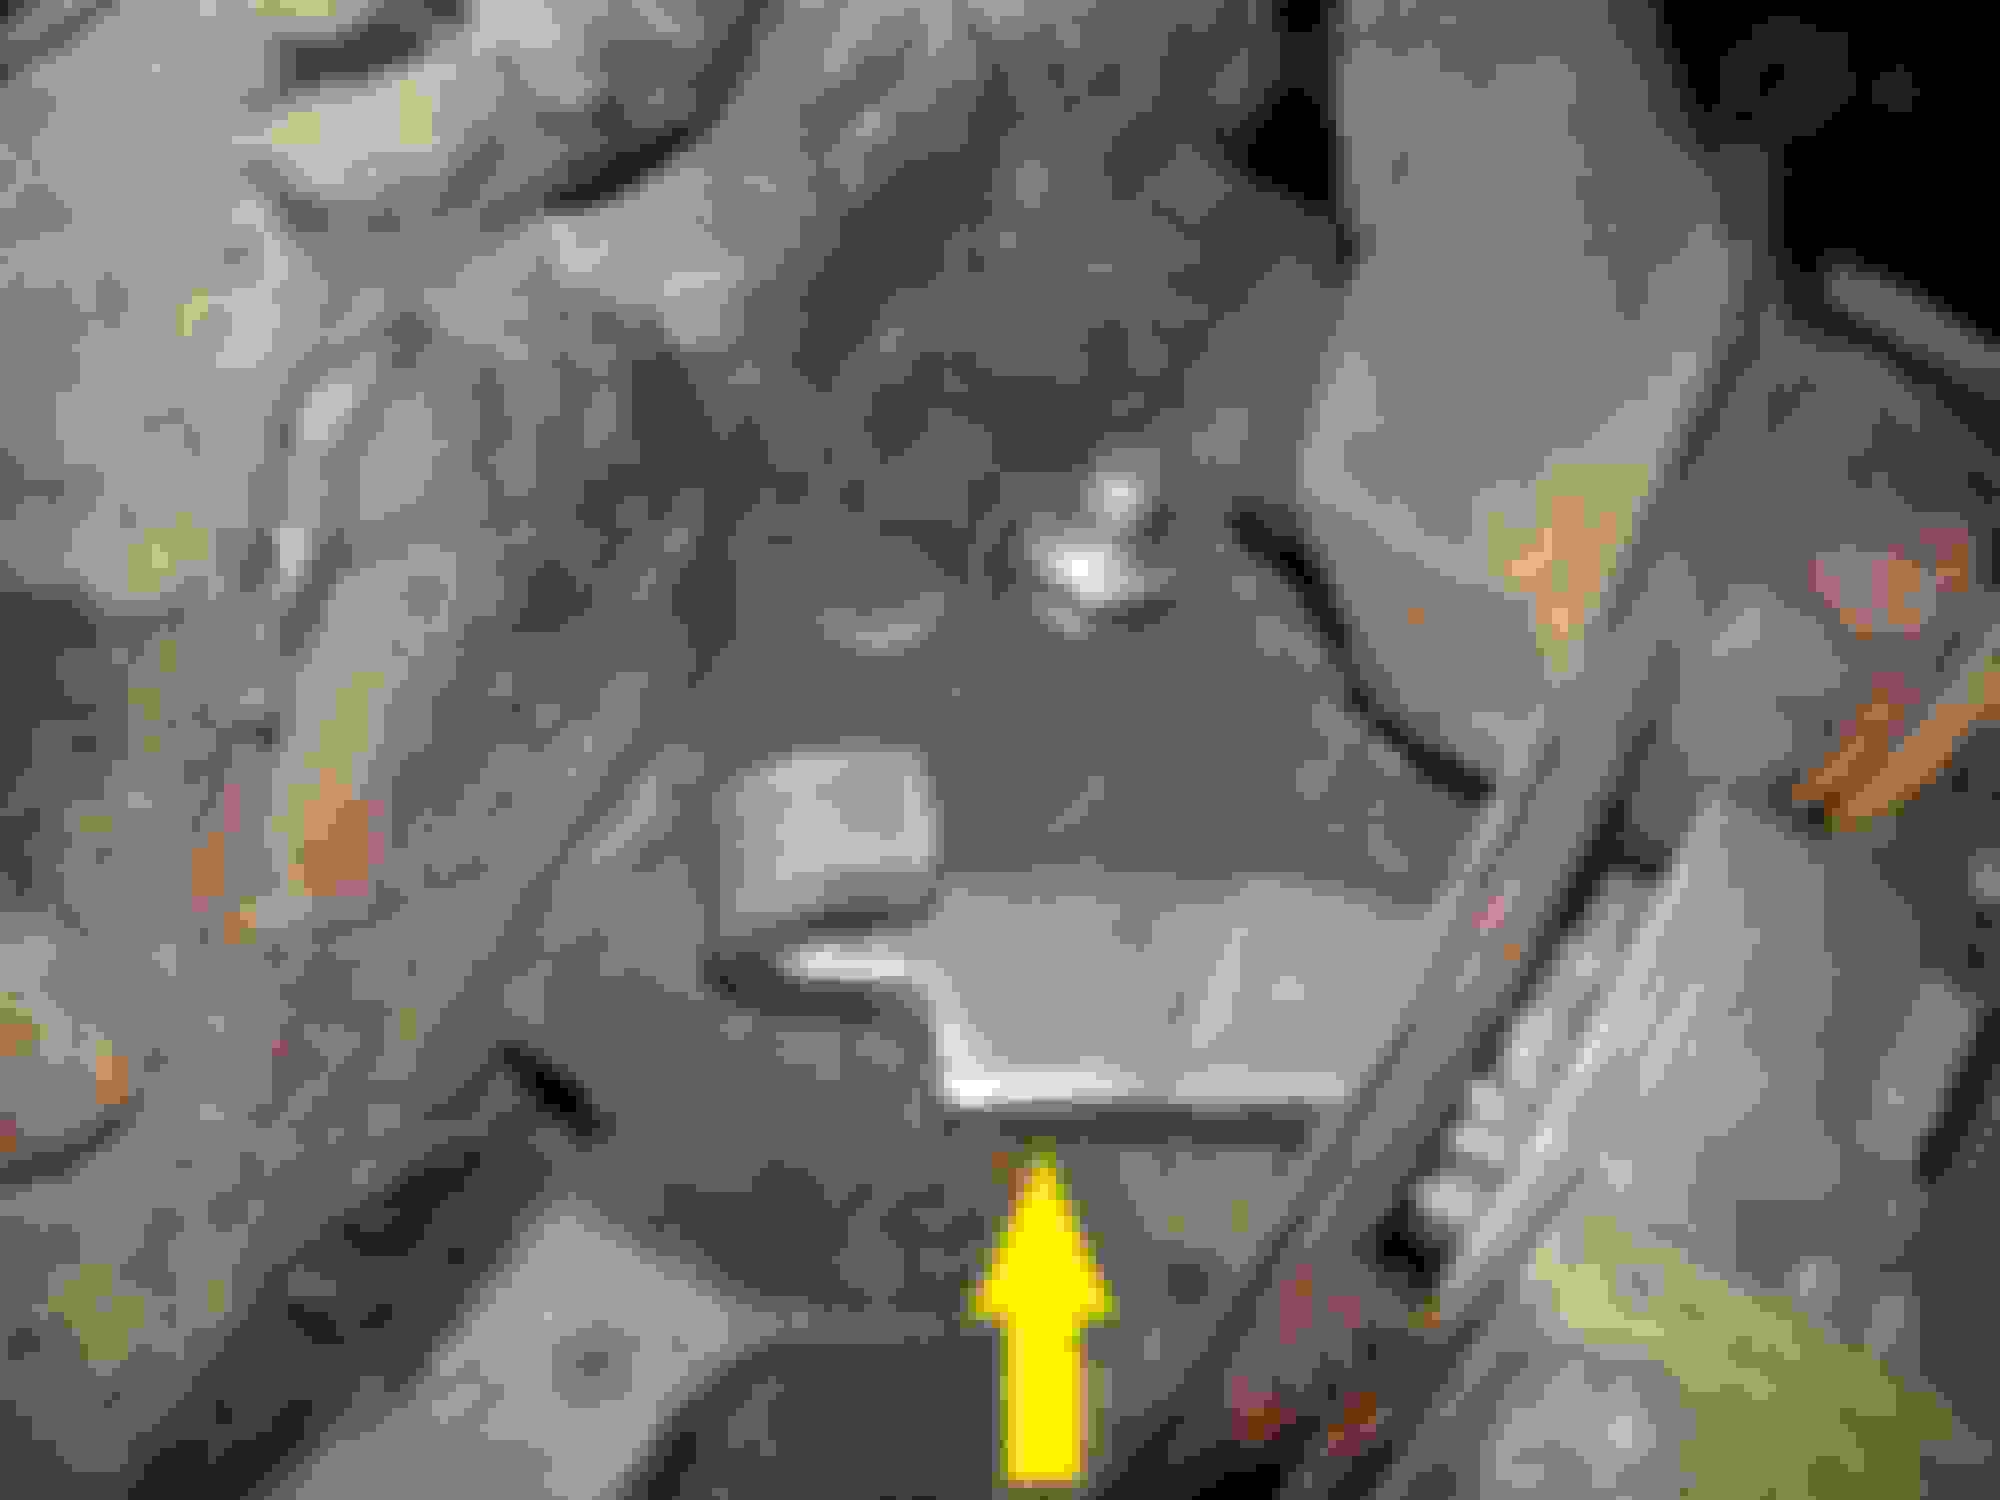
Thanks for the reply. I did correctly adjust the shoes themselves before the brake cable as defined in the service manual. Fortunately, no problems there. Haven't had a chance to burnish the pads yet as I haven't been able to get the parking brake lever to even engage. I suppose the grease fitting could be replaced with something that fit the hole, but is this factory? Seems strange if it is. I attached a picture. The real issue though, seems to be that the actuator between the shoes doesn't do much actuating. It also seems, when much pressure is put on it, it is likely to pop out of the slot in the shoe.
Thanks for the reply. I did correctly adjust the shoes themselves before the brake cable as defined in the service manual. Fortunately, no problems there. Haven't had a chance to burnish the pads yet as I haven't been able to get the parking brake lever to even engage. I suppose the grease fitting could be replaced with something that fit the hole, but is this factory? Seems strange if it is. I attached a picture. The real issue though, seems to be that the actuator between the shoes doesn't do much actuating. It also seems, when much pressure is put on it, it is likely to pop out of the slot in the shoe.
That grease fitting is NOT factory by any means. SO...if it where me. I would remove it and put in plug that will allow the cable to go by it.
Obviously clean around the grease fitting very well prior to removing it. And hopefully you can get something to to go in there and will go down far enough.
I have no clue if the person who did this tapped it for pipe thread or standard threads.
You may find that you might need to use an epoxy adhesive to fill in this hole....which is why you might want to really clean it well around the fitting before you take it out. Using a die grinder to really clean the casting of any rust and crap. SO...IF you DO need to use an epoxy adhesive...it will stick and seal this area off.
For what this is worth to those ***** reading this thread.
When people THINK that installing grease fitting(s) in this area will make it so they do not have to service the rear wheel bearings. Because they THINK that pumping in grease it will some how magically get into the bearing. They are MISTAKEN. What would need to be done...because they are basically flying blind because there is no way ion seeing how the grease is flowing inside the bearing housing. Pump so much grease into that housing that it would cause the outer grease seals to pop out.
Now the 'odds' that someone actually drilled through the bearing race. Chamfered it...an put the race back in and lined it up with the hole where the grease fitting is so when grease is pumped into it. The grease would go into the roller portion of the bearing...is like I wrote ...highly unlikely.
Alright thanks for the good info dub. I'll see if I can't get this plugged up today and then get the brakes calibrated again and see if that makes a difference. The actuator, in my opinion looks like it will have to be modified to some degree to get the brake to work anywhere near well.
Yes that is the part I'm referring to. Nothing on the outside where the cable attaches. The actuator has to move too far forward before it engages the rear shoe, is one of the problems. The other is that because of the angle the slot in the actuator makes with the shoe, it will pop out of the shoe. I need to modify it to engage sooner. The best way to do this may be to modify the interface with the front shoe.
I have NEVER needed to modify this lever....thus I seriously doubt you need to do it also.
AS long as the tangs...that are made into the lever...that fit into the shoes and causes them to be pushed outwards....and these notch tangs that fit into the shoes do not pop out...then you do not have to worry.
IF you are testing this with NO rotor on the spindle... the lever WILL move more than needed...and seem that it is not right.
Put your rotor on..and tighten up the lower adjuster til the rotor will not move.. then back it off about 6-9 teeth ...then manually move the lever and see what happens. No cable are needed at this time. IF you can spin the rotor...which is held on with your lug nuts to make sure it is installed correctly....and apply pressure on the lever and it stop the rotor...you are good to go.
Then it is just a balancing act on setting the adjusters at the wheel and your lower cable adjustment to achieve the 80 pounds on force being measured from the second finger groove in the handle from the top that is needed and outlined in the service manual to take it from the 13th click to the 14 click in the park brake handle.
There is too much play in the lever. With the rotor on and the brake shoes adjusted as you described, I can here the lever pop out of the rear shoe when I press on it with my finger. This happens as the shoe pushes up against the drum or encounters resistance. This might also be because the angle the lever makes with the part that encounters the shoe creates quite an acute angle before it encounters resistance. the notch for the rear shoe starts to form angle with a lever that tends the to push the shoe out and the lever more in.
Landon,
Now you can do whatever you wish. But Iw ill take some photos today and post them.
I have encountered this 'slipping off' effect when pressure it being applied to the lever. BUT..it normally happens on factory parts that are worn.
I am NOT saying that I have not encountered some of the ends of this lever NOT being all that it can be and there is a rounded edge to it so it does not engage into the notch or groove cut into the shoe.
I am NOT saying you are crazy and it is not happening.
I am assuming that the photo in POST #7 is the right side??
I can add more tonight when I'm not on my phone. I had the same problem. What fixed it was ditching the stainless brake shoes an putting in the stock steel/fiber replacements. That lever popped our several times. It is a chore to put back. The stainless hardware worked fine with stock shoes.
Search for my username and stainless parking brake and I may have posted something meaningful.
Landon,
Now you can do whatever you wish. But Iw ill take some photos today and post them.
I have encountered this 'slipping off' effect when pressure it being applied to the lever. BUT..it normally happens on factory parts that are worn.
I am NOT saying that I have not encountered some of the ends of this lever NOT being all that it can be and there is a rounded edge to it so it does not engage into the notch or groove cut into the shoe.
I am NOT saying you are crazy and it is not happening.
I am assuming that the photo in POST #7 is the right side??
DUB
I just appreciate all the help Dub. Thank you very much sir. Yes this picture is of the right side of the vehicle. I'm attaching a few more photos. This time of the left side. The drum has a small lip from wear, nothing excessive. Especially for something that is just meant to hold the car. I tried to show some pictures of what kind of gap there is between the shoe and the lever at the roughly 90 degree lever position. In order for the lever to engage the shoe it has be somehwere around the 45 degree point and that's where the stainless starts to slip. PIctures of the drum and backping plate/spindle as well. Other than being dirty, they look fine to me.
Last edited by richkid0808; 05-08-2018 at 11:26 AM.
I can add more tonight when I'm not on my phone. I had the same problem. What fixed it was ditching the stainless brake shoes an putting in the stock steel/fiber replacements. That lever popped our several times. It is a chore to put back. The stainless hardware worked fine with stock shoes.
Search for my username and stainless parking brake and I may have posted something meaningful.
TLR Don't mix stainless with stainless.
Really!? That's surprising. What would you say made the difference? Is the steel/fiber just a bit more grippy on the stainless lever?
Really!? That's surprising. What would you say made the difference? Is the steel/fiber just a bit more grippy on the stainless lever?
DUB has seen a lot more of these than me! It looks like I did not post photos when I did this, but it was a very frustrating several weeks, working a few hours a time here and there. My one bit of anecdotal data is that I had to reset the lever several times (which means jackstands, wheel, caliper, and rotor have to come off) with the stainless hardware/stainless shoes (both bought as new replacements).
I kept the stainless hardware installed, and swapped over to the stock-style shoes, and the problem went away. I also replaced the rotors, and did the adjustment as close to what is in the shop manual as I could without removing the half-shafts. I burnished the pads, and used a fish scale to get the 80 lb pull.
Prior to doing all of this, I had the lever pop out of place several times. It is possible that the stainless lever "galls" with the stainless shoes (too much friction). It is also possible that the stainless shoes were not cut properly.
At any rate, stainless hardware, stock shoes, and following the shop manual worked for me. Other methods and combinations did not.
As you can hopefully clearly see. This is an original lever and how the corner is a nice sharp angle and not rounded off.
DUB
Wow that edge looks a lot crisper than the ones that came in my kit. I think that would make a big difference in how well this system could work. The ones I took off didn't look like this either, and were frozen so I imagine the parking brake had already been serviced at some point.
DUB has seen a lot more of these than me! It looks like I did not post photos when I did this, but it was a very frustrating several weeks, working a few hours a time here and there. My one bit of anecdotal data is that I had to reset the lever several times (which means jackstands, wheel, caliper, and rotor have to come off) with the stainless hardware/stainless shoes (both bought as new replacements).
I kept the stainless hardware installed, and swapped over to the stock-style shoes, and the problem went away. I also replaced the rotors, and did the adjustment as close to what is in the shop manual as I could without removing the half-shafts. I burnished the pads, and used a fish scale to get the 80 lb pull.
Prior to doing all of this, I had the lever pop out of place several times. It is possible that the stainless lever "galls" with the stainless shoes (too much friction). It is also possible that the stainless shoes were not cut properly.
At any rate, stainless hardware, stock shoes, and following the shop manual worked for me. Other methods and combinations did not.
Yea I was having a hard time finding information on when you had done this. I think, the point where I'm at now, I will try modifying the lever to get the correct throw when it's engaged. Thank you so much guys for all your help!
I would either get a new kit under warranty due to the lever you have is obviously defective....or...take it to someone who has a TIG welder and let them weld some stainless onto it. and file it as needed.

 05-05-2018, 07:03 PM


 R Don't mix stainless with stainless.