
I need help with my 1969 C3 Lower Dash Pad
 12-12-2018, 06:08 PM
#1
Instructor

Thread Starter
Good afternoon friends!
It has been a while since I posted. Last February my C3 went down with a bad water pump and a bad distributor, and I vowed not to spend any money on it until I paid off the money I borrowed to buy it. Then, I decided that, even though I didn't want to spend any money, I could still work on the car. Sooo... I had this annoying electrical short in the dash. I figured I could just open up the dash and track that down, easy and cheap. Until the lower left dash pad disintegrated in my hands when I pulled it out, and I found that my center dash console had been butchered by the last owner and came out in pieces as well.
OK... so fast forward to November, and now I have bought a new lower left dash pad, a new center console/gauge cluster, a new stereo, and all of the other little pieces and parts. Here is the problem... I can't get the lower left dash pad back in. I am pretty good at Tetris, but I cannot find way to flip, turn, cajole, or push this dashpad and the speedometer/RPM clusters into place. I have removed the steering wheel, and loosened the steering column to get it to drop a little, but I have not removed it completely. I am beginning to think the reason the dashpad disintegrated in the first place was that the previous owner broke it and jammed it back into place.
My question for all of you is this... do I need to remove that steering column completely to get the dashpad back in? If so, how difficult of a job is that? If I am going to go to that extent, then I will go the extra mile and replace it with a tilt/telescoping column.
Thoughts??
 12-12-2018, 06:26 PM
#2
Le Mans Master

Removing the steering column is easy, 2 bolts at the rag joint, shift interlock cable, 2 bolts holding it to the dash and 2 nuts inside at the base. Unplug the harmonica plug and the ign plug and it's out of there. Oh ya, a trim piece that you already have off. Makes the dash job a lot easier.
The following users liked this post:
Auggievf (12-13-2018)
12-13-2018, 07:43 PM
#4
Former Vendor
Member Since: Aug 2006
Location: Jeffersonville Indiana 812-288-7103
Posts: 76,656
Received 1,813 Likes
on
1,458 Posts
St. Jude Donor '08-'09-'10-'11-'12-'13-'14-'15

Here is a step by step on how to do this.. it is the easiest way to do the job.
http://repairs.willcoxcorvette.com/w...ad-removal.pdf
http://repairs.willcoxcorvette.com/w...ad-removal.pdf
The following users liked this post:
caskiguy (12-13-2018)
12-13-2018, 08:07 PM
#5
Instructor
Thread Starter
Here is a step by step on how to do this.. it is the easiest way to do the job.
http://repairs.willcoxcorvette.com/w...ad-removal.pdf
http://repairs.willcoxcorvette.com/w...ad-removal.pdf
12-13-2018, 10:38 PM
#6
Drifting


I've been restoring the interior on my '70 model and have done much of the same as you: radio bezel, head unit, e-brake console and upper dash pad.
Don't expect everything to fit perfectly, it will be a miracle if it does! Willcox [Ernie] was a huge help to me as well, I just rebuilt my seats with parts from him [leather covers, foam, trim and hardware]
Hope you didnt buy one of those cheapass repop stereos! My buddy has one and it's crap. I installed an Alpine...
12-13-2018, 11:37 PM
#7
Instructor
Thread Starter
I've been restoring the interior on my '70 model and have done much of the same as you: radio bezel, head unit, e-brake console and upper dash pad.
Don't expect everything to fit perfectly, it will be a miracle if it does! Willcox [Ernie] was a huge help to me as well, I just rebuilt my seats with parts from him [leather covers, foam, trim and hardware]
Hope you didnt buy one of those cheapass repop stereos! My buddy has one and it's crap. I installed an Alpine...
Don't expect everything to fit perfectly, it will be a miracle if it does! Willcox [Ernie] was a huge help to me as well, I just rebuilt my seats with parts from him [leather covers, foam, trim and hardware]
Hope you didnt buy one of those cheapass repop stereos! My buddy has one and it's crap. I installed an Alpine...
12-14-2018, 05:19 AM
#8
Team Owner


I have owned my '72 since '95, and in all those years I have of course had the dash out several times, as the growth of this hotrod project has continued, I got tired of the silliness of the way it was installed....
SO, the tach and speedo were wired together and only one main ground wire clipped on the back of one housing, the lights boiled down to 4 wires as I recall, backlights all wired together, r/turn, l/turn, and ebrake..... so I got a 4 pin inline connector and wired it in ONE plug and all the lights are now GREEN LED's and I have white face instruments now....I can have my panel OUT and on the bench in about 15 minits now.....been that way for about 18 years now....
I"m lazy.........
12-14-2018, 10:02 AM
#9
Instructor
Thread Starter
I have owned my '72 since '95, and in all those years I have of course had the dash out several times, as the growth of this hotrod project has continued, I got tired of the silliness of the way it was installed....
SO, the tach and speedo were wired together and only one main ground wire clipped on the back of one housing, the lights boiled down to 4 wires as I recall, backlights all wired together, r/turn, l/turn, and ebrake..... so I got a 4 pin inline connector and wired it in ONE plug and all the lights are now GREEN LED's and I have white face instruments now....I can have my panel OUT and on the bench in about 15 minits now.....been that way for about 18 years now....
I"m lazy.........
SO, the tach and speedo were wired together and only one main ground wire clipped on the back of one housing, the lights boiled down to 4 wires as I recall, backlights all wired together, r/turn, l/turn, and ebrake..... so I got a 4 pin inline connector and wired it in ONE plug and all the lights are now GREEN LED's and I have white face instruments now....I can have my panel OUT and on the bench in about 15 minits now.....been that way for about 18 years now....
I"m lazy.........
12-14-2018, 10:20 AM
#10


You don't necessary have to remove the steering column in your c3 to get the lower dash back in. Loosen the attaching screws to the underside of the dash. Make sure the steering column trim piece is removed. Push the the lower dash pad back in and re-attach the upper dash pad screws. If you are using a reproduction dash pad, sometimes they don't fit as well as the original ones do. Personally I would always opt for restoring an original dash pad vs installing a repo one. just my .02.....
12-14-2018, 12:31 PM
#11
Former Vendor
Member Since: Aug 2006
Location: Jeffersonville Indiana 812-288-7103
Posts: 76,656
Received 1,813 Likes
on
1,458 Posts
St. Jude Donor '08-'09-'10-'11-'12-'13-'14-'15
Guys... I'll be perfectly clear on this.
Anyone that doesn't pull the column is making the job harder!
Yes you can take the two lower bolts loose from the column support and yes you can push the column down and remove the dash pad! But the issue is that the original sub-straights (the plastic backing of the pad) becomes brittle over the years. The weight of the pad with both the speedo and the tach installed is pretty darn heavy and so the likely hood is that you'll break the U section of the sub straight (the area over the steering column) in the dash pad is very high!
To make things even better is with the column out of the car you can sit in the drivers seat with the pad on your leg and plug up the wires and then the speedo cable (and tach depending on the year). With the column installed in the car you can't do this so you have to play "Mr. Upside Down" to complete the install with the column in.
This alone is the main reason I wrote the page on how to pull the left pad... "The easy way". This is how we do it here each and every time! It's too easy to pull the column and it makes the job so much easier.
And.. the new pads from CA fit like a glove. I was instrumental in the re-tooling of this dash even having two CA employee's come down here to do test fits and make changes to the mold while we worked with them to improve the fitment of the pads. Since this change was made the left pads fit perfectly. You can see some pictures of this at this link
You can scroll through this link and see pictures of the newer reproduction pads
http://repairs.willcoxcorvette.com/?...vette+dash+pad
This link is from the original fitment test we did a few years back.
http://repairs.willcoxcorvette.com/1...-pad-test-fit/
IMHO,
Willcox
Last edited by Willcox Corvette; 12-14-2018 at 12:36 PM.
12-14-2018, 01:06 PM
#12
Instructor
Thread Starter
Guys... I'll be perfectly clear on this.
Anyone that doesn't pull the column is making the job harder!
Yes you can take the two lower bolts loose from the column support and yes you can push the column down and remove the dash pad! But the issue is that the original sub-straights (the plastic backing of the pad) becomes brittle over the years. The weight of the pad with both the speedo and the tach installed is pretty darn heavy and so the likely hood is that you'll break the U section of the sub straight (the area over the steering column) in the dash pad is very high!
To make things even better is with the column out of the car you can sit in the drivers seat with the pad on your leg and plug up the wires and then the speedo cable (and tach depending on the year). With the column installed in the car you can't do this so you have to play "Mr. Upside Down" to complete the install with the column in.
This alone is the main reason I wrote the page on how to pull the left pad... "The easy way". This is how we do it here each and every time! It's too easy to pull the column and it makes the job so much easier.
And.. the new pads from CA fit like a glove. I was instrumental in the re-tooling of this dash even having two CA employee's come down here to do test fits and make changes to the mold while we worked with them to improve the fitment of the pads. Since this change was made the left pads fit perfectly. You can see some pictures of this at this link
You can scroll through this link and see pictures of the newer reproduction pads
http://repairs.willcoxcorvette.com/?...vette+dash+pad
This link is from the original fitment test we did a few years back.
http://repairs.willcoxcorvette.com/1...-pad-test-fit/
IMHO,
Willcox
Anyone that doesn't pull the column is making the job harder!
Yes you can take the two lower bolts loose from the column support and yes you can push the column down and remove the dash pad! But the issue is that the original sub-straights (the plastic backing of the pad) becomes brittle over the years. The weight of the pad with both the speedo and the tach installed is pretty darn heavy and so the likely hood is that you'll break the U section of the sub straight (the area over the steering column) in the dash pad is very high!
To make things even better is with the column out of the car you can sit in the drivers seat with the pad on your leg and plug up the wires and then the speedo cable (and tach depending on the year). With the column installed in the car you can't do this so you have to play "Mr. Upside Down" to complete the install with the column in.
This alone is the main reason I wrote the page on how to pull the left pad... "The easy way". This is how we do it here each and every time! It's too easy to pull the column and it makes the job so much easier.
And.. the new pads from CA fit like a glove. I was instrumental in the re-tooling of this dash even having two CA employee's come down here to do test fits and make changes to the mold while we worked with them to improve the fitment of the pads. Since this change was made the left pads fit perfectly. You can see some pictures of this at this link
You can scroll through this link and see pictures of the newer reproduction pads
http://repairs.willcoxcorvette.com/?...vette+dash+pad
This link is from the original fitment test we did a few years back.
http://repairs.willcoxcorvette.com/1...-pad-test-fit/
IMHO,
Willcox
So, I will say that, in support of what Wilcox has said, my dash pad was already broken when I pulled it out of the car, in exactly the manner Wilcox has described. It appears the previous owner pulled the dash pad to paint the vinyl, broke it, and just jammed it back in when they were done. In addition to all of the damage they did to the substrate, they also managed to break half of the light bulbs when they jammed it back into place. (Incidentally, that was what was creating the electrical short that started this whole mess.)
I did try removing the lower trim and a column bolts and giving myself some wiggle room to squeeze the dash pad in, but it was pretty clear it would not go in easily and I was afraid of breaking the dash pad, as had been done previously. Hence, I finally stopped and decided to risk looking like a newbie and ask the question. This is entire thread is confirmation that this is a common problem!
I have no doubt that people smarter and handier than I am have been able to slip this dash pad in place without removing the column, but I think it looks easy enough to pull it, and I like the idea of being able to connect everything while sitting right side up. I am a 6'0", 300 lbs guy, so I don't contort well.
I have two final questions to ask, considering that I am going to pull the steering column to get this done... one, I REALLY do not want to do this again for something as stupid as a blown light bulb, so I have ordered a bunch of LED replacements for the original 1895 bulbs. Has anyone used these bulbs in their cars: http://a.co/d/2cbbvy7? Is there anything I should know about switching to LEDs?
Second, I am going back and forth between whether I should just replace my steering column with a T/T column. It would definitely be more comfortable for me (see previous comment about my size), but it is a hefty price tag at about $1,500 for a rebuilt column. Any comments on that?
12-14-2018, 01:08 PM
#13
Instructor
Thread Starter
You don't necessary have to remove the steering column in your c3 to get the lower dash back in. Loosen the attaching screws to the underside of the dash. Make sure the steering column trim piece is removed. Push the the lower dash pad back in and re-attach the upper dash pad screws. If you are using a reproduction dash pad, sometimes they don't fit as well as the original ones do. Personally I would always opt for restoring an original dash pad vs installing a repo one. just my .02.....
12-16-2018, 06:08 PM
#14
Team Owner
Just the bolts under the dash itself....you may want to loosen the firewall ones with stock steering, but I put a rack in my car many years ago, and so I don't bother.....I have a late shark TT wheel/column, and I set the wheel on the seat....
12-16-2018, 10:36 PM
#15
12-17-2018, 11:40 AM
#16
Burning Brakes


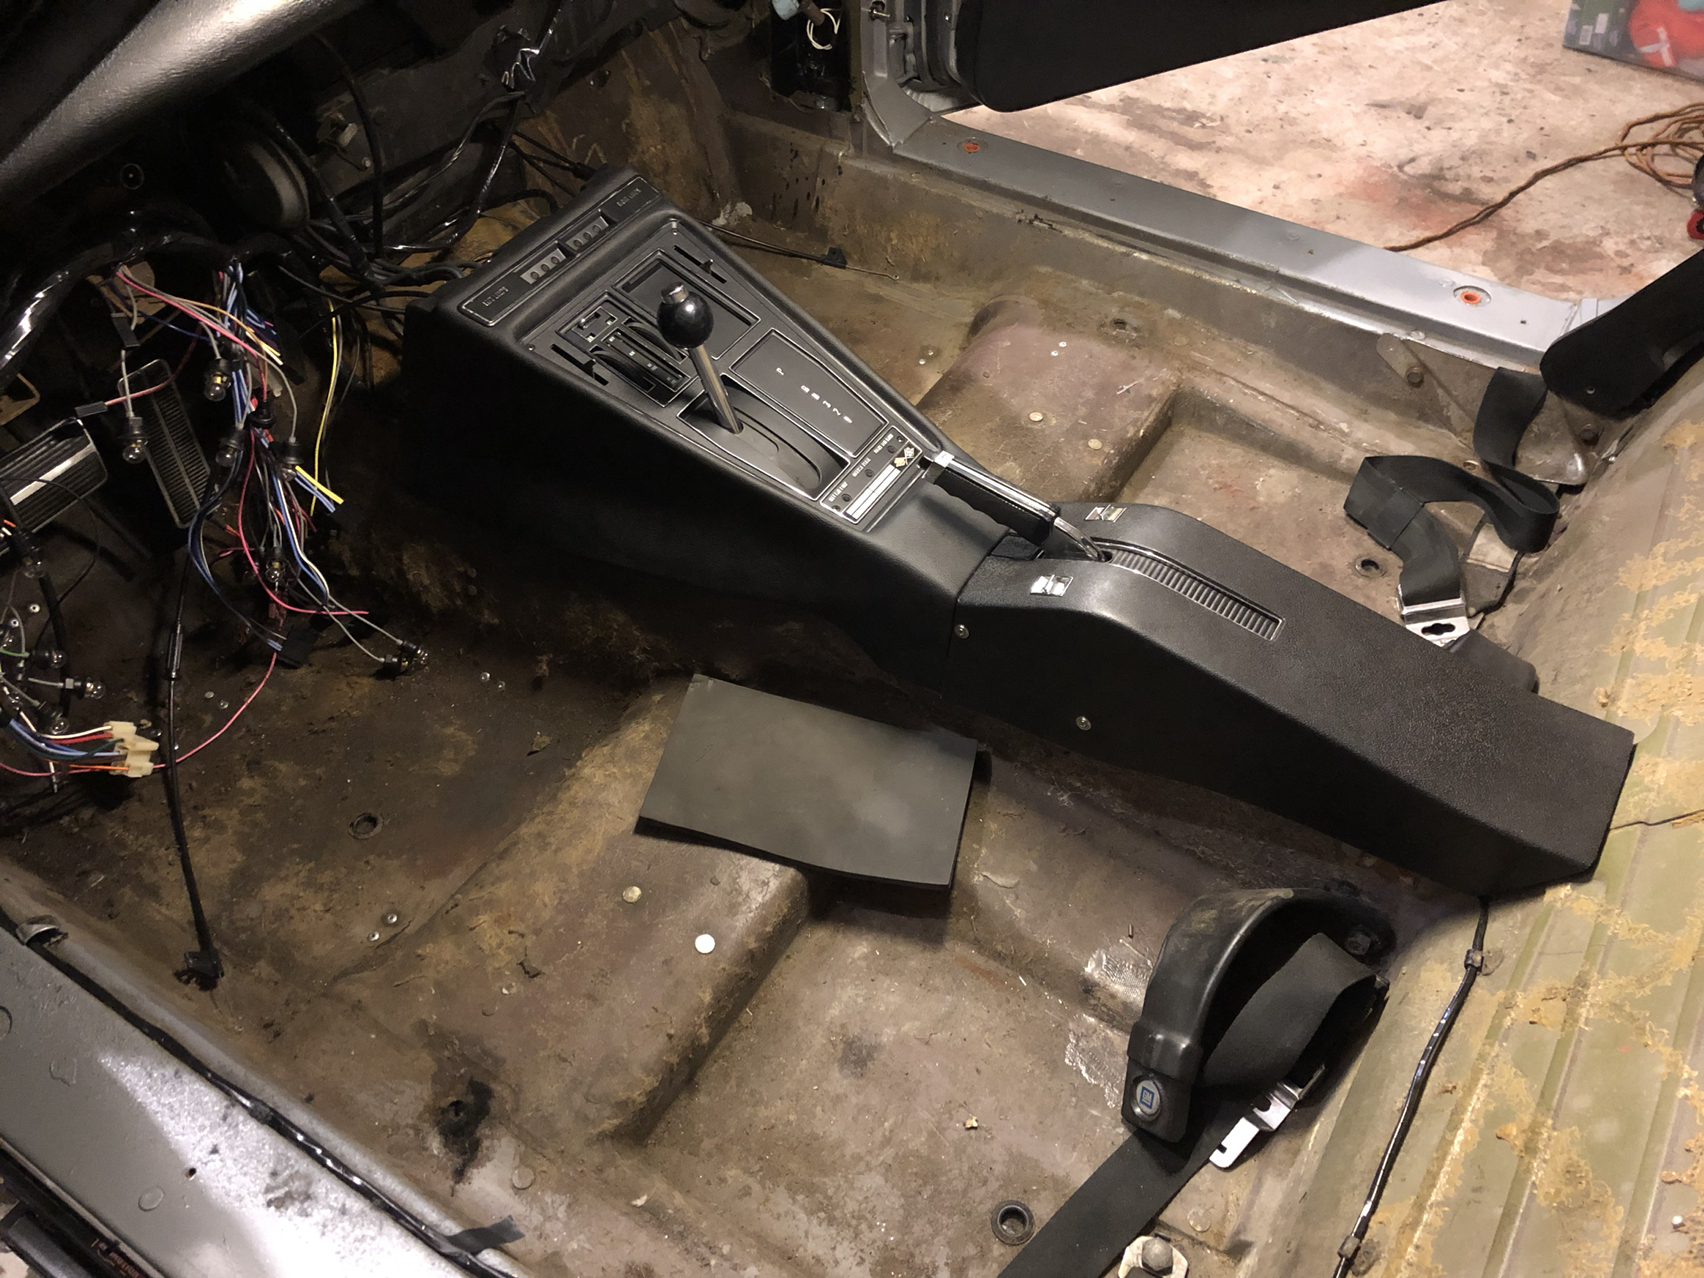
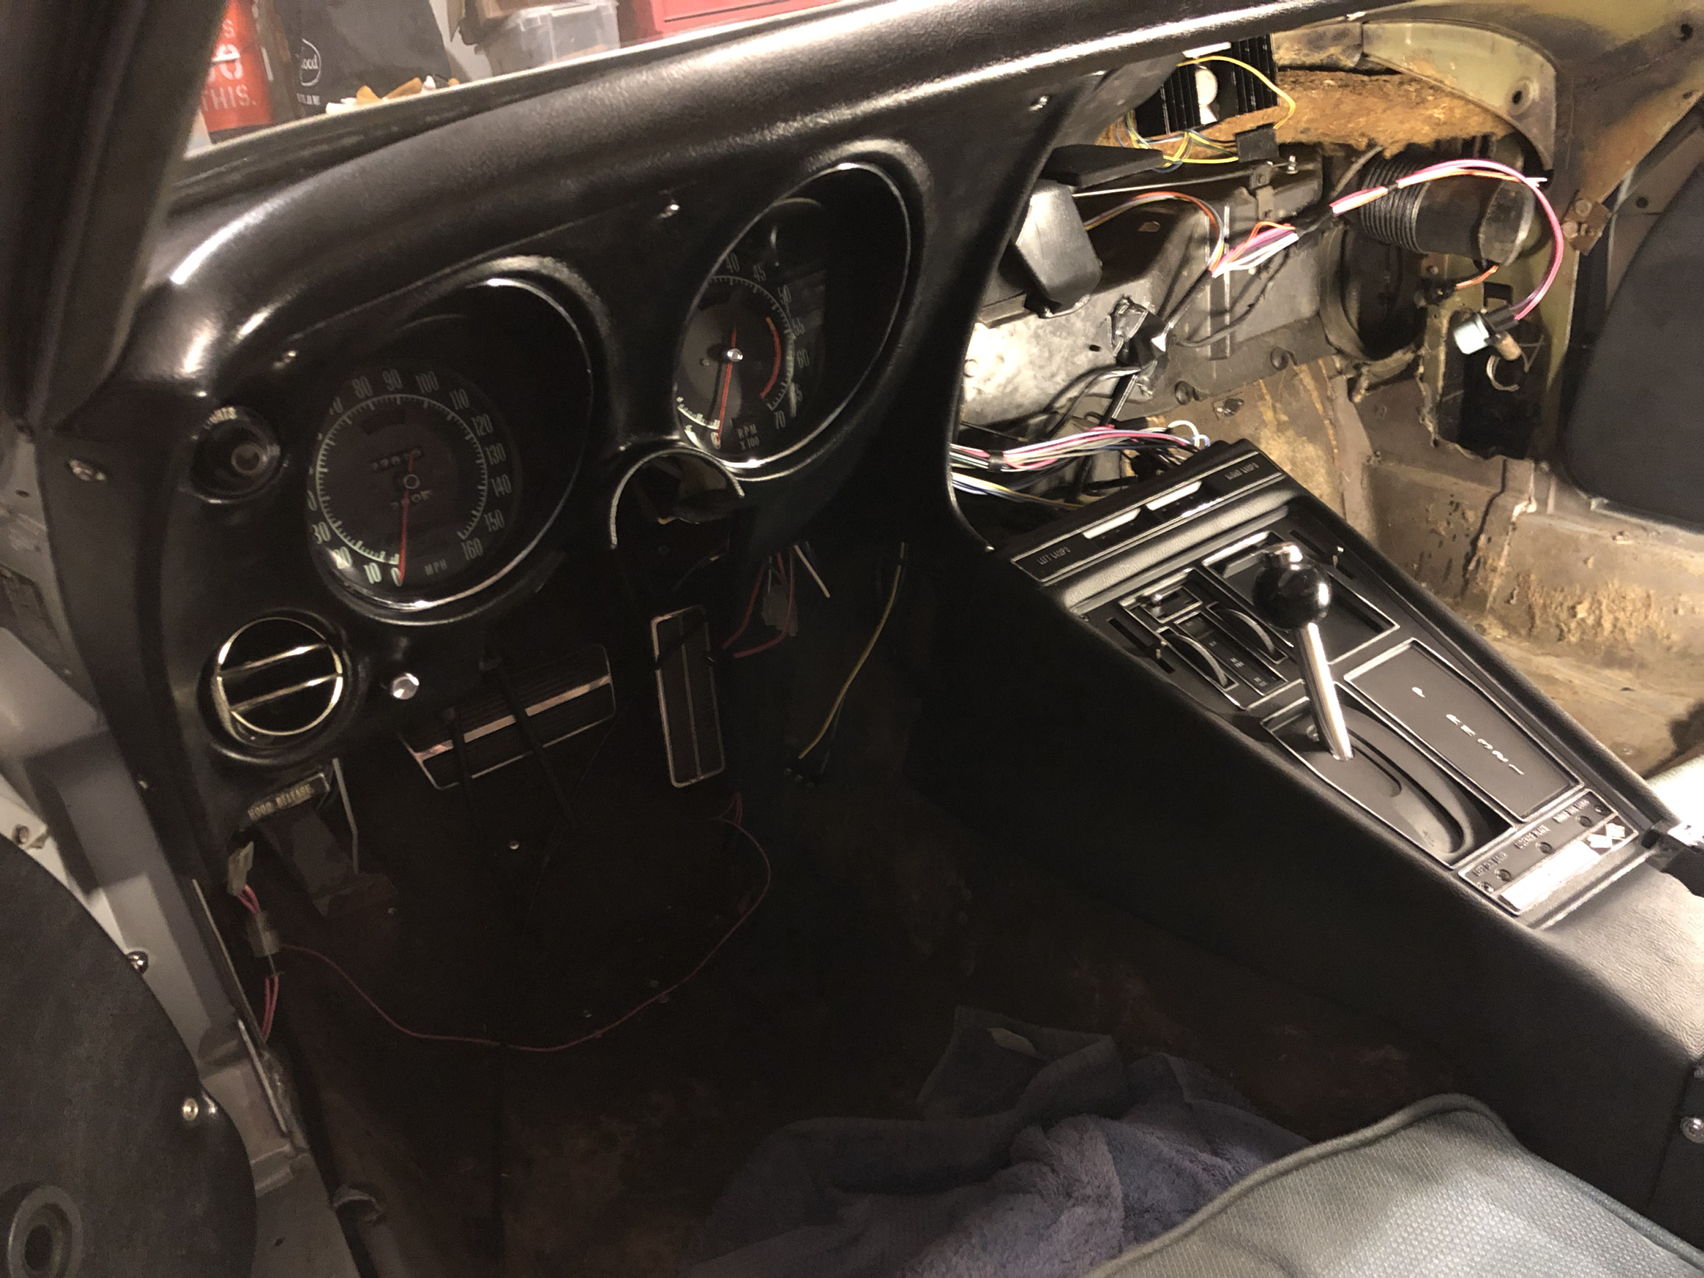
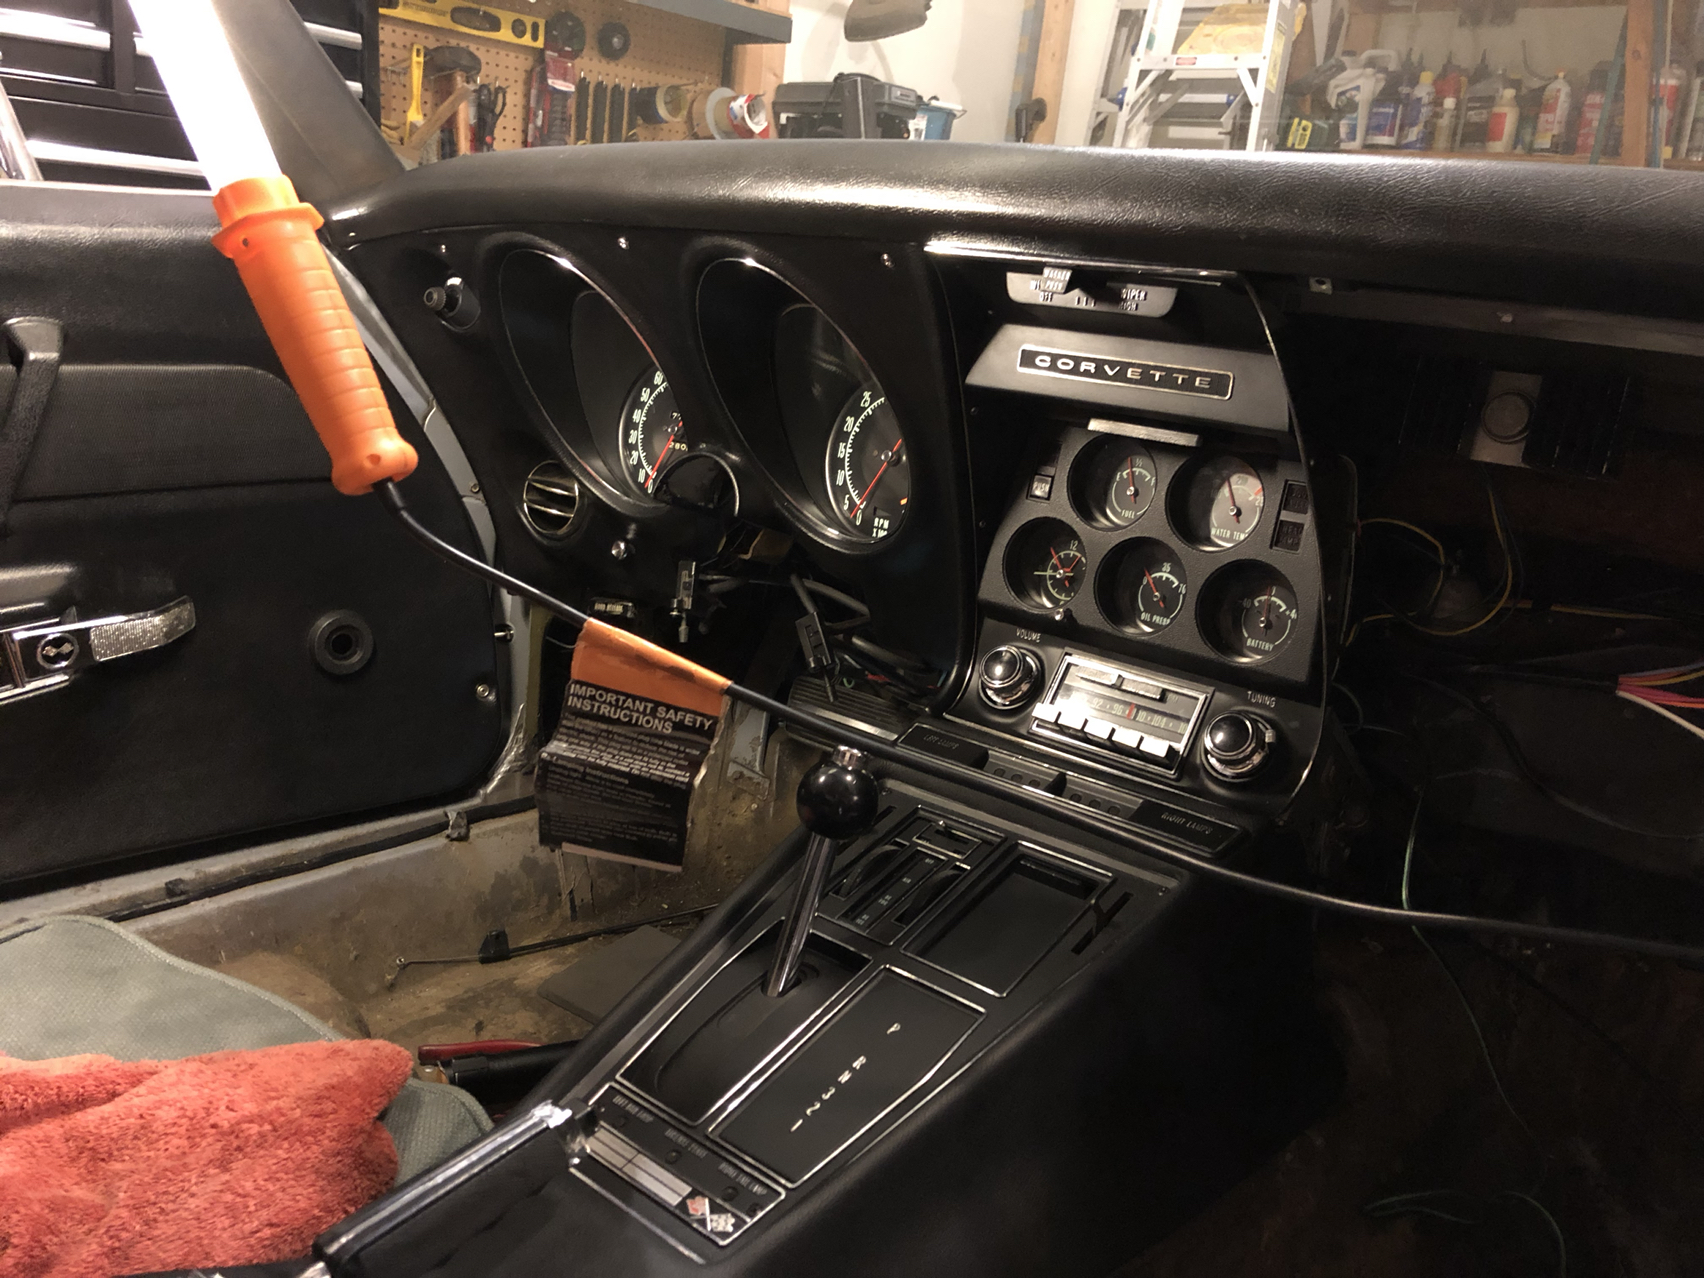
I just did this (over the course of a couple of weekends) and thought I seem to say this about working on most stuff with this car the dash work SUCKS - 10lbs in a 5lbs bag for sure! To make things worse, I replaced all the wiring harnesses so everything was stiff and I spent a lot of time making sure the wiring position was as close to the AIM as I could make out, other photos and photos of my old harnesses. My original dash pad was trashed but I did manage to find an original that's about perfect. I debated on going with a whole new set, but decided to use the OE. I also replaced my center bezel, not because is was broke, but because I wanted to put in an OE radio and the PO put in a 70's 8 track and cut a bit out of the radio bezel. Ugg! Anyway.... I did this with the steering column completely out. I don't know that I'd do this with it in, but I also had my wife help me with supporting the dash pad as I plugged things in. The speedo and tach were a bit of a bear, and some light wires were a little tight based on the harness position but it was very difficult to get the harness routed through all that and have everything fit. I used a long wooden broom handle stick to into the steering column hole as leverage and support in holding up the panel. I also found that I needed to have the center console in place to have the corner in place as we positioned the dash in place. Once I had everything in place, we slowly lifted and tilted the dash pad in place all while making sure wires and everything was staying place. NOT fun. I had to pull it back a few times to re connect bulbs that would pull out or re position the harness a bit. Then when I thought I had it....I'd forgotten to tighten the ground wires up by the light switch and also forgot to connect the vacuum lines coming from the light switch. This past weekend We got the center bezel in place. Not to bad if you don't have a radio. The OE radio fills every bit of space - kinda makes me rethink going OE, but I spent the time and money to have it rebuilt/serviced etc. Everything has lined up so far with the exception of the top center bezel screw was a bit off...but I managed to get it over some. My biggest concern is the oil pressure line. It's in good shape and was not leaking so I don't have any reason to think it would leak, but it's something I'll be thinking about. I'll be ready to energize the system this coming weekend and hopefully be able to fire it up of the Holiday break. Beating a dead horse here, but a few things I take away from this, is patients and it's very helpful to have a helper. Disconnecting the tach also gives you a bit of slack for more room. Also, Ernie and a few others have been a HUGE help when I've questioned some of the things I was doing. Frankly, I was actually thinking of sending Ernie a plane ticket out to DC for a few days of guiding me through this! Below are a few photos of what I've done so far. I'm not going to put the passenger side dash pad in until I know everything is working the way it should. 

Last edited by nix1981; 12-17-2018 at 11:43 AM.