
Mn-brent ls1-4l60e swap
 02-03-2010, 09:51 AM
#41
Burning Brakes

Brent you should have called. Just send the stuff back and I will refund you. Too bad it didn't work! It turned out really nice on James car.
For those of you that are thinking about doing the LS swap, give me a shout if you need parts or information. I specialize in these and I will help you out in any way possible. (sorry for the shameless plug)
For those of you that are thinking about doing the LS swap, give me a shout if you need parts or information. I specialize in these and I will help you out in any way possible. (sorry for the shameless plug)
 02-06-2010, 08:37 PM
#42
Safety Car


Thread Starter

Next installment:
Got the Russell #640940 fuel fitting from Summit after 5 weeks. So got out to the garage today and did some more work. Finished up the heater hoses. They have heat wrap around them near the headers area and coil loom anywhere else anything may be touching. I reinstalled 2 new heater cut-off valves, since I wont have any AC. Don't need it more than a few days a year up here in Mn. Car has not had cold AC since I bought it 8 years ago.
Pic of the finished 99+ Vette filter-regulator:
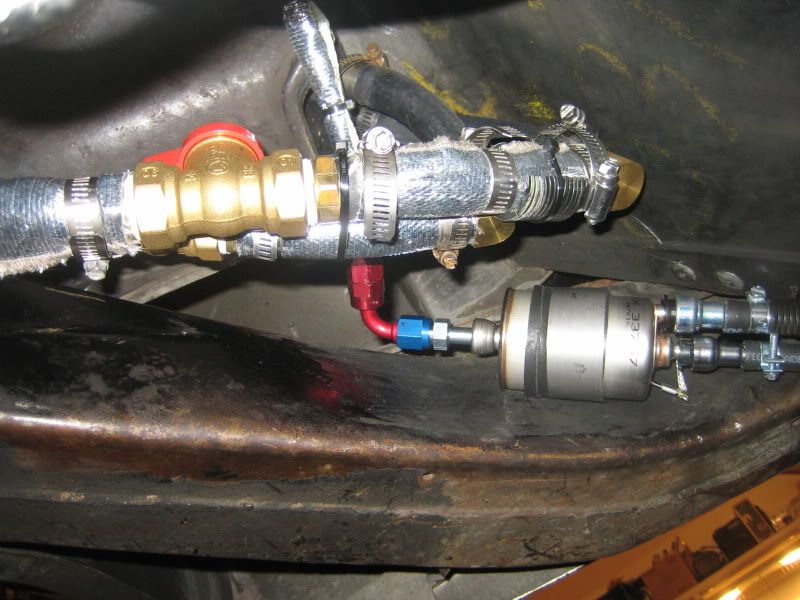
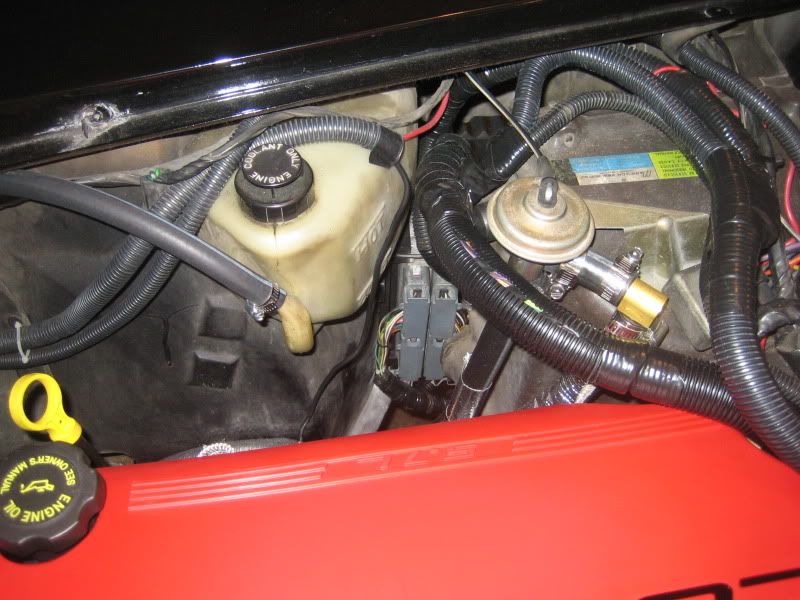
Pic of the heater hoses going to the OEM vacuum switch and all the heat wrap on the hoses, etc..
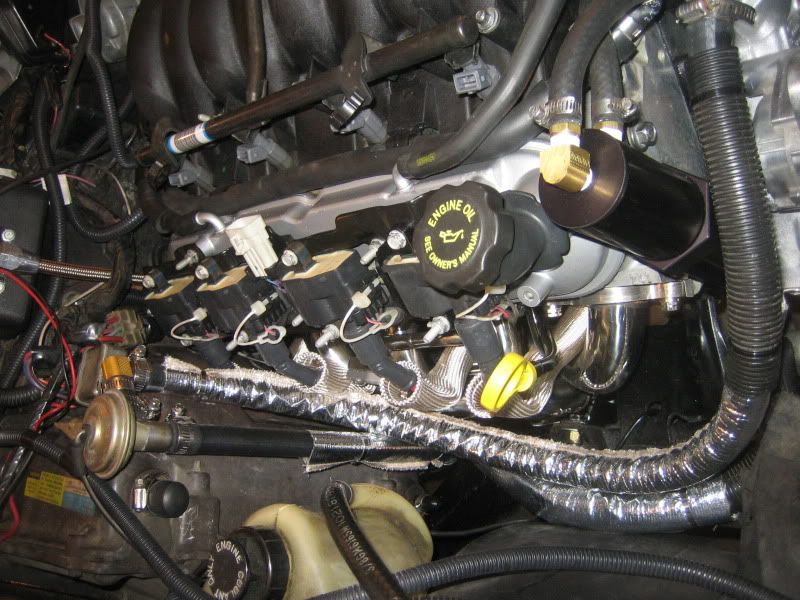
Installed a Mike Norris PCV catch can. Would have gone with a Rev Extreme can, but they are much bigger and I wasn't sure how much space I would have to spare. Quite happy with this. All these LS items are hard to come by. Had to get ahold of Mr Norris himself and he told me a distributor that has them is stock presently. That's the way to do it!! Ill have to get a 90 degree brass hose barb elbow to finish this off, as the PCV hose is kinking from the PCV to the can.

Pic of the upper rad hose set-up with 1/4 inch steam tube fitted to it. This is Gates #22352 upper rad hose. It would have fit without modifications, but I wanted the pipe in the steam tube. How cool is that!! Got the upper hose steam fitting from Jags That Run. Fuel line now connected up top as well.
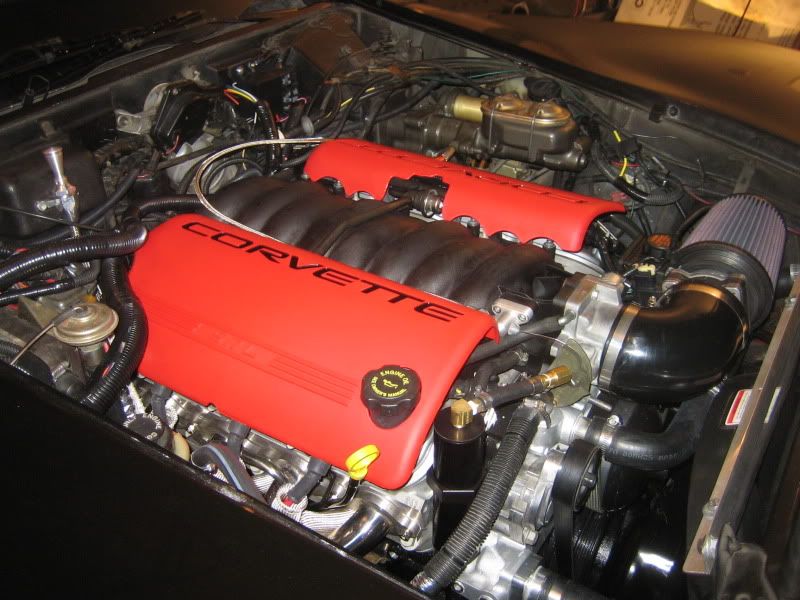
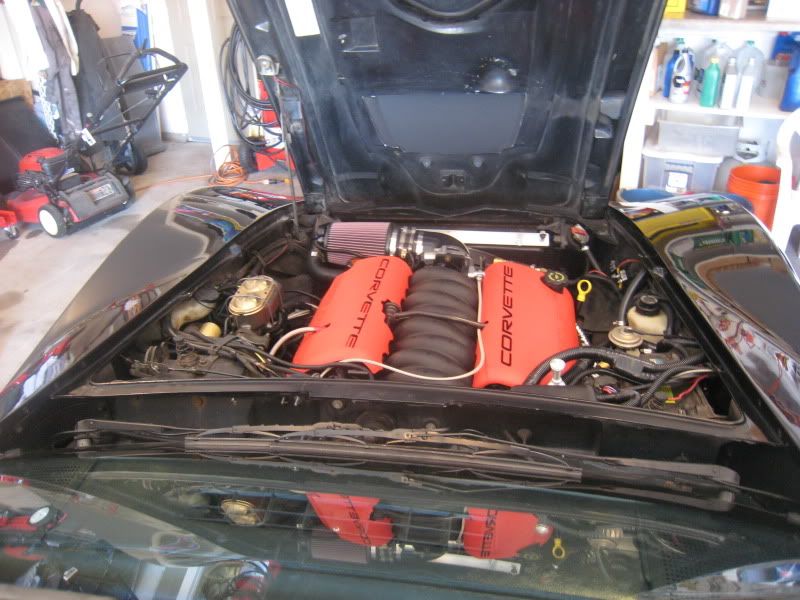
Mock up of the new smaller K&N RU-2590 filter with Z06 coil covers

Got the Russell #640940 fuel fitting from Summit after 5 weeks. So got out to the garage today and did some more work. Finished up the heater hoses. They have heat wrap around them near the headers area and coil loom anywhere else anything may be touching. I reinstalled 2 new heater cut-off valves, since I wont have any AC. Don't need it more than a few days a year up here in Mn. Car has not had cold AC since I bought it 8 years ago.
Pic of the finished 99+ Vette filter-regulator:
Pic of the heater hoses going to the OEM vacuum switch and all the heat wrap on the hoses, etc..
Installed a Mike Norris PCV catch can. Would have gone with a Rev Extreme can, but they are much bigger and I wasn't sure how much space I would have to spare. Quite happy with this. All these LS items are hard to come by. Had to get ahold of Mr Norris himself and he told me a distributor that has them is stock presently. That's the way to do it!! Ill have to get a 90 degree brass hose barb elbow to finish this off, as the PCV hose is kinking from the PCV to the can.
Pic of the upper rad hose set-up with 1/4 inch steam tube fitted to it. This is Gates #22352 upper rad hose. It would have fit without modifications, but I wanted the pipe in the steam tube.
How cool is that!! Got the upper hose steam fitting from Jags That Run. Fuel line now connected up top as well.Mock up of the new smaller K&N RU-2590 filter with Z06 coil covers
Last edited by MN-Brent; 02-06-2010 at 08:42 PM.


 02-23-2010, 01:39 PM
#45
Safety Car
Thread Starter
New Updates:
Its been a while since I posted. Doing lot of little things to make everything fit well together, and try to keep things accessible for future maintenance probabilities
I am going to mount the PCM down on the pasenger side fender behind the wheelwell and in fron of the defunct AC box. To do this, I needed to extend my PCM connectors 18 inches. I went to a junkyard and found an S10 with the same PCM as my F-body LS1, cut out about 30 inches of wire, and took tons of GM coil loom from every car I could find good pieces in for all the wiring I'm needing to cover up. I got all that + several HD Bosch relays for $20 bux. Got some spares for any possible issuees I could come up with.
I also needed to convert my brake light switch signal from a 12V with brake to 0V with brake to the PCM. I did this using a Bosch relay and the 87a terminal to get the signal it needed. I mounted that relay under the shifter console.
Any other signal that I needed in the interior to go to the PCM, I just tapped into the unused 82 ECM wiring and ohmed it out to the engine side of the firewall. By doing this, I didn't need to run any wires through the firewall, just use the existing as needed. As long as you draw your schematic of what you did, then for any future troubleshooting, you know what you have. Easy as pie really!!! Just time consuming.
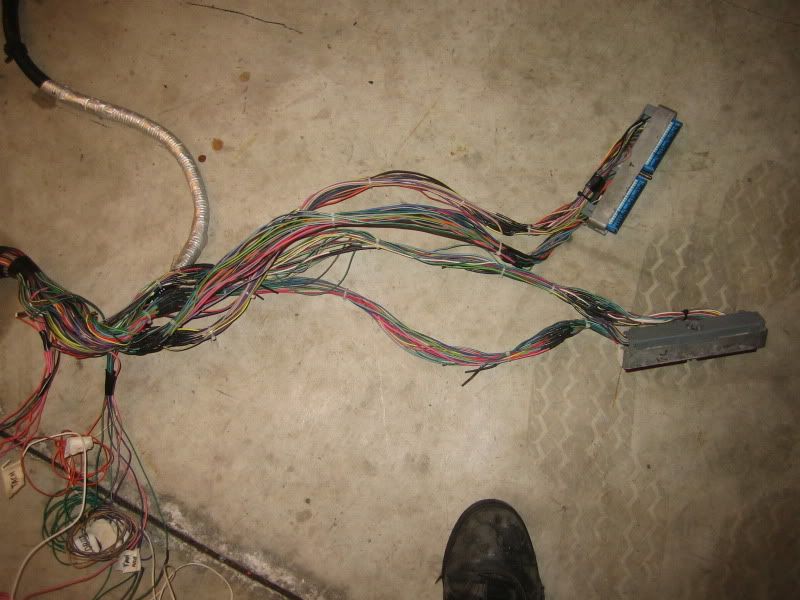
Here is a shot of the 18 inch extended wire harness. Took about 2 days of cutting, stripping, soldering, and heatshrinking to get this done. All wire extensions were color matched.
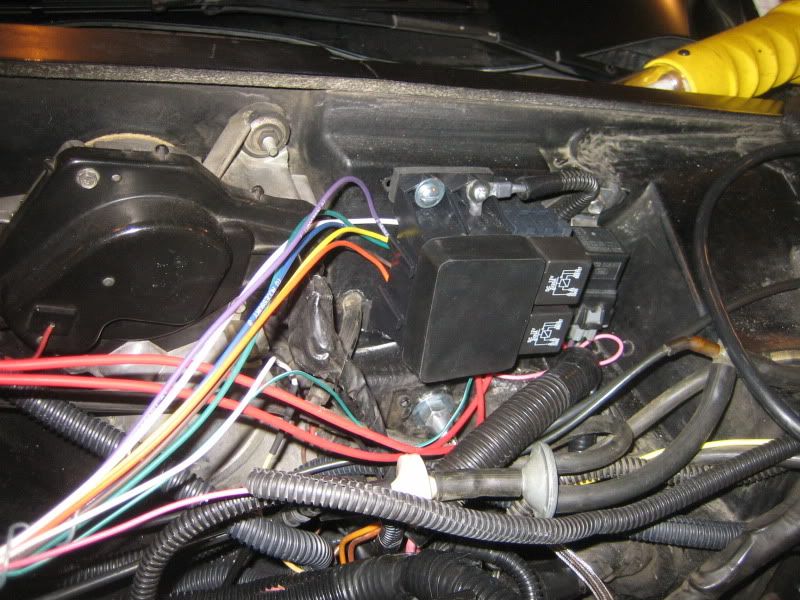
I mounted the Painless 70217 weatherproof fuse-relay box up on the firewall for a nice clean location. These are 40Amp relays. The single relay next to it is the PCM controlled fuel pump relay.
The Lokar TC1000LS1 throttle cable will not go in as is. You need to convert the pedal side machined aluminum bushing to the Corvette plastic bushing to fit the throttle lever hole. Luckily for me, my original throttle cable was replaced at some point, so the bushing was like new, not brittle as they can be if they are original. I just cut the 82 cable, and fed that bushing onto the Lokar, after I removed all the Lokar pedal end stuff. The Lokar cable end ball fits PERFECTLY onto the Corvette plastic bushing.
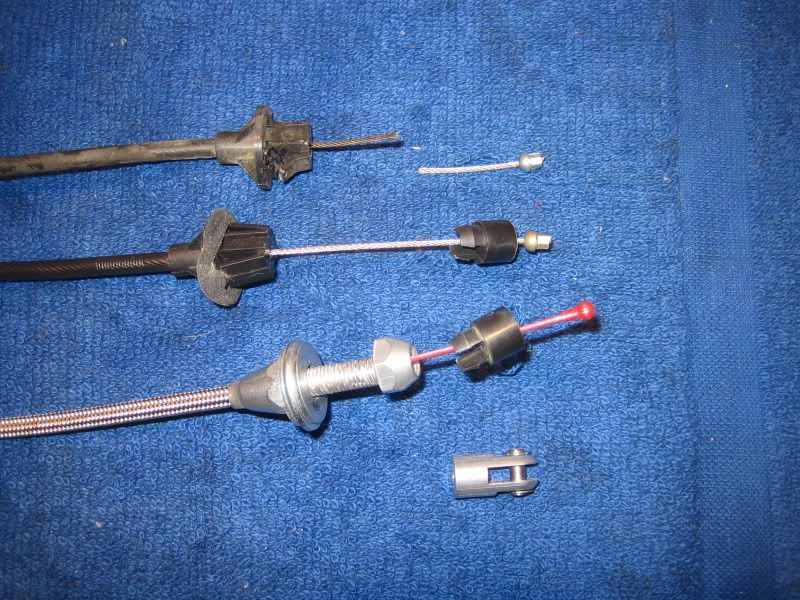
Here is the 82 cut up cable, with an 82 brand new cable (its for sale) and the Lokar modified cable. It went in with minimal swear words with a very short and skinny style cheap Chinese crap open end 9/16 wrench. I used a 9/16 flare wrench to hold the engine side of the cable nut in place while I turned the interior side nut to tighten it all down. Like I said, minimal swear words!!!
Finished up Lokar install. I was warned that I may not like the feel of this, but I have to say it initially feels as smooth as the 82 cable did. I'll wait until I actually drive it though for a full review!!
Its been a while since I posted. Doing lot of little things to make everything fit well together, and try to keep things accessible for future maintenance probabilities
I am going to mount the PCM down on the pasenger side fender behind the wheelwell and in fron of the defunct AC box. To do this, I needed to extend my PCM connectors 18 inches. I went to a junkyard and found an S10 with the same PCM as my F-body LS1, cut out about 30 inches of wire, and took tons of GM coil loom from every car I could find good pieces in for all the wiring I'm needing to cover up. I got all that + several HD Bosch relays for $20 bux. Got some spares for any possible issuees I could come up with.
I also needed to convert my brake light switch signal from a 12V with brake to 0V with brake to the PCM. I did this using a Bosch relay and the 87a terminal to get the signal it needed. I mounted that relay under the shifter console.
Any other signal that I needed in the interior to go to the PCM, I just tapped into the unused 82 ECM wiring and ohmed it out to the engine side of the firewall. By doing this, I didn't need to run any wires through the firewall, just use the existing as needed. As long as you draw your schematic of what you did, then for any future troubleshooting, you know what you have. Easy as pie really!!! Just time consuming.
Here is a shot of the 18 inch extended wire harness. Took about 2 days of cutting, stripping, soldering, and heatshrinking to get this done. All wire extensions were color matched.
I mounted the Painless 70217 weatherproof fuse-relay box up on the firewall for a nice clean location. These are 40Amp relays. The single relay next to it is the PCM controlled fuel pump relay.
The Lokar TC1000LS1 throttle cable will not go in as is. You need to convert the pedal side machined aluminum bushing to the Corvette plastic bushing to fit the throttle lever hole. Luckily for me, my original throttle cable was replaced at some point, so the bushing was like new, not brittle as they can be if they are original. I just cut the 82 cable, and fed that bushing onto the Lokar, after I removed all the Lokar pedal end stuff. The Lokar cable end ball fits PERFECTLY onto the Corvette plastic bushing.
Here is the 82 cut up cable, with an 82 brand new cable (its for sale) and the Lokar modified cable. It went in with minimal swear words with a very short and skinny style cheap Chinese crap open end 9/16 wrench. I used a 9/16 flare wrench to hold the engine side of the cable nut in place while I turned the interior side nut to tighten it all down. Like I said, minimal swear words!!!
Finished up Lokar install. I was warned that I may not like the feel of this, but I have to say it initially feels as smooth as the 82 cable did. I'll wait until I actually drive it though for a full review!!
Last edited by MN-Brent; 02-23-2010 at 04:37 PM.
02-23-2010, 03:13 PM
#46
Drifting

I'm glad you decided not to sell your car. This is a way cooler. Great job, great thread and best of luck with the final phases...
have to say nice work, with hood and radiator in place when pulling the engine....
Your on a roll........
have to say nice work, with hood and radiator in place when pulling the engine....
Your on a roll........

 02-26-2010, 11:31 AM
#49
Safety Car
Thread Starter
Next installment. Moving fast here.
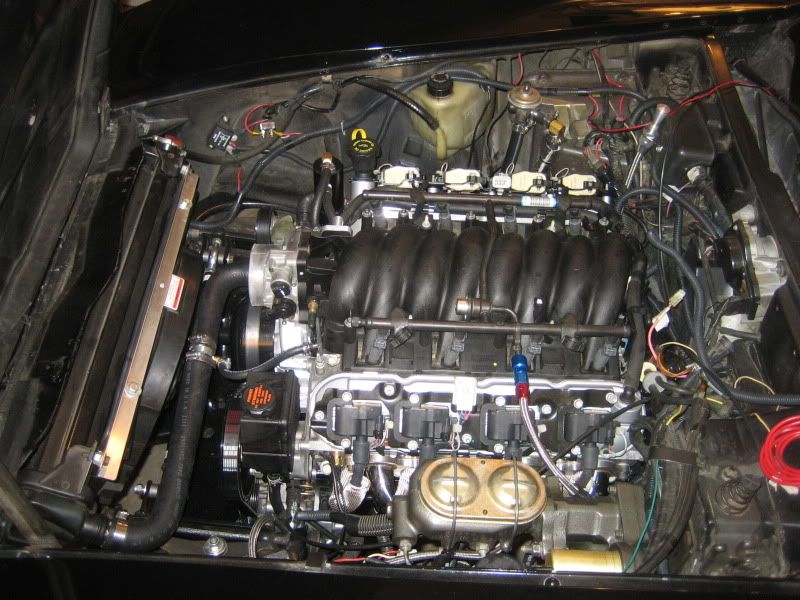
Got the PCM mounted, IAT sensor mounted in the filter end, and the OBDII connector mounted up under the dash-steering wheel area. All electrical is DONE!!! (Unless there is a problem) Planning to test fire it this weekend.
Here is the PCM mounted on the passenger wheel well arch. I used an S10 PCM plastic bracket, using an existing hole and drilled a new one, and simply bolted the bracket to the arch. The PCM slips right in, clicks and locks in place. Just like downtown!! I may put a small aluminum sheild on the lower side to prevent any possible water from hitting it from the tire, but it's pretty tucked away, well hidden from line of sight to anything road oriented, as looking at it from the tire area.
The max temp for the PCM is 80C (176F) so keeping it as far away from the exhaust was important.
OBDII connector. Need this for any possible codes that didnt get turned off with my Wait4Me tune of the PCM. I bought EFI Live to monitor-datalog all the sensors and make changes to PCM controlled fan turn on-ff temps. I can also change the tire size-rear gear if I need to . Just need to spend some time learning the software. Dont think I'll mess with Jesse's tune anytime soon. I also have the original CFI check engine light wired into the LS1 PCM, so Ill have notice of anything going on, just like GM intended.

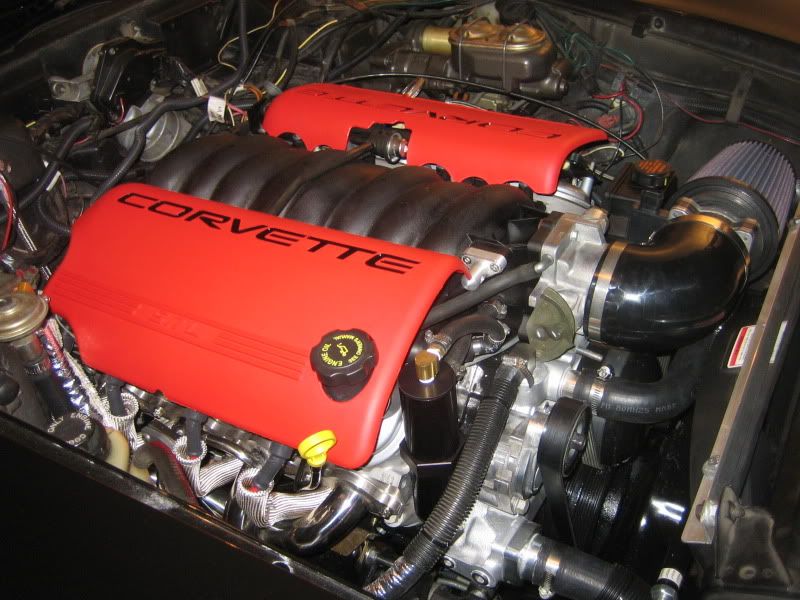
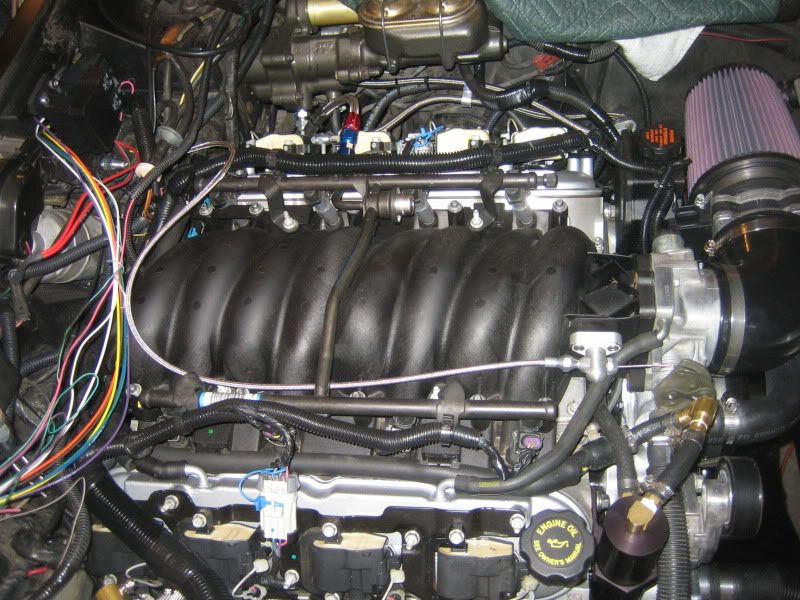
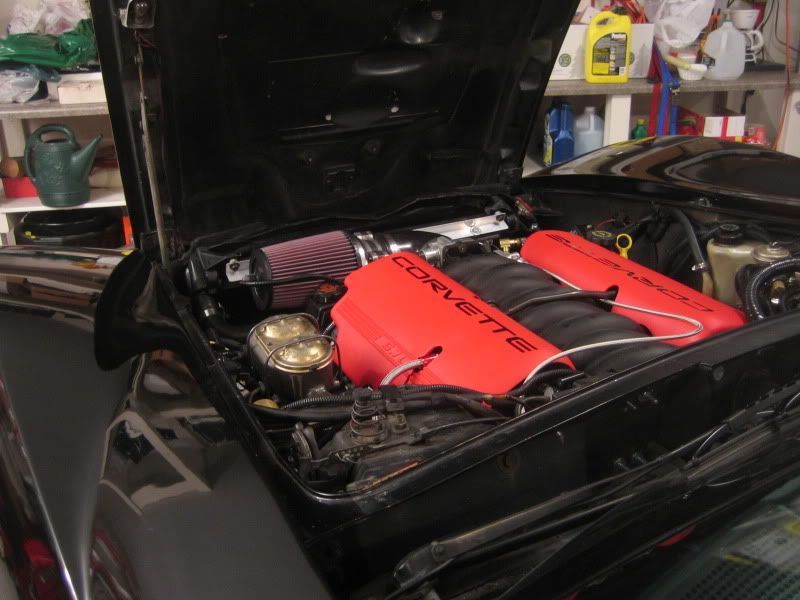
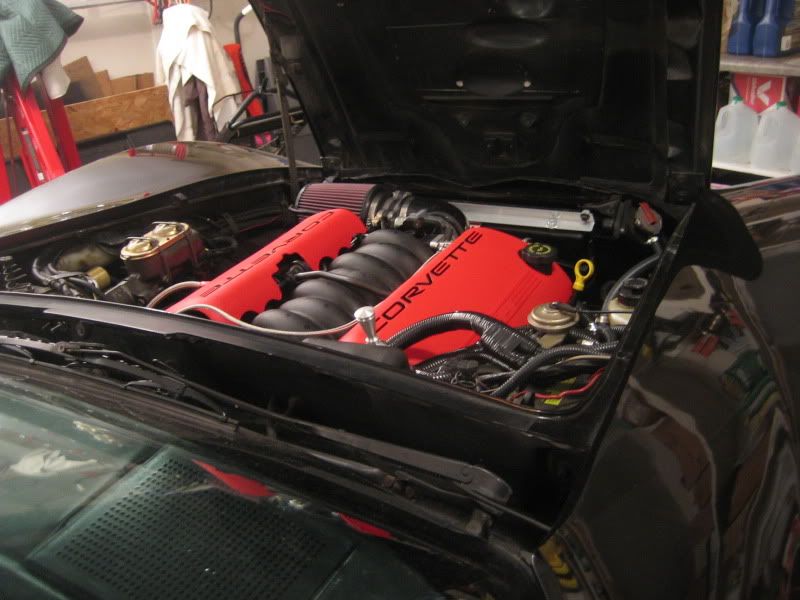
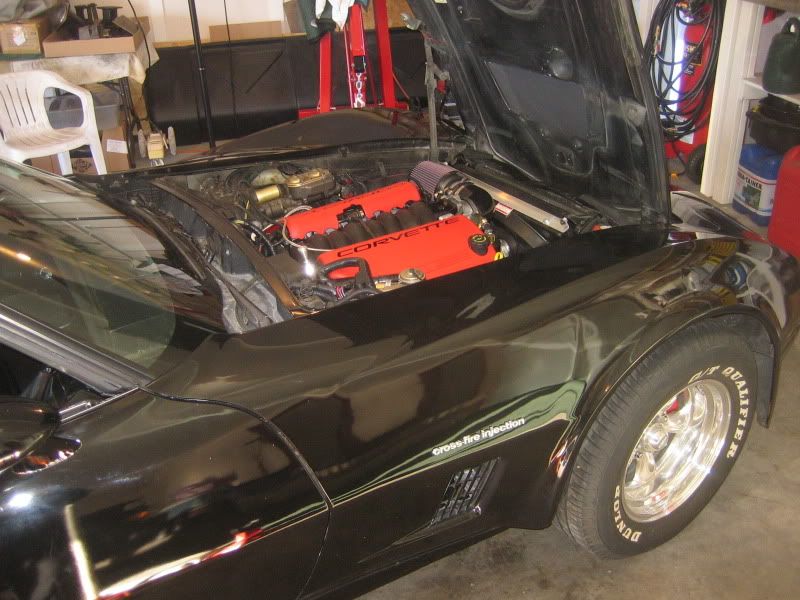
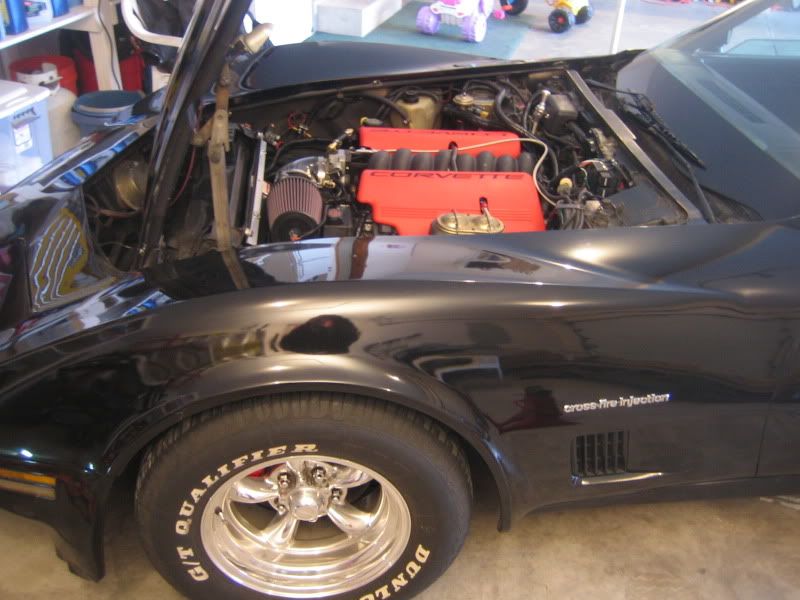
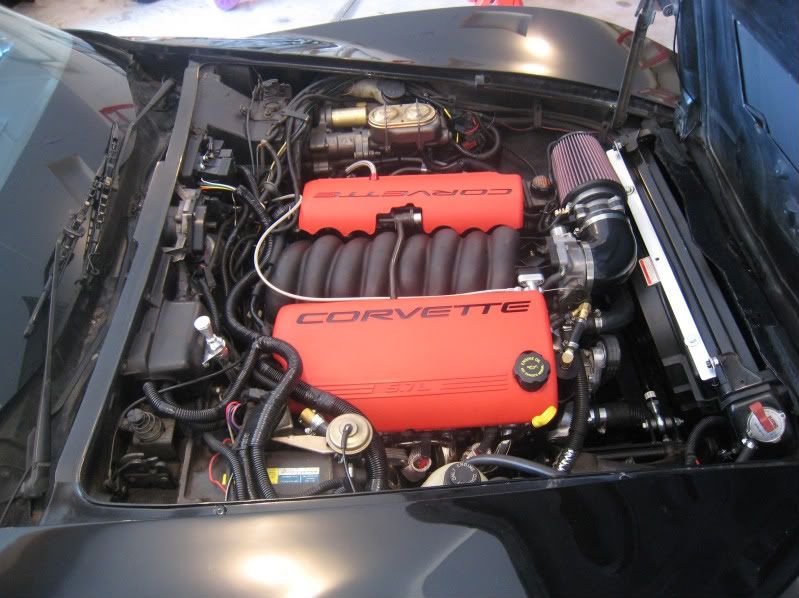
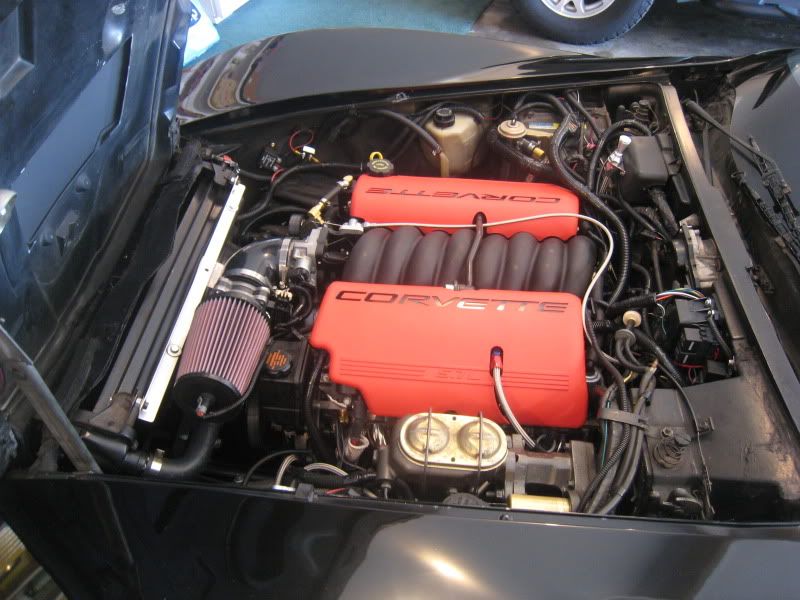
More Eye candy. Basically the finished product. I may need to cut a relief in the hood plastic inner structure due to the CFI motors' GM cold air intake set-up which may interfere slightly with my filter set-up, pushing it too close to the serpentine belt for my liking.
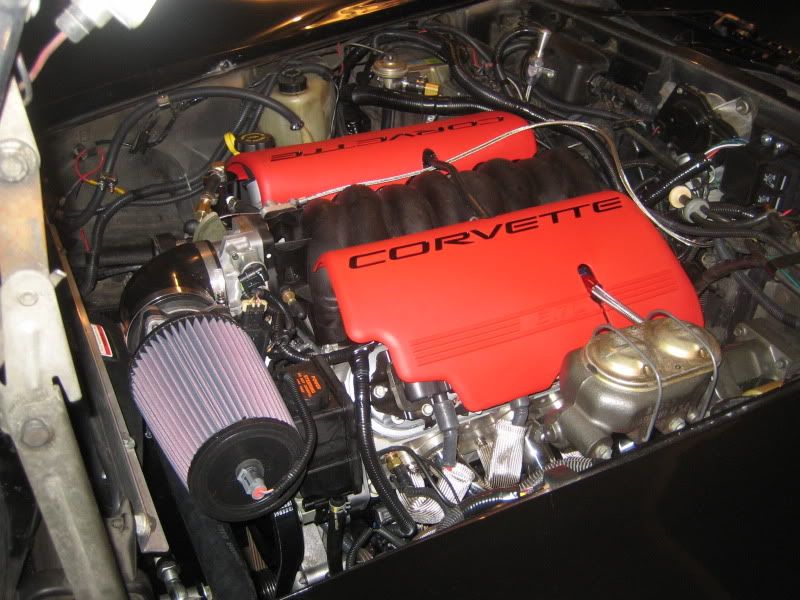
More pics with no flash. Love the red Z06 covers. Really pops under the hood. It fits my scheme of black with red accents all over the car.
Got the PCM mounted, IAT sensor mounted in the filter end, and the OBDII connector mounted up under the dash-steering wheel area. All electrical is DONE!!! (Unless there is a problem) Planning to test fire it this weekend.
Here is the PCM mounted on the passenger wheel well arch. I used an S10 PCM plastic bracket, using an existing hole and drilled a new one, and simply bolted the bracket to the arch. The PCM slips right in, clicks and locks in place. Just like downtown!! I may put a small aluminum sheild on the lower side to prevent any possible water from hitting it from the tire, but it's pretty tucked away, well hidden from line of sight to anything road oriented, as looking at it from the tire area.
The max temp for the PCM is 80C (176F) so keeping it as far away from the exhaust was important.
OBDII connector. Need this for any possible codes that didnt get turned off with my Wait4Me tune of the PCM. I bought EFI Live to monitor-datalog all the sensors and make changes to PCM controlled fan turn on-ff temps. I can also change the tire size-rear gear if I need to . Just need to spend some time learning the software. Dont think I'll mess with Jesse's tune anytime soon. I also have the original CFI check engine light wired into the LS1 PCM, so Ill have notice of anything going on, just like GM intended.
More Eye candy. Basically the finished product. I may need to cut a relief in the hood plastic inner structure due to the CFI motors' GM cold air intake set-up which may interfere slightly with my filter set-up, pushing it too close to the serpentine belt for my liking.
More pics with no flash. Love the red Z06 covers. Really pops under the hood. It fits my scheme of black with red accents all over the car.
Last edited by MN-Brent; 02-26-2010 at 12:32 PM.
02-28-2010, 10:22 PM
#52
Safety Car
Thread Starter
Fired the ol' boy up this weekend!!  Nice and loud with the open headers.
Pulled the fuel pump relay and turned it over until I got ~45PSI. That took maybe 30-45 seconds or so. Seemed like forever. I then kept turning it for another 30 seconds or so, just to get a good oil prime done.
I then hooked up the fuel pump relay and clicked over the key 2x and just checked for fuel pressure present at the schrader valve. That was good to go.
So I started turning it and BAMO, fired up like she was started only yesterday. Just had to give it a little gas pedal action. On all subsequent starts, it has started possibly before one revolution is complete. Gotta love that!!
I'll try to get a vid or two loaded up on Youtube soon.
Engine purrs nice and quiet at idle, no rod knocking or lifter noises to worry about I did some short back up / fwd movements to check the 4L60E and settle the suspension.
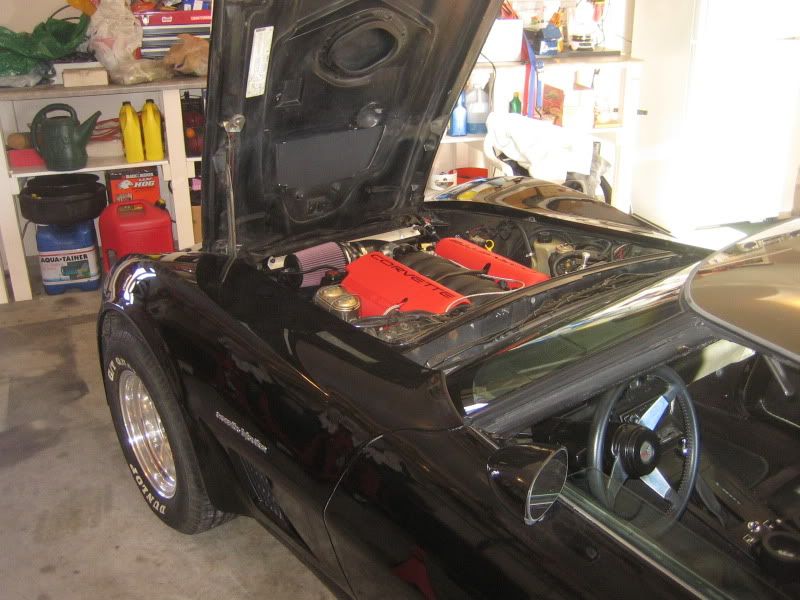
Since the Gen3 LS1 is ~80 to 90 lbs lighter than a Gen1 SBC, my front end has raised up about 5/8 of an inch (from 27 5/8 to 28 1/4 fender height). So the next project is to pull the front coils and cut another 1/4 to 1/3 turn on them to lower it. It has 460lb coils with 3/4 turn already cut out.
I also did a cutout on the hood to allow more clearance for the air filter and keep it off the power steering pump pulley.
Pics of the lifted front end:
Nice and loud with the open headers. Pulled the fuel pump relay and turned it over until I got ~45PSI. That took maybe 30-45 seconds or so. Seemed like forever. I then kept turning it for another 30 seconds or so, just to get a good oil prime done.
I then hooked up the fuel pump relay and clicked over the key 2x and just checked for fuel pressure present at the schrader valve. That was good to go.
So I started turning it and BAMO, fired up like she was started only yesterday. Just had to give it a little gas pedal action. On all subsequent starts, it has started possibly before one revolution is complete. Gotta love that!!
I'll try to get a vid or two loaded up on Youtube soon.
Engine purrs nice and quiet at idle, no rod knocking or lifter noises to worry about
I did some short back up / fwd movements to check the 4L60E and settle the suspension.Since the Gen3 LS1 is ~80 to 90 lbs lighter than a Gen1 SBC, my front end has raised up about 5/8 of an inch (from 27 5/8 to 28 1/4 fender height). So the next project is to pull the front coils and cut another 1/4 to 1/3 turn on them to lower it. It has 460lb coils with 3/4 turn already cut out.
I also did a cutout on the hood to allow more clearance for the air filter and keep it off the power steering pump pulley.
Pics of the lifted front end:
Last edited by MN-Brent; 03-02-2010 at 12:34 PM.
03-02-2010, 02:50 PM
#58
Safety Car
Thread Starter
If you do it this way, you wont need to remove the hood or the radiator. To me it's a cleaner install method for automatics. You wont have the huge weight of the motor-trans combo at a severe angle dangling over the hood or fenders.

If it was a manual tranny, I might have put them together out of the car to allow for more ease of maintaining clutch alignment.
03-06-2010, 09:48 PM
#59
Safety Car
Thread Starter
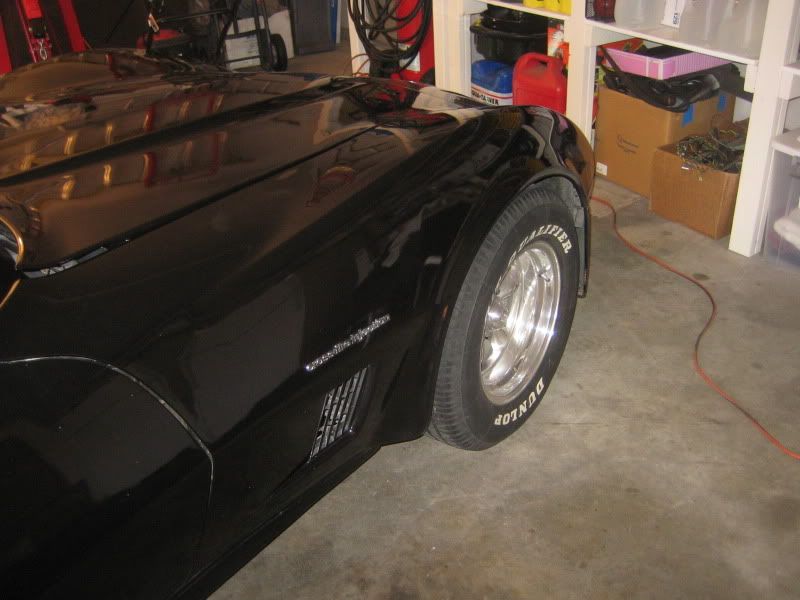
So I needed to lower the front end. This is my third time doing this, so it went pretty fast. I was originally at 27 5/8 with 460lb coils cut 3/4 turn with the CFI motor. With the LS1, I jumped up to 28 1/4. My guesstimate of another 1/3 turn max turned out right on.
I cut another 1/3 turn, so I'm at approx 1 1/8 turns cut total, it put me at 27 1/4 inch fender height. Man it looks great. I cant stop staring at it. Had to work through a couple beers before I could go back in the house, once I was done. >
Here some pics of the new ride height with the lighter LS1. Next comes exhaust and alignment.
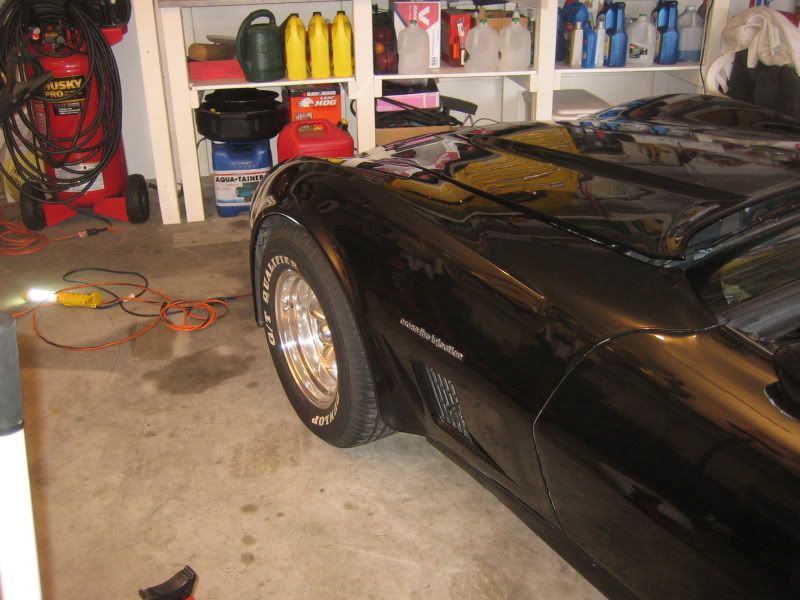
I cut another 1/3 turn, so I'm at approx 1 1/8 turns cut total, it put me at 27 1/4 inch fender height. Man it looks great. I cant stop staring at it. Had to work through a couple beers before I could go back in the house, once I was done.
>Here some pics of the new ride height with the lighter LS1. Next comes exhaust and alignment.
Last edited by MN-Brent; 03-20-2010 at 01:53 AM.