
Power Steering Control Valve
 10-09-2010, 08:40 PM
#1
Burning Brakes

Thread Starter


Has anybody rebuilt their power steering control valve or cylinder with the kits available from the vendors ? Is it worth the effort ?
 10-09-2010, 09:37 PM
#2
Team Owner

Yes. Much better option than buying a rebuilt unit or [particularly] than buying a new one. You know that your unit 'used to work OK'; that's one step ahead of buying anything else.
The rebuild process is very easy for the control valve and for the cylinder. There is only the outer seal and the ballstud to replace on the cylinder; the inner seal cannot be changed. And, if it worked OK before the rebuild, it will work OK after (unless the ram rod is bent).
Download Jim Shea's articles on the control valve and its rebuild. Study them through a time or two before you start work on it. You just need to get a feel for how it's put together so that your work will flow easily. If you have to refer to "instructions" too many times during rebuild of a component, you open up the door for assembly errors. Lay the parts out in the same order as you take them apart. All parts get cleaned and reused except for the seals. If you find that there are some 'hard parts' that are damaged, buy a new one [IMO]. At least, it won't be worn-out when you get it.
Good luck.
10-09-2010, 10:35 PM
#3
Melting Slicks

rebuilt mine has worked fine for over a year now, used these instructions / pics. i also counted the number of turns it took to unscrew it. so i could return it to basically the same spot.
http://www.cssbinc.com/images/ads/ho...structions.pdf
http://www.cssbinc.com/images/ads/ho...structions.pdf
Last edited by speedreed8; 10-10-2010 at 12:39 PM.
 10-10-2010, 02:43 AM
#5
Safety Car

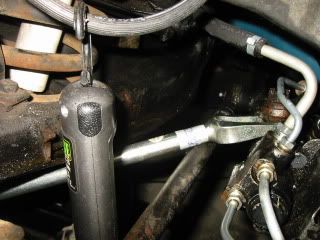
Front of car up on stands, driver side wheel off. come in kind of from the front with a pickle fork to get the pitman arm off. The rest is actually pretty self evident as far as removal of the valve.
10-10-2010, 09:52 AM
#6
Safety Car
Member Since: Aug 2001
Location: North Easton Mass
Posts: 4,883
Likes: 0
Received 8 Likes
on
8 Posts

There are 2 kits available for the PS control valve. The seal kit isn't expensive and is one that you would always want to buy. After you take the valve apart you can inspect the stud side of the valve for wear. If the ball end of the stud is worn or the sleeve that is sits in is grooved you can buy a kit to replace that side of the valve. It's more expensive, but the total of both kits is only ~$85.00 or so.
As others have said, read jim Shea's articles and keep everything in order when you remove the parts. Don't force anything together when assembling or you will probably mangle a seal and have a massive leak. Ask me how I know this.

Rick B.
As others have said, read jim Shea's articles and keep everything in order when you remove the parts. Don't force anything together when assembling or you will probably mangle a seal and have a massive leak. Ask me how I know this.
Rick B.
10-12-2010, 07:40 AM
#9
Le Mans Master

So just to be clear, you guys would definitely recommend rebuilding the OEM control valve and also the steering piston rather than buying a NEW one, not a rebuilt? I have the rebuild kits for both the control valve and steering piston but I am going to have GTR1999 do the steering box first to see the difference with that change only.
10-12-2010, 08:14 AM
#10
Le Mans Master

So just to be clear, you guys would definitely recommend rebuilding the OEM control valve and also the steering piston rather than buying a NEW one, not a rebuilt? I have the rebuild kits for both the control valve and steering piston but I am going to have GTR1999 do the steering box first to see the difference with that change only.
10-12-2010, 08:35 AM
#11
Le Mans Master
When the valve/adapter is "rebuilt" by the vendors, they don't replace parts that are beyond use.... such as the "ball stud cage" or "ball stud housing". If these parts are worn beyond use, a rebuild will be unsuccessful. This is why it sometimes takes purchasing 3 or more rebuilt units before you get one that doesn't fail. If your original adapter is not worn beyond use, you are better off rebuilding it than taking your chances with somebody elses junk. It still may fail due to wear, but the odds are in your favor. If you don't want to be bothered with rebuilding your own, then buy new. Now, if the vendors would/could run a rebuilding program where they replace the severely worn ball stud cage or housing, then things would be different.
I am with you on this one since I feel competent enough to do just about anything on my C3 and always try to keep the OEM parts when I can-it is getting harder and harder as the car ages though. All of the main components (engine, 4 speed, rear diff, etc) are original (65,000 miles) but many of the ancillary components are not (alternator, still have it though, water pump, brake calipers, Q-Jet carb (long story on this one), distributor, radiator, exhaust manifolds (have them stored), exhaust system, AIR PUMP and hardware (have it stored), etc. I guess I will rebuild the steering piston and control valve and can always purchase new if it does not work out to my liking! Thanx.
10-12-2010, 12:53 PM
#12
Drifting


So just to be clear, you guys would definitely recommend rebuilding the OEM control valve and also the steering piston rather than buying a NEW one, not a rebuilt? I have the rebuild kits for both the control valve and steering piston but I am going to have GTR1999 do the steering box first to see the difference with that change only.
Gary sent the box before I sent the check for it. He still does business the old fashion way, based on mutual trust.
10-12-2010, 07:42 PM
#13
Le Mans Master
Just finished up putting one of Gary's "blueprinted" steering boxes in the 68. Money well spent, steering is tighter and smoother than ever. You won't reget it.
Gary sent the box before I sent the check for it. He still does business the old fashion way, based on mutual trust.
Gary sent the box before I sent the check for it. He still does business the old fashion way, based on mutual trust.
10-12-2010, 11:20 PM
#14
Drifting
I have spoken to Gary on the phone and have heard great things about his work. Gary told me to remove the box with the pitman arm attached to the box and he will remove the pitman arm. Did you do it that way also? Gary lives not far from me in New Haven CT and I am next "store" in RI so I will probably drive to see him with the box removed, about 2 hours. Thanx
10-13-2010, 07:19 AM
#15
Le Mans Master
I plan on marking the position of the rag joint to the box and to the angle of the steerinjg column? Necessary or can you align the steering wheel relative to the box at re-install? Sorry for all the questions but don't want any headaches which is the reason I have been delaying doing the steering box rebuild!
10-13-2010, 09:52 AM
#16
Drifting
Thanx-I will remove the pitman arm attached to the box. How hard was it to remove the pitman arm from the power steering control valve? I plan on using a tie rod puller on that section. Also, did you separate the rag joint where it is bolted together or did you loosen the steering column from the interior and pull the column into the interior to separate the column from the rag joint attached to the box? Lastly,
I plan on marking the position of the rag joint to the box and to the angle of the steerinjg column? Necessary or can you align the steering wheel relative to the box at re-install? Sorry for all the questions but don't want any headaches which is the reason I have been delaying doing the steering box rebuild!
I plan on marking the position of the rag joint to the box and to the angle of the steerinjg column? Necessary or can you align the steering wheel relative to the box at re-install? Sorry for all the questions but don't want any headaches which is the reason I have been delaying doing the steering box rebuild!
10-13-2010, 01:21 PM
#17
Instructor


I rebuilt mine...and it leaked!
My car was sitting in the weeds for a long time, so the piston got pitted. Therefore, after a rebuild, it tears up the seals (again) and leaks.
So, I bought a lifetime warranty unit from Autozone with new hoses and a new PS pump. Guess what? it leaks....still!
So yeah, all the headaches you hear about, are true!
I'm going to try to swap the unit out with another one. if it STILL doesn't work, I'm buying an early X-mas present...Rack and Pinion!
10-13-2010, 05:25 PM
#18
Le Mans Master
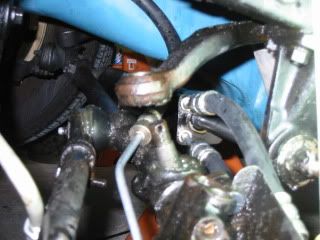
The ball stud from the control valve to the pitman arm was easy, 2 or 3 whacks on the pickle fork and it was loose. I split the rag joint, slid the steering column flange up the splines and when the 3 steering box mounting bolts were loose the rag joint came loose easily. Not necessary to slide the column back. Should be no angle change as the steering box mounting bolt holes allow very little extra movement so everything will be in the same place. The rag joint will only go back together one way as one coupling bolt is 5/16" and one is 3/8". As long as the new steering box is on center, the steering wheel is on center and the rag joint pinch bolts are facing correctly it will be an easy swap.
10-14-2010, 05:24 PM
#19
Safety Car
Yes. Much better option than buying a rebuilt unit or [particularly] than buying a new one. You know that your unit 'used to work OK'; that's one step ahead of buying anything else.
The rebuild process is very easy for the control valve and for the cylinder. There is only the outer seal and the ballstud to replace on the cylinder; the inner seal cannot be changed. And, if it worked OK before the rebuild, it will work OK after (unless the ram rod is bent).
Download Jim Shea's articles on the control valve and its rebuild. Study them through a time or two before you start work on it. You just need to get a feel for how it's put together so that your work will flow easily. If you have to refer to "instructions" too many times during rebuild of a component, you open up the door for assembly errors. Lay the parts out in the same order as you take them apart. All parts get cleaned and reused except for the seals. If you find that there are some 'hard parts' that are damaged, buy a new one [IMO]. At least, it won't be worn-out when you get it.
Good luck.
The rebuild process is very easy for the control valve and for the cylinder. There is only the outer seal and the ballstud to replace on the cylinder; the inner seal cannot be changed. And, if it worked OK before the rebuild, it will work OK after (unless the ram rod is bent).
Download Jim Shea's articles on the control valve and its rebuild. Study them through a time or two before you start work on it. You just need to get a feel for how it's put together so that your work will flow easily. If you have to refer to "instructions" too many times during rebuild of a component, you open up the door for assembly errors. Lay the parts out in the same order as you take them apart. All parts get cleaned and reused except for the seals. If you find that there are some 'hard parts' that are damaged, buy a new one [IMO]. At least, it won't be worn-out when you get it.
Good luck.
 And very fulfilling afterward to know that you took this on and completed it successfully. I have a shop manual that was helpful as well

