
LS3 into my 72


 03-22-2014, 11:23 AM
#323
Melting Slicks


Gordon, do not install the MAF sensor in the 6 o'clock position. It must be installed between the 12 o'clock and 3 o'clock position only.
Last edited by KENS80V; 03-22-2014 at 11:31 AM.
03-22-2014, 01:16 PM
#324
Race Director

Thread Starter
Replied to your email on this also. Makes sense for moisture or anything else. Mine had no instructions as it was a bone yard pullout. Thanks for the tip. Probably put it in the 2 o'clock position.
03-23-2014, 06:03 AM
#325
Race Director
Thread Starter
The tube is from spectre and the number I used is 97990. This has a little longer leg on one side which I will probably trim a little off of. Like I said the best price I got was from Amazon at about 36 bucks and I was not in a rush so I did the free shipping. I used a K&N filter RU 2590. There are a million filters out there. This size seemed about right and fits fine. The boss I used for the MAF sensor came from Nook and Tranny. Part number GMR-19166574. Cost was 14 dollars and 4 bucks shipping. The silicone couplers are everywhere. Just google 4 inch silicone couplers and find them. I did get the ones with some better clamps instead of the standard screw clamps. Hope this helps out.
 04-05-2014, 04:59 PM
#329
Instructor


Great build. I'd love to do this type of install in our 79 someday. I've wondered recently if it would be physically possible to have a forward canted radiator and C7-style hood extractor in a C3 restomod?
Chappie
Chappie
04-06-2014, 06:54 AM
#330
Race Director
Thread Starter
Talked to Nick,the owner of AR headers. Very nice guy and he said we need to get these right. Bring the car to him and he will get the headers fit perfectly. Also asked about an exhaust system, "no problem what size do you want" may go with a 3 inch system. Just have to get the car to Long Island. Work is busy and I have some vacation coming up. I'll get it there as soon as I can. Then it's off to the tuner, I was at Tune Times open house yesterday. Talked with the head tuner. He said bring it in and we will set the initial tune. Then drive it and break the clutch in and get everything working. Then we will hit the Dino to get every last HP we can out of it.
Starting to get back pumped up about the install. Saw a C7 with cam and headers on their dyno. Sounded awesome and put down 460HP to the wheels
Starting to get back pumped up about the install. Saw a C7 with cam and headers on their dyno. Sounded awesome and put down 460HP to the wheels
06-15-2014, 07:58 AM
#331
Race Director
Thread Starter
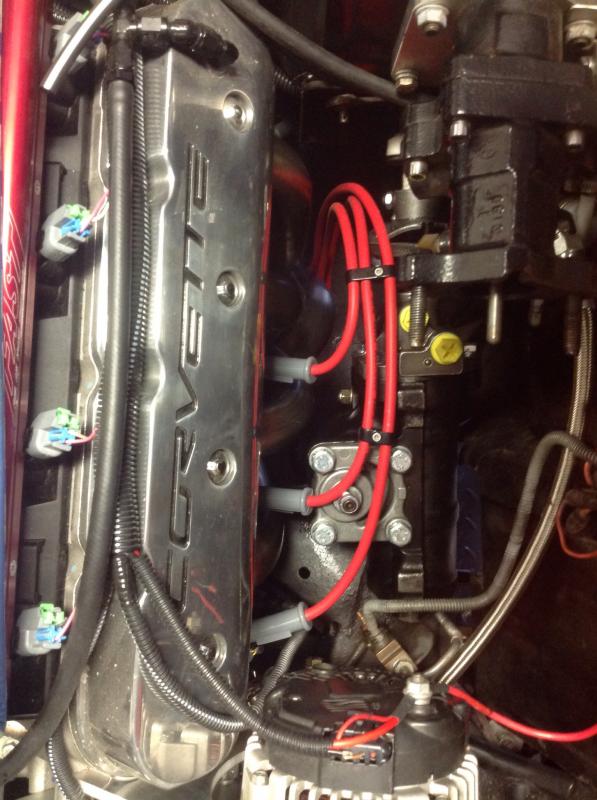
Let's try and get this one going again. I have the car back now with new headers and exhaust. It looks great and should work well with good ground clearance. I will have to reroute the plug wires as with these headers you cannot run the wires behind the headers. Just not enough room and it will burn the plug wires. So I have run the front 3 cylinders out in front. The rear one can go behind. I will keep the coil packs the same location. Pictures of this to come.
I have also decided to try the Borgeson setup over Steeroids. No reason other than the plumbing is a little cleaner with the Borgeson setup. I have the steeroids almost out and had to rework the idler arm slightly to clear the new headers, not a big deal. Trying to get back on track with this project.
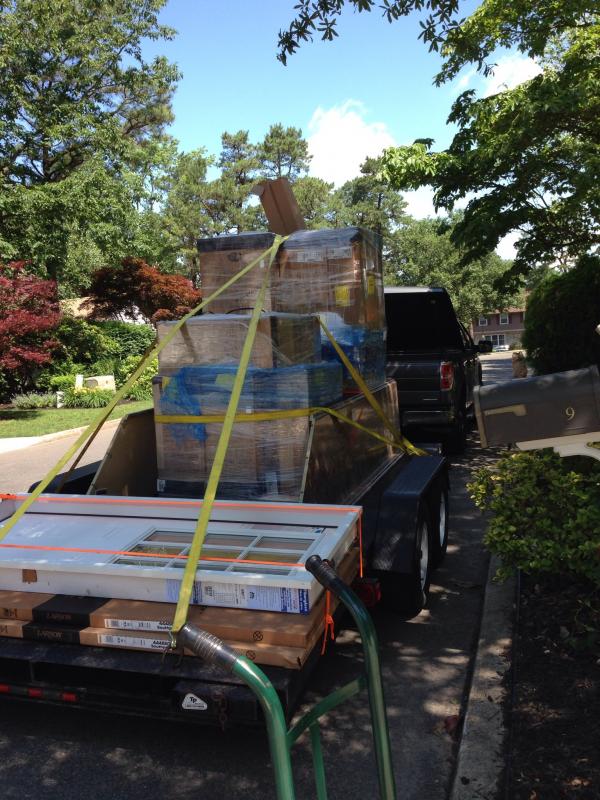
Here is what has taken some of my time recently. The car trailer has been an important piece in rebuilding my beach house after Sandy. Here is some doors and a new kitchen being transported down to the beach.
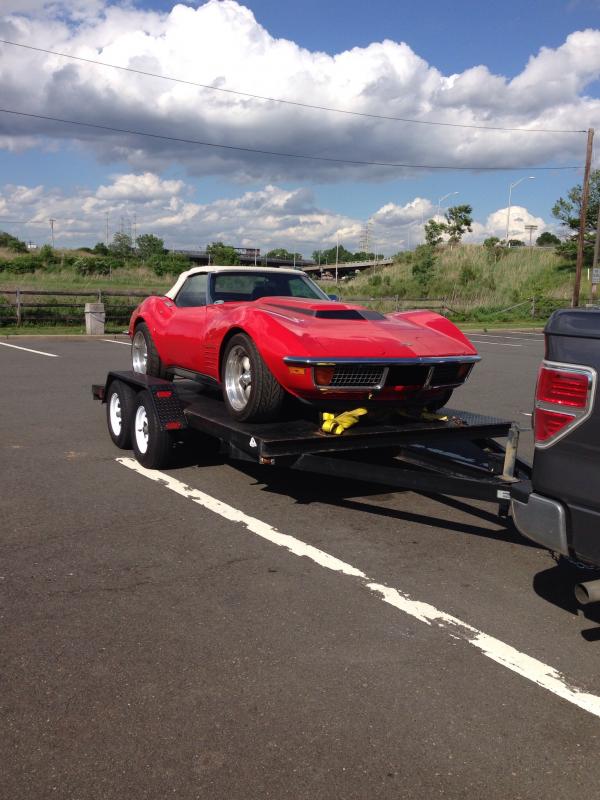
And here is the trailers intended use. This is on its way back from AR headers after the exhaust is done
I have also decided to try the Borgeson setup over Steeroids. No reason other than the plumbing is a little cleaner with the Borgeson setup. I have the steeroids almost out and had to rework the idler arm slightly to clear the new headers, not a big deal. Trying to get back on track with this project.
Here is what has taken some of my time recently. The car trailer has been an important piece in rebuilding my beach house after Sandy. Here is some doors and a new kitchen being transported down to the beach.

And here is the trailers intended use. This is on its way back from AR headers after the exhaust is done

Last edited by Gordonm; 06-15-2014 at 08:26 AM.
 06-15-2014, 10:07 PM
#333
Race Director
Thread Starter
The journey continues.
I just wanted the exhaust to be in this post. I had another post with the exhaust but I thought I'd put a few pictures in here also. This system was a totally custom built setup from AR headers. Nice fit and the sound so far is great.
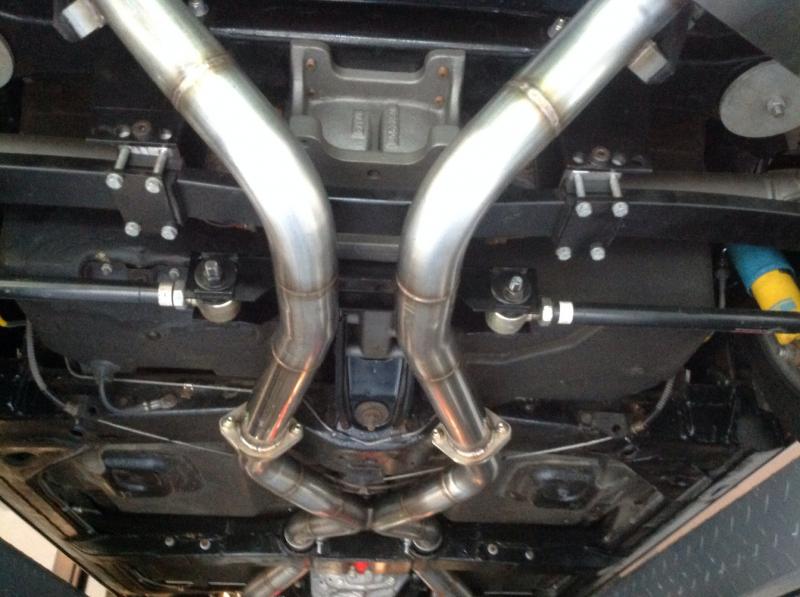
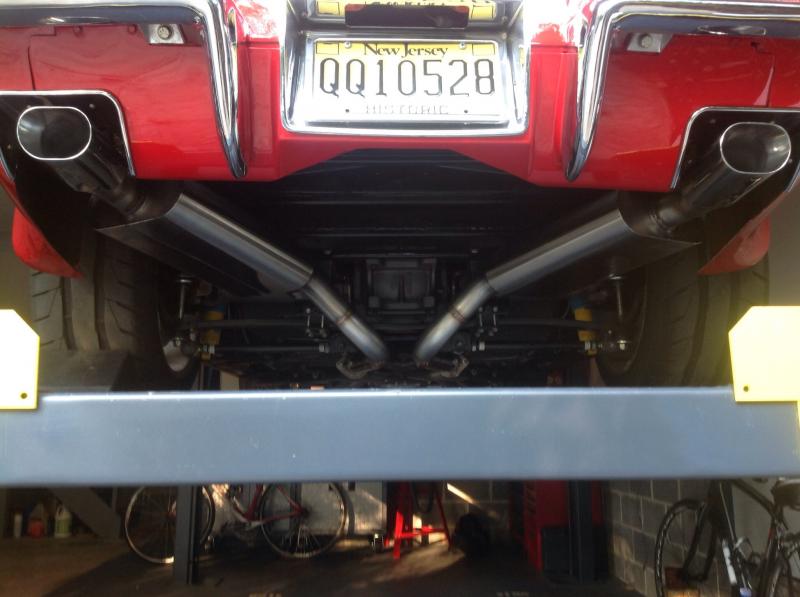
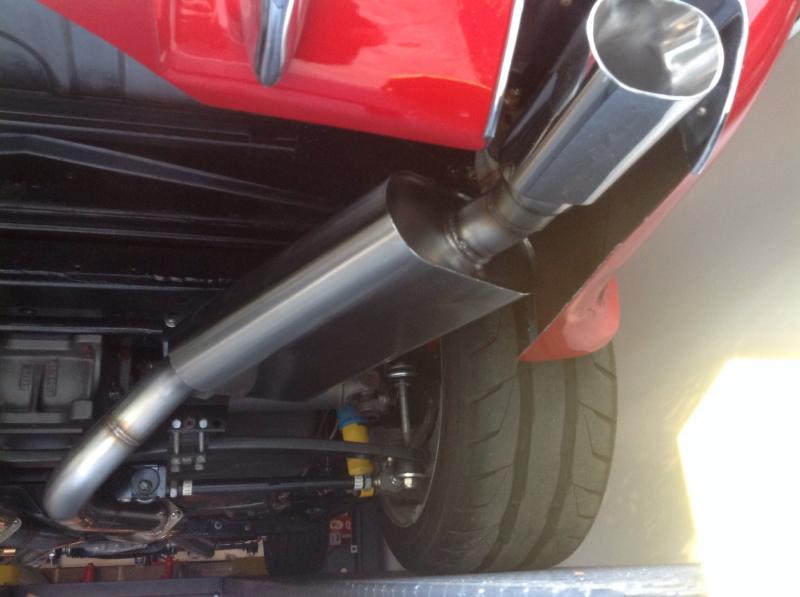
I just wanted the exhaust to be in this post. I had another post with the exhaust but I thought I'd put a few pictures in here also. This system was a totally custom built setup from AR headers. Nice fit and the sound so far is great.


 06-17-2014, 09:03 AM
#334
Drifting

Gordon, when you are done with the car I would love to hear what you think about the new steering box over the rack and pinion setup.
The car is looking great, it wont be long before your on the road with it.
Terry
The car is looking great, it wont be long before your on the road with it.
Terry
06-17-2014, 06:57 PM
#335
Race Director
Thread Starter
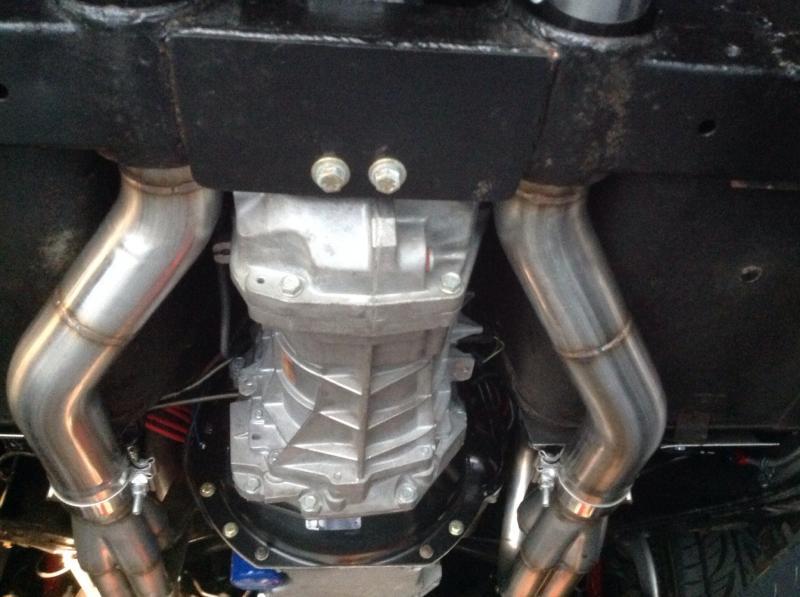
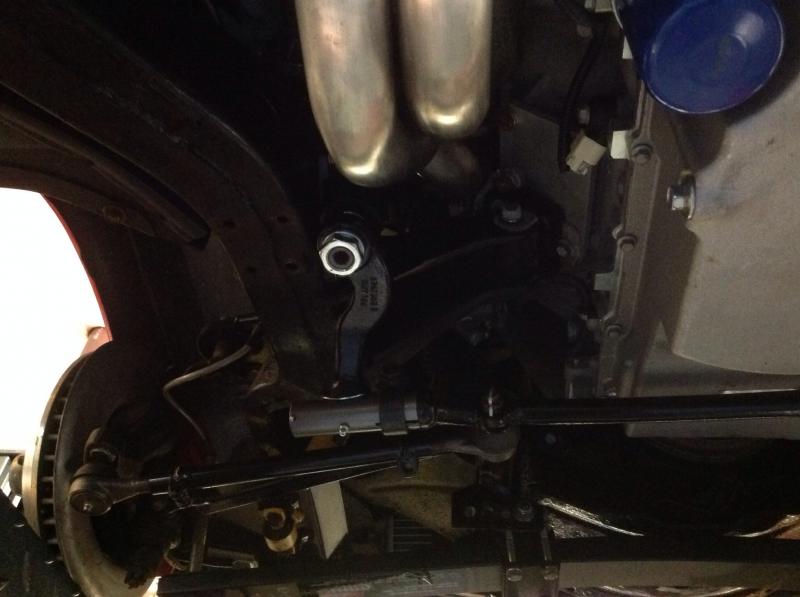
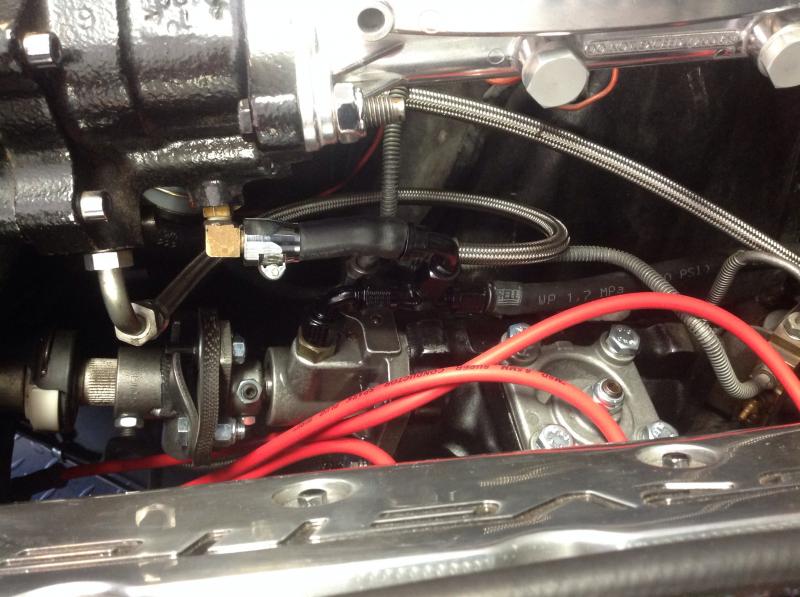
Couple more pictures after a little work today. Here you can see the Borgeson box in the car, master cylinder removed. Underneath with the linkage, plenty of clearance with a stock LS3 corvette pan and the headers all clear. I did have to do a little grinding on the idler arm up at the top but nothing bad. I just have to plumb the Hydroboost to Borgeson box and the return lines and it will be ready to steer.
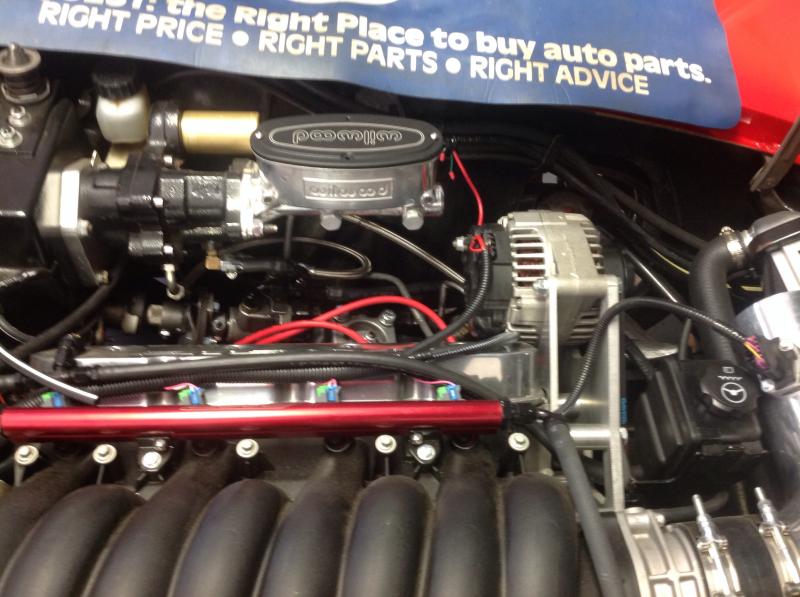
also the plug wire routing. These do not have the coil end on yet, just laid them in here for measuring. Looks like a 6 cylinder but trust me all 8 will fire. The 2 rear ones I am running behind the header as there is plenty of room.
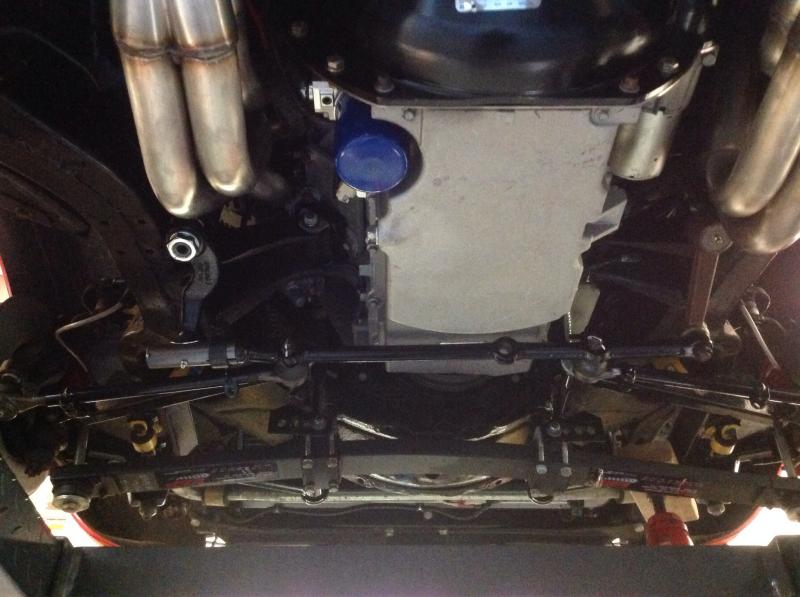
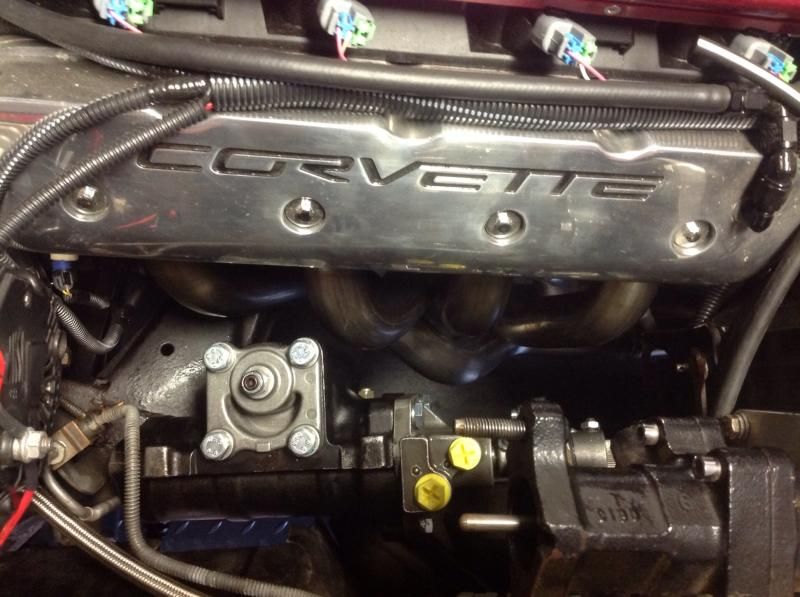
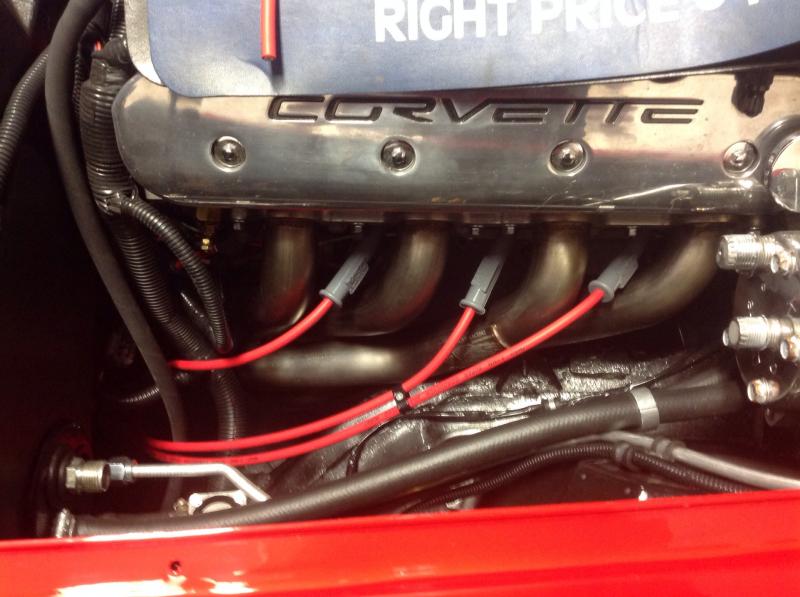
also the plug wire routing. These do not have the coil end on yet, just laid them in here for measuring. Looks like a 6 cylinder but trust me all 8 will fire. The 2 rear ones I am running behind the header as there is plenty of room.


 06-17-2014, 09:34 PM
#337
Race Director
Thread Starter
I'm working on it whenever I can. I seem to only be able to get an hour or two here and there. I take what I can get and do what I can. I'd like to be able to at least take it down the street within the next few weeks. I have not turned a tire in quite a long time. I'm anxious to get a little rubber down on the road.
Last edited by Gordonm; 06-18-2014 at 06:01 AM.


 06-23-2014, 08:17 PM
#340
Race Director
Thread Starter
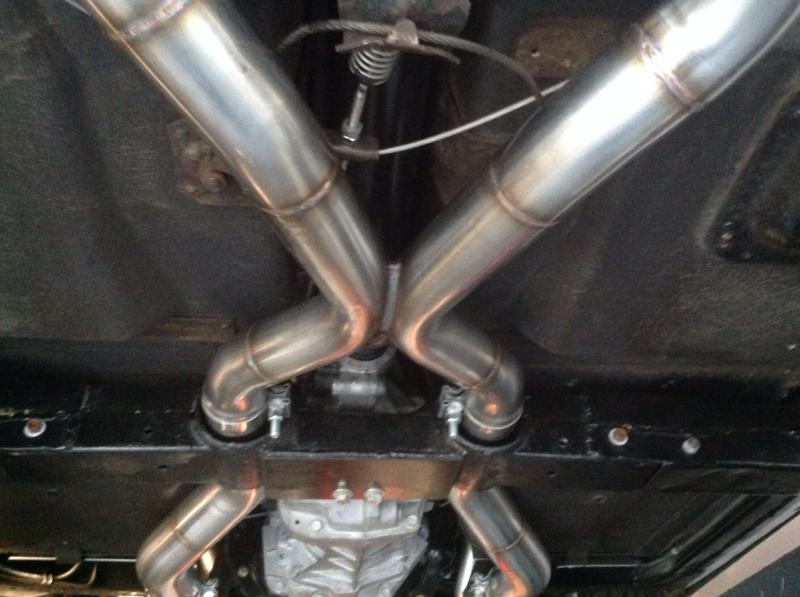
Just to keep up with this thread and some of the mods, I installed the Borgeson box today. Much cleaner plumbing and a nice fit. It all fits with the stock LS3 09 Corvette pan. I had to do a little modification the the idler arm due to the large 1 7/8 headers. They are very close to the bracket for the upper mount on the idler arm. Little grinding was done but all is well.
Today was the first time the motor has run with all the computer stuff hooked up. Main thing was the O2 sensors have never been hooked up. It ran quite rich for a while, also was the first time it was able to run more than a minute or two without dying. Everything on the engine side seems to be working well. I have to hook up all the gauges and tach now. Making some good progress now!


Today was the first time the motor has run with all the computer stuff hooked up. Main thing was the O2 sensors have never been hooked up. It ran quite rich for a while, also was the first time it was able to run more than a minute or two without dying. Everything on the engine side seems to be working well. I have to hook up all the gauges and tach now. Making some good progress now!
Last edited by Gordonm; 06-23-2014 at 08:20 PM.