When you click on links to various merchants on this site and make a purchase, this can result in this site earning a commission. Affiliate programs and affiliations include, but are not limited to, the eBay Partner Network.
Hi Rob, I've tried to contact you a couple of times to see how your project was coming along. Guess you were busy. Glad to see more posts. It's looking great. Keep up the good work. I'm slowly plugging away on mine.
Rob
Thanks for all the comments guys. Sorry, I haven't responded lately...I was on a trip to Colombia. And before I talk cars, I have to let any single, recently single or probably gonna be single guys know that you MUST go to Colombia. Medellin or Bogota, but I highly recommend Medellin. PM if you've got questions!
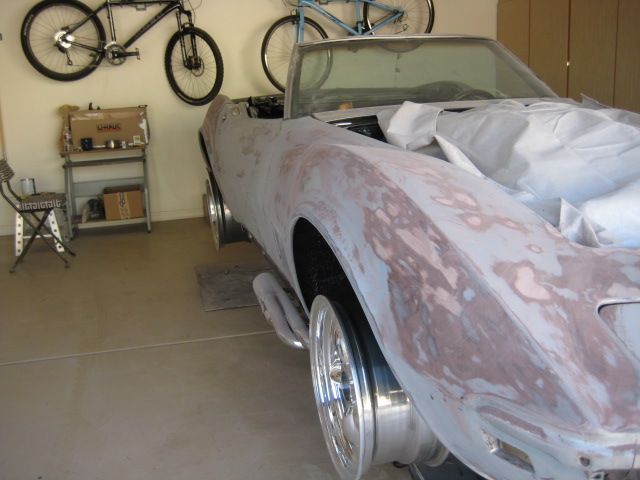
My update...I'm in bodywork hell. All is on track, but I'm really looking forward getting past this stage...painted and all the odds n ends out of boxes and things put back together. I stripped with razorblades, then dry blocked with 80 grit. Now Im doing all the repairs. I plan to high-build and block 2-3 times...so Im still a month or two from going to paint.
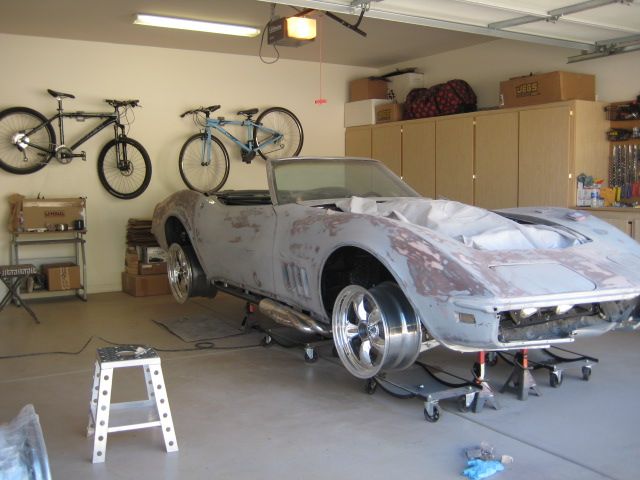
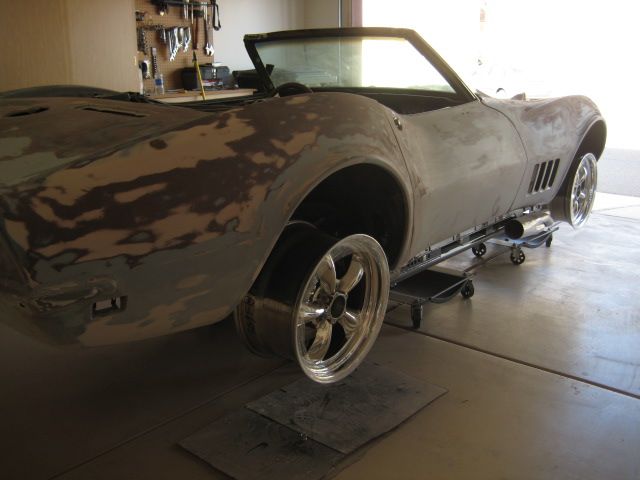
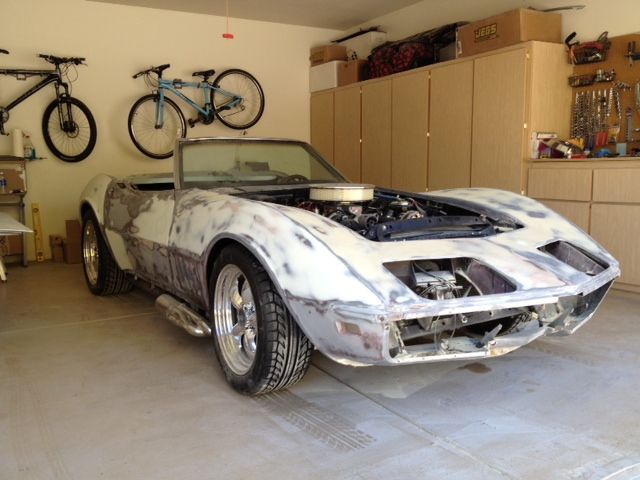
My wheels: many may remember my issue trying to measure for width and backspace. remember my track width is a tad wider fr/rr than a stock '68. I built a fixture, needed some help from forum members to see how wheels fit into the wells...in order to get the look I was after and prevent any rubbing issues. Glad to report, my wheels (custom build ARE TTIIs) are spot on. Rears are 18x9.5 w/6.75 BS and Fronts are 17x8 w/5.5 BS. I plan to run 275/40 and 245/45 Continental Extreme...
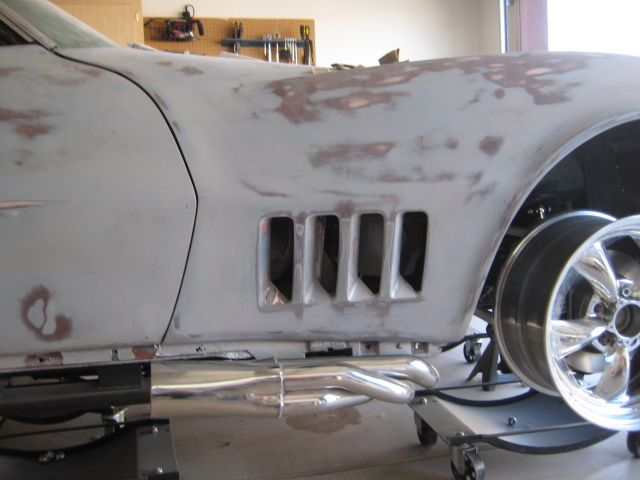
Oh, forgot to mention that I cut out my fourth gill on both sides. I've always wanted to do it, but read that it would affect the bond strip. About 5 inches inside the fender you can see the fresh air vents to the pass compartment, so this might affect their operation by creating a low pressure area and sucking air out. In my case, I sealed them closed when I installed the Vintage Air, but should be considered for others who may want to follow suit. It doesn't seem like it will affect the bond at all, and I really like the look...apologies to the purists!!!
Hi Rob,
Those wheels look great. What are you going to do for a hood? Looks like you air cleaner is to tall for a stock hood. Keep those photos coming.
Rob
Thanks for the comment. I am very happy with the wheel look and fitment. Hope this works...attempting to attach a photo from work and photobucket is partially blocked.
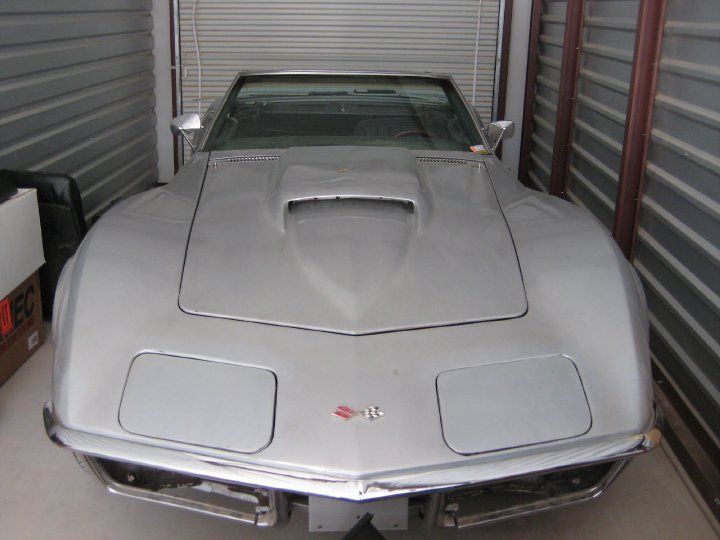
My hood is the stock '68 smallblock hood with a Motion scoop grafted on. The pic is as I bought the car. I was originally planning to use an L88 long style aftermarket hood, but this one kind of grew on me. It needs some work, but the scoop is straight, centered and secure...I think it will turn out good.
It actually fits great. In the pic, the nose is sagging due to the left inner fender bond breaking loose and poorly shimmed nose supports. Its got a piece grafted into the scoop opening, to prevent water intrusion, that will come out and hood pins that are poorly located. I bought a billet hood pin set that I plan to use, but I will fab brackets and relocate to better spots.
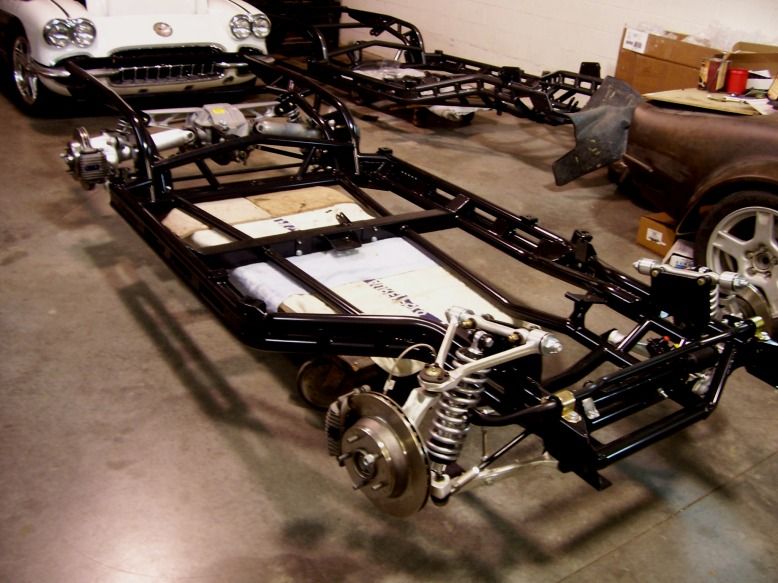
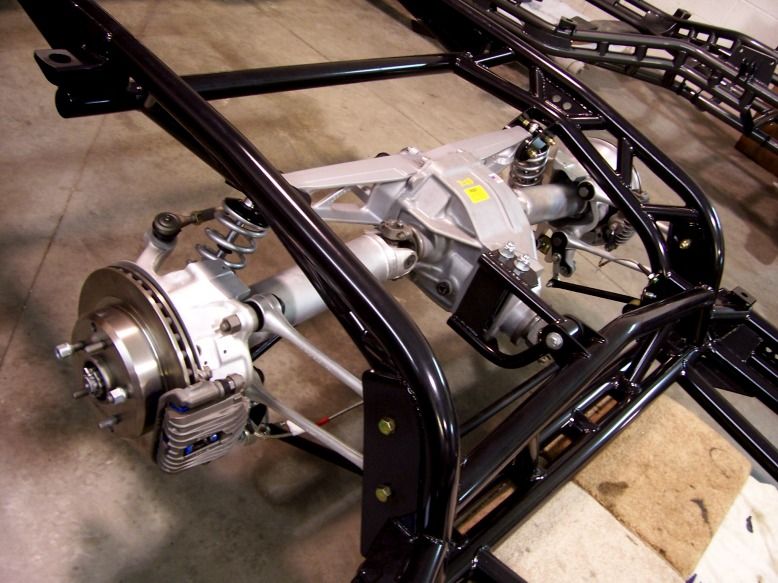
This Thread is about as disjointed as it can get. These pics were sent by Mike at SRIII before shipment. Here's what you get with a Stage II chassis. Options were D44 rear diff and SS brakelines. The request was to use 1987 C4 items and to keep track width as close as possible to '68 dimensions (you can see how you are limited on the front due to the needed space to mount the motor). Also, side exhaust was specified...hence the two additional tubes running length wise from the engine mount area, through the trans mount beam, to the rear kick-up area.
This Thread is about as disjointed as it can get. These pics were sent by Mike at SRIII before shipment. Here's what you get with a Stage II chassis. Options were D44 rear diff and SS brakelines. The request was to use 1987 C4 items and to keep track width as close as possible to '68 dimensions (you can see how you are limited on the front due to the needed space to mount the motor). Also, side exhaust was specified...hence the two additional tubes running length wise from the engine mount area, through the trans mount beam, to the rear kick-up area.
r,
Rob
That's really really nice!, congs on that outstanding job
Hi P123,
It's really great to CRAFTSMANSHIP! That's a terrific looking chassis and runnng gear!
I guess I'm still thinking the same thing as the last time I posted!
Regards,
Alan
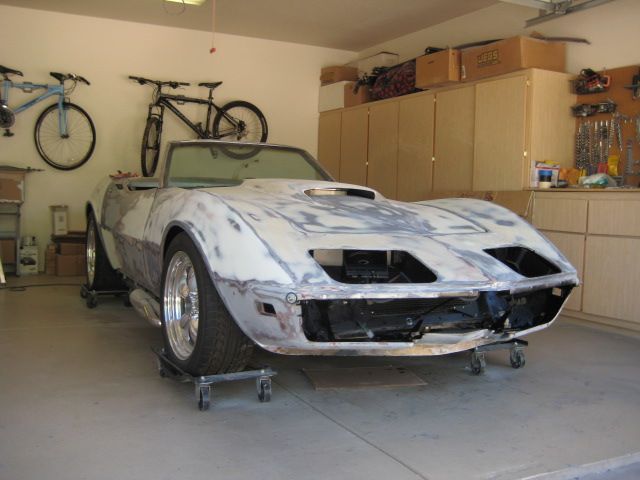
Just a pic to show how the wheels/tires fit in the wells. Rear 18x9.5 (6.75" BS) w/ 275/40-18; Front 17x8 (5.5 BS) w/ 245/45-17... I have a bit of room to go wider on both ends, but I wanted to play it conservative the first time around. May go with 6.5 BS and a 285 tire on the rear down the road...
Hi Rob,
I see that you went with side pipes also. What brand are they> Did you have to modify the to fit? I had to modify the second tube on the driver side to clear the frame on mine.
Rob
So slow going...these pics have been posted elsewhere, but maybe we'll make this thread the master
I was surprised to see this thread pop up. So I've been going through a 'life' transition, if you will, and my new job has me travelling quite a bit and I got stuck in the middle of an airplane interior project that is nearly done.
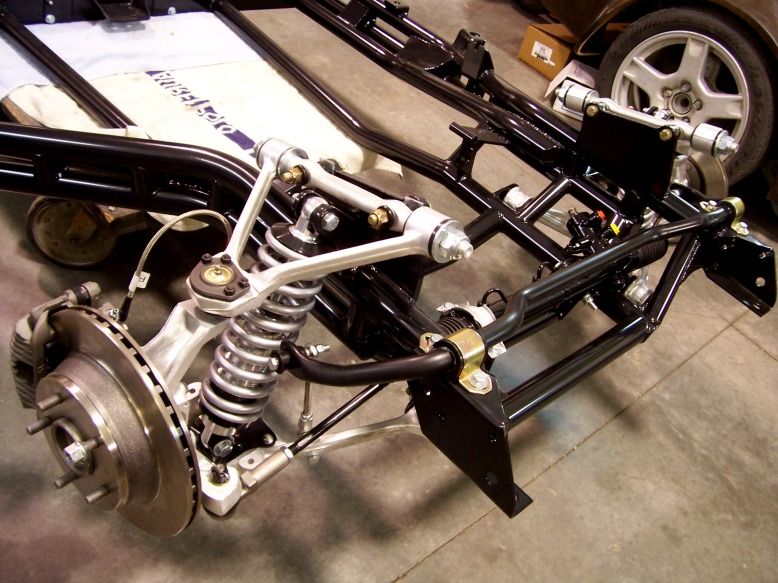
Vetteguy, The side pipes are Hooker stainless and as seated in the car there is a stainless o2 bung welded into the collector at the 9 o'clock position. Because of how the SRIII frame and body interface, the wiring actually runs through/between the frame tubes. I was somewhat concerned about this so I fabbed and engine stabilizer bar that connects to a bracket on the pax side/rear cylinder head to a longitudinal frame tube. This should help with a few things. I took the header to an exhaust shop to the have the bung installed....very tough to cut the hole.
Datsup7T2,
Thanks for the encouragement. I'm planning to get back on this thing soon. Waiting for a hefty arrival from Wilcox as we speak...all the exterior trim, weather stripping, lenses, door handles, emblems...I've also begged, borrowed and stolen a calibration file for the EFI...soon!


 02-10-2012, 01:01 AM