
My first rebuild
 11-22-2012, 05:27 PM
#41
Le Mans Master

Member Since: Mar 2008
Location: Oxford MA-----You just lost the game!!!!
Posts: 5,948
Likes: 0
Received 62 Likes
on
52 Posts

Nah, you really need a puller. Be careful removing the cam, you don't want to nick the cam bearings. What I like to do is, after you remove the timing chain gear, screw a long bolt, 6-8 inches long, into the cam, so you can use it as a handle while removing the cam. Works good for installing a cam, too.
Keep the shiny side up!
Scott
Keep the shiny side up!
Scott
 11-22-2012, 06:43 PM
#43
Safety Car


Why are you rebuilding this engine? If oil pressure and compression was good I would just clean the deck carefully, check it for straightness and invest your money in a set of heads and a cam. Just from the pictures it looks like a low mileage performance motor. Someone took the time to use an aftermarket crank, pistons and have the engine assembly balanced!
Nice base
Nice base
11-22-2012, 06:51 PM
#44
Drifting

Thread Starter

Why are you rebuilding this engine? If oil pressure and compression was good I would just clean the deck carefully, check it for straightness and invest your money in a set of heads and a cam. Just from the pictures it looks like a low mileage performance motor. Someone took the time to use an aftermarket crank, pistons and have the engine assembly balanced!
Nice base
Nice base
There were too many unknown problems. I am just trying to get it to a good running place now. If it doesn't need rebuilt, I am all for that. SBG and Scott as well as many of you have just been helping me out. I also pulled it to clean and fix a few things in the engine compartment.
11-22-2012, 07:17 PM
#46
Safety Car
I guess it's time to start popping bearing caps. Detonation sometimes can hammer the top of the bearing.
The balancer slip is pretty common but the problem comes in when people still try using it to time the motor.
You might get lucky and the bearings might be in the beginning stages of wear but if not, it looks like a new crank with plenty of meat for the crank to be ground.
You can handle this with no problem, just keep posting pics and questions!!!
Good Luck
11-22-2012, 07:57 PM
#47
Drifting
Thread Starter
I guess it's time to start popping bearing caps. Detonation sometimes can hammer the top of the bearing.
The balancer slip is pretty common but the problem comes in when people still try using it to time the motor.
You might get lucky and the bearings might be in the beginning stages of wear but if not, it looks like a new crank with plenty of meat for the crank to be ground.
You can handle this with no problem, just keep posting pics and questions!!!
Good Luck
The balancer slip is pretty common but the problem comes in when people still try using it to time the motor.
You might get lucky and the bearings might be in the beginning stages of wear but if not, it looks like a new crank with plenty of meat for the crank to be ground.
You can handle this with no problem, just keep posting pics and questions!!!
Good Luck
11-22-2012, 08:54 PM
#48
Drifting


 ...just messing with you.
 The bearing caps are actually the "main" caps. You may have heard of "4 bolt main" and "2 bolt main". They are what hold the crankshaft in the bottom of the block. When the engine is on a stand and upside down with the oil pan off, the crank gets layed into the block which have half of a bearing in each race. Once the crank is in, the "caps" with the other half of the bearing get placed over the crank and secured into the engine. Each cap either has 2 bolts or 4 bolts... You have a total of 5 main caps. 1 at each end of the engine and three in the middle.
To answer your question, you should number them to orient which came from where and do not spin them. Basically, if you pull them off, make sure they go back on exactly the way they came off, and torqued to the proper rating in the proper sequence. ...by the way you are looking for any "copper" looking metal areas or grooves in the bearings.
11-22-2012, 09:06 PM
#49
Drifting
You have 4 bolt main caps. You need to buy a numbering punch kit and number each main cap. Then if you remove the rods and pistons number the cap and rod as set. If you don't you may end up having to get extra machine work done. Basically just try to number and arrange things so they go back exactly as they were.
You may have already been doing this but I just wanted to support the importance as mentioned above.
You may have already been doing this but I just wanted to support the importance as mentioned above.
11-22-2012, 09:43 PM
#50
Drifting
Thread Starter
You have 4 bolt main caps. You need to buy a numbering punch kit and number each main cap. Then if you remove the rods and pistons number the cap and rod as set. If you don't you may end up having to get extra machine work done. Basically just try to number and arrange things so they go back exactly as they were.
You may have already been doing this but I just wanted to support the importance as mentioned above.
You may have already been doing this but I just wanted to support the importance as mentioned above.

 11-23-2012, 01:16 AM
#53
Melting Slicks

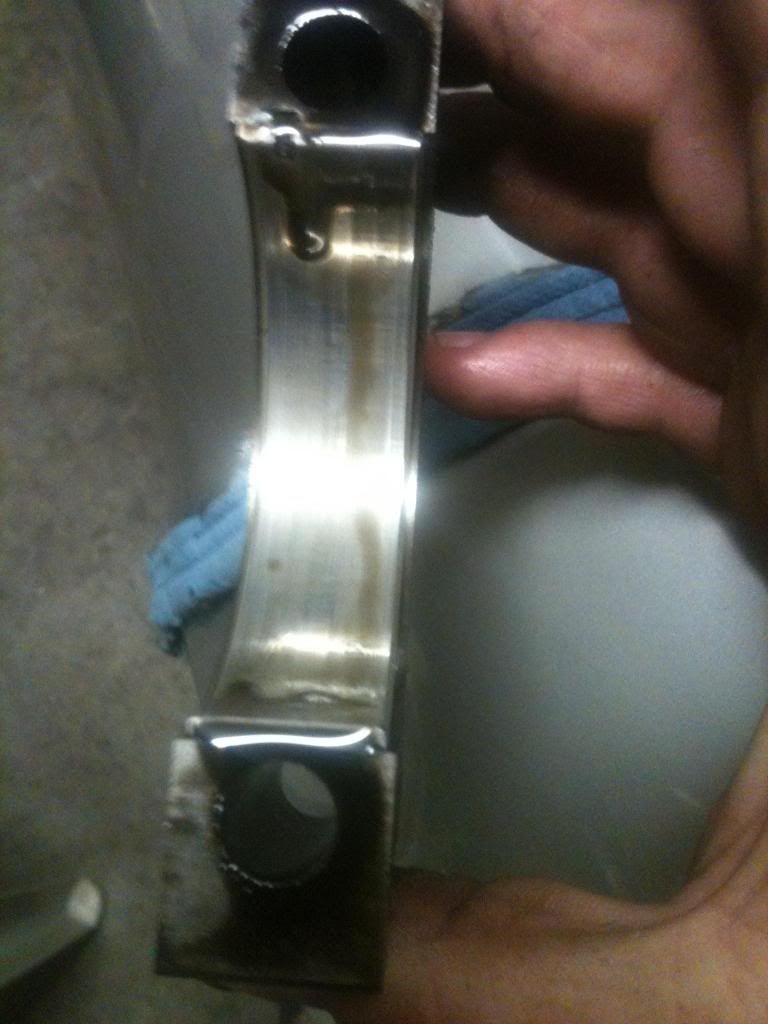
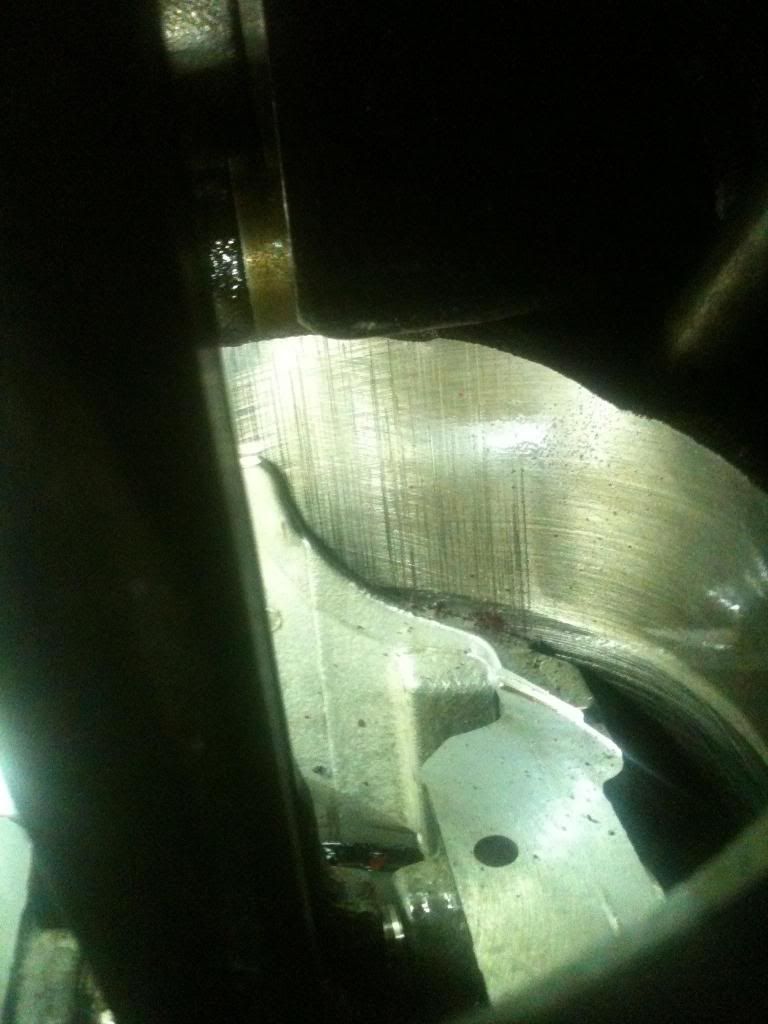
steel crank, forged rods, bearings look good.
As for the scoring - see if you can catch a fingernail on it.... if not (and probably not from that picture)... re-ring away
... and get some decent heads
... and you can pull the crank without pulling the balancer.... but it's a PITA because you have to take the timing cover with it
As for the scoring - see if you can catch a fingernail on it.... if not (and probably not from that picture)... re-ring away
... and get some decent heads
... and you can pull the crank without pulling the balancer.... but it's a PITA because you have to take the timing cover with it
11-23-2012, 01:21 AM
#54
Melting Slicks
.... Scott - I'll mention this to attach to the end of the cam discussion. I've moved towards getting a lot more help on my engine builds because there is a huge amount to know when building 2500 hp - to the point that I'm part of a team that's assembling my latest motor. When we designed the motor, we seriously did start with the cam, and one of the Yodas* told me that bit of knowledge about the cam. Most times, even with what I know, most times I feel like my best contribution is coffee and donuts. 
*they're all really smart, short, and I swear have a green hue around them
*they're all really smart, short, and I swear have a green hue around them
11-23-2012, 01:25 AM
#55
Drifting
Thread Starter
steel crank, forged rods, bearings look good.
As for the scoring - see if you can catch a fingernail on it.... if not (and probably not from that picture)... re-ring away
... and get some decent heads
... and you can pull the crank without pulling the balancer.... but it's a PITA because you have to take the timing cover with it
As for the scoring - see if you can catch a fingernail on it.... if not (and probably not from that picture)... re-ring away
... and get some decent heads
... and you can pull the crank without pulling the balancer.... but it's a PITA because you have to take the timing cover with it
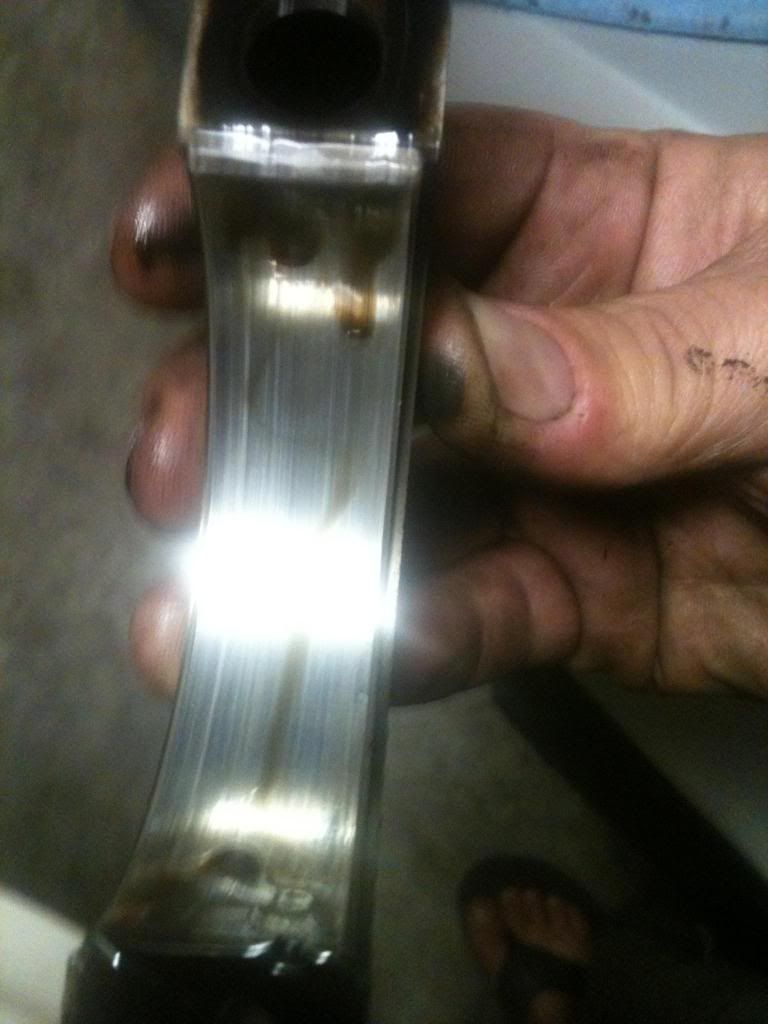
that is the deepest scratches I have found and they will not catch a nail. SBG, is there a place I can watch a video or something on how to re-ring? Do I need to hone the cylinders? I am going to get a puller in the morning, I also have not figured out where the metal in the pan came from.Can I get ring at a local part store (anything special) or do I need to order them?
Last edited by FatCat; 11-23-2012 at 01:27 AM.
11-23-2012, 02:08 AM
#56
Le Mans Master
Member Since: Mar 2008
Location: Oxford MA-----You just lost the game!!!!
Posts: 5,948
Likes: 0
Received 62 Likes
on
52 Posts
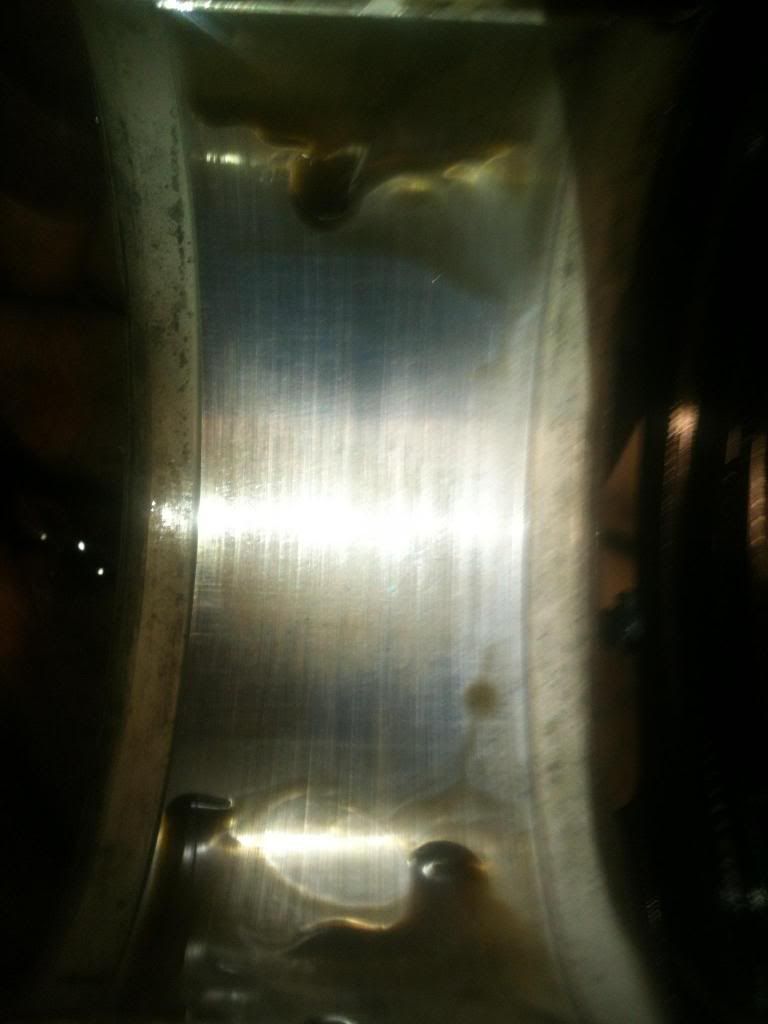
Close-up flash photography can make things look a lot worse than they are. You can still see the cross-hatching through the scoring, and you say you can't catch a fingernail on it, I would be awfully tempted to not even re-ring it. Those bearings look almost new, too, I'd be tempted to re-use them. Key word there is tempted. The smart thing to do would be to take it to a machine shop and let them clean and magnaflux the block. They can also measure the crank for you and tell you what size bearings you need to order, and get some recommendations from them. Or, you could roll the dice! Get some Plasti-gauge, and see what the clearance is on the main bearings. I think most bearings will say what size they are on the back, if you want new ones of the same size. And you still haven't looked at the rod bearings. Who knows what might be going on there! It's looking good so far, though! I'd guess that since the main bearings look so good, you can be reasonably confidant that there hasn't been too much grit flowing through the oiling system. What did the bottom of the lifters look like? Any wear there?
BTW, don't get to thinking I am any kind of expert at all! I have had a hand in re-building maybe a half dozen engines in my whole life (not counting two-strokes, but they are a completely different animal) and they have all been kinda half-assed, (some more than others!)compared to what some of the guys on this forum are used to. Like SBG, for instance. When people start talking about 2500 horsepower engines, it's time for me to leave the room!
You'll probably want to order your rings and bearings as a package. Here's a link to a place that has some hard-to-beat deals:
http://www.northernautoparts.com/Pro...uctModelId=381
Keep the shiny side up!
Scott
Last edited by scottyp99; 11-23-2012 at 02:14 AM.
11-23-2012, 05:00 AM
#57
Melting Slicks

I'd have the rods magnafluxed as well, had one break on me not long after a rebuild, will never make that mistake again, I did drive the car hard but it still shouldn't have broken...
11-23-2012, 08:03 AM
#58
Safety Car
Maybe you can narrow down the metal in your pan. Take a magnet and see if its alum or steel. If its steel it may have been left over from the machine shop. If its alum you may have a cracked ring and considering the detonation that motor went through it would be a good idea to check all the pistons anyway! A summit re-ring kit is cheap and you'll get all new bearings,ring, gaskets,ect...
I hope you keeped all those bearing caps in order. It's a MUST!!!
I hope you keeped all those bearing caps in order. It's a MUST!!!
Last edited by hugie82; 11-23-2012 at 08:13 AM.
11-23-2012, 08:07 AM
#59
Safety Car
If you are reinstalling the caps, they only go on one way but you can force them on wrong. Look and you'll see the cap for the rod is slightly offset. The mains have arrows pointing to the front of the engine.
Fatcat, there is NO STUPID question when you're learning !!! Ask anything that come to mind or before you try tackling something new...
Fatcat, there is NO STUPID question when you're learning !!! Ask anything that come to mind or before you try tackling something new...
Last edited by hugie82; 11-23-2012 at 08:18 AM.
11-23-2012, 09:06 AM
#60
Drifting
Thread Starter
Maybe you can narrow down the metal in your pan. Take a magnet and see if its alum or steel. If its steel it may have been left over from the machine shop. If its alum you may have a cracked ring and considering the detonation that motor went through it would be a good idea to check all the pistons anyway! A summit re-ring kit is cheap and you'll get all new bearings,ring, gaskets,ect...
I hope you keeped all those bearing caps in order. It's a MUST!!!
I hope you keeped all those bearing caps in order. It's a MUST!!!