
OBX Sidemount headers
 12-10-2012, 06:24 PM
#1
Intermediate

Thread Starter

Member Since: Oct 2009
Posts: 29
Likes: 0
Received 0 Likes
on
0 Posts
looking to buy a set of OBX sidemount headers, has anybody bought these, what do i need to look out for,do they fit, had a set of hooker they rusted out in one year.OBX are stainless.
 12-10-2012, 09:06 PM
#2
Intermediate
Member Since: Dec 2012
Posts: 48
Likes: 0
Received 0 Likes
on
0 Posts
I bought the standard long tube stainless ones and they hung down about 2 inches more than they should, It was bad enough I had to replace them with some shortys. Be very carefull good luck
12-10-2012, 09:54 PM
#3
Racer
They're not the same quality as say a set of Hookers, but the price is worth the extra work. Some people have a few minor fitment issues, others none. Do a search, well discussed. They're great headers.
12-10-2012, 10:13 PM
#4
Burning Brakes


Only issues with mine are that the side tubes are closer to the frame at the rear than at the front and the bolt holes on the flange didn't want to line up easily. I would buy a set of Fel-Pro gaskets and check the flange holes before attempting to mount them.
Oh, and now I have the problem that they make the rest of car look bad by comparison.
I'll work on fixing that...
Oh, and now I have the problem that they make the rest of car look bad by comparison.
I'll work on fixing that...
12-10-2012, 10:16 PM
#5
Intermediate
Member Since: Dec 2012
Posts: 48
Likes: 0
Received 0 Likes
on
0 Posts
???
Only issues with mine are that the side tubes are closer to the frame at the rear than at the front and the bolt holes on the flange didn't want to line up easily. I would buy a set of Fel-Pro gaskets and check the flange holes before attempting to mount them.
Oh, and now I have the problem that they make the rest of car look bad by comparison.
I'll work on fixing that...
Oh, and now I have the problem that they make the rest of car look bad by comparison.
I'll work on fixing that...
12-11-2012, 07:21 AM
#7
Burning Brakes
You will have installation issues. Access to a lift is very helpful. Check header flange fit to heads first. I fought mine for several days (and visits to a muffler shop for "pounding") before mine could be installed. Make a template of the header flanges for both sides (bolt holes and port slots) and and place on heads to check alignment accuracy. Then attempt to place your header bolts into the header flange bolt holes to see if they can actually be inserted - and if the bolt can be inserted, check to see if you can access the bolt head with a wrench (some of the pounding I mentioned earlier). I had to fabricated a special wrench so I could tighten my head bolts. Once installed they do look good.
Good luck.
Good luck.
 12-14-2012, 12:16 PM
#9
Instructor
Member Since: Apr 2010
Location: Fairview PA
Posts: 177
Likes: 0
Received 0 Likes
on
0 Posts
Have the SS hooker headers myself and side pipes. I was lucky enough to do this when the body was off the car, so all in all it was not to bad. However, after I got everything back together, looks like it would be a pain to do with everything in place.
12-14-2012, 10:02 PM
#10
Pro

A lot of the installation problems will depend on how straight the body is and how centered on the frame it is. My installation seemed to lean towards the worst case scenario though I'm sure there could be worse out there.
First thing that I found out was the bolt holes were not drilled 100% accurately. I had to elongate (wallo out) the second holes in order to get the bolts to start. You will want to use longer bolts since the header flange is 3/8" thick but on the holes where the pipes make a sharp bend you'll use the standard length bolts here.
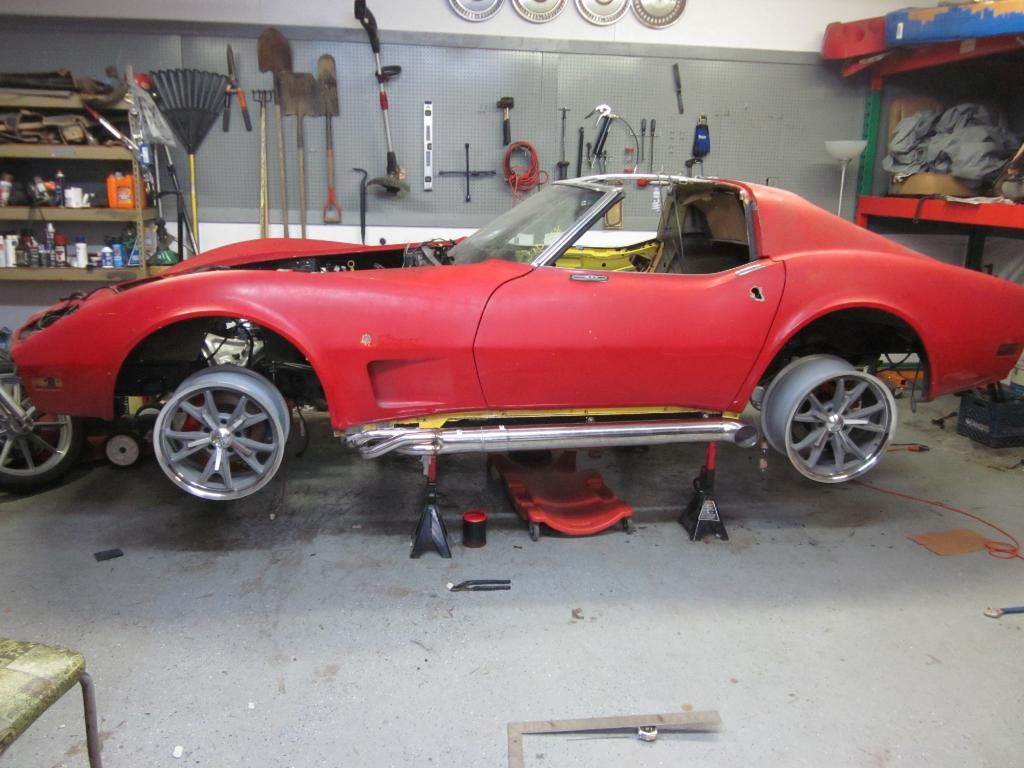
The second problem will be the rocker moldings and whether they will go back on in one piece, two pieces with with some trimming. Also the rear of the side pipe (exit tube) tends to bow inward towards the frame. I had to cut my rocker moldings into two pieces and grind them down to conform to the tube shape. One screw holds the front section in and the remaining screws hole the rest. Unless you get on all fours you can't tell what I did since I took my time making cardboard molds as guides to modify the rockers with.
Everything else was good. No hitting the idler arm or steering box. A/C bracket for the Vintage Air I installed only needed a slight grind on the spacer tube since the pipes are larger in diameter. I did run into a problem getting a spark plug socket on #2 spark plug but the rest were fine, a little bit of a challenge but went in fine.
So the bottom line is what kind of tools do you have and what is your mechanical experience. If you can think creatively and fabricate a little bit then you'll be fine, if not search for a shop willing to take on the install and let them handle it.
First thing that I found out was the bolt holes were not drilled 100% accurately. I had to elongate (wallo out) the second holes in order to get the bolts to start. You will want to use longer bolts since the header flange is 3/8" thick but on the holes where the pipes make a sharp bend you'll use the standard length bolts here.
The second problem will be the rocker moldings and whether they will go back on in one piece, two pieces with with some trimming. Also the rear of the side pipe (exit tube) tends to bow inward towards the frame. I had to cut my rocker moldings into two pieces and grind them down to conform to the tube shape. One screw holds the front section in and the remaining screws hole the rest. Unless you get on all fours you can't tell what I did since I took my time making cardboard molds as guides to modify the rockers with.
Everything else was good. No hitting the idler arm or steering box. A/C bracket for the Vintage Air I installed only needed a slight grind on the spacer tube since the pipes are larger in diameter. I did run into a problem getting a spark plug socket on #2 spark plug but the rest were fine, a little bit of a challenge but went in fine.
So the bottom line is what kind of tools do you have and what is your mechanical experience. If you can think creatively and fabricate a little bit then you'll be fine, if not search for a shop willing to take on the install and let them handle it.
12-15-2012, 07:11 AM
#11
Burning Brakes
Good response Palmbeach, your "creativity" statement is right on. Also, had I not had access to a lift and a great selection of tools I couldn't have completed the install.