
Speed Direct's Shark Bite Rear Suspension Conversion
 03-27-2014, 12:51 AM
#1
Pro

Thread Starter
After a LOT of deliberation, replacement costs vs suspension conversions, I kept coming back to Speed Direct's Shark Bite suspension conversion. Yes, there are a few others out there, but NONE offers the visual satisfaction along with street/performance adjust-ability in one neat and tidy little package. This thread isn't about debate-the decision has already been made, yesterday with a call to the gal at Speed Direct to place my order. I had already gone over the options a few weeks ago with Mark Flavin, and had him save the quote for easy future reference and began saving my dollars. I went with the single adjustable shocks, not that I didn't want the doubles, it just would have made me wait at least another week or so to get the kit, as fundidge is low and this build busting my you know whats in every direction! Anyway, the sweet gal informed me they had everything in stock, ready to ship EXCEPT the single adjustable shocks. They were on back order. Probably reading into my sad bummerness, and not wanting me to have to wait, the kind gal offered to upgrade me to double adjustable shocks, and at NO cost to me, just to be able to get them out to me without having to wait a few weeks. What's a guy supposed to say to that? THANK YOU...Thank You...thank you. Face it, the kit isn't cheap, and took some additional saving, but it not only will look great, have unreal adjust-ability (especially now with the doubles) and it takes care of a 40 year old issue I would have to deal with, one way or another.
This morning, before work, I checked my email, and it said FedEx already had the package, and at the local shipping facility. No way, right? Since I work outside of the home, and a signature was required, I opted to pick it at the local FedEx facility. Come on, I mean really? It had to be nearly noon yesterday when I ordered it and I'm already drooling over it in real life? Can this be?
Yes. The shipping gods have spoken. This time anyway.
[IMG]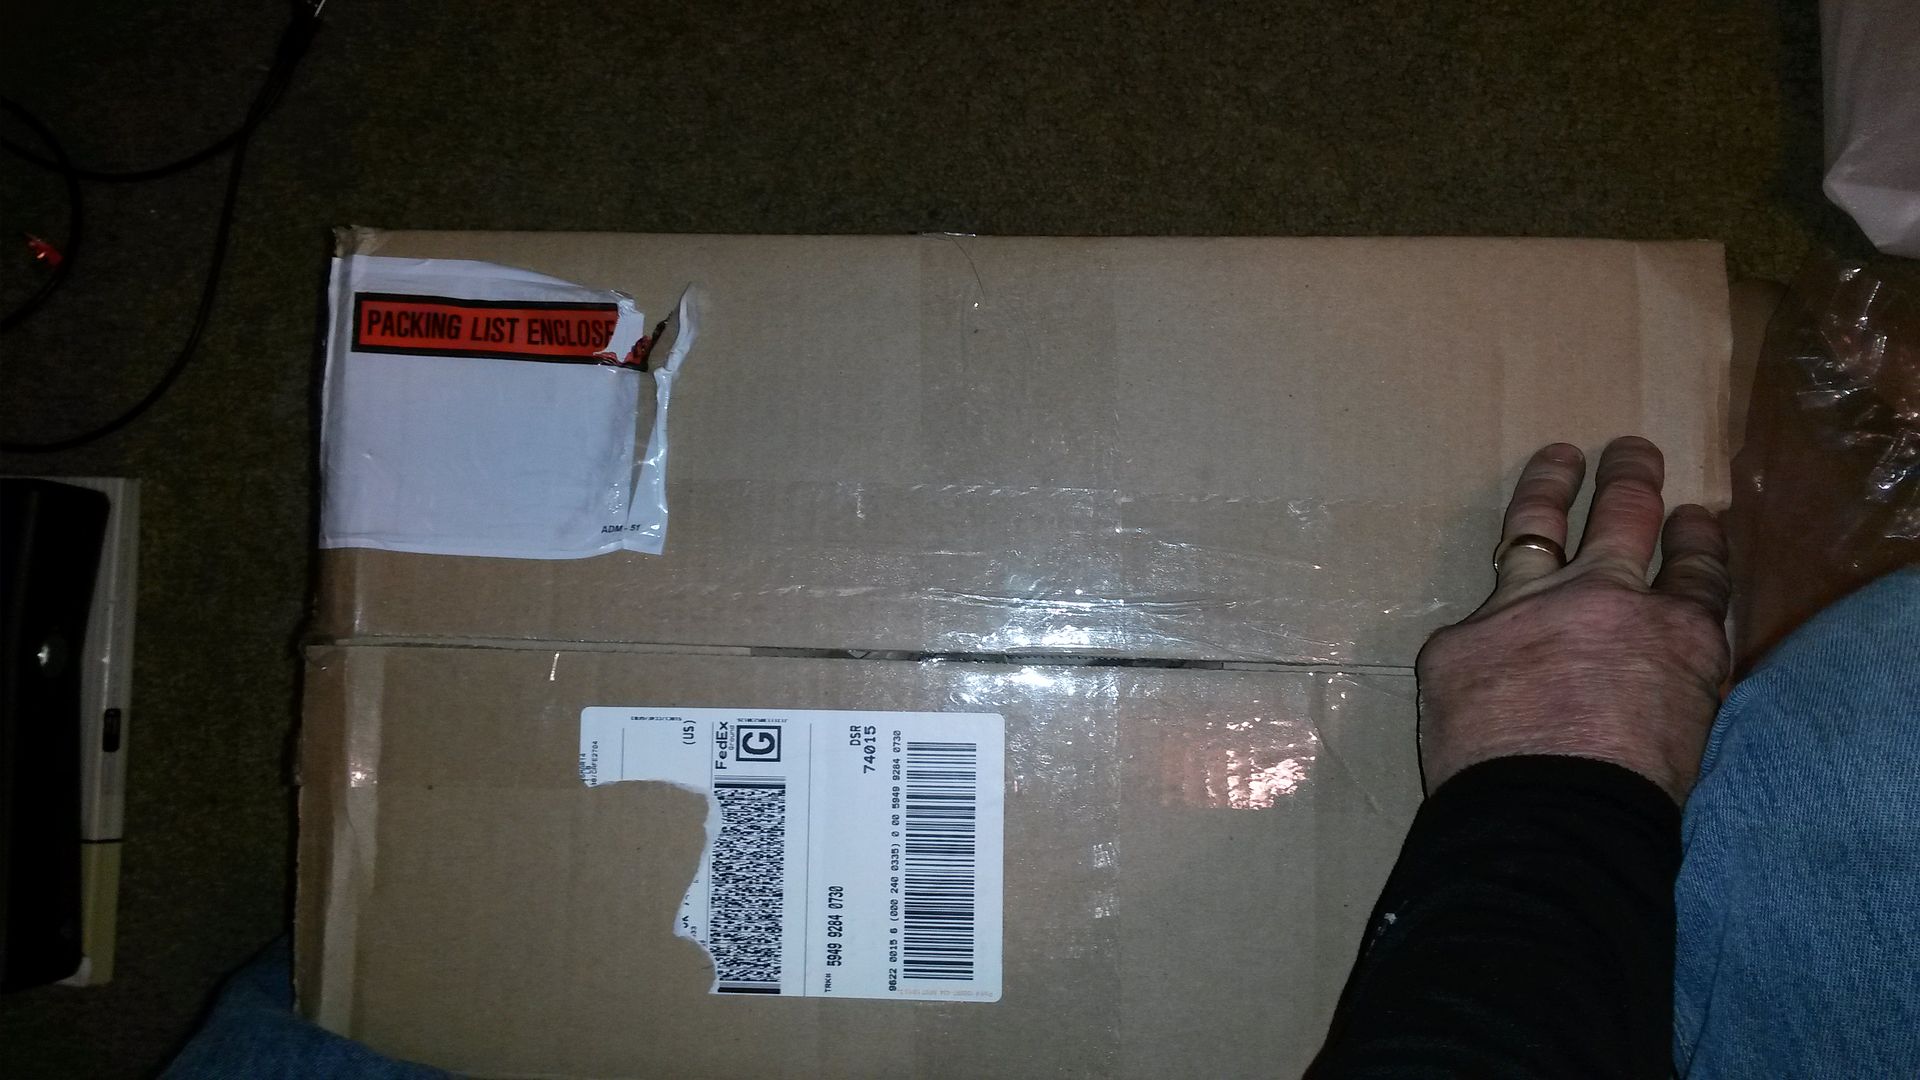 [/IMG]
A quick opening of the box revealed these guys didn't want the show quality powder paint to get dinged during shipping. Not only protected well, but packaged clearly, and each part had it's own zip lock bag with not only the part number on it, but the date of manufacture as well as the revision number of each component.
[IMG]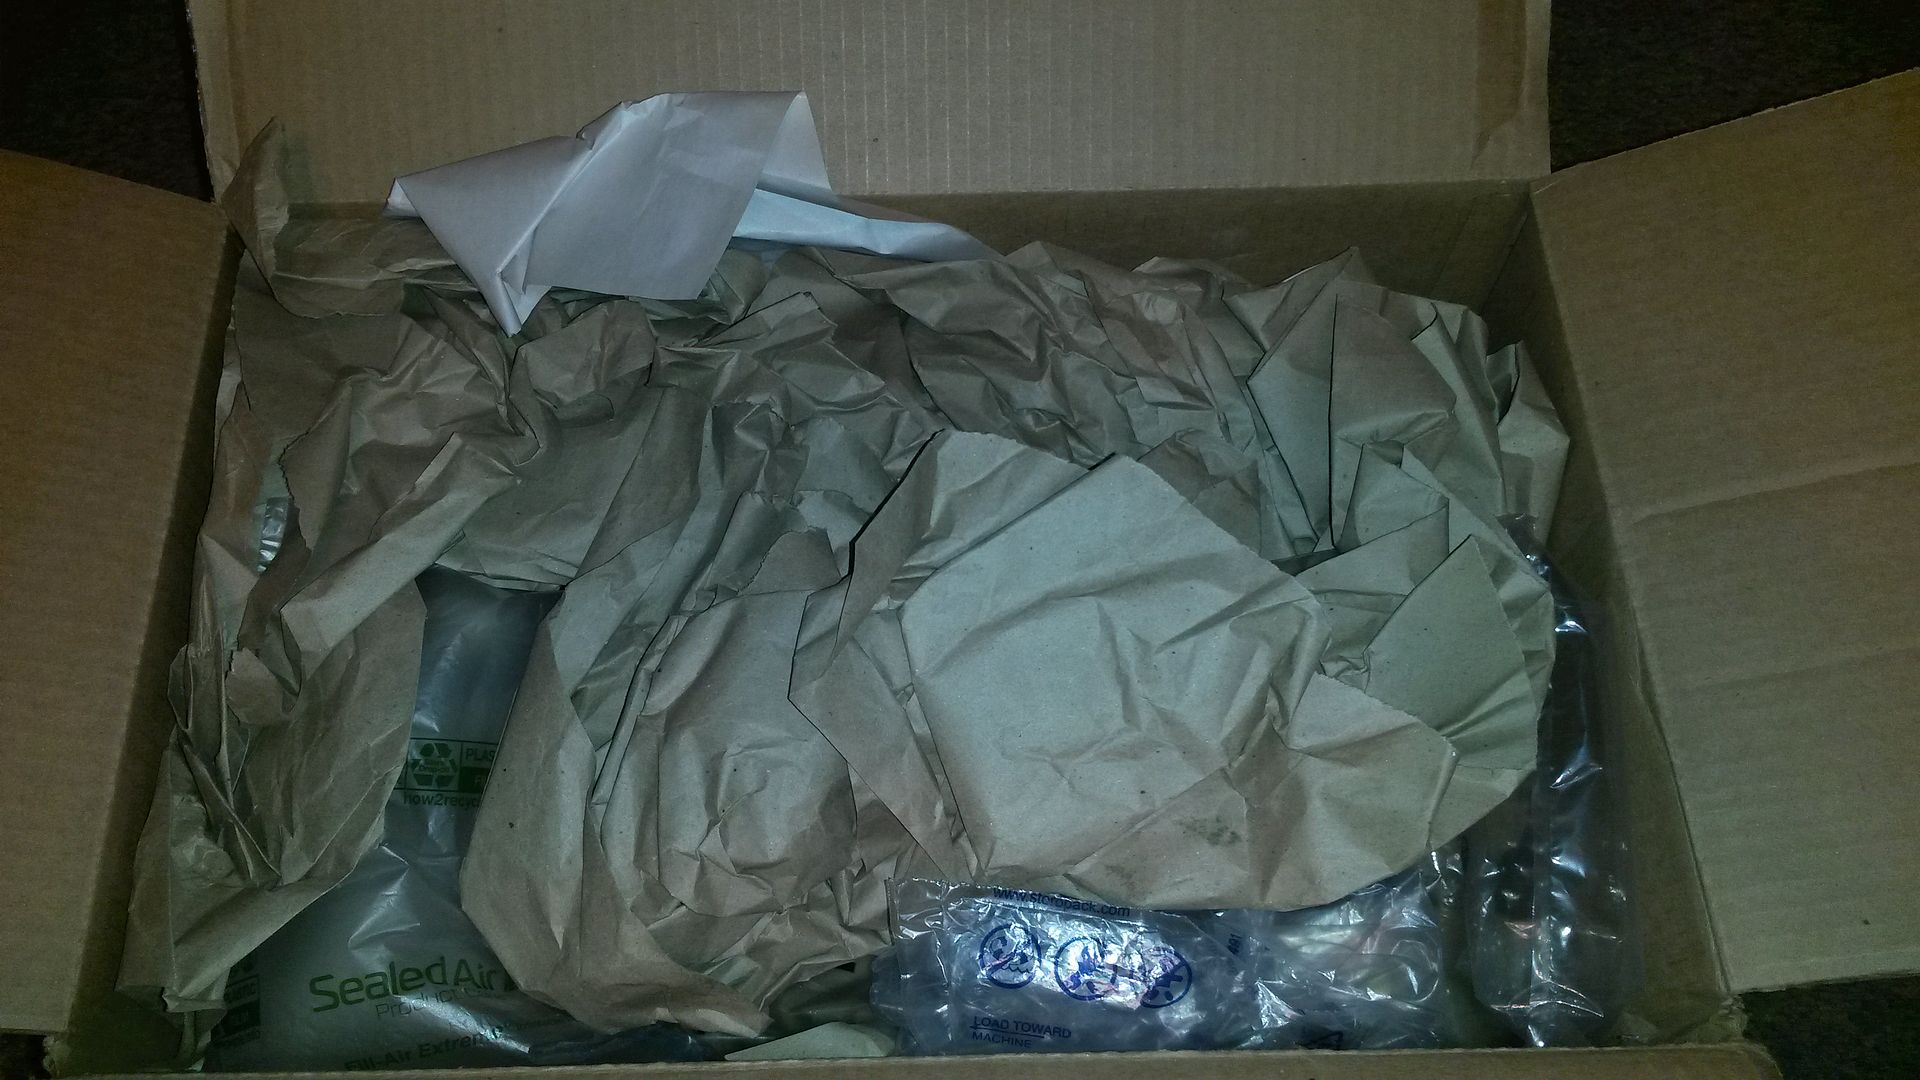 [/IMG]
[IMG]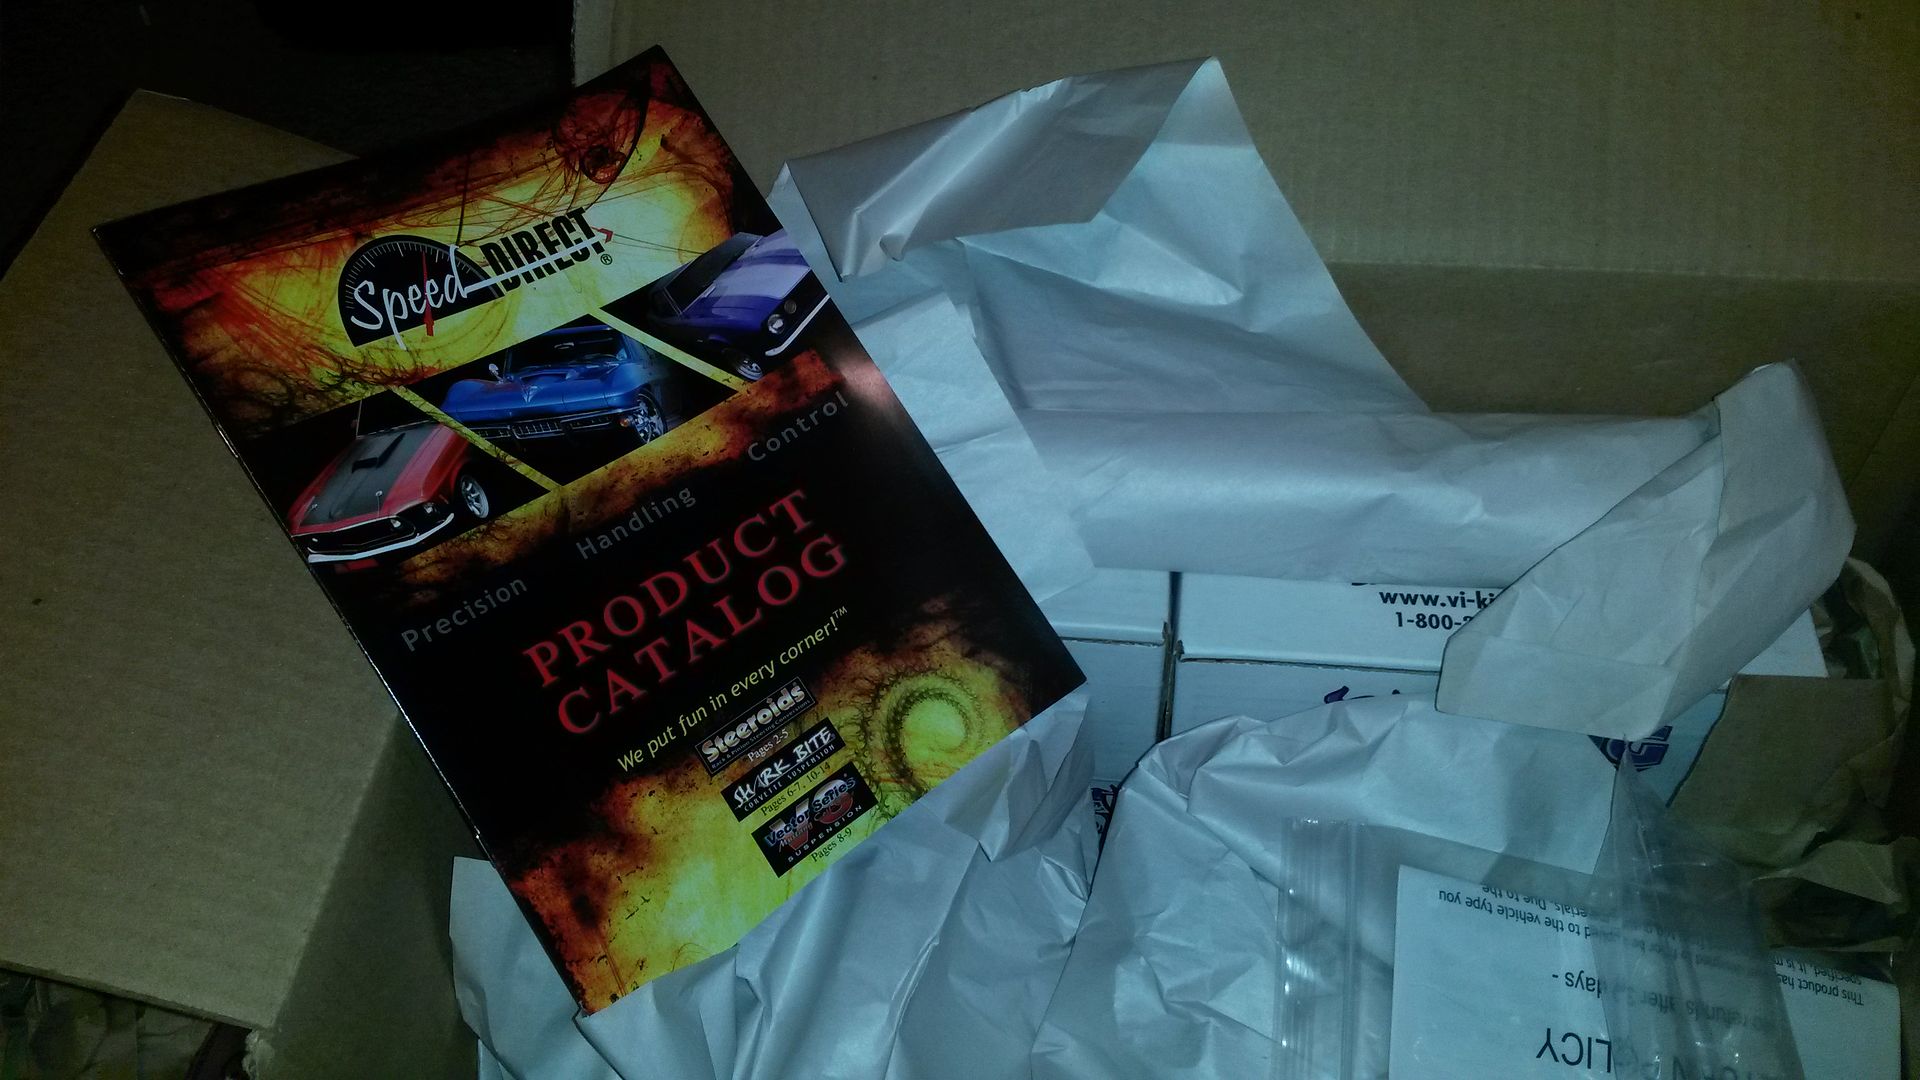 [/IMG]
Here is what you get.
[IMG] [/IMG]
When it came to the shocks, I wasn't quite sure what to expect. I was pleasantly surprised to find both the double adjustable shocks as well as the beautiful chrome coil overs were made by Viking. Not only are they known for quality at a price that cant be beat, they are built and assembled in America, by Americans in Lakeville, MN. Glad to support a few American families in my build and not some offshore outfit.
[IMG]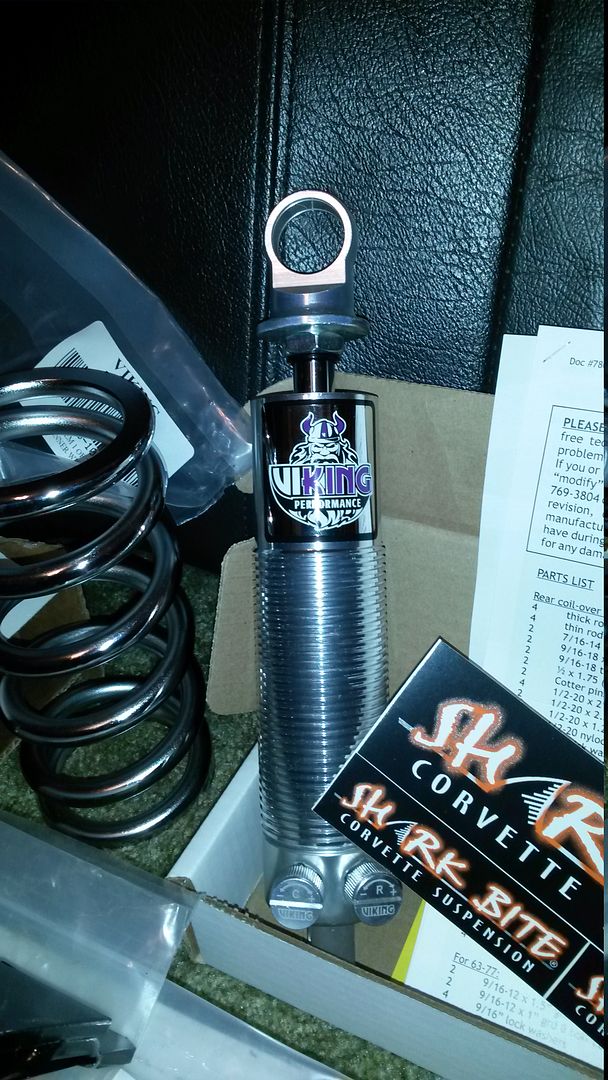 [/IMG]
I've heard a few claim the Shark Bite had flimsy mounting brackets. I beg to differ. These babies are rock solid, 1/4" thick, and have a glossy black powder coat that puts out local powder paint facility to shame. I plan on showing them a few brackets so they know what to expect from me when doing my trailing arms.
[IMG]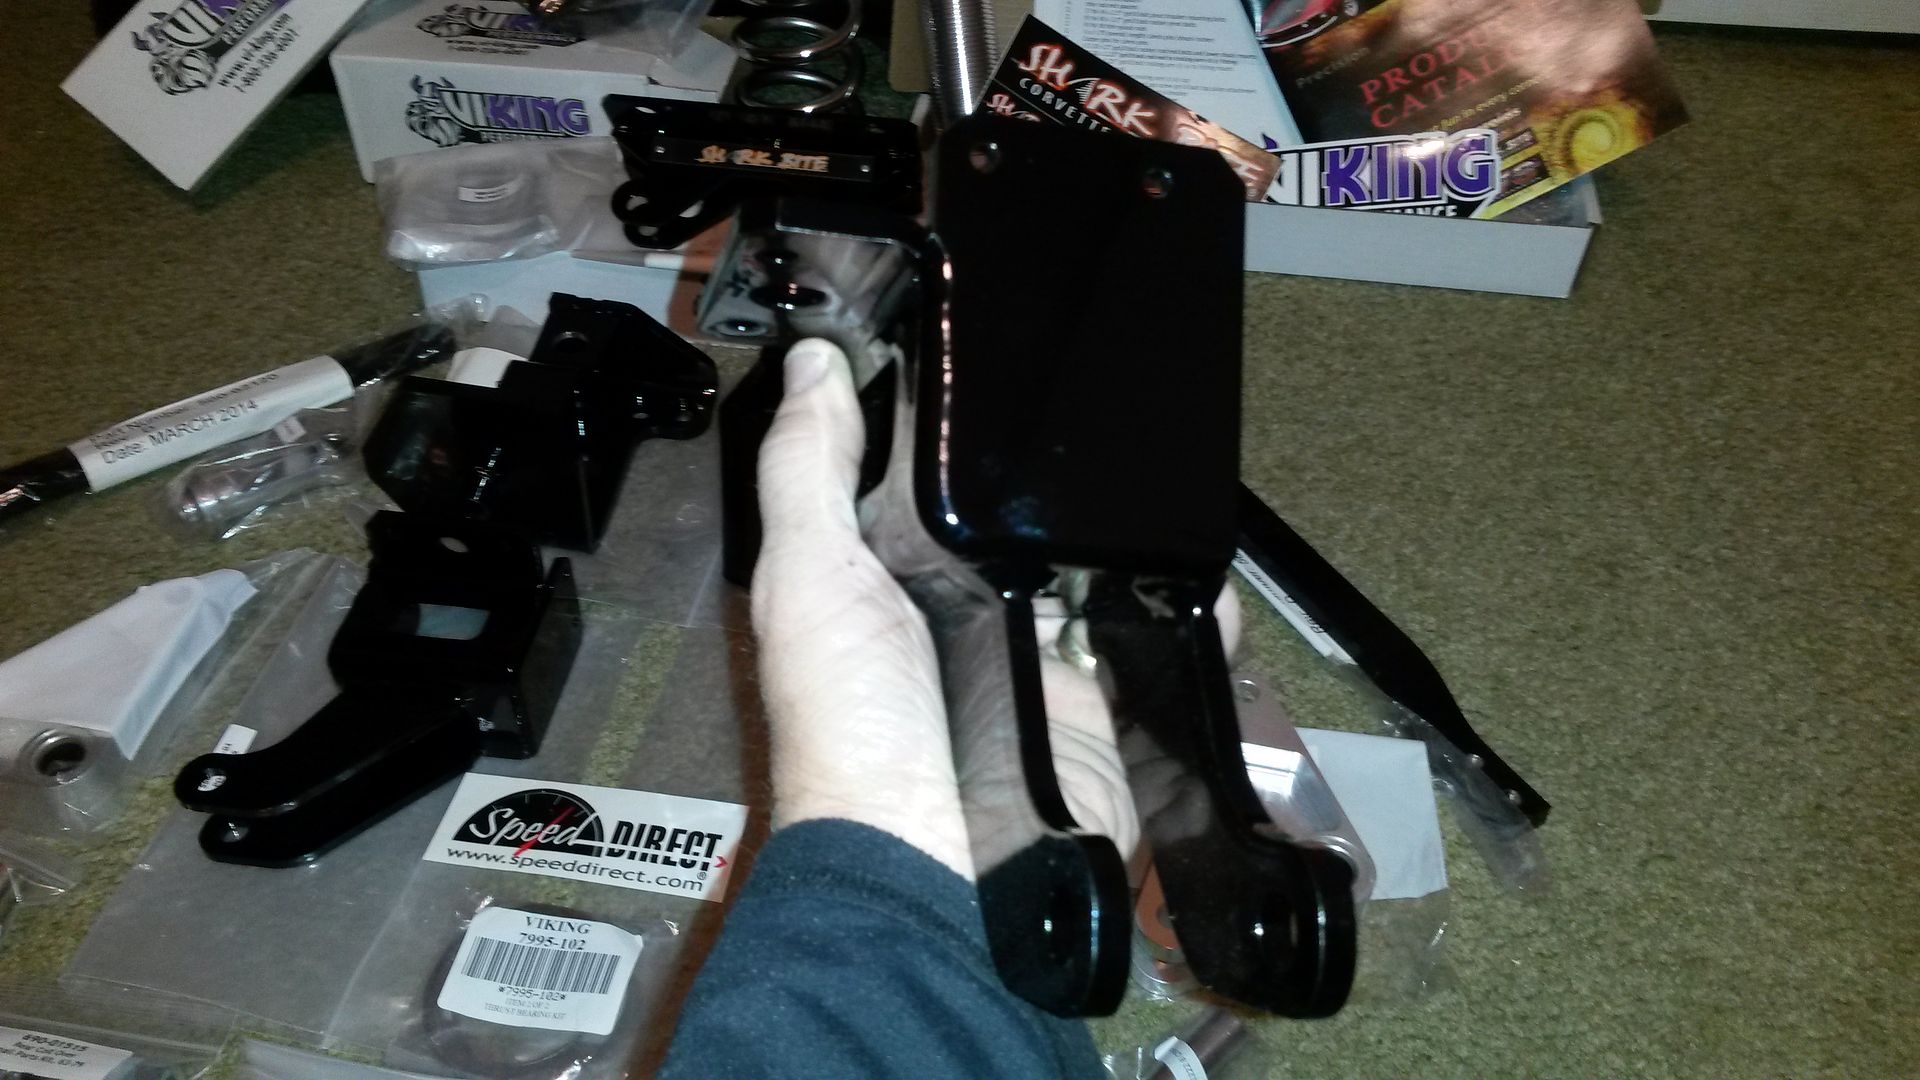 [/IMG]
[IMG]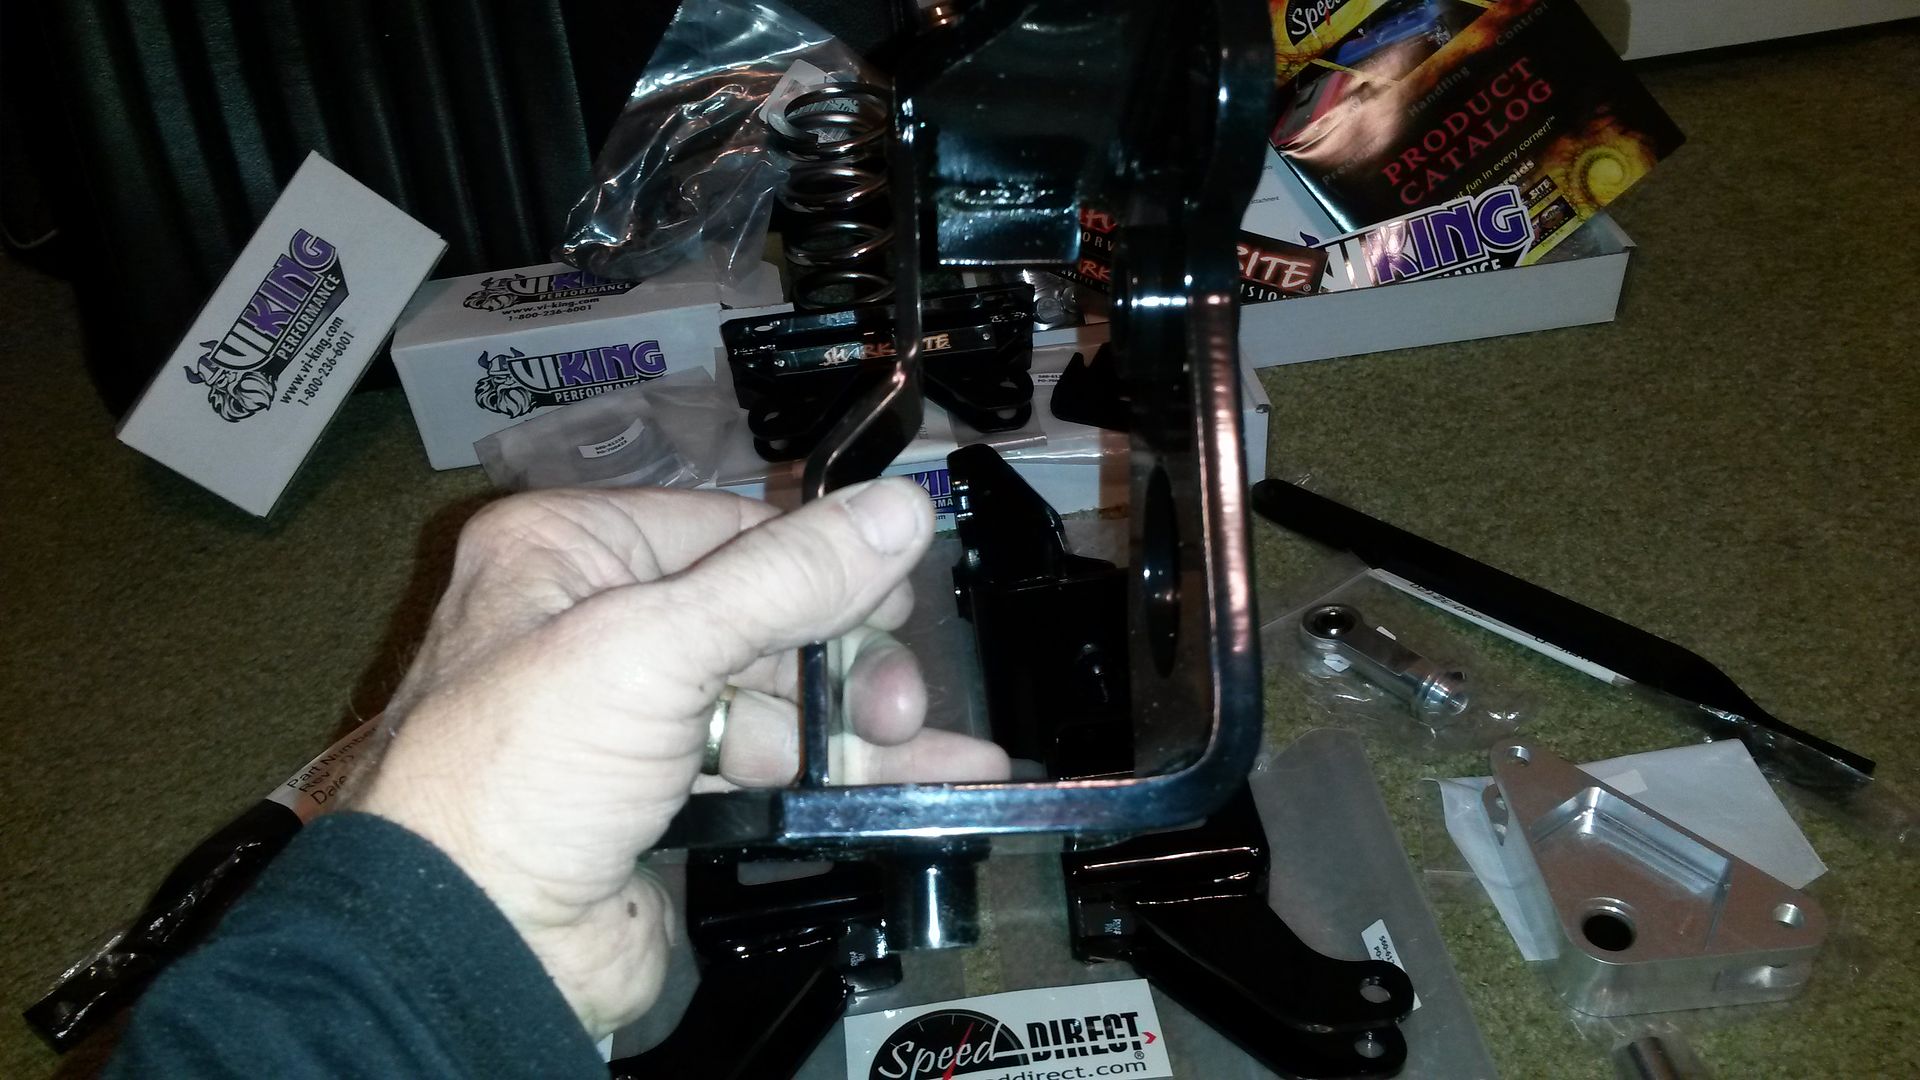 [/IMG]
Even the various ends are very high quality and should last a lifetime.
[IMG]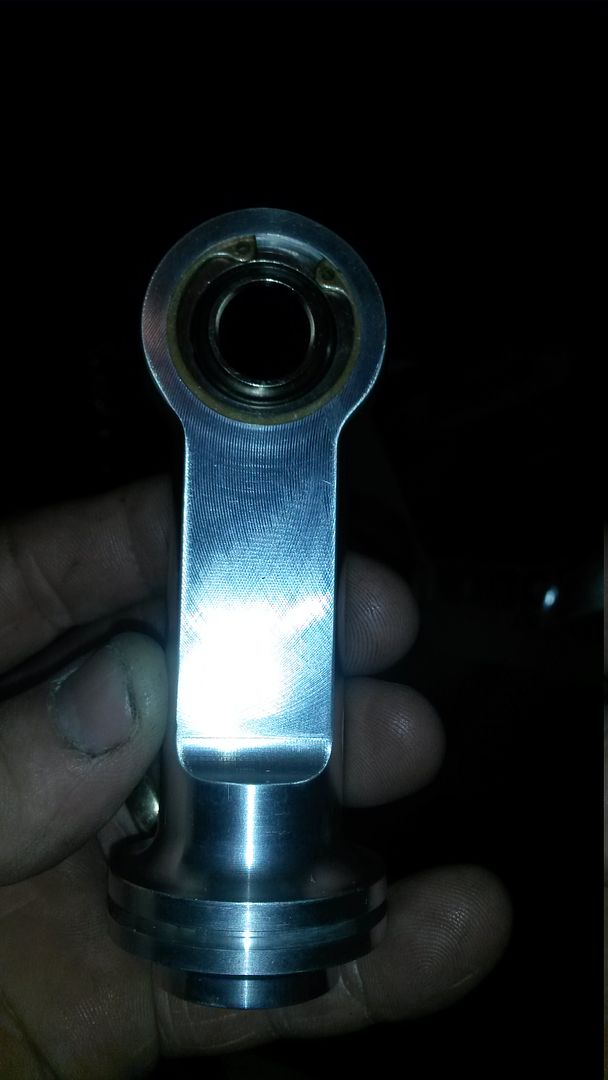 [/IMG]
The rocker design is an engineering marvel. Functionality meets finesse.
[IMG]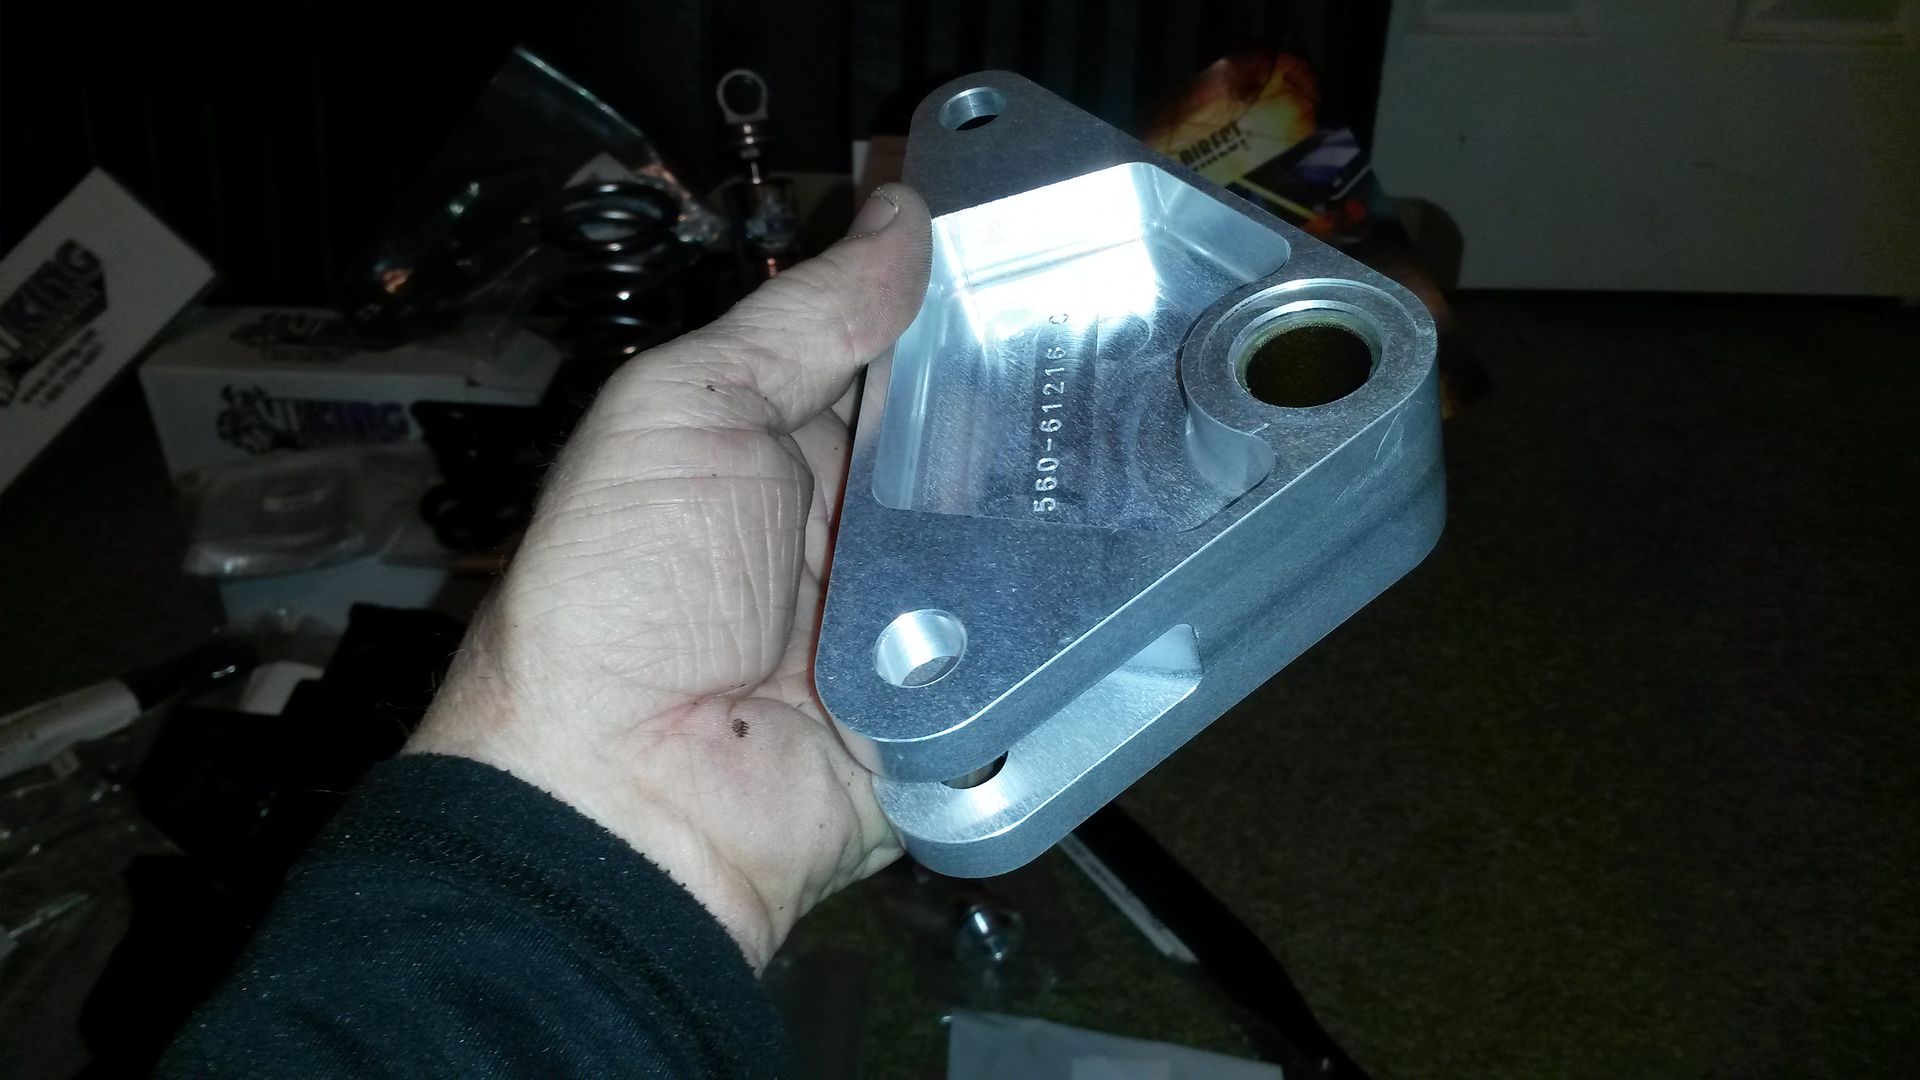 [/IMG]
Not only does this provide a great fully independent and fully adjustable suspension platform, it does so with a finesse that truly stands alone, untouched by any other available bolt on rear suspension mod for a C3 Corvette that I personally have ever seen. Should be a fun project! As soon as the trailing arms look as good as the Shark Bite bracketry, I'll start detailing the install. Seems there is very little out there in the area of real world, hands on reviews on this cool setup. I hope to offer some insight into this conversion, ease of install, any pitfalls along the way, and some real-world testing in some of Southeast Oklahoma's twisty little roads. More to come!
This morning, before work, I checked my email, and it said FedEx already had the package, and at the local shipping facility. No way, right? Since I work outside of the home, and a signature was required, I opted to pick it at the local FedEx facility. Come on, I mean really? It had to be nearly noon yesterday when I ordered it and I'm already drooling over it in real life? Can this be?
Yes. The shipping gods have spoken. This time anyway.
[IMG]
 [/IMG]
A quick opening of the box revealed these guys didn't want the show quality powder paint to get dinged during shipping. Not only protected well, but packaged clearly, and each part had it's own zip lock bag with not only the part number on it, but the date of manufacture as well as the revision number of each component.
[IMG]
 [/IMG]
[IMG]
 [/IMG]
Here is what you get.
[IMG]
 [/IMG]
When it came to the shocks, I wasn't quite sure what to expect. I was pleasantly surprised to find both the double adjustable shocks as well as the beautiful chrome coil overs were made by Viking. Not only are they known for quality at a price that cant be beat, they are built and assembled in America, by Americans in Lakeville, MN. Glad to support a few American families in my build and not some offshore outfit.
[IMG]
 [/IMG]
I've heard a few claim the Shark Bite had flimsy mounting brackets. I beg to differ. These babies are rock solid, 1/4" thick, and have a glossy black powder coat that puts out local powder paint facility to shame. I plan on showing them a few brackets so they know what to expect from me when doing my trailing arms.
[IMG]
 [/IMG]
[IMG]
 [/IMG]
Even the various ends are very high quality and should last a lifetime.
[IMG]
 [/IMG]
The rocker design is an engineering marvel. Functionality meets finesse.
[IMG]
 [/IMG]
Not only does this provide a great fully independent and fully adjustable suspension platform, it does so with a finesse that truly stands alone, untouched by any other available bolt on rear suspension mod for a C3 Corvette that I personally have ever seen. Should be a fun project! As soon as the trailing arms look as good as the Shark Bite bracketry, I'll start detailing the install. Seems there is very little out there in the area of real world, hands on reviews on this cool setup. I hope to offer some insight into this conversion, ease of install, any pitfalls along the way, and some real-world testing in some of Southeast Oklahoma's twisty little roads. More to come!
Last edited by Patro46; 03-27-2014 at 12:56 AM.

The following users liked this post:
I make oil (04-16-2018)
03-27-2014, 03:40 AM
#2
Burning Brakes

Nice Patro! Very much interested in reading your upcoming posts since I will be buying that kit too for my '77. Which springs did you pick? (soft, medium or hard). I hesitate between soft and medium - most of my driving will be in city suburbs, and I won't be that young anymore once the car is completed. 
03-27-2014, 08:32 AM
#3
Pro
Thread Starter
Nice Patro! Very much interested in reading your upcoming posts since I will be buying that kit too for my '77. Which springs did you pick? (soft, medium or hard). I hesitate between soft and medium - most of my driving will be in city suburbs, and I won't be that young anymore once the car is completed.
03-27-2014, 11:52 AM
#4
Le Mans Master

Some pointers,
Were the lateral braces meet the rear end you may either need to grind the brace to clear the bolts that screw into the pumpkin or grind the bolts until the brace clears.
I ground down the bolt until the brace to line up correctly.

Also chase the threads especially the brackets that use the small screws. Picture 6 in your post. They are a bitch to get stated because the paint won't allow the screw to start.
It's also very tight once it comes together. I wound drilling one side out and using a longer screw with a nut on the other end.
03-27-2014, 12:00 PM
#5
Le Mans Master
I also spent the time to drop the rear so I could paint the cover and replace the 1/2 shafts with rebuilt ones. Changed the rear end oil too of course.
Replaced the Camber rods with the VPB HD Camber struts with cam bolt eliminator.

Replaced the Camber rods with the VPB HD Camber struts with cam bolt eliminator.
 03-27-2014, 12:26 PM
#6
Le Mans Master

That looks awesome 
03-27-2014, 08:55 PM
#7
Pro
Thread Starter
Some pointers,
Were the lateral braces meet the rear end you may either need to grind the brace to clear the bolts that screw into the pumpkin or grind the bolts until the brace clears.
I ground down the bolt until the brace to line up correctly.
Good tip! I'll be on the lookout here!
Also chase the threads especially the brackets that use the small screws. Picture 6 in your post. They are a bitch to get stated because the paint won't allow the screw to start.
It's also very tight once it comes together. I wound drilling one side out and using a longer screw with a nut on the other end.


 03-27-2014, 09:41 PM
#9
Team Owner

it LOOKS cool, but don't perform worth crap, apparently......
check around.....vettemod .com for one....to do a search....
 03-27-2014, 09:51 PM
#10
Le Mans Master
it does look good, no doubt about it. i have heard negative feedback on it but I'm curious how you like it once installed. I've heard bad things about good products and vice versa, and this forum is crazy at times. good luck

 03-28-2014, 12:52 AM
#12
Pro
Thread Starter
I took the trailing arms in for powder painting, and since I'm several days out, I thought I'd get a feel for the shocks and assemble them. I got a chance to play with the 2 way adjustable feature. It DOES work. Huge difference with just a few clicks, both in and out.
[IMG]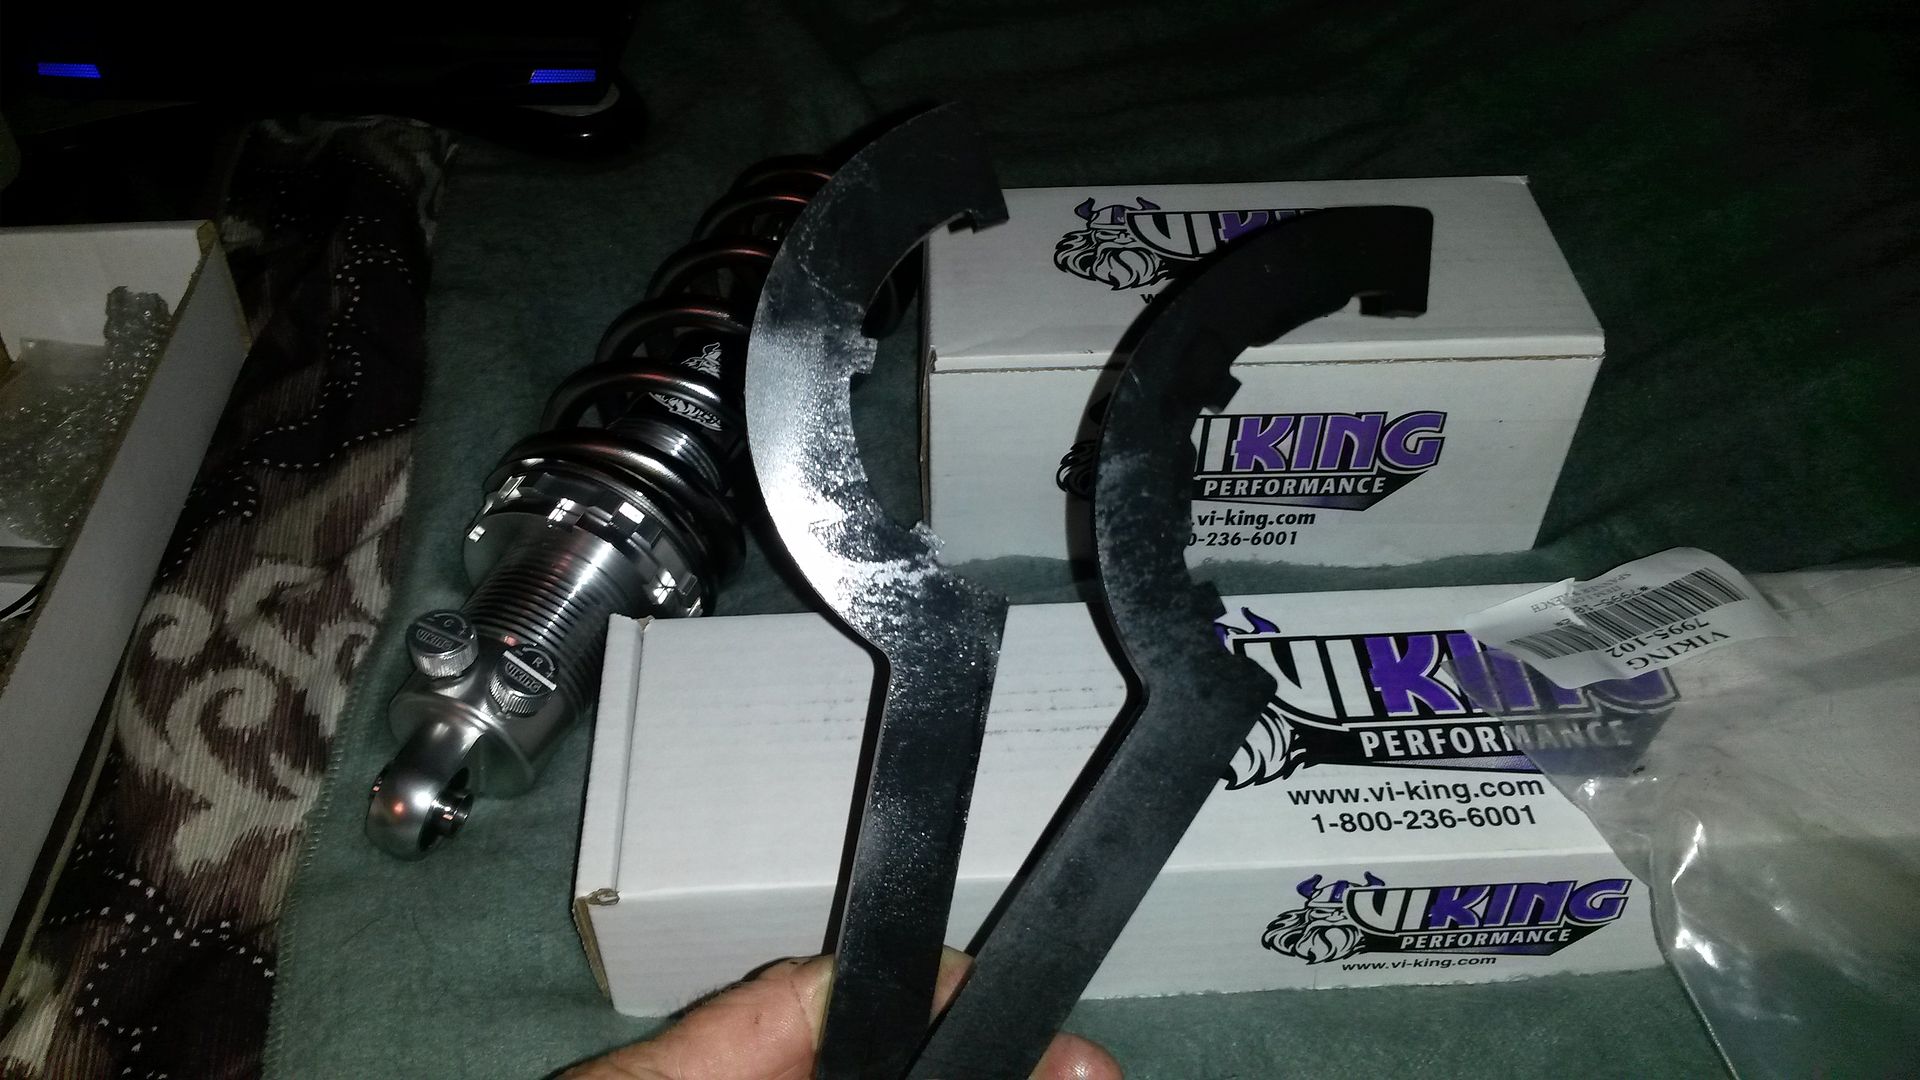 [/IMG]
Though not included with the shocks, Speed Direct included the optional thrust washer pack for both shocks. This makes adjusting the ride height with the spanner wrench very easy.
[IMG]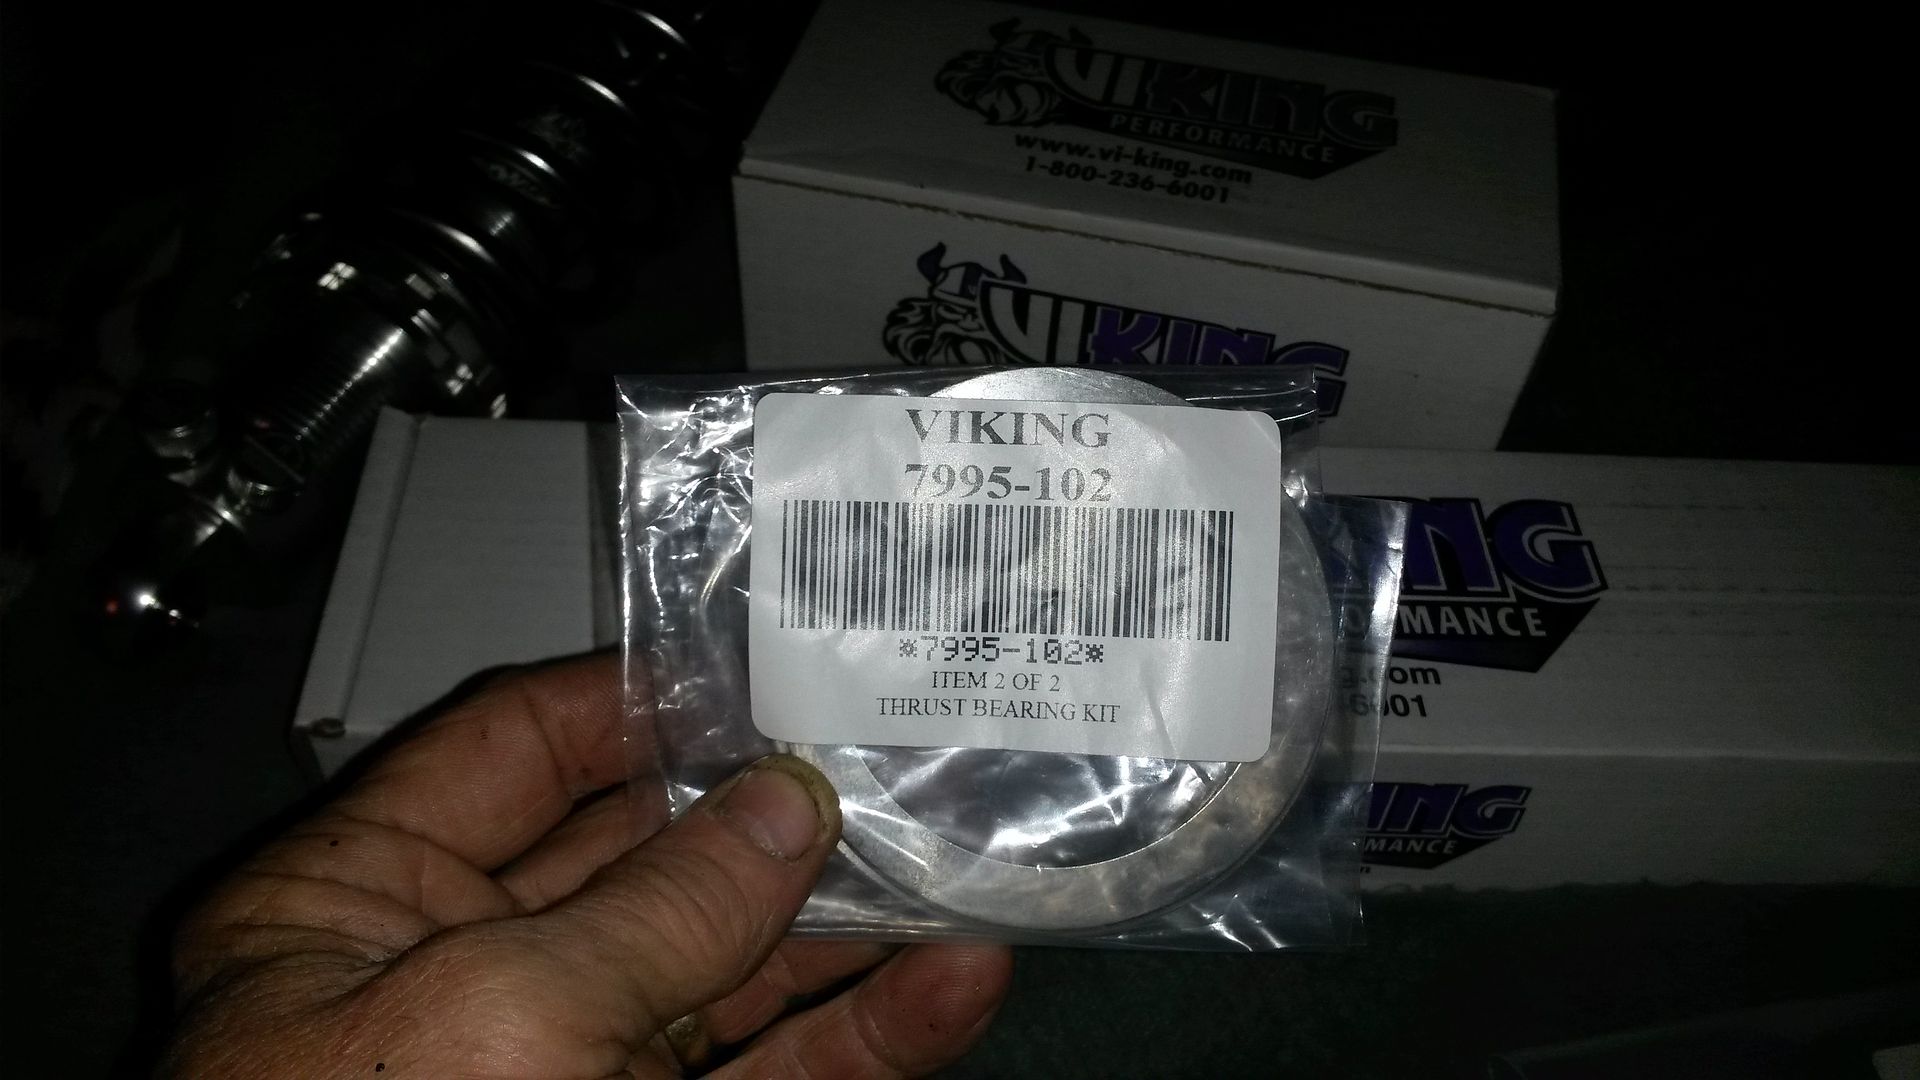 [/IMG]
When you first open the box, your greeted with this.
[IMG]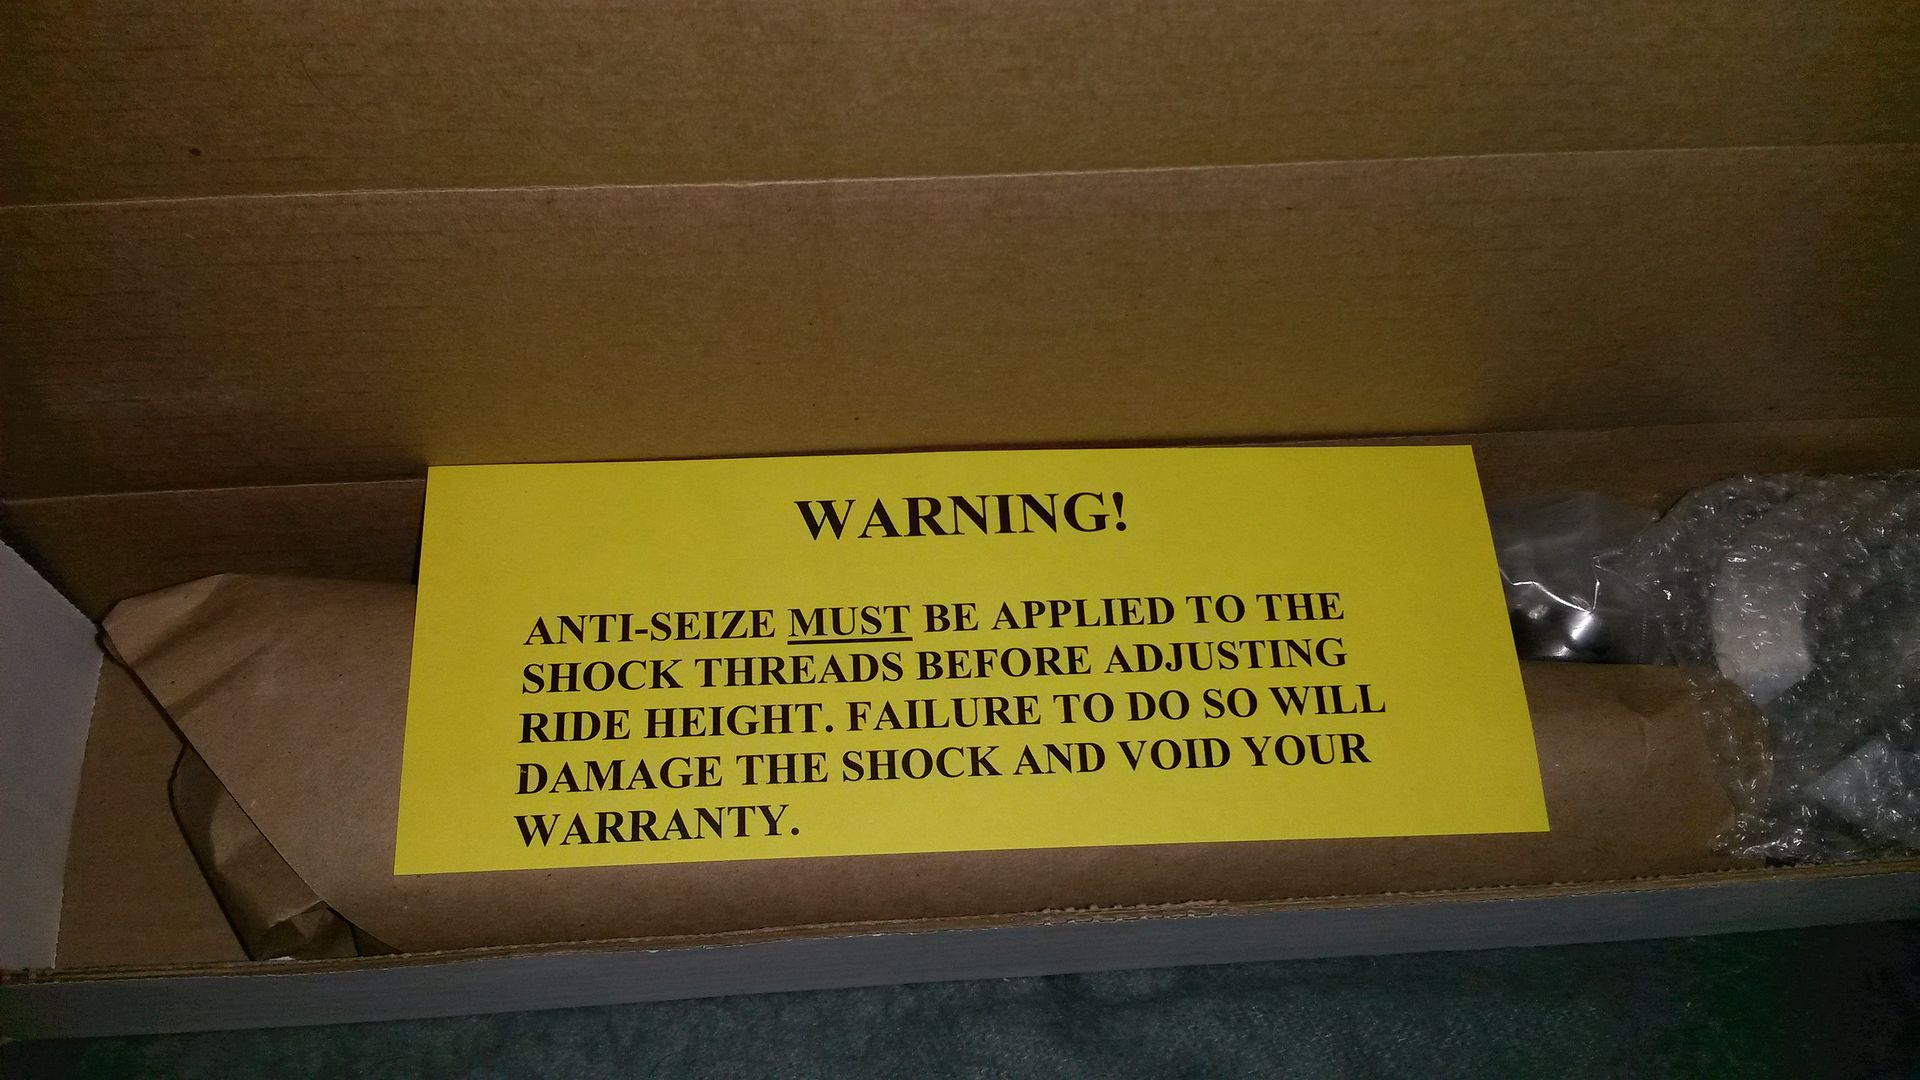 [/IMG]
*I haven't used any compound for this assembly mockup.
Here is a view of an assembled shock, with the parts required to assemble one to it's left.
[IMG]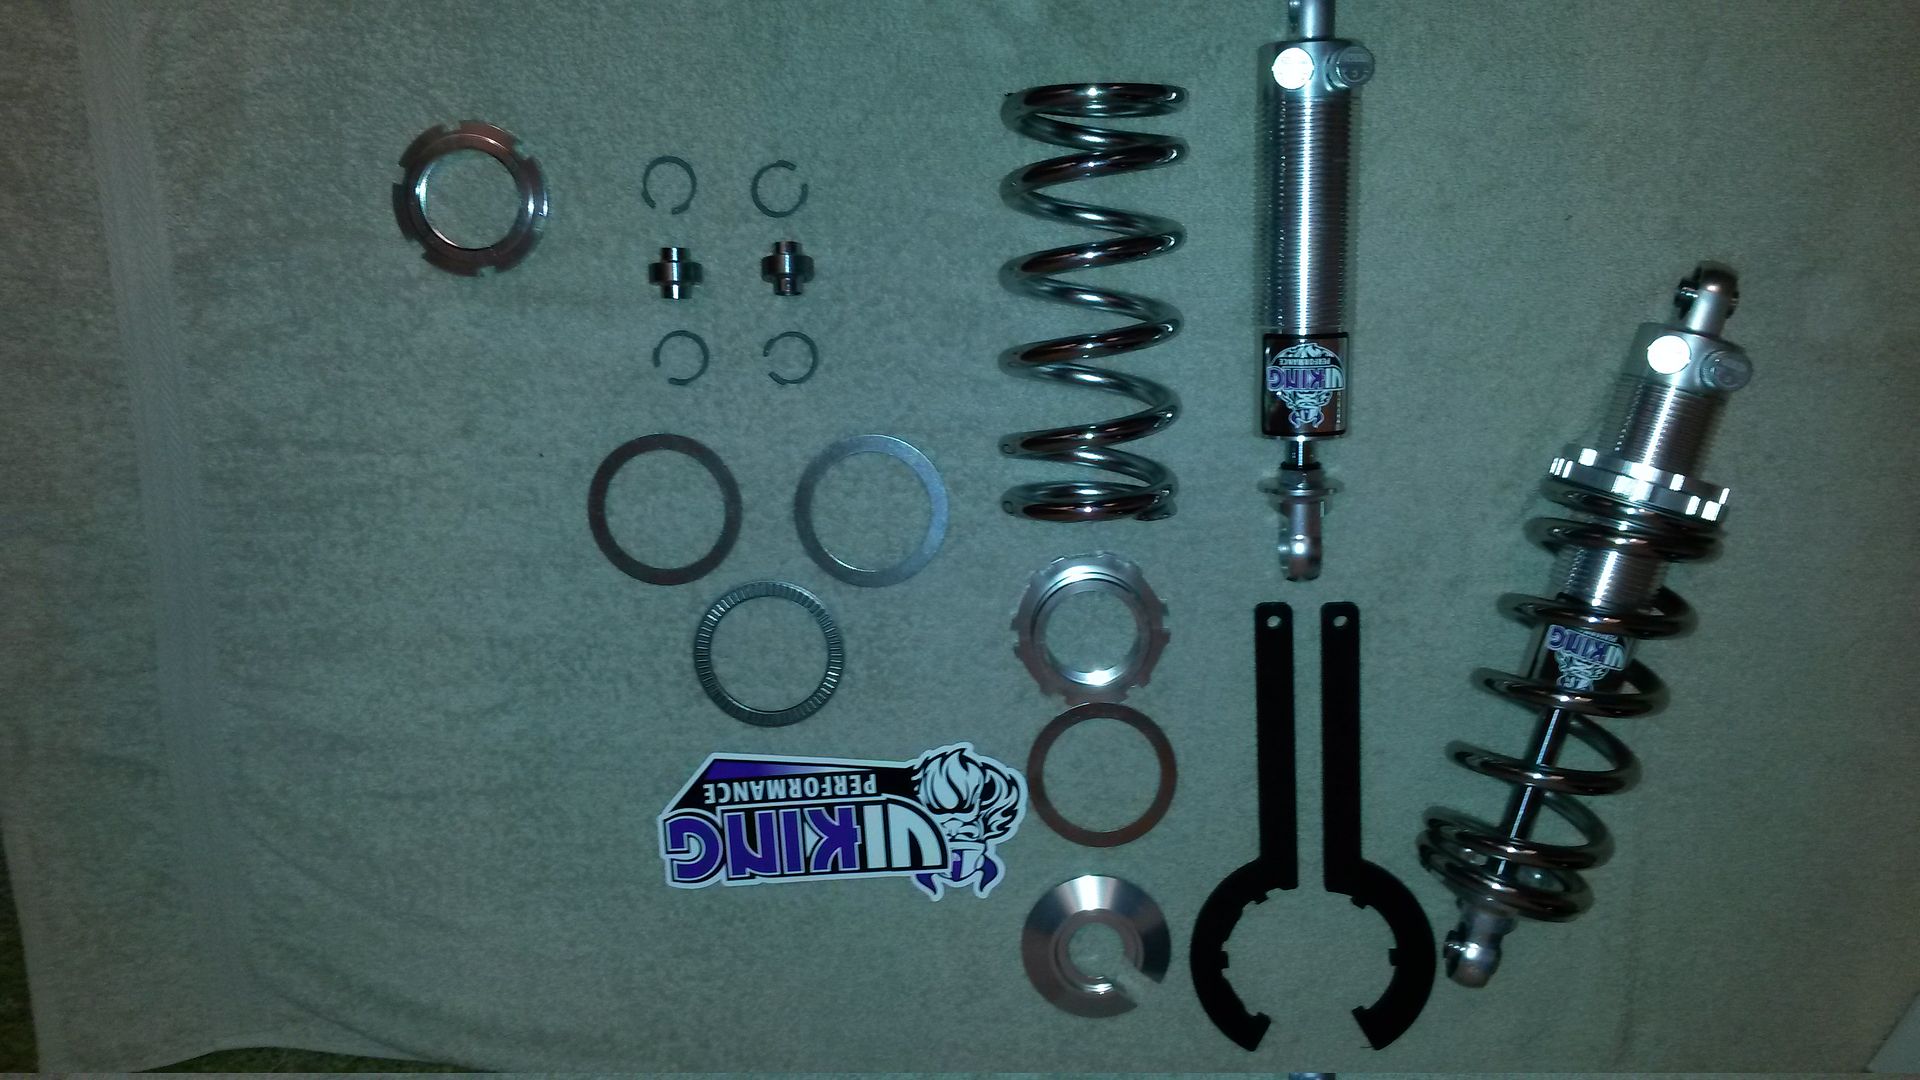 [/IMG]
[IMG]
 [/IMG]
Though not included with the shocks, Speed Direct included the optional thrust washer pack for both shocks. This makes adjusting the ride height with the spanner wrench very easy.
[IMG]
 [/IMG]
When you first open the box, your greeted with this.
[IMG]
 [/IMG]
*I haven't used any compound for this assembly mockup.
Here is a view of an assembled shock, with the parts required to assemble one to it's left.
[IMG]
 [/IMG]
03-28-2014, 08:59 AM
[/IMG]
03-28-2014, 08:59 AM
#13
Le Mans Master
Member Since: May 2003
Location: Fernandina Beach FL
Posts: 8,475
Received 3,218 Likes
on
1,730 Posts
2023 Restomod of the Year finalist
2020 C3 of the Year Winner - Modified

It IS a good looking suspension....but sorta along the same lines as a trophy wife...
Richard
Richard
03-28-2014, 12:06 PM
#14
Le Mans Master
 03-28-2014, 01:22 PM
#15
Pro
Thread Starter
Threads like this always seems to bring all flavors of opinions. I'd also be willing to bet a lot a negative opinions are of the "he said she said" flavor, and certainly not of the "hands on flavor". This is what I hope to offer. Substance. Stay tuned!
03-28-2014, 09:48 PM
#17
Pro
Thread Starter
Both ends of the shocks are machined for c-clips on each side.
[IMG]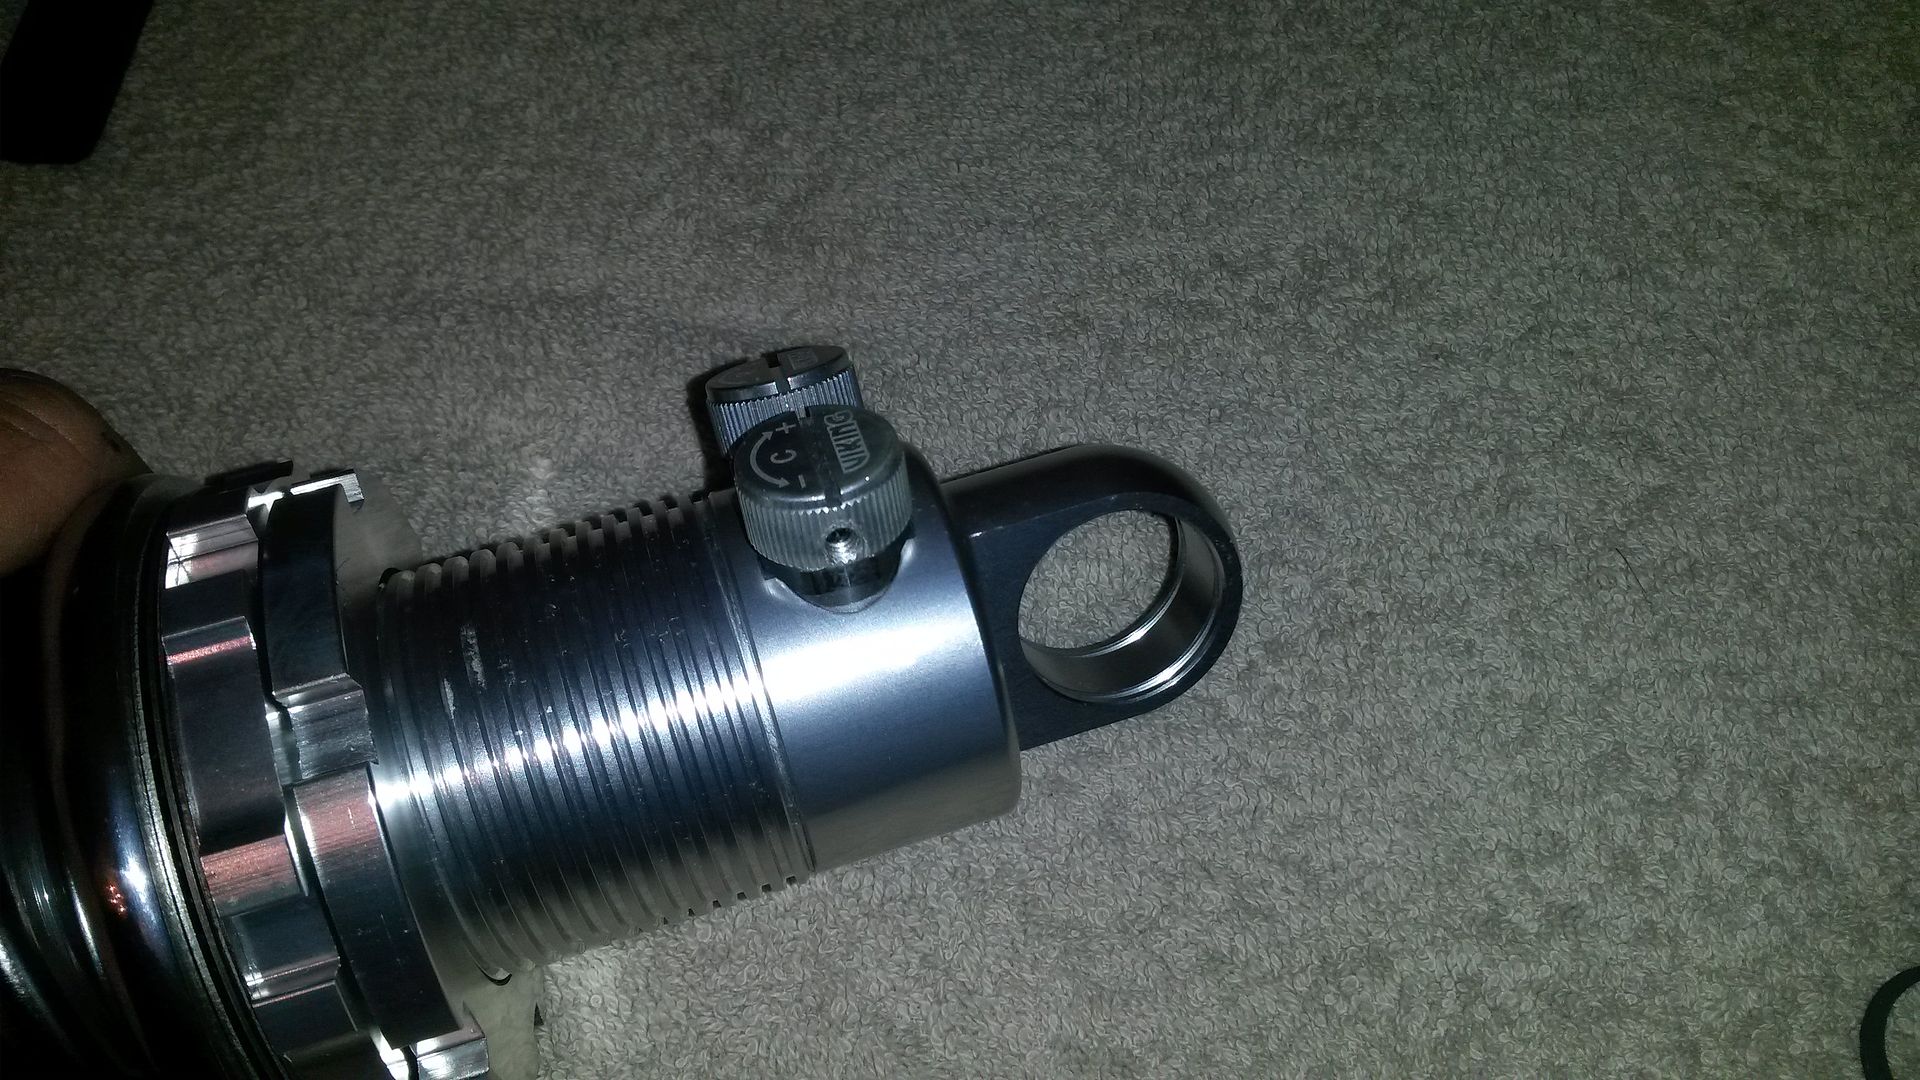 [/IMG]
Simply insert a c clip in one end.
[IMG]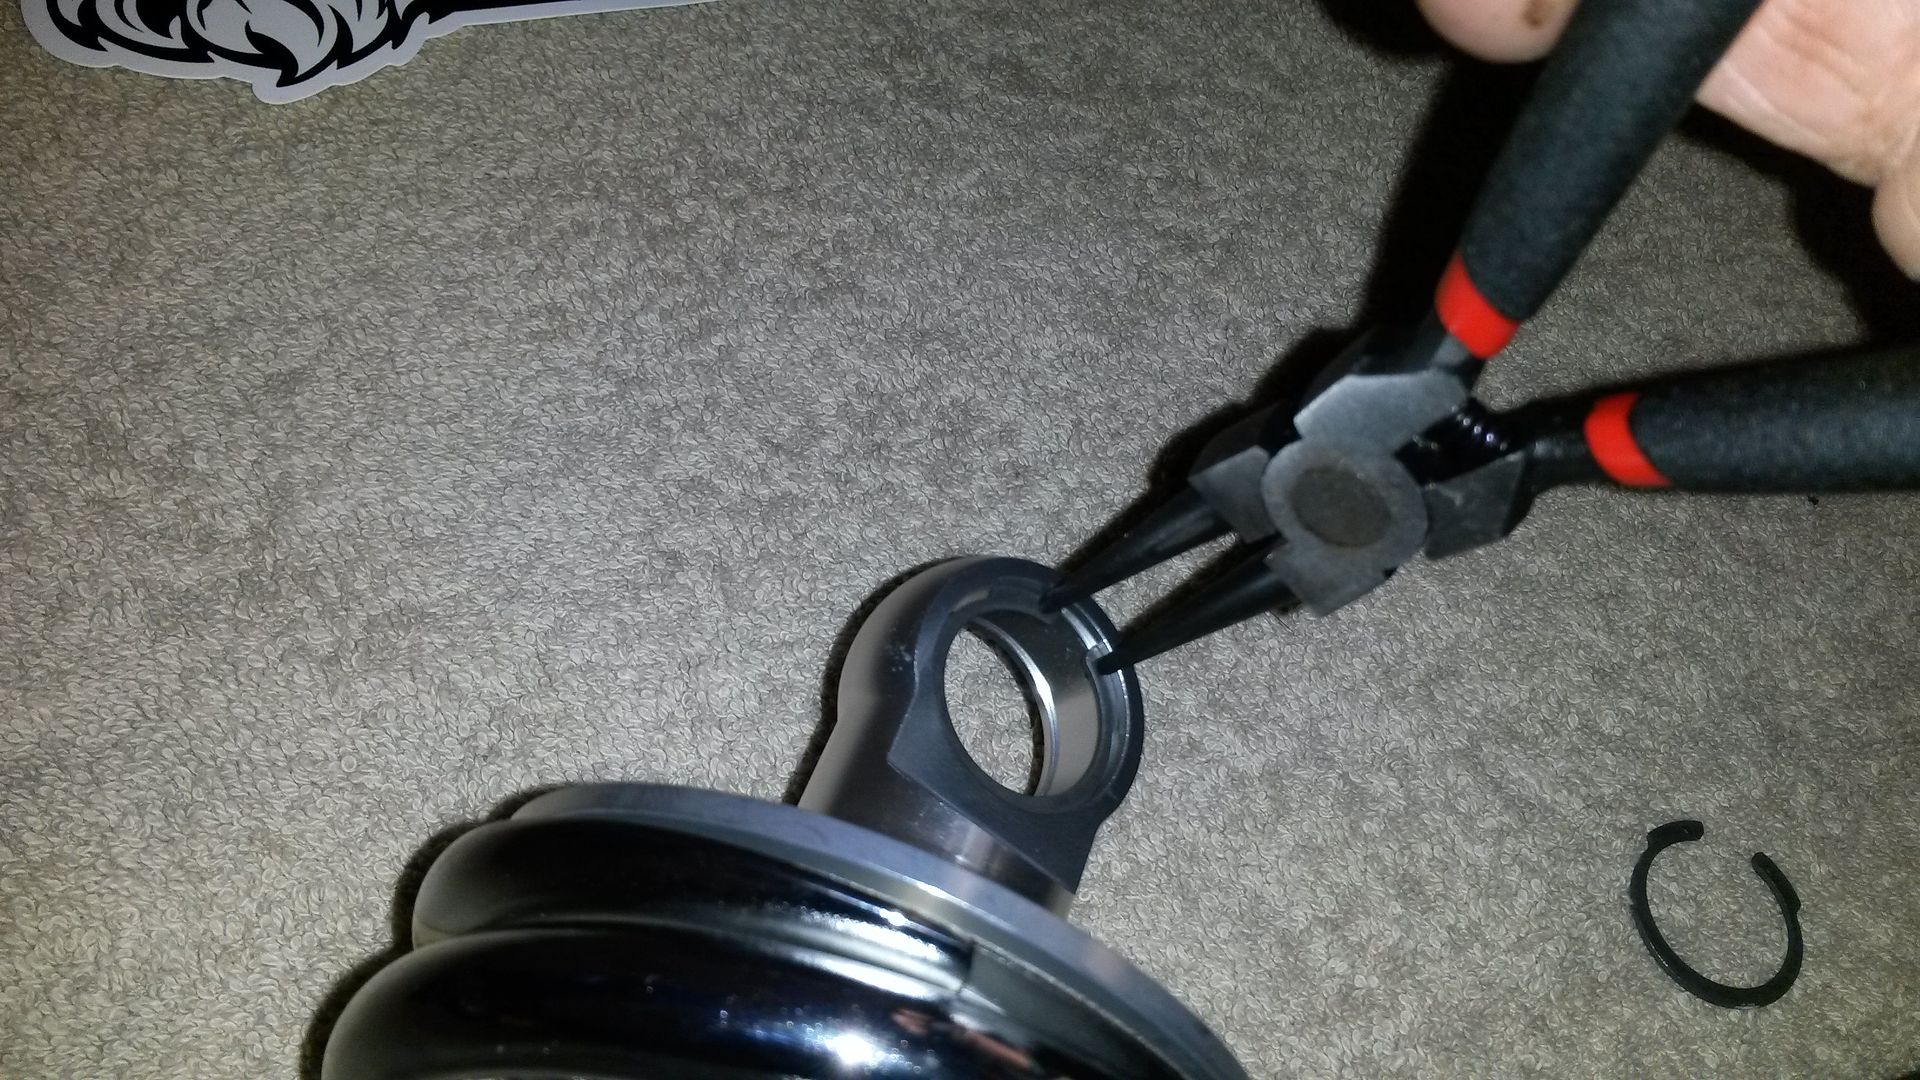 [/IMG]
Speed Direct even includes these Spherical Steel Bearings.
[IMG]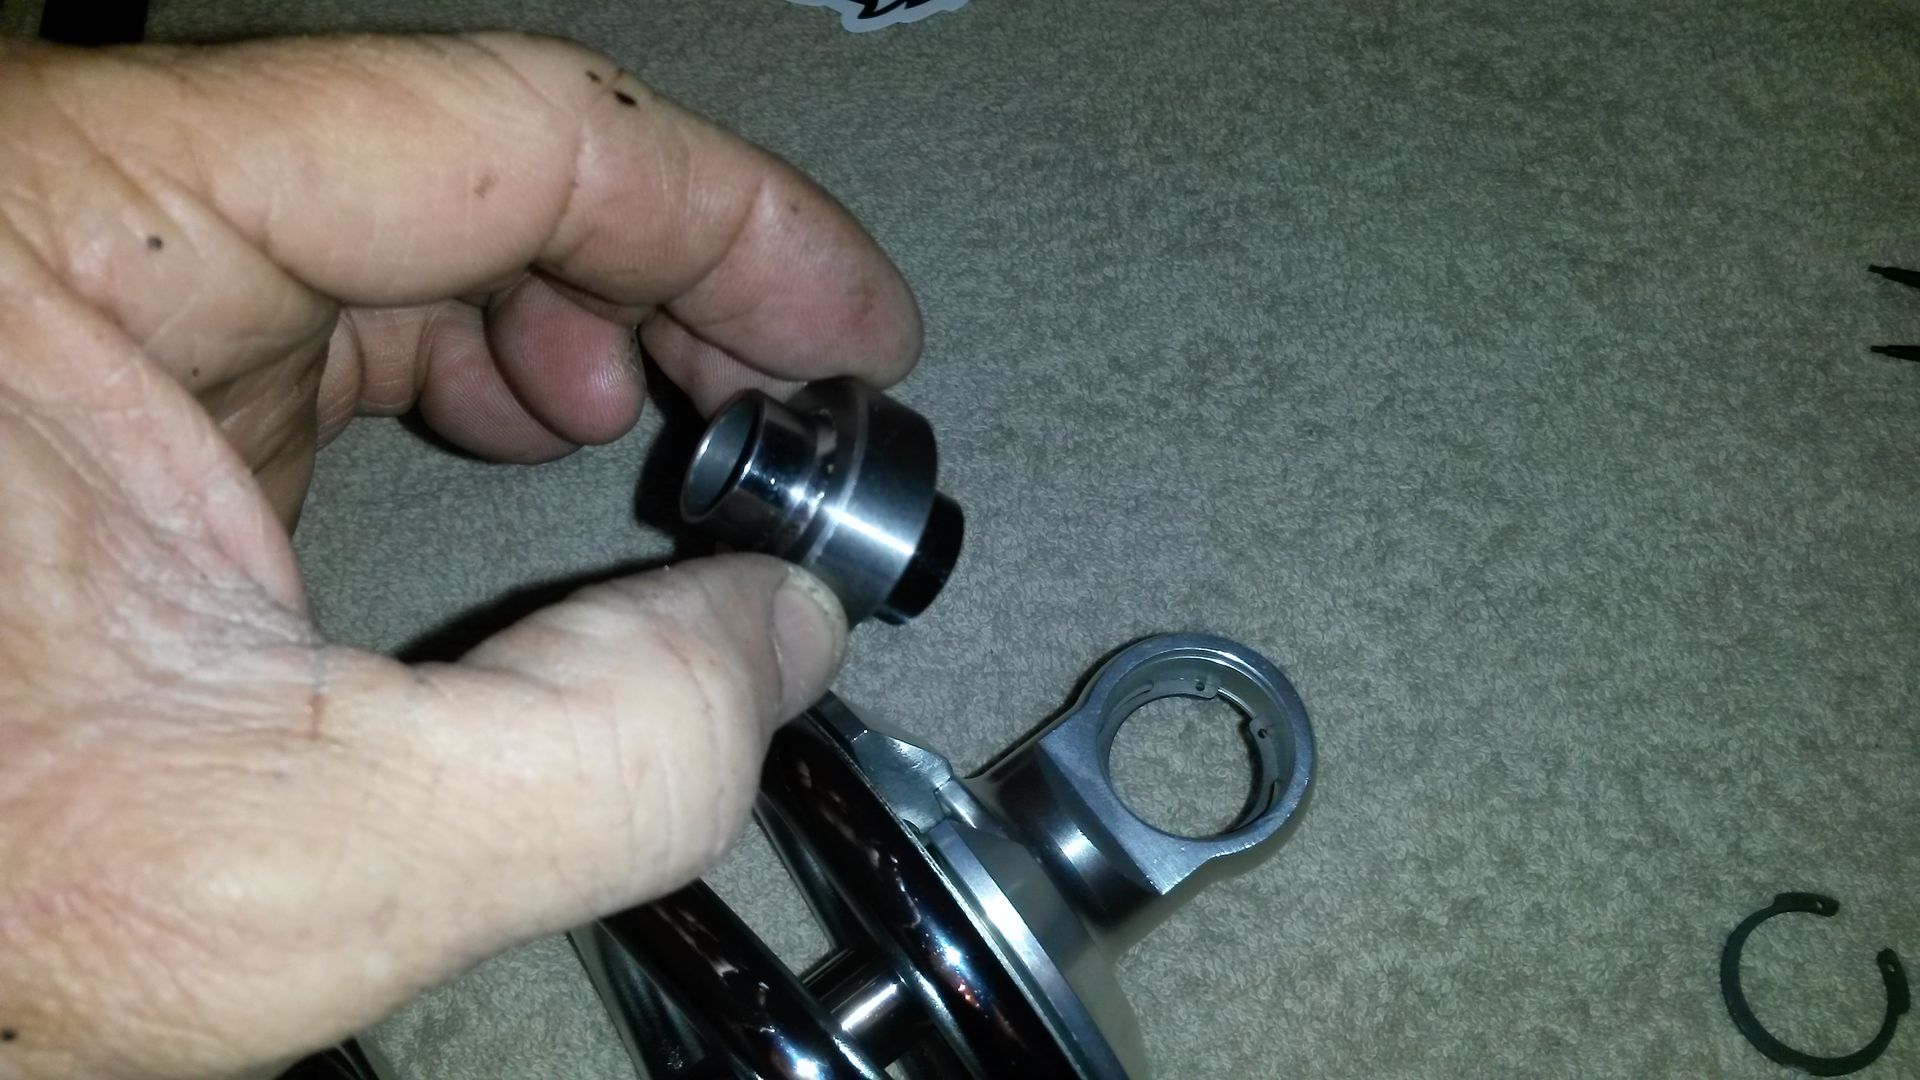 [/IMG]
[IMG]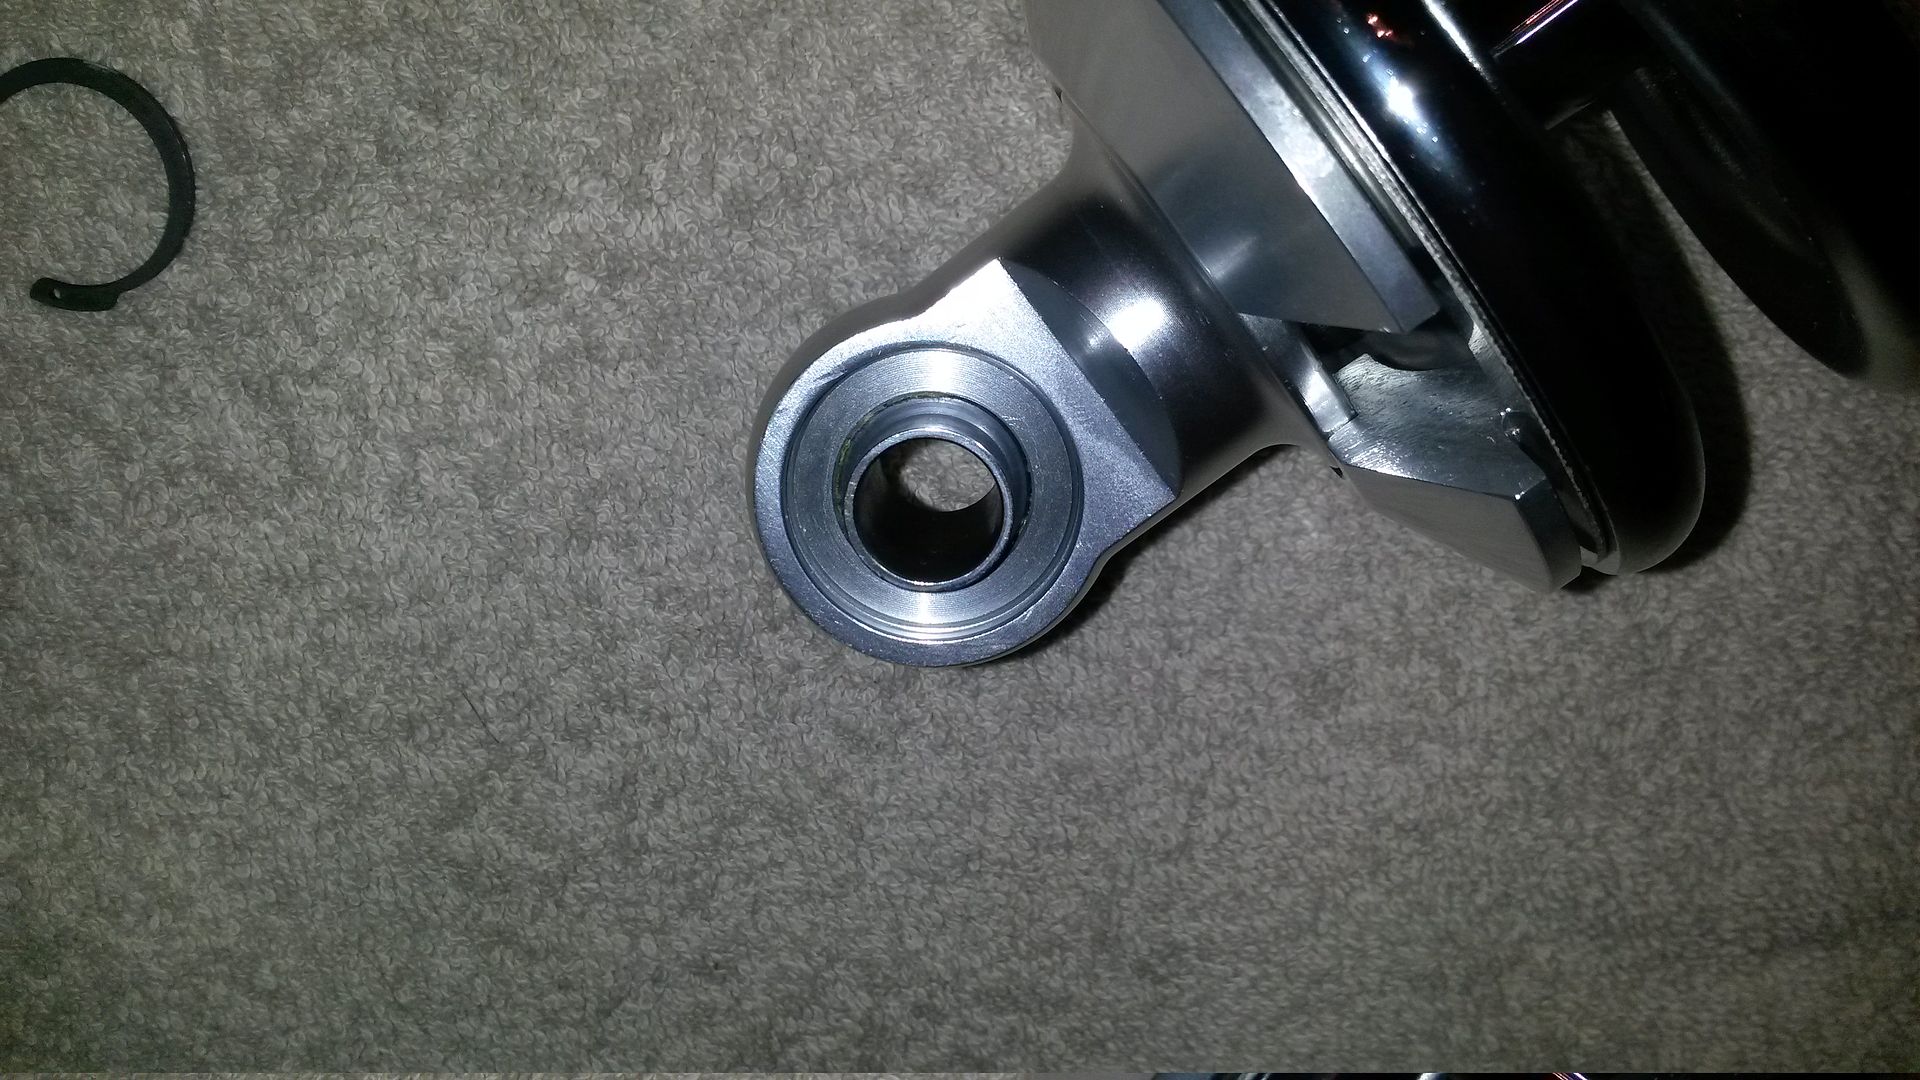 [/IMG]
[IMG]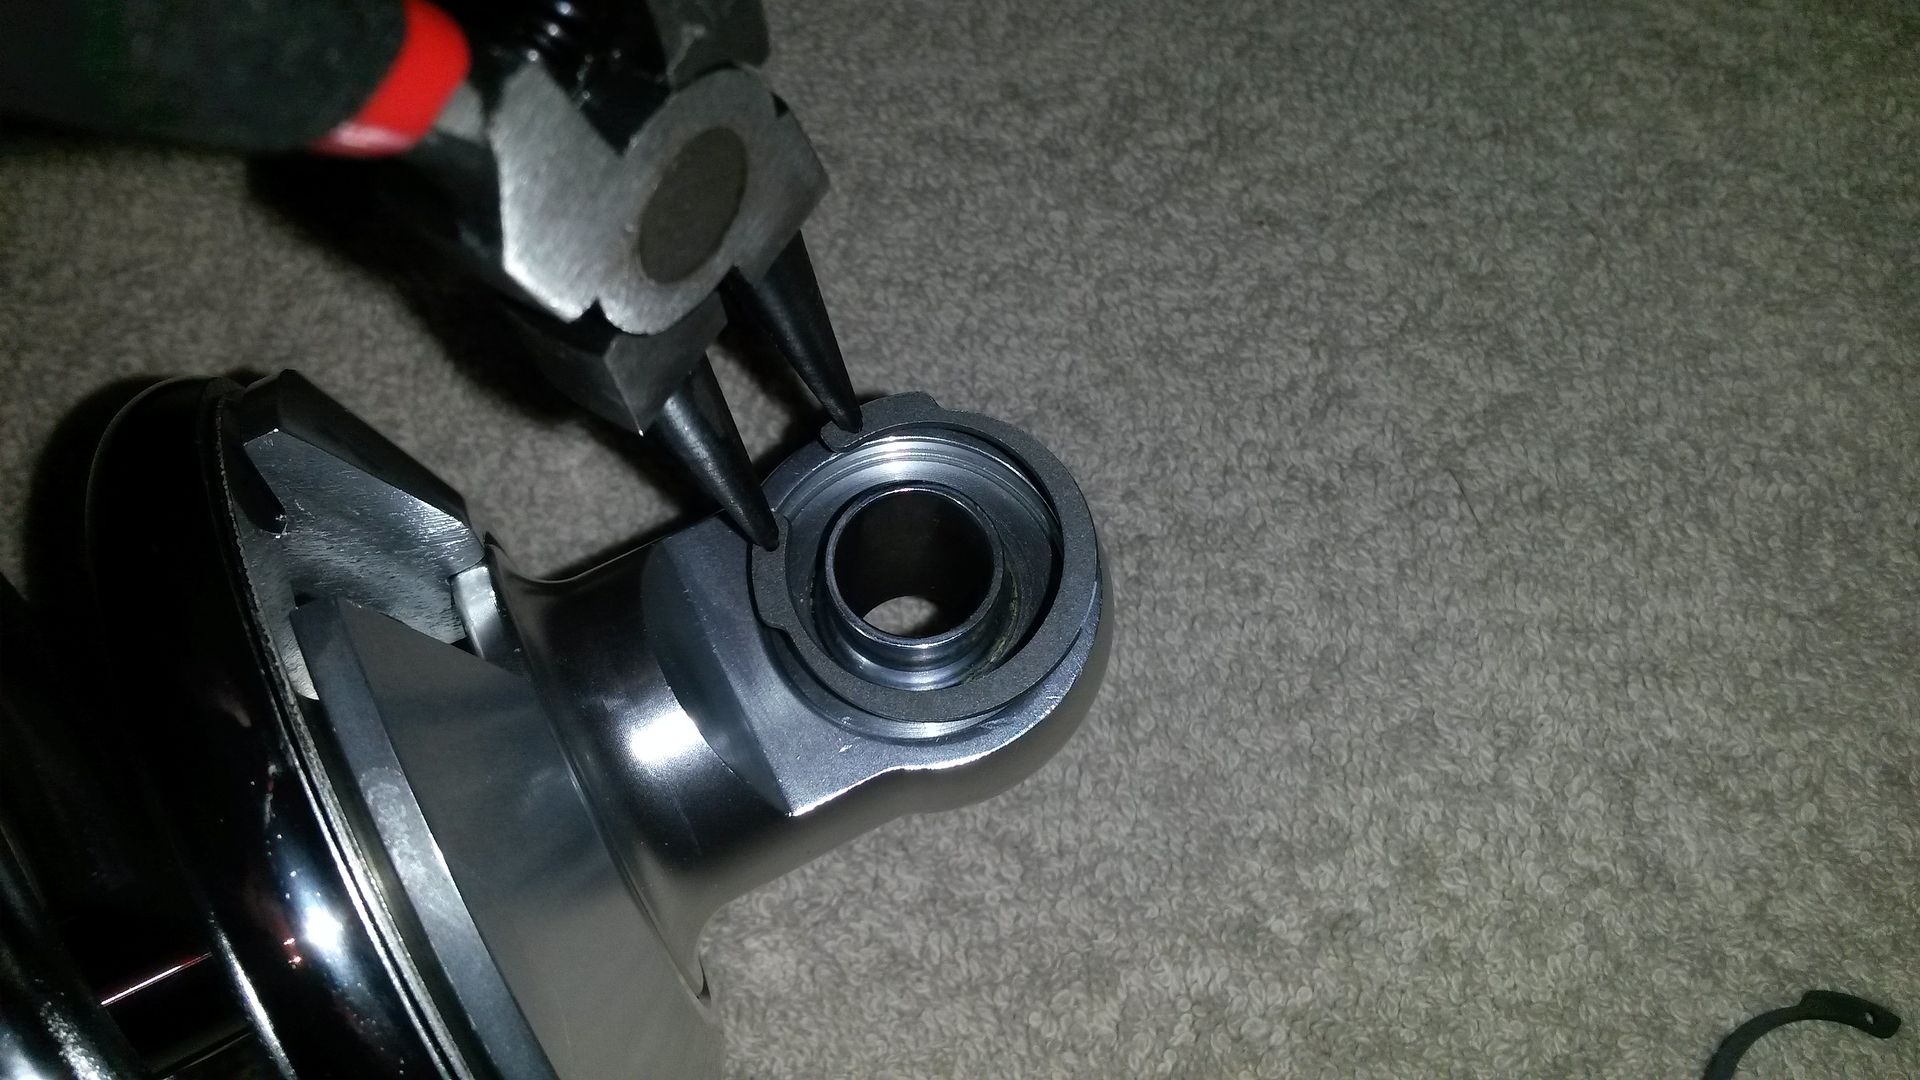 [/IMG]
[IMG]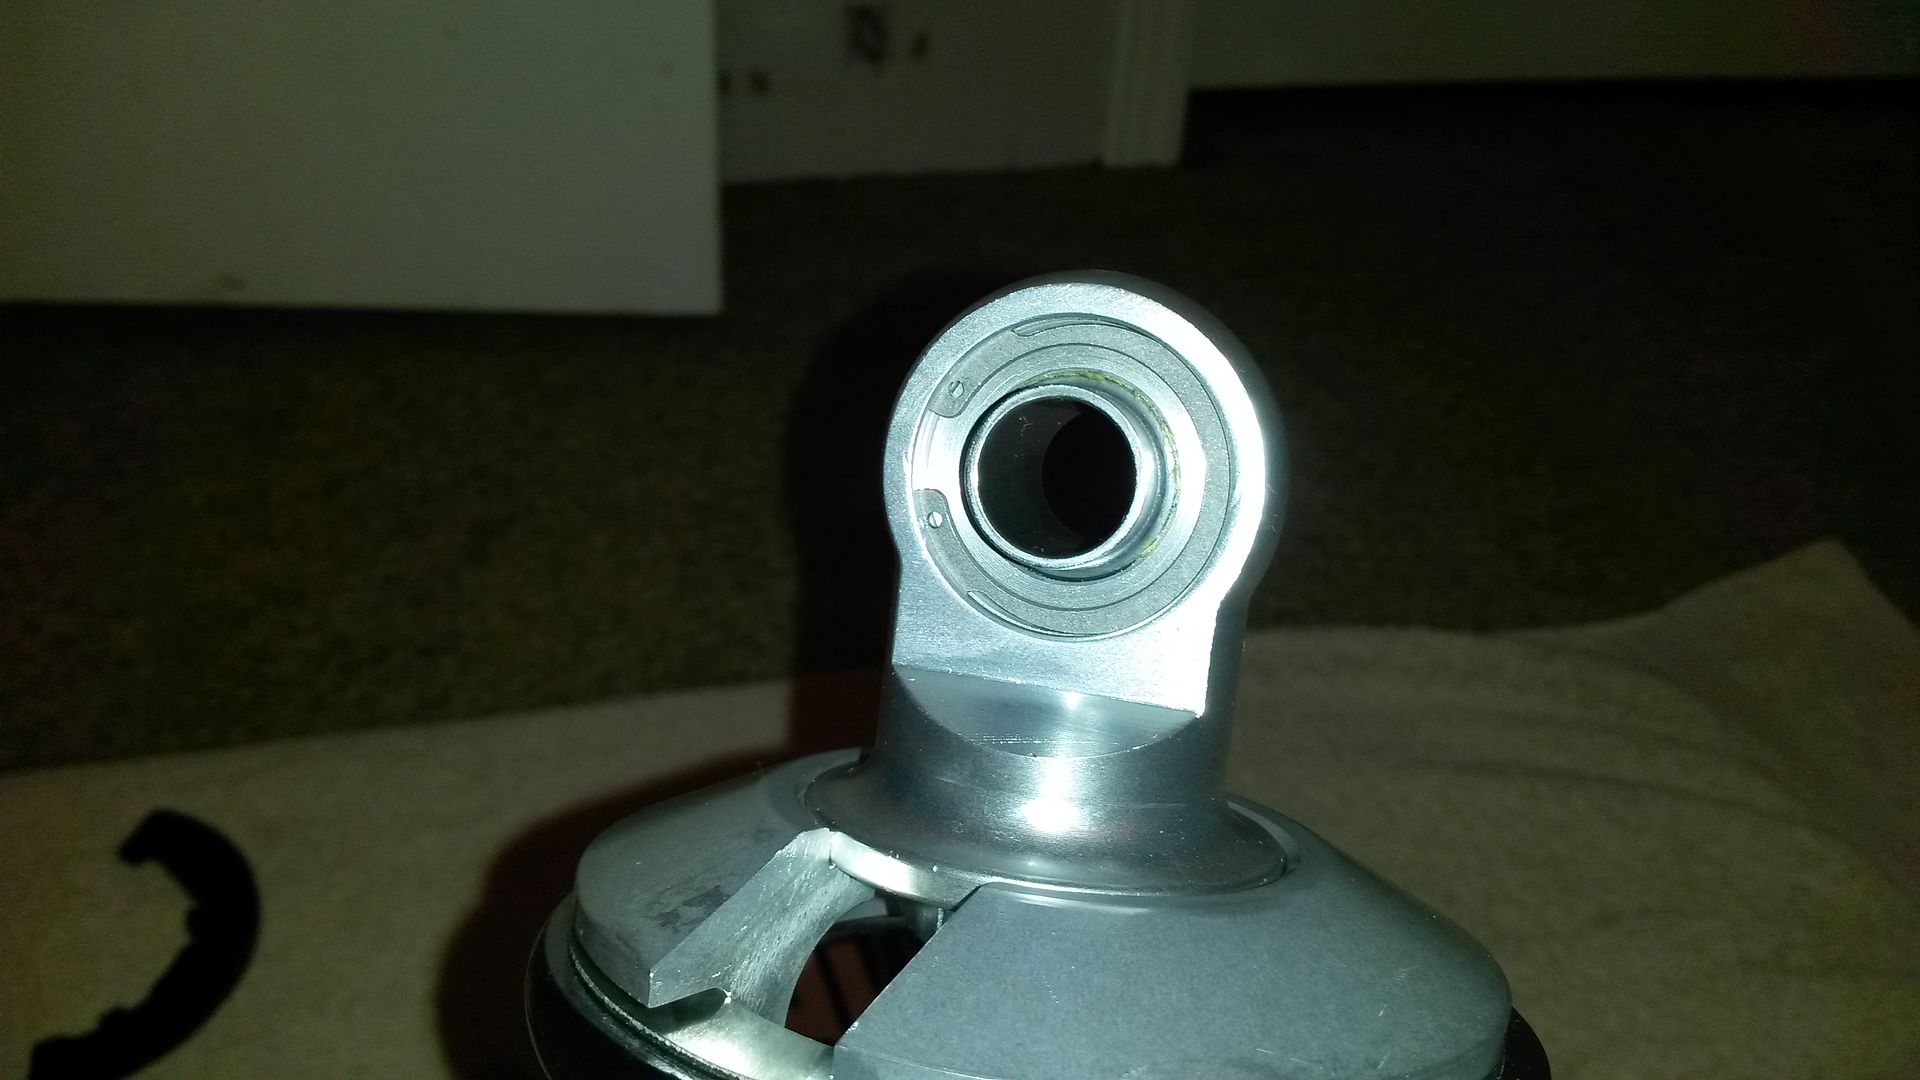 [/IMG]
[IMG]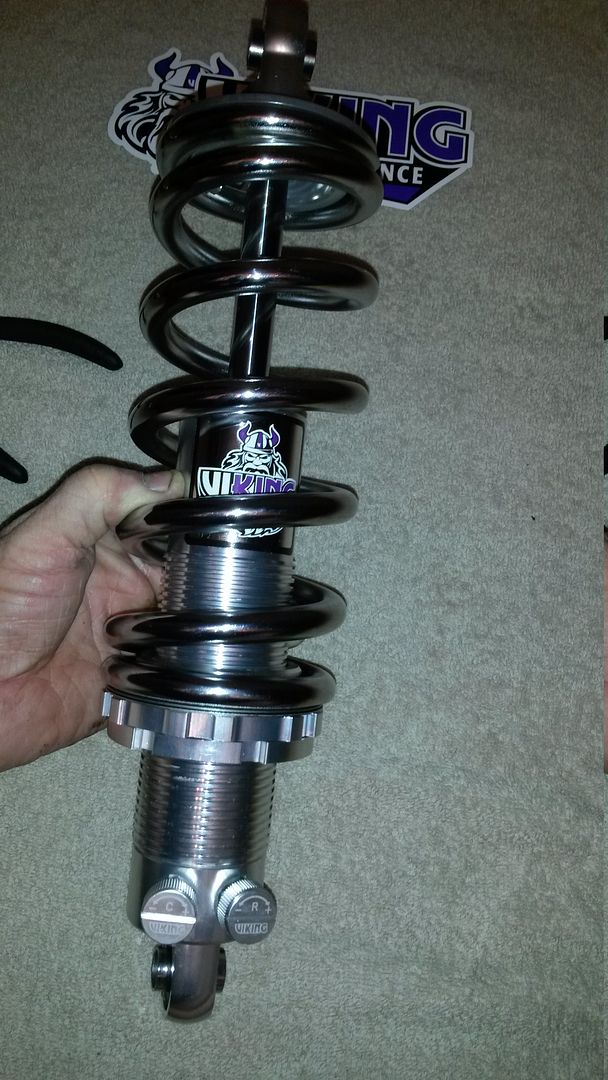 [/IMG]
I think once the shocks are set up, having taken the time to adjust the new suspension, this shock should provide a ride equal to or better than a stock mono-leaf setup. Soon as the trailing arms are back from powder painting, I can get the rear end back in. The move from 3:08's to 3:70's should make a notable difference in giddy up!
[IMG]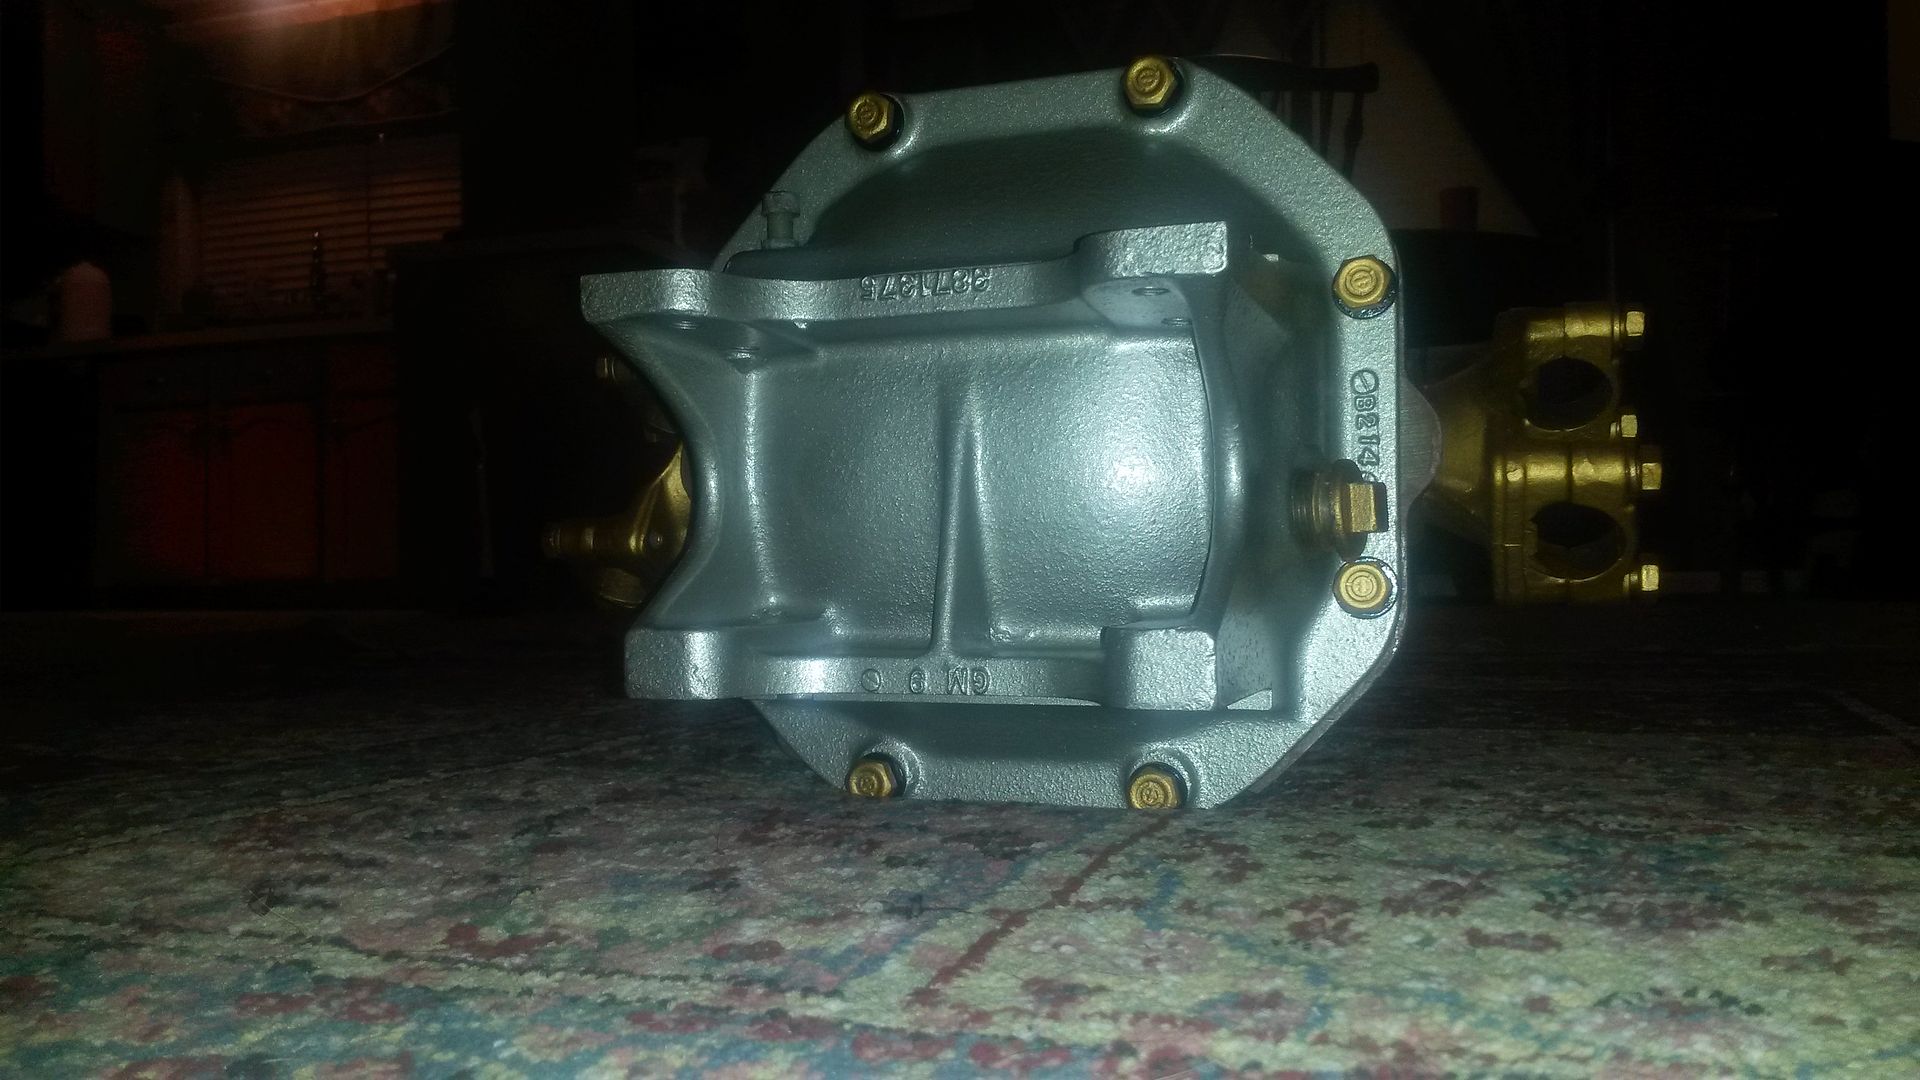 [/IMG]
[IMG]
 [/IMG]
Simply insert a c clip in one end.
[IMG]
 [/IMG]
Speed Direct even includes these Spherical Steel Bearings.
[IMG]
 [/IMG]
[IMG]
 [/IMG]
[IMG]
 [/IMG]
[IMG]
 [/IMG]
[IMG]
 [/IMG]
I think once the shocks are set up, having taken the time to adjust the new suspension, this shock should provide a ride equal to or better than a stock mono-leaf setup. Soon as the trailing arms are back from powder painting, I can get the rear end back in. The move from 3:08's to 3:70's should make a notable difference in giddy up!
[IMG]
 [/IMG]

 03-31-2014, 10:43 AM
#19
Le Mans Master
However, as others have stated, I not so sure about that setup improving the handling of your C3. The basic shortcomings of the C2/C3 suspension involves some design limitations in the suspension itself that involves primarily the use of the halfshafts as one of the lateral links and the design/placement of the strut rod mentioned previously, neither issue which is addressed by the shark bites rear suspension conversion to any degree. To my knowledge, the only modification that will significantly improve the rear suspension over the OEM design is a 5 or 6 link independent rear suspension like on the C4-C7's.
You might get a better ride from that suspension but I have to say with my 360 composite, Bilsteins, Competition struts and modern 17 inch Z rated rubber, my car rides pretty darn nice-shockingly so- and the handling is outstanding.
Good luck!
03-31-2014, 11:06 AM
#20
Le Mans Master


